


What is Afterpay?
Afterpay is a payment method that allows customers to receive the purchase and pay in installments.
By offering Afterpay, you’re allowing your customers to take their purchase home today with the flexibility to pay in 4 installments over 6 weeks.
A flexible payment plan compared to full payment enhances your chance of getting more conversions and new customers.
How to Integrate Afterpay with Shopify?
To begin, you will need to add Afterpay to your Shopify store. Kindly check out this article for the detailed instructions.
After that, the Afterpay widget will be inserted automatically at the top of GemPages’s product pages.
In some cases, you would prefer to show the widget in the other position.
Follow the steps to adjust the position of the widget:
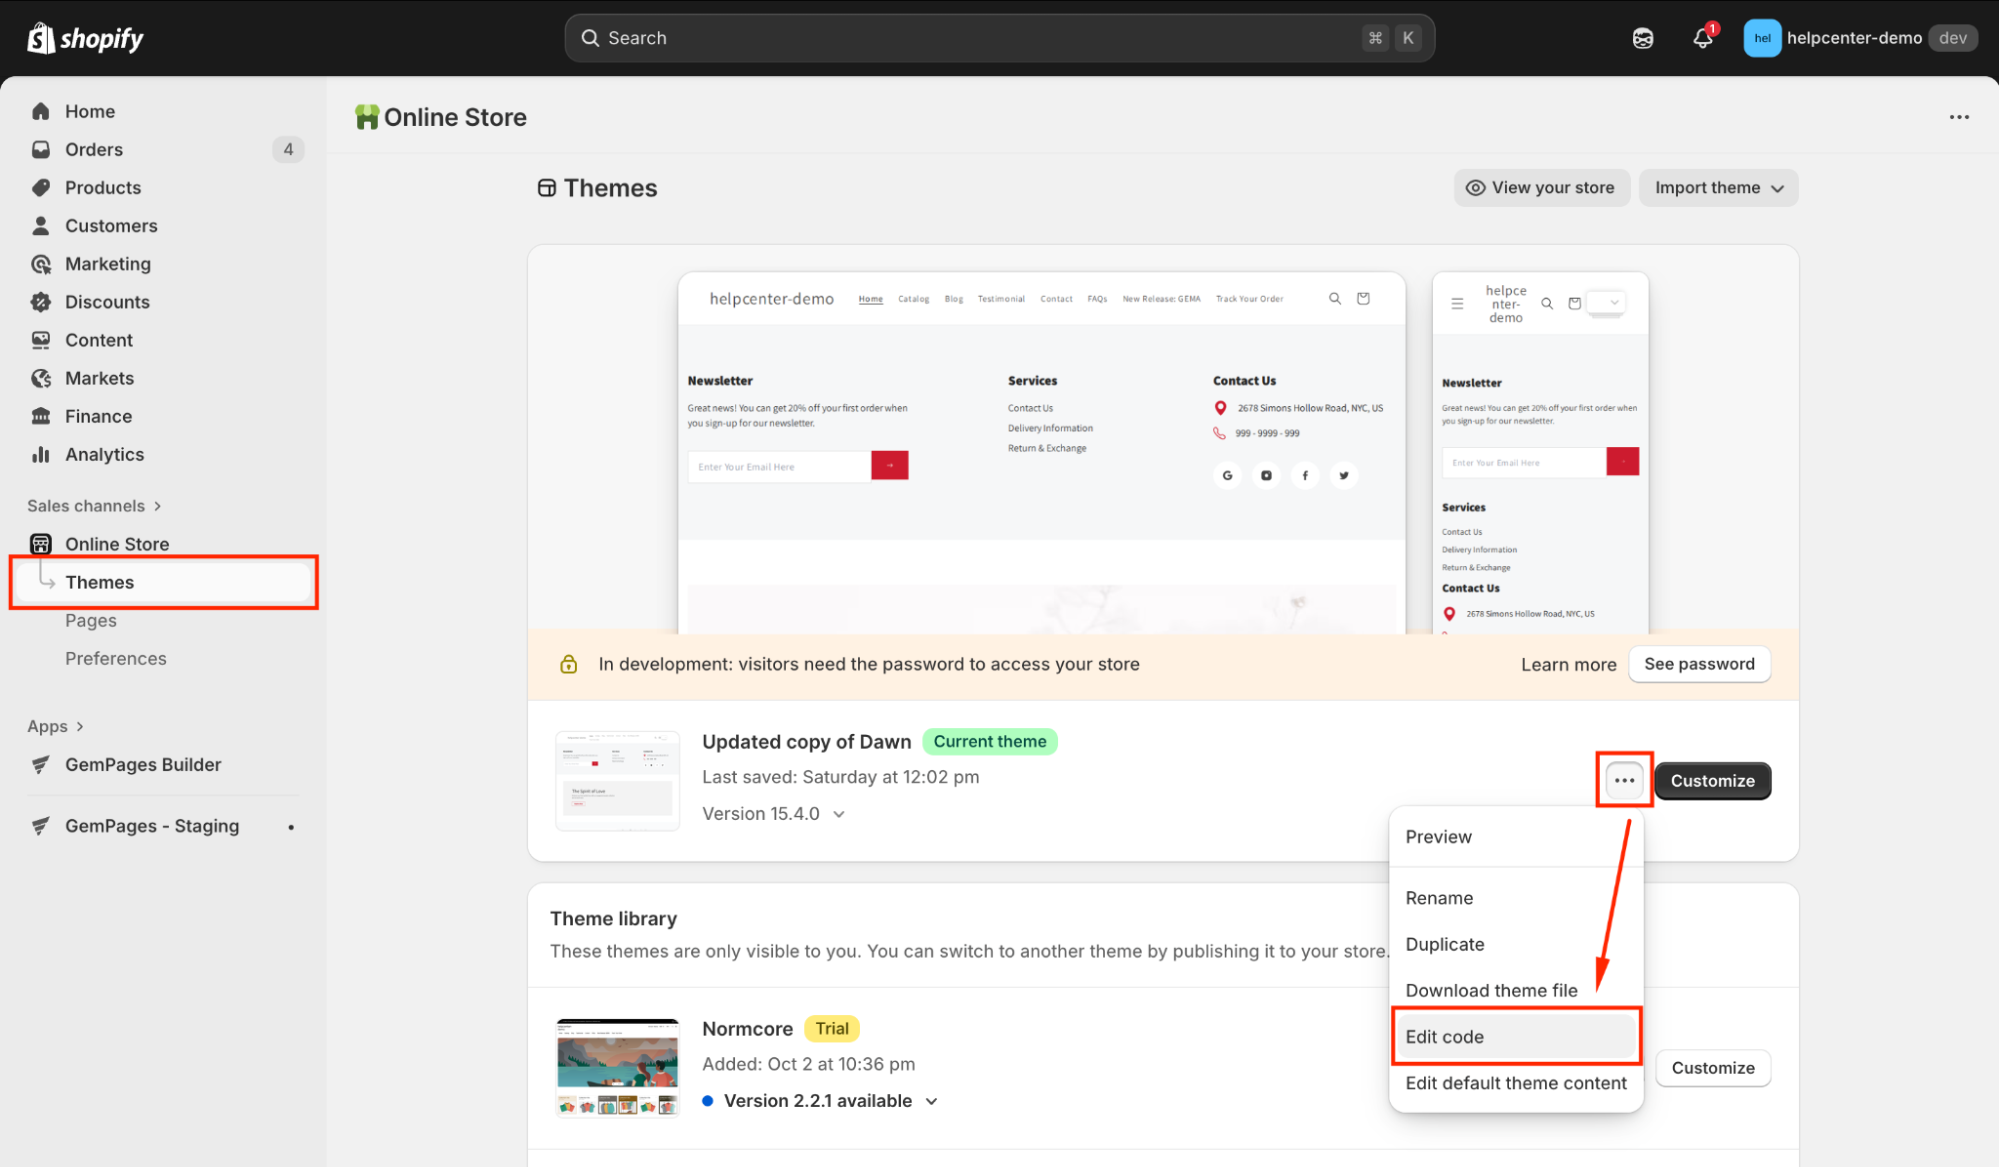
Step 1: Navigate to your Shopify Admin > Themes, click on the three-dot button, and select Edit code from the dropdown.
Step 2: Search for the file “theme.liquid”. Select to open the file.
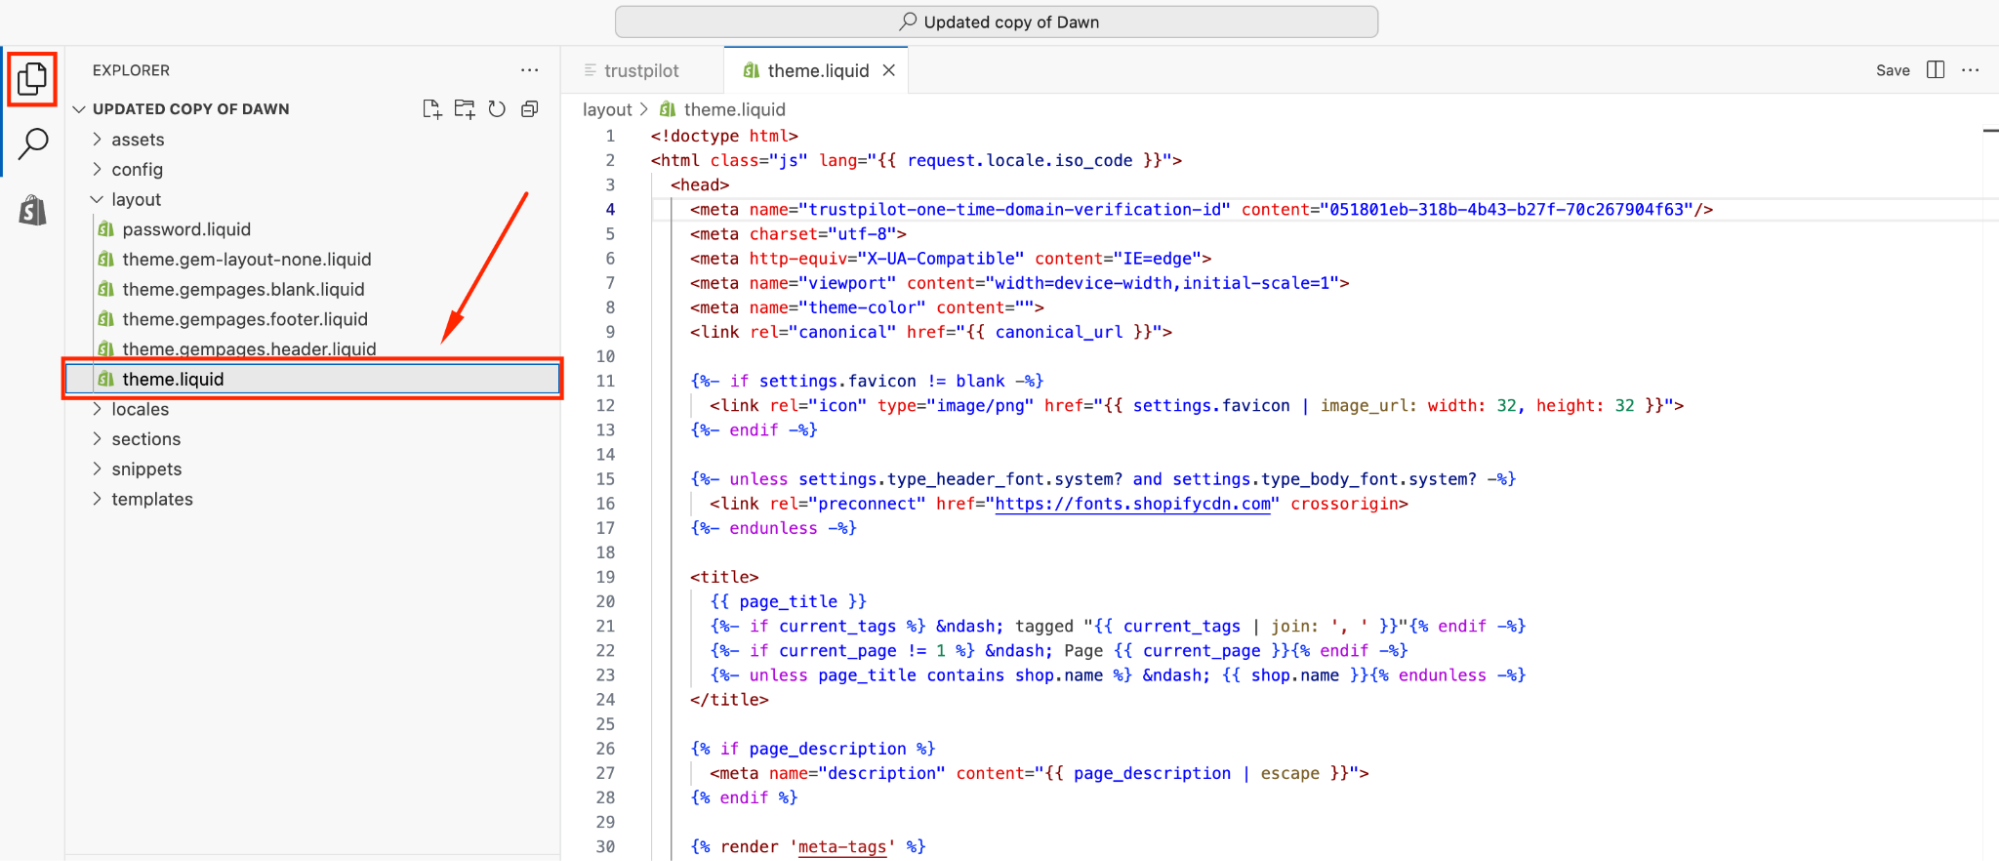
Step 3: Next, scroll down and find the section containing Afterpay codes.
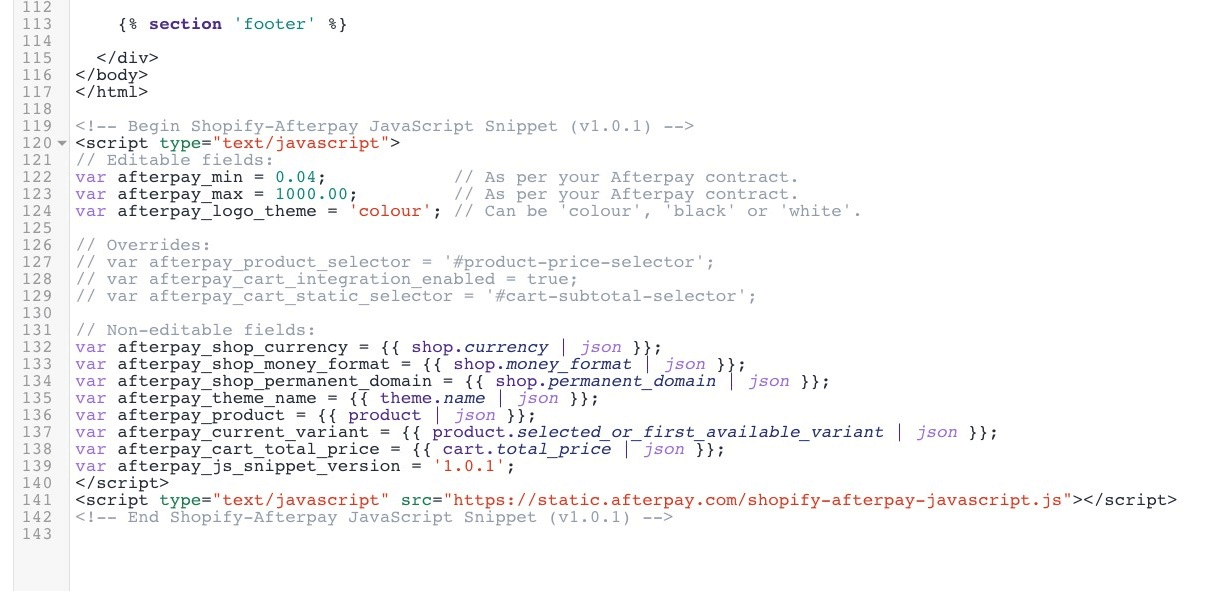
Step 4: Look for the line of code below and remove the // at the beginning of the line.
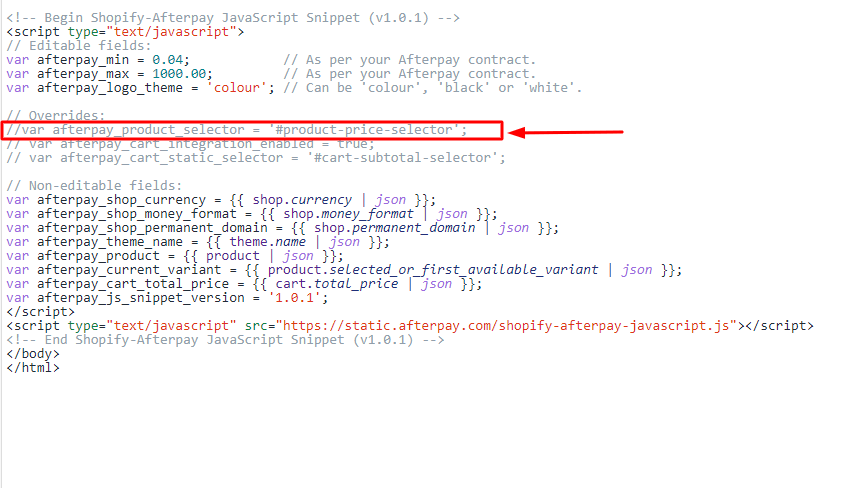
After removing, the line should be:
var afterpay_product_selector = '#product-price-selector';
Next, hit “Save” to save your changes.
How to Integrate Afterpay with GemPages?
First, go to the GemPages Dashboard > Pages > Product. From there, click on your preferred product page to locate the editor.
Continue following these steps to display Afterpay in your product page built with GemPages.
For GemPages version 6
Step 1: Drag and drop a Liquid Element from the left sidebar to your page and put it right under the element (P) Price or any position you wish inside the Product Module.
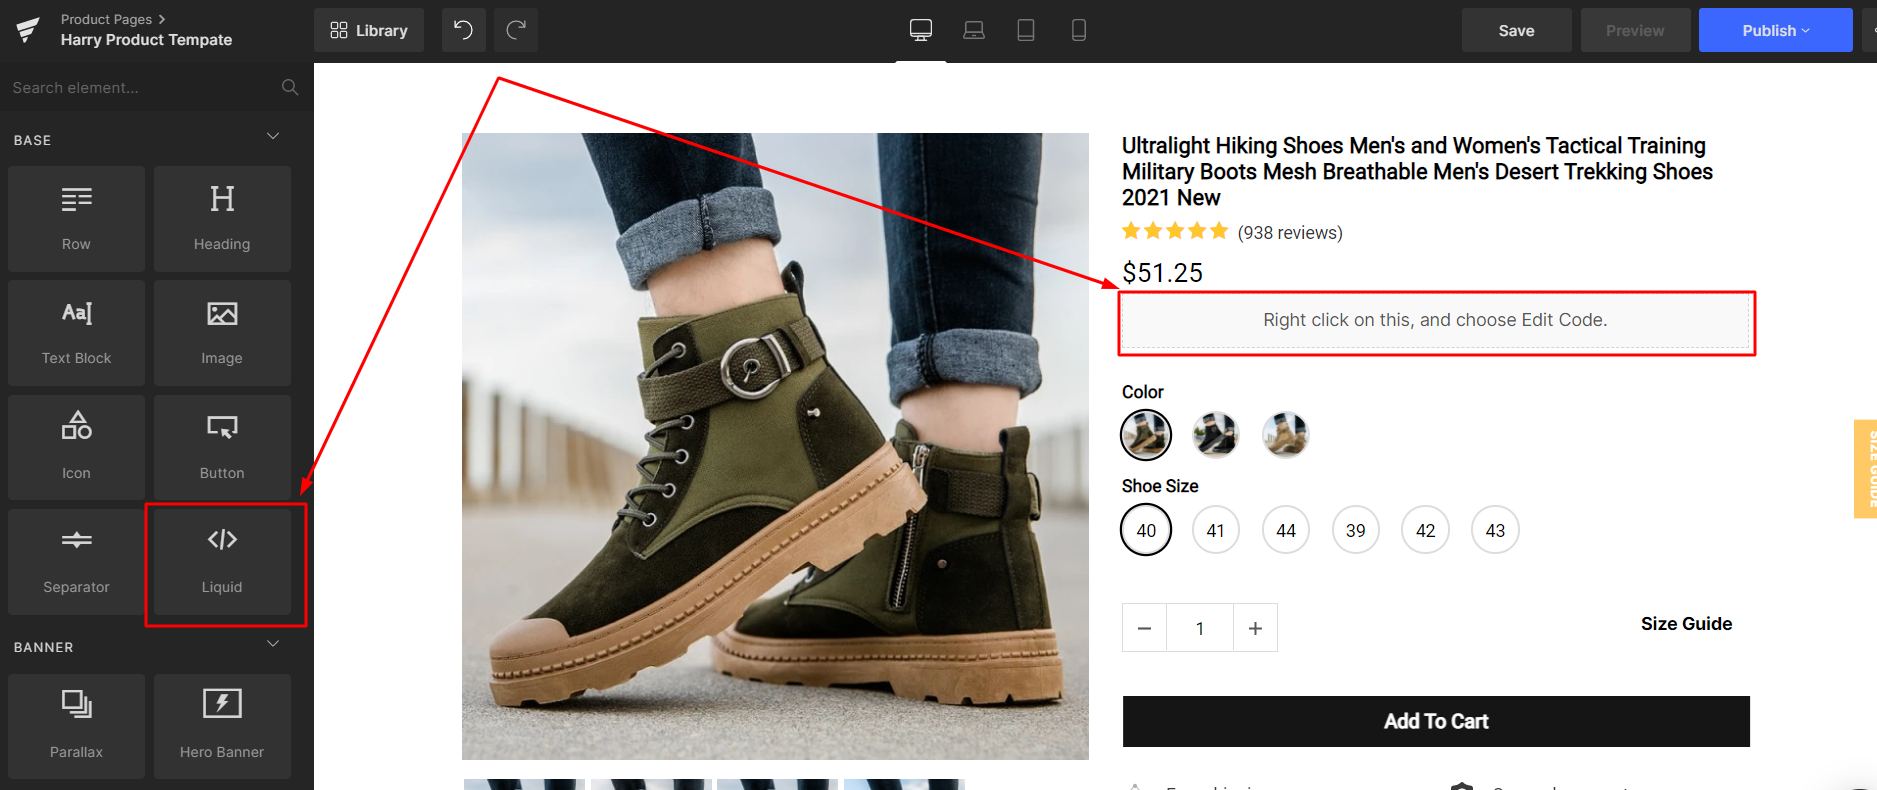
Step 3: Right-click on the Liquid Module and choose Edit code to open the code panel.
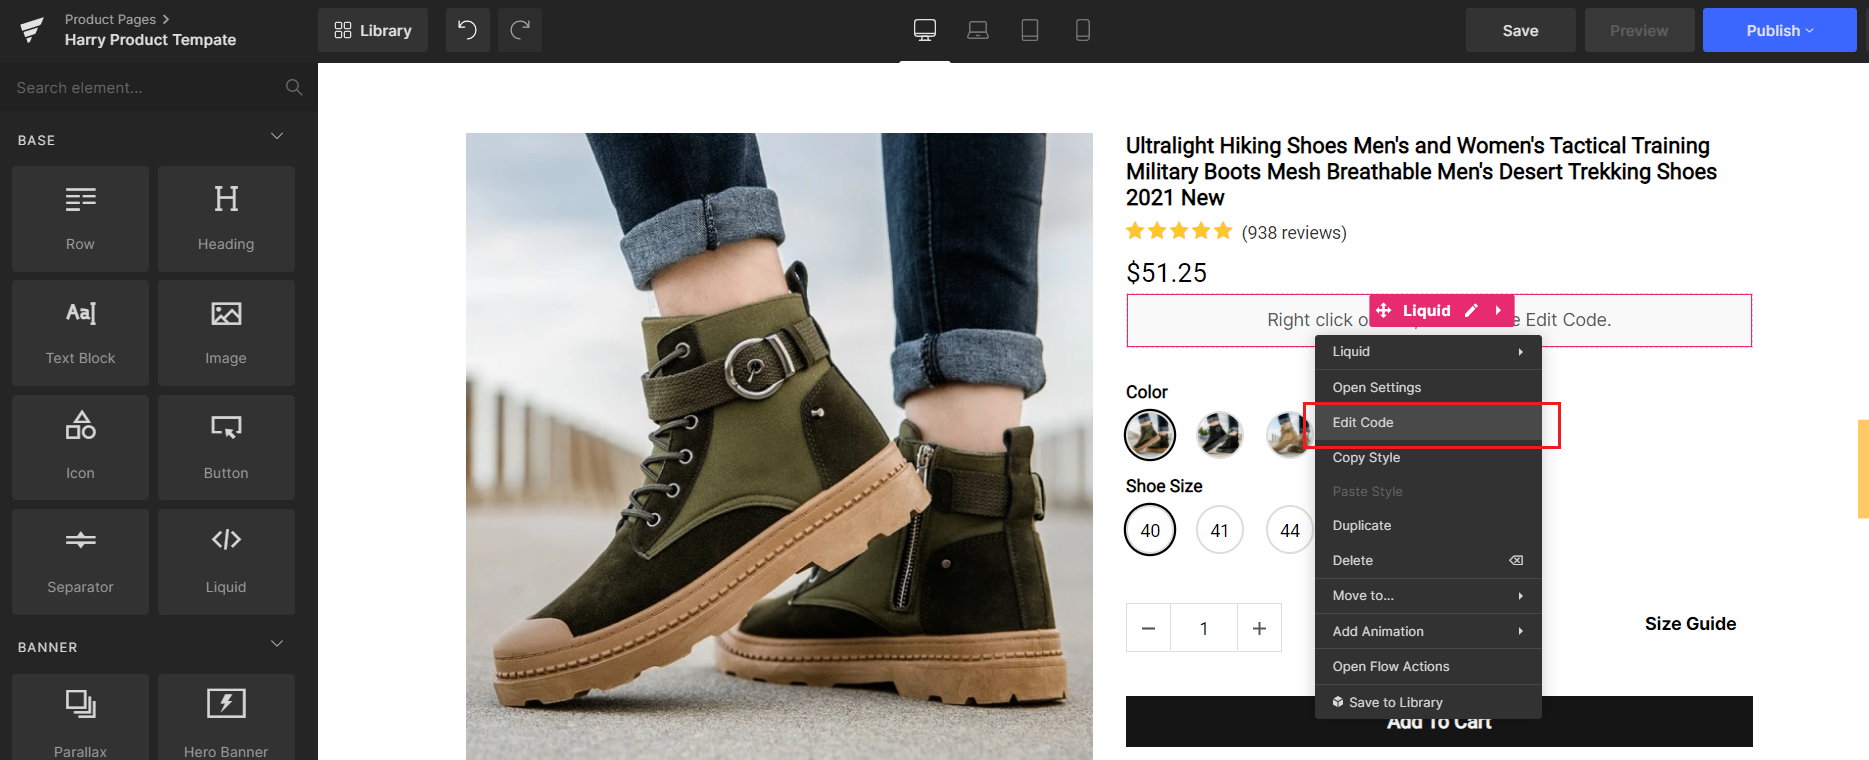
Step 4: Copy and paste the HTML code below into the Template tab. Once done, click Save to apply changes.
<div id="product-price-selector"></div>

When everything is in place, save and hit Publish to republish your product page.
For GemPages version 7
Once open your target product page to the editor, follow these steps:
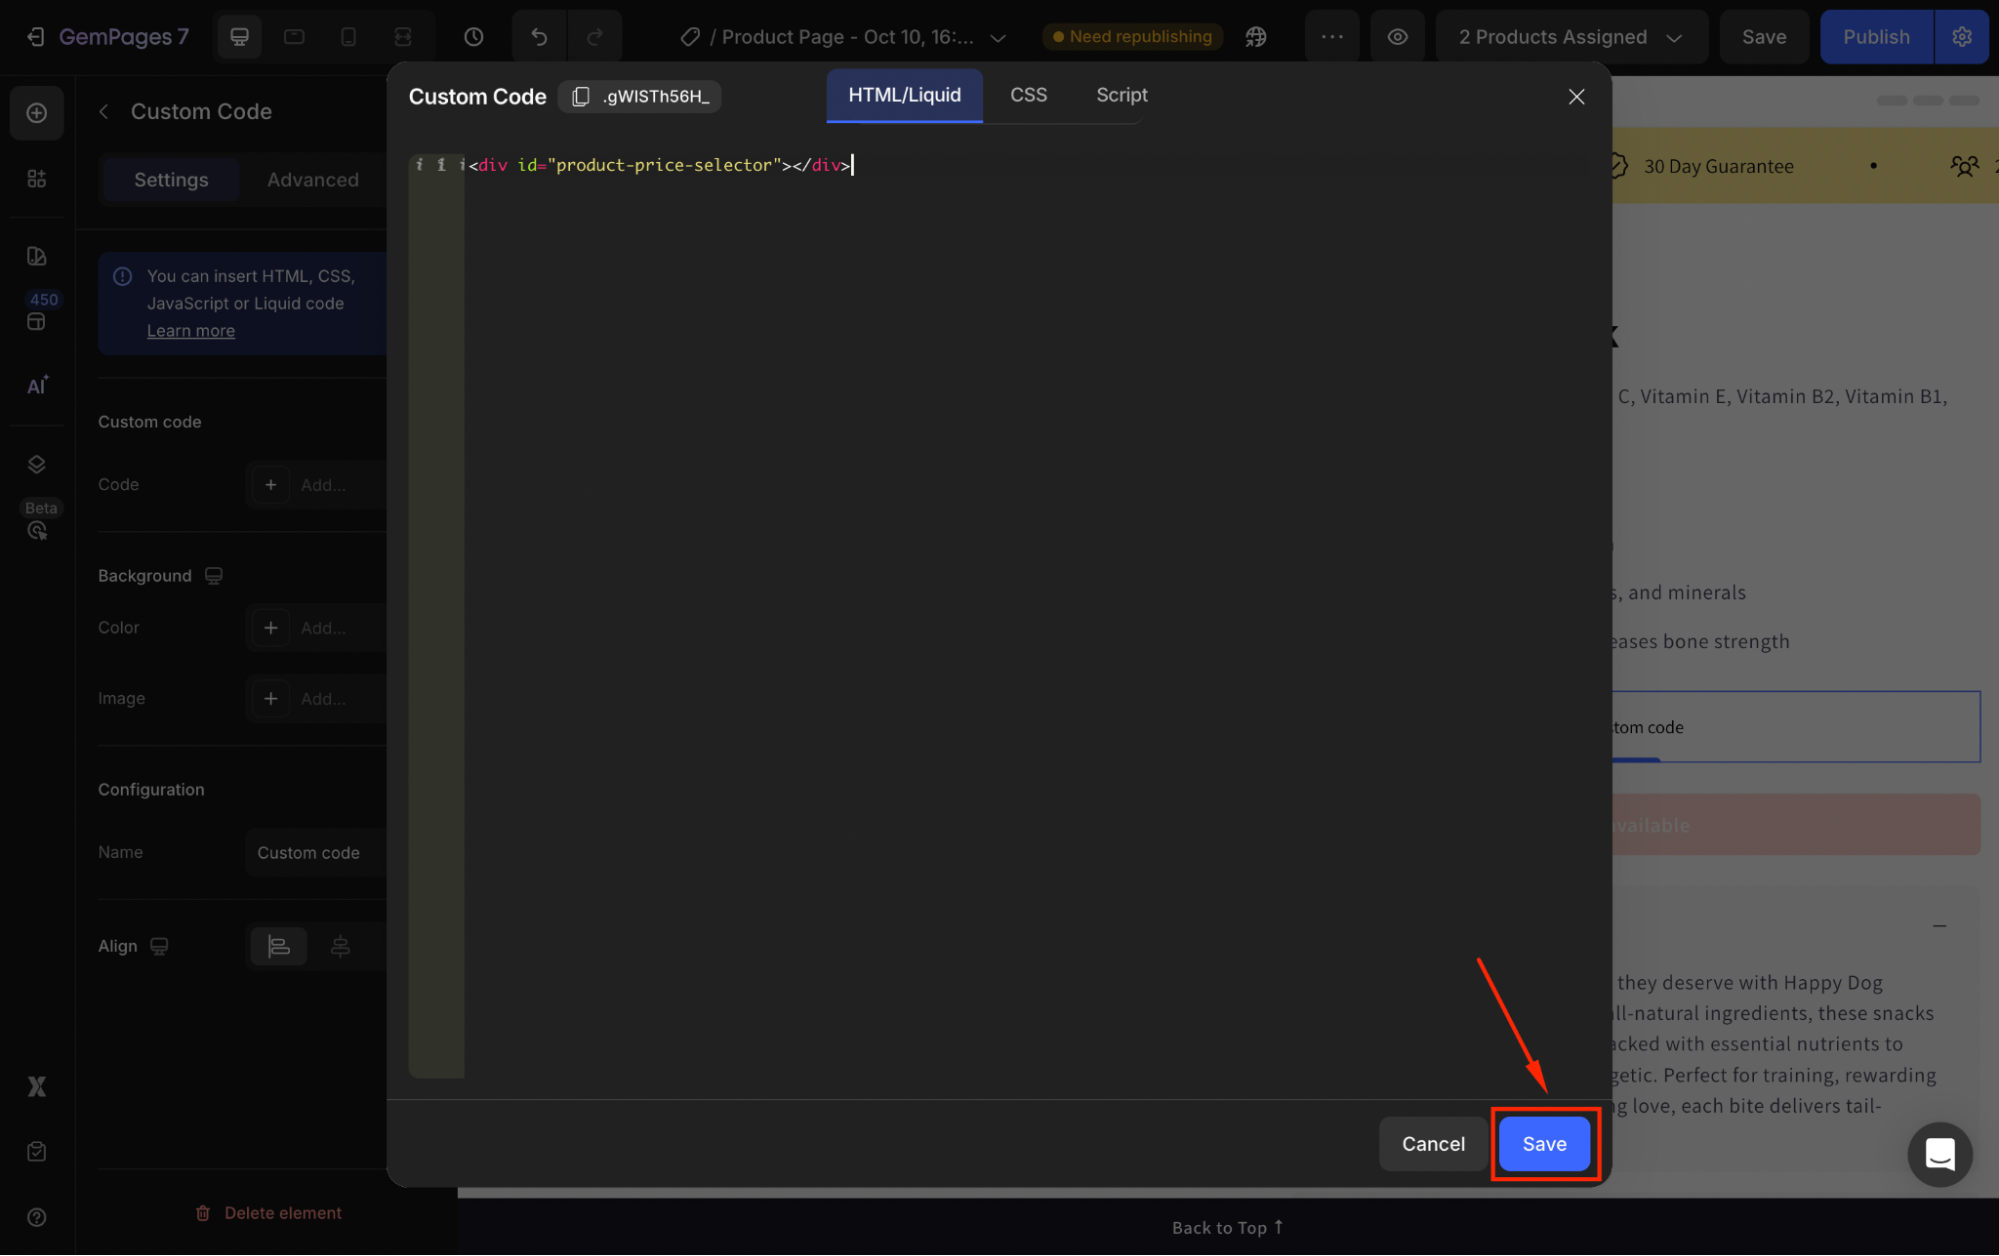
Step 1: From the left sidebar, use the search bar to locate the Custom Code Element. Drag and drop this element to your desired position in the Product Element.
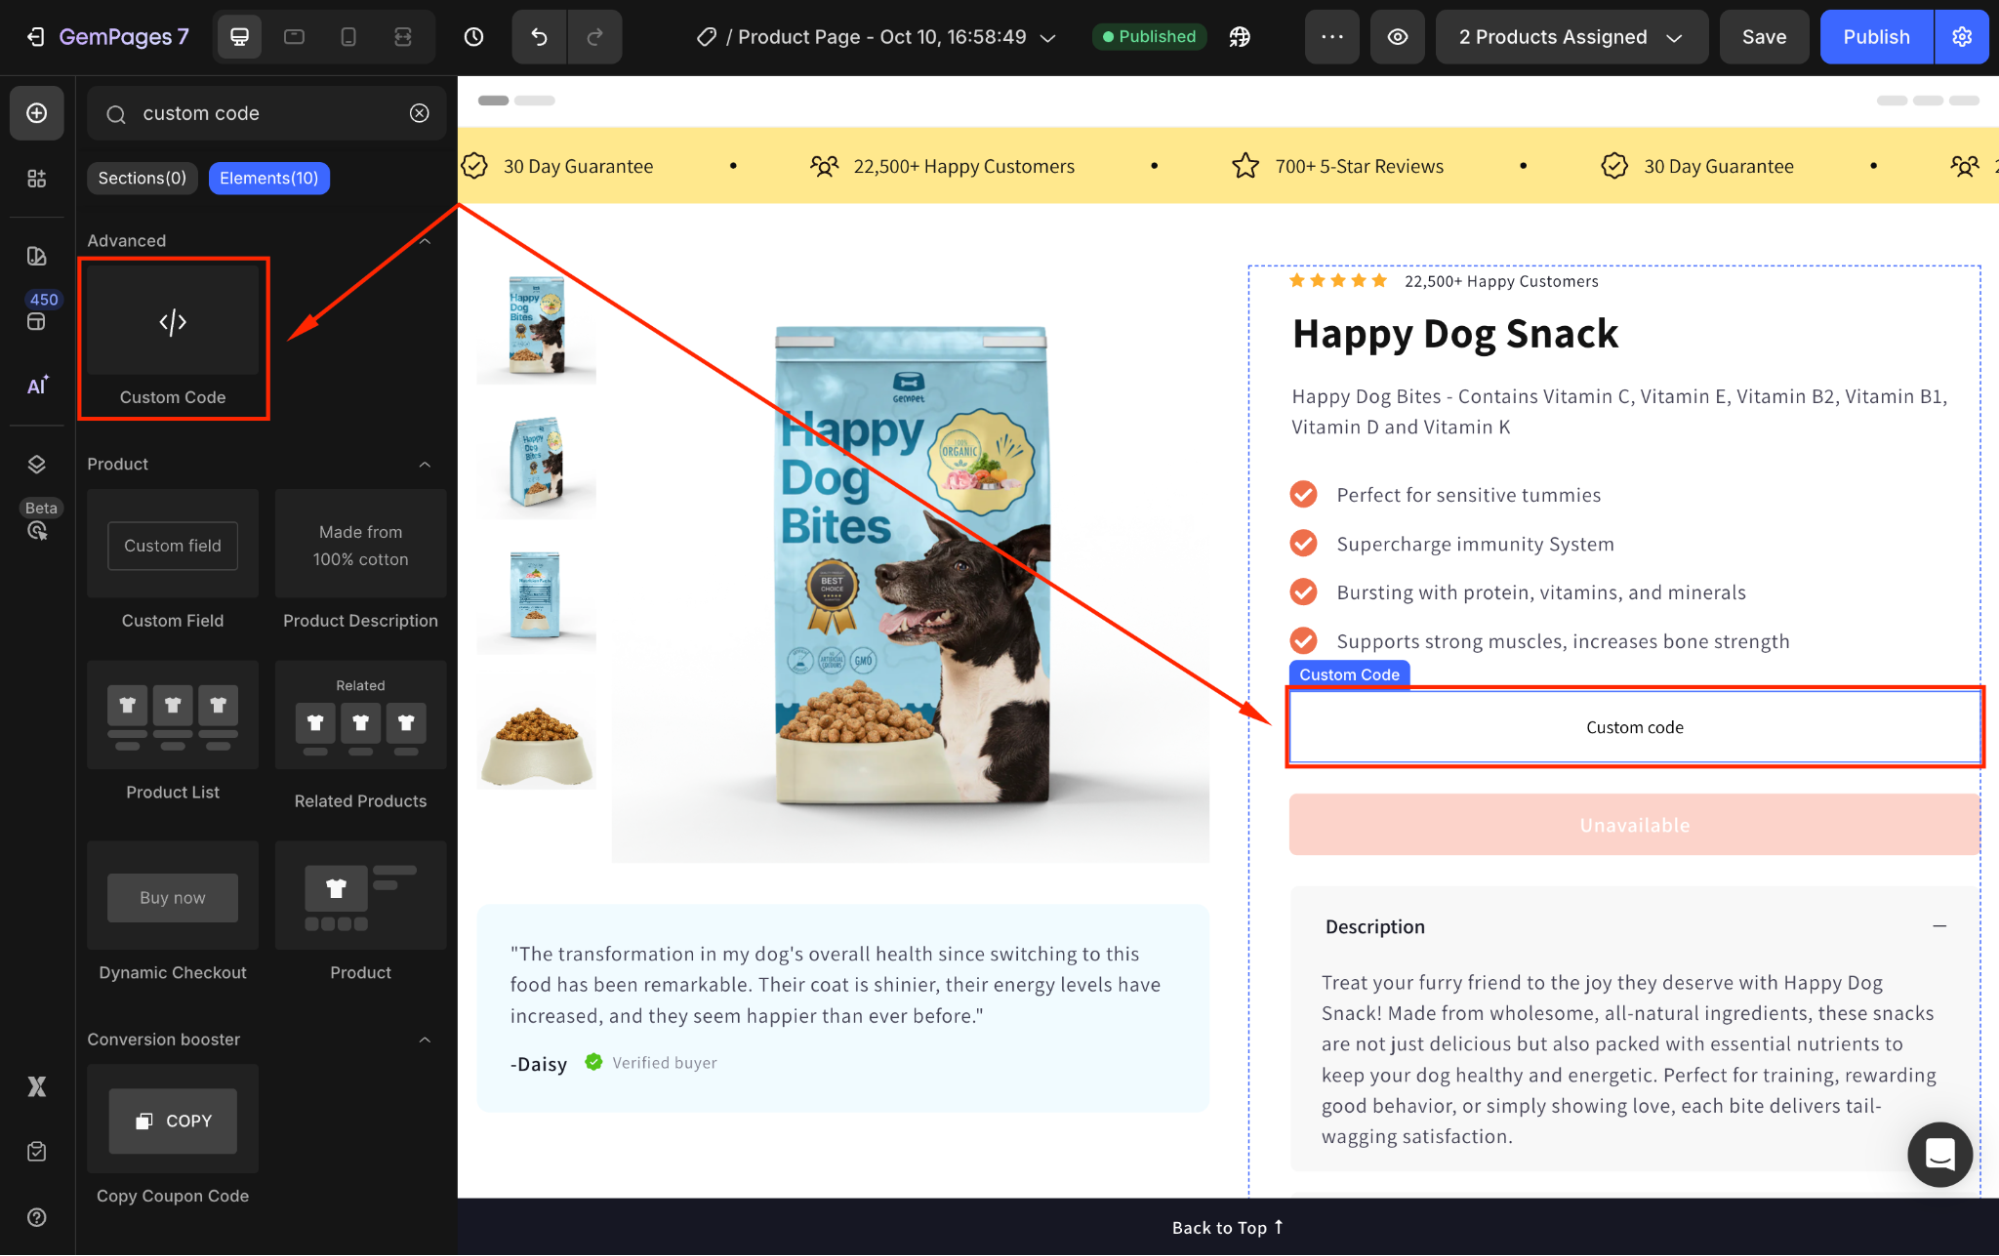
Step 2: Click the element to open its settings. Under the Custom code, click on the box to open the code panel.
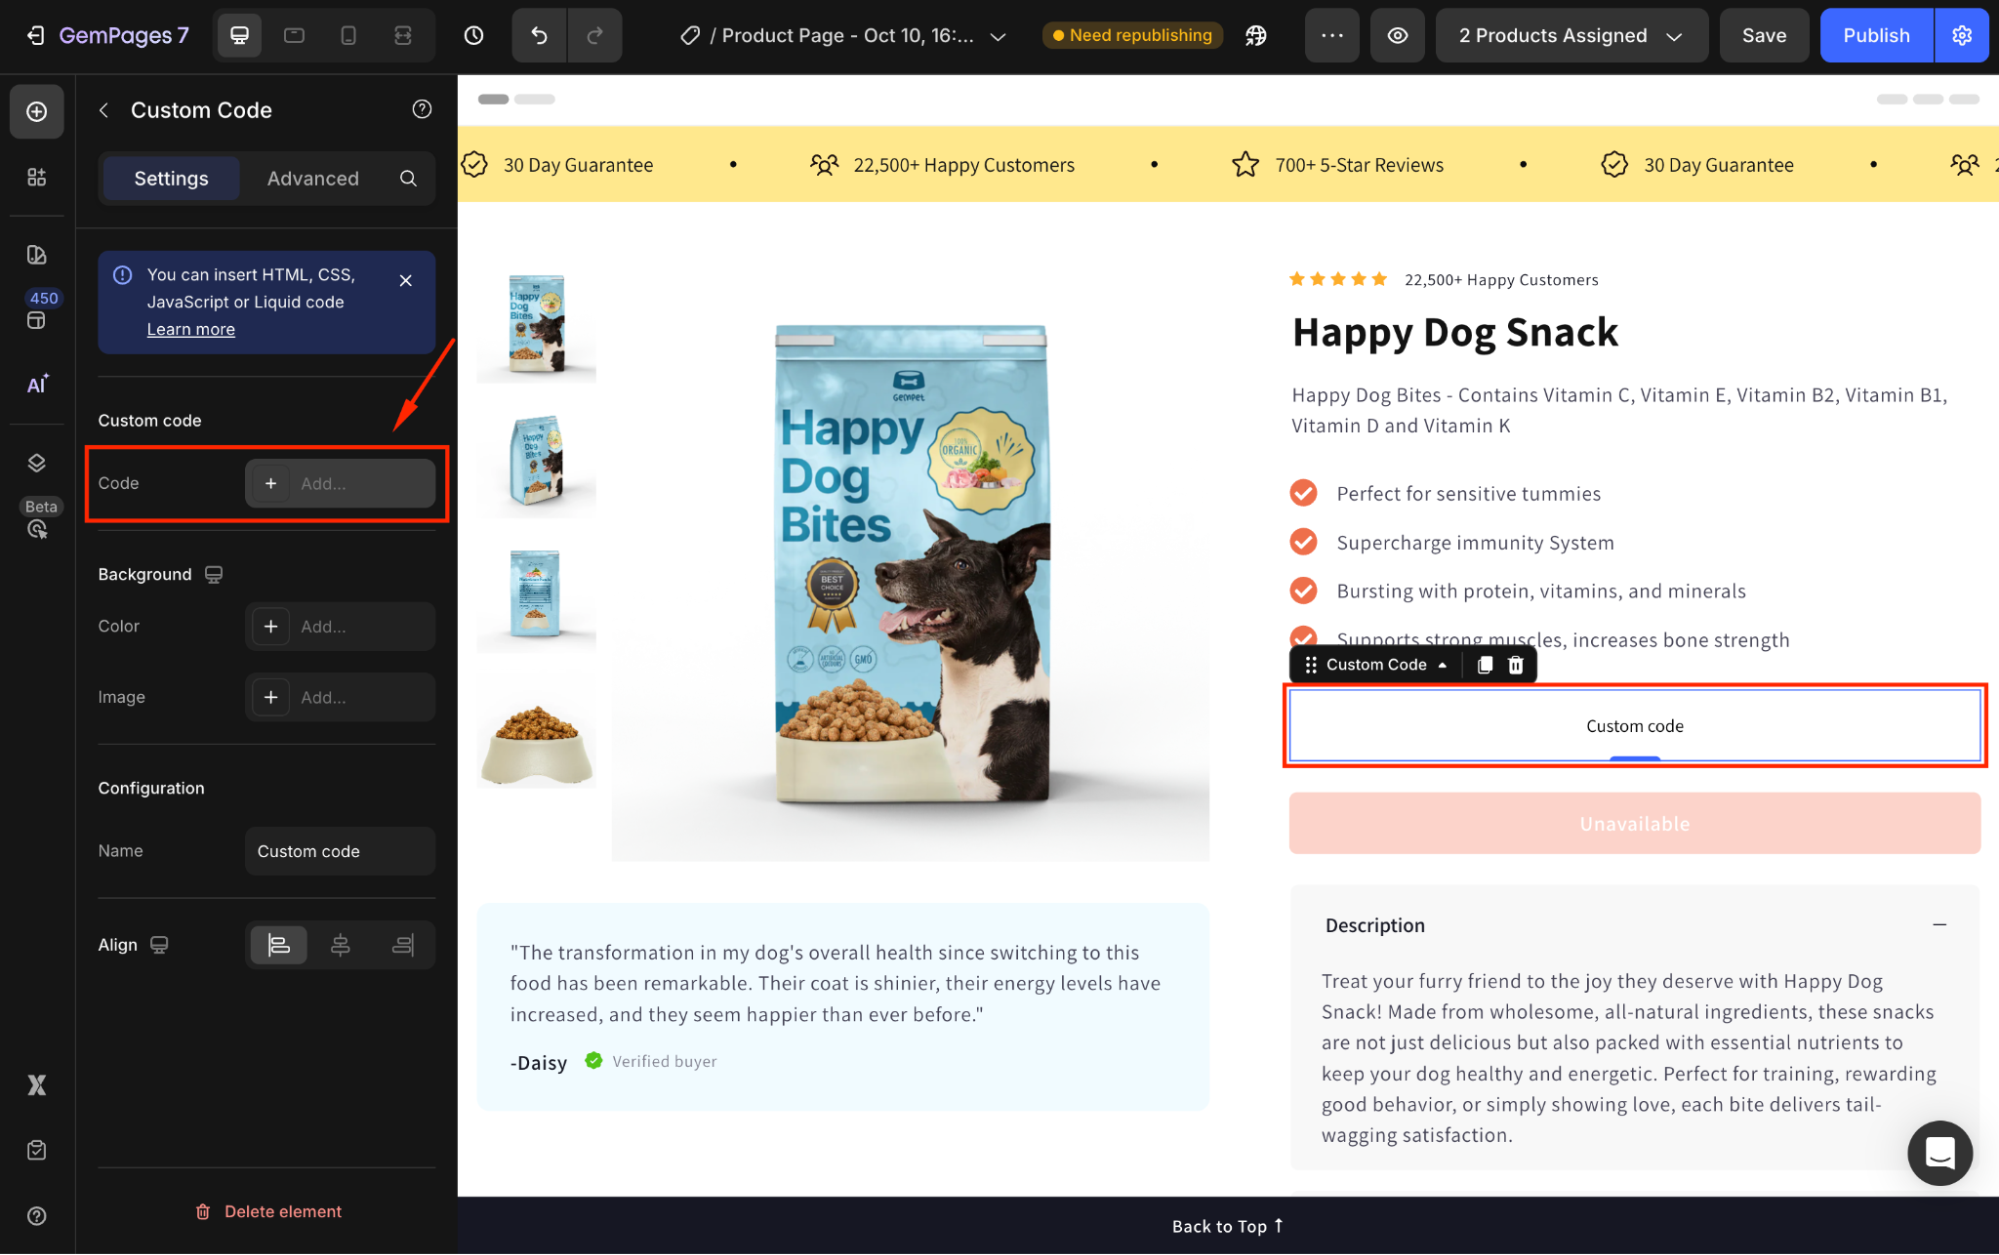
Step 3: Paste the HTML code below under the HTML/Liquid tab.
<div id="product-price-selector"></div>
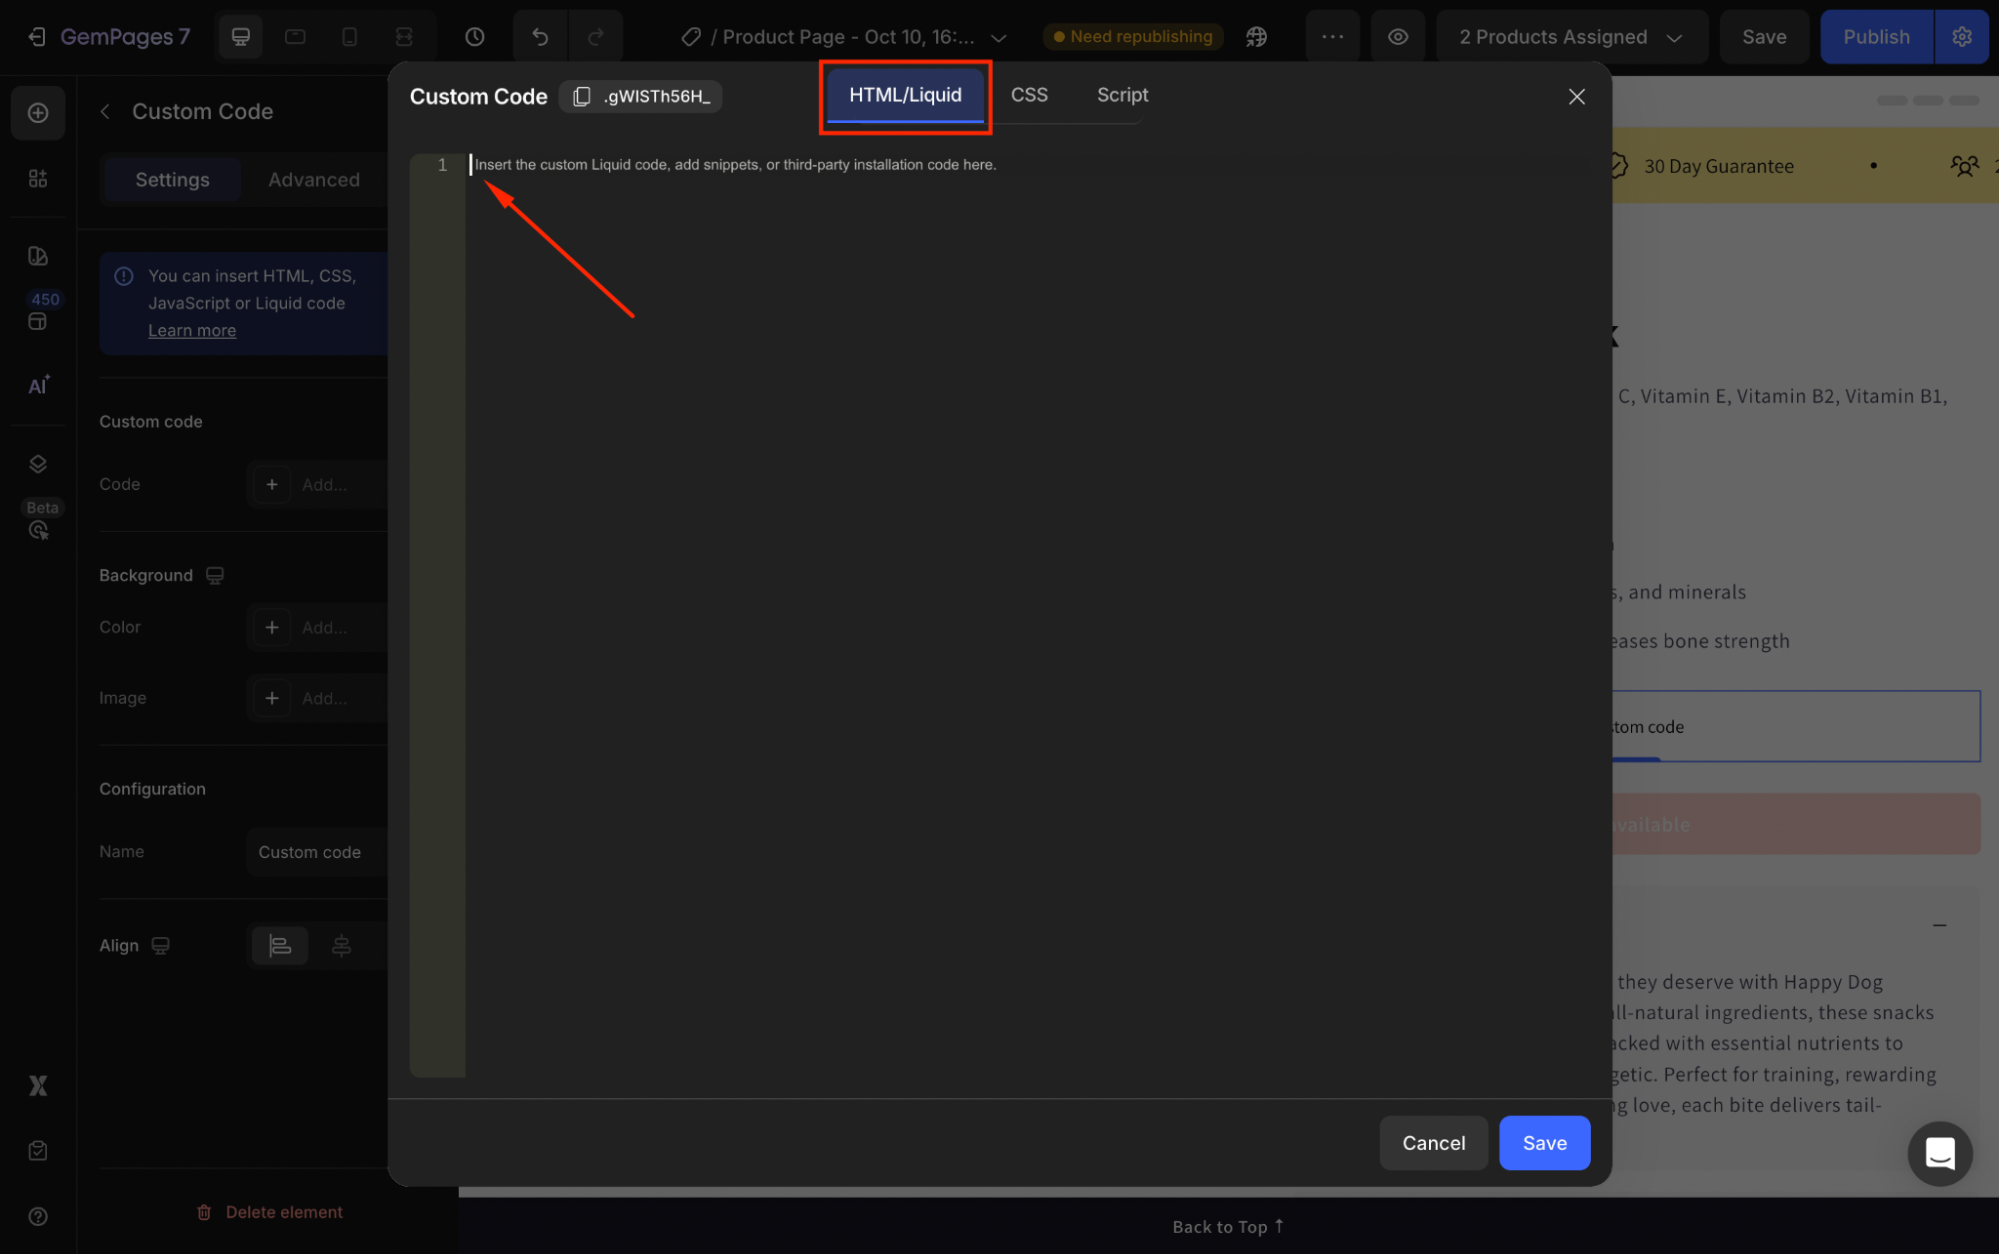
Once done, click Save.
That’s it! You are all set with the Afterpay widget that helps you increase sales and win new customers.


Thank you for your comments