


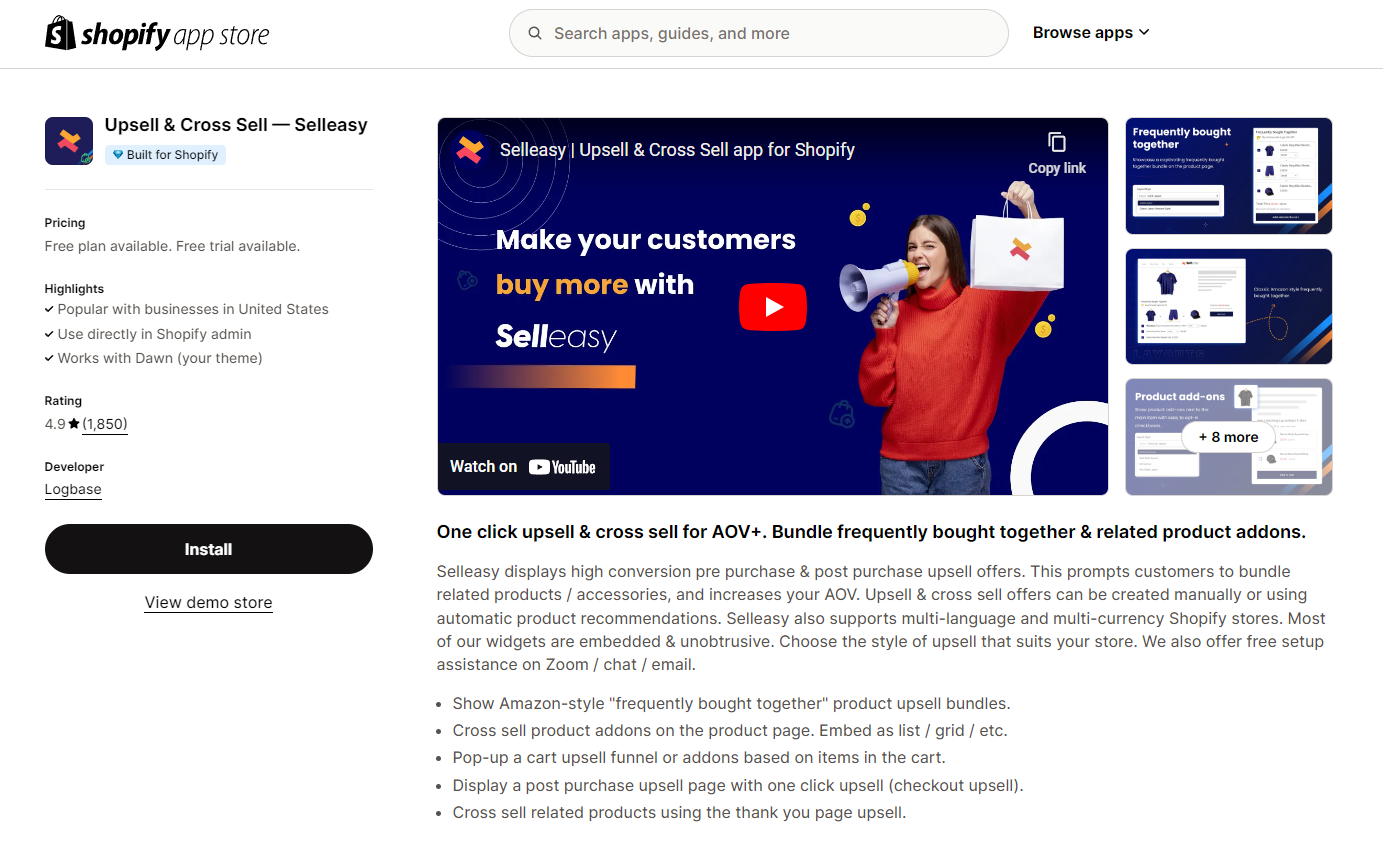
About Upsell & Cross Sell – Selleasy
Upsell & Cross Sell – Selleasy is designed to boost your average order value with seamless upselling and cross-selling features. It lets you offer product bundles, related product add-ons, and automatic recommendations to increase sales.
Key Features of Upsell & Cross Sell – Selleasy
Explore the powerful features of Upsell & Cross Sell – Selleasy, including:
- “Frequently Bought Together” Bundles: Display upsell bundles similar to Amazon’s style.
- Product Add-ons: Cross-sell add-ons on the product page, with list or grid options.
- Cart Upsell Pop-ups: Suggest upsells or add-ons based on items in the cart.
- Post-Purchase Upsell Page: Show a one-click upsell offer after purchase.
- Thank You Page Recommendations: Cross-sell related products on the thank you page.
Note: The app is well-suited for stores in the following categories:
- Fashion and Accessories
- Beauty and Cosmetics
- Electronics
- Home and Furniture
- Food and Beverage
- Sports and Outdoor
How to Install & Setup Upsell & Cross Sell – Selleasy
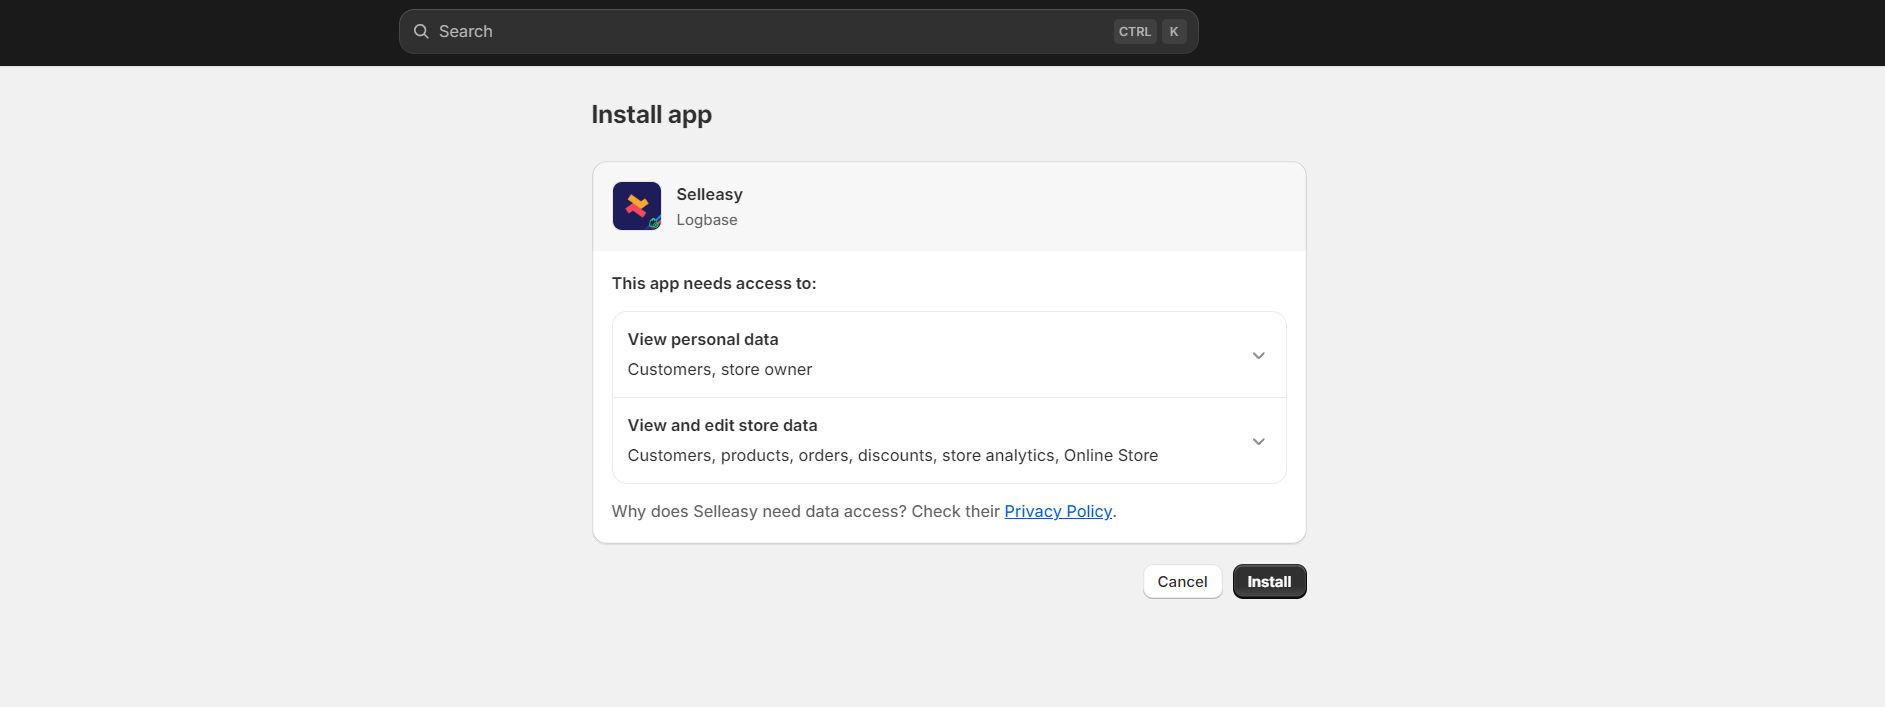
Step 1: In the Shopify App Store, find the Upsell & Cross Sell – Selleasy and click “Install”.
Step 2: Grant the app to access necessary data.
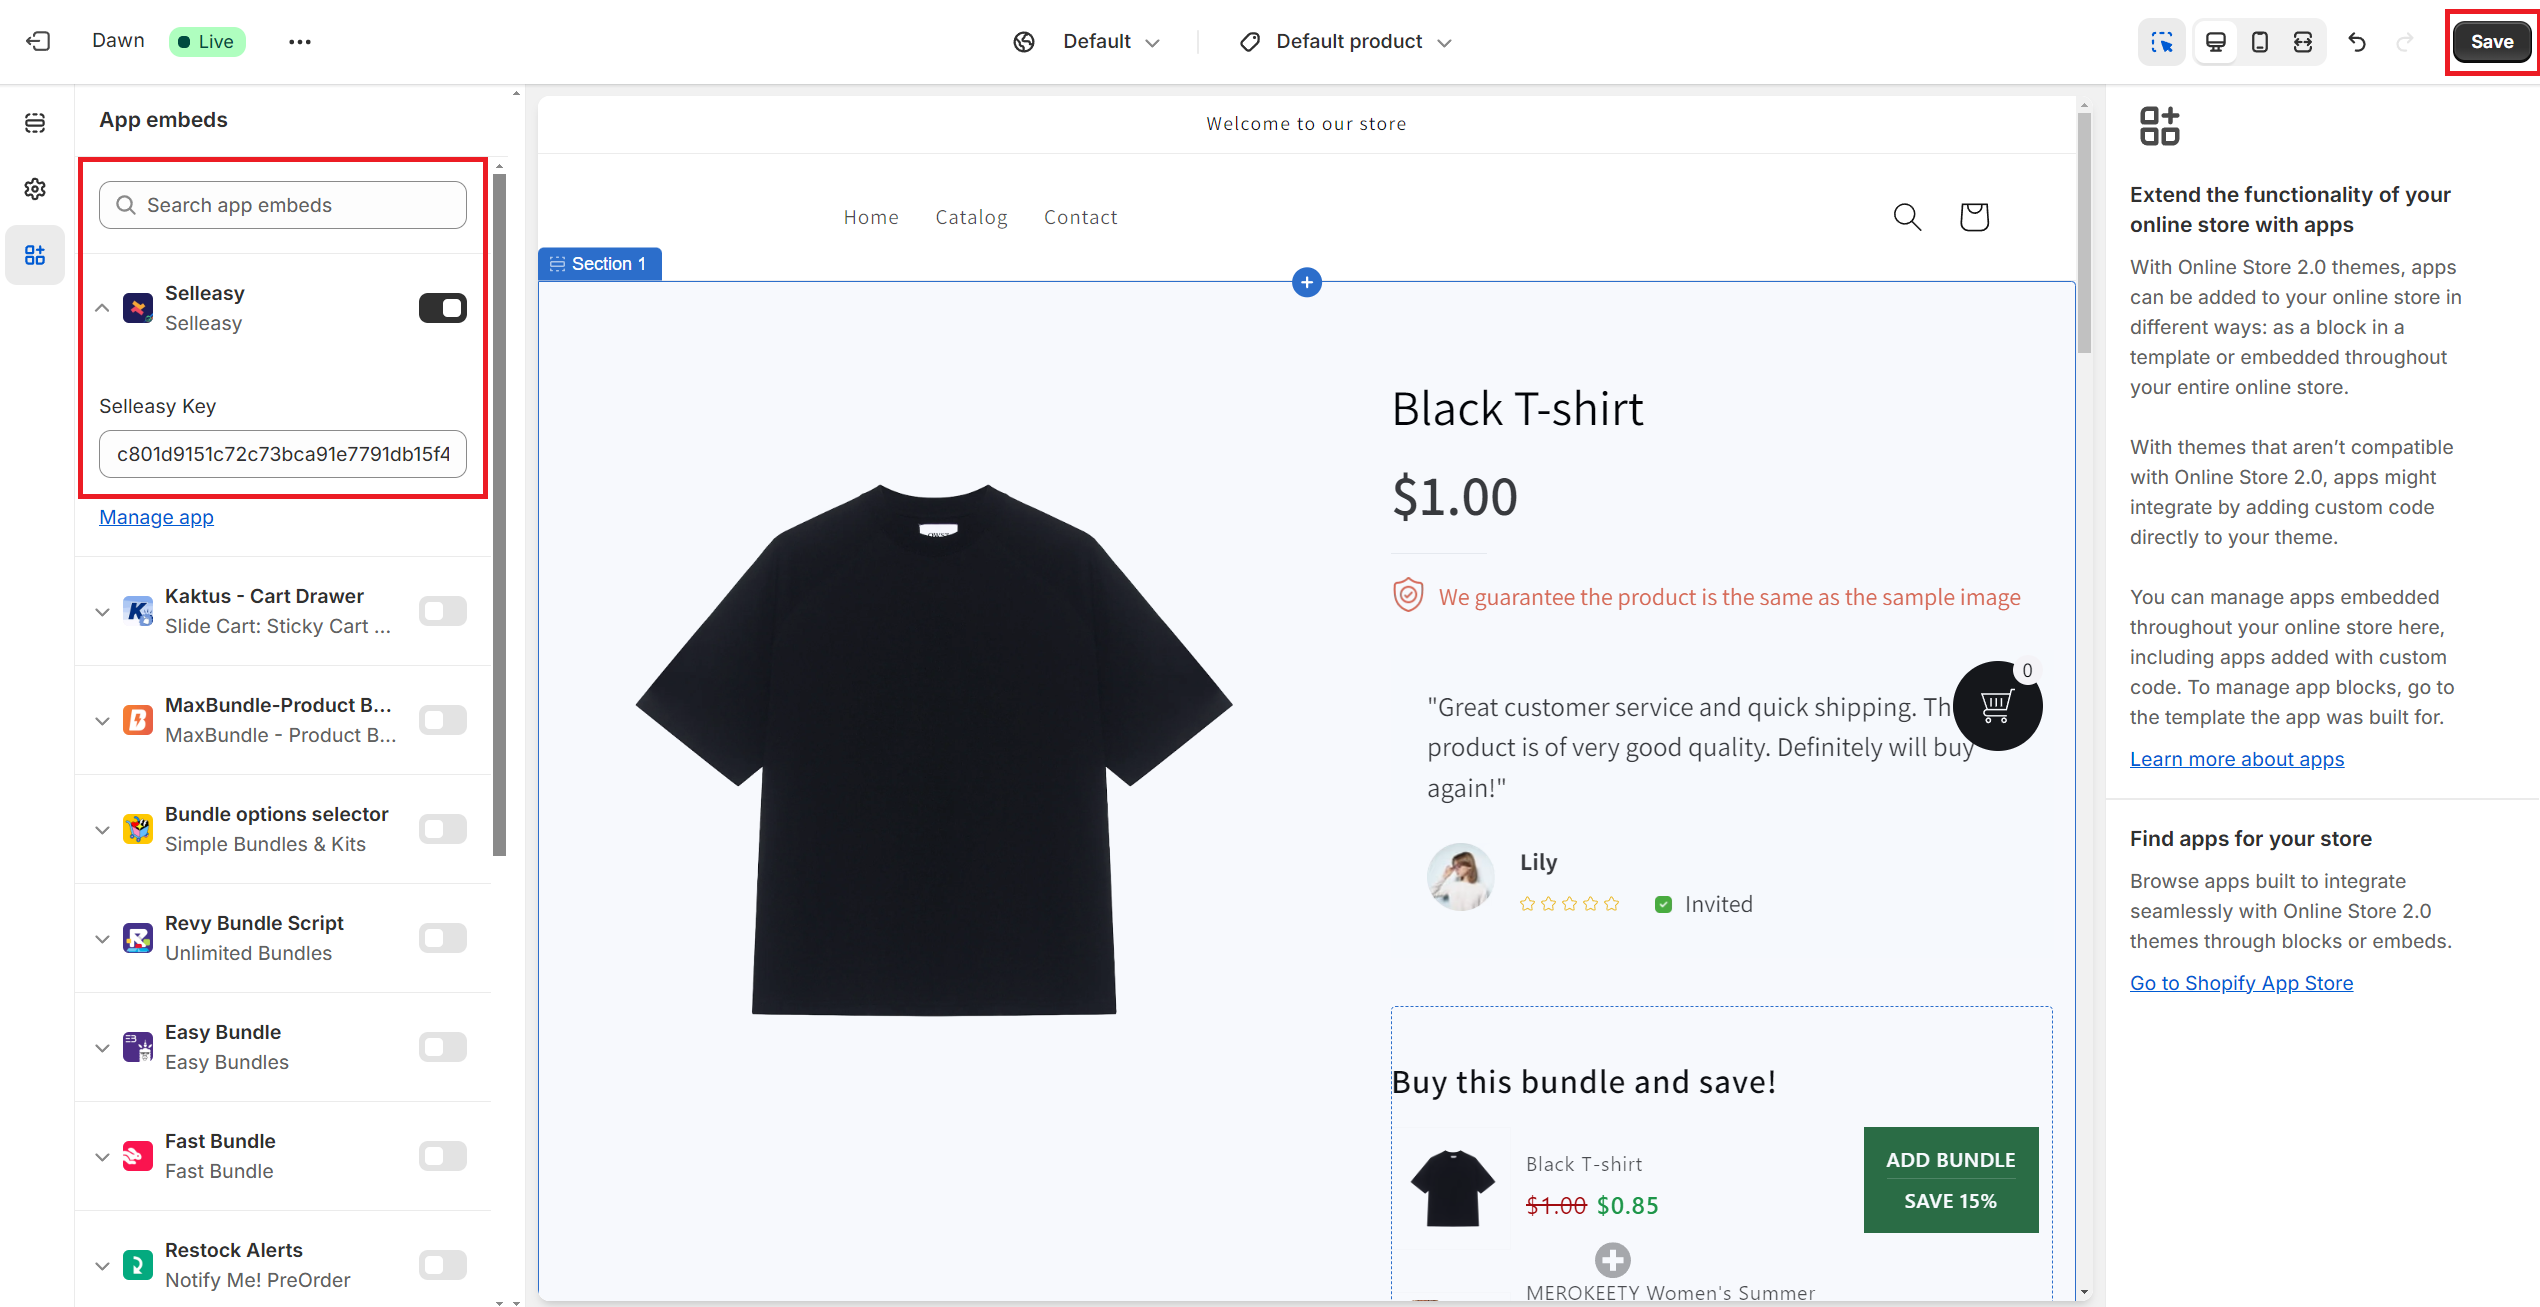
Step 3: You will be directed to the app’s dashboard. Go to the Shopify Theme Editor and enable the app embed.
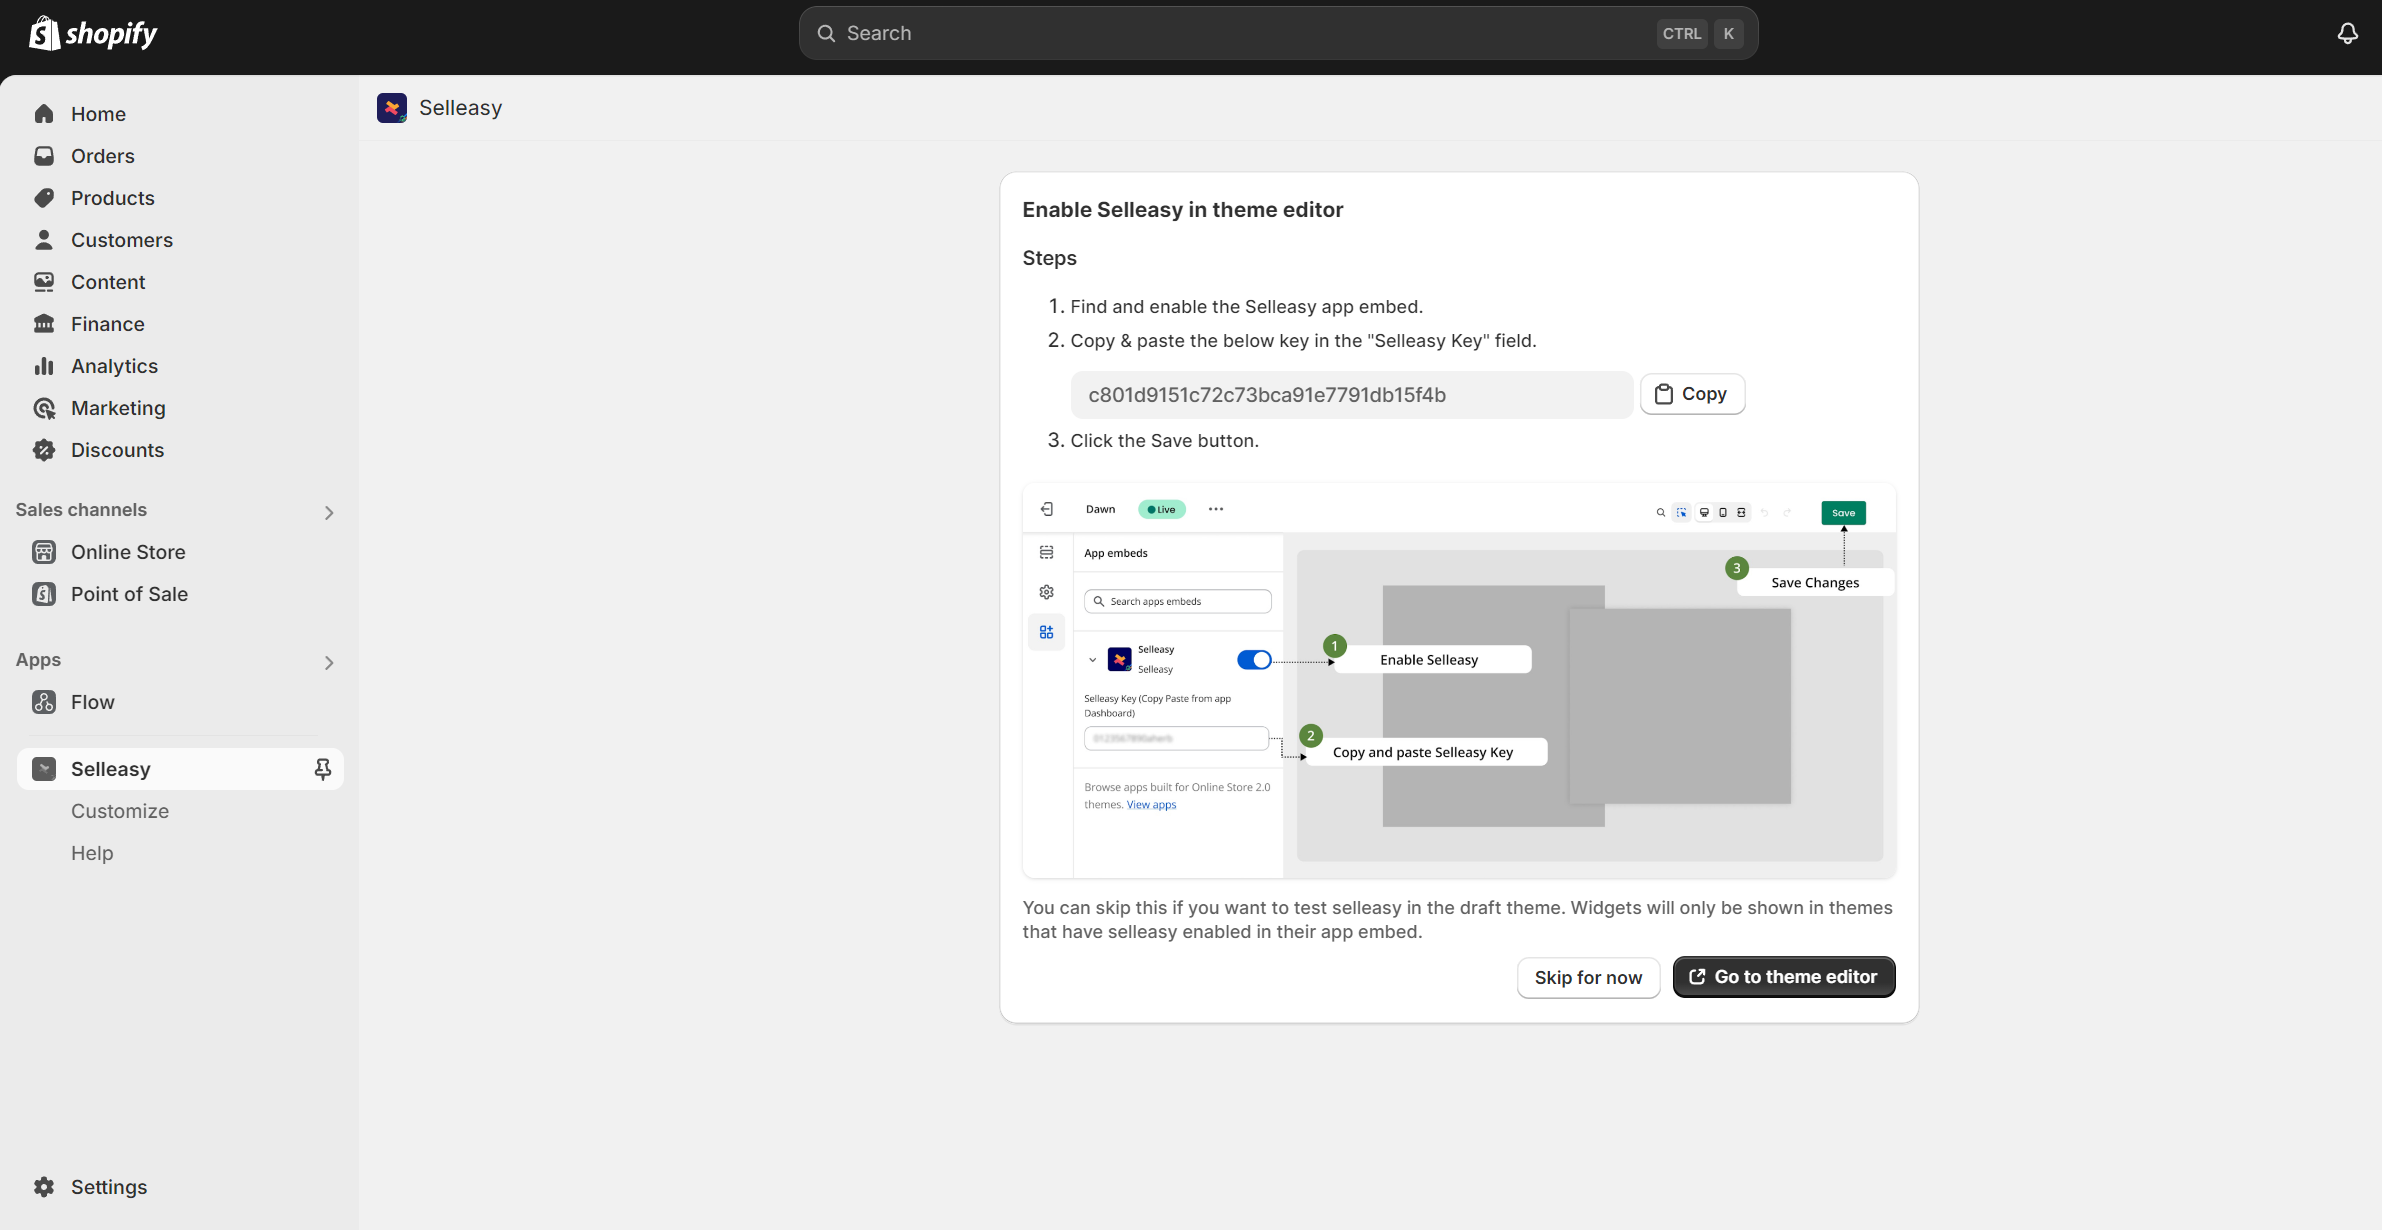
Step 4: Paste the Selleasy key, then click “Save”.
Step 5:
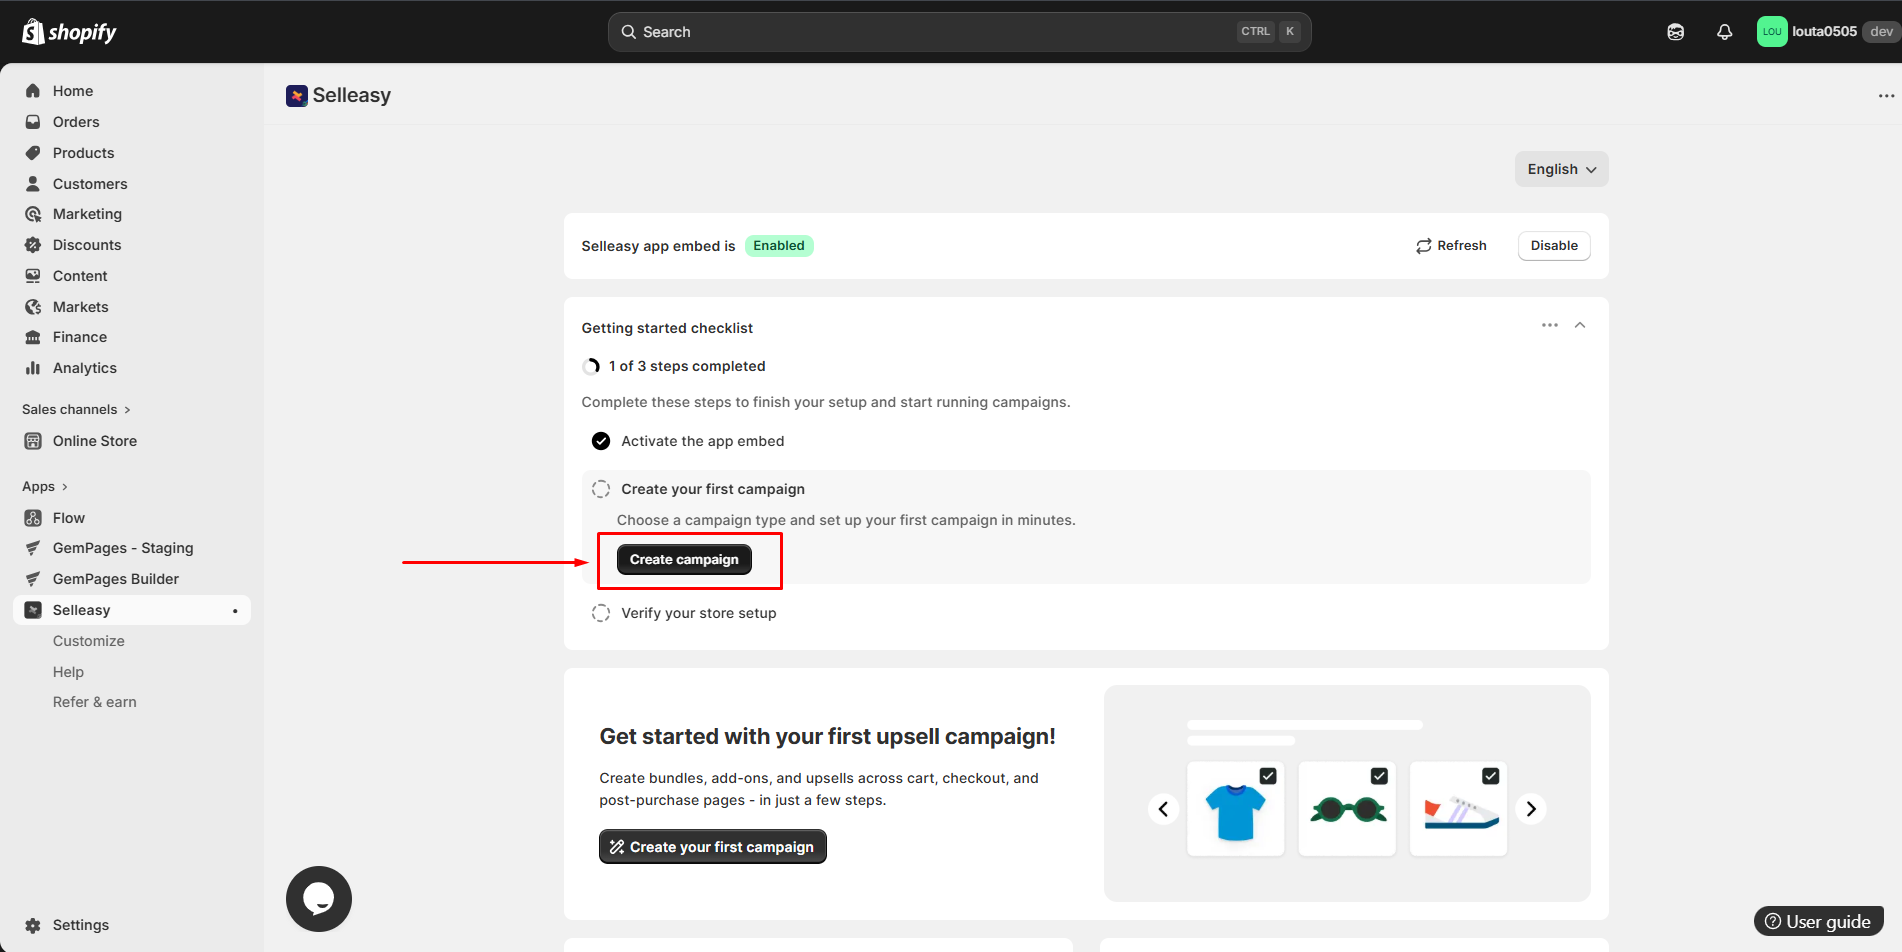
To create an upsell or cross-sell offer:
- Go to Campaigns inside the Selleasy dashboard
- Click Create Campaign
Selleasy supports many campaign types, each designed for different display locations and use cases.
Step 6: Browse the available campaign types. To quickly find the right campaign, you can filter campaigns based on display position (such as product page or cart).
Note: There are some widgets and options from the app that haven’t been integrated with GemPages, which are Cart add-ons, Upsell funnel, and Thank you page add-ons.
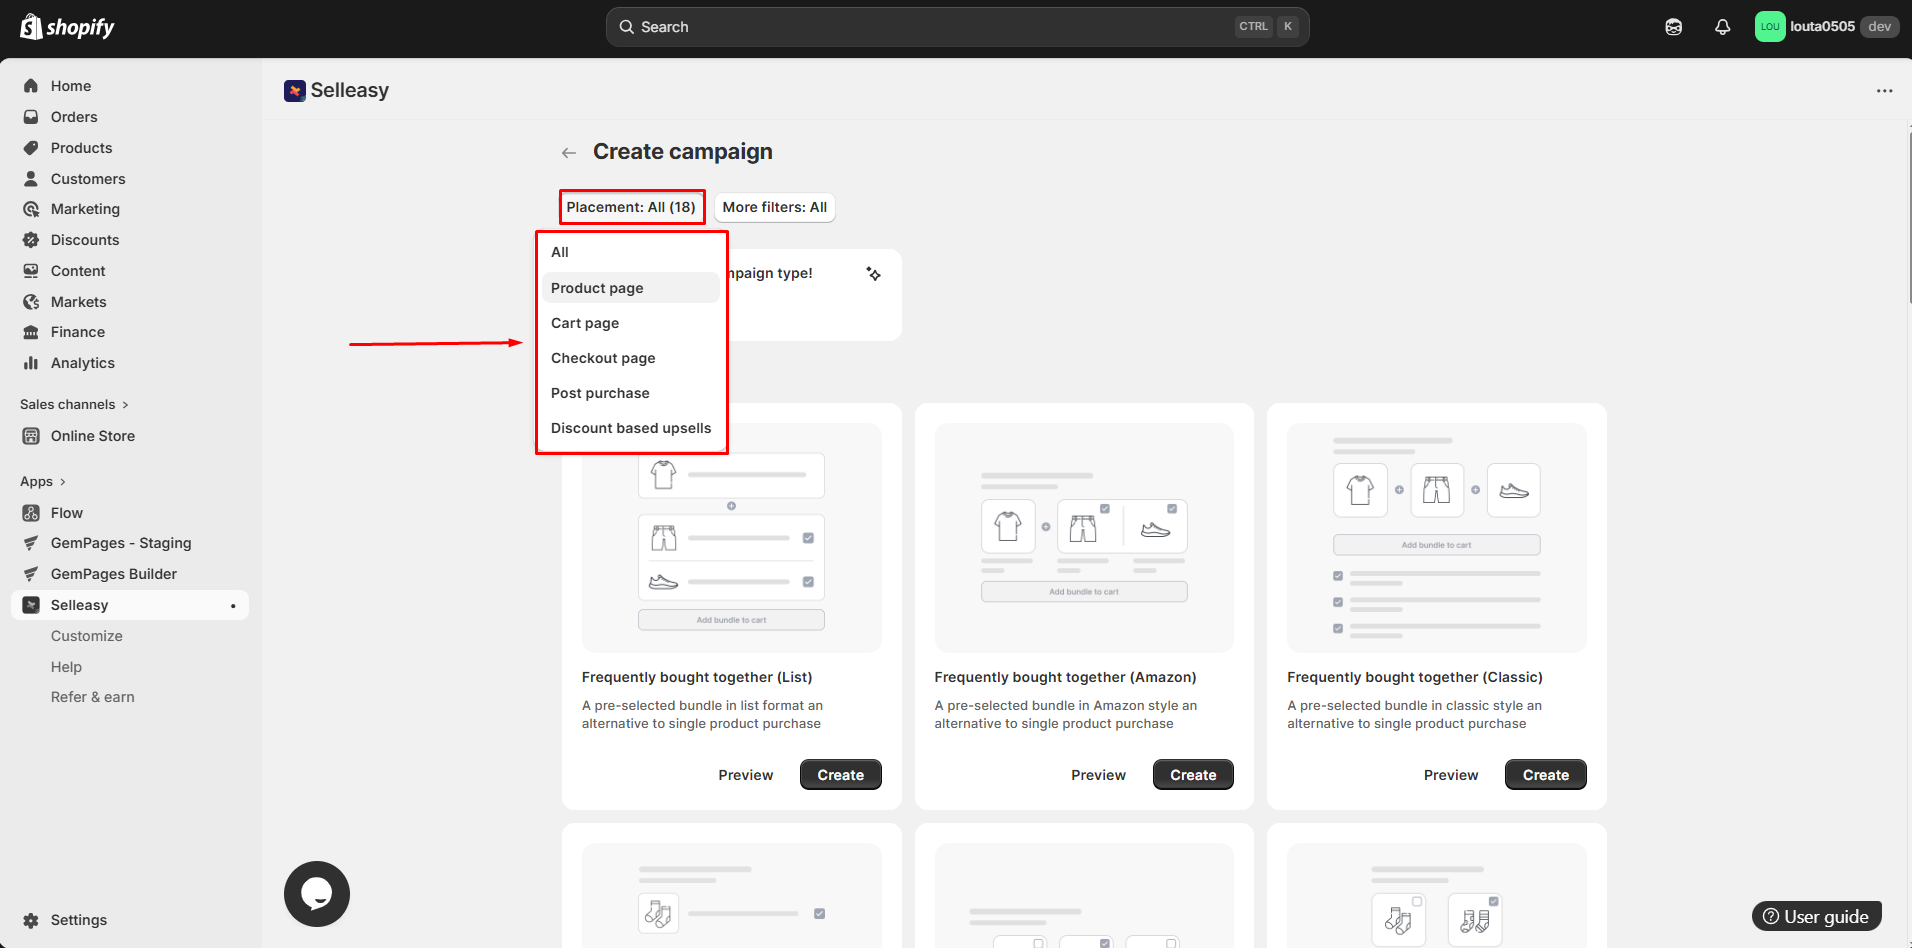
Step 7: Then click Create under the campaign type that you want to set up.

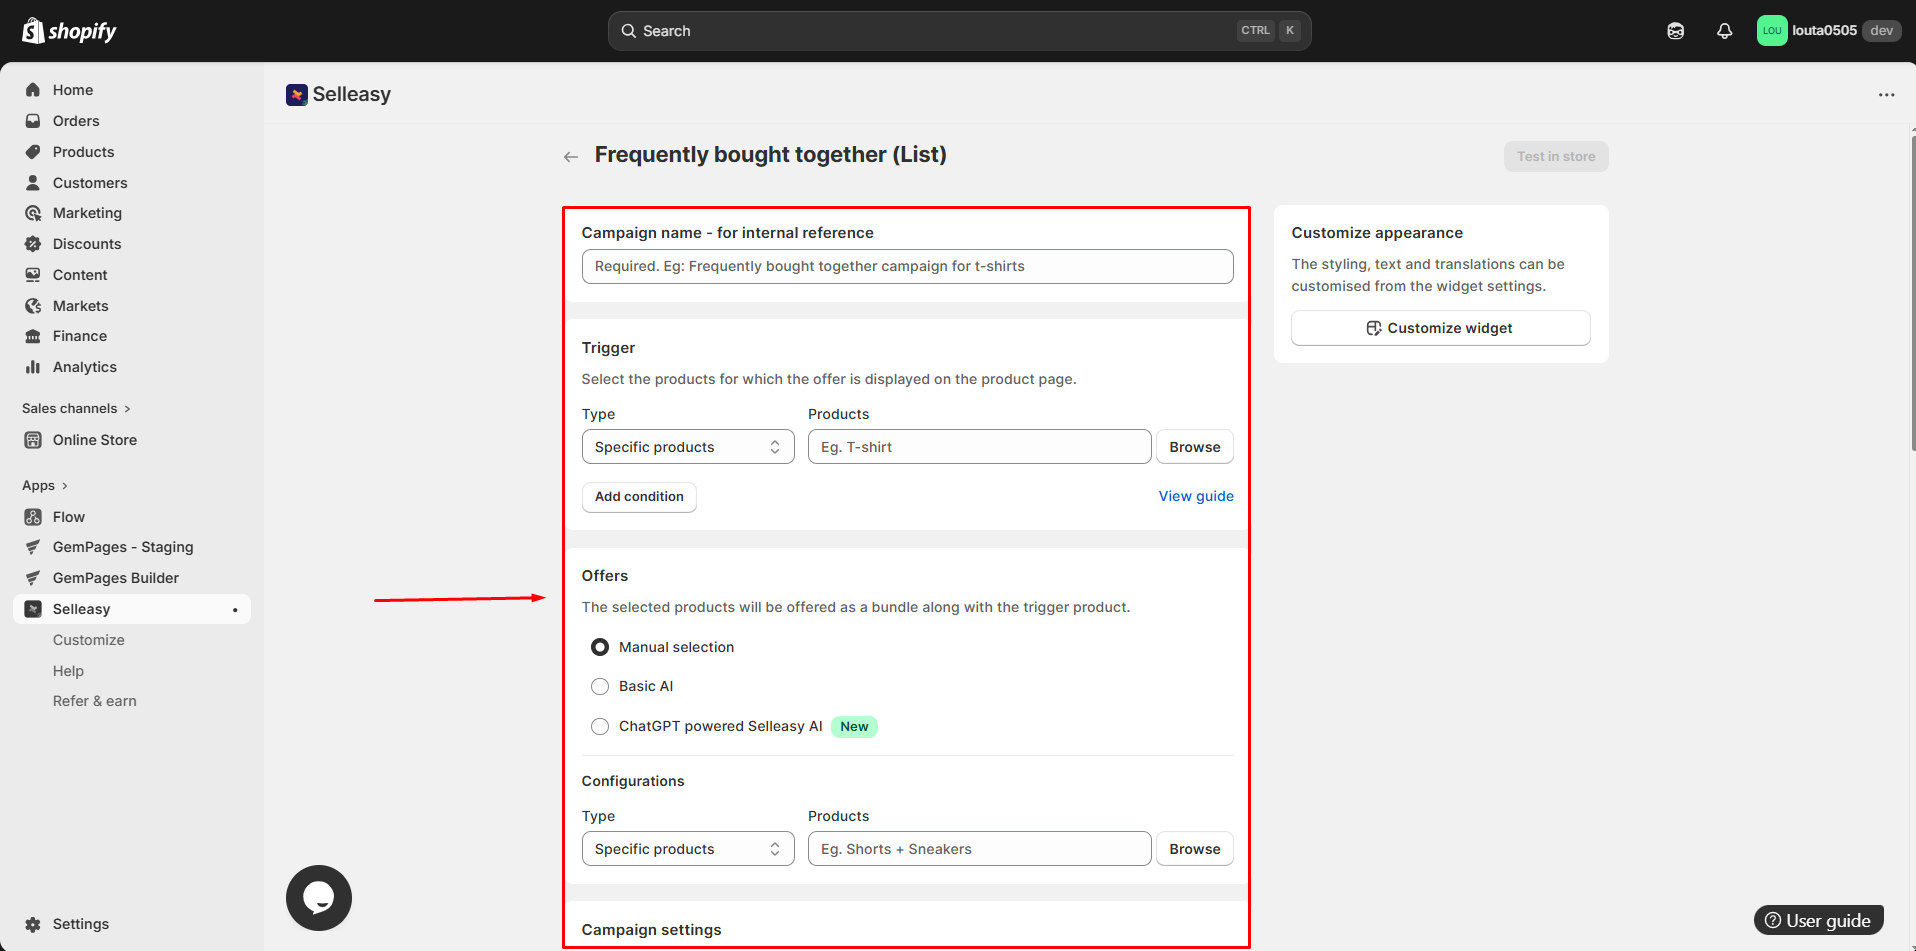
Step 8: In this step, you will configure the core details of your campaign.
Typical settings include:
- Select Products: Choose the main product(s) that will trigger the upsell.
- Choose Offer Products: Select the recommended or bundled products to display.
- Set Discounts: Apply optional discounts to make the offer more attractive.
- Configure Time Settings: Set campaign duration or scheduling options if needed.
- Other Settings: Adjust display layout, behavior, and additional customization options depending on the selected campaign type.
After completing the configuration: Click Save to store your campaign.
Step 9: After saving the campaign:
- Click Customize Widget
- Adjust the visual design, layout, and styling
- Save your changes
Your campaign widget is now ready to be added to GemPages.
How to Add Upsell & Cross Sell – Selleasy to GemPages V7
After creating your campaign in Selleasy, follow the steps below to display it on your GemPages product page.
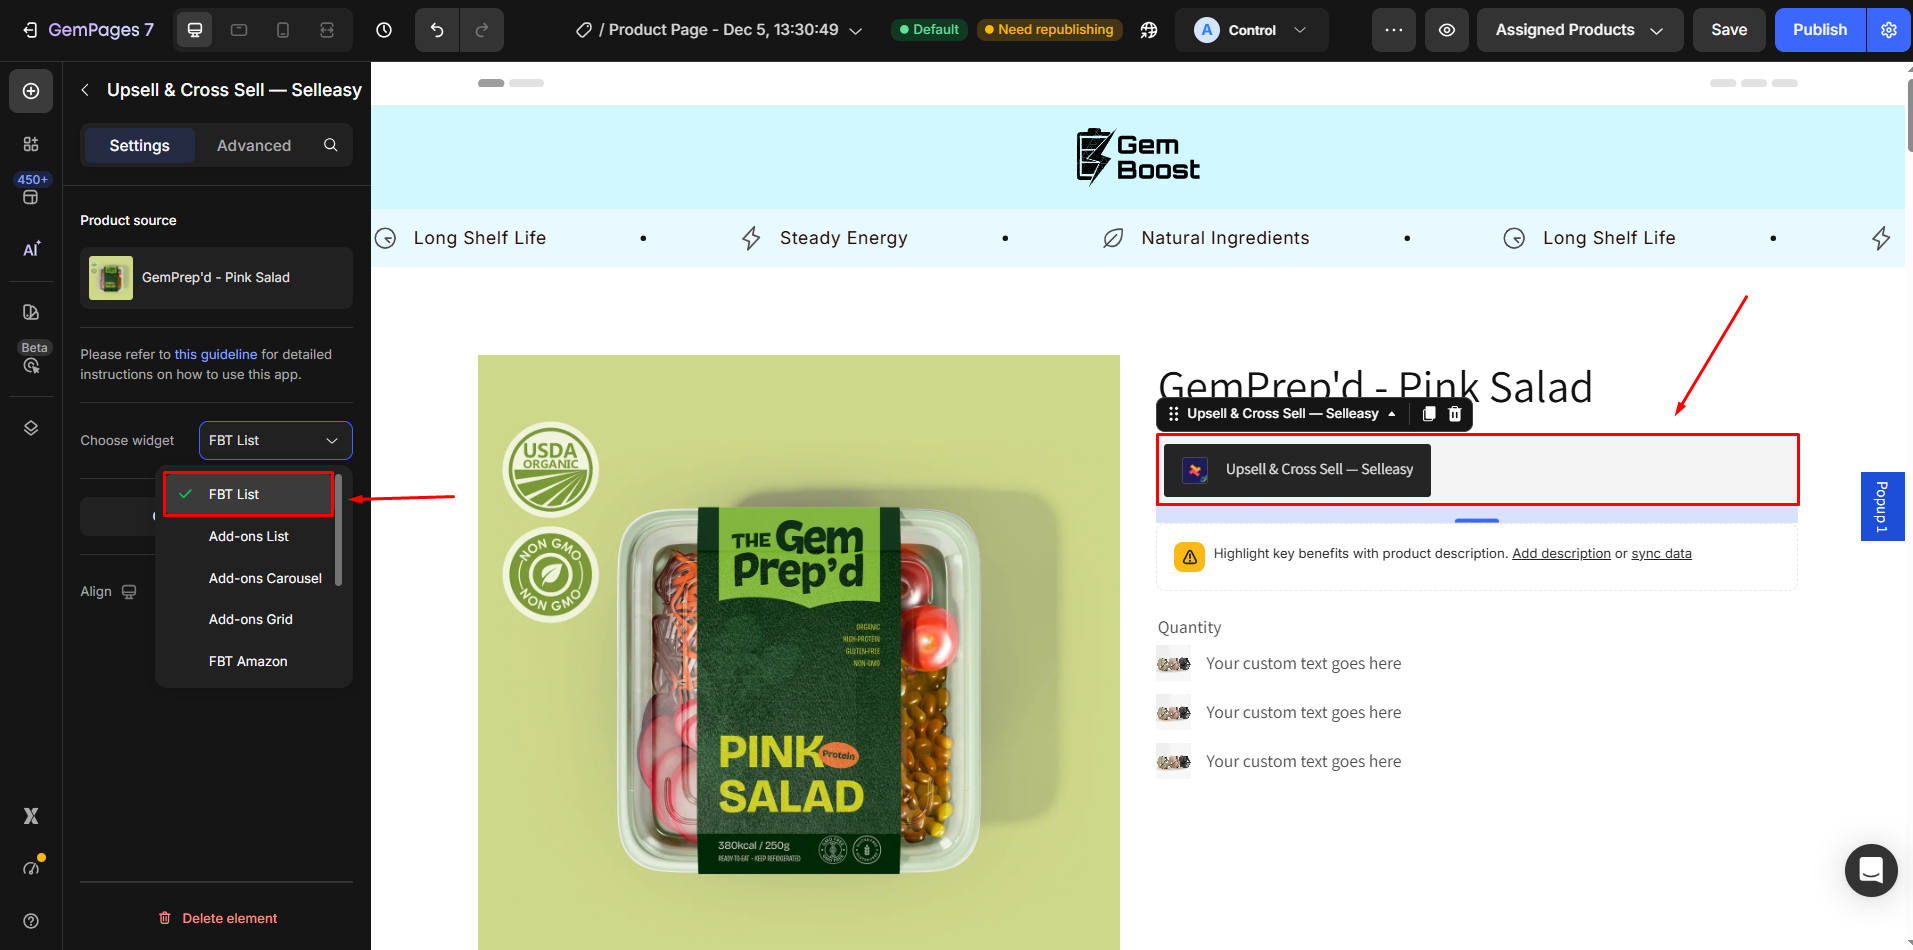
Step 1: Open your GemPages product page editor.
Then:
- Drag and drop the App Element into the desired position on the page
- Choose Upsell & Cross Sell – Selleasy from the app list
Step 2: Place the element where you want the upsell widget to appear
After adding the element:
- Select the campaign widget that you previously created in Selleasy
- Make sure the correct campaign type is selected
Step 3: Click Save, then Publish your page.
Your Selleasy widget will now be live on your product page.
Note:
- The app is not compatible with GemPages’ preview mode.
- Upsell & Cross Sell – Selleasy only works with product pages.
- Only one Upsell & Cross Sell – Selleasy element can be used per page.
- There are some widgets and options from the app that haven’t been integrated with GemPages, which are Cart add-ons, Upsell funnel, and Thank you page add-ons.


Thank you for your comments