


This article shows you how to use the Stock Counter element in GemPages Editor v7 to display product availability, create urgency, and support better inventory management. By customizing the Stock Counter, you can visually show remaining stock, edit stock messages, and encourage faster purchases.
About the Stock Counter Element in GemPages
The Stock Counter element is designed to showcase your product’s remaining inventory with a progress bar, icon, or text. It works with Shopify’s inventory management system and can be customized to fit your store branding.
Why use Stock Counter?
- Create urgency by showing limited stock.
- Build trust with transparent inventory status.
- Support sales campaigns by editing stock messages (e.g., “Only 5 left in stock!”).
How to Add a Stock Counter Element to Your Page?
To make it work properly, just make sure to place the Stock Counter inside the Product Module on your page. Follow these steps to add one to your page.
Step 1: Access GemPages Dashboard > Pages, and locate the target page to open the editor.
Step 2: In the left sidebar, search for the Stock Counter element, and drag & drop one inside the Product module.
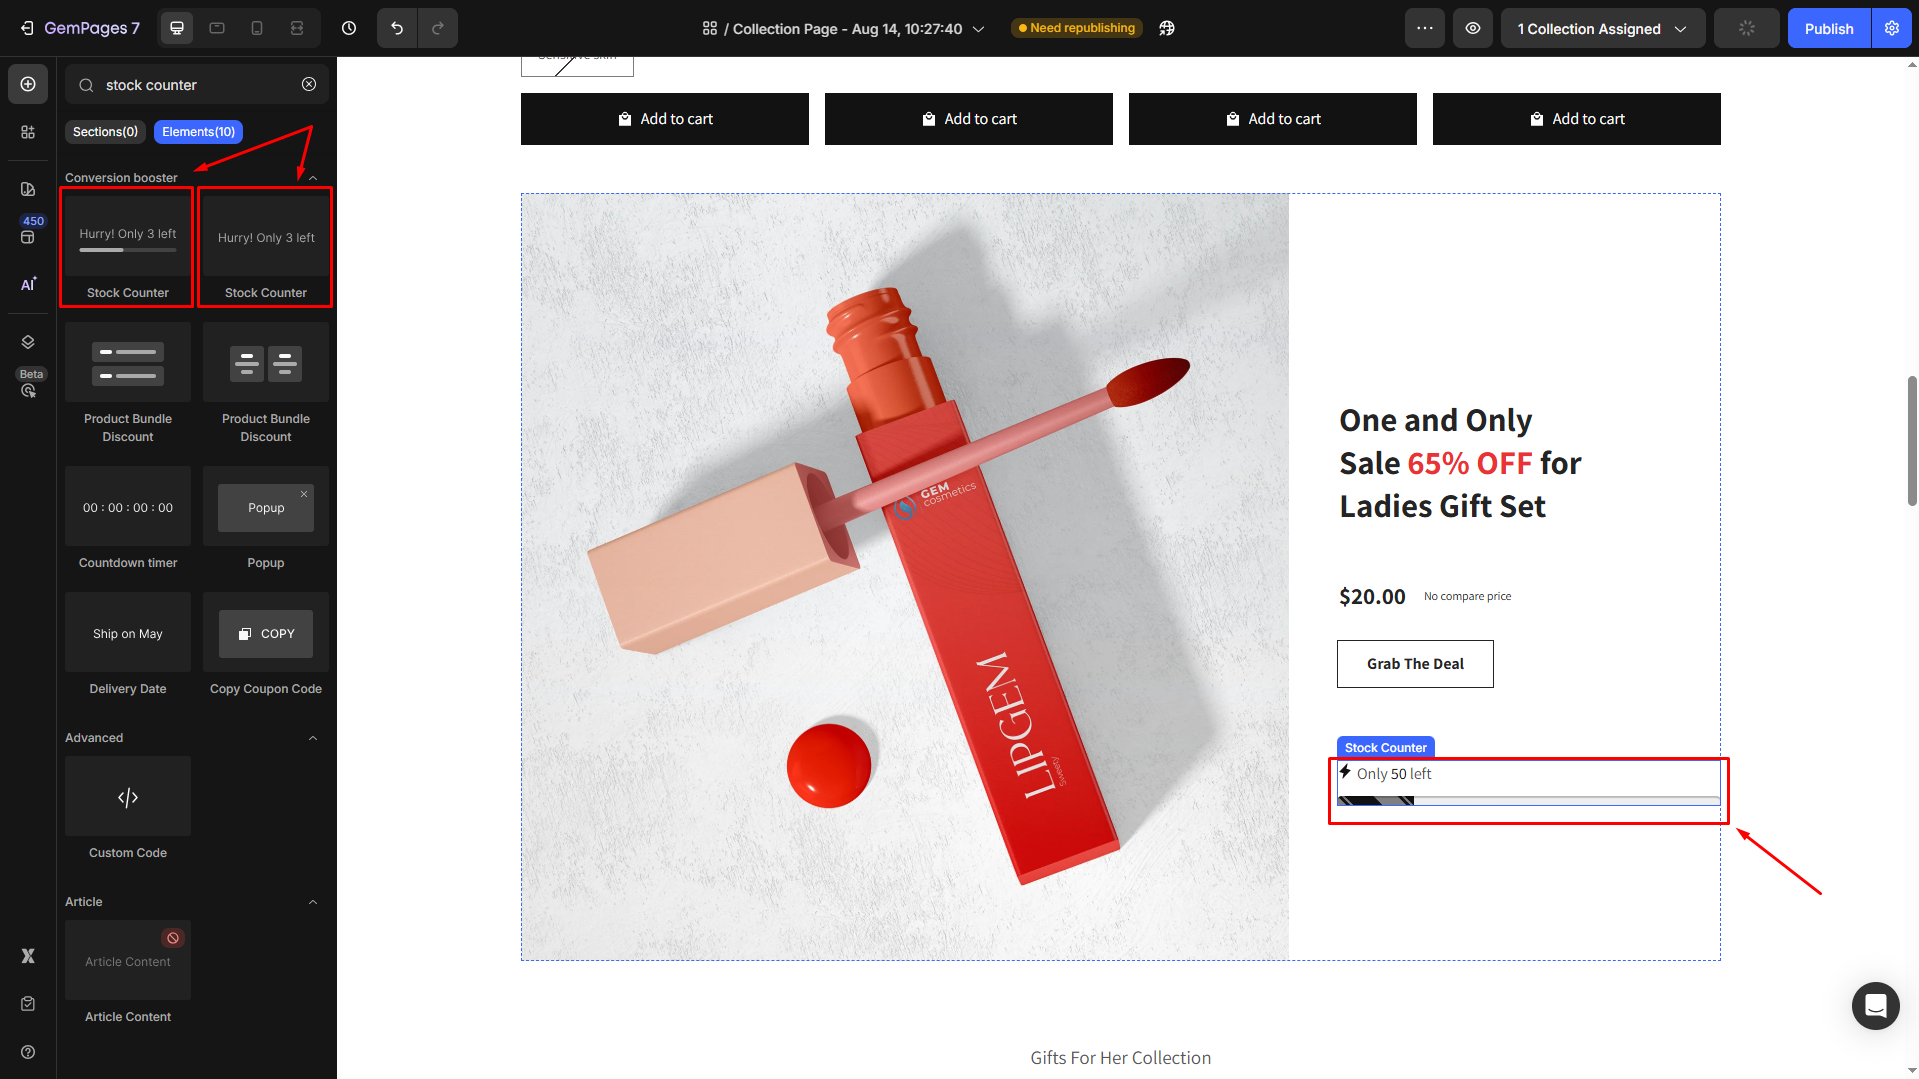
The element’s configurations will be available on the left sidebar, which we’ll cover in the next sections.
Configure the Settings tab
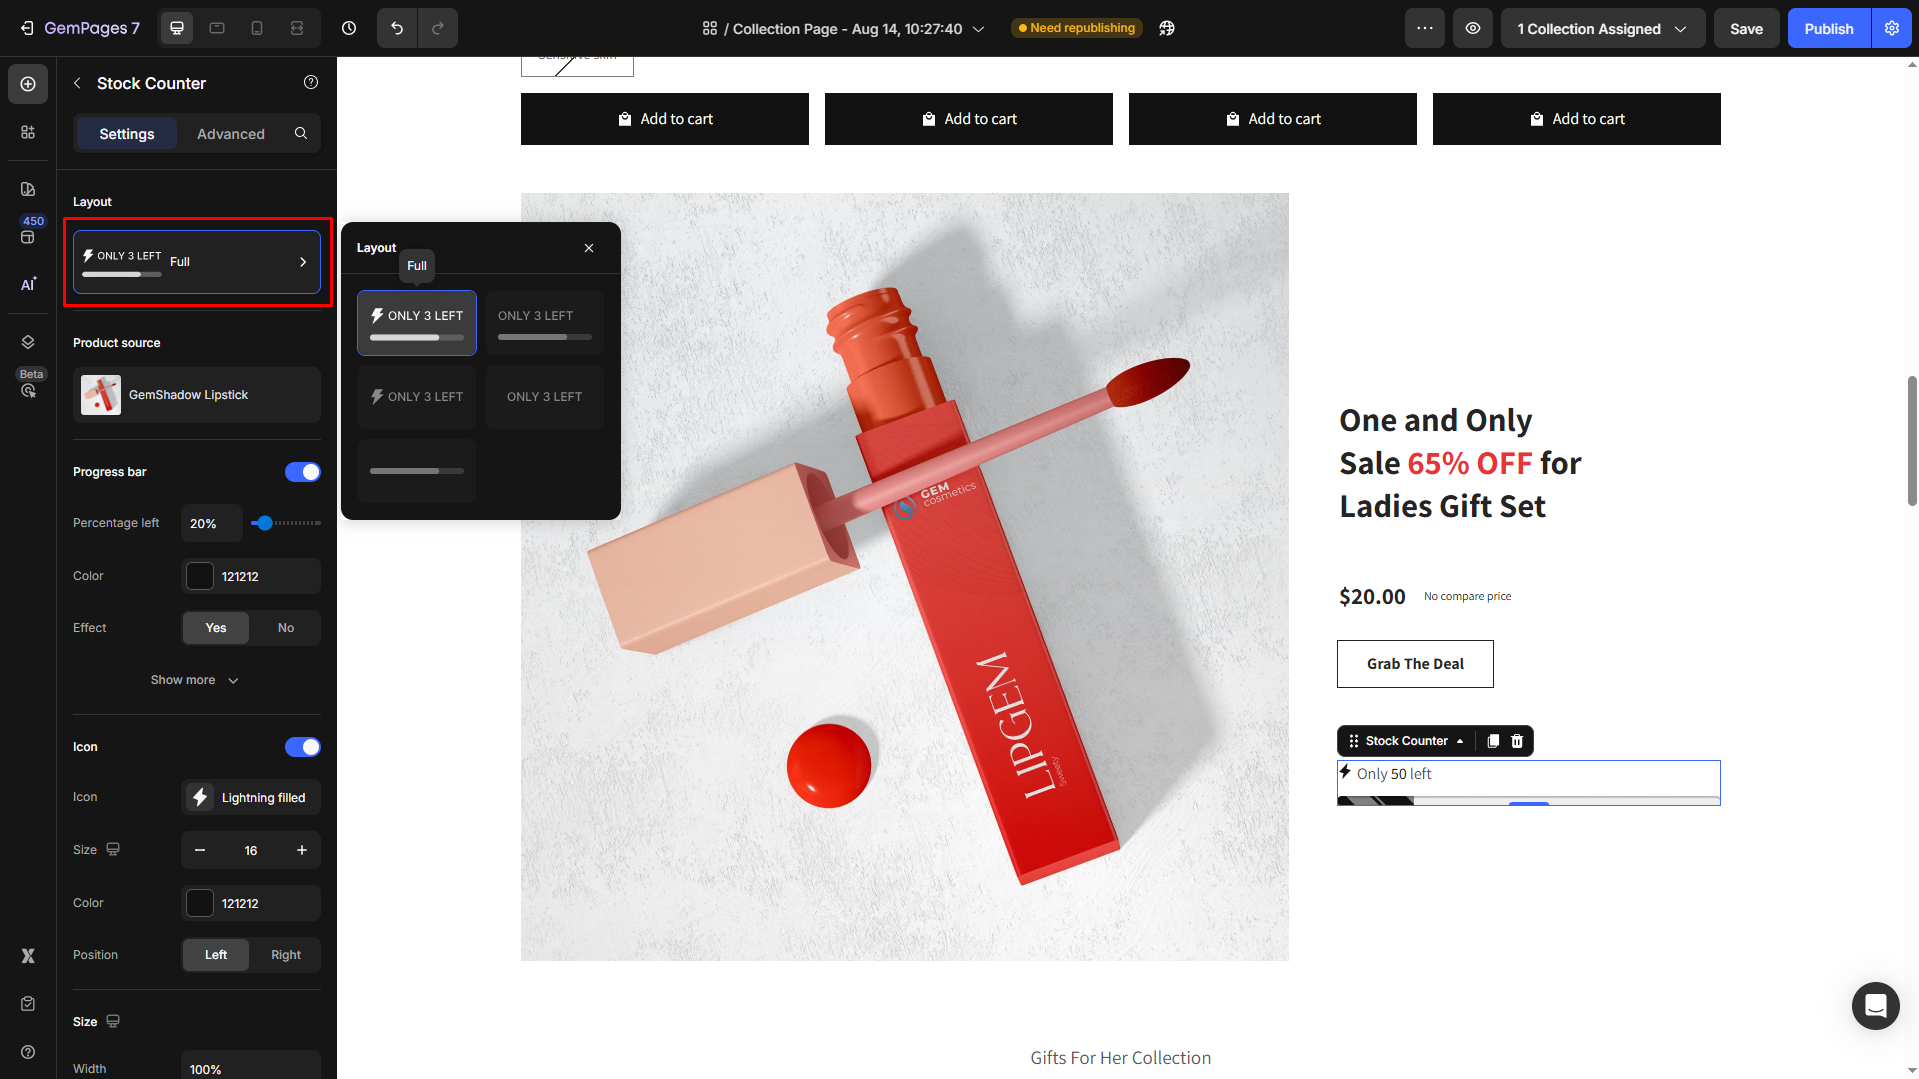
Layout
Select the layout of the Stock Counter element from these options:
- Full: The element will contain an icon, text, and a progress bar.
- Text & progress bar
- Icon & Text
- Text only
- Progress bar only
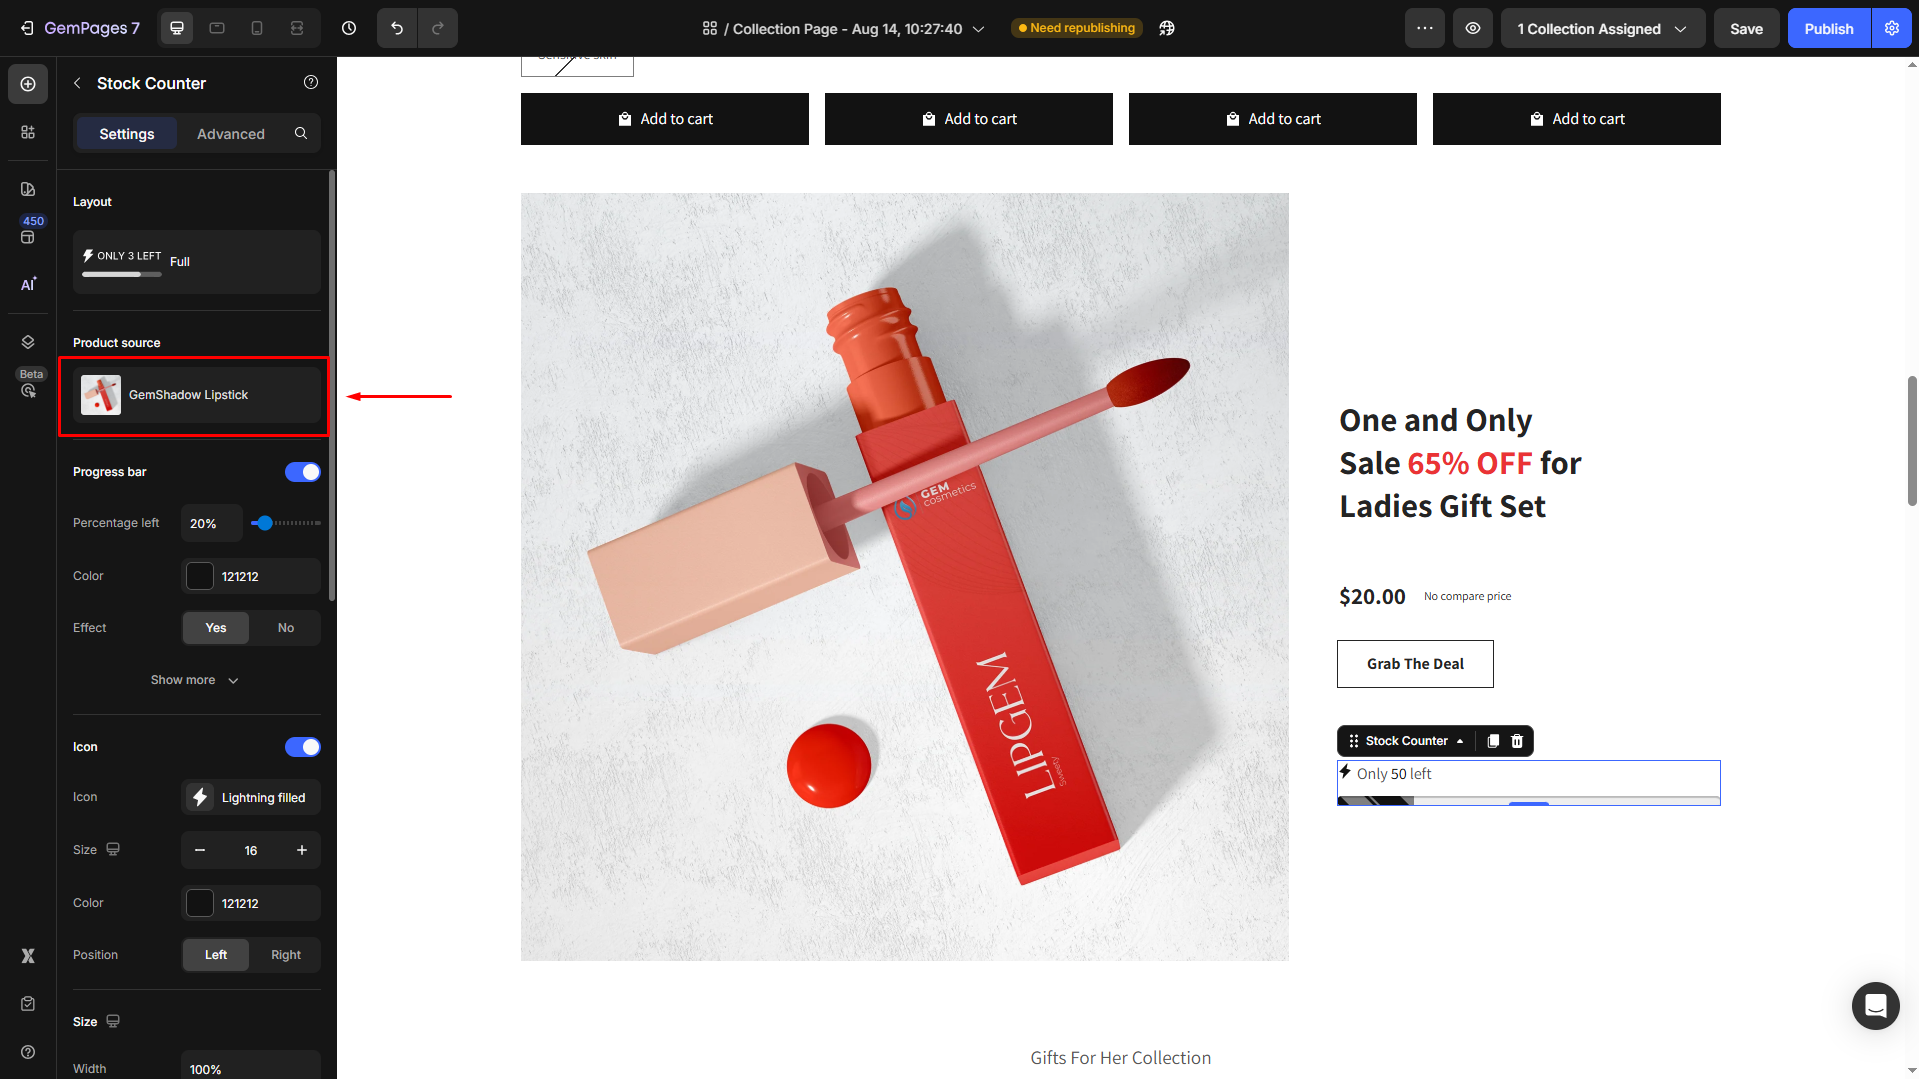
Product source
Click the product to manage it in the Product element.
Progress bar
As the layout is full, the Progress bar will automatically toggle ON. Adjust the progress bar as you prefer:
- Percentage left: Adjust the percentage of stock remaining. For example, setting 20% means the bar will display as nearly empty, signaling scarcity.
- Color: Change the color of the progress bar to match your store branding. Use the color picker or enter a HEX code.
- Effect: Enable or disable animation for the progress bar.
- Yes: The bar fills with a smooth animation.
- No: The bar appears static.
- Height: Define the thickness of the progress bar (in pixels). A higher number creates a thicker bar.
- Position: Choose where the progress bar will display relative to the text:
- Top: Bar appears above the stock text.
- Bottom: Bar appears below the stock text.
- Corner: Adjust the corner radius to style the progress bar to be sharp, round, or pill.

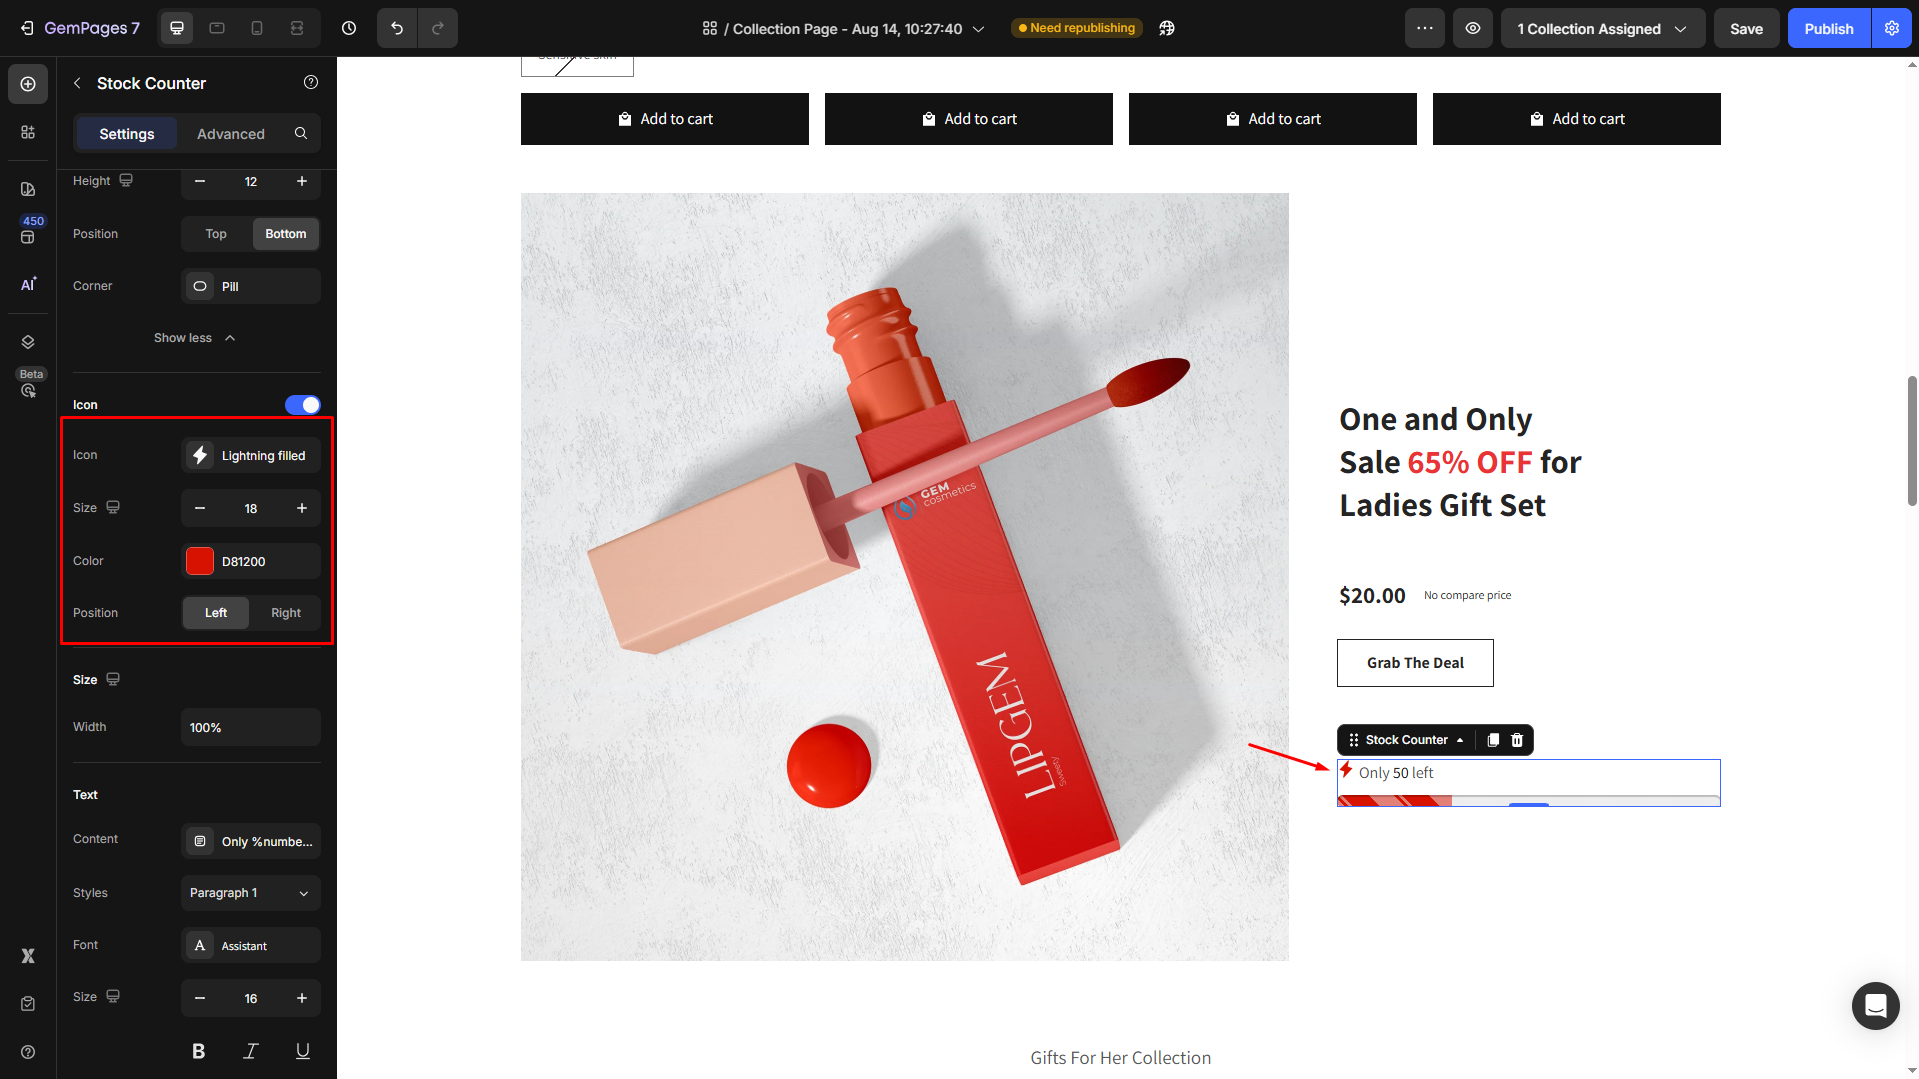
Icon
Customize the icon displayed within the Stock Counter element.
- Icon: Choose from the GemPages’ available icons or upload your own (only SVG file accepted).
- Size: Adjust the icon size (in pixels). Larger icons draw more attention, while smaller ones keep the design subtle.
- Color: Set the icon color to align with your store branding. Enter a HEX code or use the color picker.
- Position: Decide where the icon should display:
- Left: Icon appears before the text.
- Right: Icon appears after the text.
Size
The Size setting lets you define the width of the Stock Counter component on your page.
Width: Set how much horizontal space the Stock Counter will take:
- Enter a percentage value (e.g., 50%) to make the counter scale relative to the container width.
- Enter a pixel value (e.g., 300px) to set a fixed width.
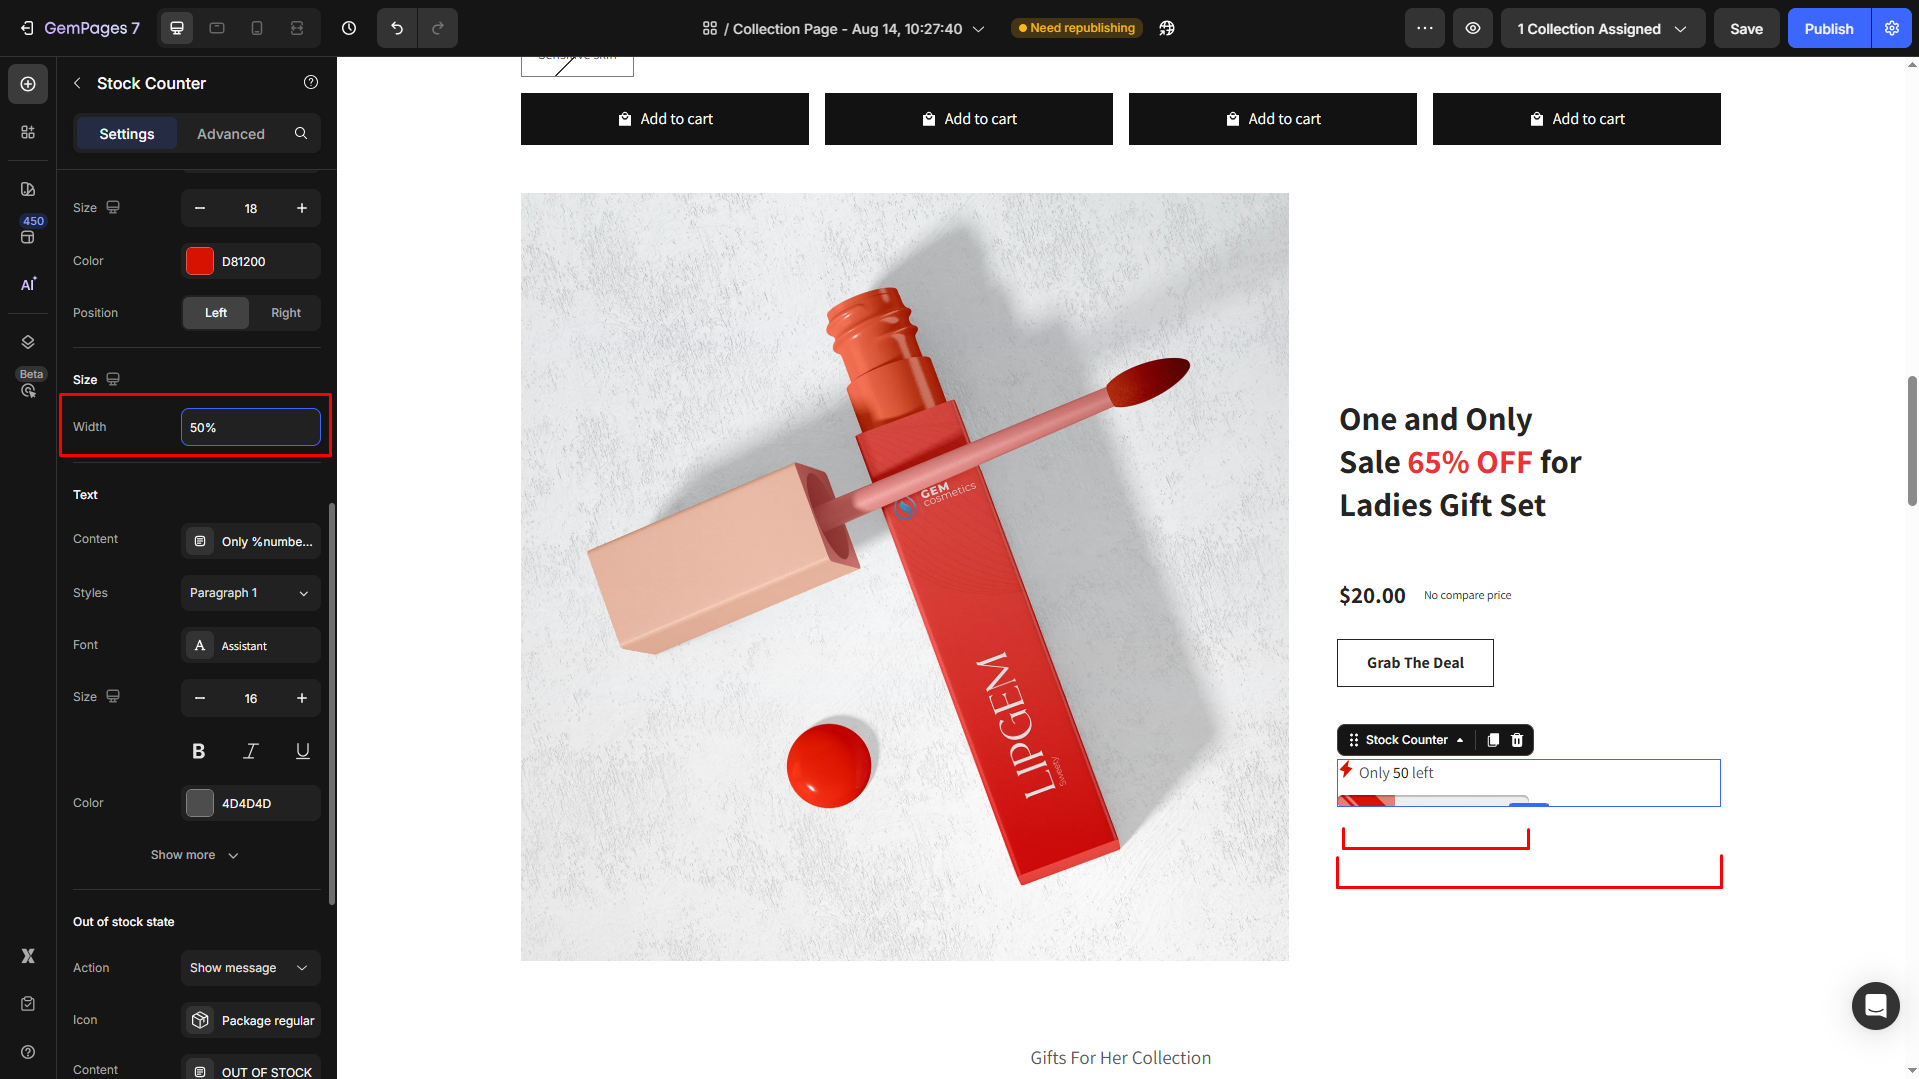
Smaller values keep the counter compact, useful for sidebars or tighter layouts.
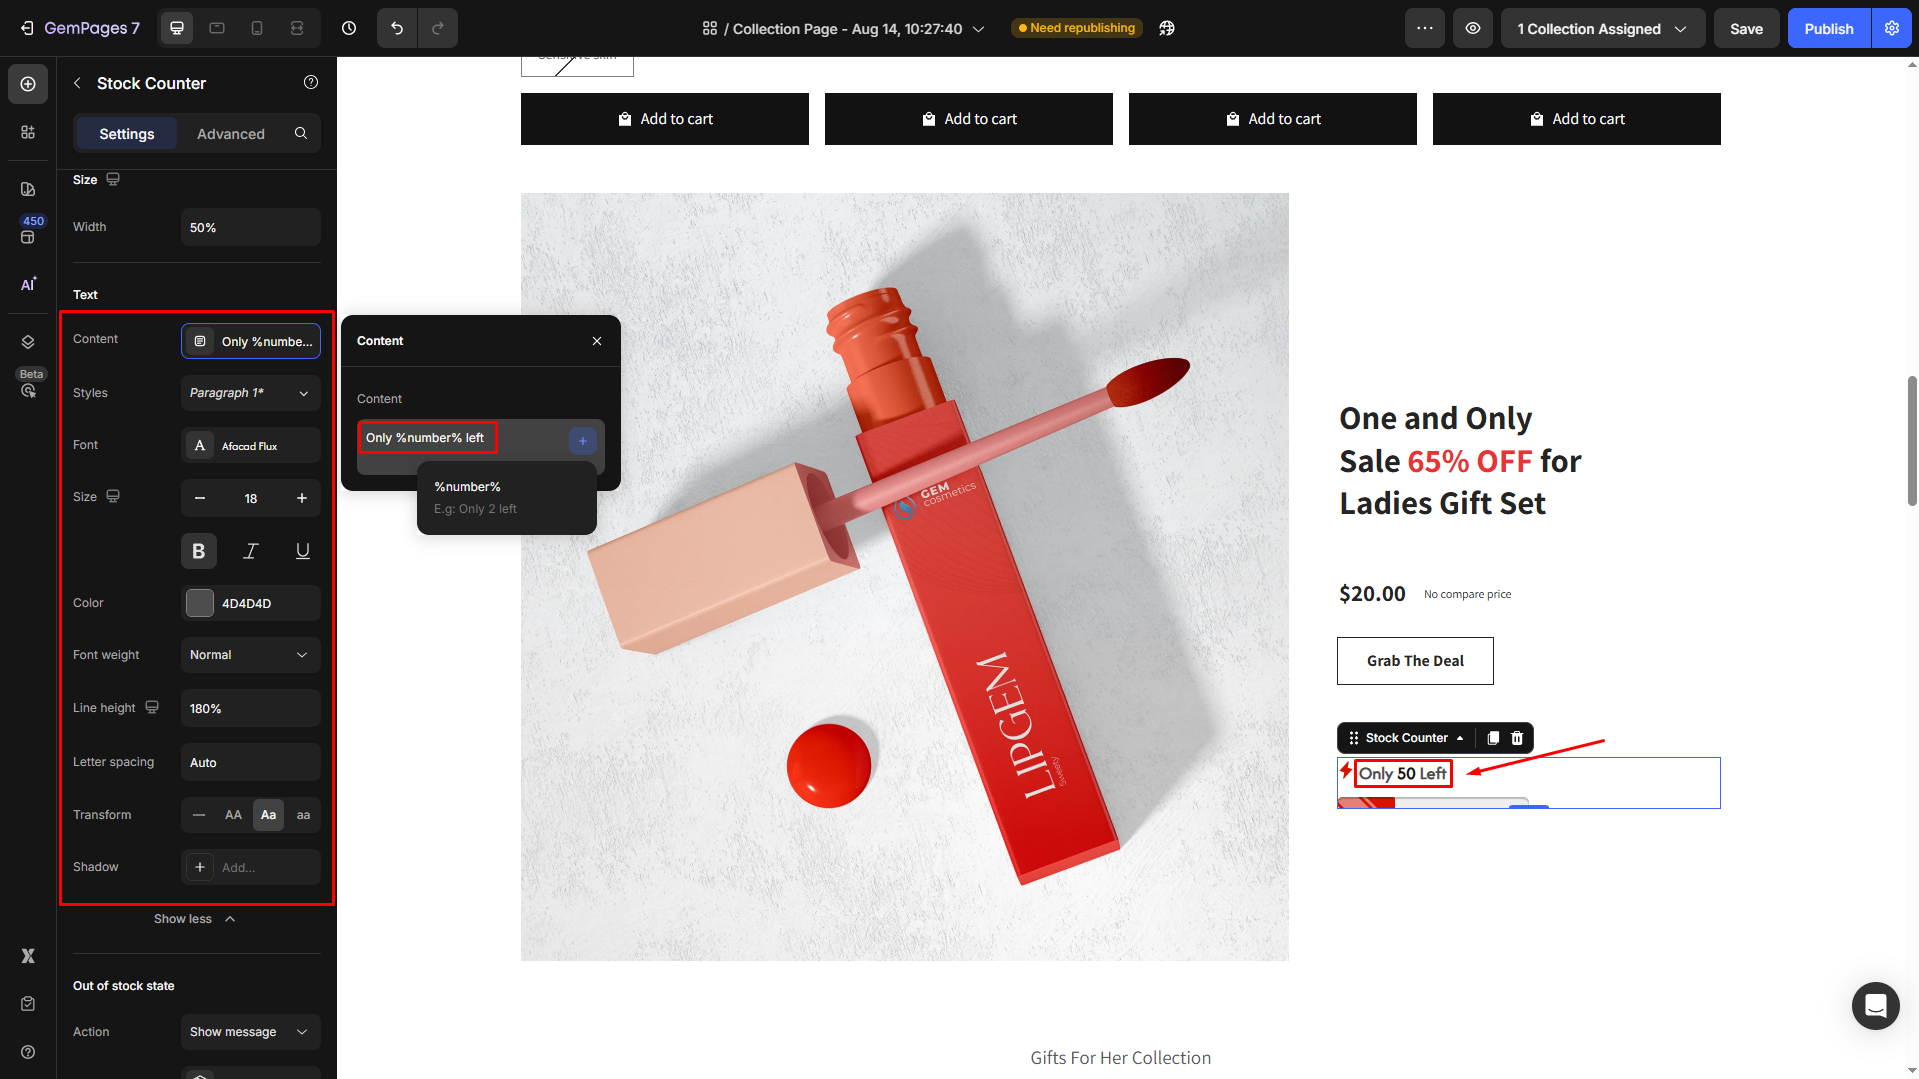
Text
Under the Text section, modify the button text as you prefer:
- Content: By default, it’s set to “Only %number% left”. Change it as your way to trigger customers to take action.
- Styles: Choose the text style from Heading 1-6 or Paragraph 1-3 as the global style.
- Font: Select a font style that matches your brand identity.
- Size: Adjust the font size to make the text prominent.
- Color: Pick a color that complements your design.
- Font Weight: Control how thick or thin the text appears.
- Line Height: Adjust the space between lines for better readability.
- Letter Spacing: Create a more modern or compact look by changing the space between letters.
- Transform: Convert the text to uppercase, lowercase, or capitalize the first letter of each word.
- Shadow: Apply drop shadow effects to enhance visual depth.
Out of stock state
These settings control what happens when the product runs out of stock.
- Action: Choose what the counter should do:
- Show message: Display a custom out-of-stock message.
- Hide element: The Stock Counter will be hidden from the page.
- Icon: Select an icon to display with the out-of-stock message (e.g., package, warning, cross).
- Content: Edit the message text (default: “OUT OF STOCK”).
- Icon color: Adjust the color of the out-of-stock icon.
- Text color: Adjust the color of the out-of-stock text.
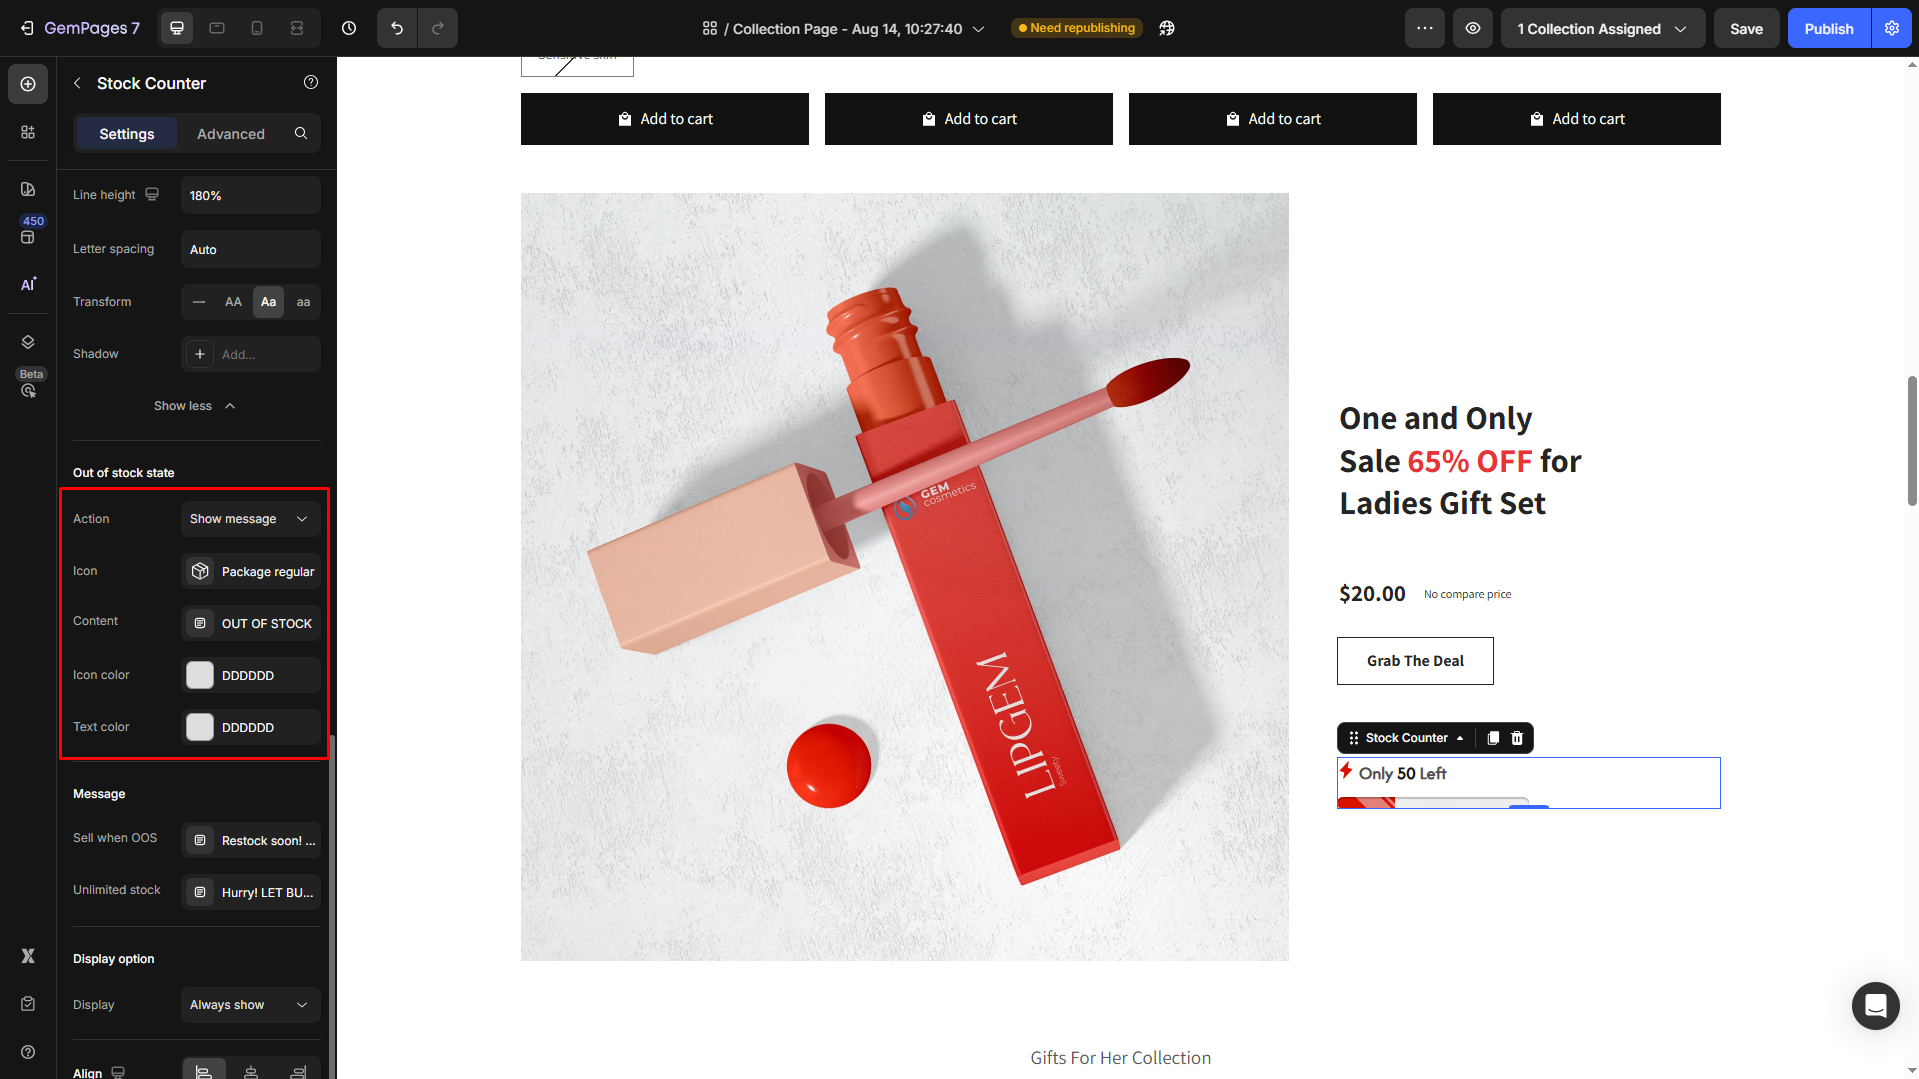
Message
Customize messages based on stock conditions:
- Sell when OOS (Out of stock): Add a message encouraging customers to wait or pre-order (e.g., “Restock soon! Stay tuned.”).
- Unlimited stock: Set a message when stock is not limited (e.g., “Hurry! LET BUYERS RUSH IN”).

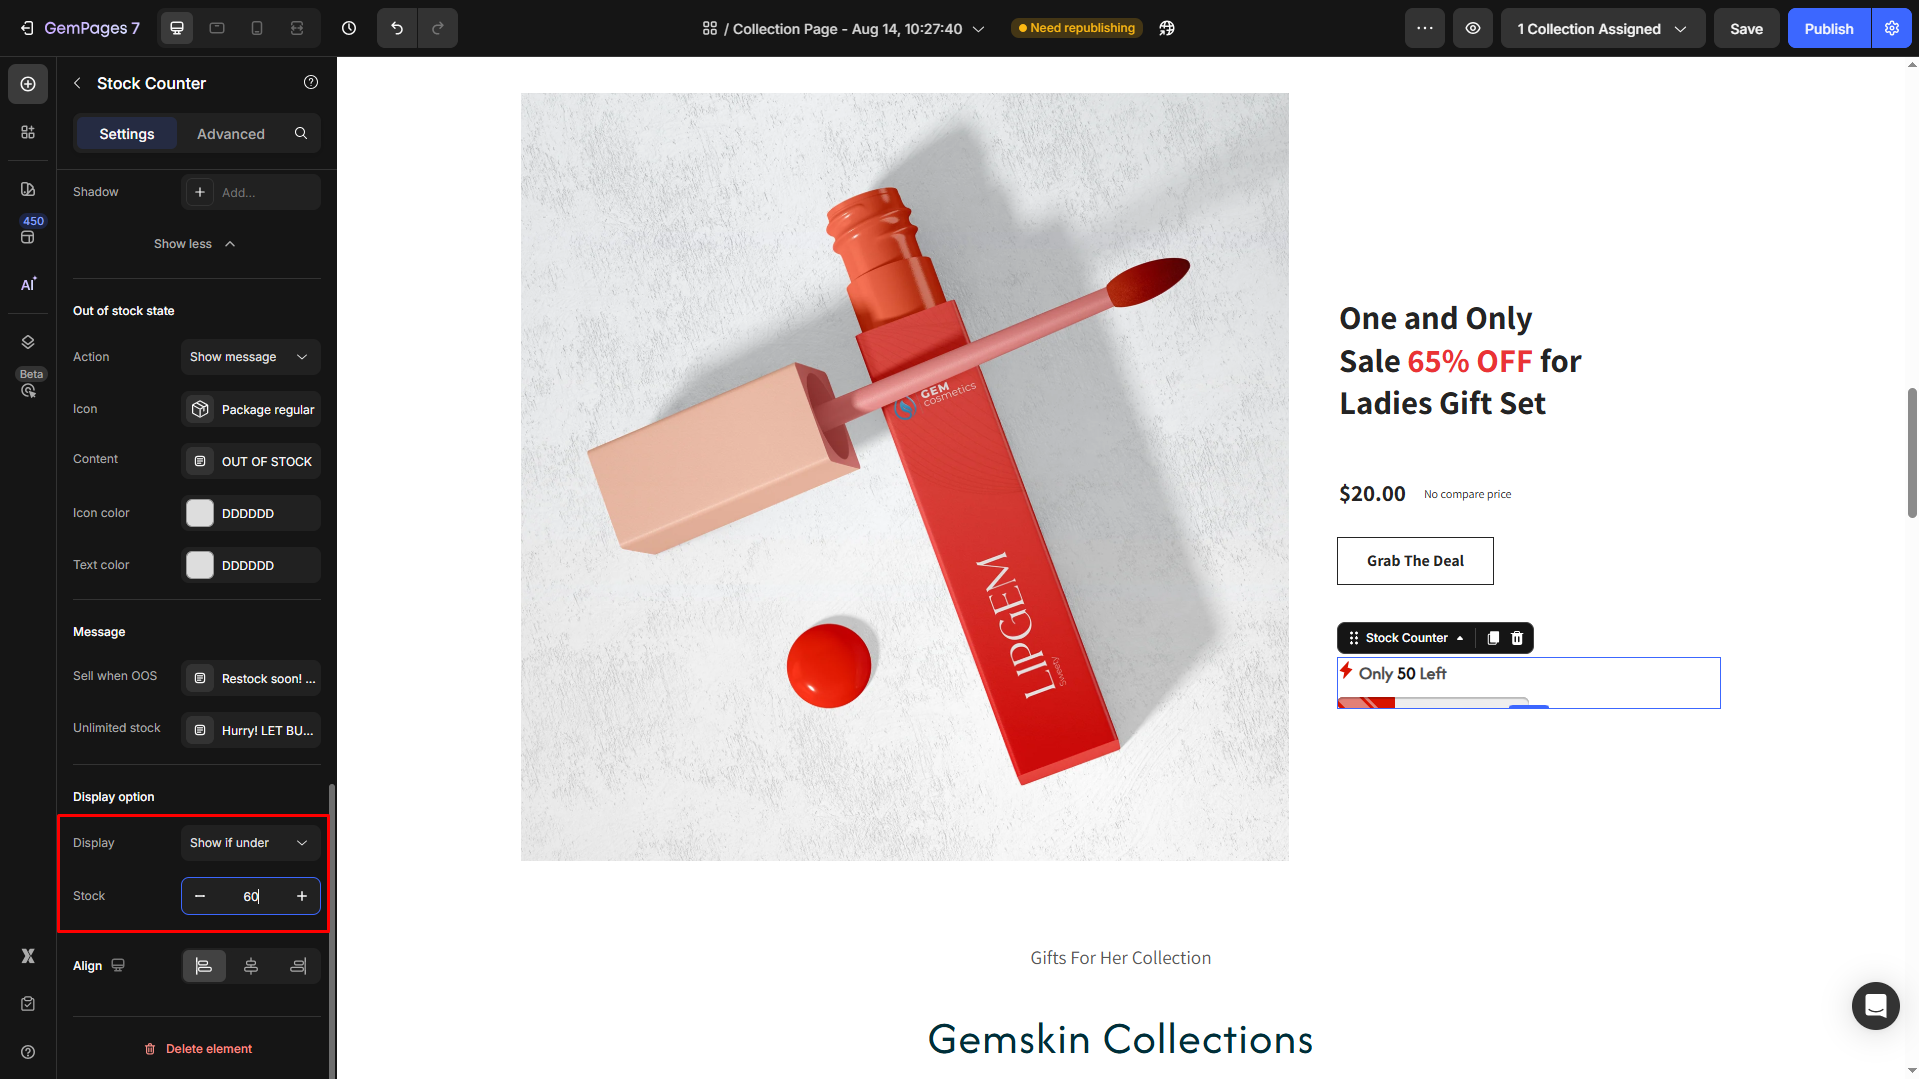
Display option
Control when the Stock Counter should appear:
- Always show: Display the counter at all times.
- Show if under: Only display the counter if the remaining stock is below a specified limit.
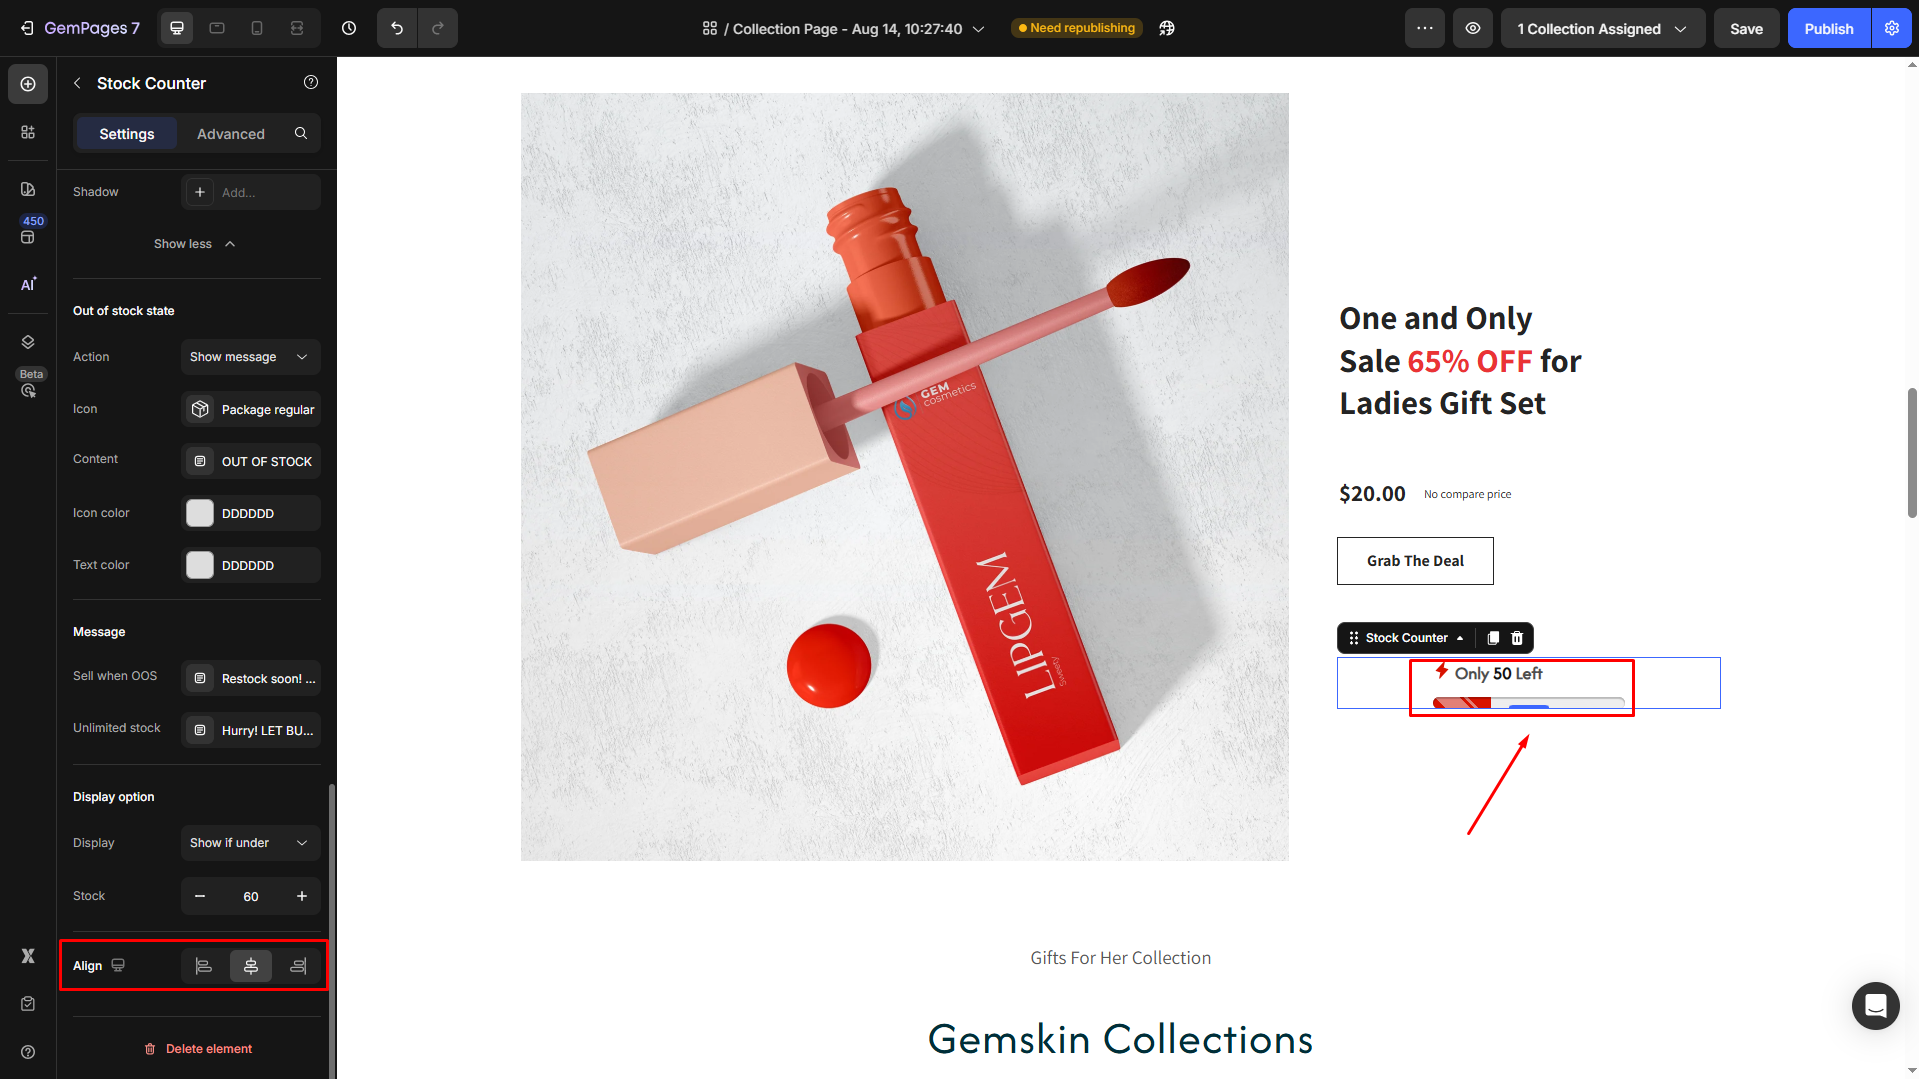
Align
Set the alignment of the Stock Counter within its container to left, center, or right.
Configure the Advanced Tab
For more advanced customization, please navigate to the Advanced tab and follow the instructions in this article.
FAQs
1. Can I use Stock Counter outside the Product Module?
No, the element must be placed inside the Product Module to pull inventory data correctly.
2. Does Stock Counter sync with Shopify inventory?
Yes. It reflects the inventory managed in Shopify’s inventory management system.


Thank you for your comments