Your Shopify store logo is one of the first things customers notice when they land on your Shopify store. It’s small—but it speaks volumes. A clean, well-placed logo builds trust, sets the tone for your brand, and helps your store look polished and professional.
In this guide, we’ll walk you through what a Shopify logo is, how to design a great one, the exact sizes you need, and how to add it to your store, specially if you’re using GemPages to customize your layout.
What is a Shopify Logo?
A logo is your brand’s identity in one image. On Shopify, it usually sits in the top-left corner of your store, right next to your navigation bar, and appears across your site, including:
- Header and footer
- Checkout page
- Browser tab (favicon)
- Emails and marketing materials
A good logo gives your store a professional look, builds brand recognition, and sets you apart from the competition.
What Makes a Good Shopify Logo?
A strong logo combines strategy with design. It should be:
- Simple: Clean shapes and minimal text make it easy to remember
- Relevant: Represents your brand values, products, or audience
- Versatile: Scales well across digital and print platforms
- Timeless: Avoids design fads that date quickly
- Scalable: Maintains clarity at all sizes, from tiny favicons to large billboards
- Distinctive: Unique enough to stand out from competitors
Here are some tools to help you get started:
Shopify Logo Maker
Shopify’s free logo maker is quick and beginner-friendly. Customize fonts, icons, and layouts with minimal effort.
Canva
Perfect for DIY branding. Canva offers drag-and-drop templates, custom fonts, and transparency options. Great for exporting logos in PNG or SVG formats.
Looka, Hatchful, or Adobe Express
These tools offer more advanced branding suites, often including matching social media kits and brand guidelines.
Best Shopify Logo Sizes (Pixel Dimensions)
Logos need to be sharp on all devices—desktop, mobile, retina screens—and load fast. Here are the pixel-perfect sizes to keep your Shopify logo sharp and professional:
Website Header Logo
| Format | Recommended Size |
| Vertical Layout | 160 x 160 pixels |
| Horizontal Layout 1 | 250 x 150 pixels |
| Horizontal Layout 2 | 350 x 75 pixels |
| Horizontal Layout 3 | 400 x 100 pixels |
Favicon Size (Browser Tab Icon)
The logo is also used as the favicon—the small icon that appears in the browser tab. It helps desktop users quickly recognize your site when they have multiple tabs open. The ideal favicon sizes are:
| Type | Recommended Size |
| Standard | 16 x 16 pixels |
| Retina | 32 x 32 pixels |
| High-res | 48 x 48 pixels |
Recommended Shopify Logo Size for Mobile
Logos on mobile screens should be slightly smaller to ensure visual balance and avoid pushing down key navigation elements.
Suggested mobile ideal logo width range: 100px–140px.
You can adjust the exact final size based on your theme spacing and header height.
Best File Types for Shopify Logo (PNG vs JPG vs SVG)
Choosing the right logo file type affects clarity, loading speed, and how sharp your logo displays across devices.
For Shopify stores, PNG and SVG are the most recommended formats.
|
Format |
When to Use | Pros |
Cons |
| PNG | Best choice for most Shopify stores | Supports transparency, sharp detail, and clean edges | Slightly heavier file size vs SVG |
| SVG | Ideal if the theme supports SVG upload | Vector-based, scales perfectly at any size, sharp on all devices | Not all themes/apps support SVG upload |
| JPG | Only if the logo has no transparency & simple color blocks | Smaller file size than PNG | Not sharp enough for branding, no transparency support |
Whenever possible, use PNG or SVG to keep your brand visuals crisp on responsive layouts and retina screens.
How to Add Your Logo to Shopify?
Your logo primarily shows up in the store header—but you can also place it in the footer or even on special pages.
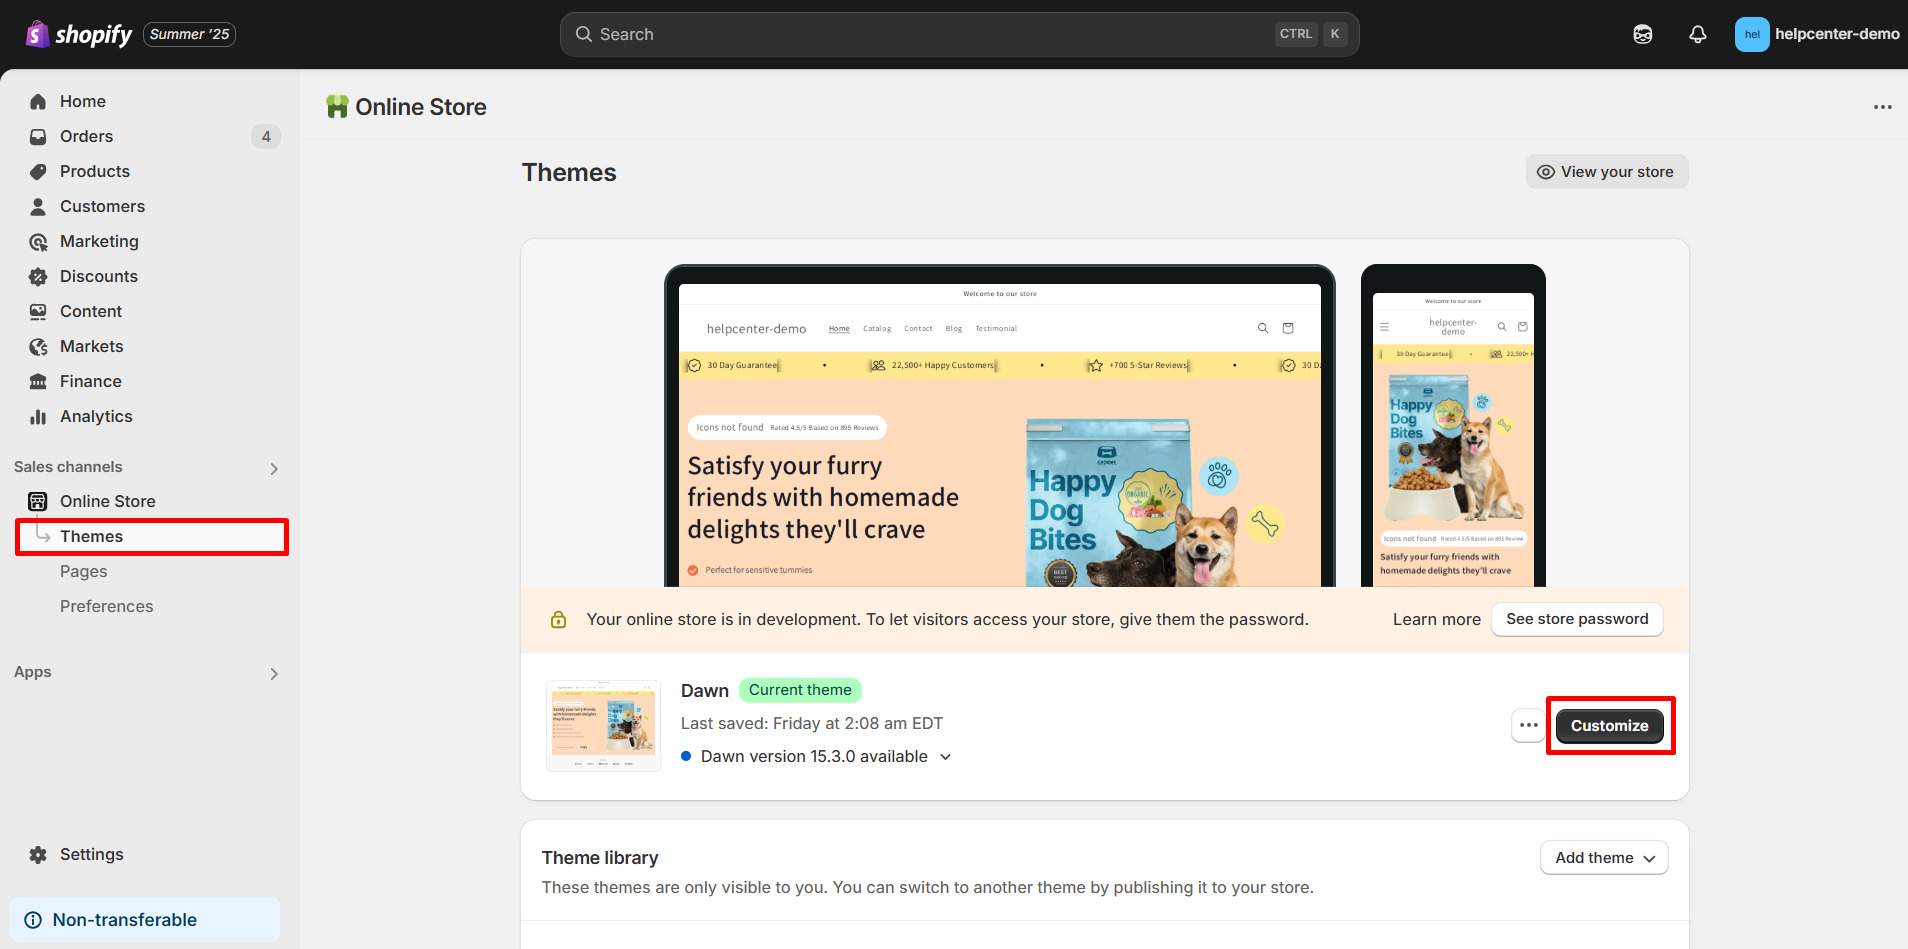
Step 1: From your Shopify admin, go to Online Store → Themes. Click Customize on your active theme.
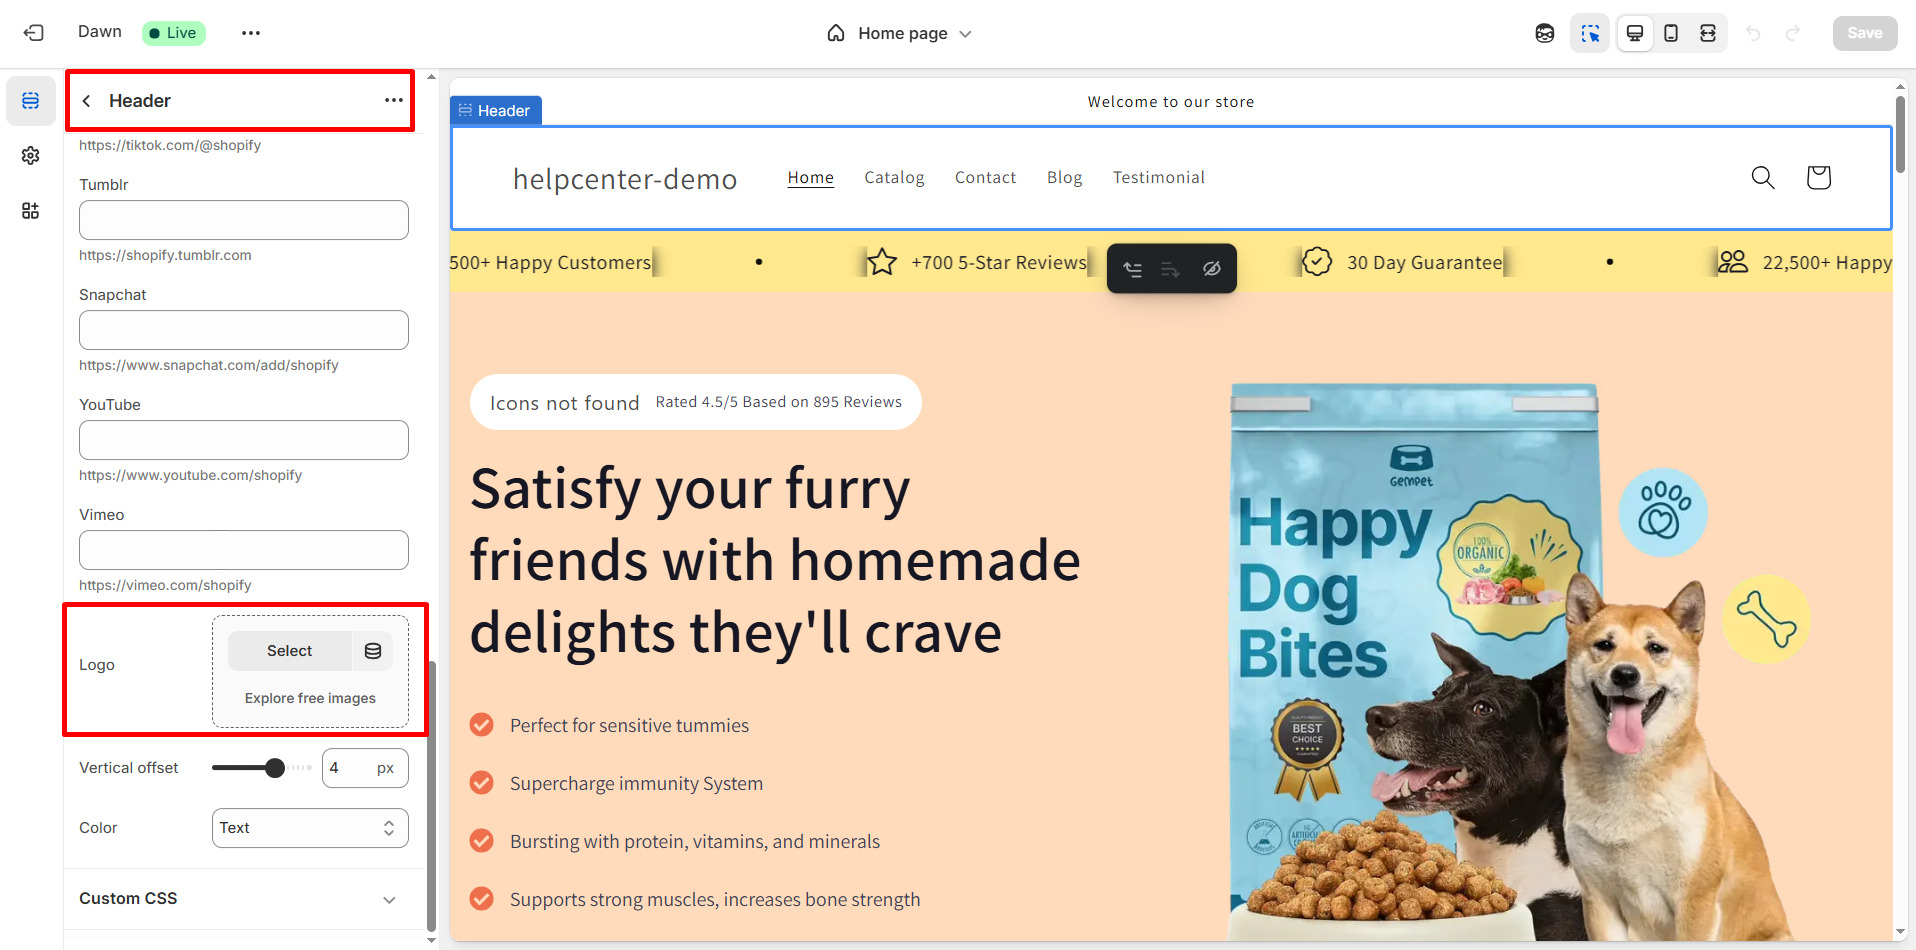
Step 2: In the left panel, select Header (or sometimes Theme Settings → Logo).
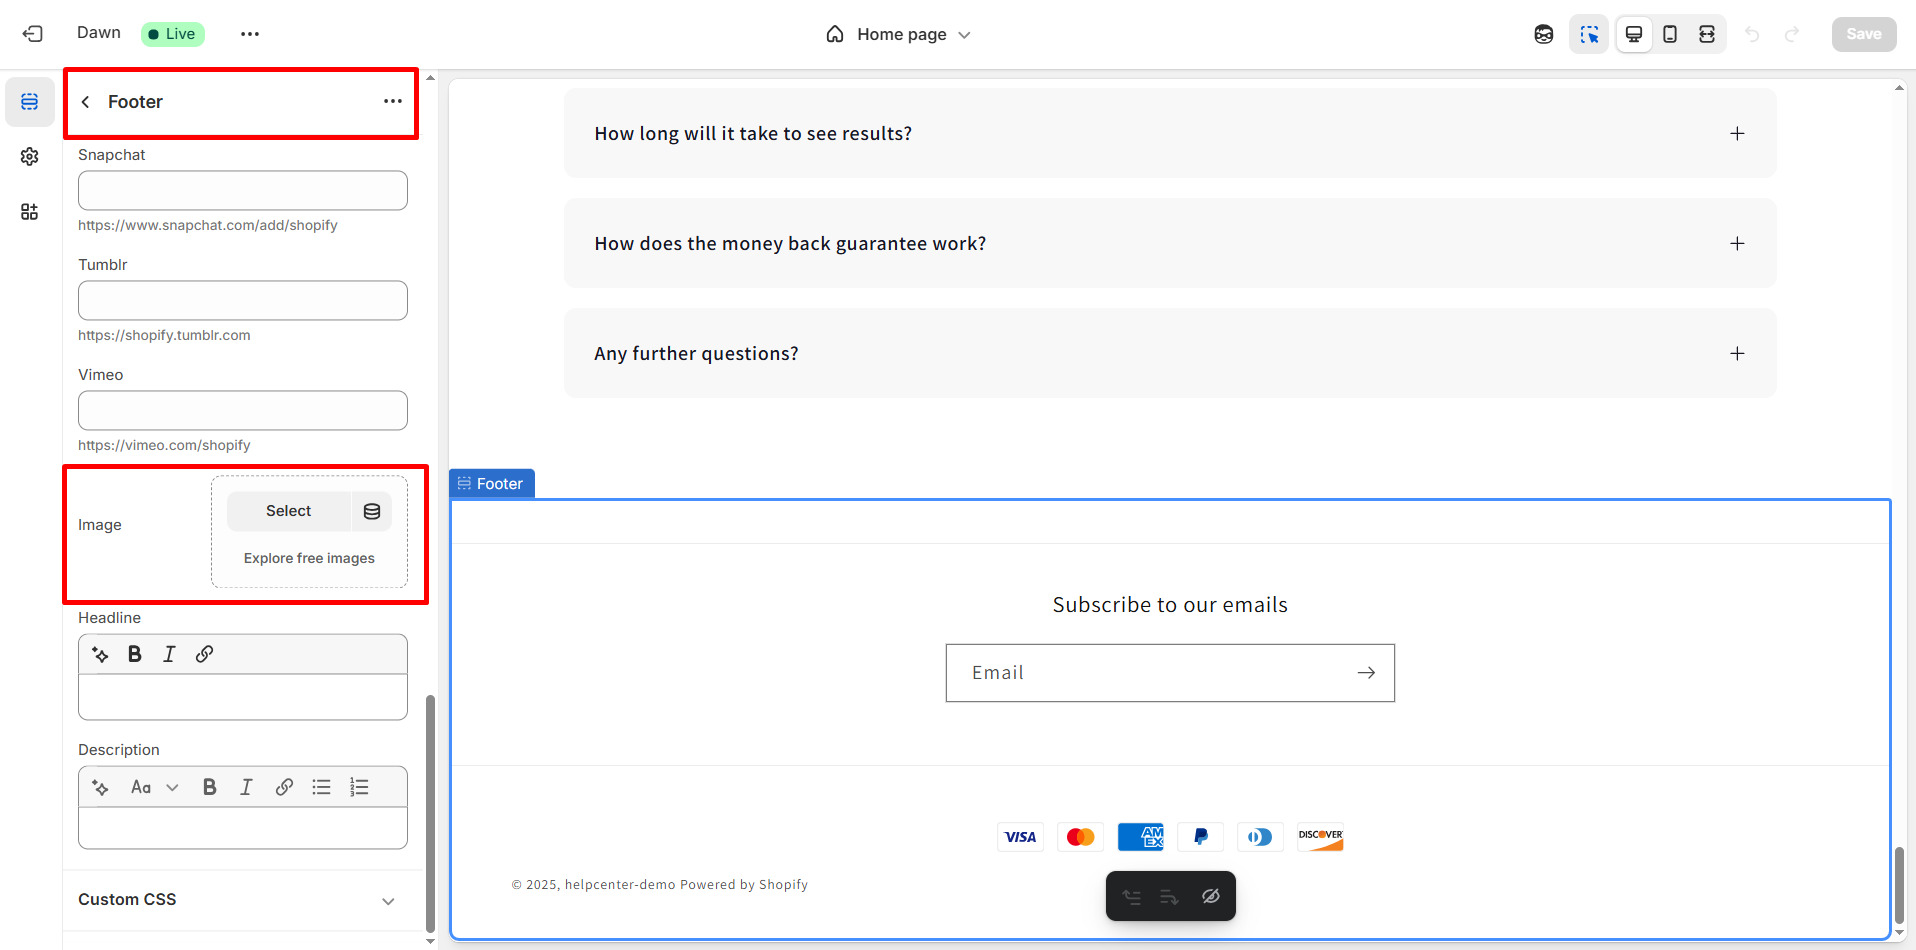
Step 3: For footer logo: navigate to Footer in the theme settings and repeat the upload.
Step 4: Save your settings and preview both desktop and mobile views.
How to Add a Logo to Your Shopify Page with GemPages
Once your logo is uploaded to Shopify following the above steps, it will automatically appear in the header, footer, or other default theme locations. However, suppose you want to display your logo on specific pages, such as product pages or your “About Us” page. In that case, GemPages page builder offers a simple and flexible solution to customize layouts and place your logo exactly where you want it.
Specific Use Cases for Adding Logos with GemPages
1. About Us / Our Story Page
- Purpose: Strengthen brand recognition while telling your company’s story.
- How to use: Place your logo at the top of the page or repeat it at the end of the introduction to leave a lasting impression.
- Why it works: Customers come here to learn about your brand, so reinforcing your logo emphasizes professionalism and brand consistency.
2. Collection Pages
- Use case: For multi-brand stores or those grouping products by brand.
- Example: A collection page titled “Made by [Brand]” can include the brand’s logo to visually distinguish products.
- Why it’s effective: Enhances aesthetics and helps customers easily identify different brands or product lines.
3. Product Detail Page
- Use case: To highlight flagship products or collaborations.
- Example: For a collaborative product line like “GemPages x XYZ,” add the partner’s logo alongside yours.
- Why it matters: Builds trust and highlights the product’s brand value.
4. Pop-up or Slide-in Promotions
- Use case: Display your logo in email capture pop-ups or discount notifications.
- Why it helps: Maintains brand consistency across all customer touchpoints, reinforcing recognition during conversion actions.
How to Add a Shopify Logo on a Page Using GemPages?
Here is how you can add your Shopify logo to a specific page (e.g., About Us) using GemPages:
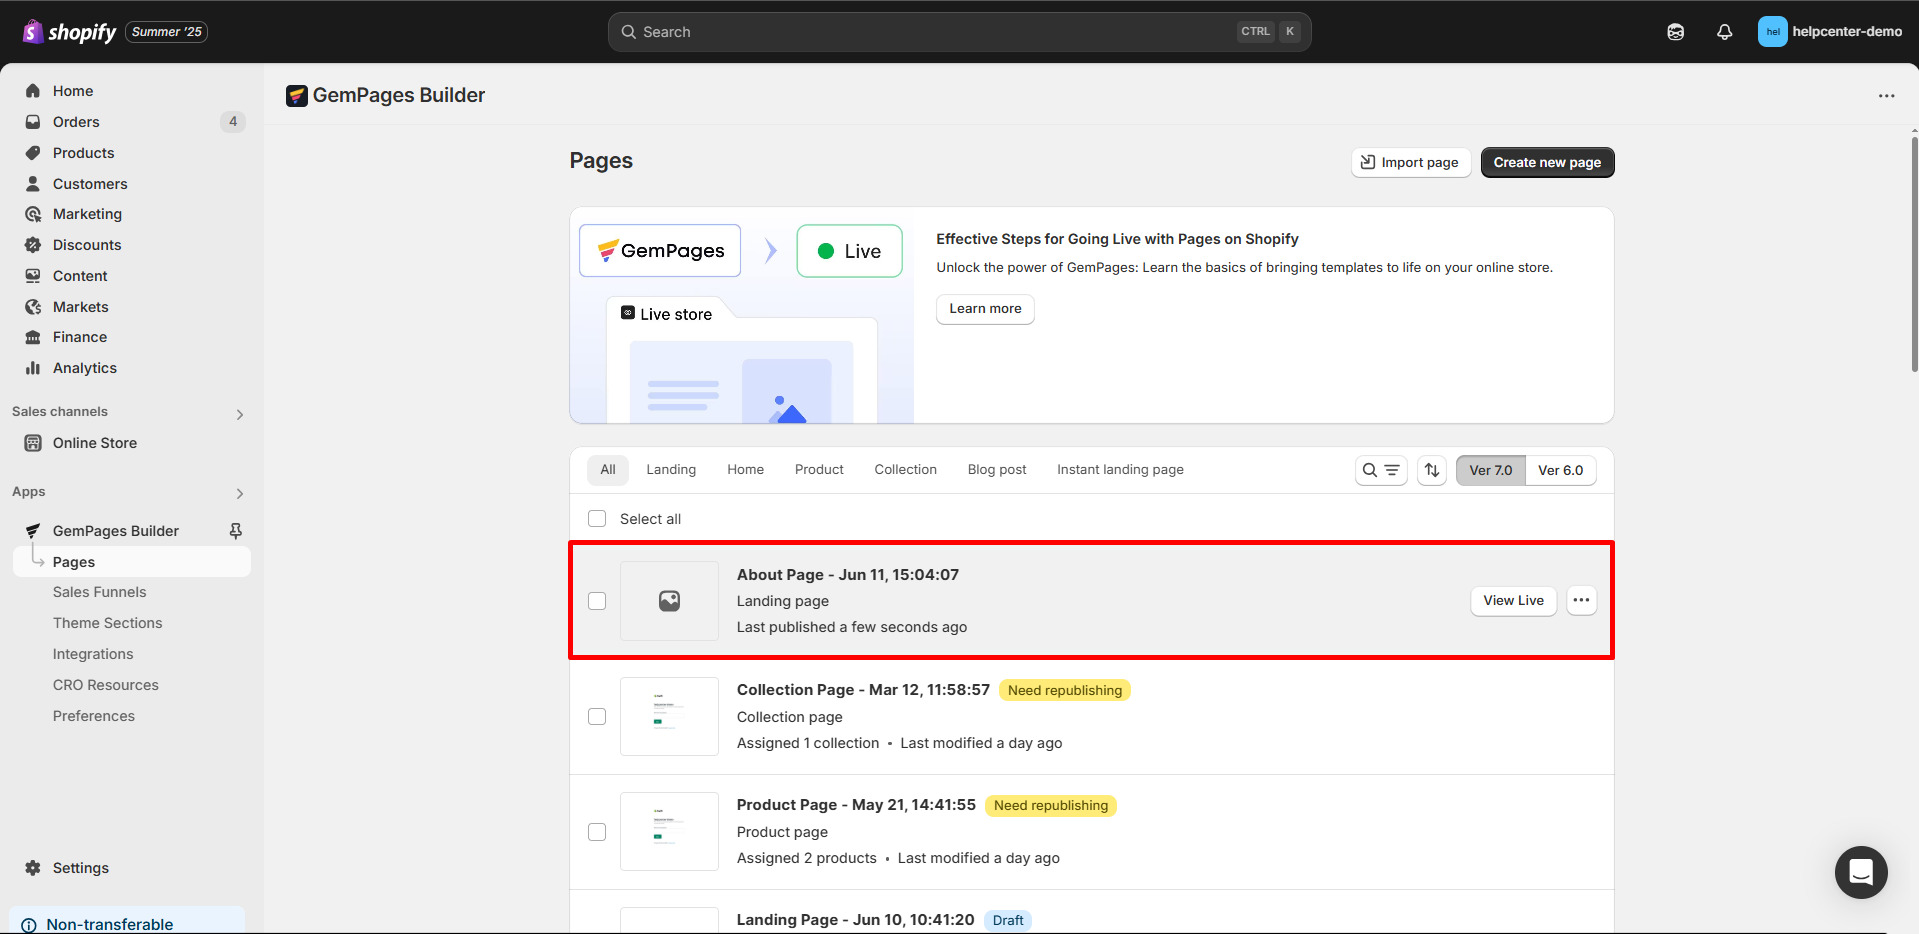
Step 1: Open your GemPages dashboard and select the page you want to edit (e.g., About Us).
Step 2: Locate the Image element in the elements panel.
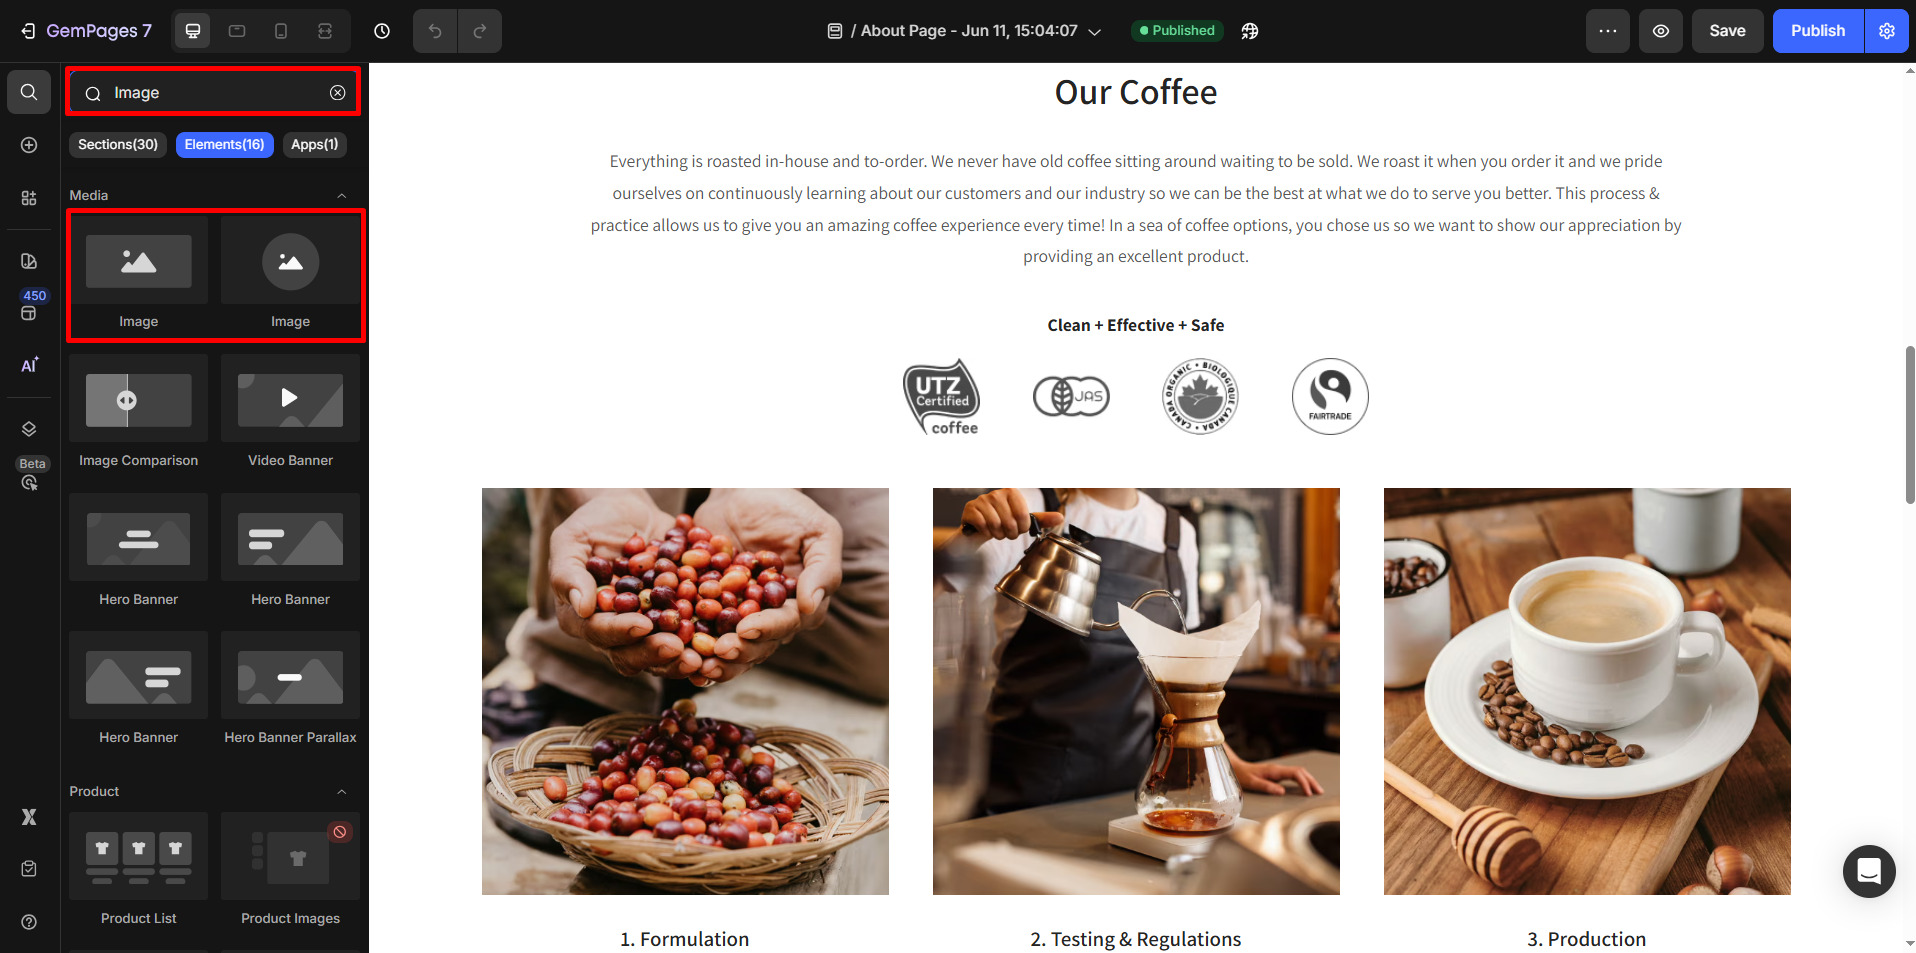
Step 3: Drag and drop the Image element to your desired spot on the page.
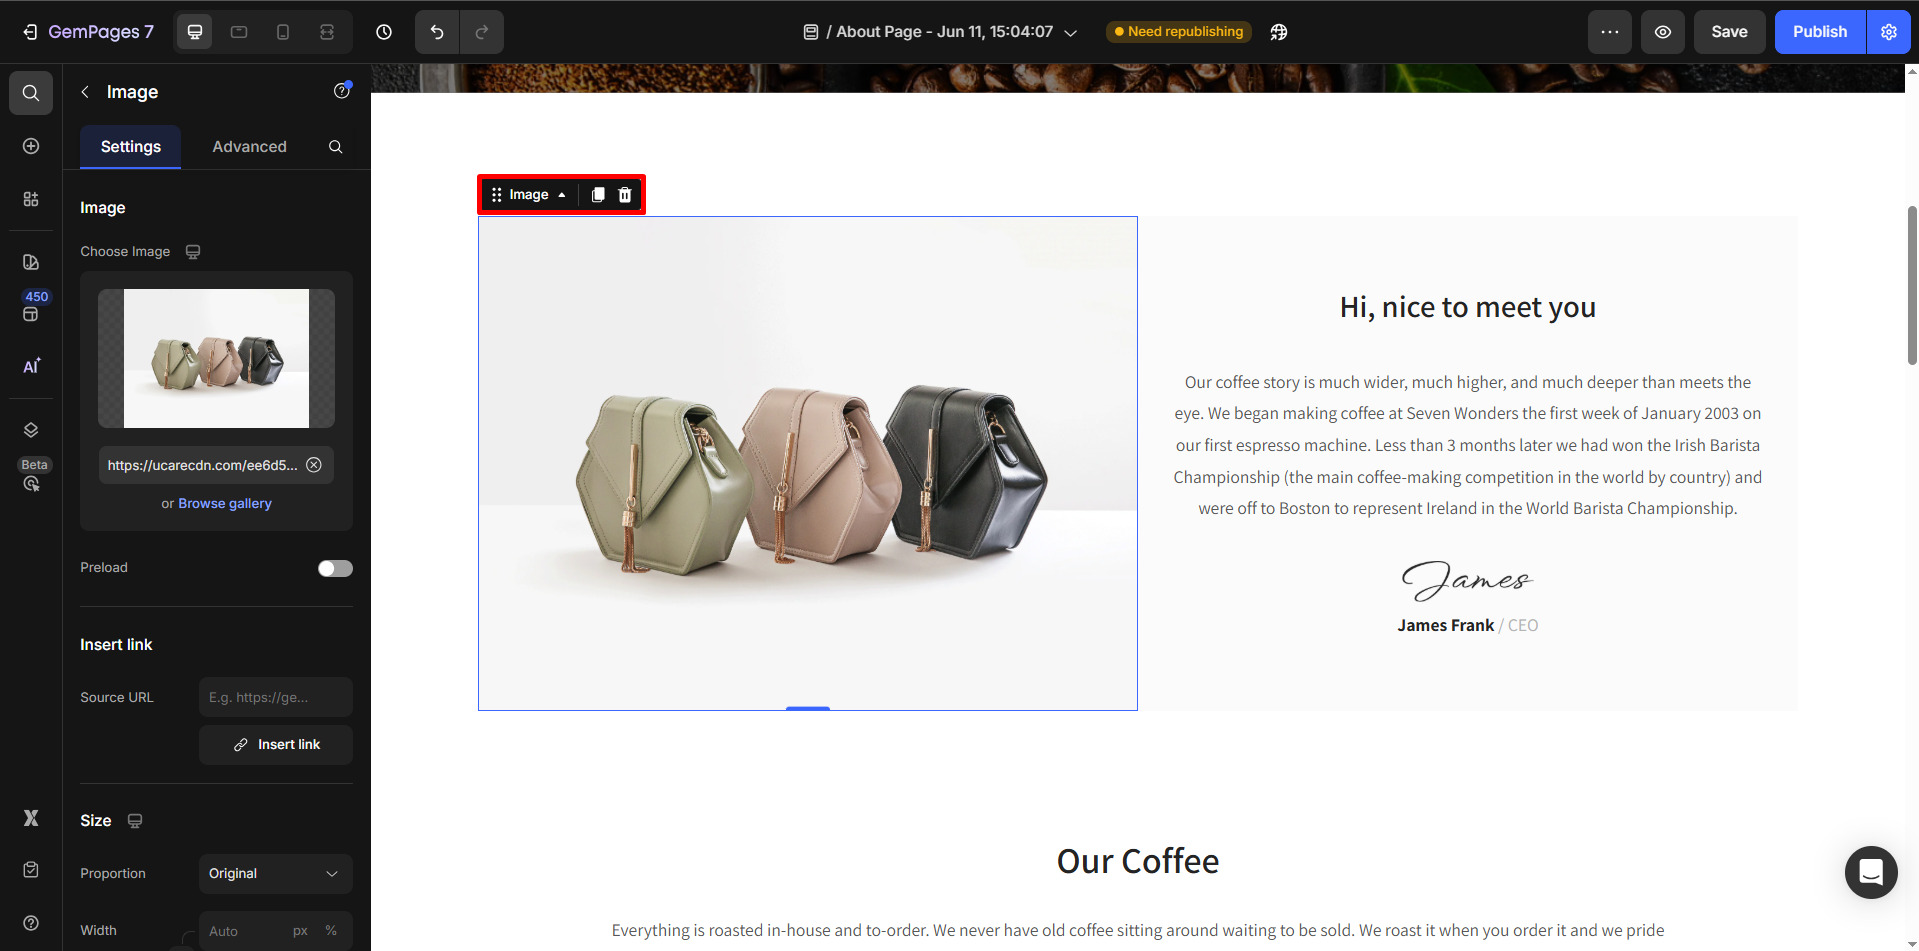
Step 4: Upload your logo image from your files or Shopify library.
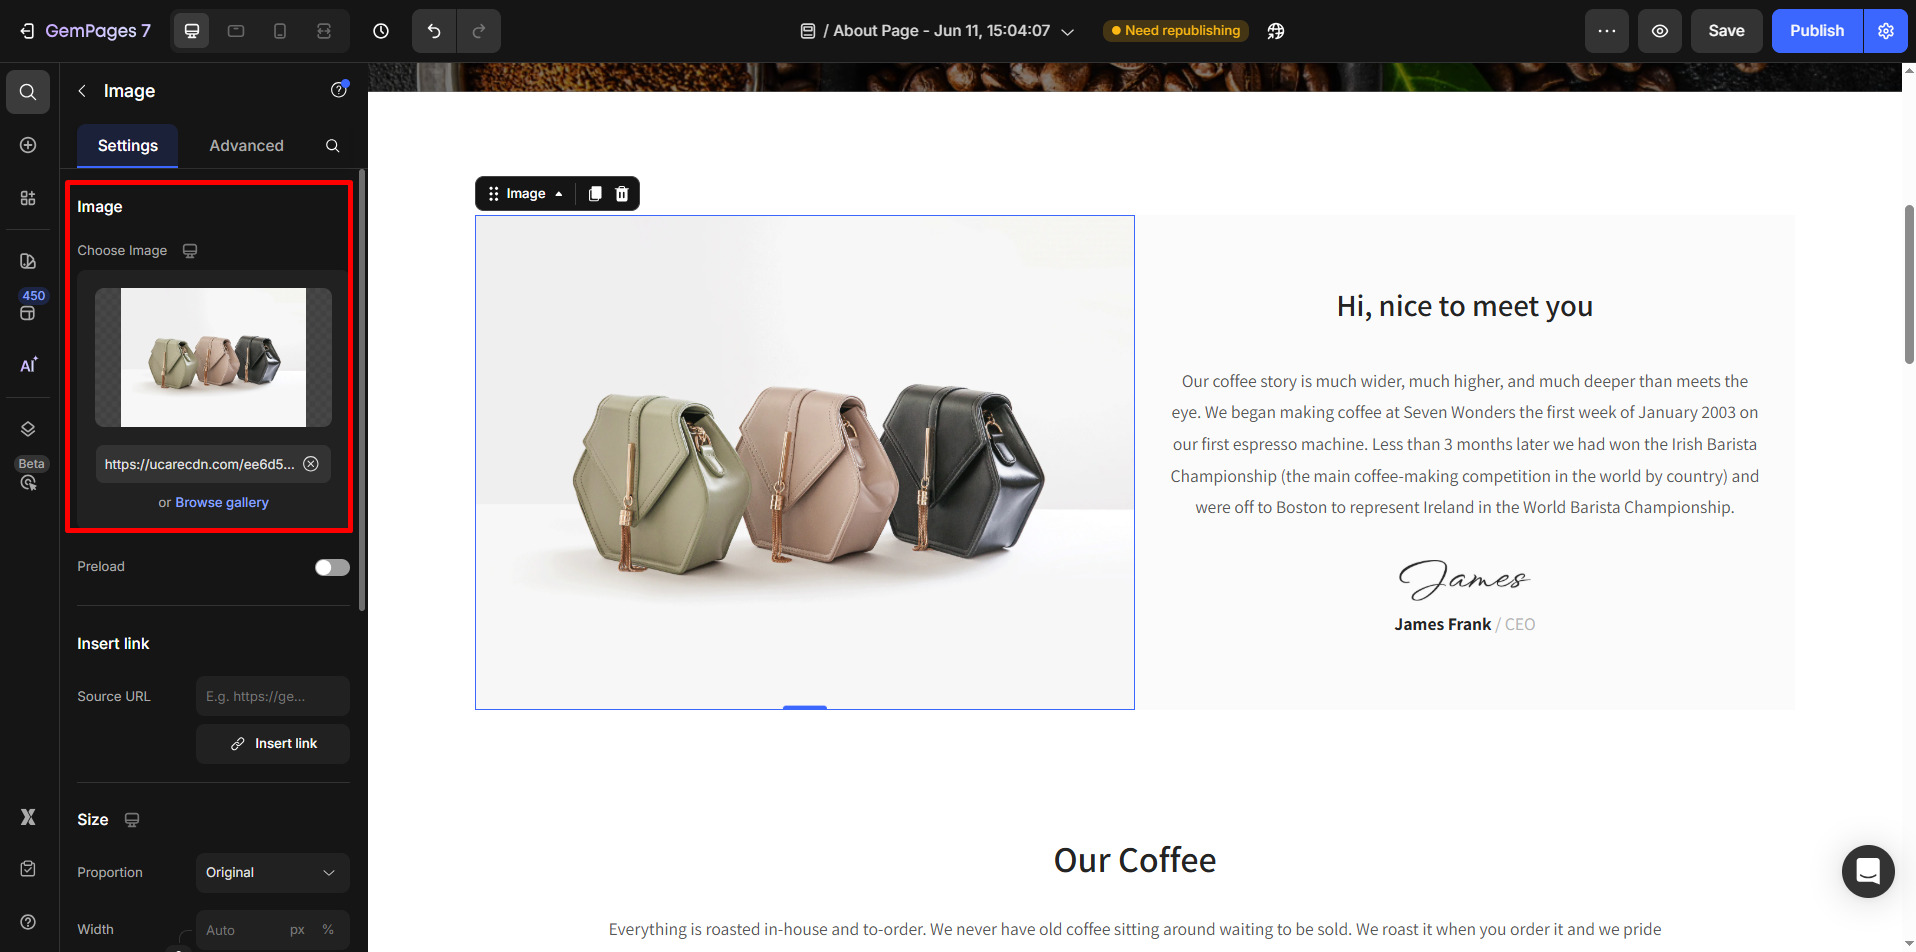
Step 5: Customize your logo’s size, shape, alignment, and SEO properties using GemPages settings.
Step 6: Save and publish your page to see the logo live.
For a detailed image customization guide, refer to the GemPages documentation on the Image Element.
FAQs about Shopify Logo
1. What format is best for Shopify logos?
PNG or SVG are the most recommended file formats for Shopify.
- PNG is great when you need transparency and want crisp edges.
- SVG is vector-based and perfect for maintaining sharpness at any screen size, especially with modern responsive themes.
These formats ensure your logo looks professional across mobile, retina, and desktop.
2. Should I design a different logo size for mobile?
Yes, it’s better to optimize a smaller width specifically for mobile so the logo doesn’t overpower your header layout. A good recommended range is 100px–140px.
This improves readability, reduces header height, and keeps navigation above-the-fold — which is important for mobile conversion.
3. How big should a favicon be for Shopify?
Shopify generally works well with 16×16, 32×32, or 48x48px favicon dimensions.
Use 32x32px for most modern devices because it balances clarity and load speed best.
This helps customers quickly recognize your store when multiple tabs are open.
4. Is JPG a good option for Shopify logos?
JPG can work if your logo doesn’t need transparency and has simple, minimal color areas.
However, PNG or SVG usually deliver better clarity and are more brand-consistent, especially on high-resolution screens.
Avoid using JPG if you need clean edges, transparency, or want your brand visuals to look premium


Thank you for your comments