


What is a Product Bundle in Shopify?
A product bundle is a marketing and sales strategy in which multiple individual products are grouped and sold as a single, combined offer.
These bundles are typically offered at a lower total price than if each item were purchased separately, creating a sense of added value for the customer.
For example, instead of selling one makeup item at $20, you can offer a “Buy 2, Save 10%” deal. This not only appeals to price-sensitive shoppers but also encourages them to purchase more items in a single transaction.
Benefits of Product Bundles:
- Boost Average Order Value (AOV): Customers are more likely to buy in larger quantities when they perceive added value.
- Encourage Upsells and Cross-sells: You can group complementary products (e.g., skincare sets, outfit combinations) to showcase value.
- Improve Customer Experience: Pre-curated bundles simplify decision-making, especially for gift buyers or first-time visitors.
How to Create a Product Bundle in Shopify?
Follow the steps below to create product bundle listings in your Shopify admin.
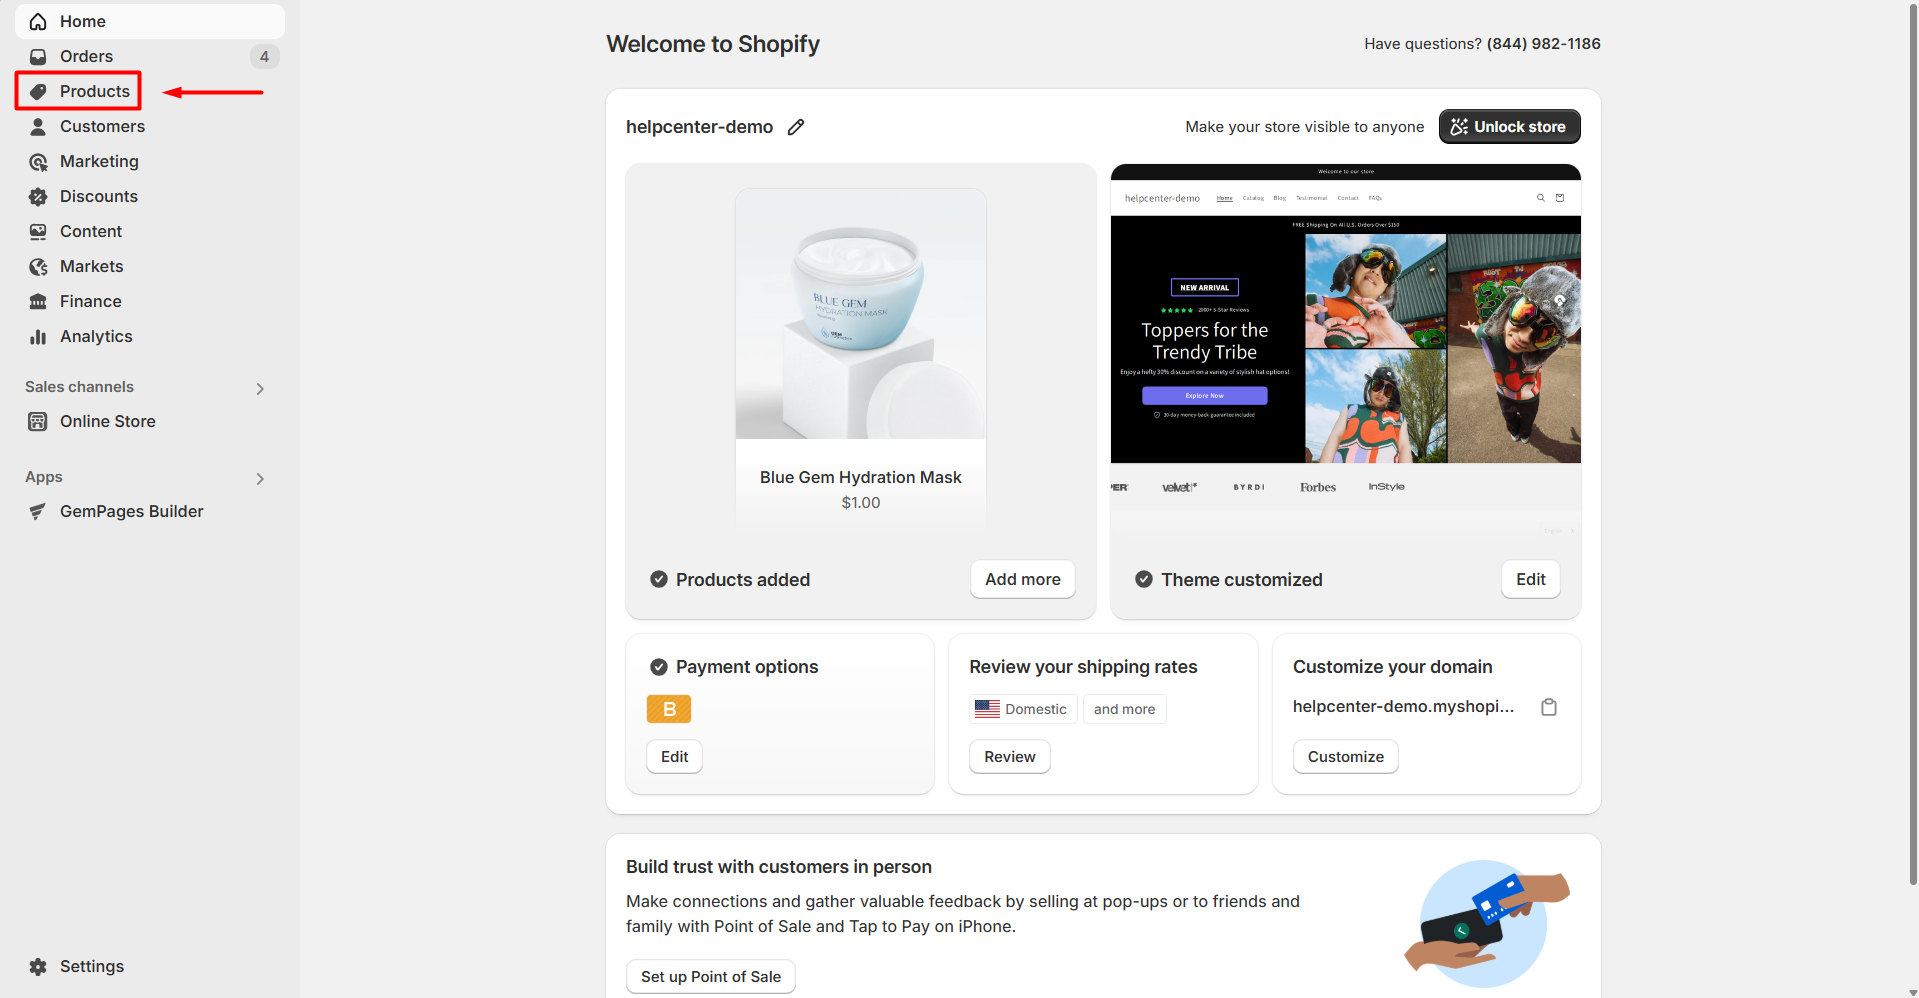
Step 1: Log in to your Shopify admin. From the left sidebar, navigate to the Products.
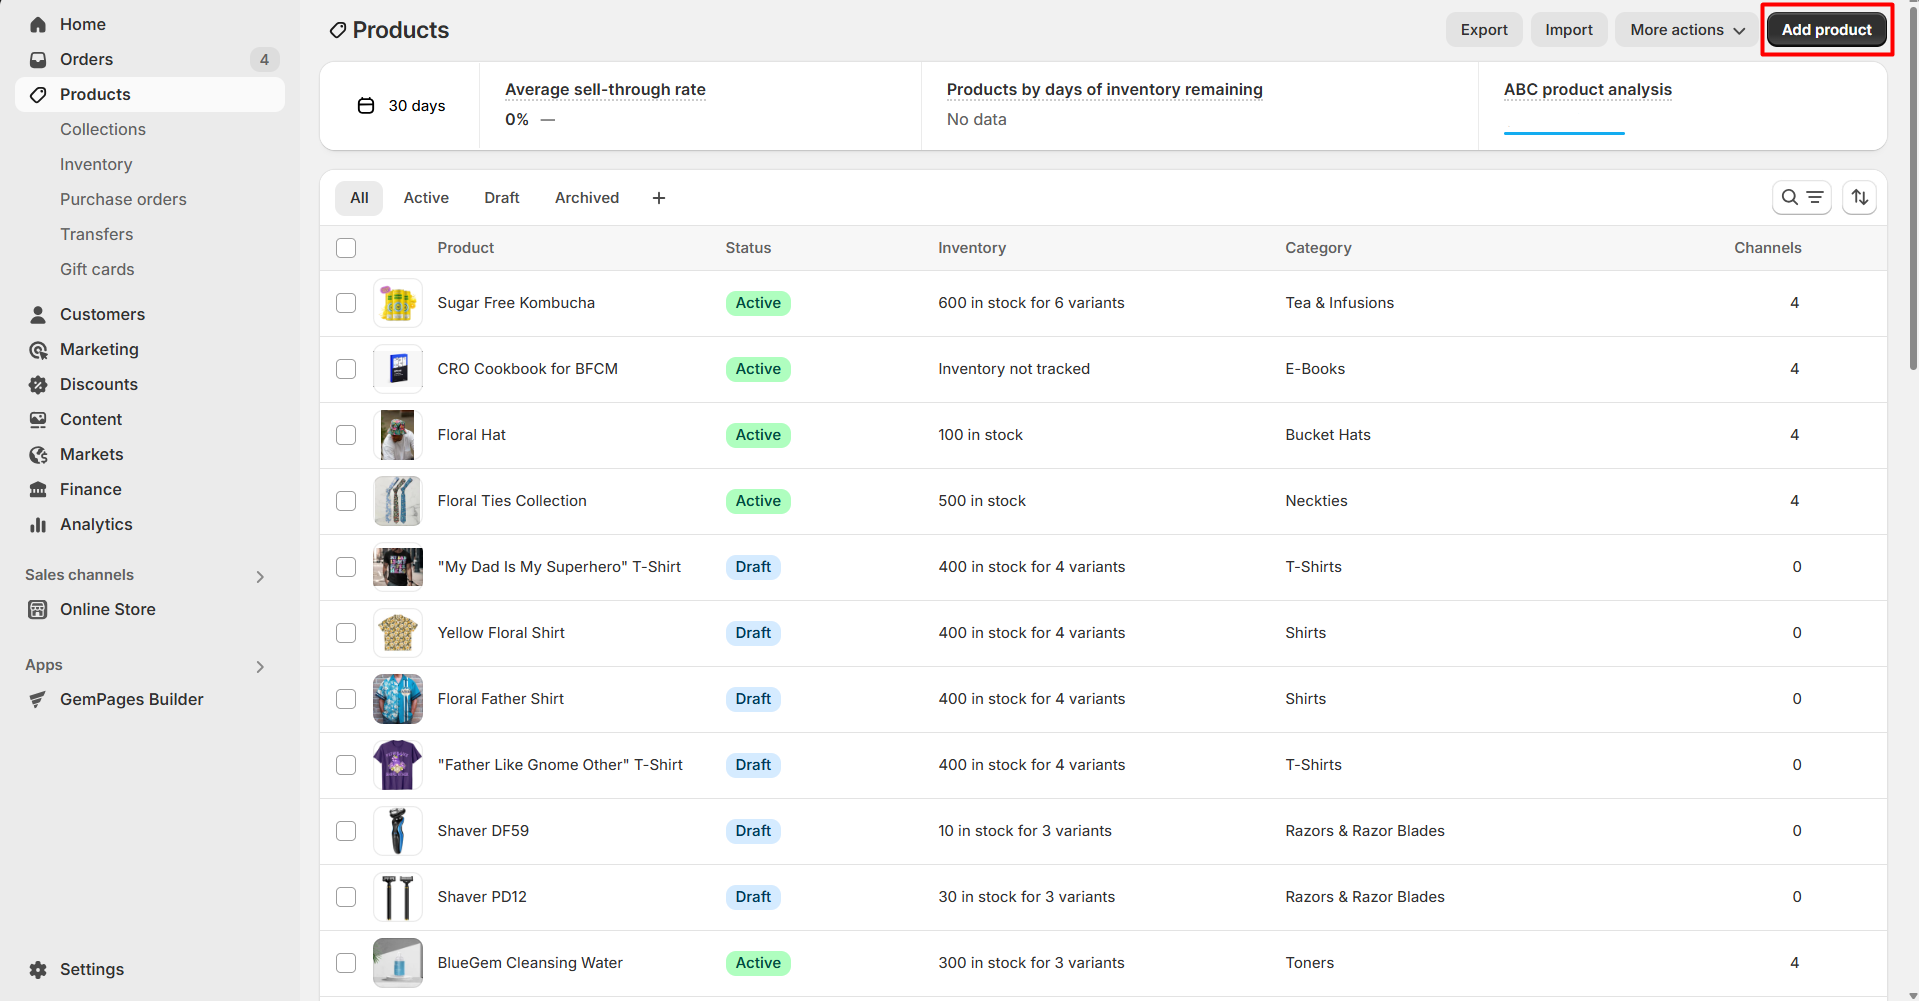
Step 2: Hit the Add product button in the top right corner.
Step 3: Next, create the product bundles. You will need to create multiple product listings with the respective quantities and discounted prices at this step.
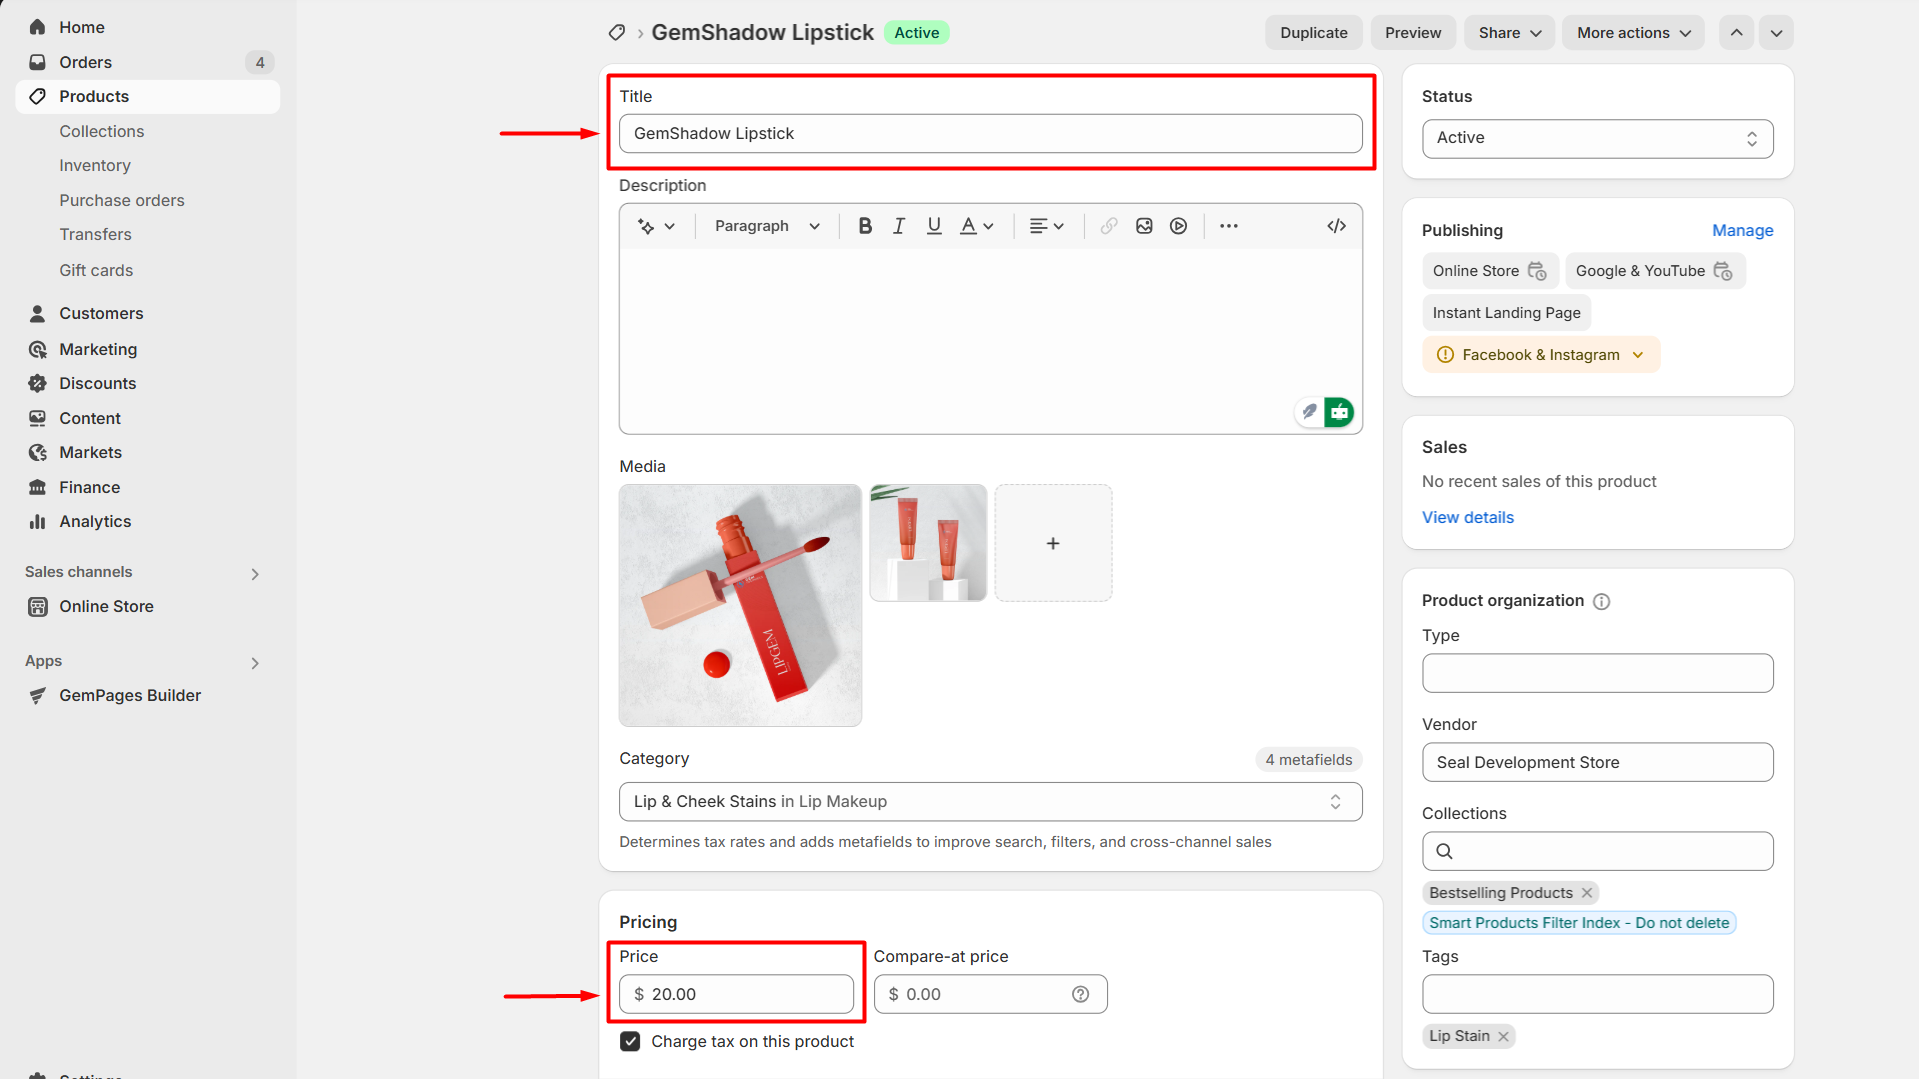
For example, we have a product named “GemShadow Lipstick” with a price of $20 per item. Customers can save 10% for buying 2 items and 20% for 3.
To do so, let’s create 3 product listings as below:
- Listing #1: One item, normal price.
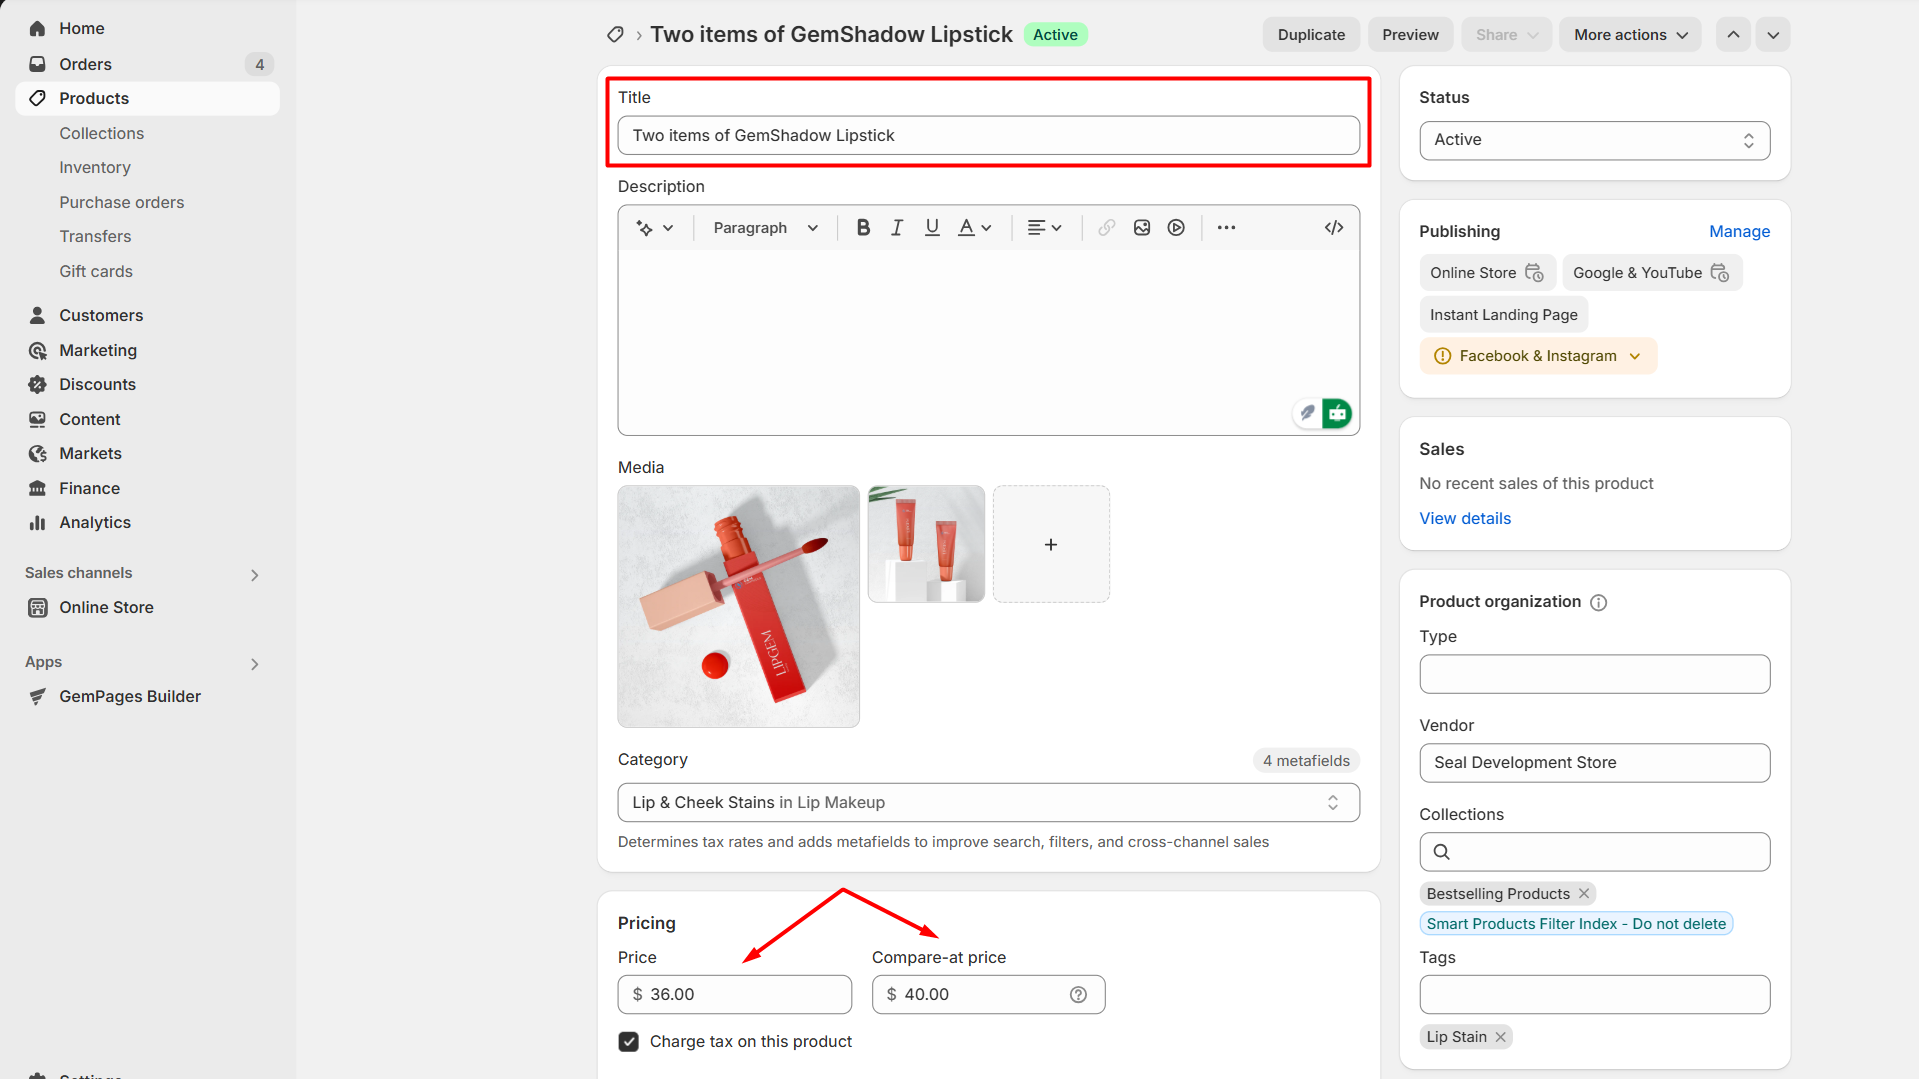
- Listing #2: Two items, 10% discount.
- Listing #3: Three items, 20% discount.

How to Display Your Shopify Product Bundles in GemPages?
The steps to display product bundles in GemPages depend on the version of the editor you are using. Check your editor version and follow the appropriate instructions below.
Display Product Bundles in GemPages Version 6
Step 1: From the GemPages Dashboard, open your preferred template to edit. Navigate to the Library at the top of your Editor.
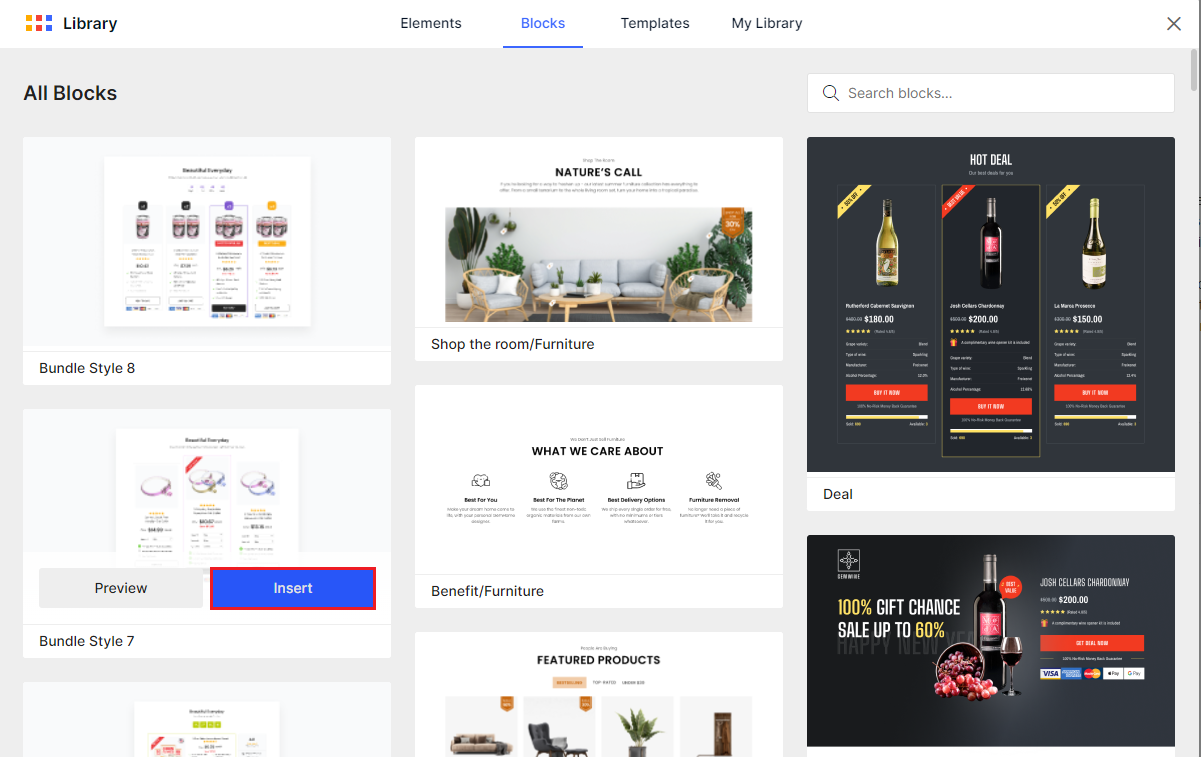
Step 2: Under the Blocks tab, look for your preferred bundle template using the search bar.

Step 3: Hover on the selected block and hit “Insert” to add it to your page.
Step 4: Exit the library. Click on each column of the block to reveal the Product Module.
Select “Pick a Product” under the Settings tab in the left sidebar to select the listings you’ve completed in the Shopify admin.
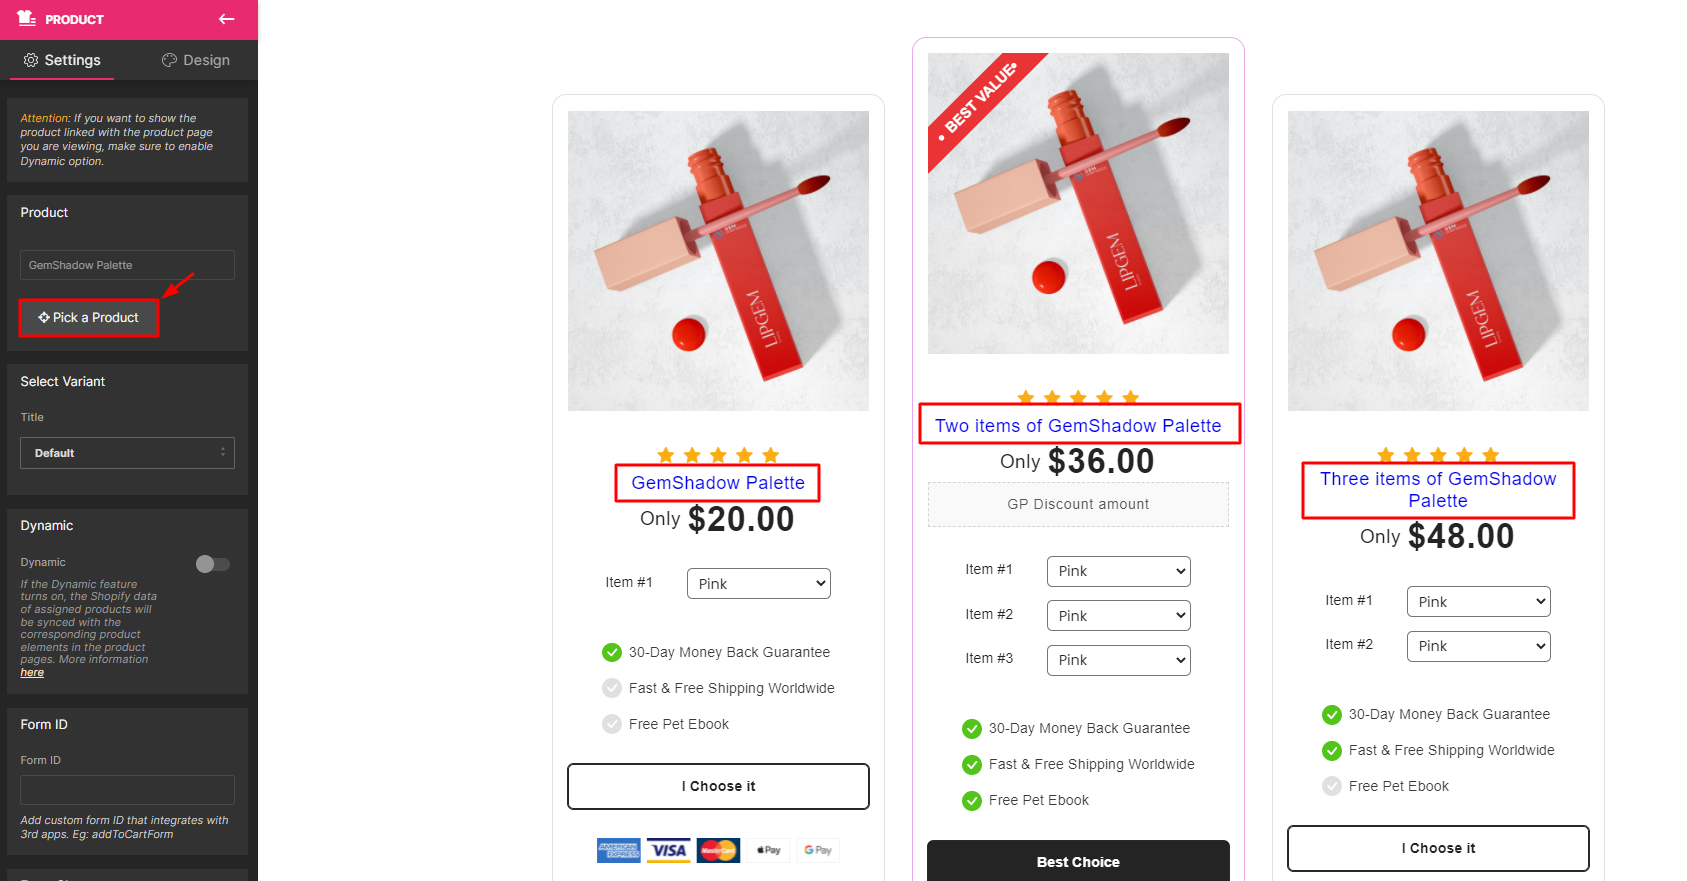
Step 5: Modify the Product Modules as you desire to finalize your bundles. For more information, visit this detailed guide for the Product Module.
When everything is in place, hit “Save” then “Publish.”
You can also check out this video tutorial to create a product bundle within GemPages V6:
Display Product Bundles in GemPages Version 7
Step 1: From the GemPages Dashboard > Pages, click on your target page to open the editor.
Step 2: From the left sidebar, access the Template Library by clicking the icon on the left sidebar.

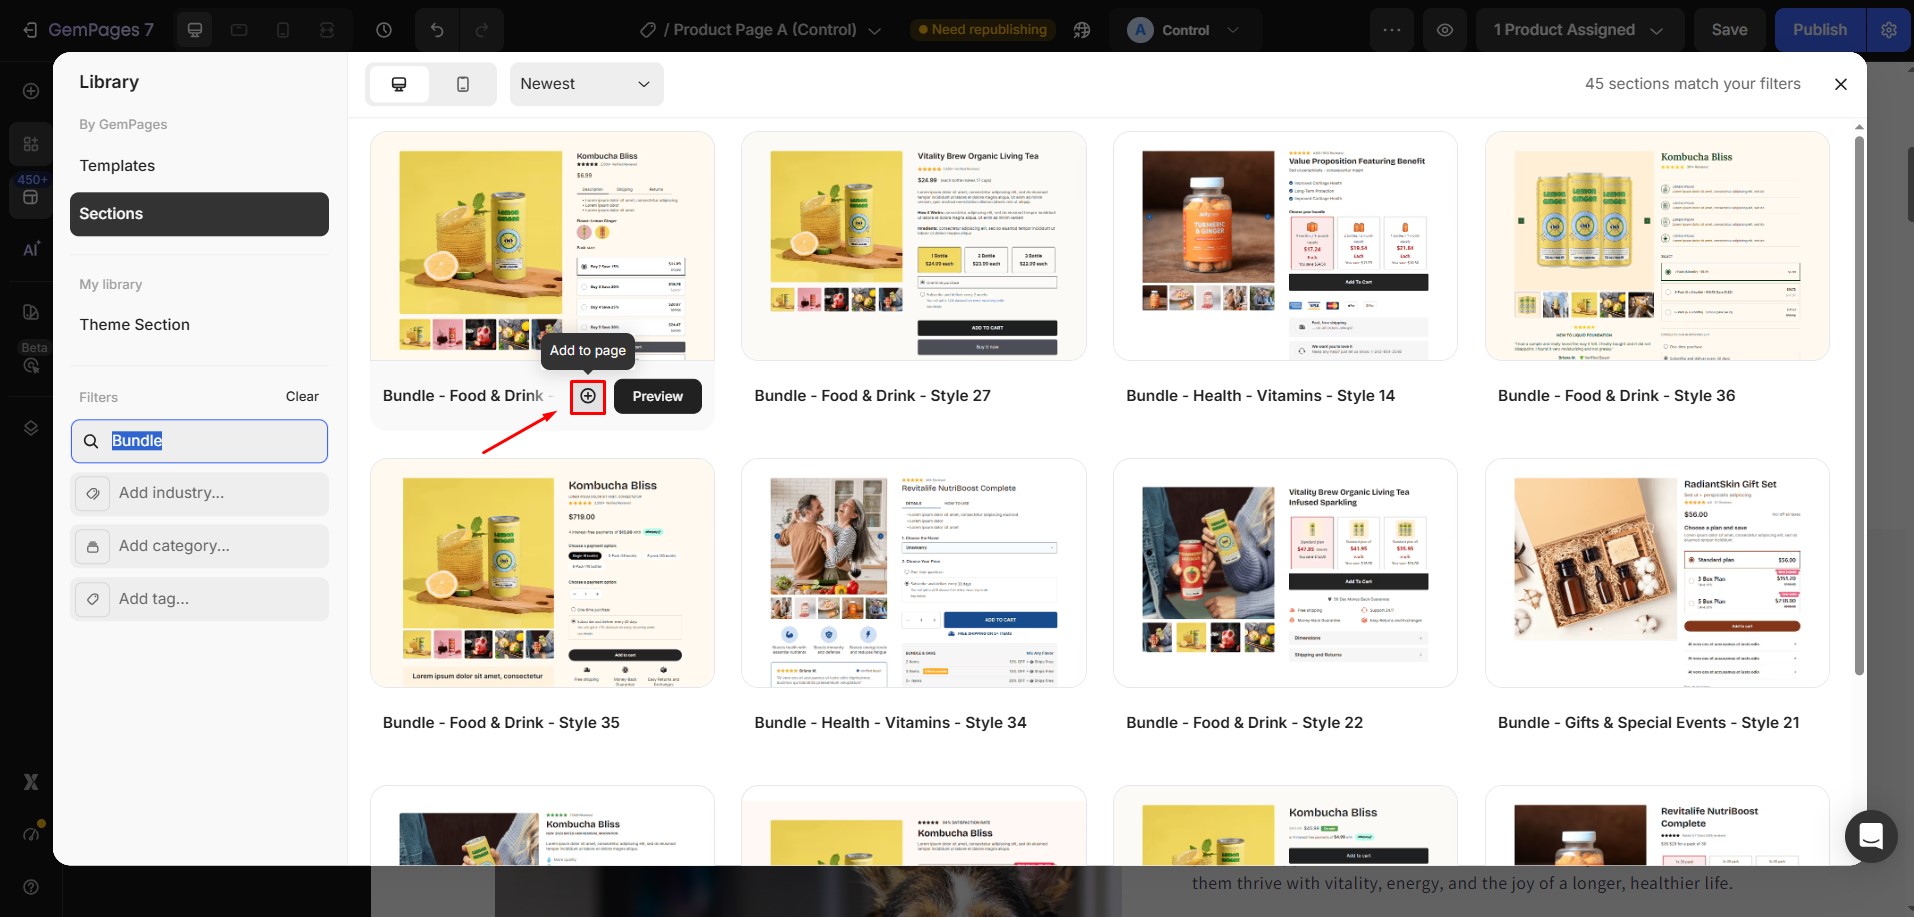
Step 3: Navigate to the Section tab. From the left sidebar, scroll down to find the Bundle category and click on it to display all bundle sections.
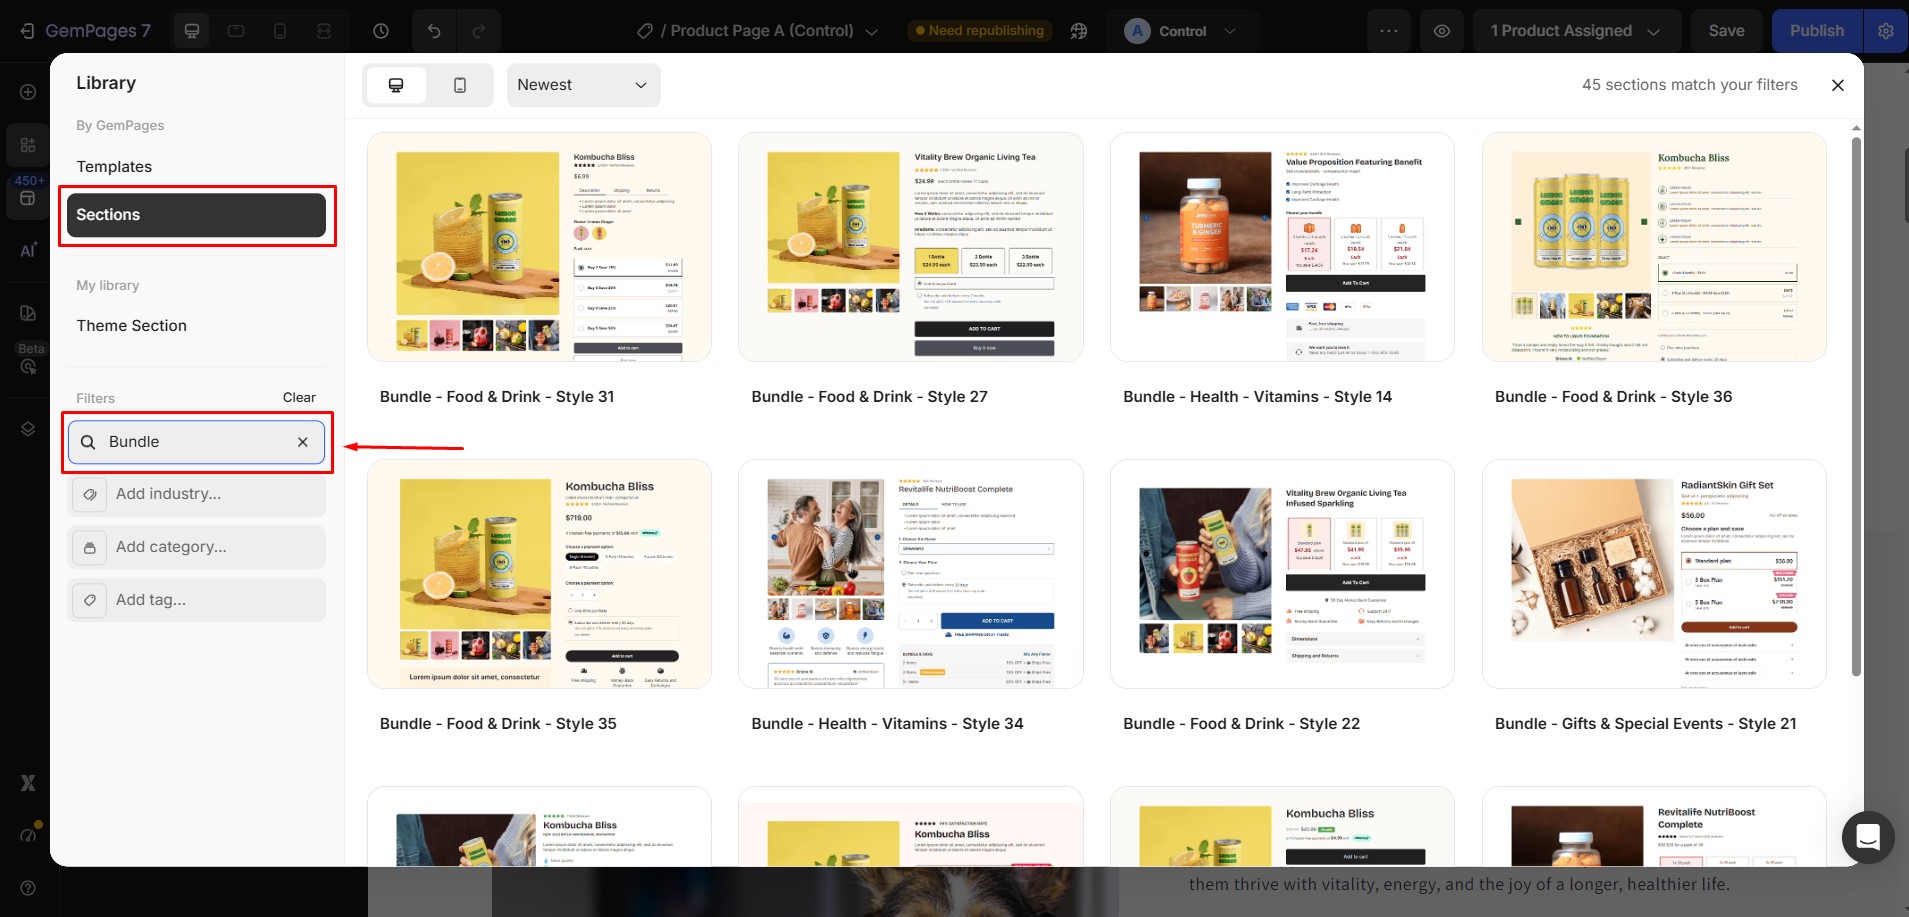
Step 4: Hover over the desired section, then click “Add to page” to incorporate the section into the page.
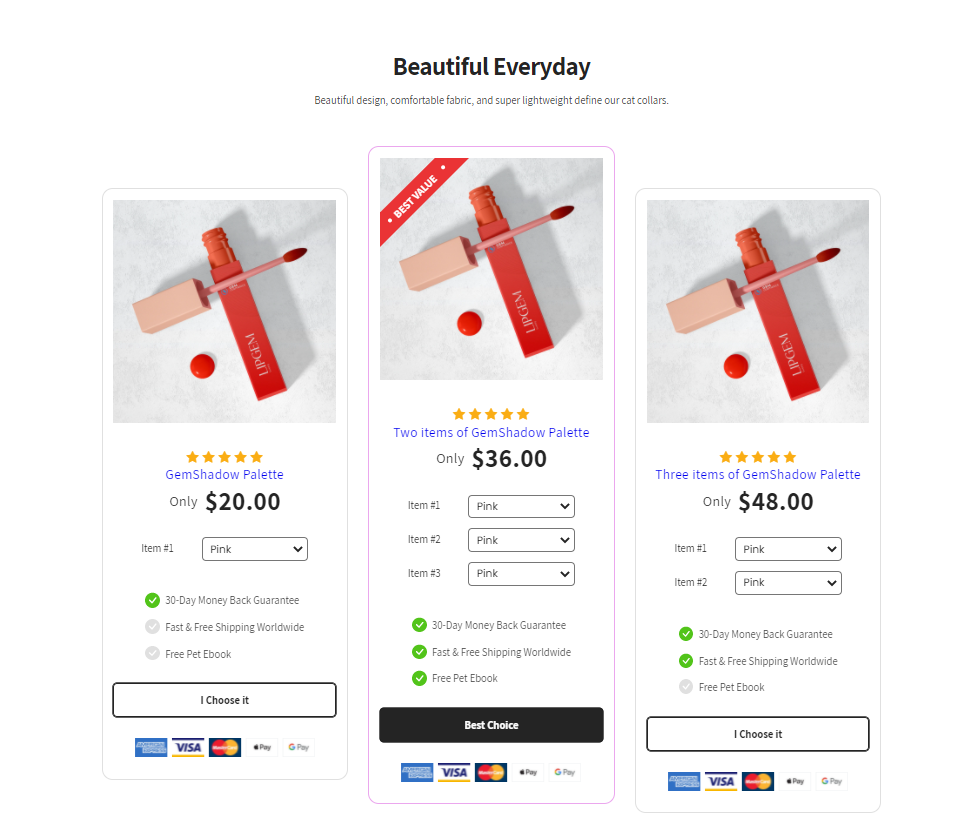
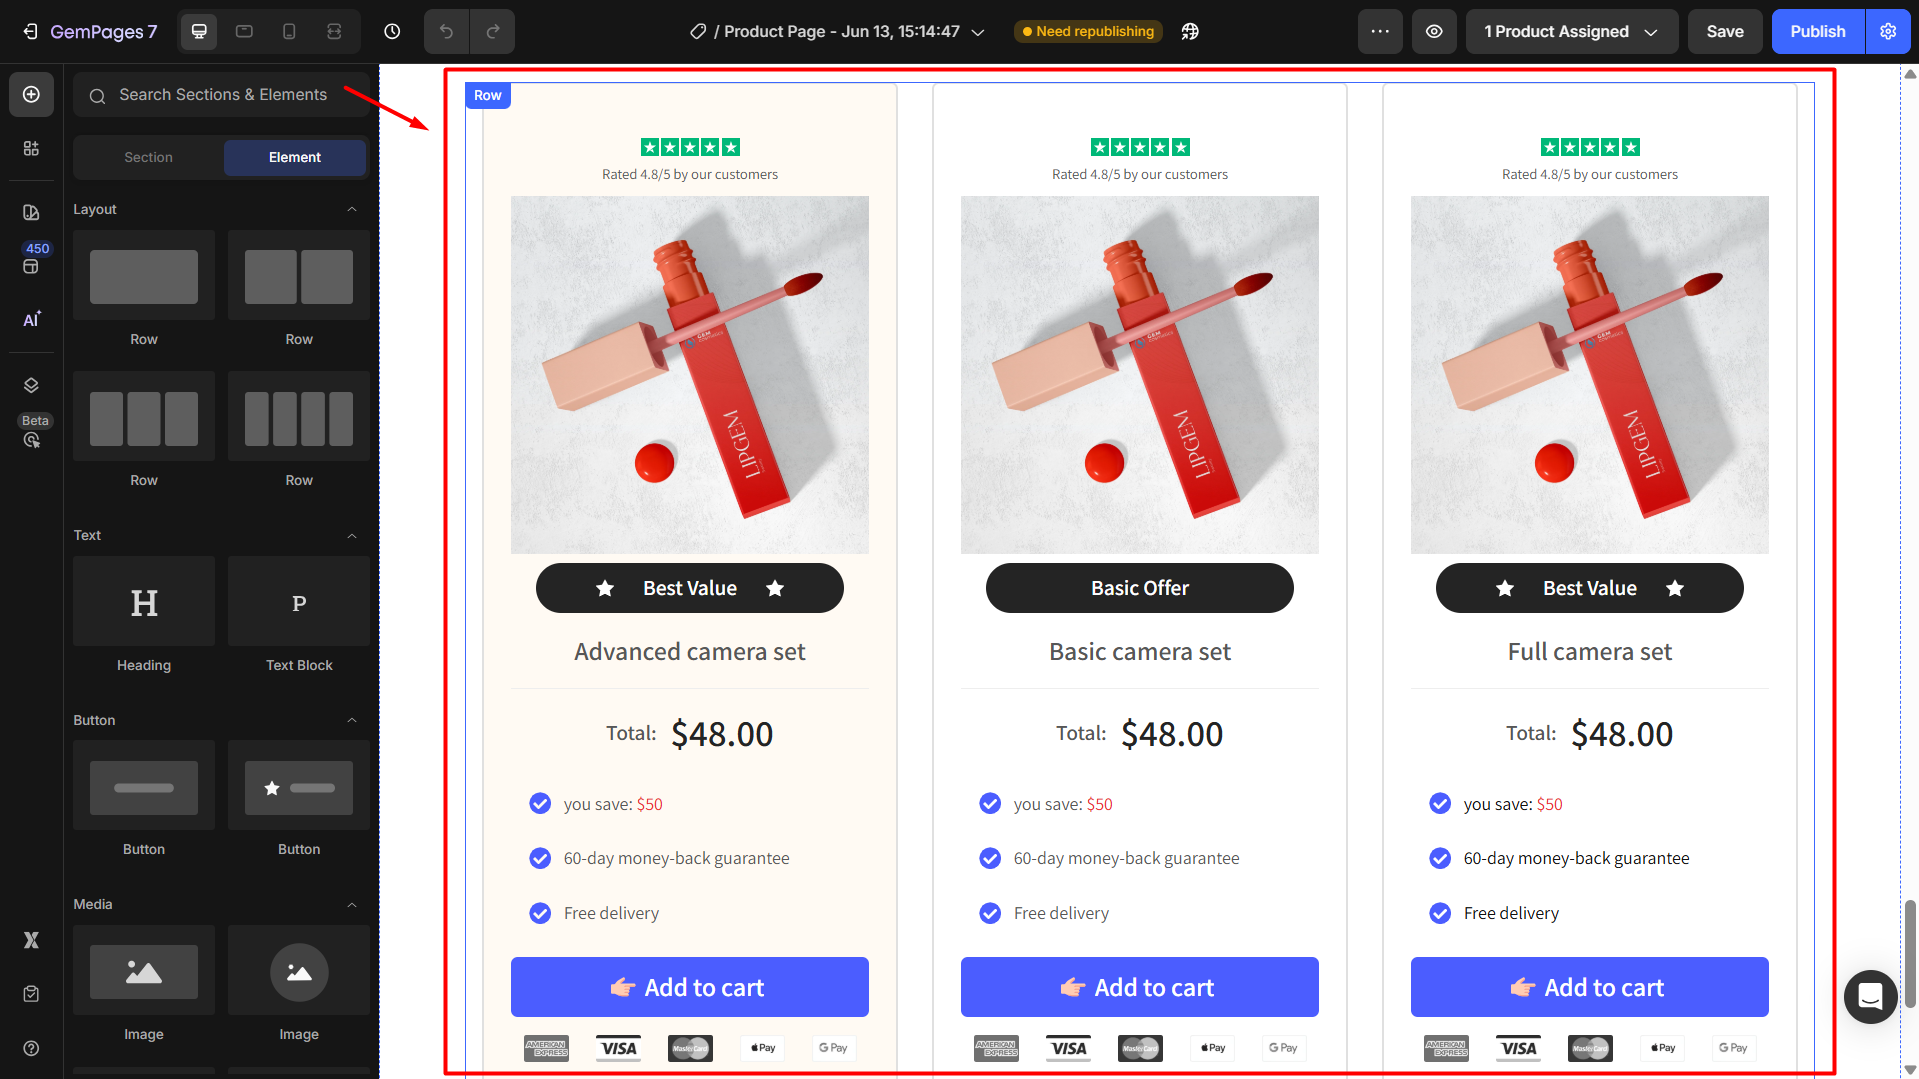
 Step 5: Once you are back in the editor, you’ll see the bundles added to your page.
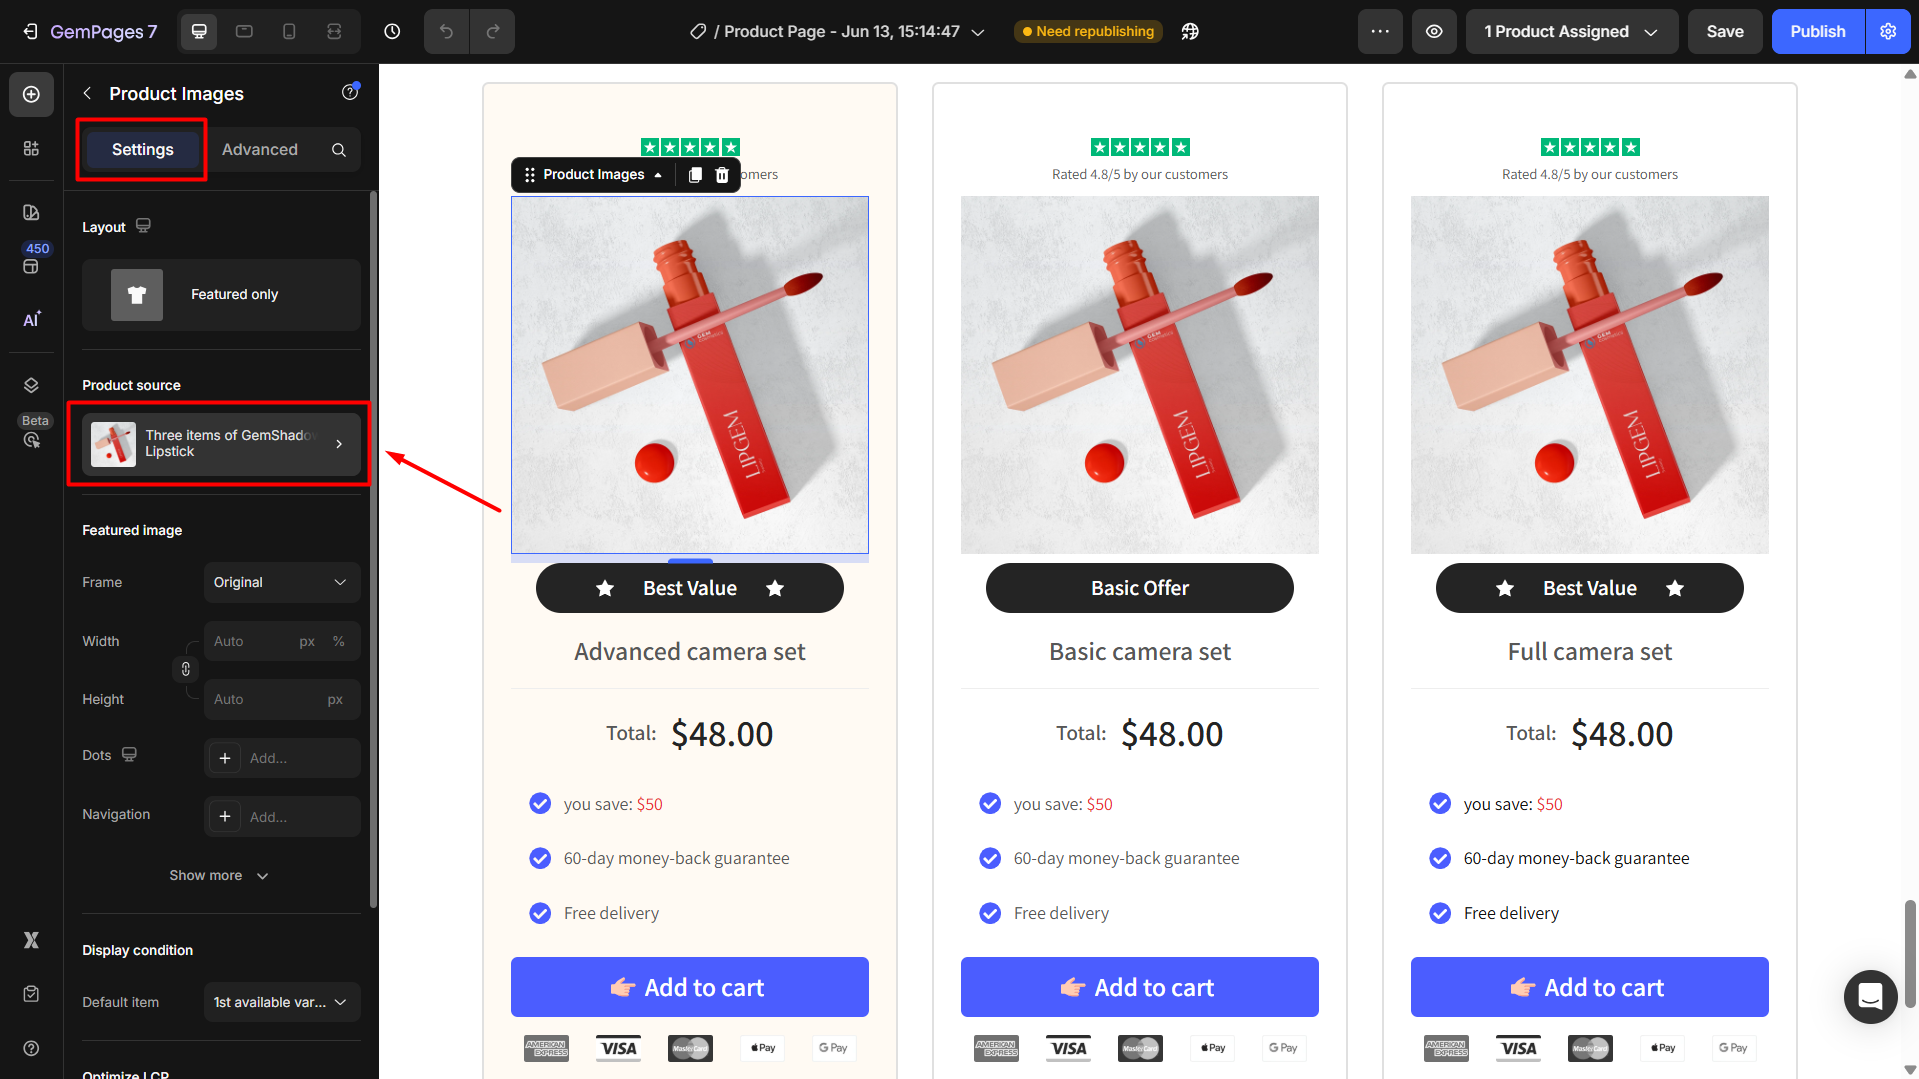
To select the product for each bundle, click on the product image to open its settings. Then click the product box under the Product source section in the Settings tab. Then, manage the product in the Product element.
Step 6: Hit “Save” and “Publish” when finished to make your changes live.
How to Create Product Bundles with Automatic Discounts
If you prefer to manage only one product instead of creating multiple product listings, you can use Shopify Automatic Discounts together with GemPages Product elements.
With this method, Shopify automatically applies discounts based on the quantity purchased, while GemPages lets you preset the quantity for each bundle option. This helps simplify inventory management and keeps your product catalog organized.
Step 1: Create an Automatic Discount in Shopify
- In your Shopify admin, navigate to Discounts and click Create discount.
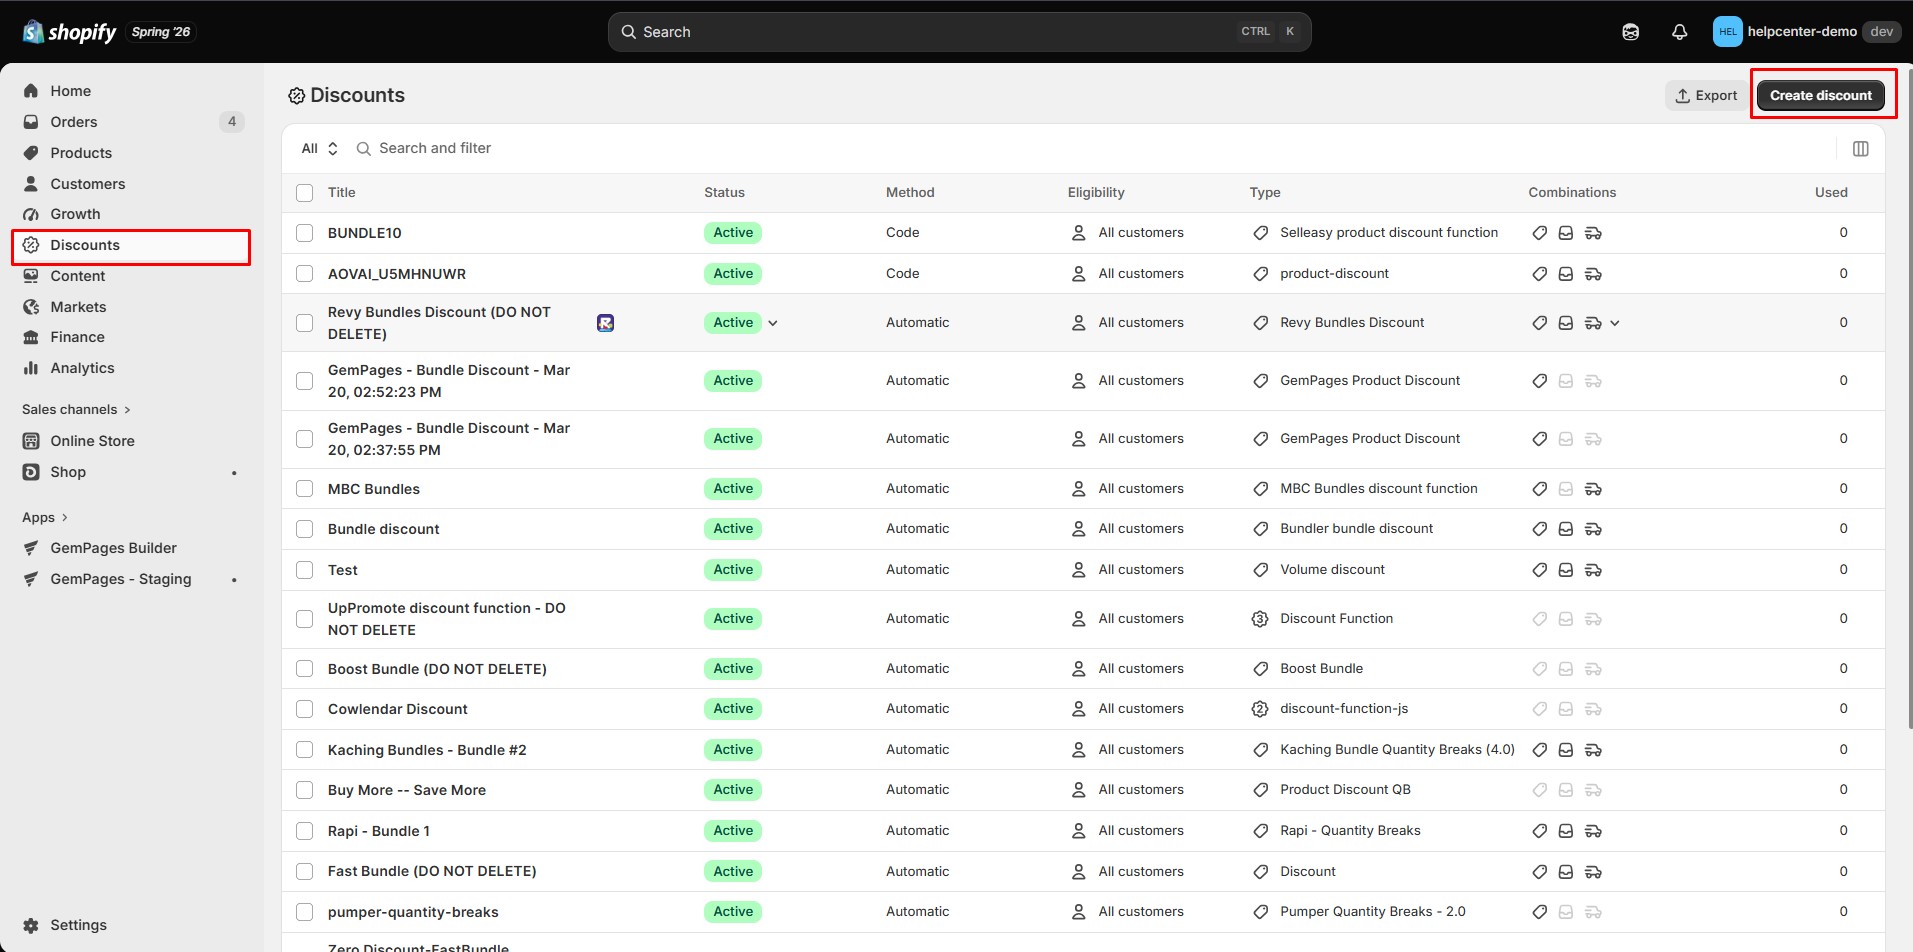
- Choose Amount off products and then choose Automatic Discount.
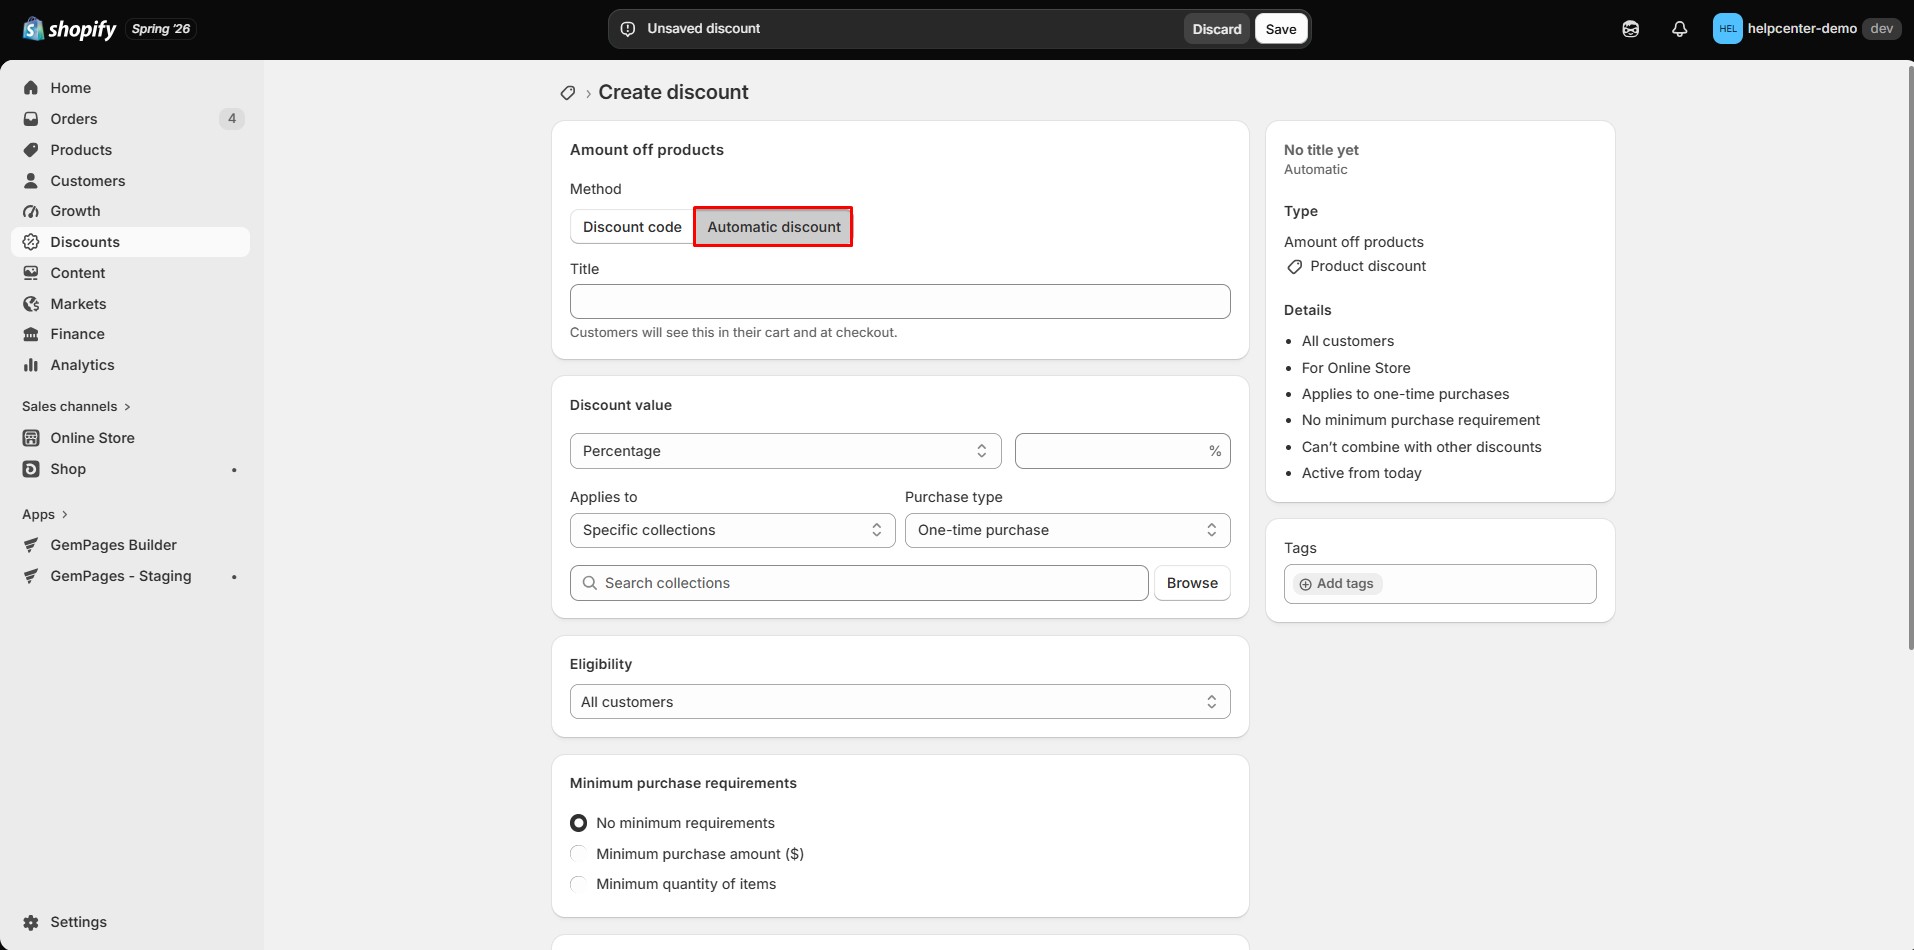
- Configure the quantity-based discount rules for your bundle.
 Once saved, Shopify will automatically apply the discount when customers purchase the required quantity.
Step 2: Create Bundle Options in GemPages
Instead of using multiple Shopify products, build your bundle layout using separate Product elements.
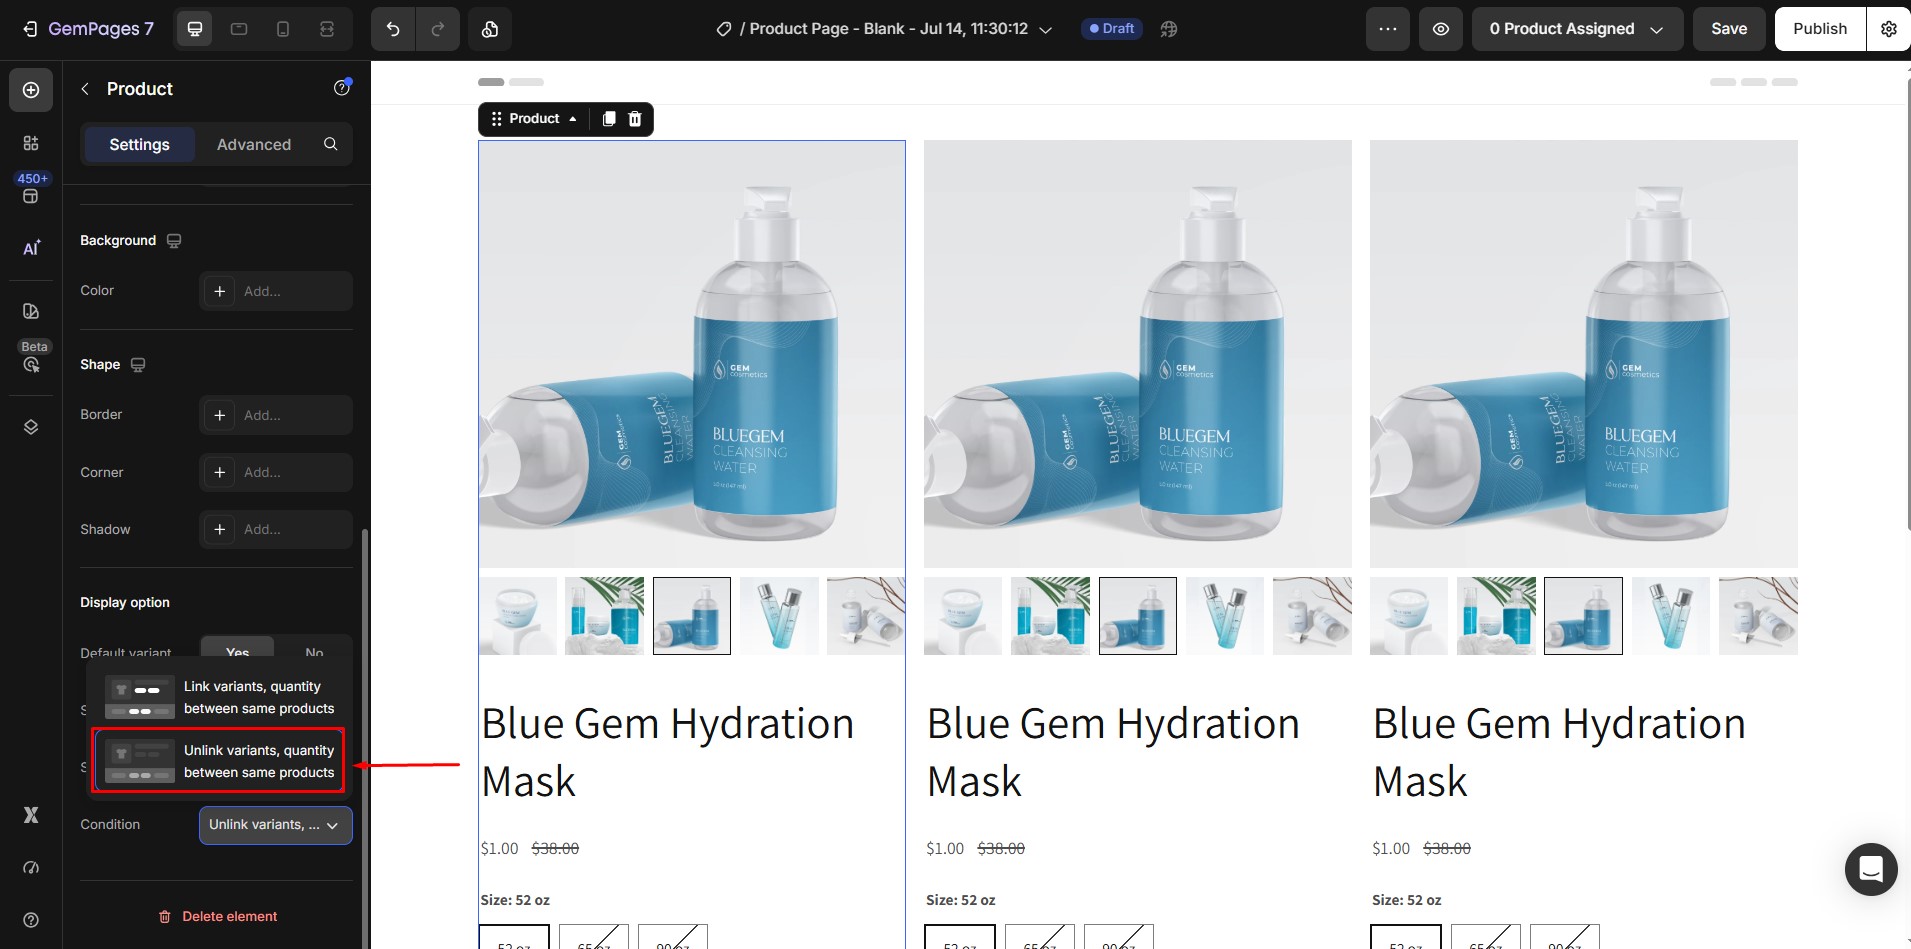
For each Product element:
- Select the same Shopify product.
- Enable Unlink Variants in the Product settings so each bundle option works independently.
 Step 3: Set the Default Quantity
 Step 3: Set the Default Quantity
For each Product element, set the default quantity to match the bundle offer.
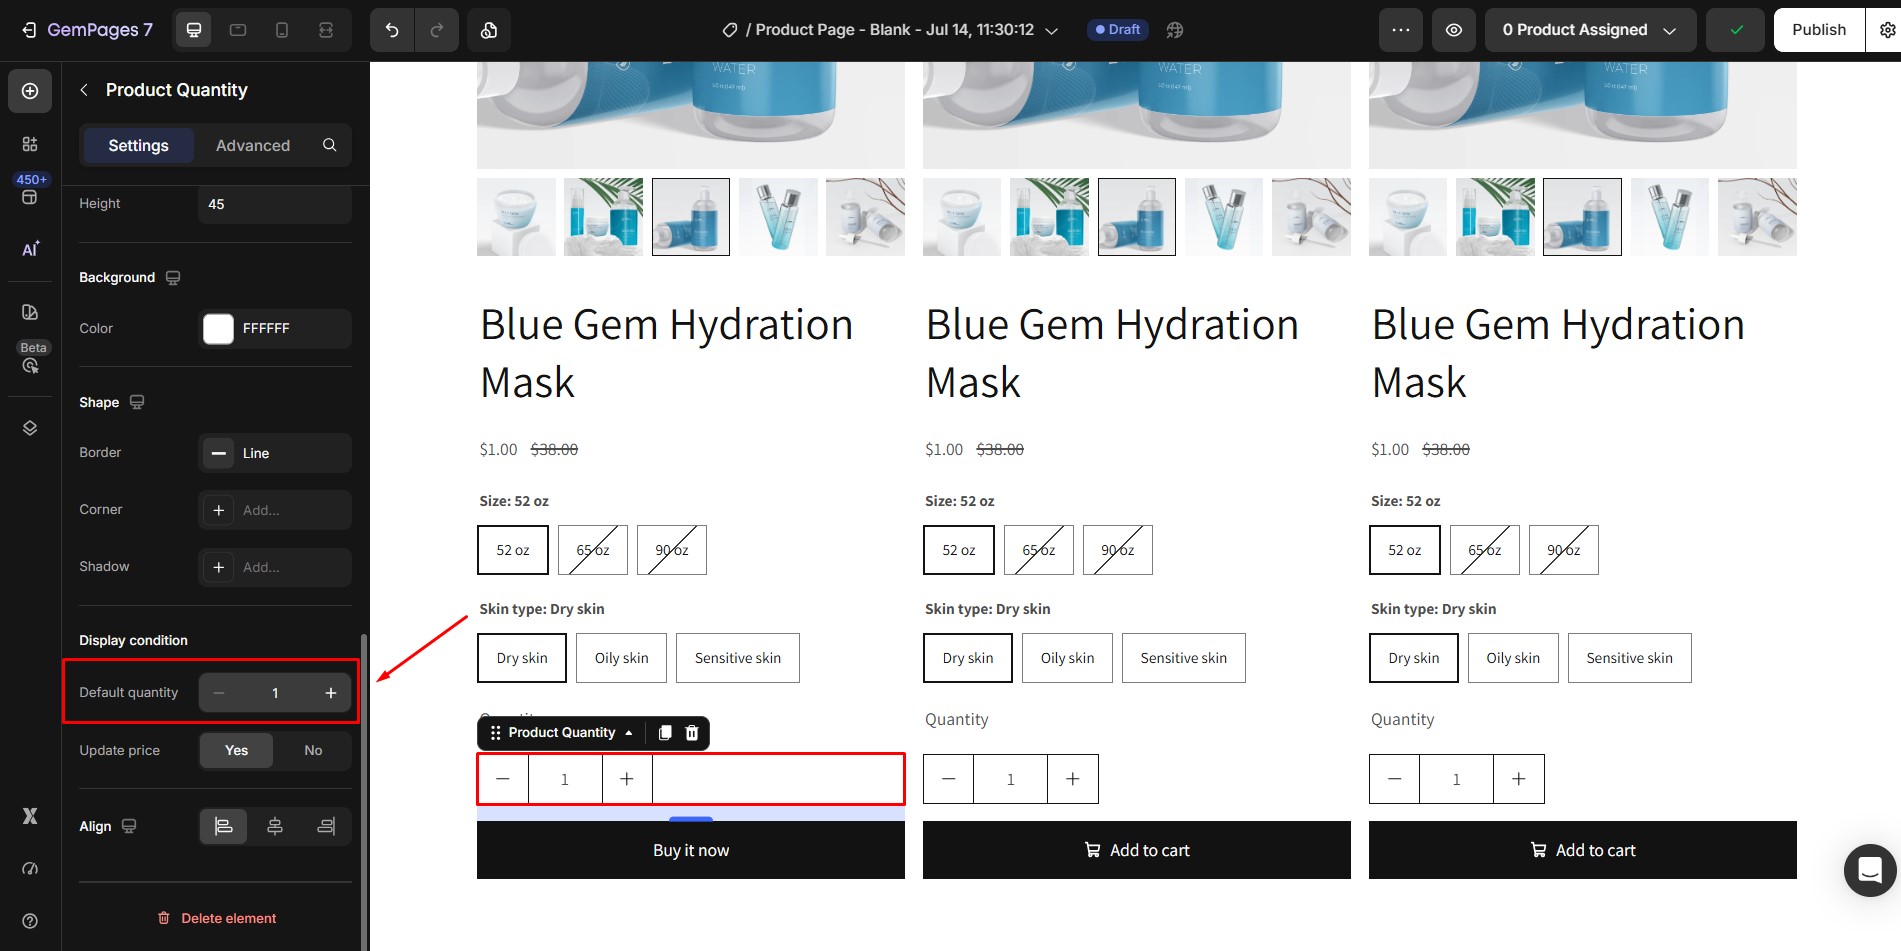
For example:
- Bundle 1 → Quantity: 1
- Bundle 2 → Quantity: 2
- Bundle 3 → Quantity: 3
 Customers will automatically add the predefined quantity to their cart when selecting a bundle.
Step 4: Hide the Quantity Selector
Since each bundle already has a predefined quantity, you can hide the Quantity Selector to create a cleaner shopping experience.
- Right-click the Quantity element.
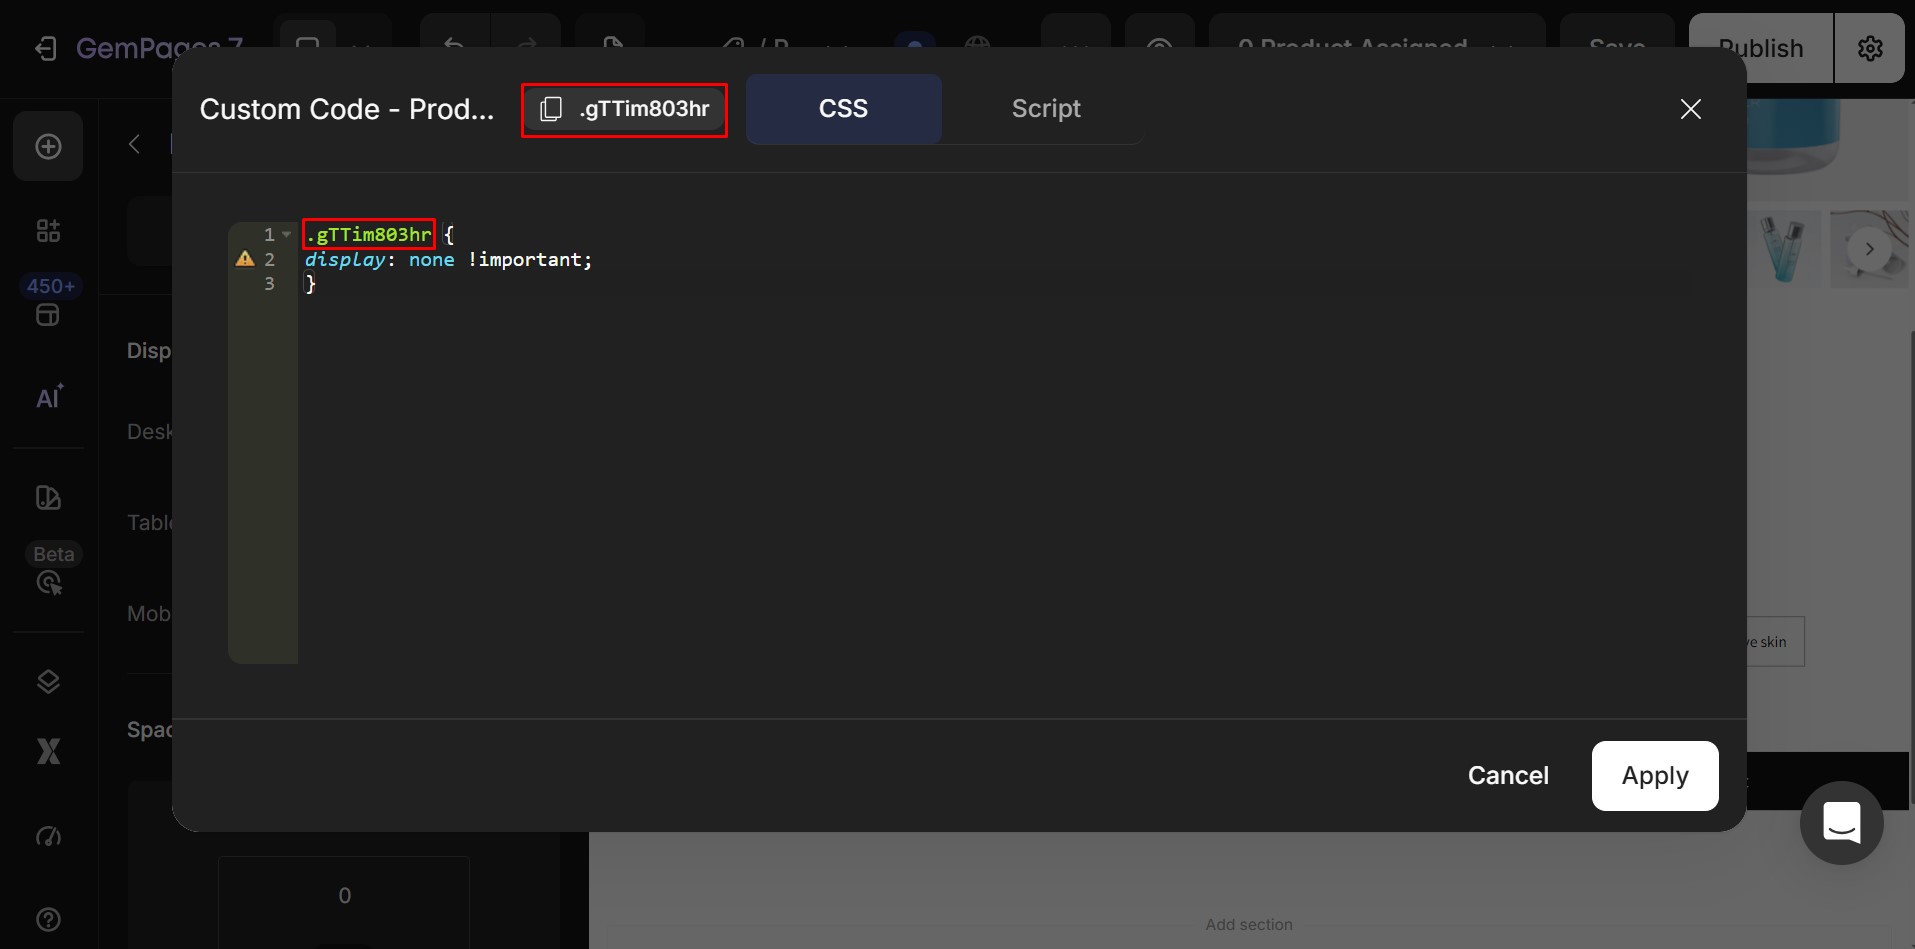
- Select Custom Code to open the Custom Code panel.
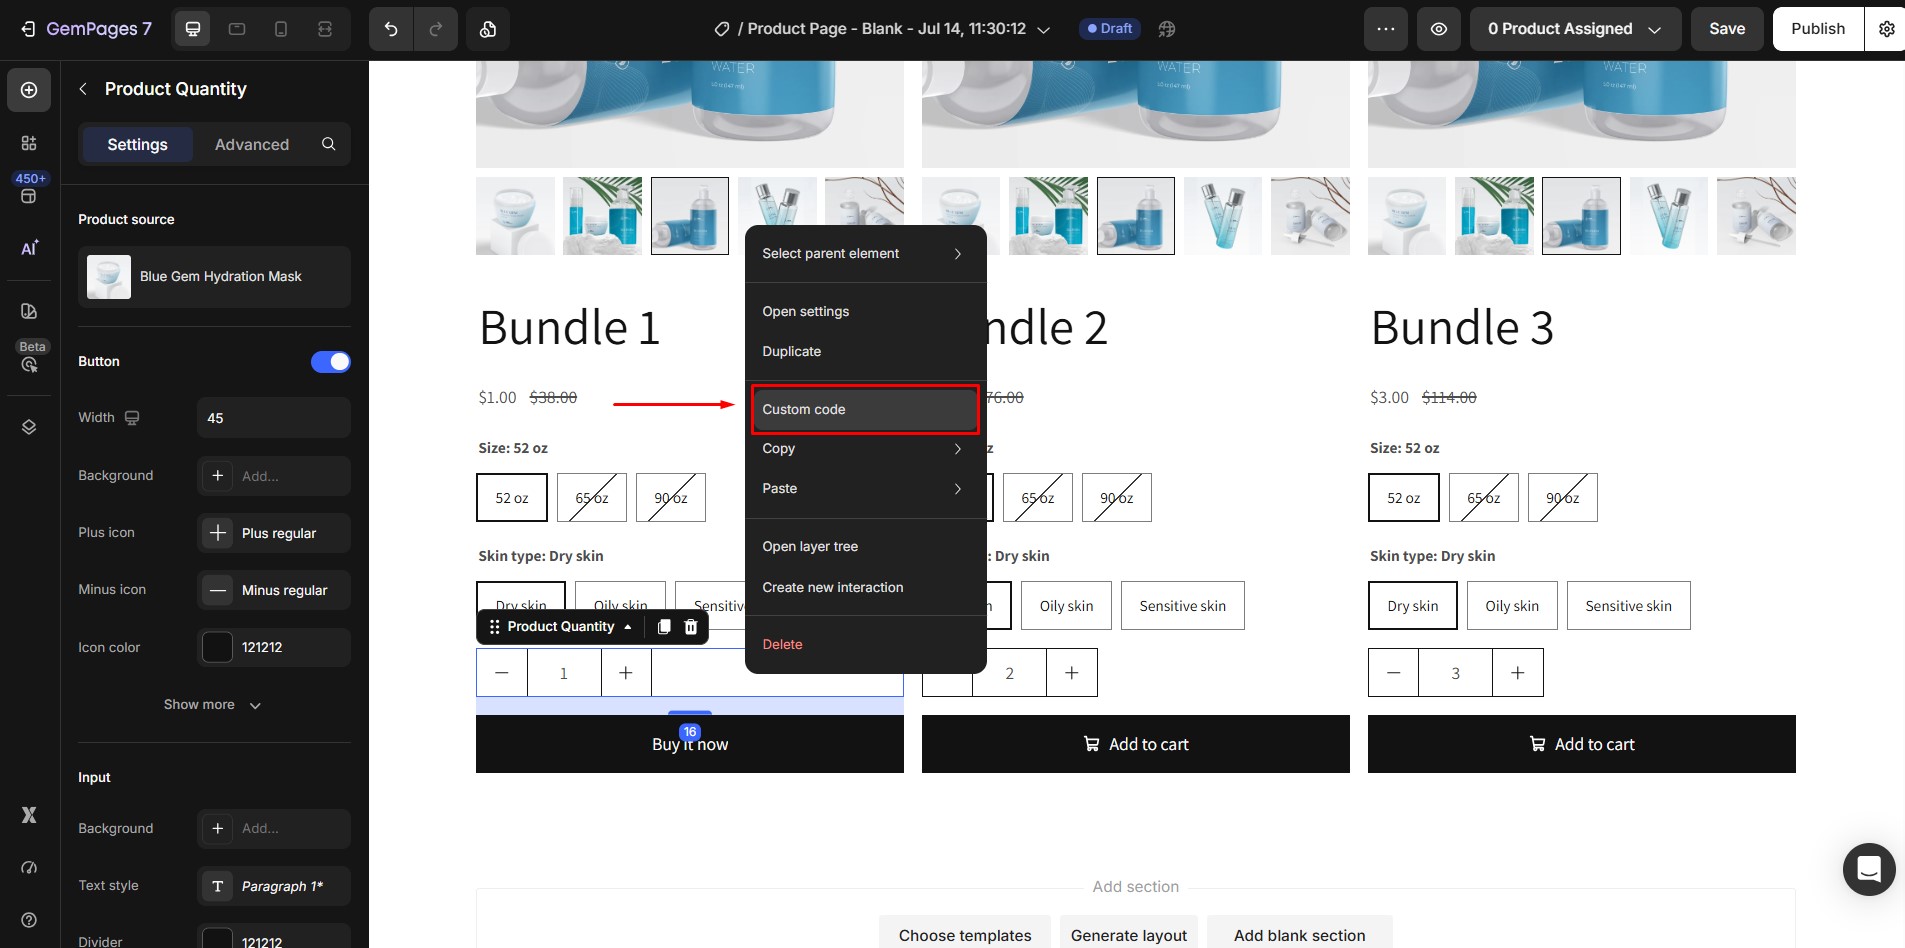
- Paste the following CSS into the CSS section:
.gq_DCGd3ne {
display: none !important;
}
Replace gq_DCGd3ne with the actual Element ID of your Quantity element. You can find this ID at the top of the Custom Code panel.
After publishing the page, customers will only see the bundle options while Shopify automatically applies the corresponding discount at checkout.
FAQs about Shopify Product Bundles
1. What are the benefits of using product bundles?
Product bundles help boost Average Order Value (AOV), encourage upsells and cross-sells by grouping complementary items, and improve customer experience by simplifying purchasing decisions.
2. How many active bundles can I have in Shopify?
Shopify currently allows only 5 active bundles at a time. You need to deactivate unused bundles to ensure the feature functions properly. If more than 5 bundles are set up, the bundle feature will not work.
3. How can I display my Shopify product bundles in GemPages?
You can display bundles in GemPages by adding a bundle section or block through the editor’s Template Library (for both v6 and v7 versions), then linking your Shopify product listings to each product module.
4. Why is my product bundle not showing on the live page?
Make sure the bundle product listings are already created and active in Shopify, then add them to the bundle block/section inside GemPages.
After selecting the products in the Product Module, you must click Save and Publish in GemPages so the bundle displays on the live store.
If you have more than 5 active bundles in Shopify, deactivate unused bundles to ensure the feature works properly.
5. How can I scroll directly to a product bundle on the page?
You can scroll directly to a product bundle by linking a button to the bundle element using the Scroll to option.
- First, select the button that you want customers to click to scroll down to the product bundle.
- Next, in the Link settings, turn on the link option. From the link type dropdown, choose Scroll to.
(To get the class of the bundle element, right-click on the bundle section in the editor, then select Copy → Copy class.)
- After that, paste the copied class into the Scroll to field.
- Make sure to replace the first dot (.) in the class name with a hashtag (#) before saving.
Once completed, clicking the button will automatically scroll customers to the product bundle section on the page.


Thank you for your comments