


About the Collection Banner
Collection Banner is an image or visual element displayed at the top of a collection page, representing the collection’s theme or purpose.

Dynamic banners allow each collection to showcase its unique banner image automatically based on the collection data from Shopify.
How to Dynamically Display a Collection Banner for Each Collection in GemPages?
To display the collection banner dynamically based on each collection, follow these steps:
Step 1: Add or Change Collection Featured Image in Shopify (Optional)
Note: If you’ve already added images for your collections, you can skip this step.
- Log in to your Shopify Admin. Go to Products > Collections.
- Select the collection you want to customize.
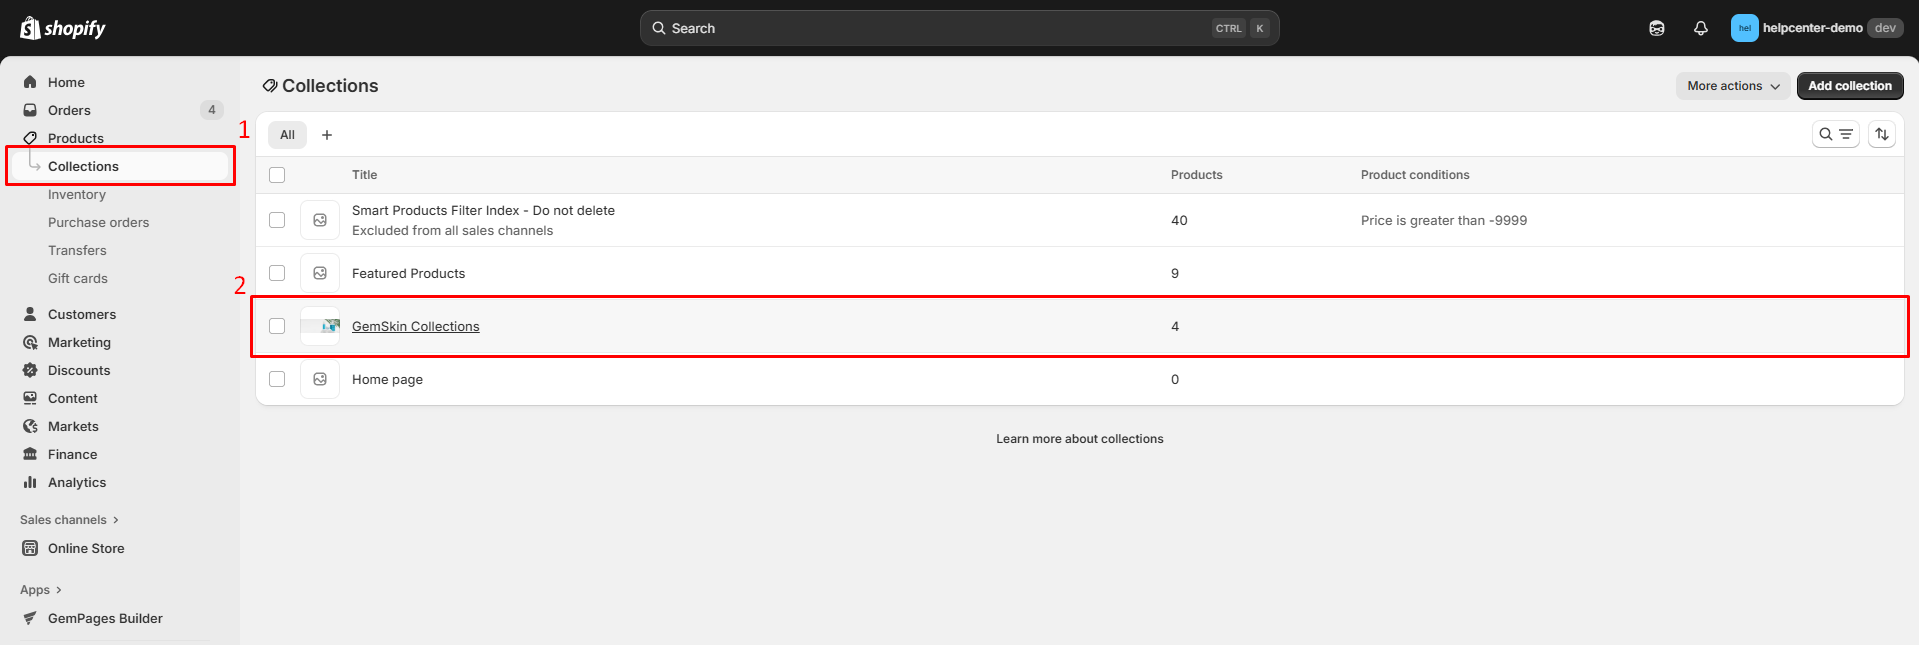
- Under the Image section, upload or change the featured image for the collection.
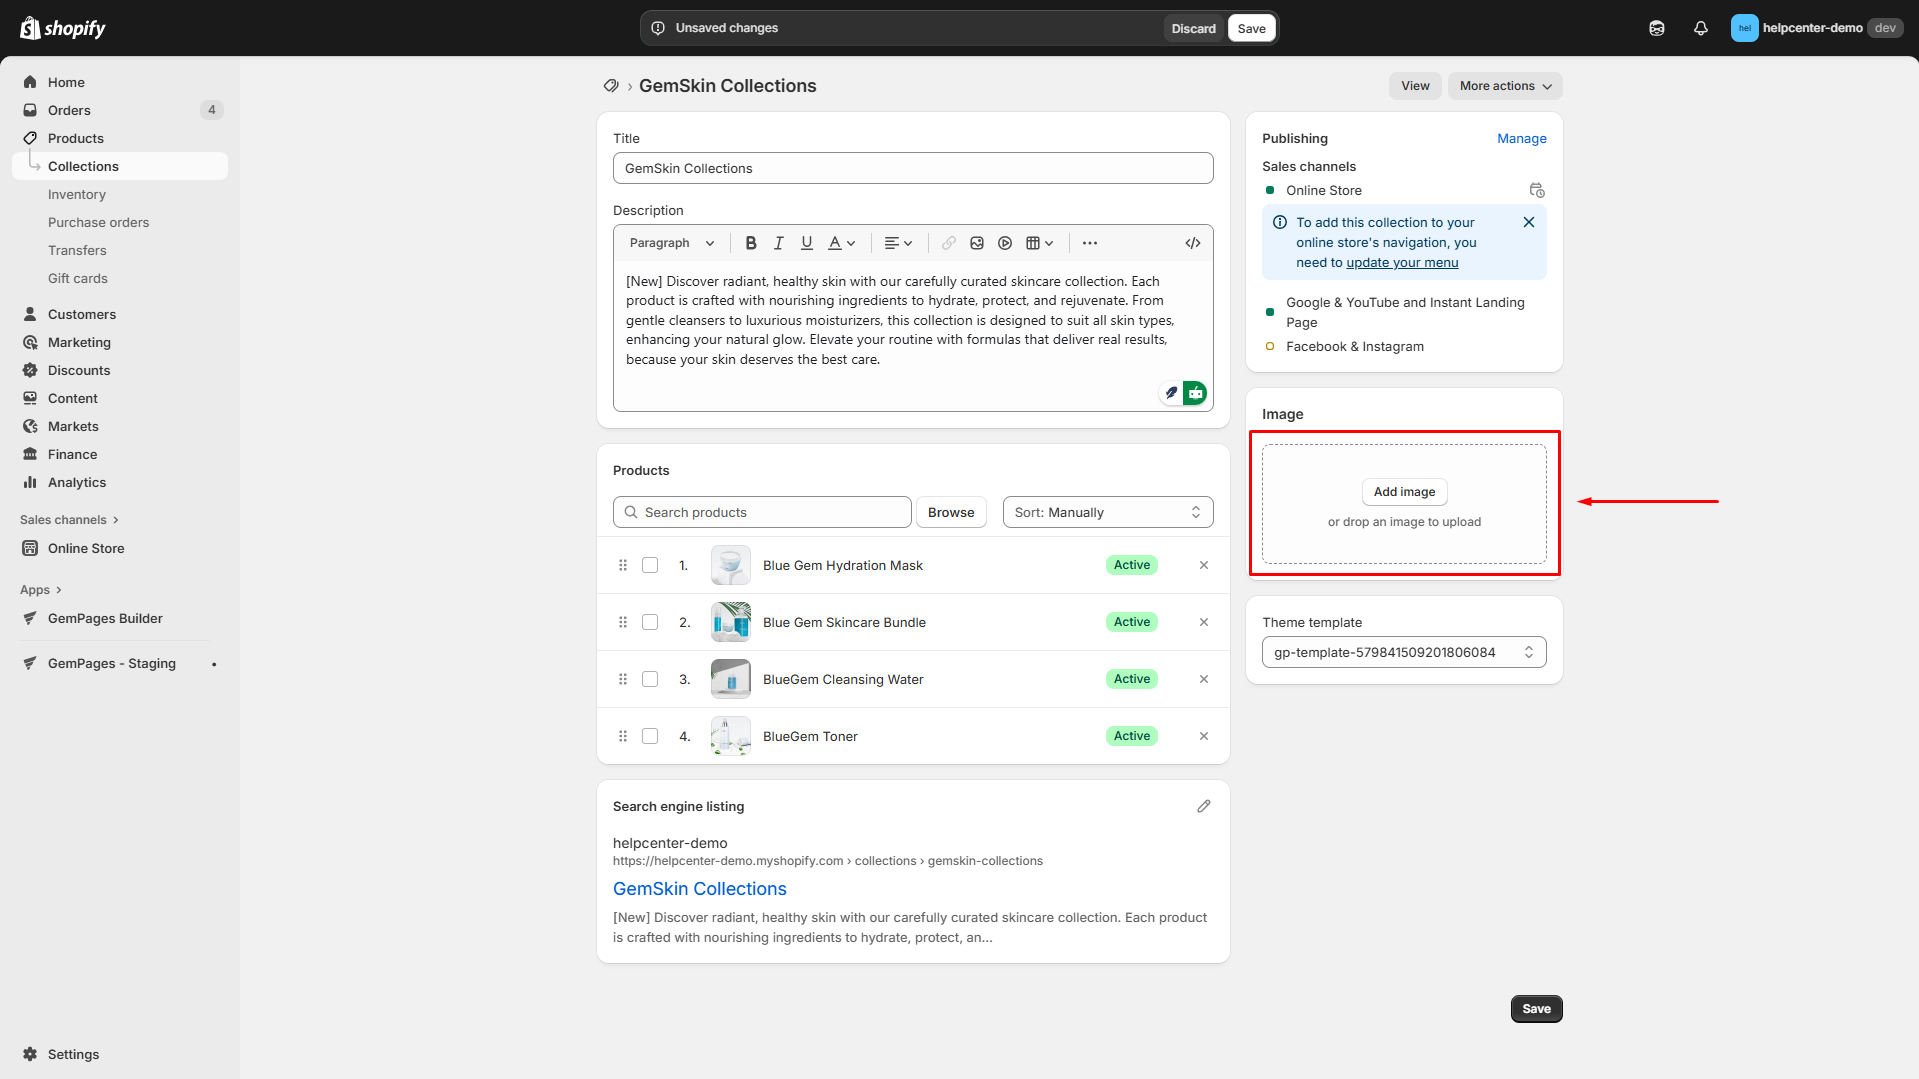
This image will serve as the banner for the corresponding collection.
- Once done, hit Save to apply your changes.
Step 2: Create a Collection Page in GemPages
For a detailed guide on creating collection pages, refer to this article: How to Create a New Collection Page.
- Access the GemPages dashboard and click on the Create new page section.
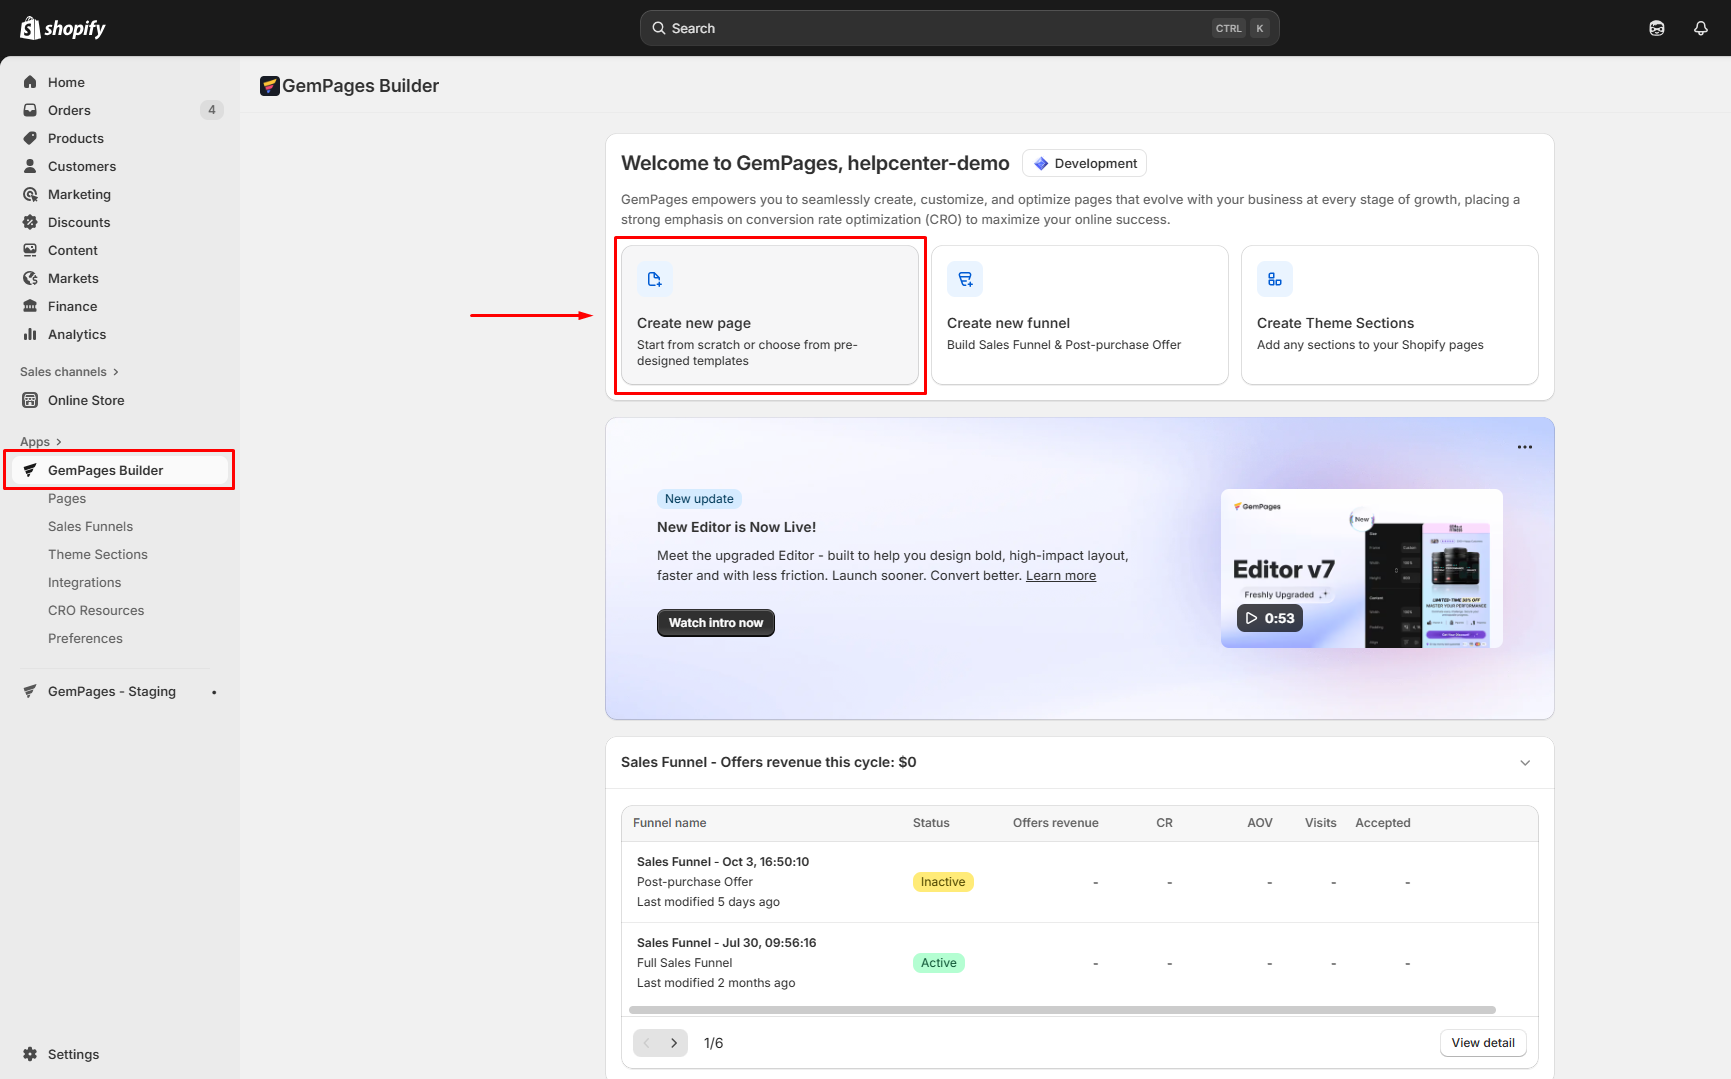
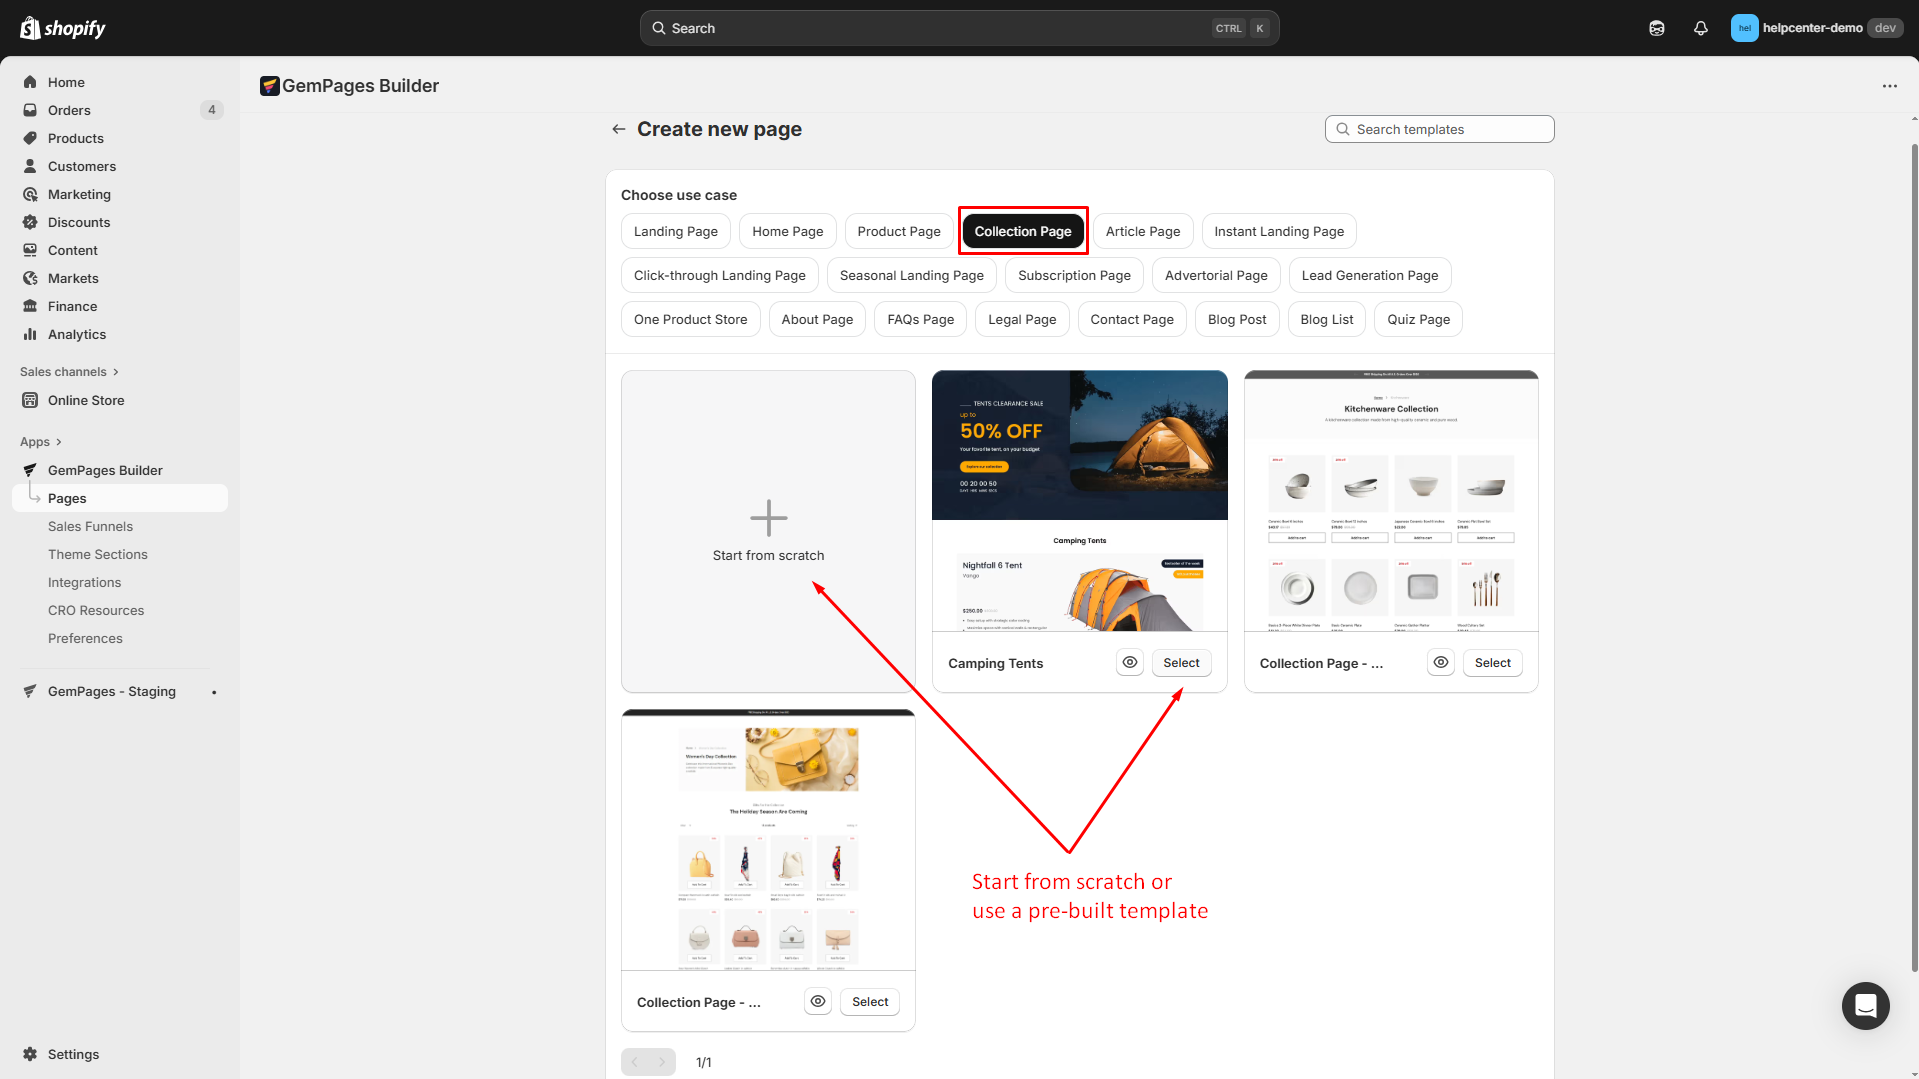
- Select Collection as the use case. Then, you can start building a new collection page from scratch (blank page) or use a pre-built template.
Step 3: Assign collection
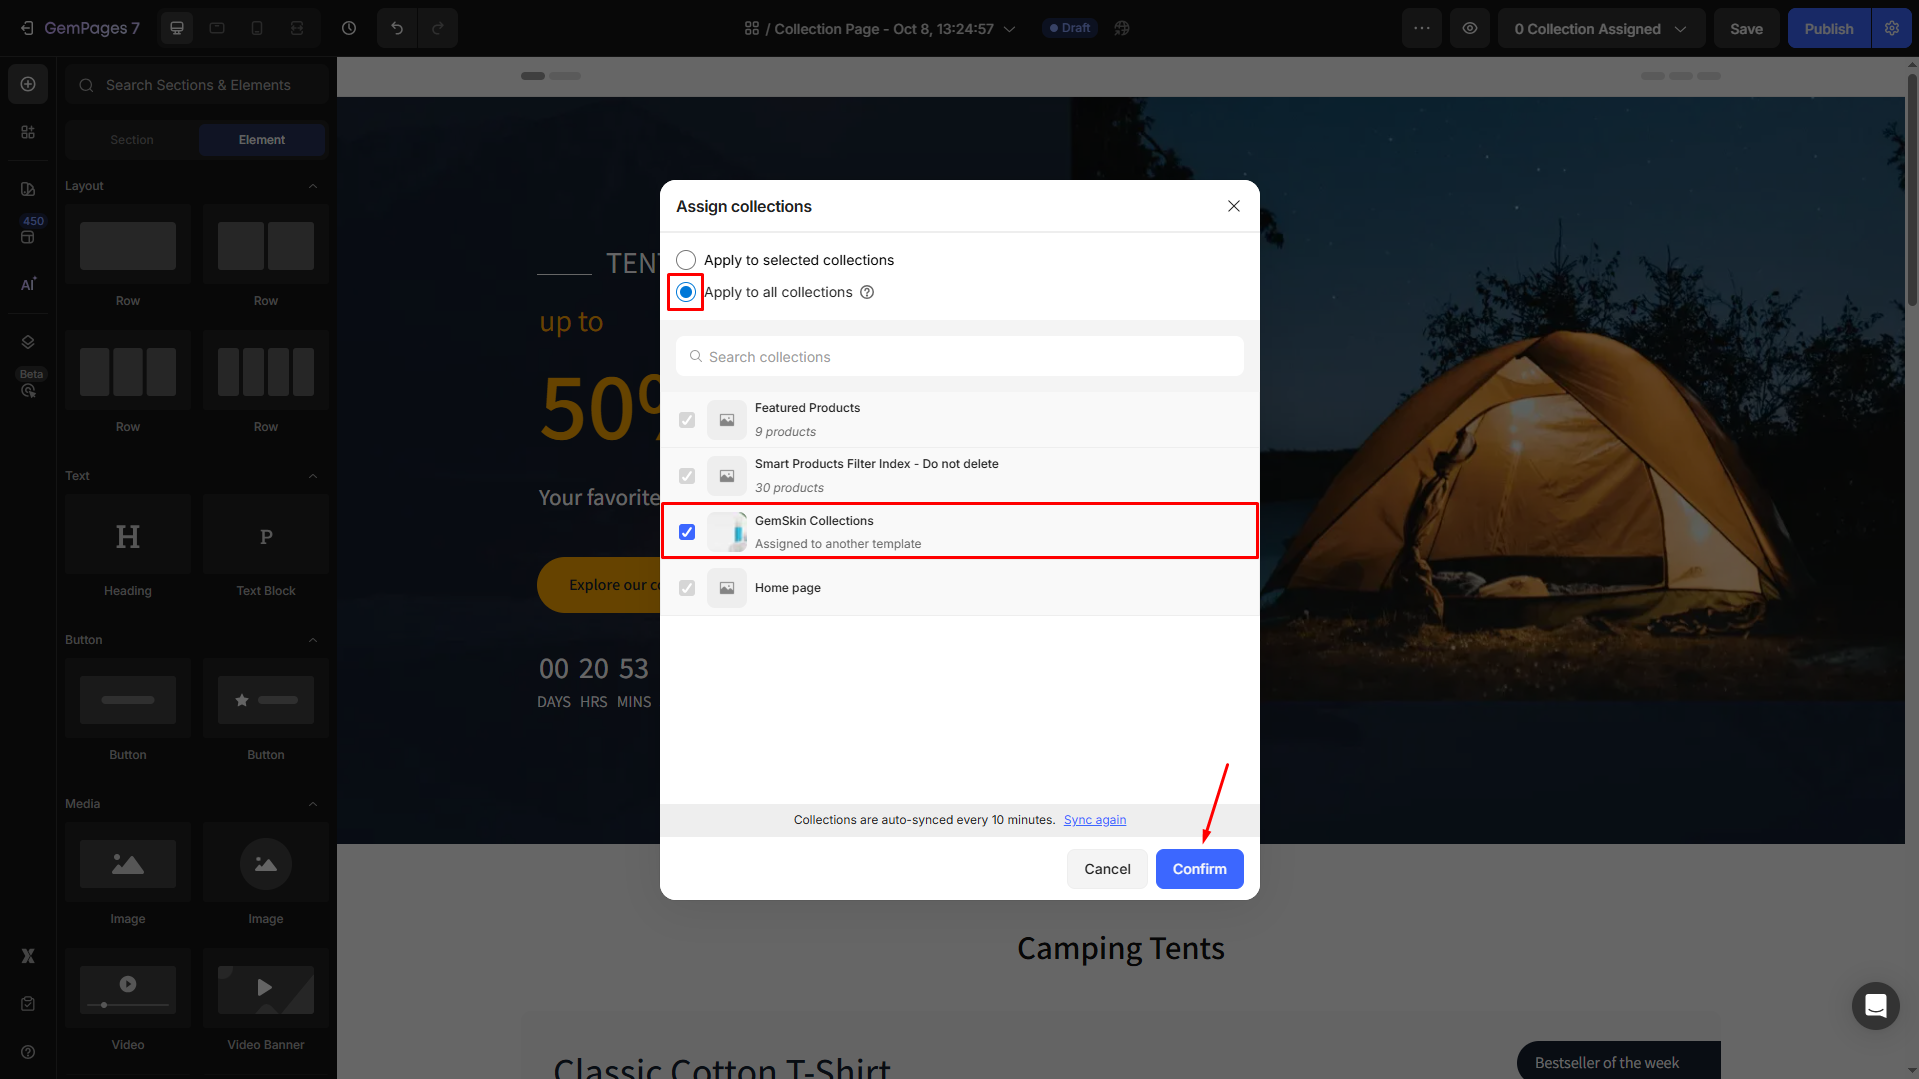
In the top bar, click on “0 Collection Assigned” to assign your collection to this collection page.
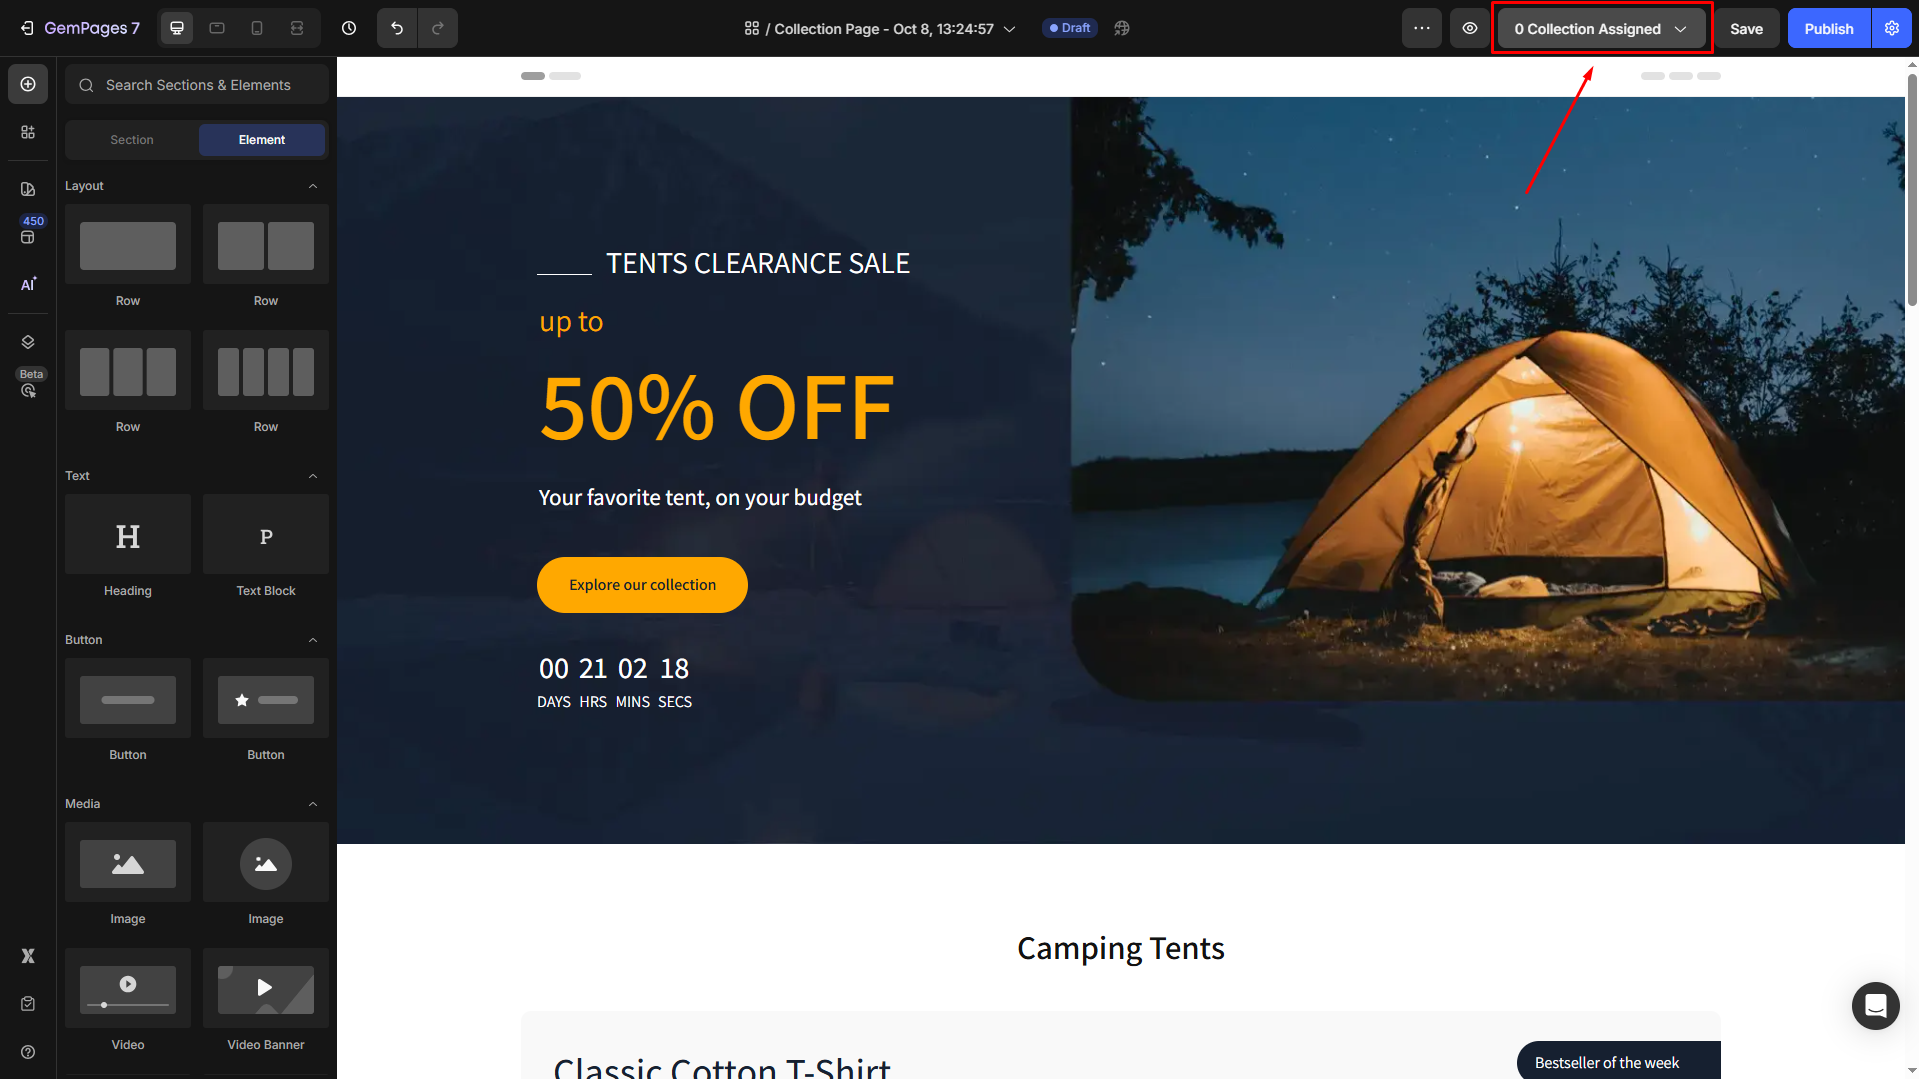
You can apply this page to all collections or select one/several preferred ones.
- All Collection Pages: The template will be applied to every collection in your store.
- Specific Collections: Select the collections you want to apply this template to.
For example, we choose the GemSkin Collections.
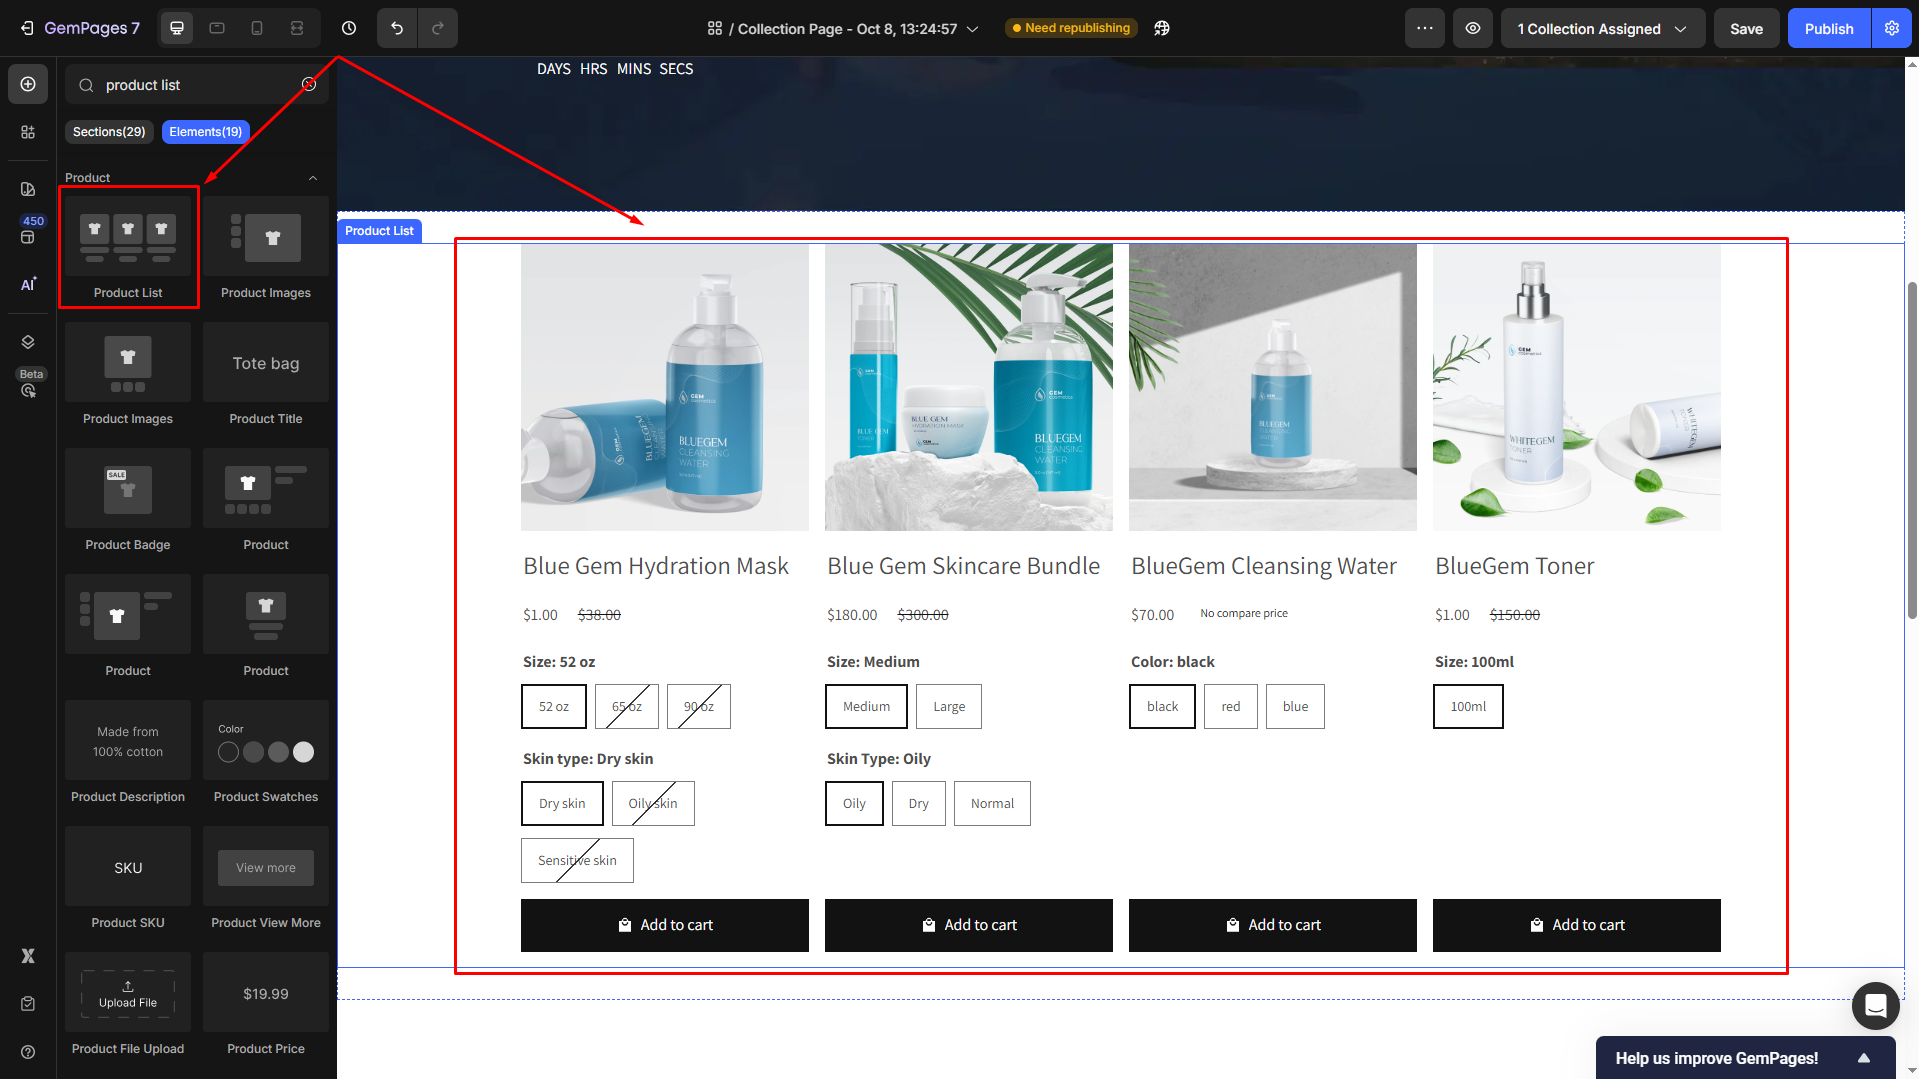
Step 4: Add necessary collection elements
From the left sidebar, you can drag and drop several elements tailored for collection, such as the Product List Element.
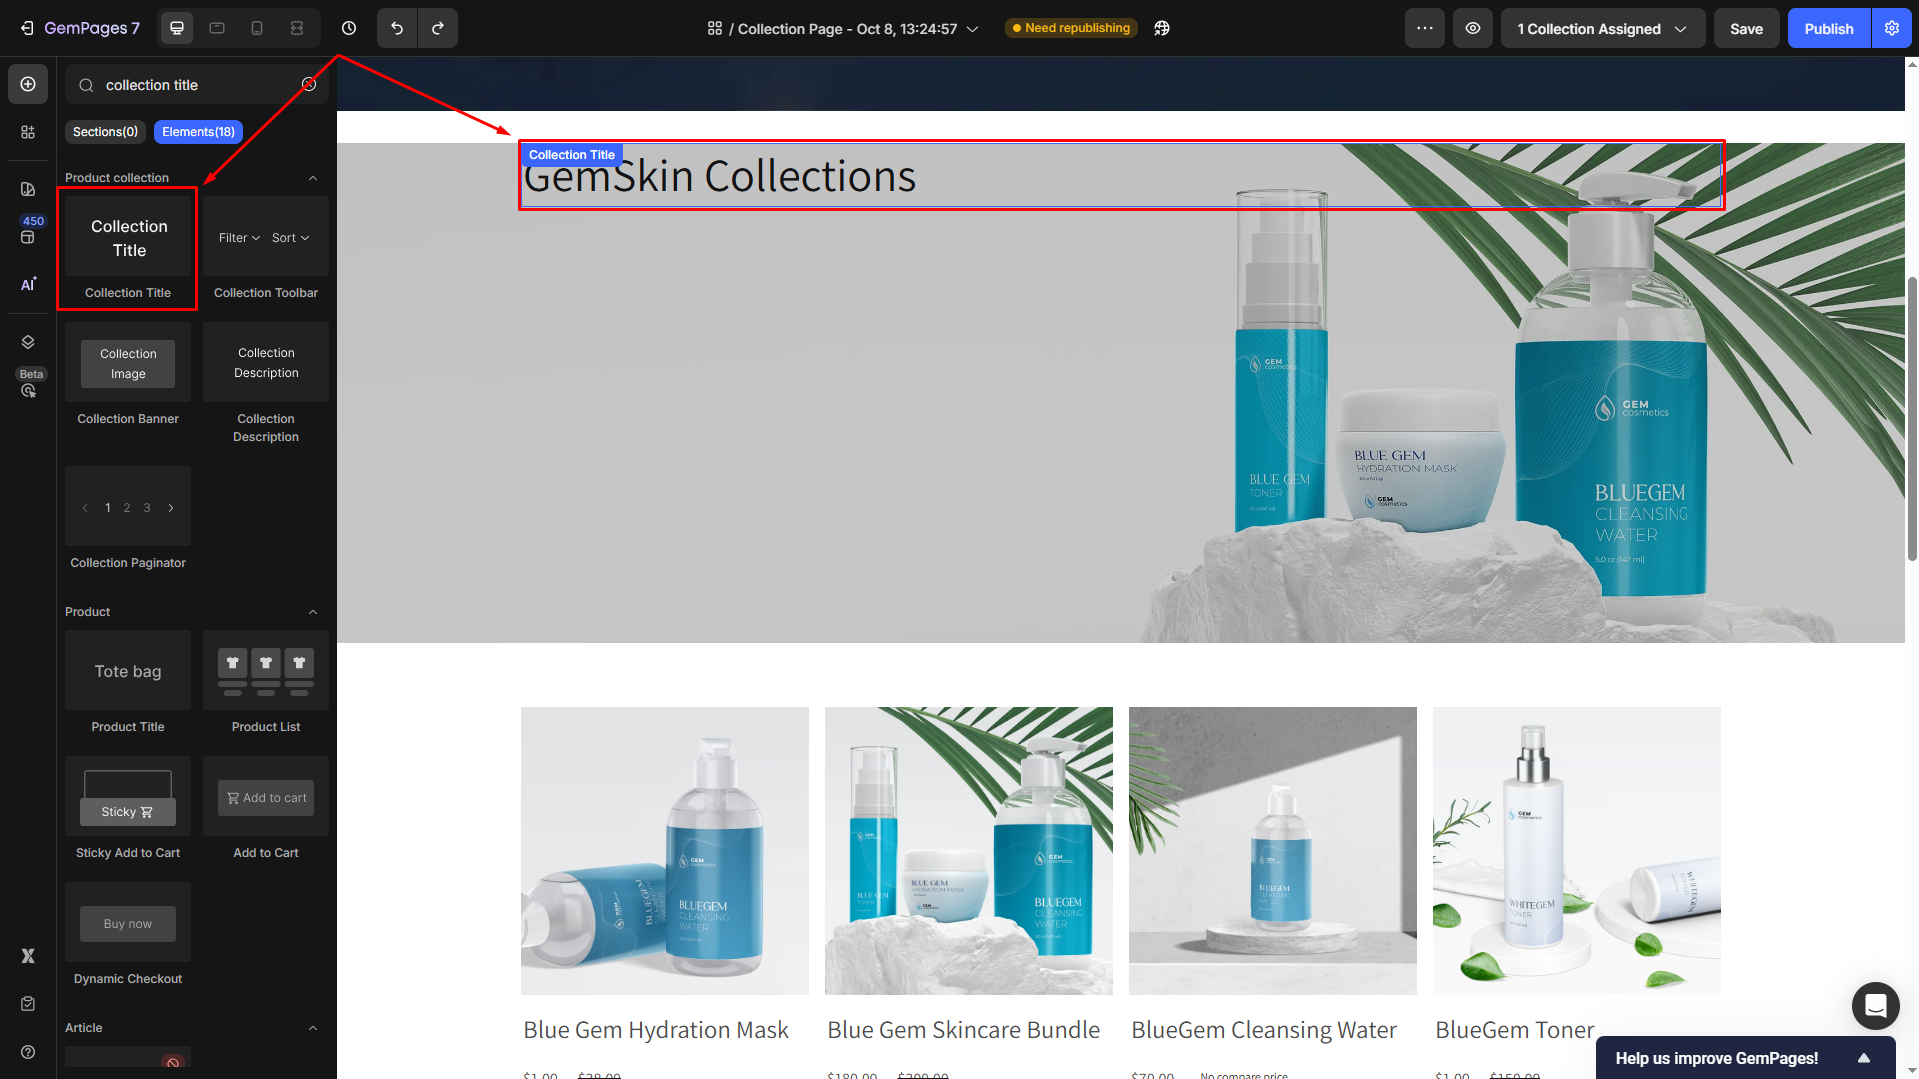
Step 5: Add Collection Banner Element
- In the GemPages editor, drag and drop the Collection Banner element onto your Collection Page layout.
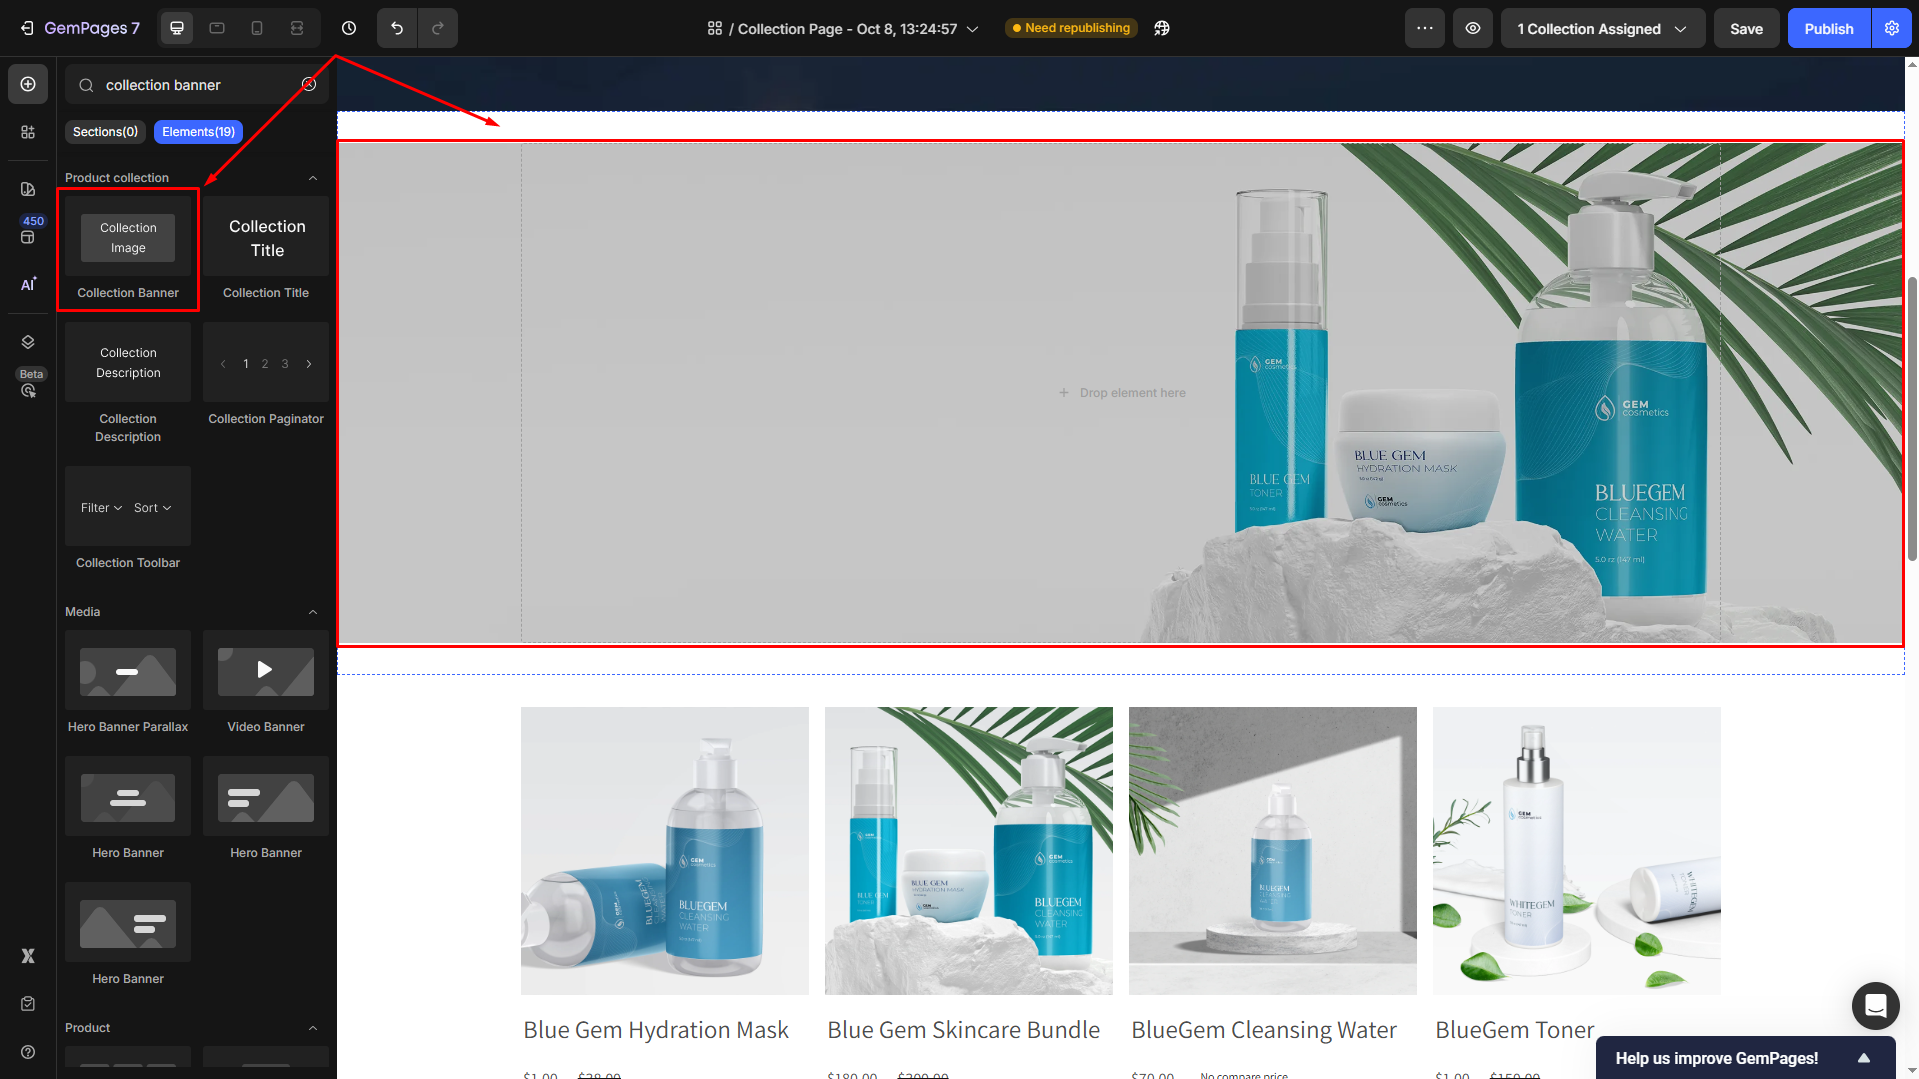
The banner will dynamically display the featured image of the current collection viewed by the customer.
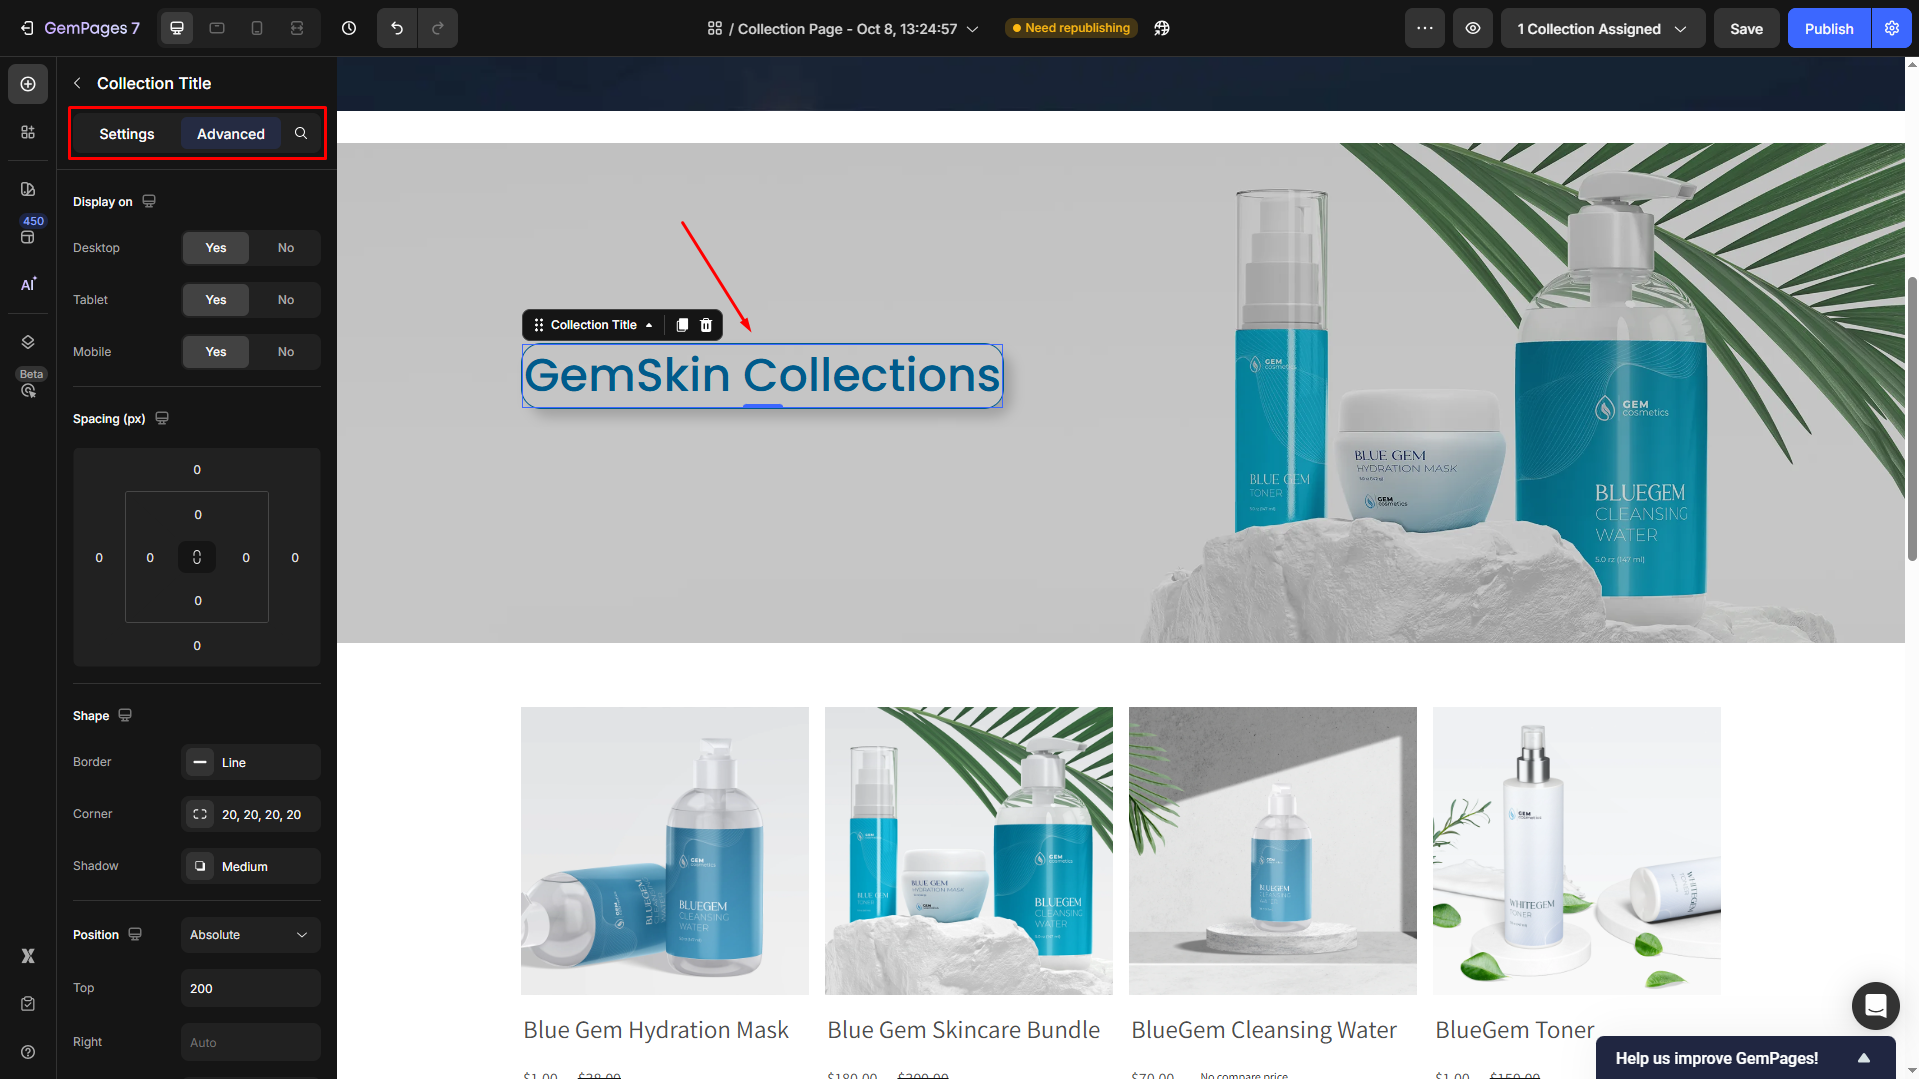
You can customize the banner’s size, alignment, and style using the settings panel in the left sidebar.
- Add other dynamic collection elements to the banner, such as the collection title, description, etc.
This ensures each collection page updates correctly with its unique products, titles, and features from Shopify data.
Step 6: Save and publish
- Once you’ve completed designing the Collection Page, click Save, and your dynamic banners are ready to display.
- You can preview the page to check the results before republishing your page:
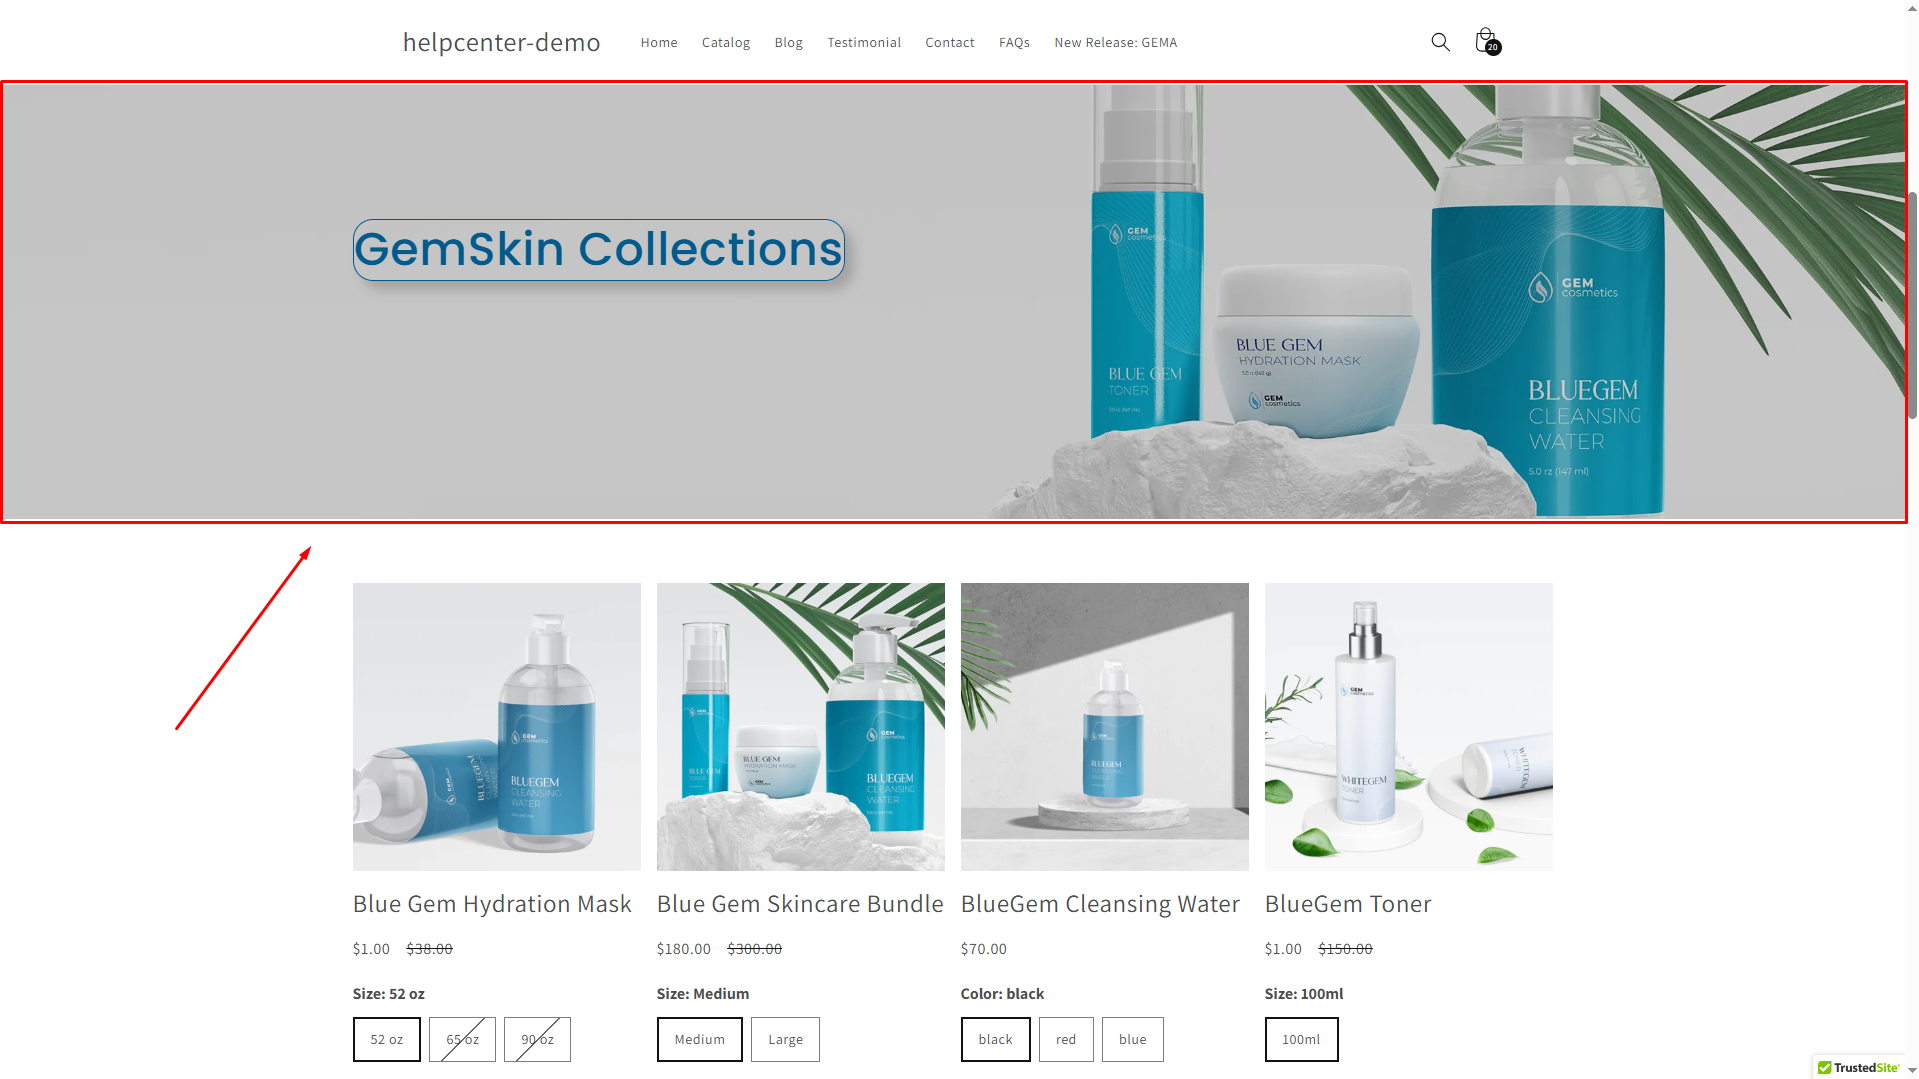
You’ve now set up a fully dynamic Collection Banner that automatically pulls data from Shopify. Each collection page will show its own banner, creating a personalized and cohesive browsing experience.
FAQs
1. Why is my collection banner not showing the correct image?
Make sure you’ve uploaded a featured image for each collection in Shopify and assigned the correct collections to your GemPages template.
If the issue persists, try republishing the page or waiting a few minutes for Shopify data to sync.
2. Can I use a different banner image than the Shopify featured image?
No. The Collection Banner element automatically syncs with the featured image from Shopify, and this image can’t be changed or replaced manually in GemPages.
3. Can I display the collection title or description on the banner?
Absolutely. Add the Collection Title and Collection Description elements inside the banner section. They will automatically pull dynamic data from Shopify for each collection.
4. Does this setup work for both mobile and desktop?
Yes. The Collection Banner element is responsive by default, but you can customize its size, padding, or alignment separately for mobile and desktop views under the Advanced tab.
5. How do I change the banner layout for specific collections?
If you want different layouts per collection, create multiple Collection Page templates and assign them individually using the “Assign Collection” feature in the GemPages Editor.


Thank you for your comments