


Assign a Collection to Your Collection Page
Within GemPages v7, you can assign a collection to your collection page directly in the dashboard or enter the editor to proceed. Follow these steps below:
From the GemPages Dashboard
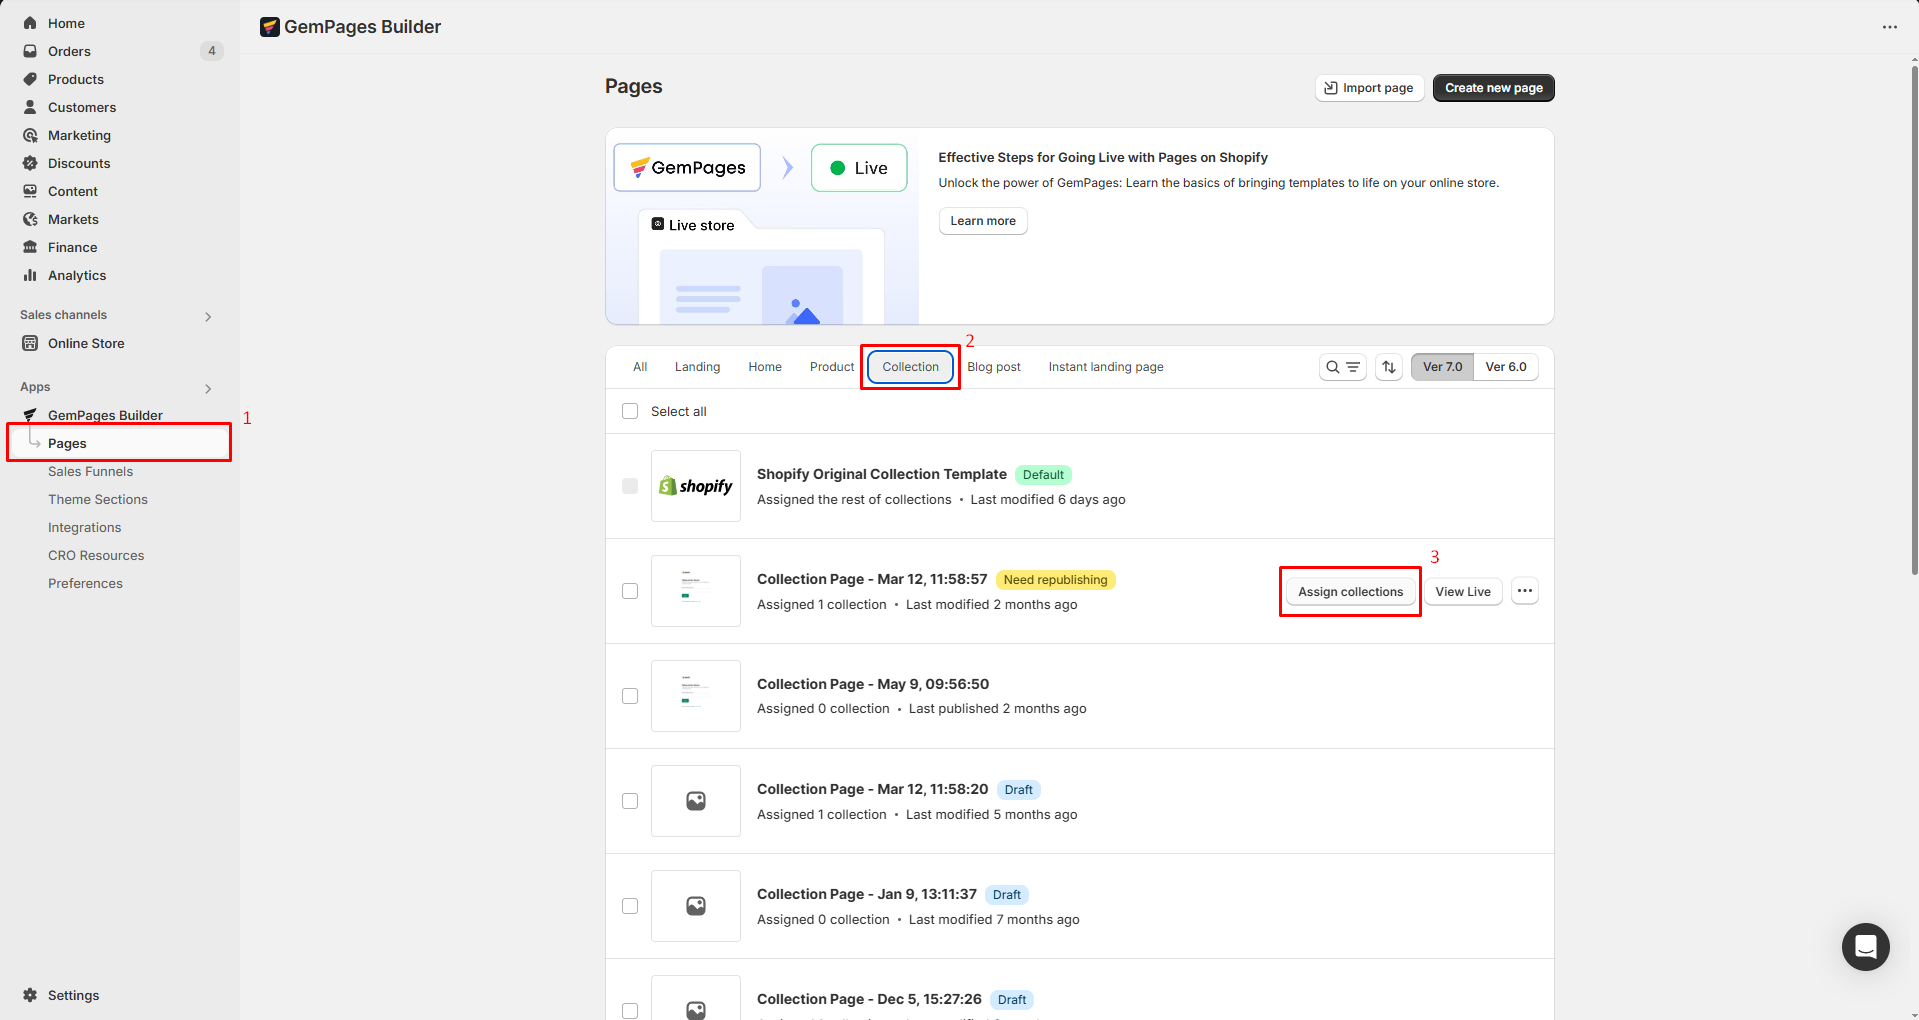
- Log in to your Shopify admin and access the GemPages Builder app.
- Go to Pages > Collection to see all your collection pages built with GemPages
- Hover on the target collection page and click Assign collections to assign a collection to this page.
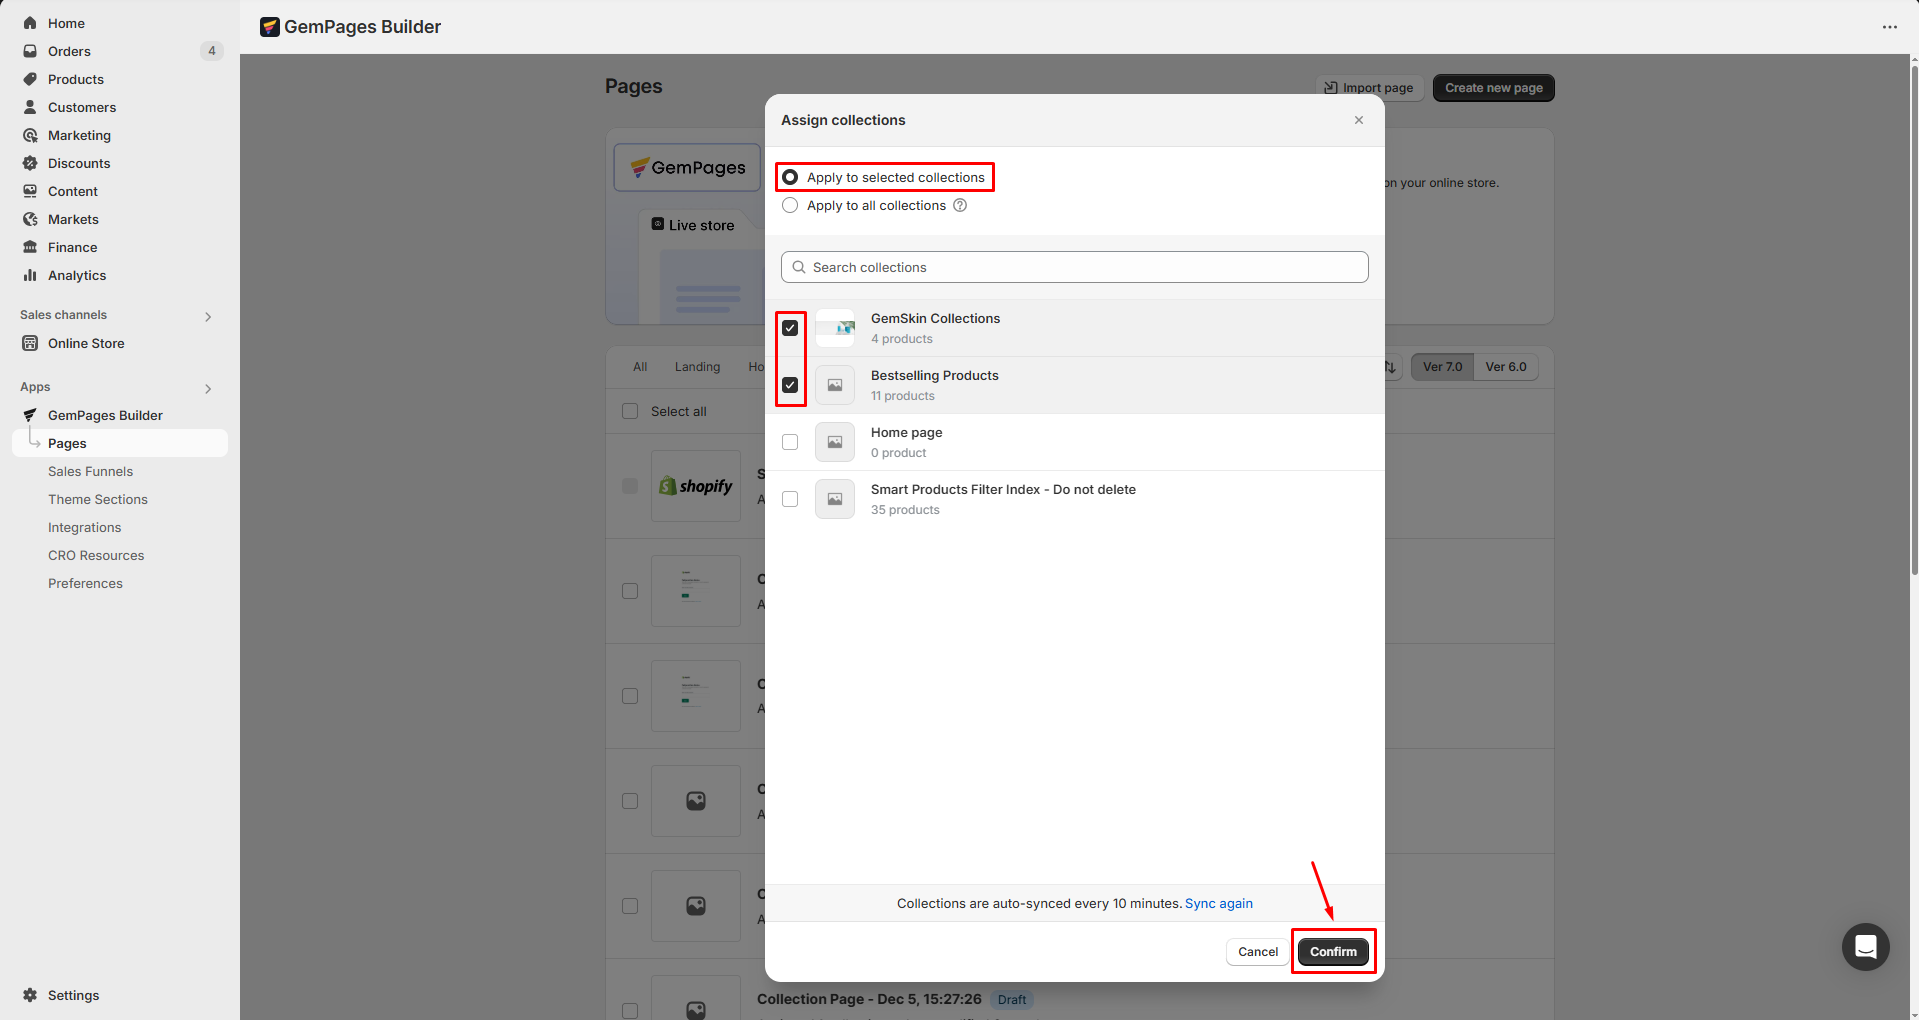
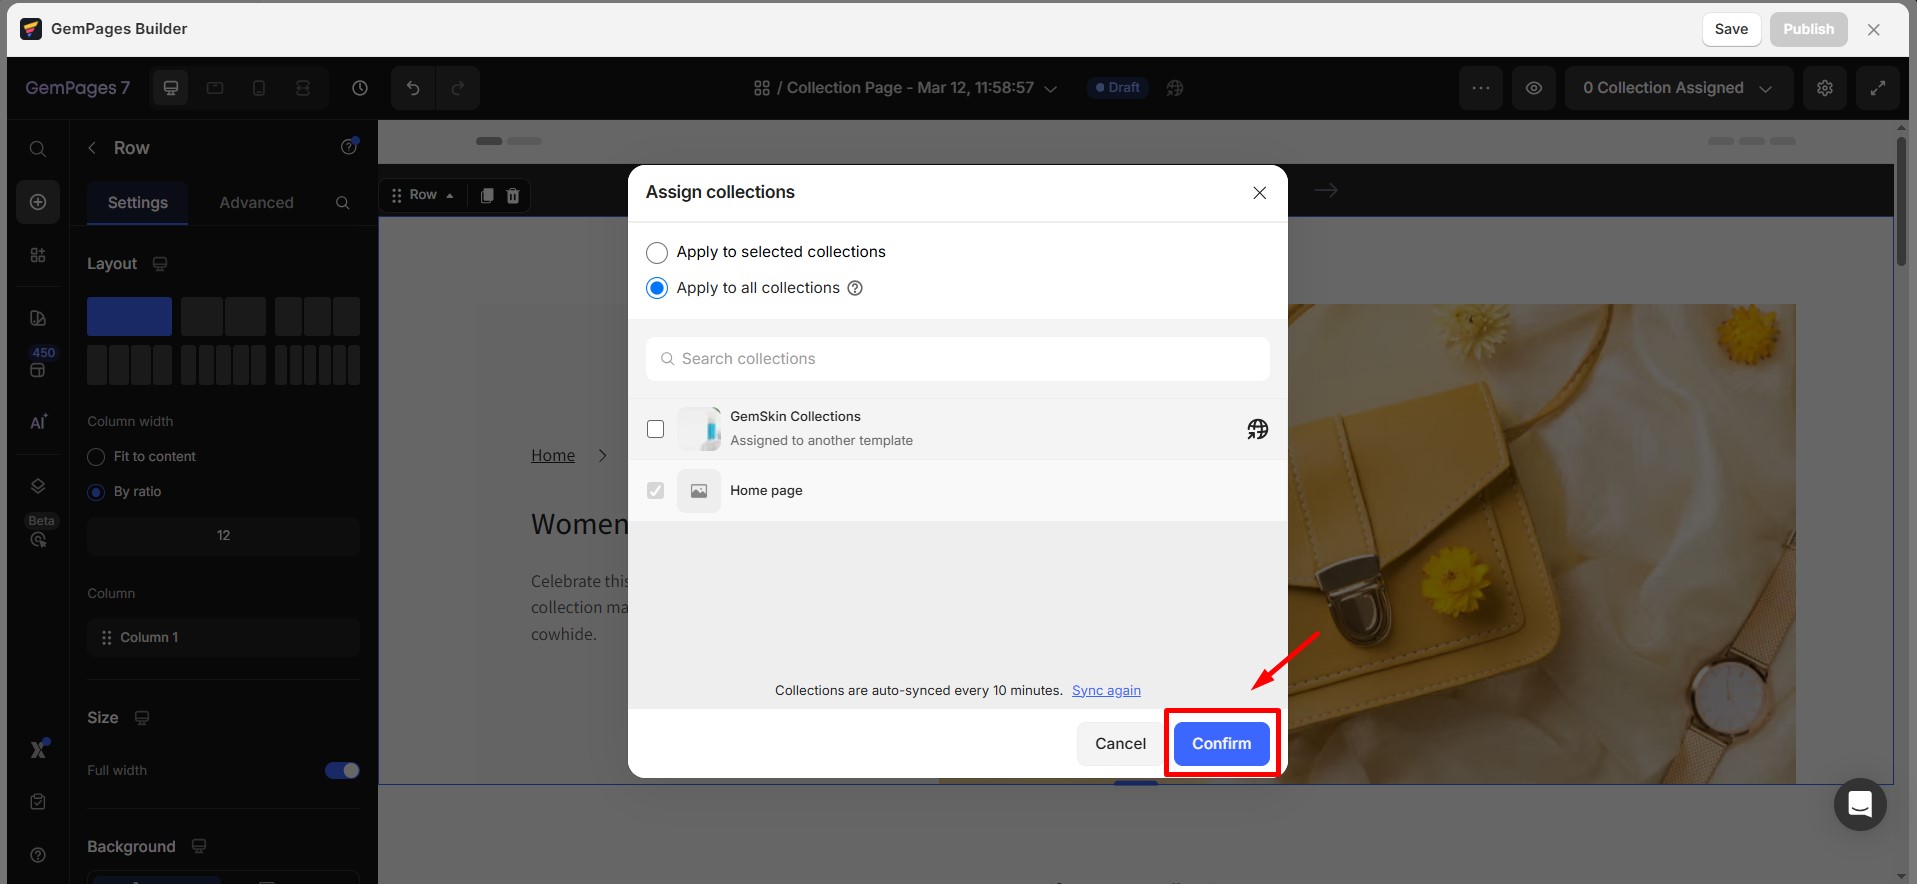
- In the dialog, you have two options:
1. Apply to Selected Collections
This option allows you to manually select specific collections that will use this template.
Click on Select Collections, then choose the collections you want to assign.
2. Apply to All Collections
This option will replace the default collection page and apply this template to all collections in your store, except those already assigned to another template.
If you want all collections to follow a uniform design, this is the recommended option.
- Once done, hit the Confirm button to save your update.
From the GemPages Editor
Step 1: Access GemPages Editor
- From the GemPages Dashboard > Pages, click on the target collection page to enter the editor.
- If you haven’t created a collection page yet, refer to this article to set up one.
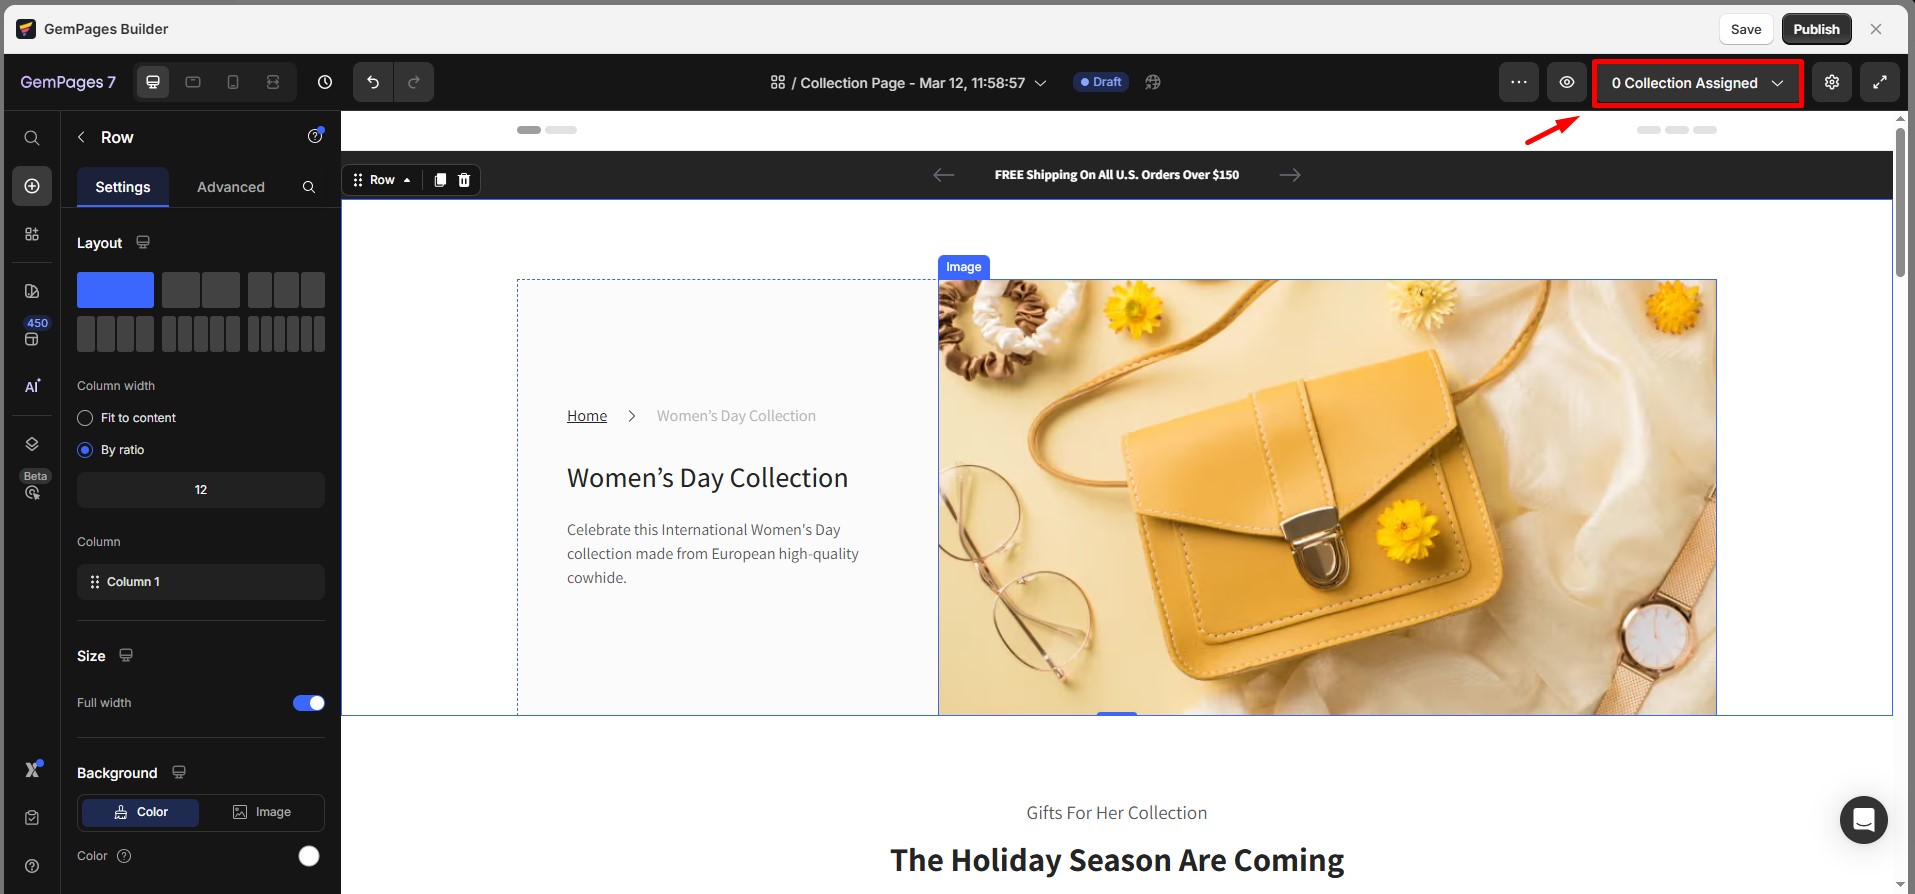
Step 2: Assign collections to the page
Once you have selected the collection page template, you will see an option to assign collections.
GemPages enables you to link multiple Shopify collections to a single collection page template. This way, you can showcase products from various collections together on a single page by choosing the collections you want while setting up your template.
- Choose Apply to all collections if you want to assign all available collections to your collection page.
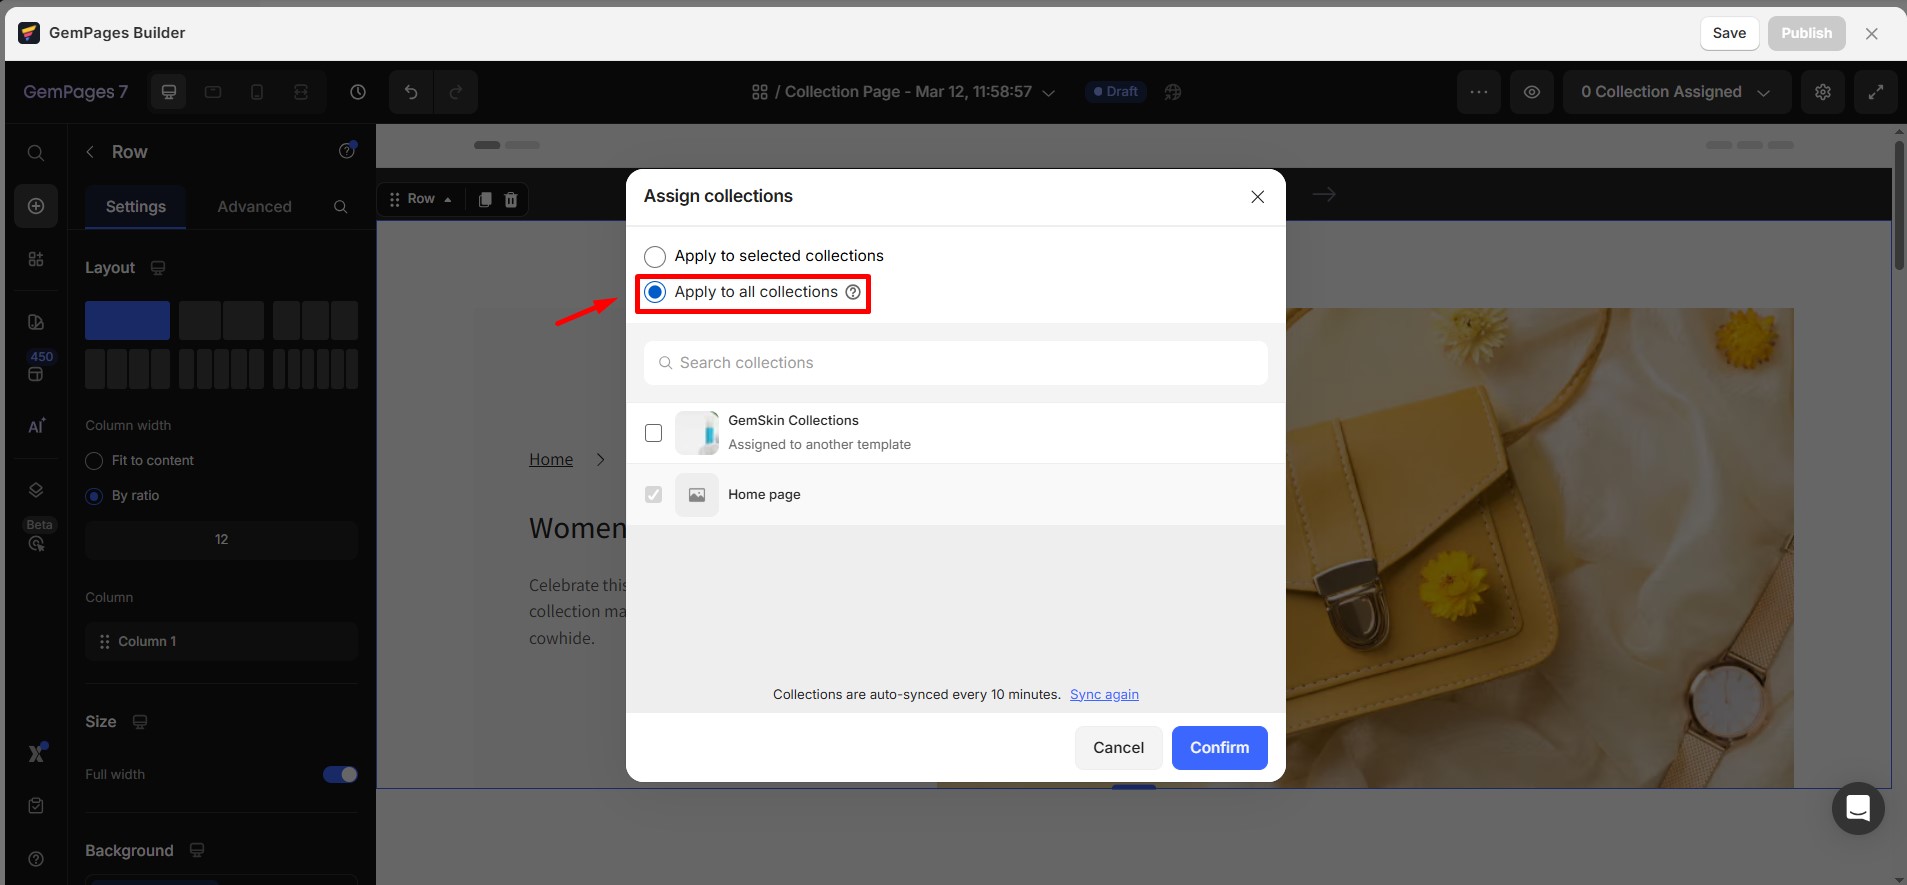
- If you prefer to select one or multiple collections, select Apply to selected collections and click the box next to the target collection you want to assign.

Step 3: Confirm and Save
- Review your selection to ensure the correct collections are assigned.
- Click Confirm to finalize the assignment.
- Click Save & Publish to apply the changes to your store.
Notes:
- If a collection is already assigned to another template, it will not be affected when choosing “Apply to All Collections.”
- You can edit or change the assigned collections anytime by revisiting the Collection Pages section in GemPages.
- If you’ve recently created or updated collections in Shopify but don’t see them listed in GemPages, you’ll need to sync the data so they appear in the selection list. To do this:
- Go to Product Source in GemPages.
- Click the Sync Collections button.
FAQs about Assigning Collection to the Collection Page
1. How do I assign a collection to a collection page in GemPages?
Follow these steps below to assign collections to your collection page:
- Go to GemPages Dashboard > Pages > Collection
- hover over your target page, click Assign collections
- Choose either “Apply to Selected Collections” or “Apply to All Collections”
- Then hit Confirm.
2. Can I use one collection page for multiple collections?
Yes. You can assign multiple Shopify collections to a single collection page template using the “Apply to Selected Collections” option in the dashboard or editor.
3. What happens if a collection is already assigned to another template?
It won’t be affected when you choose “Apply to All Collections”. To change its assignment, you’ll need to manually reassign it using “Assign collections” from the Collections in Pages section.
4. Why are some collections greyed out when assigning?
Collections that are already assigned to another collection page template cannot be selected again.
To use them for a different template, you must change their assignment first by re-opening the Assign collections dialog on the page they are currently linked to, and updating the selection.
5. Can I unassign or reassign a collection to another page?
Yes. Simply go to GemPages > Pages > Collection, find the page you want to modify, and click Assign collections again to update your selection.
6. How can I make one collection page the default for all collections?
Select your collection page, click Assign collections, and choose “Apply to All Collections”. This makes the design template apply store-wide, except for collections already using another template.
7. Can I link product pages to a collection page?
- The collection page displays products from the assigned Shopify collection.
- Each product card is automatically mapped to its Shopify product page.
- When customers click a product, they are redirected to the correct product page without any manual setup.
8. Can I change the order of products in a collection page?
The product order on a collection page is controlled by Shopify’s collection sorting settings, not by GemPages. GemPages displays products based on the selected collection’s order (such as manual order, best-selling, or newest). To change the product order, go to Shopify Admin > Products > Collections and adjust the sorting there. Any updates will automatically reflect on your GemPages collection page.


Thank you for your comments