This guide explains how to translate GemPages pages into different languages using Shopify’s translation features.
You’ll learn how to use Shopify Translate & Adapt for manual translation and third-party Shopify translation apps for automatic translation.
Why Translate Your Shopify Store?
If you sell to multiple regions, translating your Shopify store helps customers browse in their preferred language, improving both trust and conversion rates.
Shopify allows you to manage multilingual content through its Translate & Adapt app or compatible translation apps like Transcy and Weglot.
When no translation is provided, your store automatically displays content in its primary language. Translating GemPages pages ensures a seamless experience across all languages.
Before You Start
To translate your Shopify store and GemPages pages, ensure your store meets these requirements:
1. Your store is on the Basic plan or higher.
2. Your published theme supports multiple languages.
- All free Shopify themes are compatible.
- If you use a third-party theme, check with the developer for multilingual support.
3. Your theme includes a language selector. If not, you can add one using a translation app from the Shopify App Store.
4. You have installed either Shopify Translate & Adapt or another Shopify translation app (e.g., Transcy, Weglot).
GemPages supports both manual translation via Shopify’s native tools and automatic translation through third-party apps.
You can choose one of the following methods:
- Shopify Translate & Adapt – Free, manual translation with full control.
- Automatic translation apps – AI-powered translations for faster setup and scalability.
How to Translate GemPages from English to Other Languages?
When expanding your market internationally, translating your website’s content into multiple languages becomes crucial.
With GemPages, you have two main methods to translate your site’s content:
Method #1. Using the Shopify Translate & Adapt app
Shopify Translate & Adapt is an app created by Shopify that simplifies the translation and localization of your store’s content, helping merchants reach diverse audiences.
It supports theme, product description, and checkout translations for a seamless multilingual shopping experience. It also allows you to translate any text created with the GemPages Editor.
For more detailed instructions on how to use this app, you can refer to the article Shopify Translate & Adapt.
Follow these steps to install and set up this app in your Shopify store.
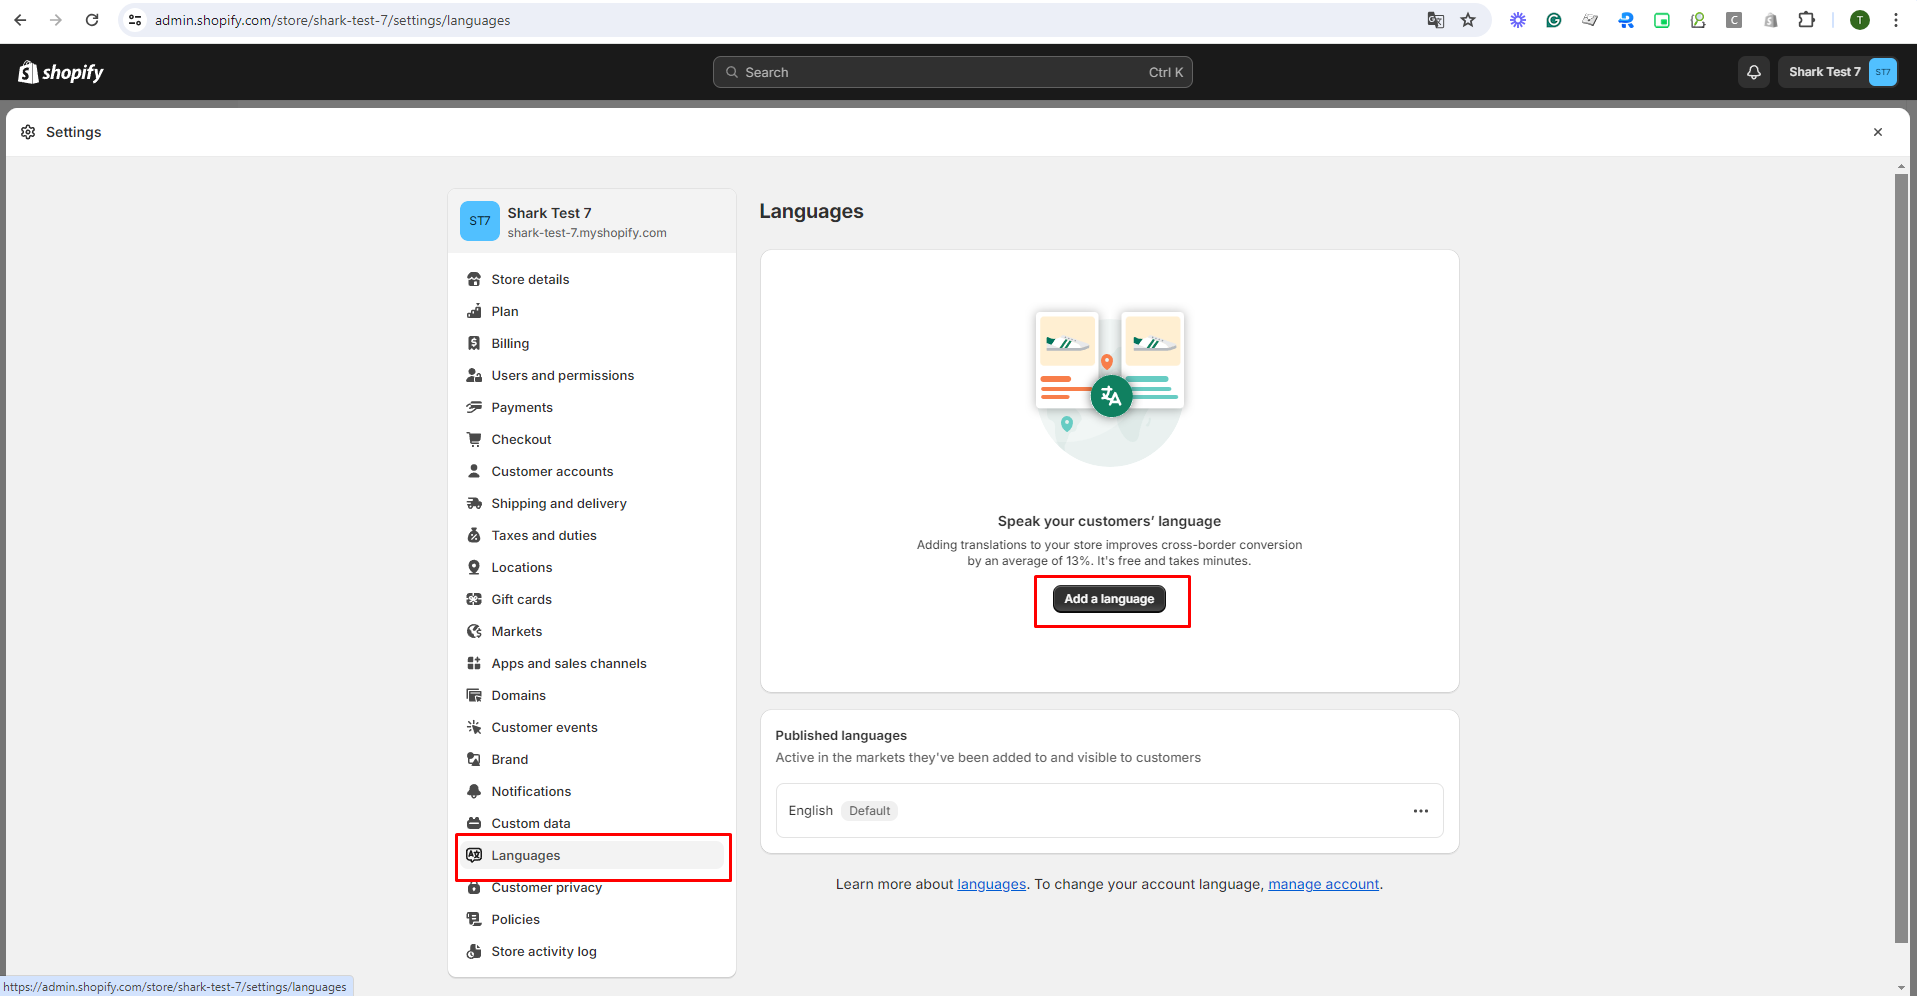
Step 1: Add language
Choose the language you want to translate for your site by clicking on “Add language”.
Step 2: Translate content
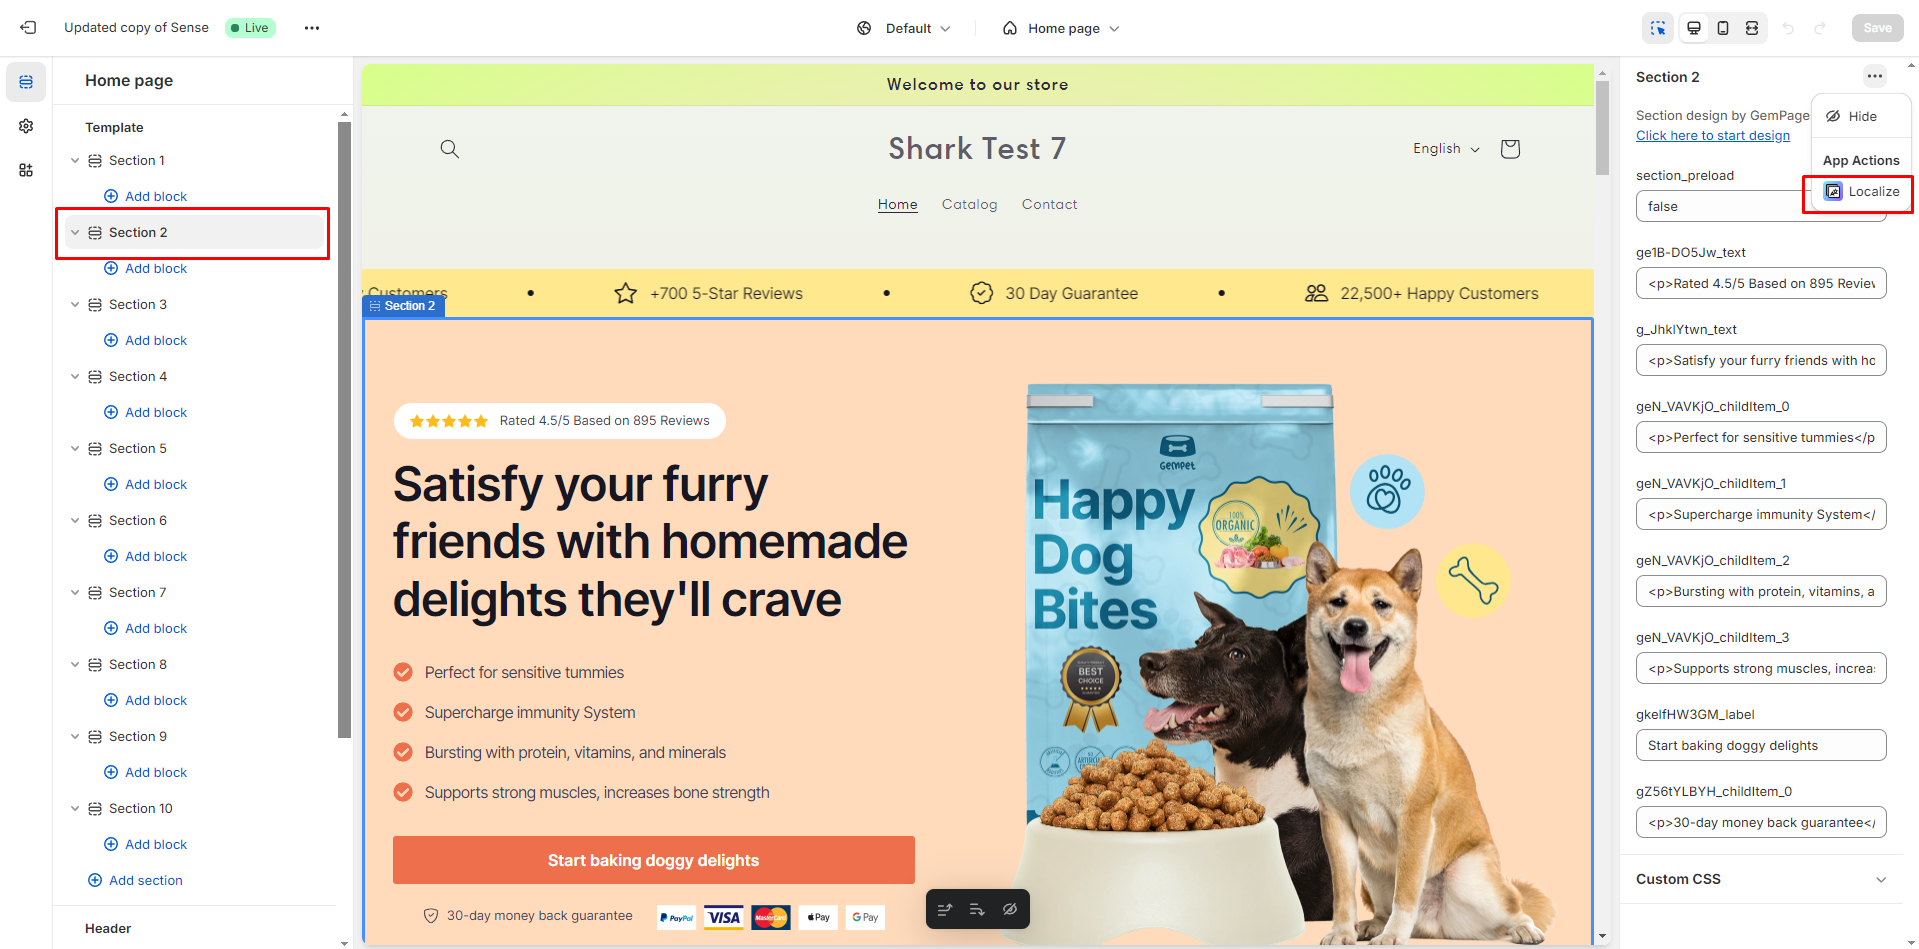
- From Shopify Theme settings, open a GemPages Template that you want to translate.
- Choose a section and click “Localize” as the picture below.
When you enter this screen, you’ll see the interface split into two columns:
- The left column displays the original content in English.
- The right column is where you can translate it into your desired language.
You can go through each piece of content one by one, ensuring that each section is accurately translated and personalized for the target language.
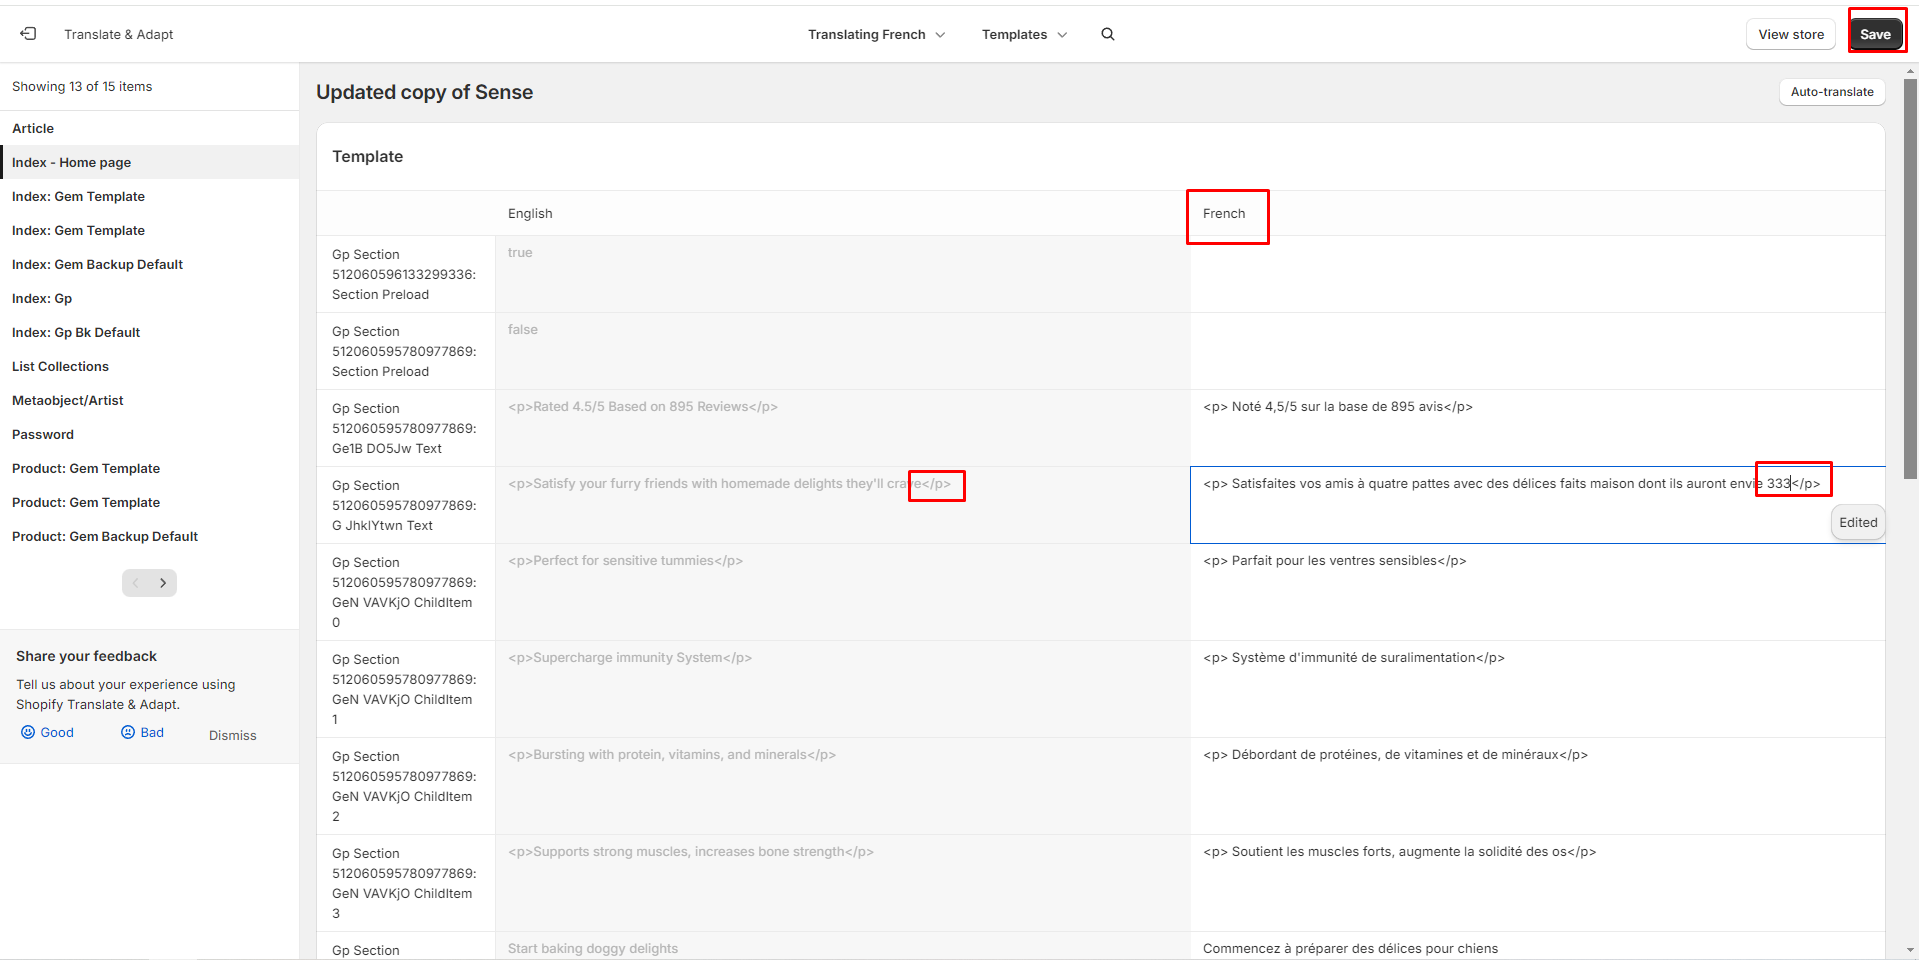
Then, choose auto translate or manual translate, and click “Save”.
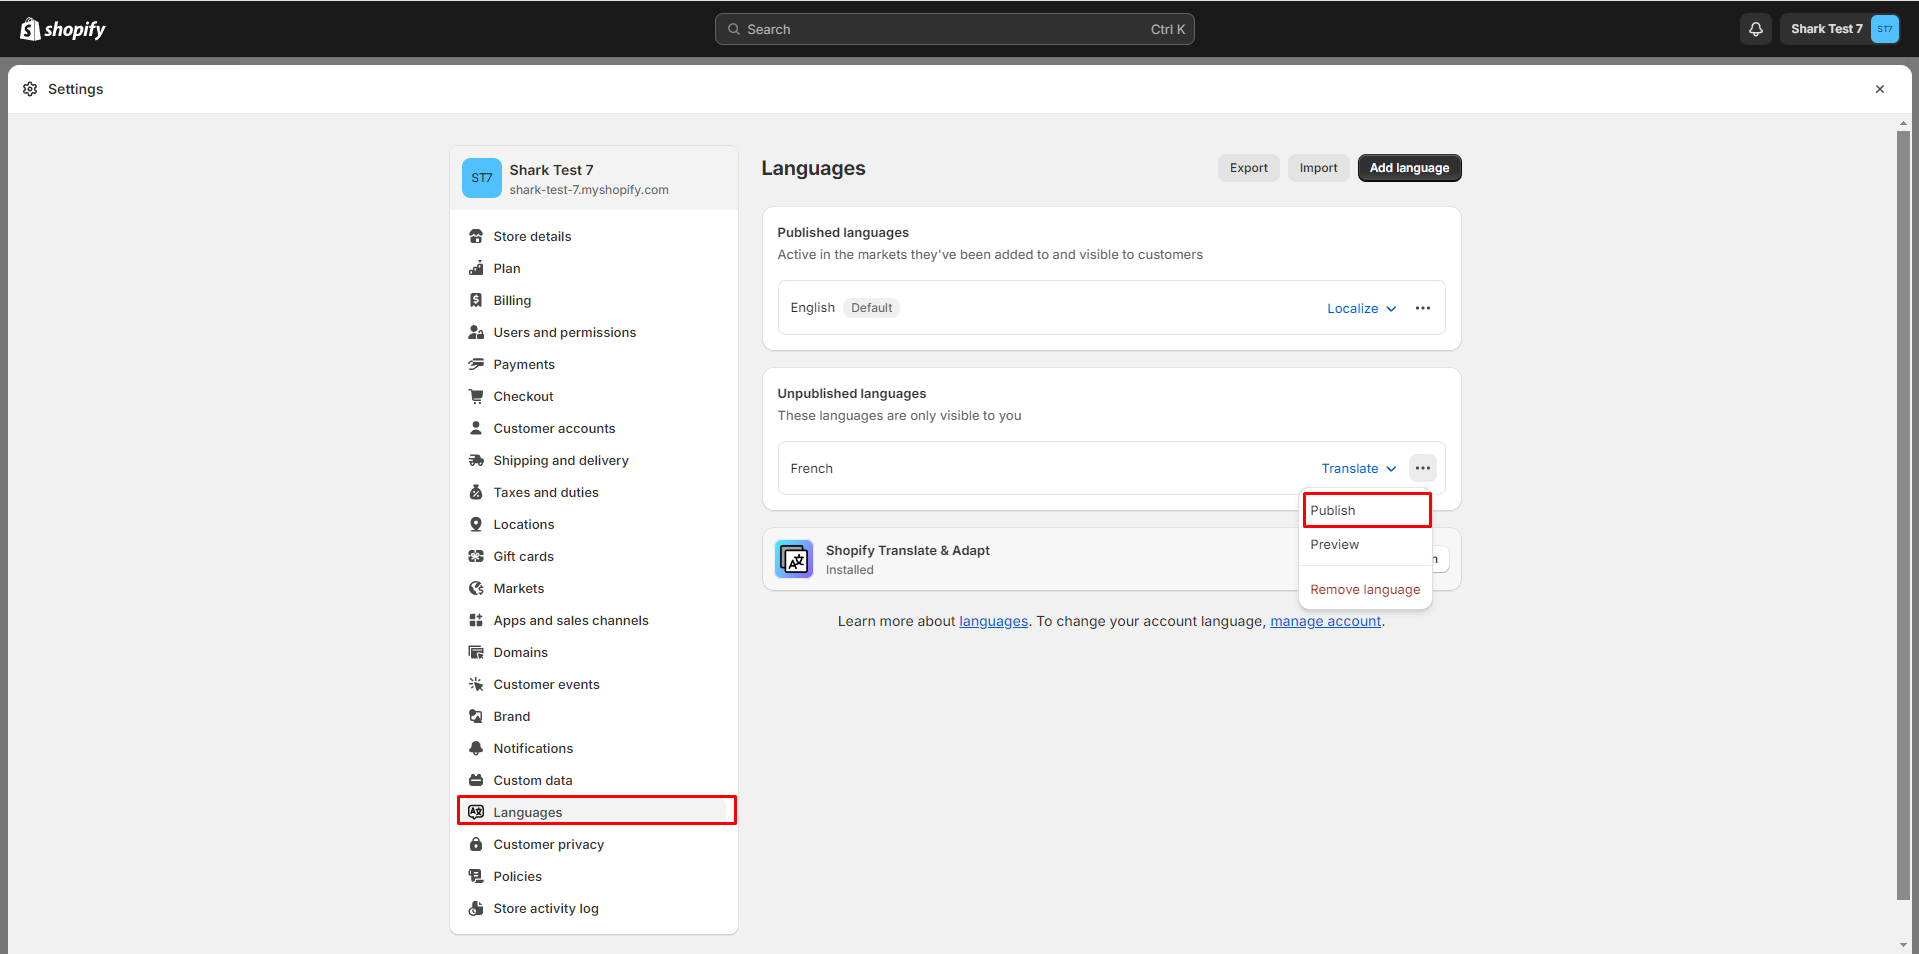
Step 3: Publish the new language
Click “Publish” to publish the new language on your Shopify store.
Step 4: Add the language you want to translate to the market section.
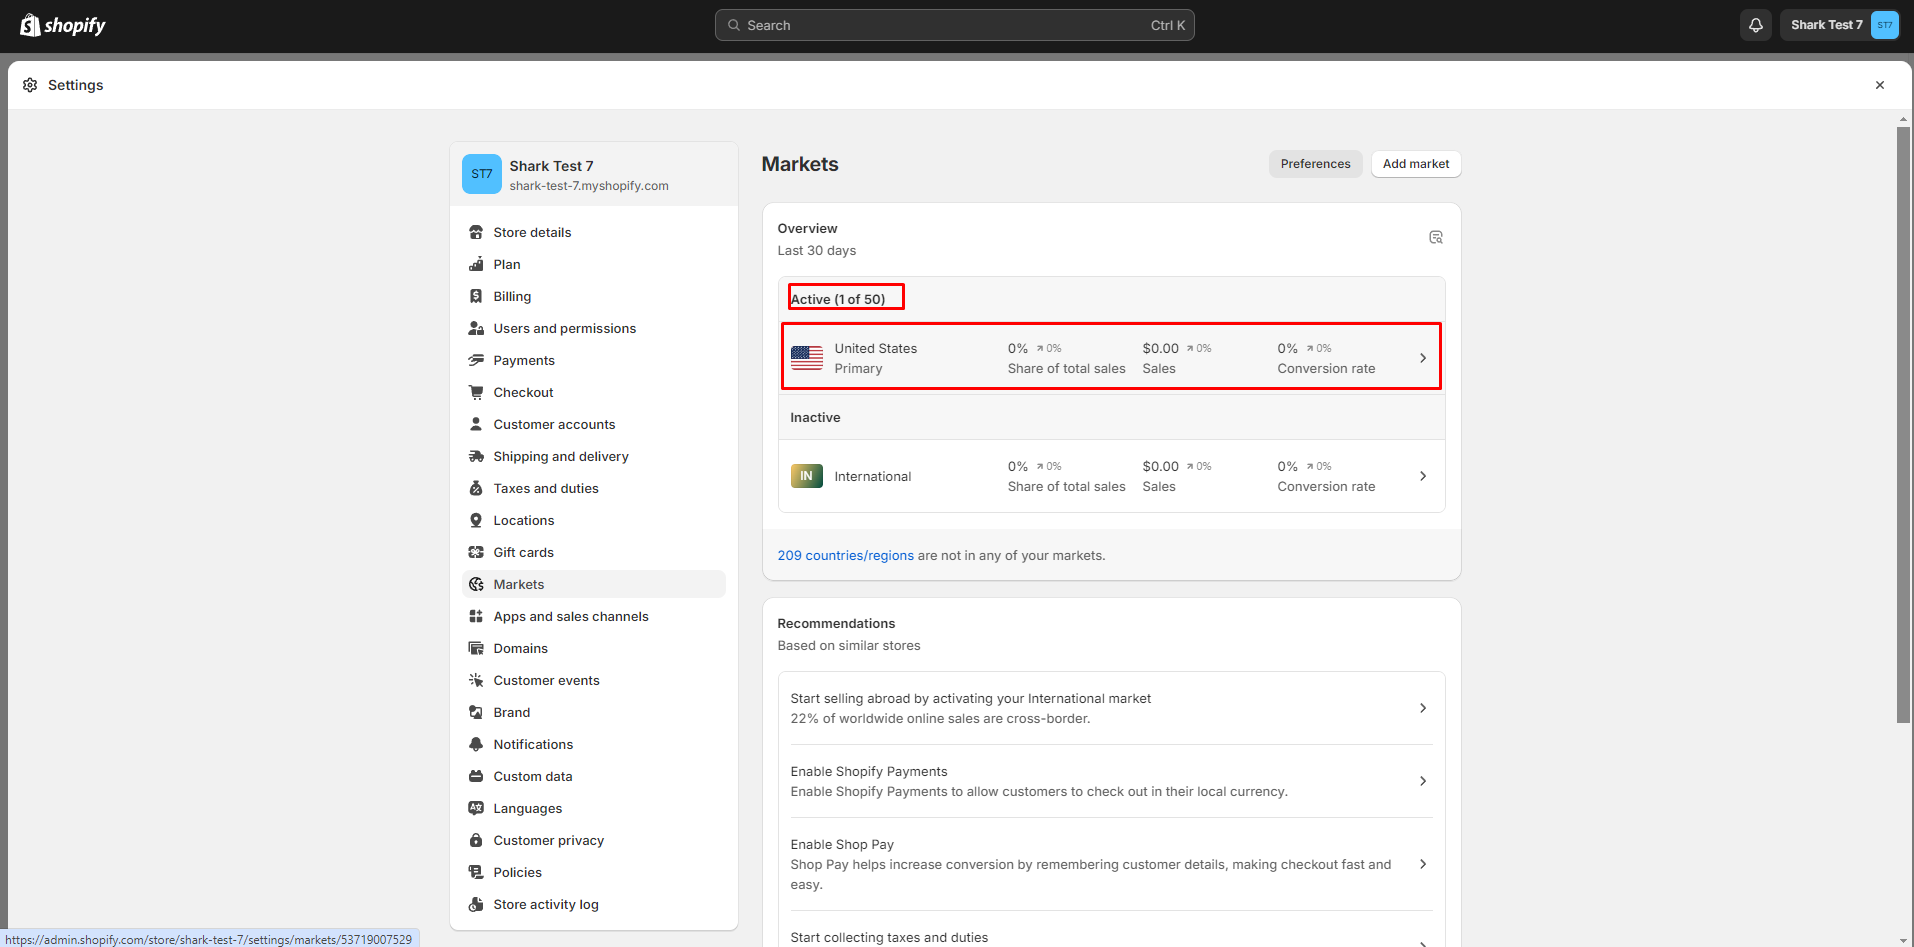
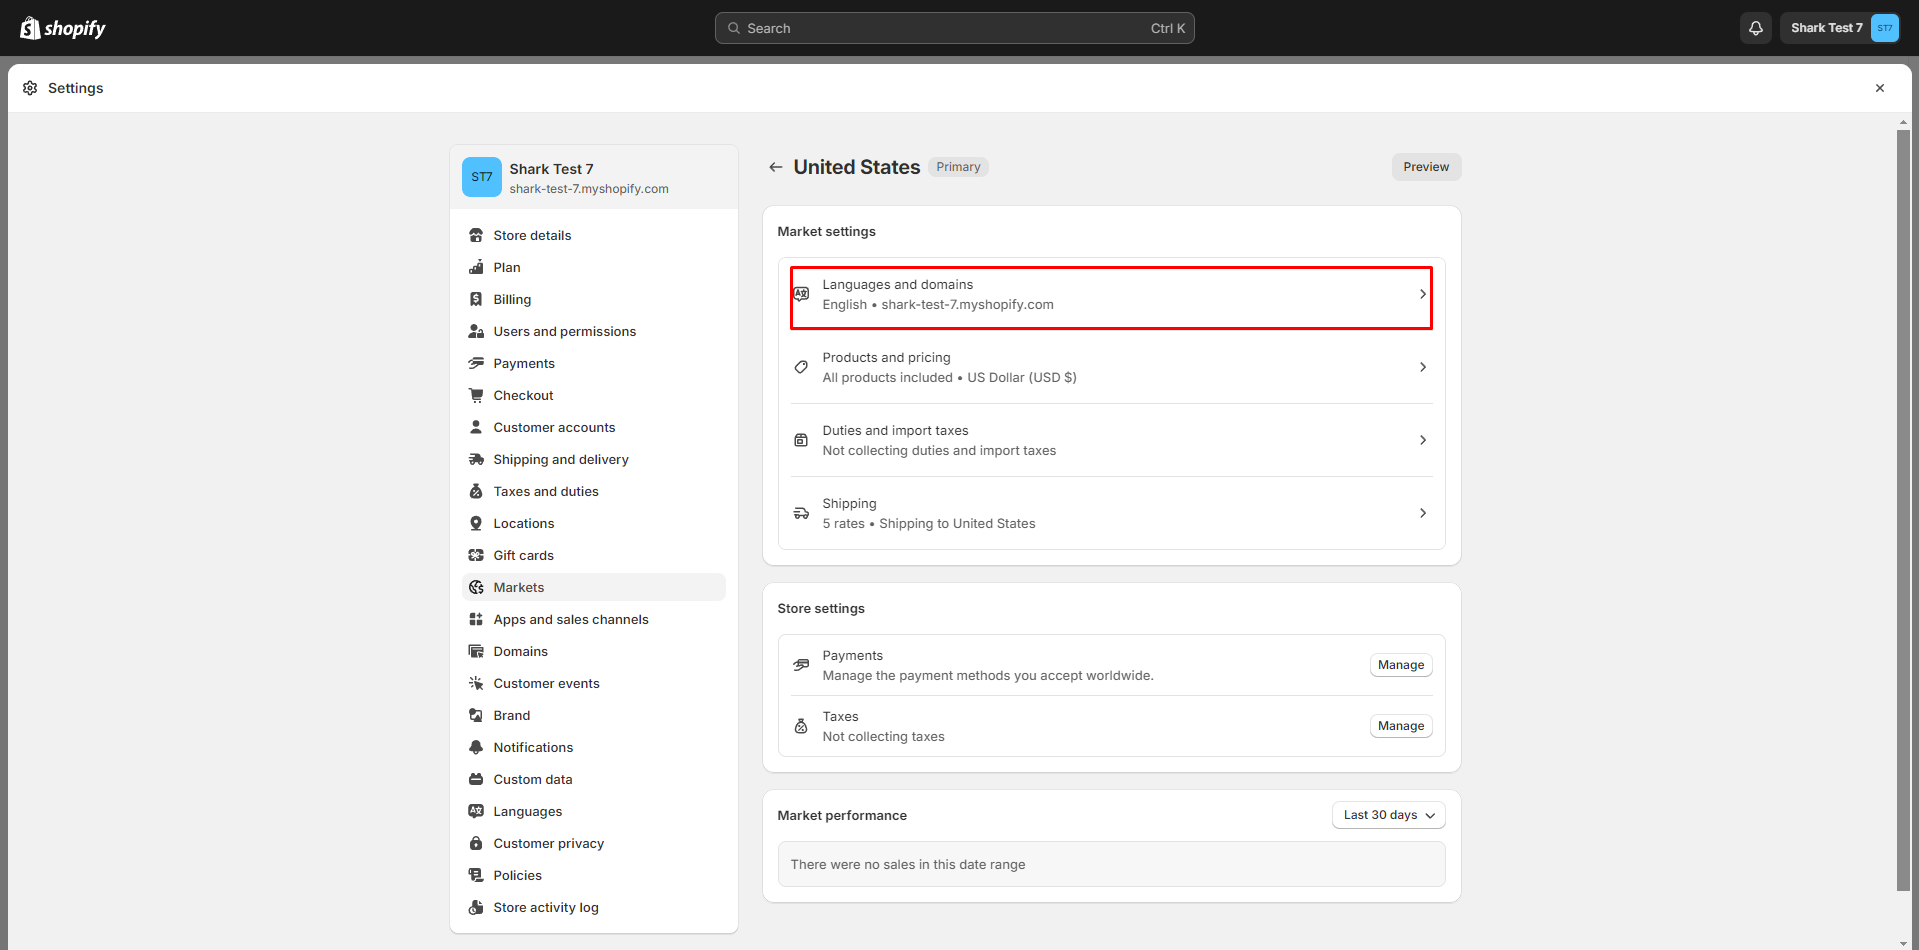
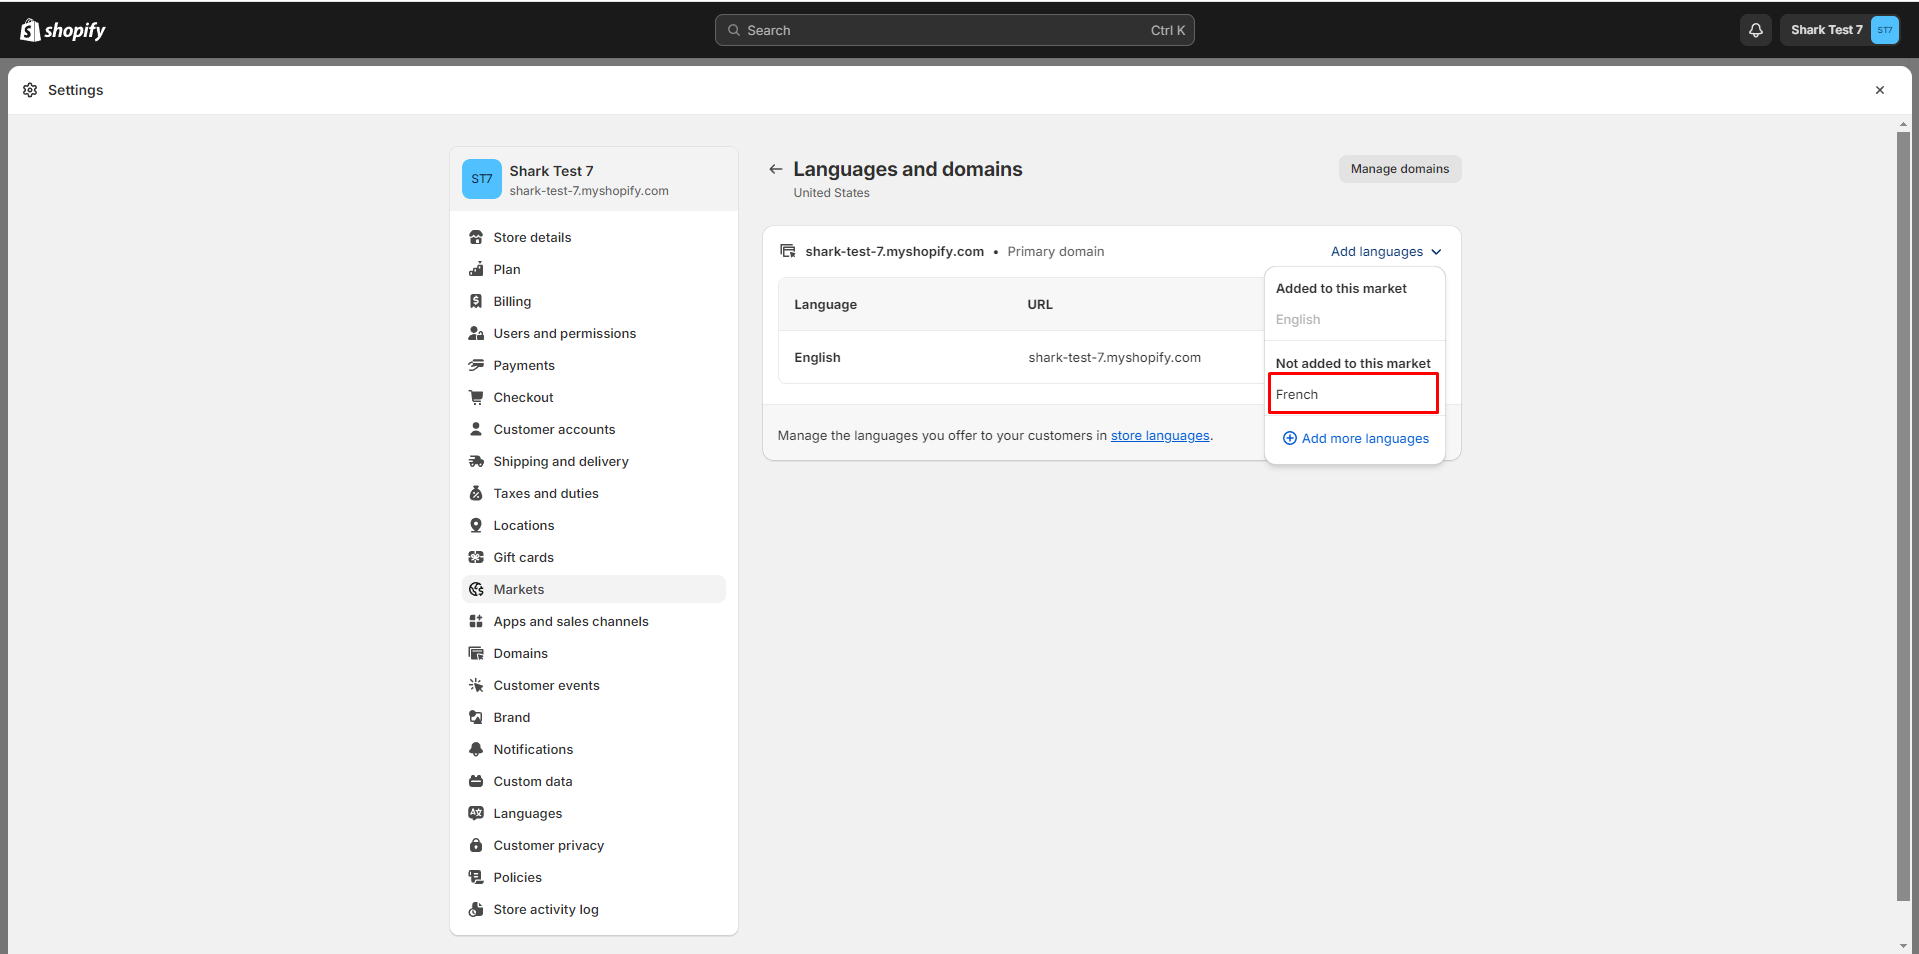
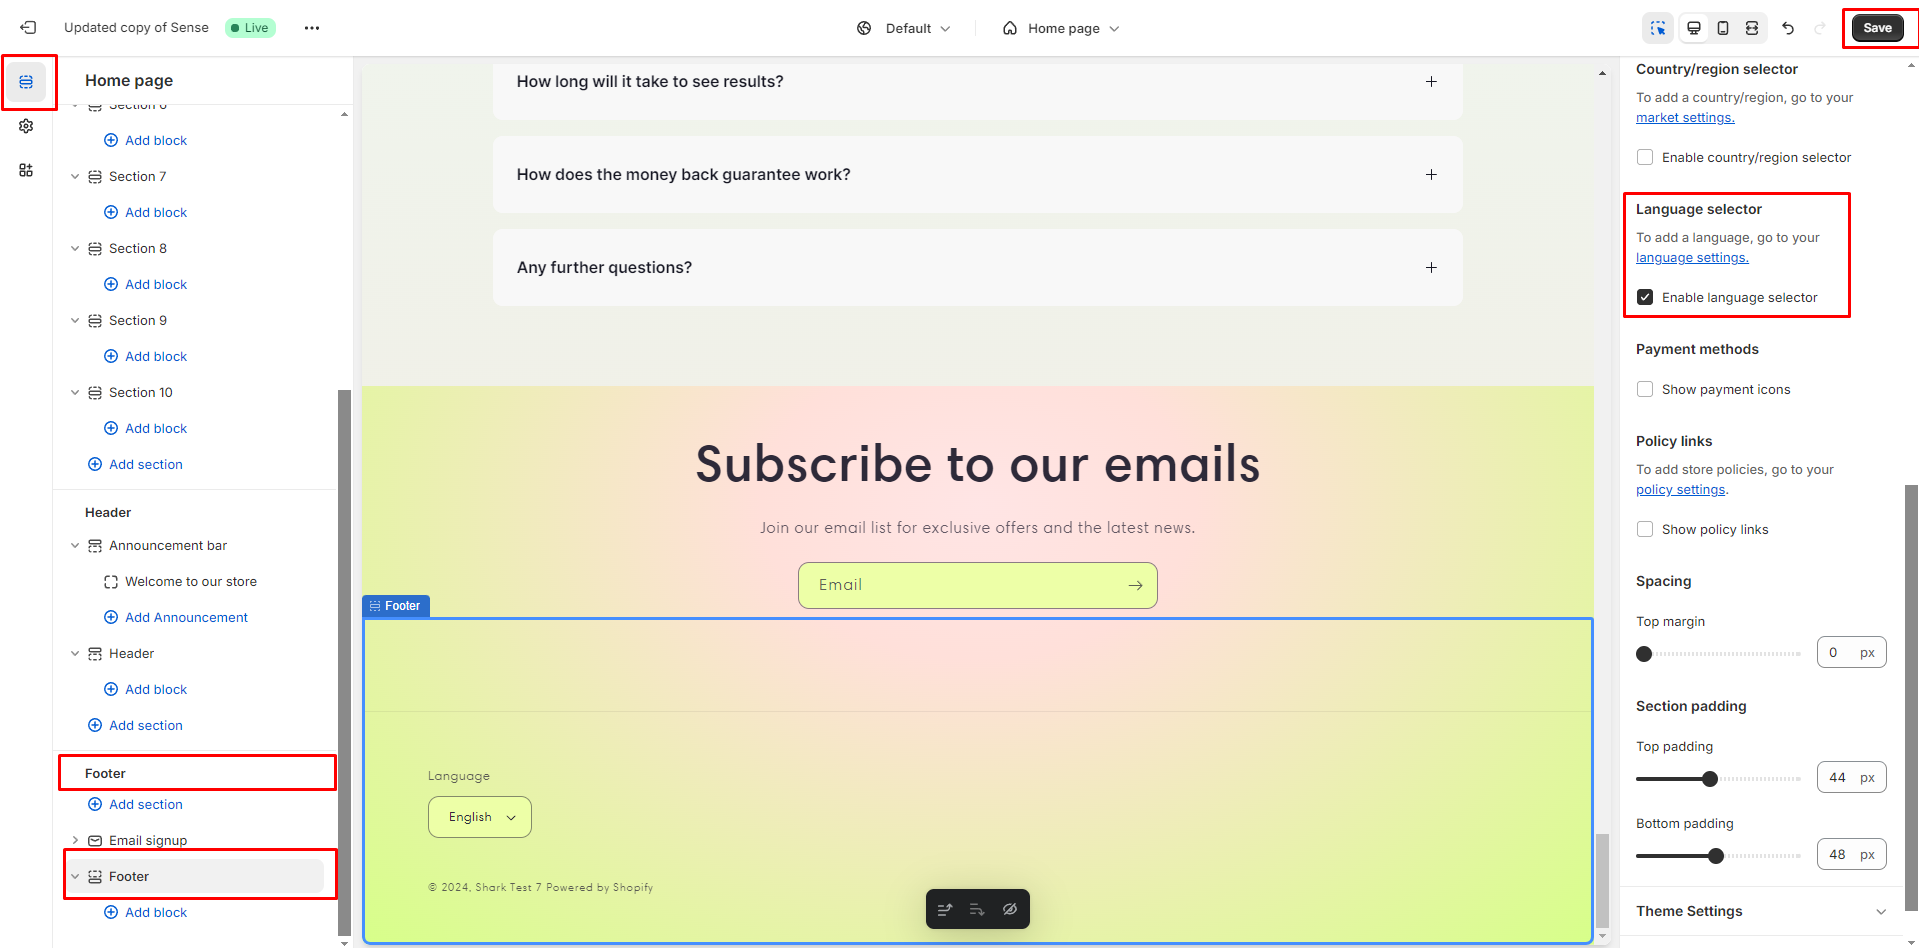
Step 5: Activate the Language Selector on the Header or Footer while customizing your theme.
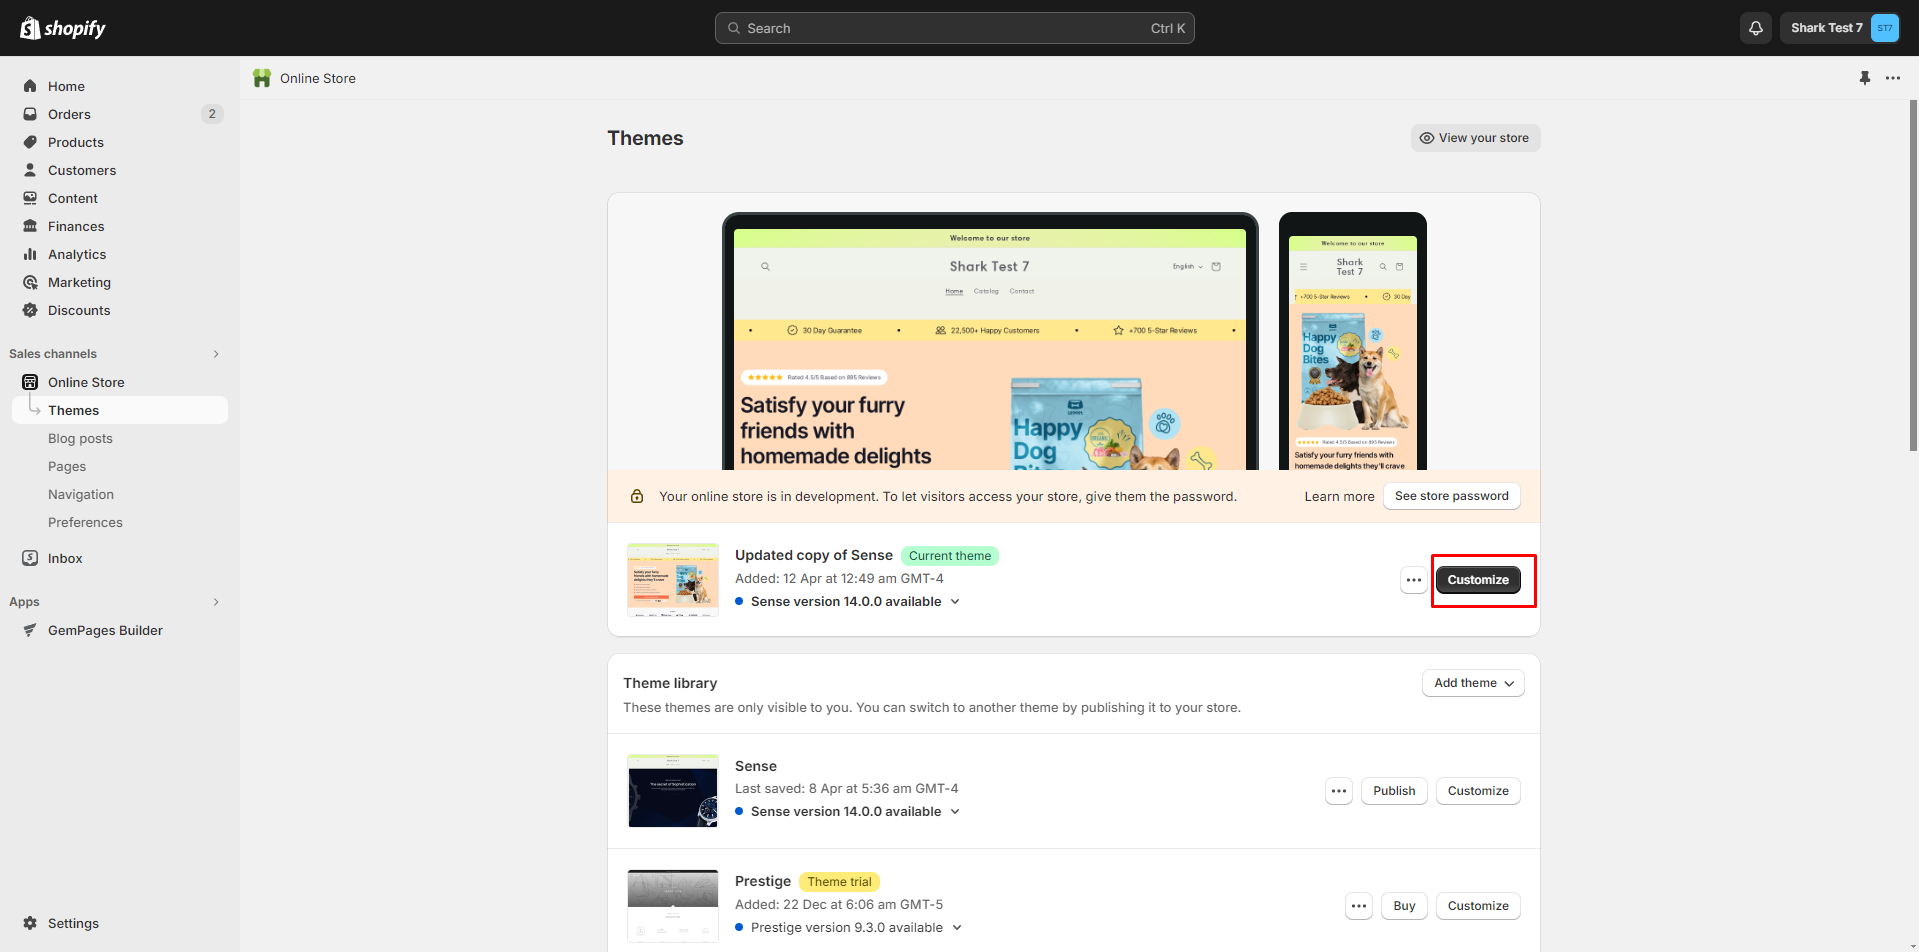
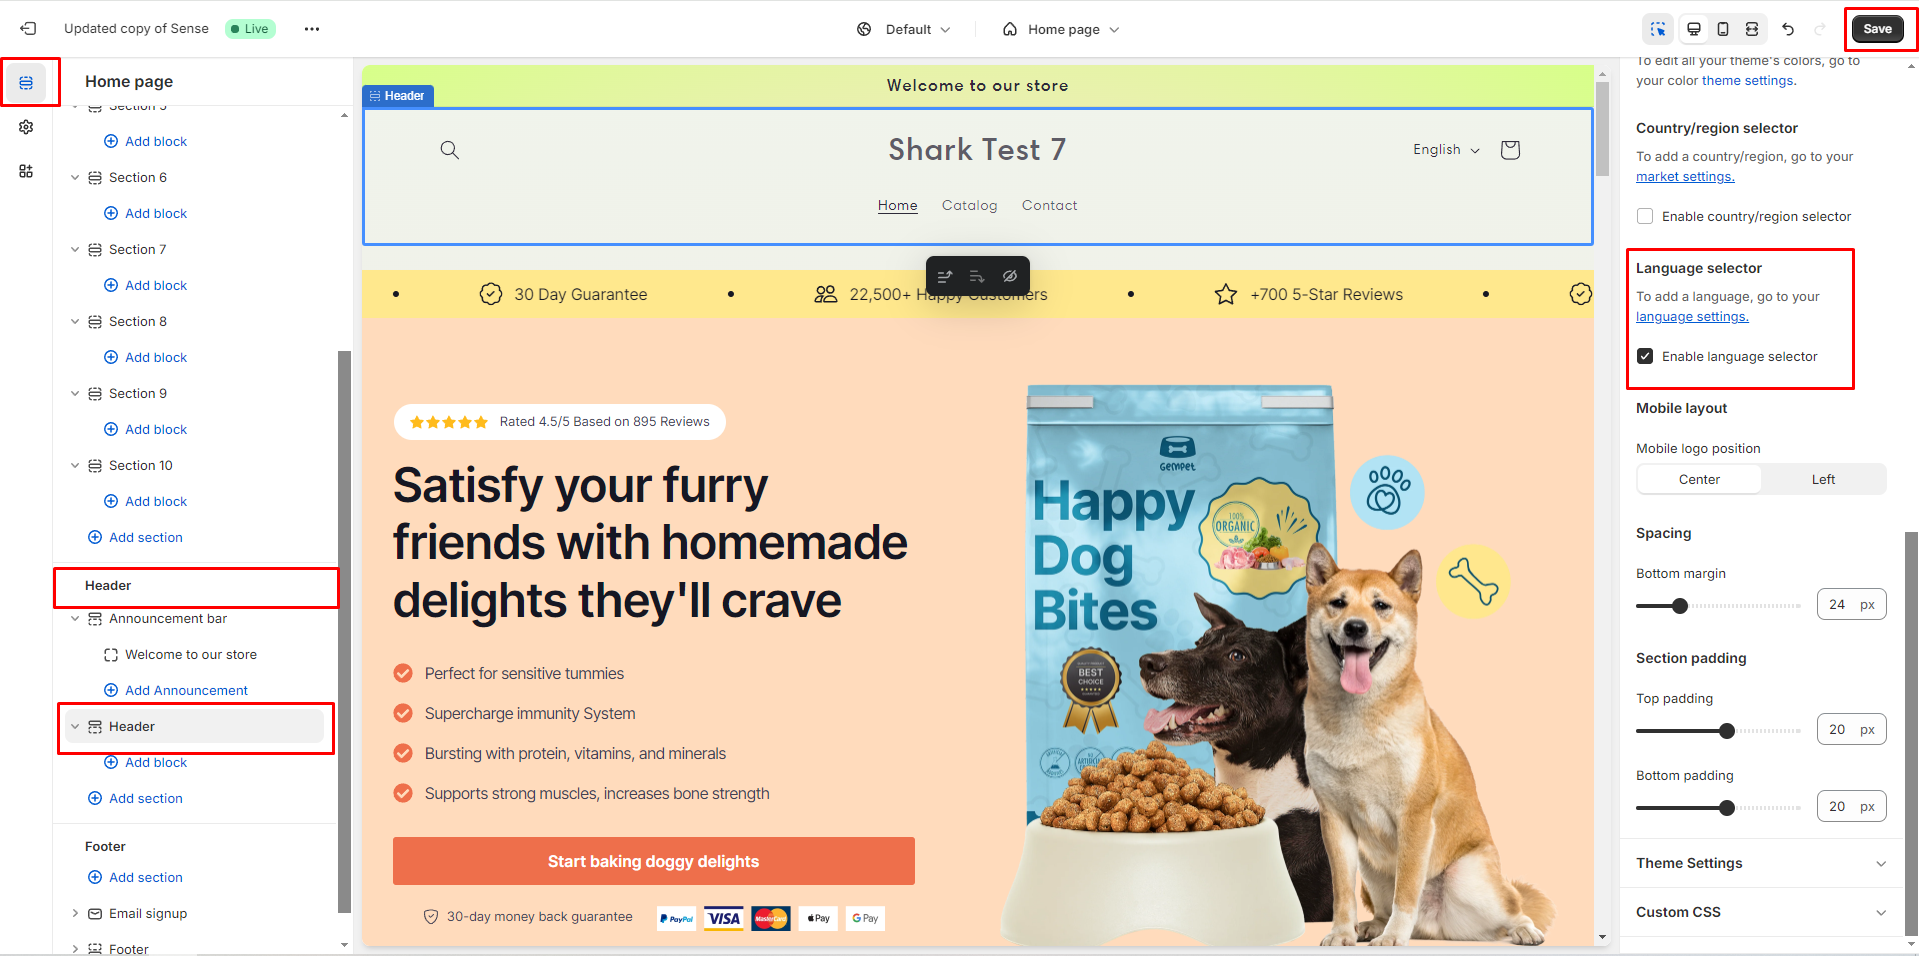
Hit “Save” when finished.
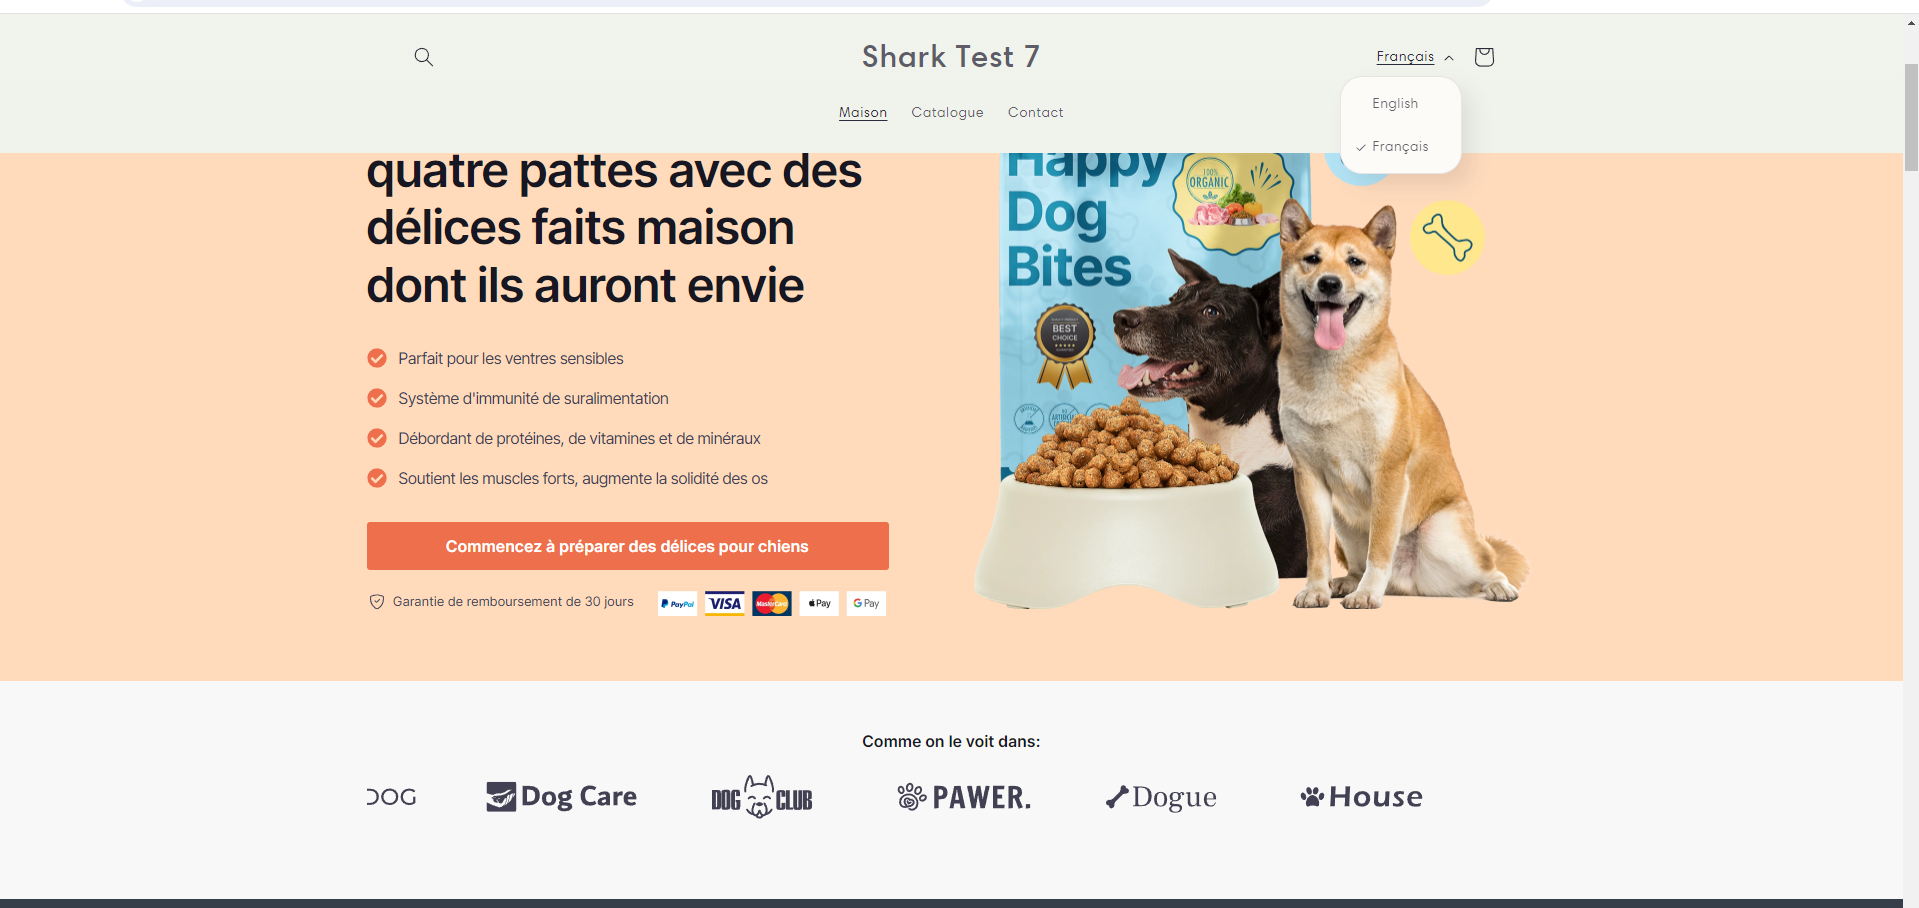
Step 6: Now you can view the result on the live page.
That’s our guide for setting up Shopify Translate & Adapt and using it on your Shopify store.
For issues related to app settings or widget customization, please reach out to the Shopify Translate & Adapt Support Team.
Method #2. Using Automatic Translation Apps
For the second method, we recommend you use the Transcy – AI Language Translate and Weglot Translation apps for automatic translation.
These apps are highly compatible with GemPages, which allows you to translate your GemPages content from English into any desired language.
Transcy allows automatic translation using AI technology, making it easy to translate pages created with GemPages into multiple languages.
It offers flexible plans with free tiers for basic translation and paid options for deeper customization.
Transcy helps ensure accurate and contextual translations across various regions and is ideal for a multilingual Shopify store setup.
For more information on how to integrate and use these apps, check out this article.
Weglot simplifies the multilingual process by automatically translating your GemPages content.
It provides real-time translations with minimal setup and ensures content synchronization across different languages. Weglot is praised for its intuitive interface and ease of use.
For more information on how to integrate and use the Weglot Translation app, refer to our guidance.
FAQs
1. Can I translate all GemPages content with Shopify Translate & Adapt?
Yes. Shopify Translate & Adapt supports translating any text created inside GemPages, along with your store’s theme, product pages, and checkout.
2. Do I need coding skills to integrate translation apps with GemPages?
No. With GemPages v7, you can easily connect third-party translation apps through the Shopify Apps Element without touching code.
3. Which is better: manual or automatic translation?
It depends on your goals. Manual translation via Shopify Translate & Adapt offers greater accuracy and localization control, while automatic apps like Transcy or Weglot provide faster setup and scalability.
4. Can translation apps affect my store speed?
Most well-built apps like Transcy and Weglot are optimized for Shopify, but always test performance after installation. Use GemPages’ preview and live mode to ensure smooth user experience.
5. Can I translate the GemPages Editor interface into other languages?
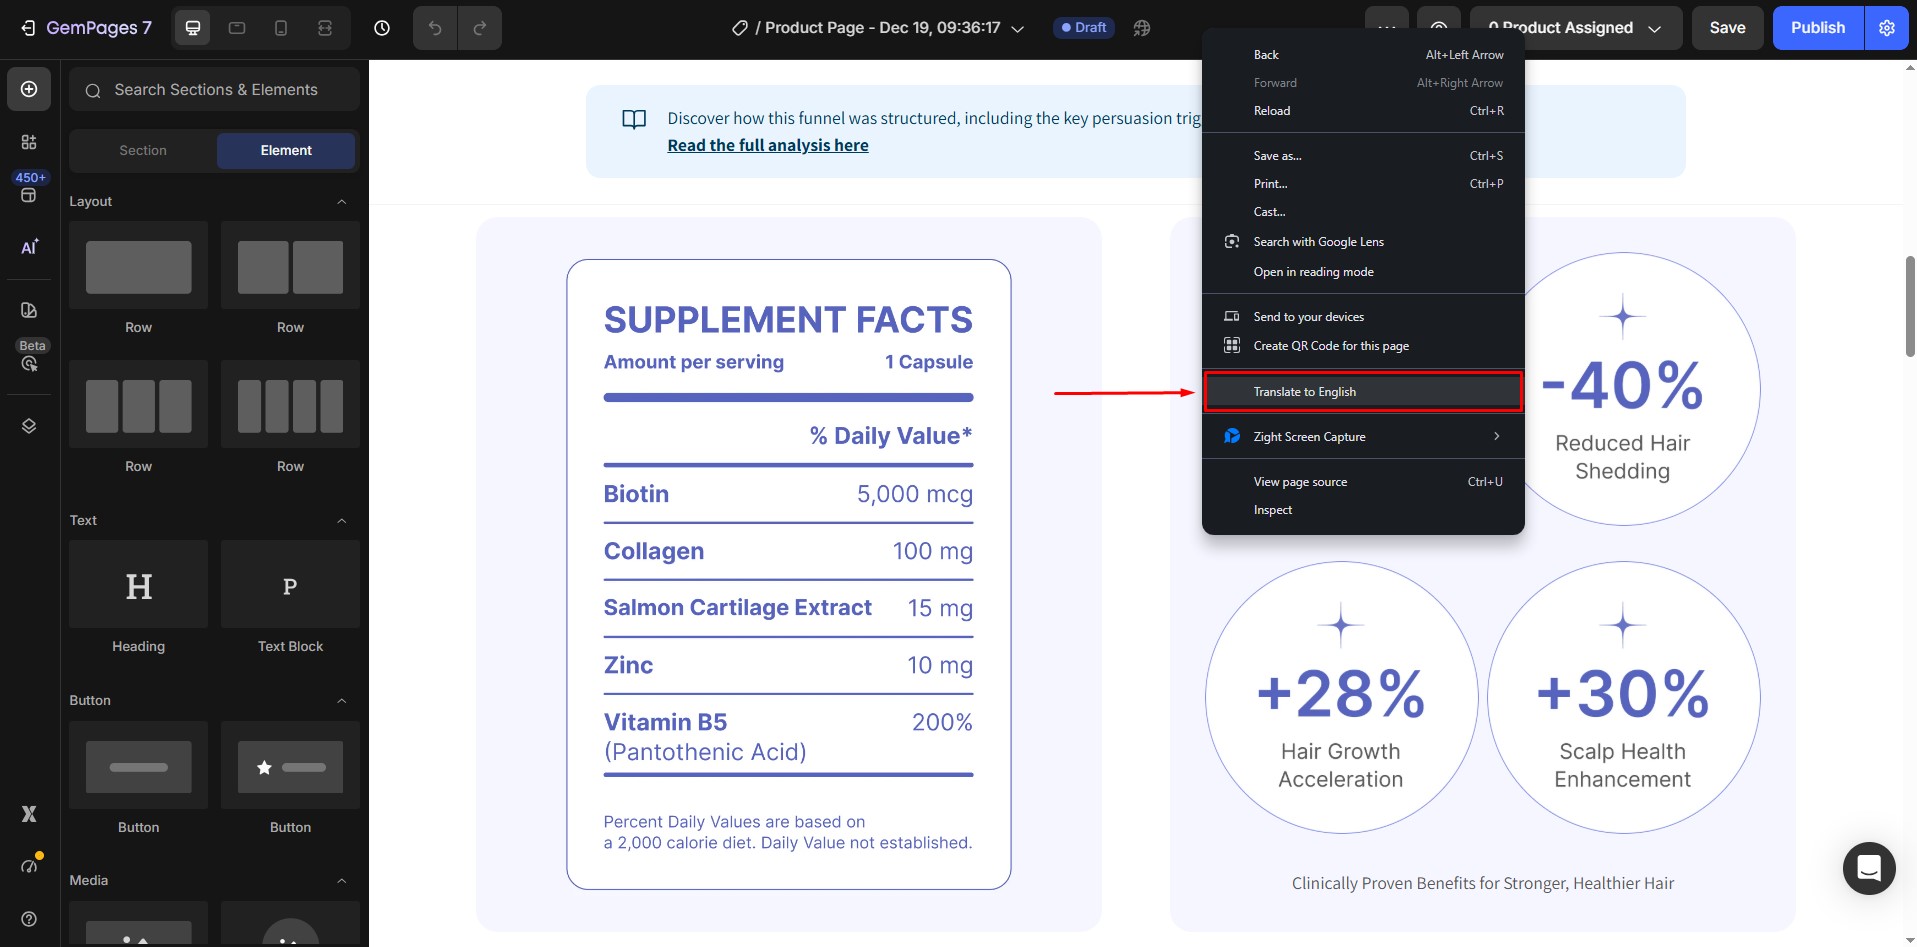
Yes. If you prefer to browse the GemPages Editor interface in another language, you can use your browser’s built-in translation tool. On Chrome for Windows, simply right-click anywhere outside the Editor canvas and select Translate. This allows you to view the interface labels and menus in your preferred language without affecting your store’s actual content.
6. Can I translate GemPages content from Spanish to English?
Yes. GemPages supports translating content from Spanish to English through Shopify’s translation system, such as Shopify Translate & Adapt or compatible third-party translation apps (e.g. Transcy, Weglot).
GemPages itself does not perform translations. Instead, it displays the translated content provided by Shopify or the installed translation app. As long as your source content is in Spanish and English is added as a target language, the translated version will appear correctly on GemPages pages.


Thank you for your comments