


About the Sticky Add-to-Cart element
A Sticky Add-to-Cart button on a webpage is a button that remains visible and “sticks” to the screen as you scroll. It is a valuable UI element on e-commerce websites that enhances the shopping experience by providing easy access to the cart and streamlining the checkout process.
It contributes to better user engagement, improved conversion rates, and overall user satisfaction by reducing friction in the online shopping journey.
How to Add a Sticky Add-to-Cart Element to Your Page?
To incorporate a Sticky Add-to-Cart in GemPages Editor v7, please follow these steps:
Step 1: Access the GemPages Dashboard > Pages > Collection, then click on your target collection page to locate the editor.
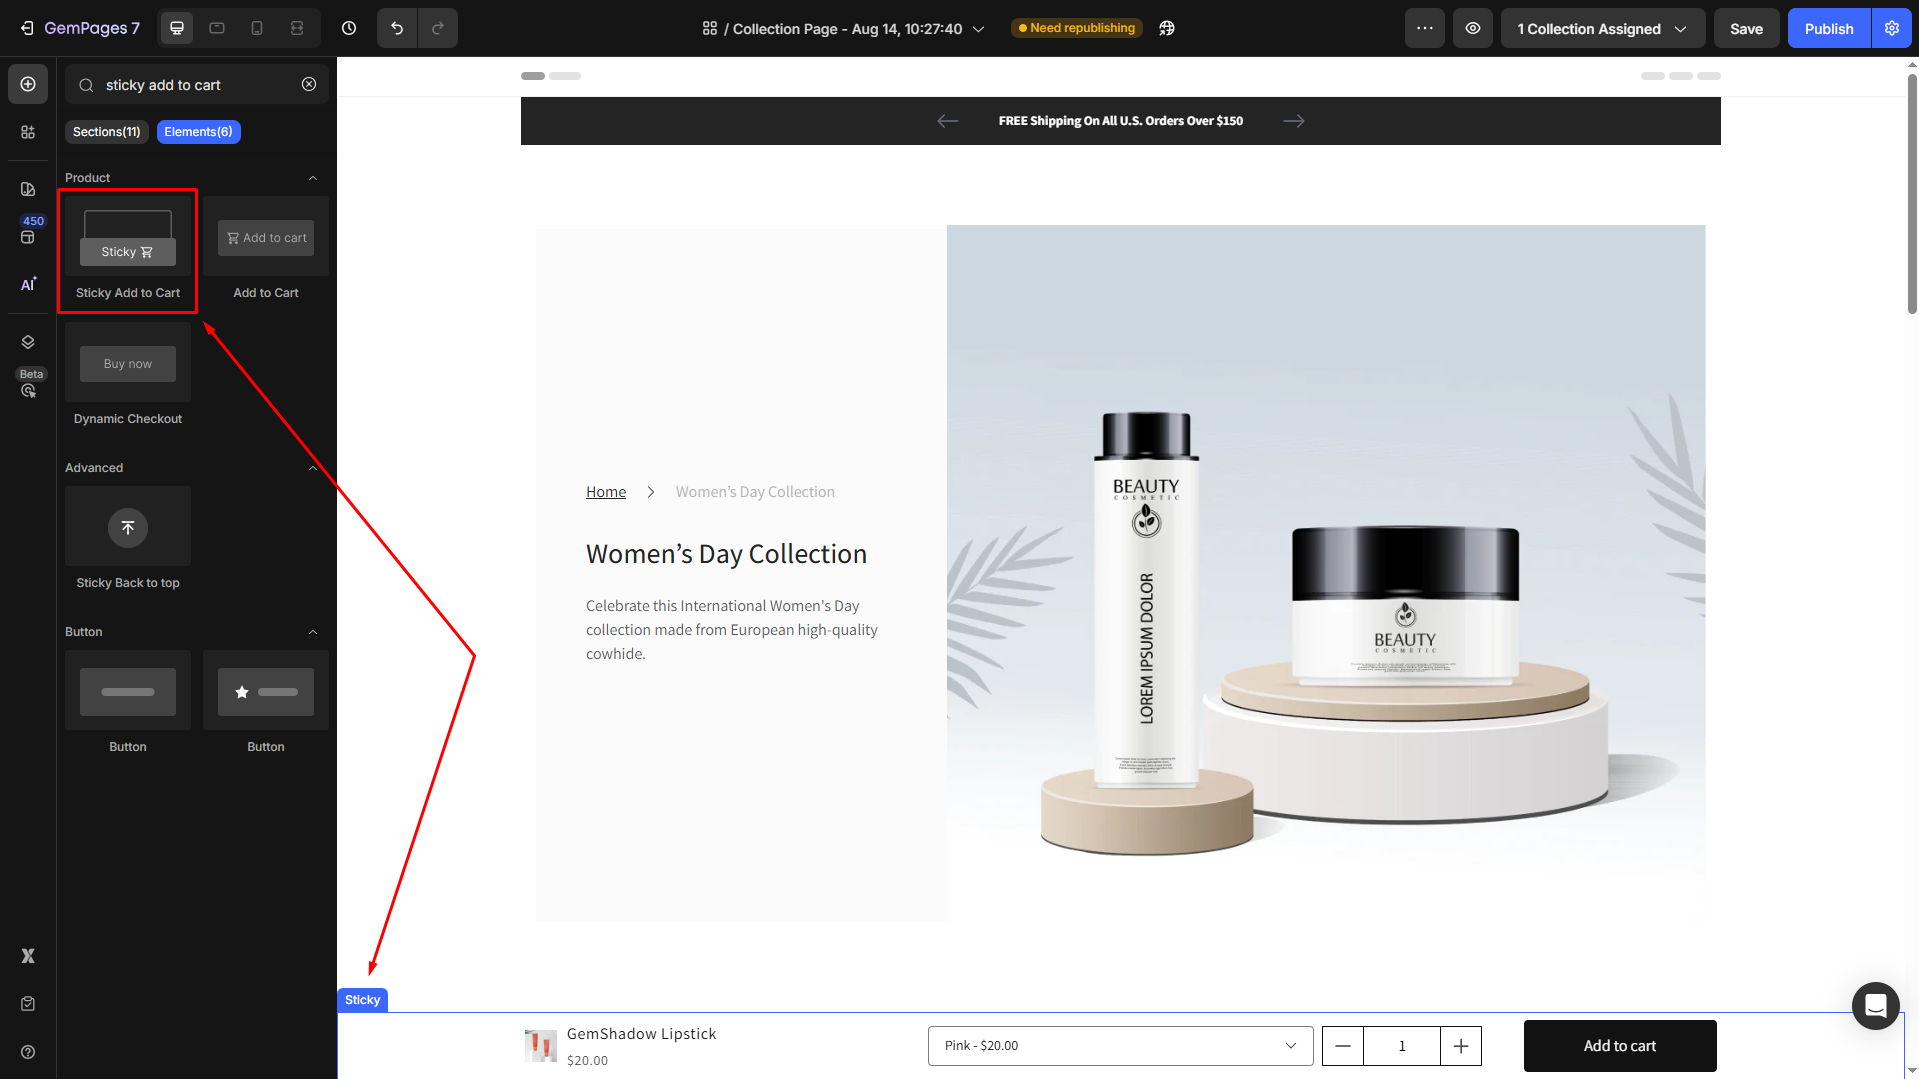
Step 2: From the left sidebar, search for the “sticky add to cart” and drag & drop it to your page.
Important: The Sticky Add-to-Cart element can only be placed in the first or last section of your page.
This limitation is intentional and helps ensure the sticky bar works correctly across different devices and scrolling behaviors. Since the element is designed to stay fixed on the screen while customers scroll, placing it in the middle of the page could cause layout conflicts, overlapping issues, or inconsistent display behavior with other sections.
To maintain a stable and seamless shopping experience, GemPages only supports Sticky Add-to-Cart placement at the top-most or bottom-most section of the page structure.
By default, the Sticky Add-to-Cart element comes preloaded with essential components:
- Product module (Product image, Product title, and Product price)
- Product variant & swatches
- Product quantity
- Product Add to Cart
This ready-made setup ensures your sticky bar is functional right away. You can simply “Save” and “Publish” the page, and the Sticky Add-to-Cart will be ready on your live page.
However, for seamless integration with your overall page design, you have complete flexibility to customize both the Sticky Add-to-Cart itself and its child elements.
Configure the Settings tab
When you select the Sticky Add-to-Cart element, you’ll discover all the configuration options conveniently located on the left sidebar, including:
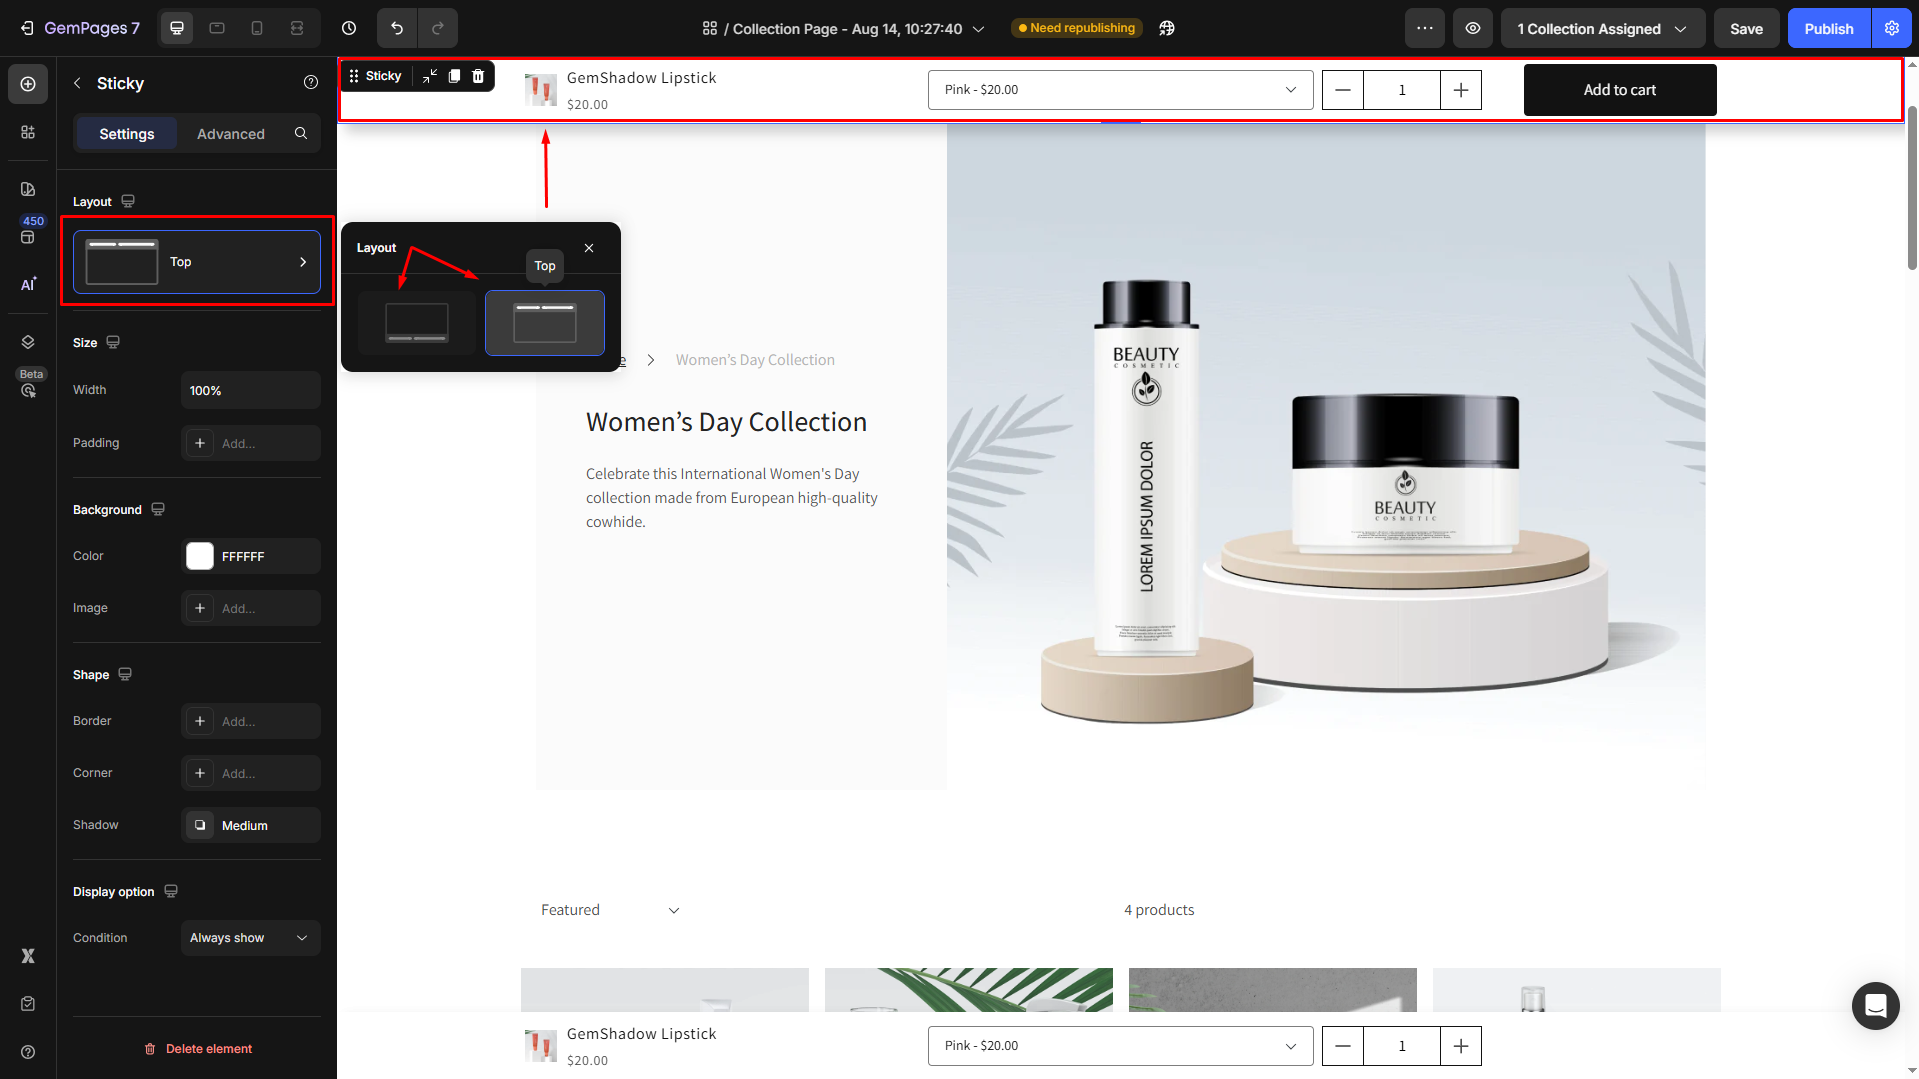
Layout
From the Layout section, you can choose the position of the sticky add-to-cart on your page:
- Bottom position
- Top of the page (works like a sticky custom header with cart button)
Some merchants want to place an Add to Cart button inside their header so it stays visible as customers scroll. Since a Product Add-to-Cart requires a Product module (which isn’t supported inside a theme header), the best alternative is to use the Sticky Add-to-Cart element.
By setting its layout position to Top, it behaves just like a header cart button, always accessible without disrupting the page design.
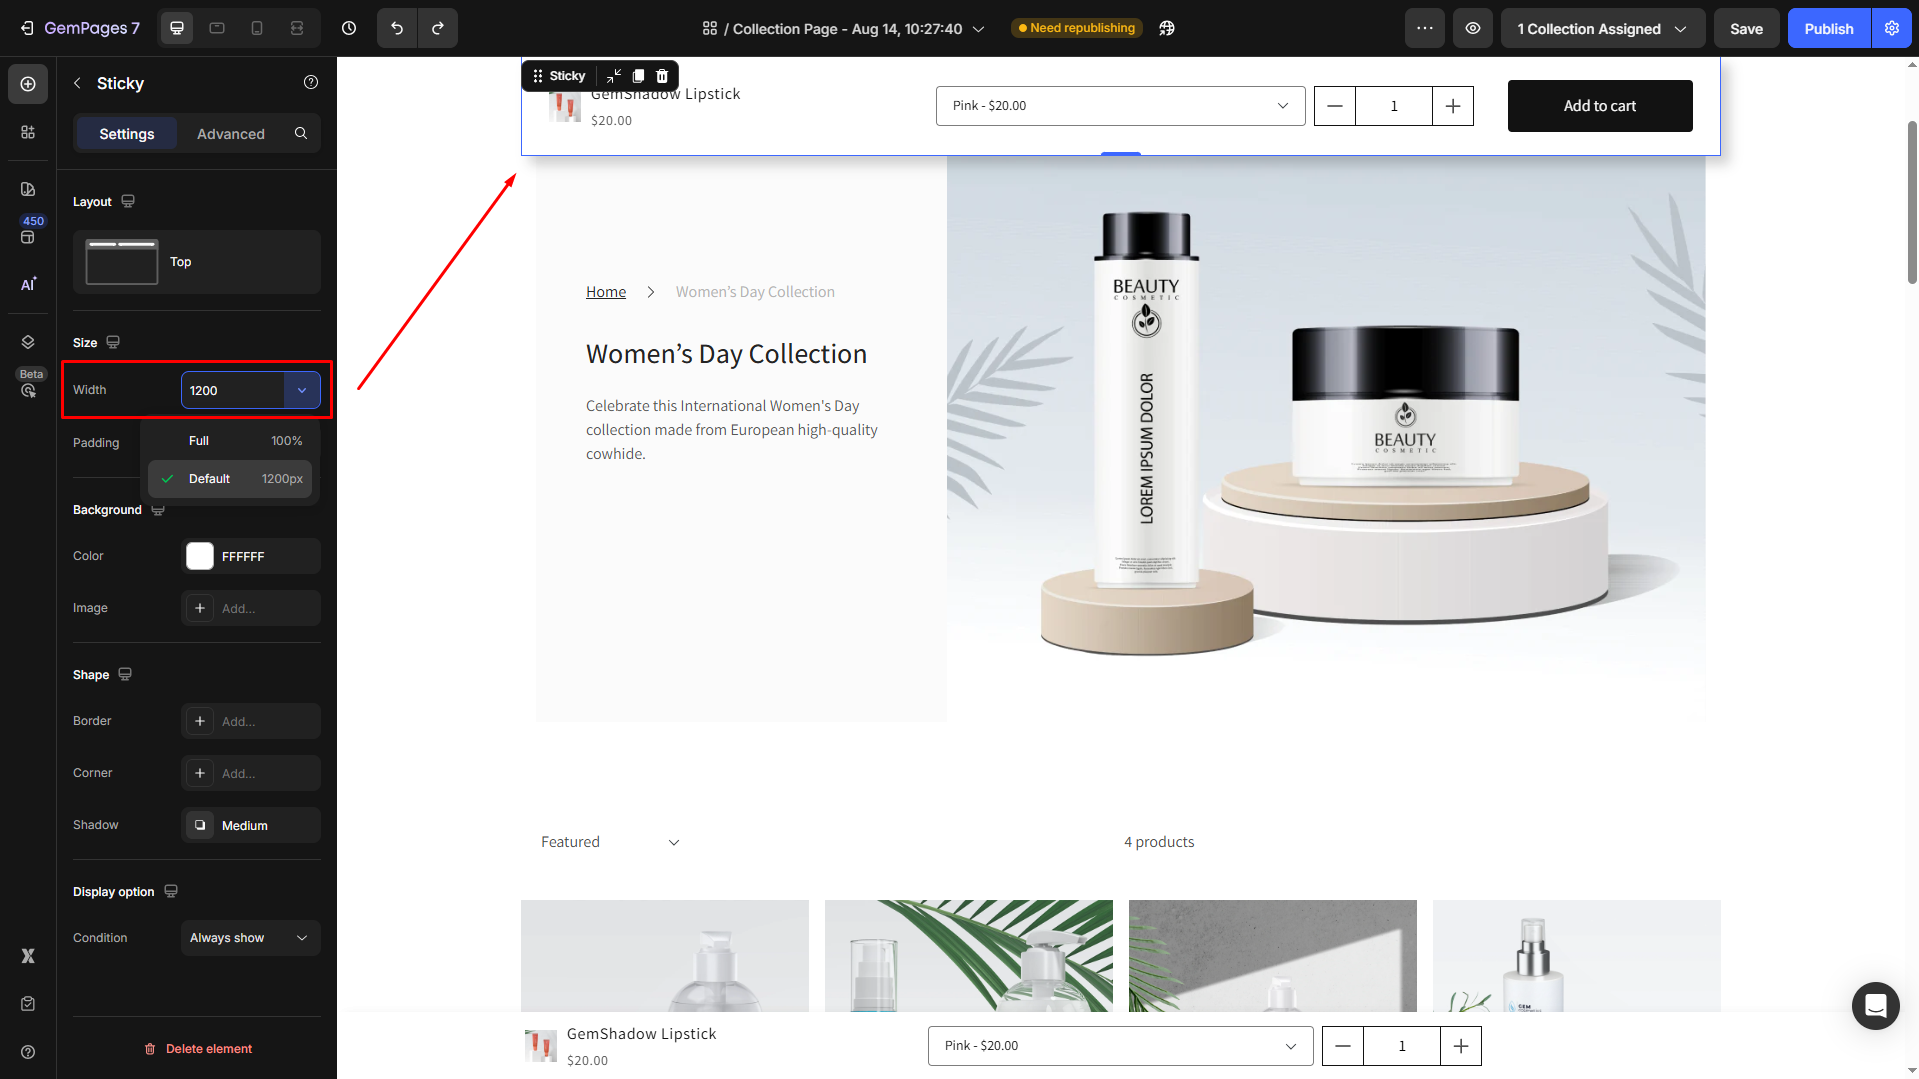
Size
The Size section allows you to control the overall dimensions of your Sticky Add-to-Cart button, ensuring it fits seamlessly into your page layout.
Width: Customize the width of the element. You can enter a specific value (in px) in the box, or choose from available options:
- Fit content (Auto): The button will automatically adjust to match the size of its content (text + icon).
- Full (100%): The button will expand to fill the full width of its container, making it more prominent on the page.
Padding: Padding defines the internal spacing between the button’s content (text, icon, price) and its borders.

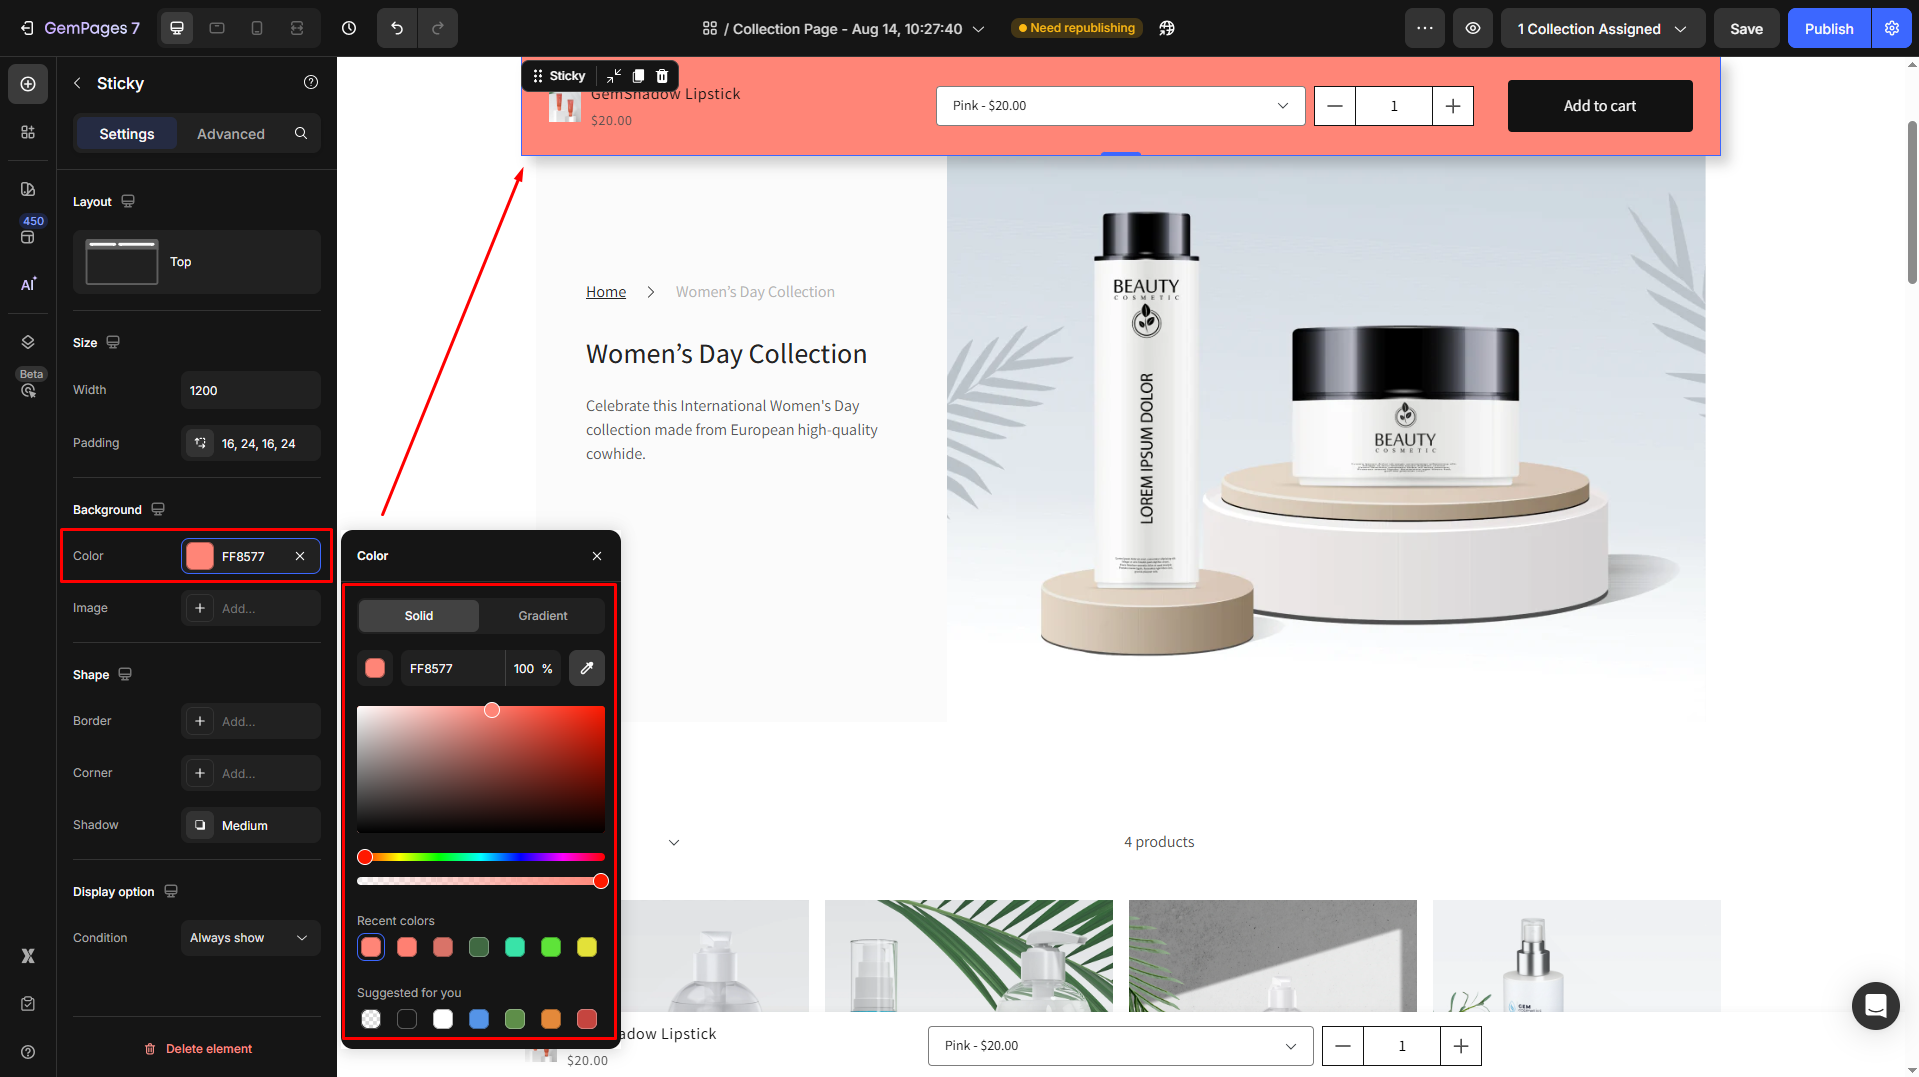
Background
Set a solid or gradient color background for your sticky add-to-cart. You can adjust the color by:
- Enter the color code
- Drag or select from the color swatches
- Use the color picker to select any color on your current page
- Choose one from the Recent colors or Suggested for you lists
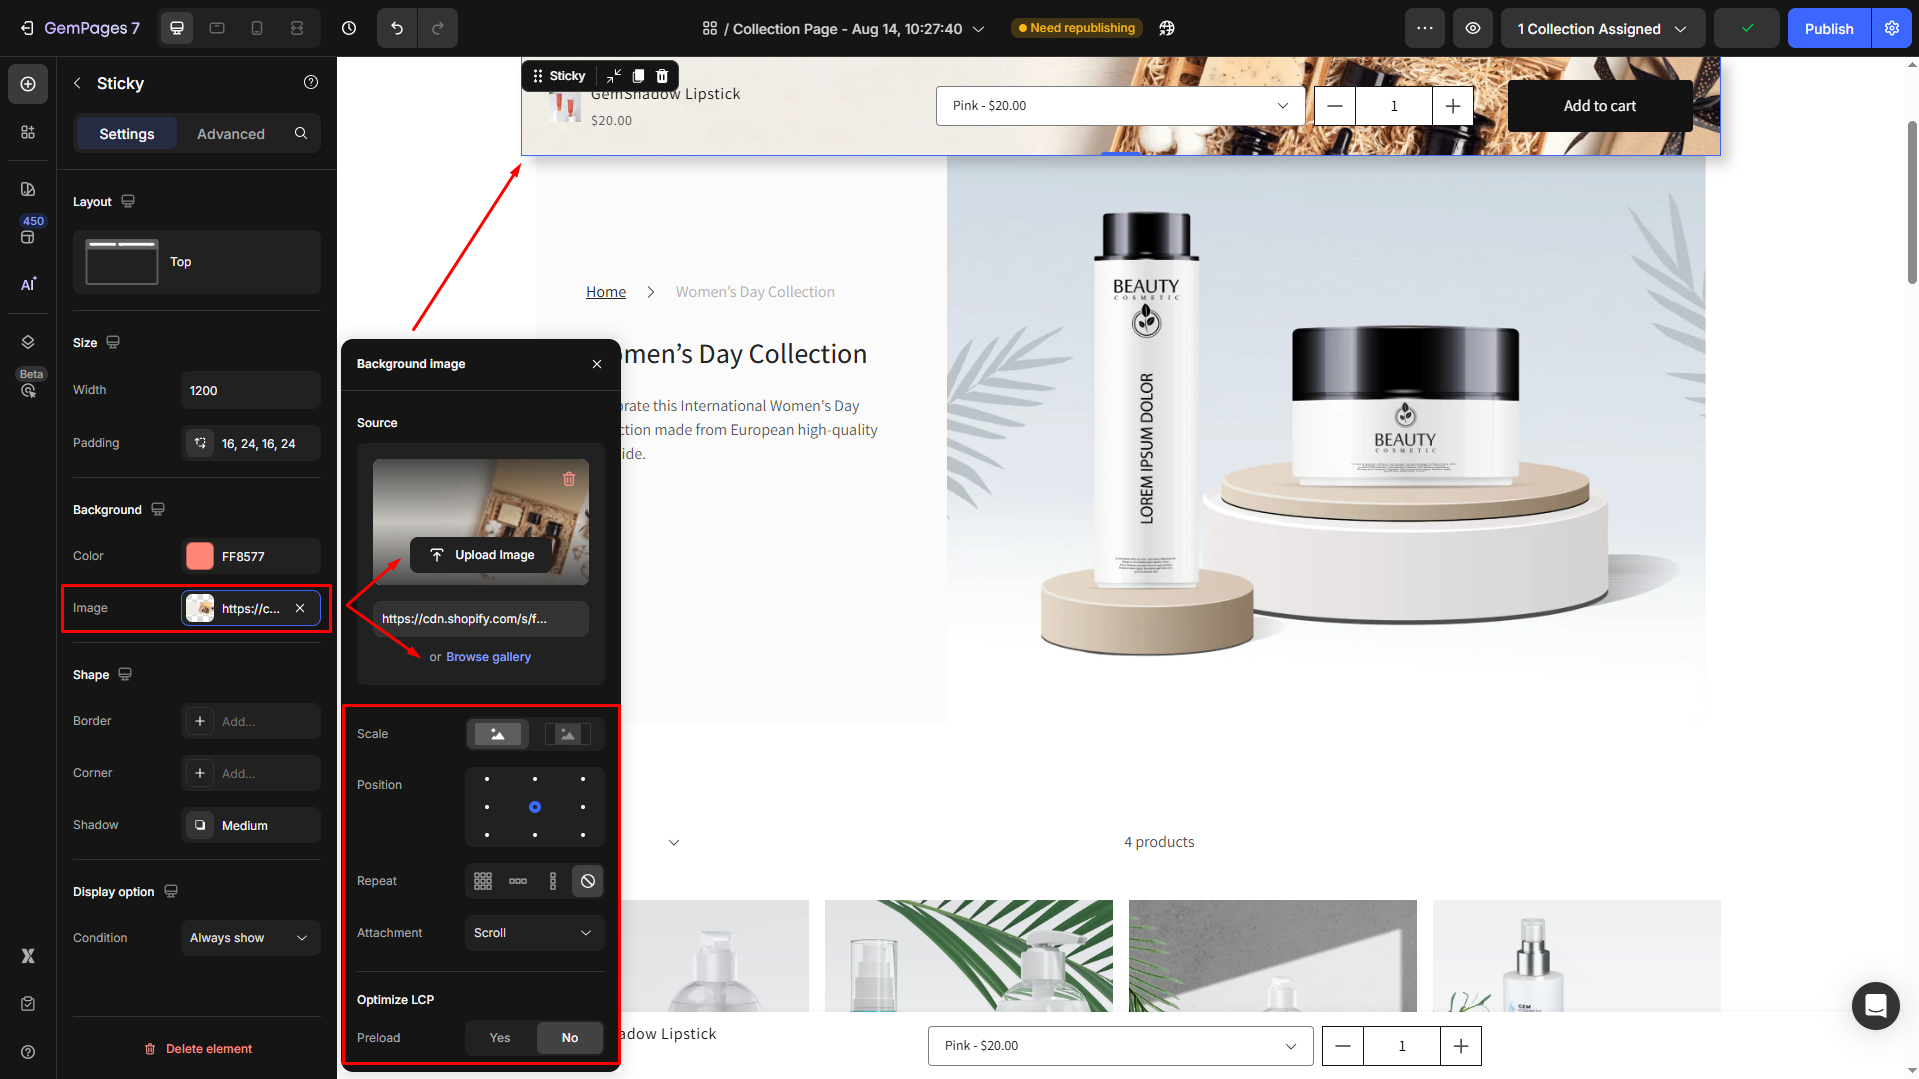
If you prefer an image background, upload a new image or choose from your gallery to set it as the element’s background.
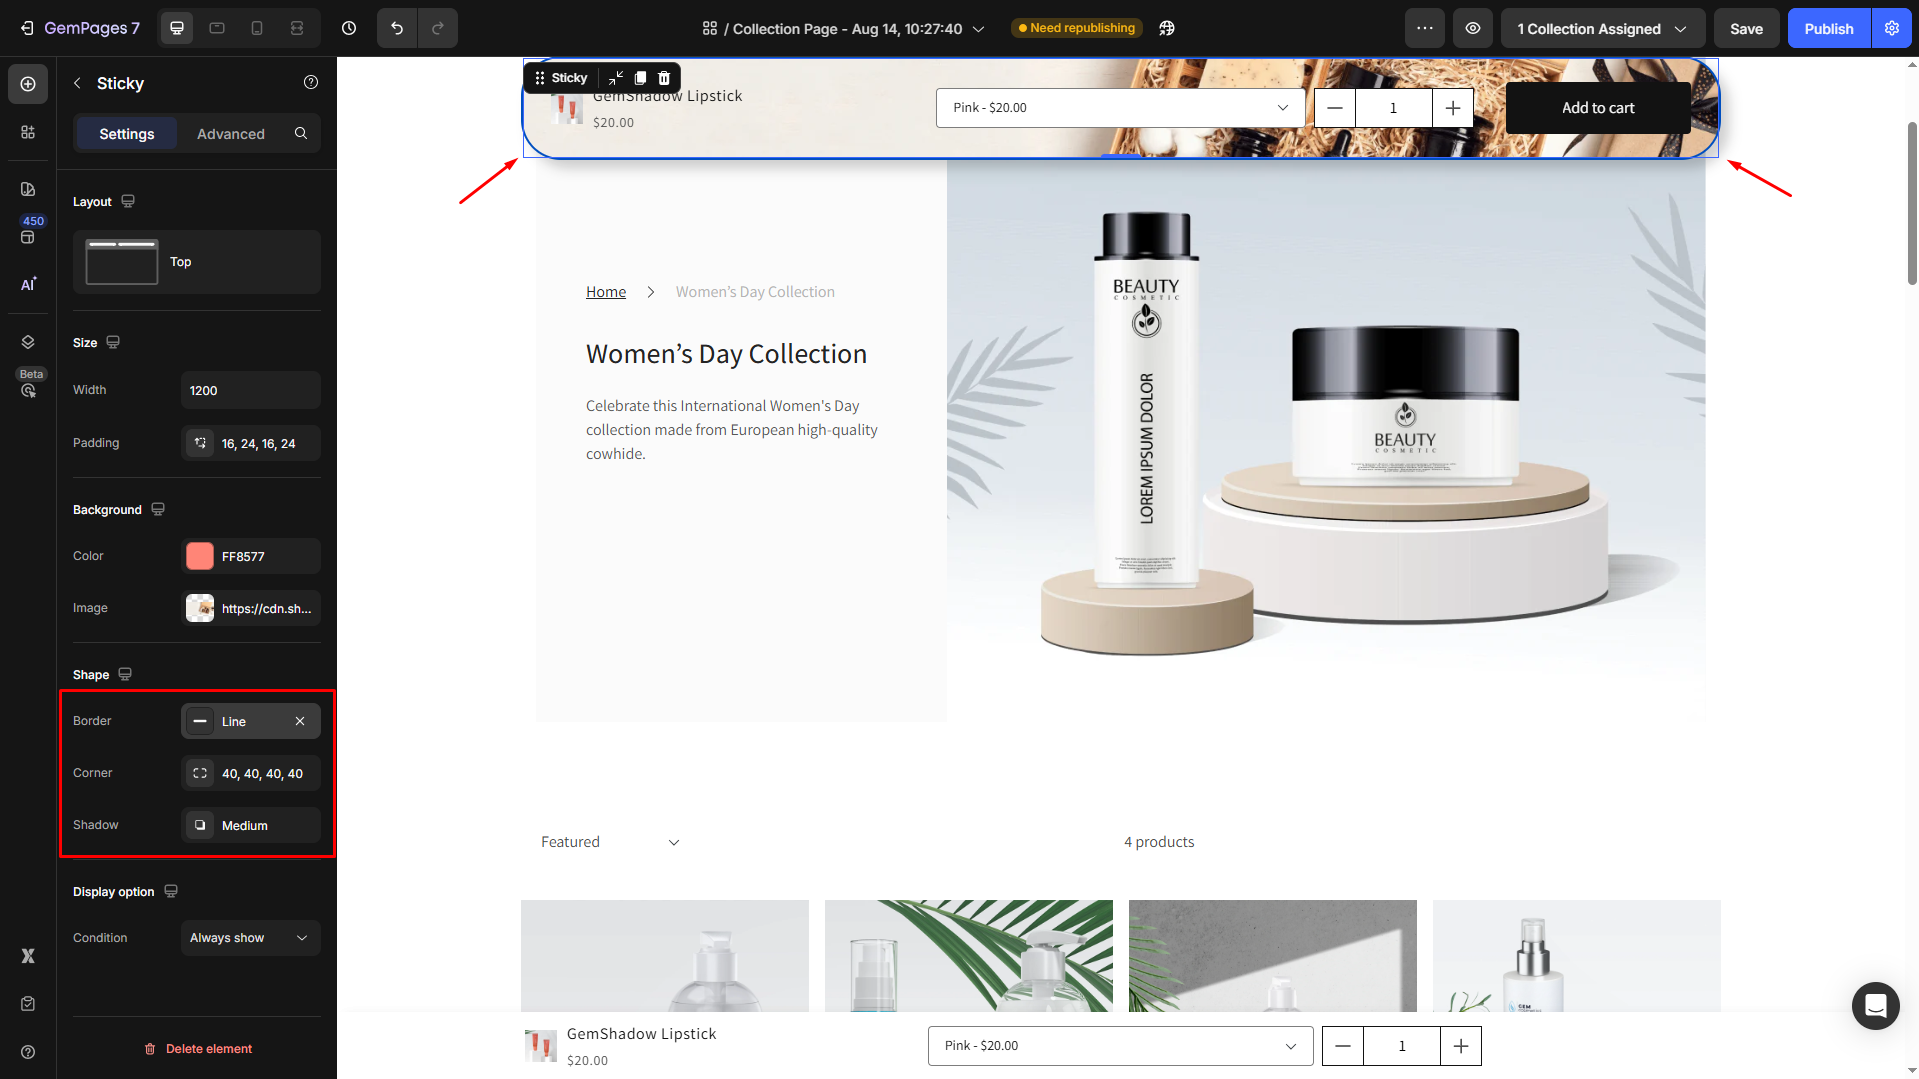
Shape
- Border: You can change the border color, thickness, and stroke.
- Corner: The section corner can be square, round, or pill-shaped. Also, you can enter an exact radius to customize the element’s corner your way.
- Shadow: Add a shadow and adjust its display (size, color, blur, and distance).
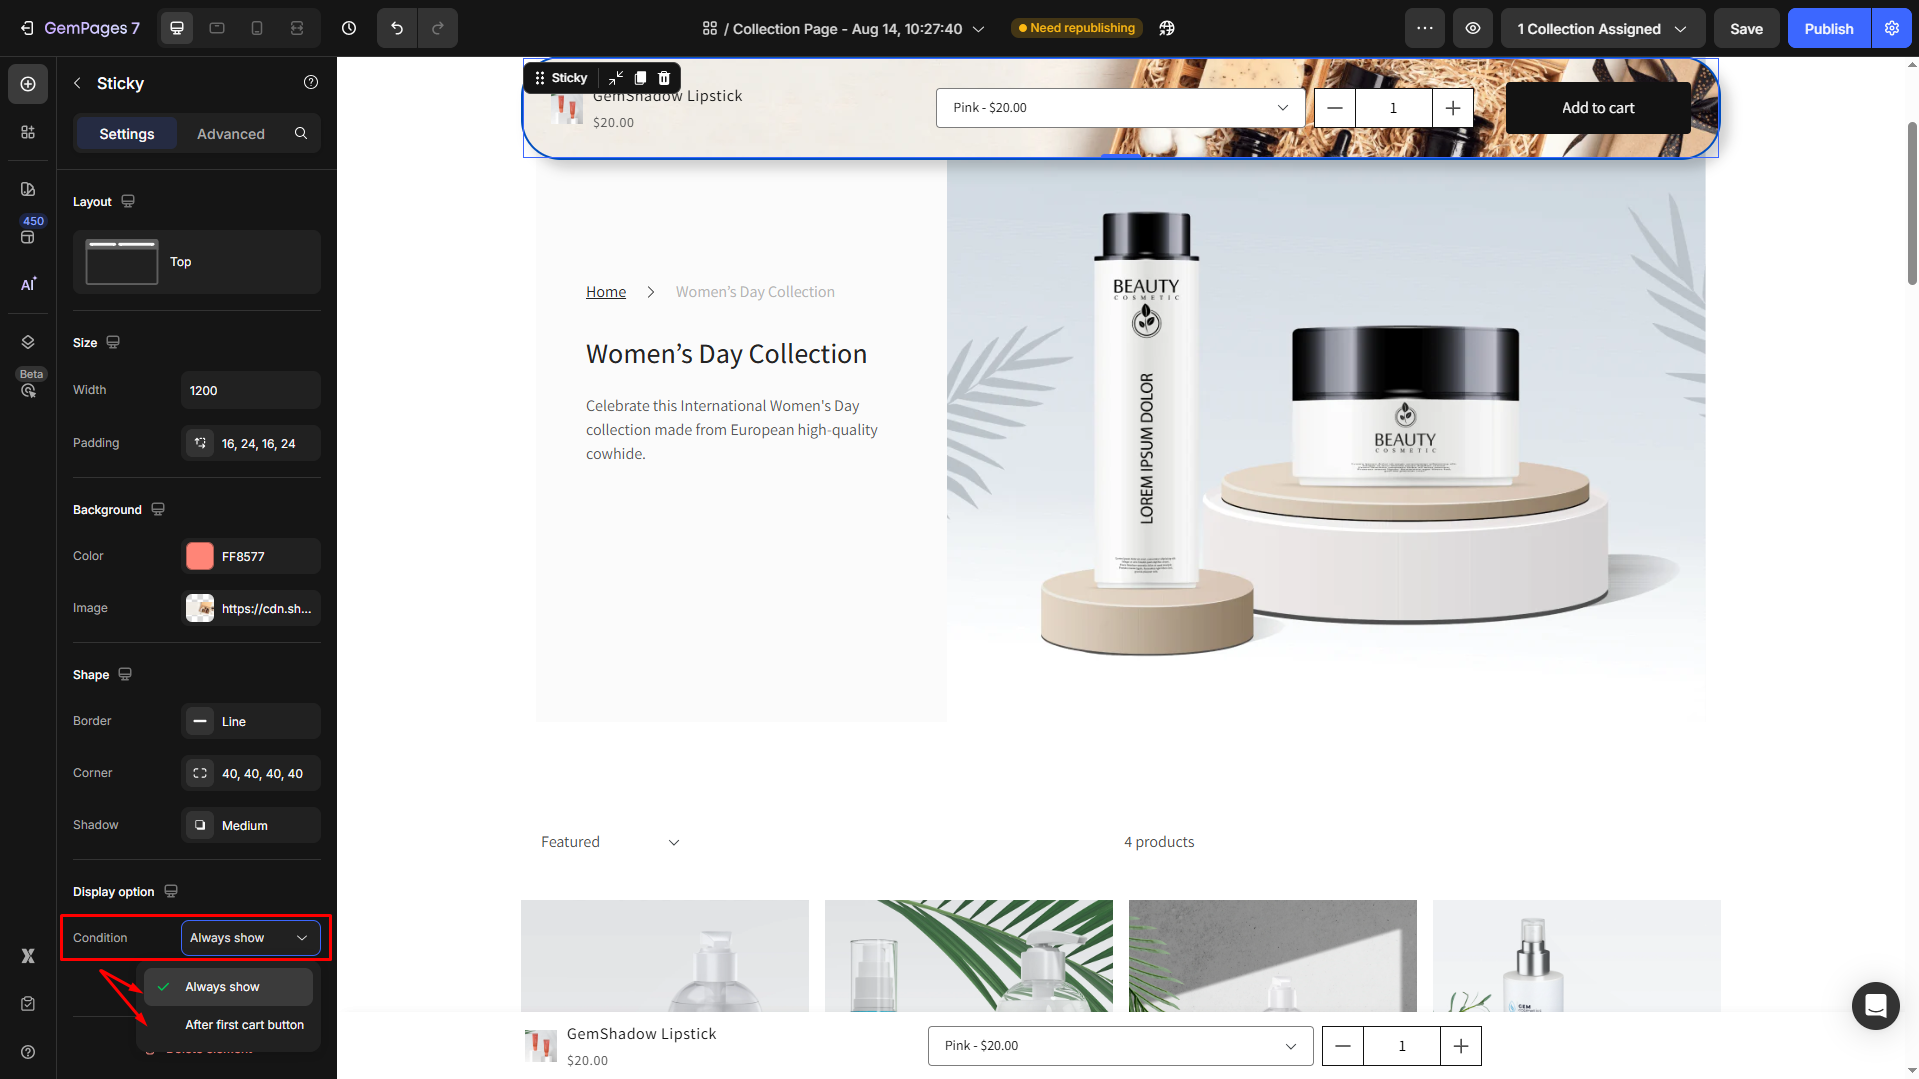
Display option
Set the condition to define when your sticky add-to-cart will display on your page. You can choose two options as below:
- Always show: The Sticky Add-to-Cart button will remain visible at all times as the customer scrolls through the page. This ensures quick access to the cart, reducing friction during the shopping journey.
- After first cart button: This element will only appear after the first standard Add-to-Cart button comes into view. This option helps avoid redundancy at the top of the page and makes the sticky button feel more contextual.
Configure the Advanced Tab
For more advanced customization, please navigate to the Advanced tab and follow the instructions in this article.
FAQs about the Sticky Add-to-Cart Element
1. Is the Sticky Add-to-Cart responsive on mobile?
Yes. The default Sticky Add-to-Cart is fully responsive. On mobile, it displays in a simplified format (usually just the button) to save space and ensure a clean layout.
2. Why doesn’t my Sticky Add-to-Cart show up on the live page?
A common cause is that the Display option is set to “After first cart button” while your page doesn’t contain any Add to Cart button above the fold. In that case, the sticky bar won’t ever appear.
How to fix:
- Change the Display option to “Always show“, or
- Add an Add to Cart button to your page if you prefer the “After first cart button” display option.
3. Can I use an image background for the Sticky Add-to-Cart?
Yes. In the Background section, you can either set a solid/gradient color or upload an image to use as the button’s background.
4. How can I change the shape of the Sticky Add-to-Cart?
In the Shape settings, you can customize the border, corner radius (square, round, or pill-shaped), and shadow.
5. The Sticky Add-to-Cart is not showing on mobile. What should I do?
This can happen for a few reasons:
- Visibility settings: Check the element’s settings in the Advanced tab and make sure it is not hidden on mobile.
- Display option: If set to After first cart button, but your mobile layout doesn’t include a standard Add to Cart button above the fold, the sticky bar won’t appear. Switch to Always show.
- Layout differences on mobile: On phones, the Sticky Add-to-Cart may display in a simplified version (button only). Scroll down to confirm it is not minimized.
6. Can the Sticky Add-to-Cart replace my theme header cart button?
Yes, in practice. If your theme header doesn’t have a cart button, simply enable the Sticky Add-to-Cart at the top of the page. It provides the same functionality, always visible as customers scroll.
7. Can I use the Sticky Add-to-Cart element as a regular sticky button (not Add to Cart)?
The Sticky Add-to-Cart element is designed specifically for product Add to Cart actions. It requires a product context and isn’t intended to be used as a general CTA button.
However, if you need a sticky CTA button that links to another page (e.g., collection, landing page, etc.), we recommend you remove all the included elements inside the Sticky Add-to-Cart element, then put the standard Button Element instead.
Check this video guide for further instructions.


Thank you for your comments