


What Is a Sticky Section?
A sticky section stays fixed in place as visitors scroll through your page, making it ideal for keeping important content visible, such as promotions, navigation bars, or product details. In this article, you will learn how to easily create two common types of sticky layouts using GemPages V7:
- A sticky bar that stays at the top or bottom of the page
- A sticky column that keeps product images fixed alongside scrolling product information
How to Create a Sticky Section in GemPages?
#1. Add a sticky bar on your page
A sticky bar is useful for announcements, navigation links, CTAs, or promotions that remain visible as users scroll.
From the GemPages Dashboard, open your preferred template to edit. You can quickly find the Row element on the left sidebar of the Editor, drag and drop the Row into your preferred position.
Nest all the elements you need inside the Row to create a sticky bar as you wish to finalize your design.
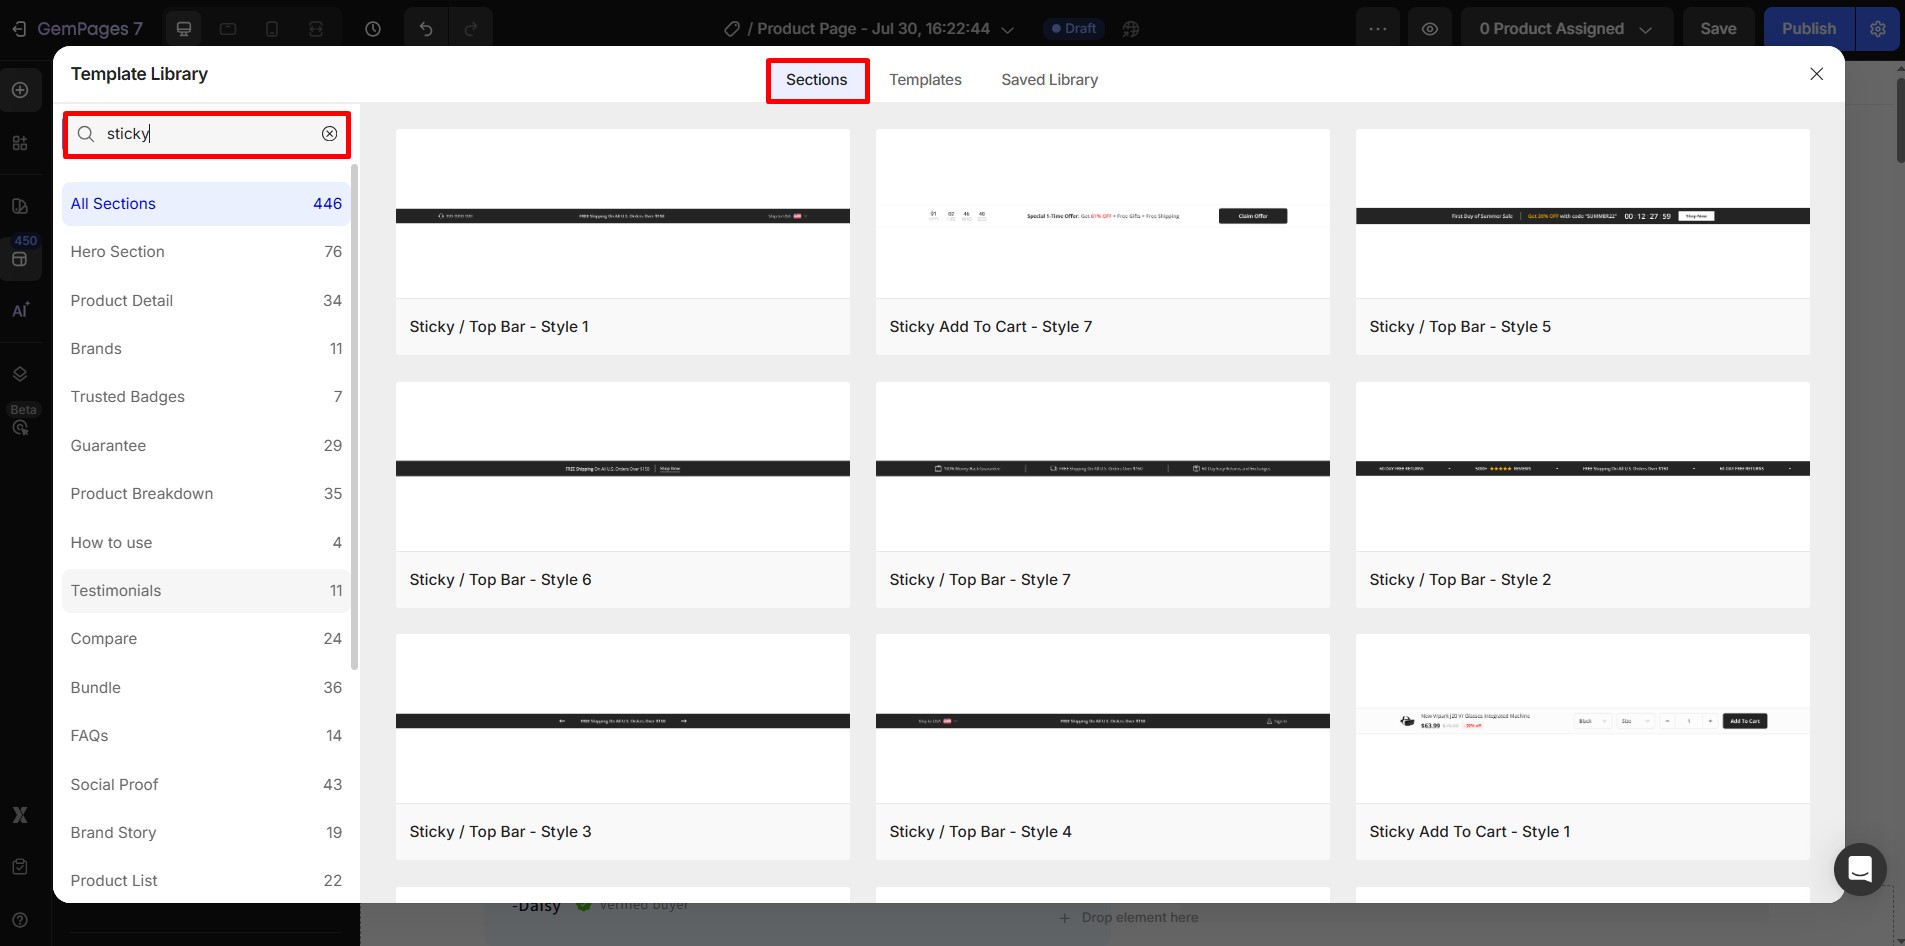
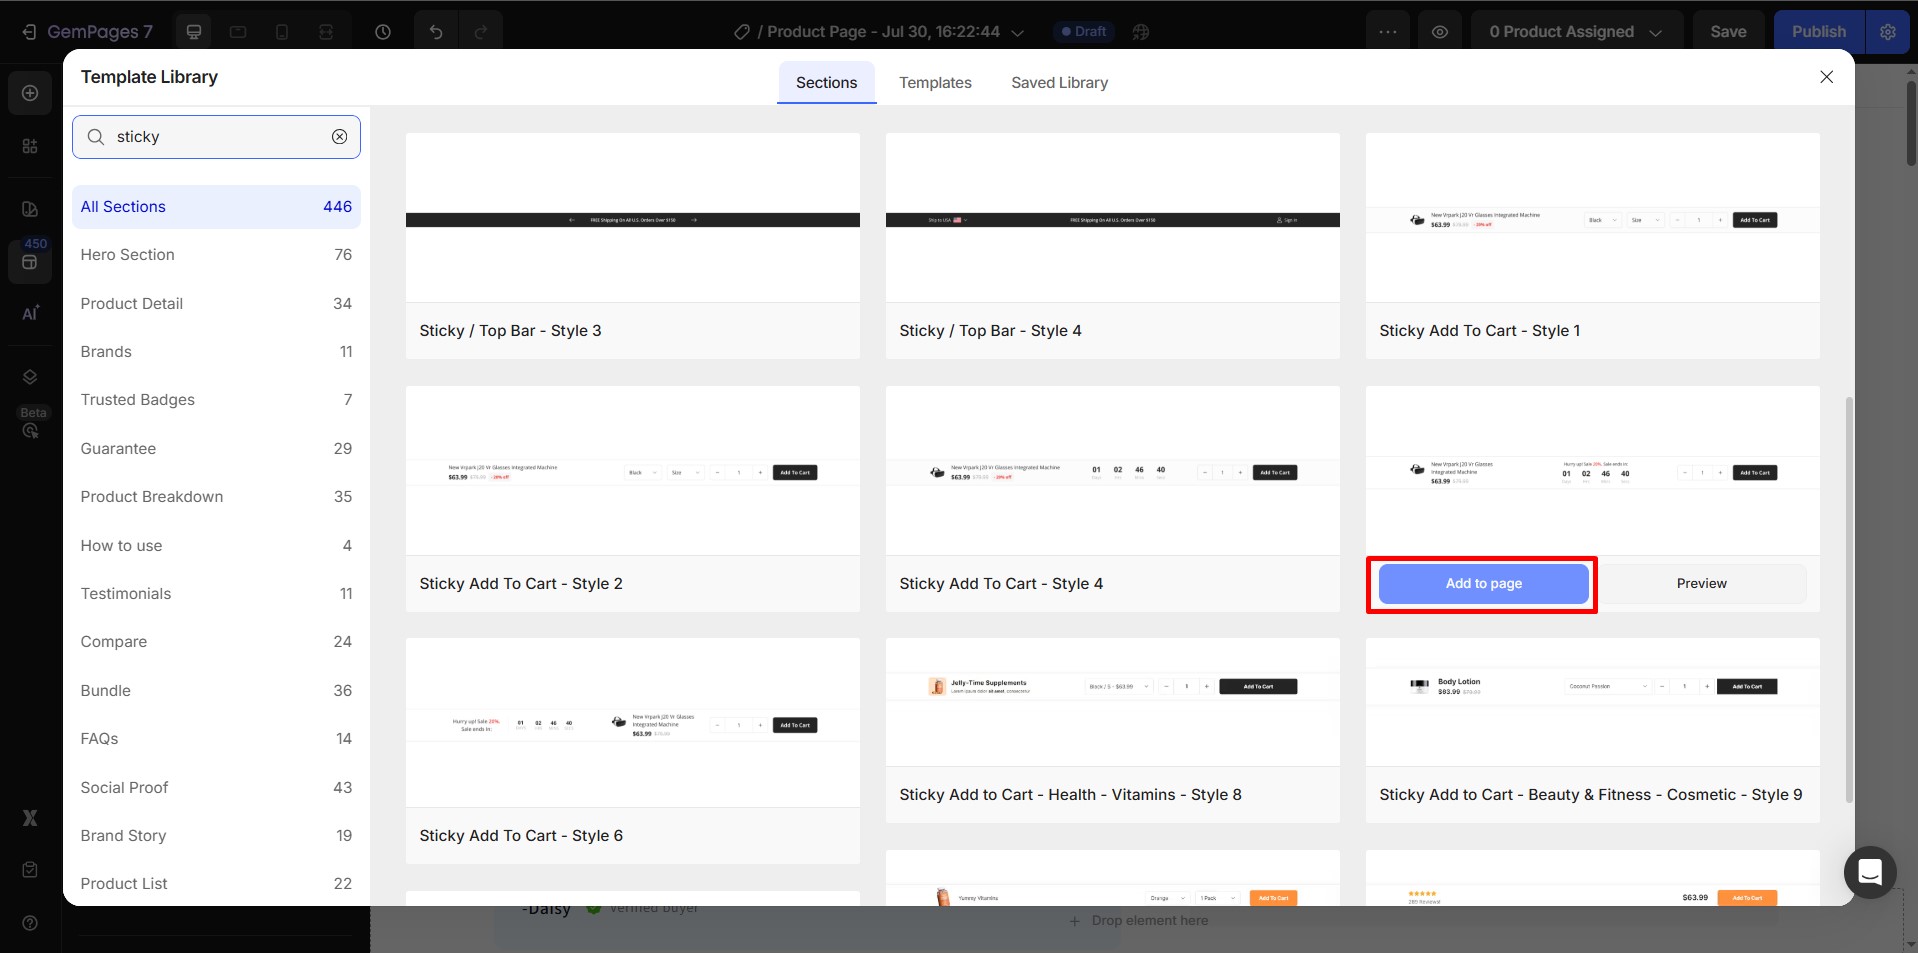
Alternatively, you can use one of our pre-designed sticky sections instead of building one from scratch.
- Go to Library > Sections, then search for “Sticky”.
- You’ll find a variety of ready-made layouts, including Sticky Bars and Sticky Carts.
- Click Add to page on the section you want to use. The selected layout will be inserted into your template automatically.
#2. Make your product image sticky
This layout is commonly used in product pages, where the product image stays in place while users scroll through additional product details.
Step 1: From the GemPages Dashboard, open your product page template in the Editor.
Step 2: Click on the Product Images element to reveal the configuration on the left sidebar. Go to the Advanced tab, find the “Position” section, and select “Sticky” from the dropdown menu.
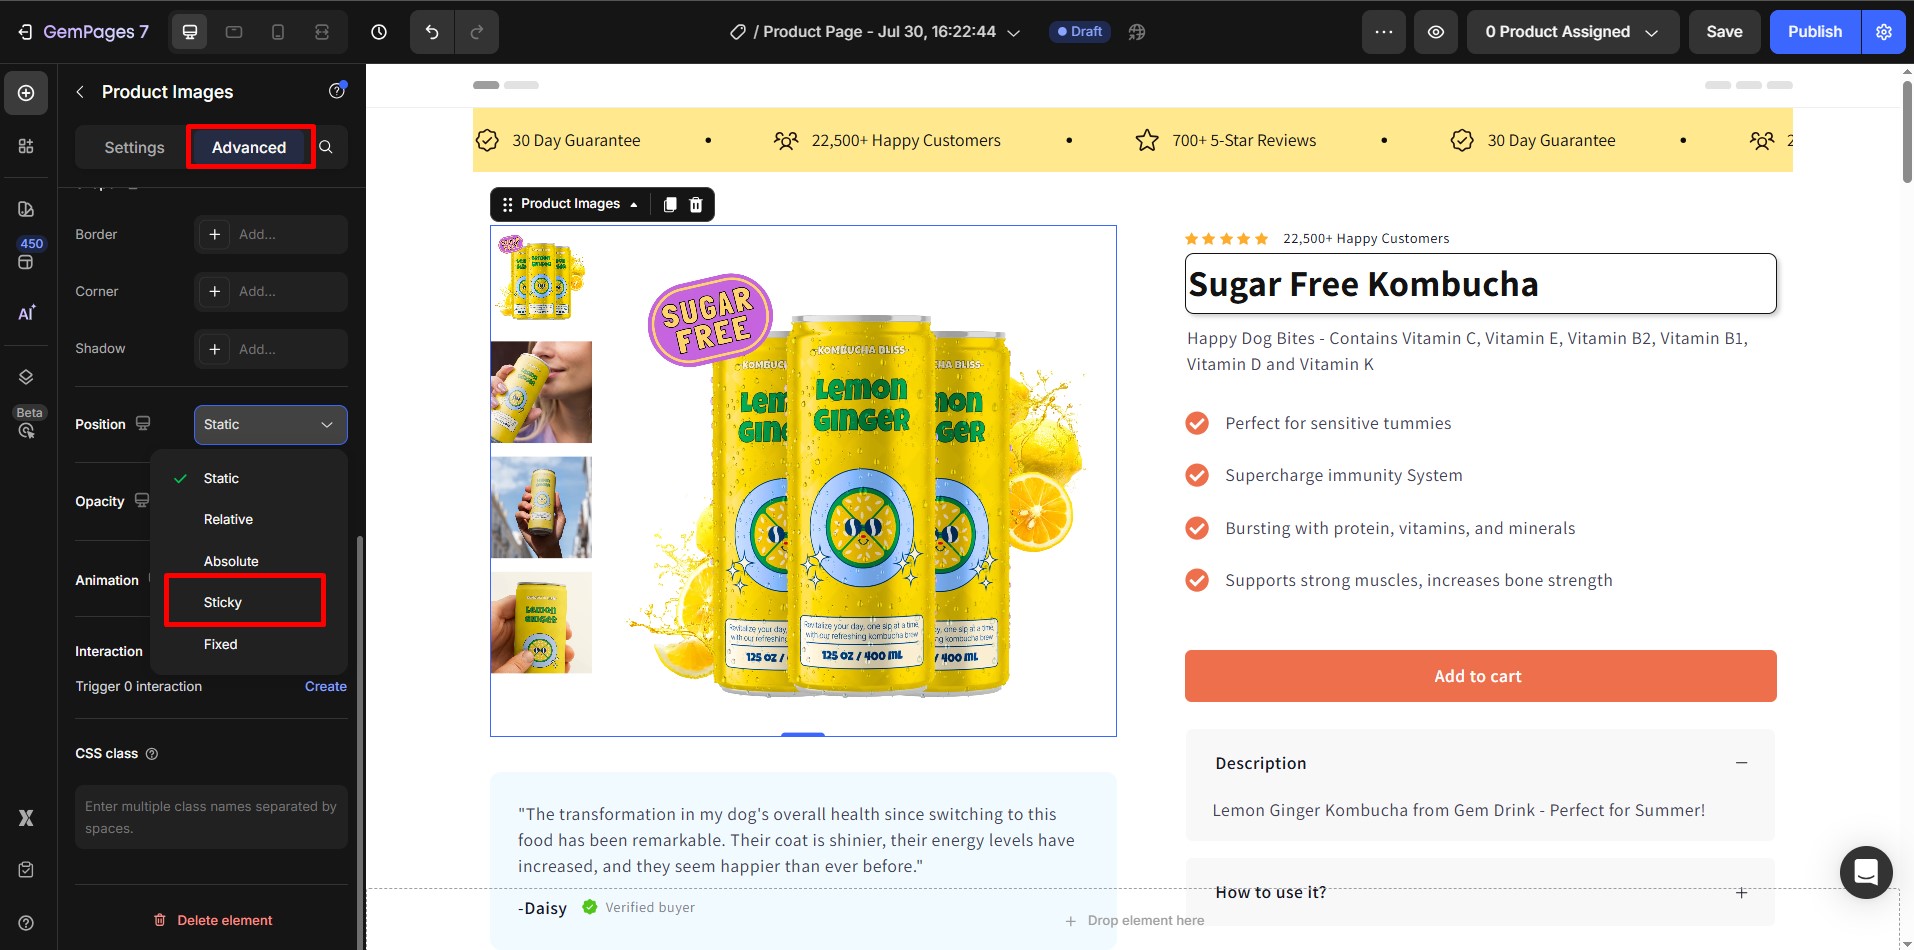
Step 3: Hit “Save” and “Publish” and check the result on the live page.
Depending on the theme you use, the Sticky position functionality might not behave as expected. If this occurs, please reach out to our support team for assistance.


Thank you for your comments