Before we start, GemPages must be installed on both stores. For more information, visit the GemPages website.
Note:
- For version V7, this feature is available for all GemPages plans (on the Free plan will not be able to use the Export feature).
- For version V6, this feature is only available for paid GemPages plans – Build, Optimize, Enterprise (not including the Shopify development store).
GemPage Version 7
GemPages’ Export and Import feature allows you to export one or multiple templates from your current store and import them seamlessly into another GemPages store. This ensures consistency across your web pages and saves you time.
How to Export a Template Using GemPages V7?
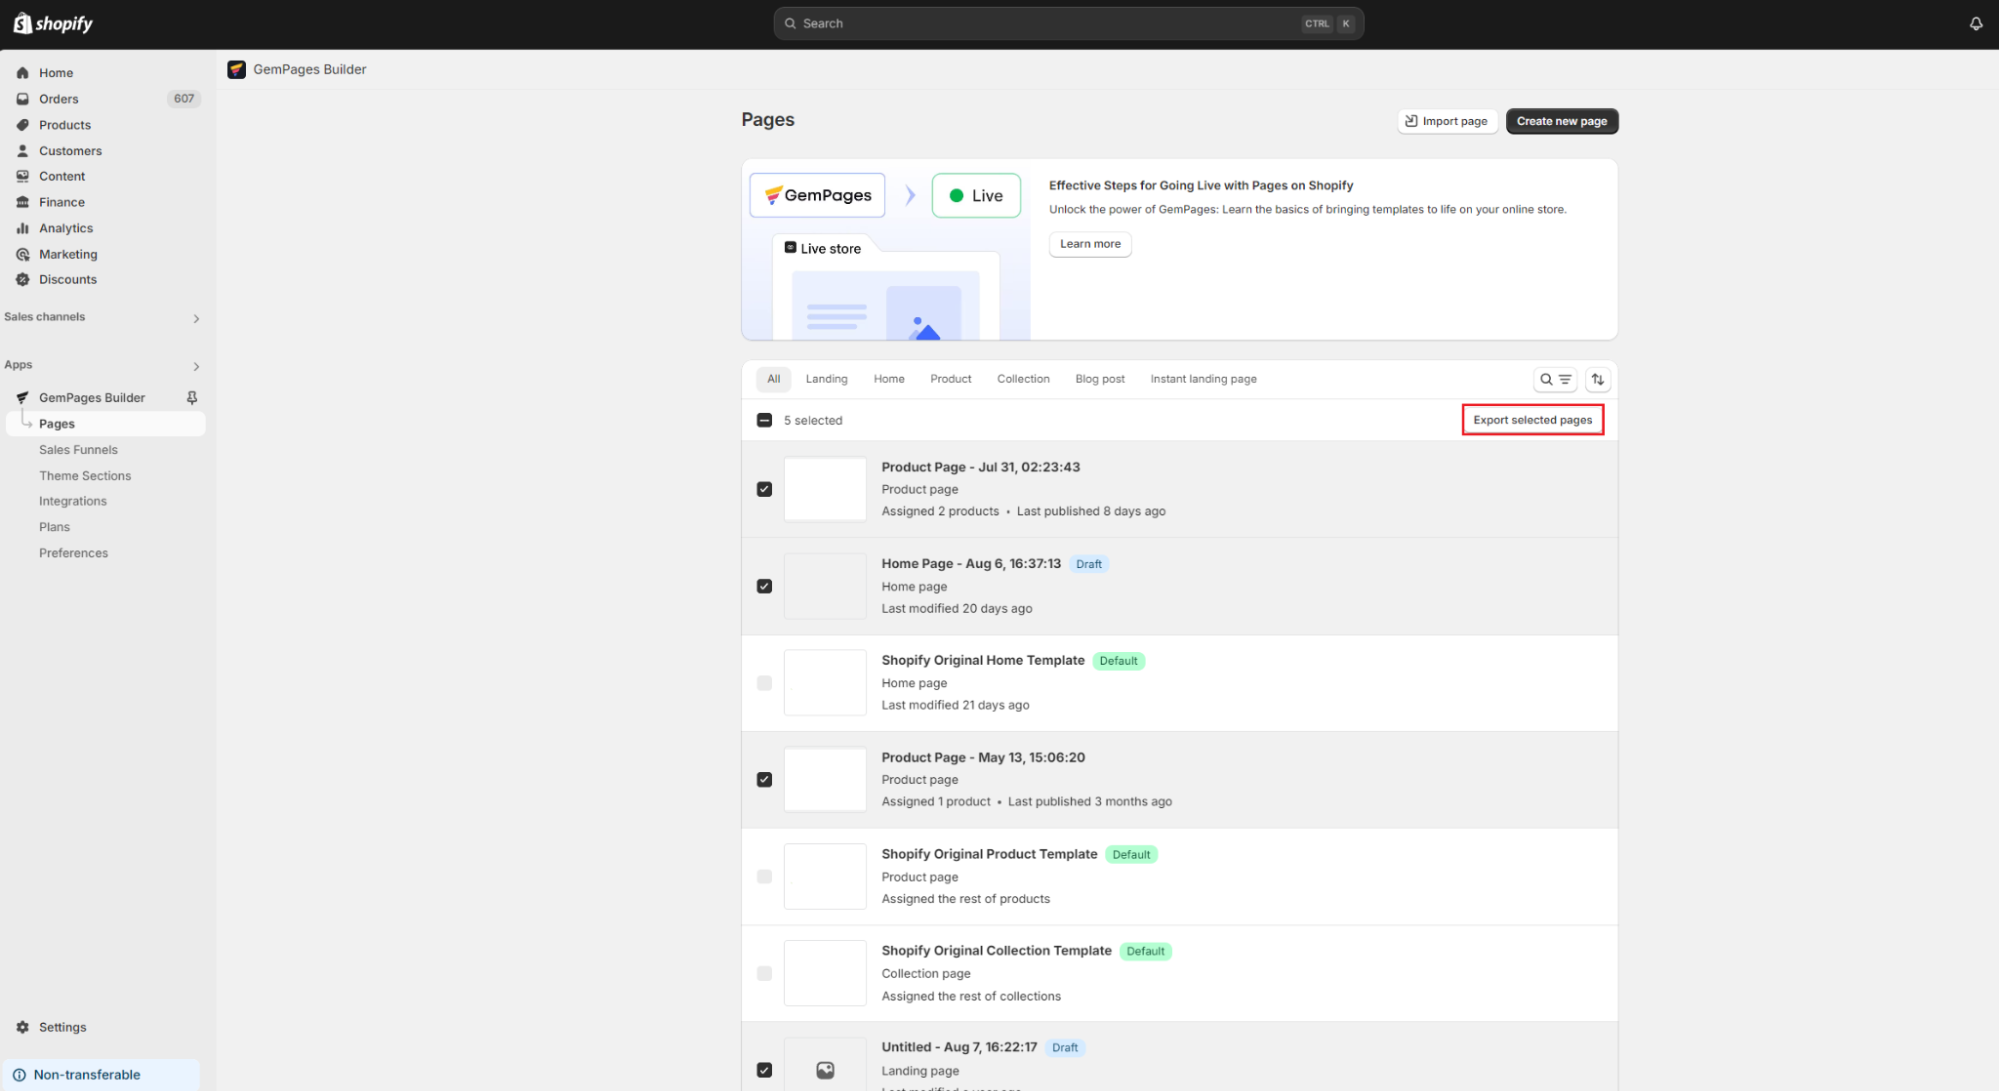
Step 1: Access the GemPages Dashboard and navigate to the Pages section.
Step 2: Choose one or more templates to export (up to 20 templates). Next, click “Export selected template” at the bottom of your page.
Step 3: Confirm the template export. You’ll encounter one of two situations: If you’re not the store owner, images won’t be included in the export. If you are the owner, everything will be exported as expected.
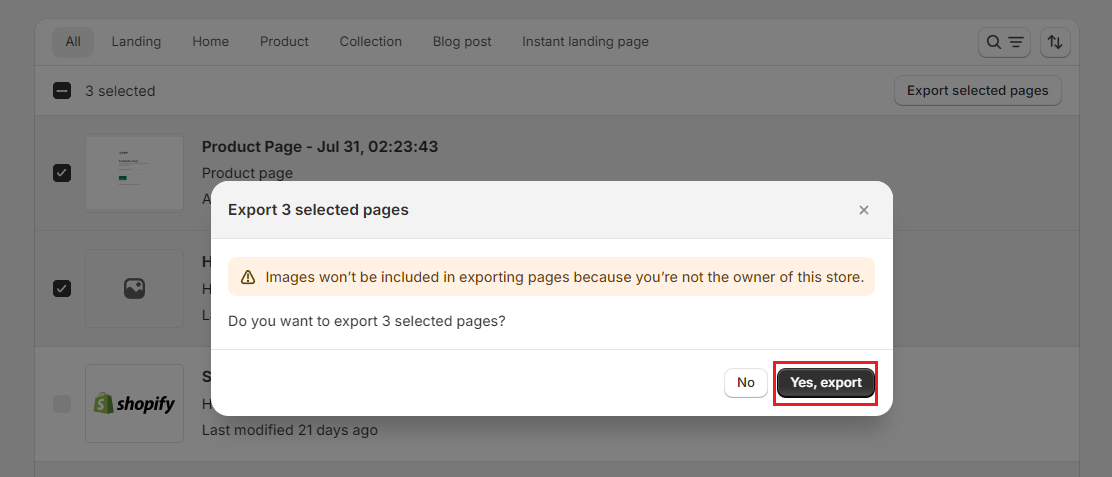
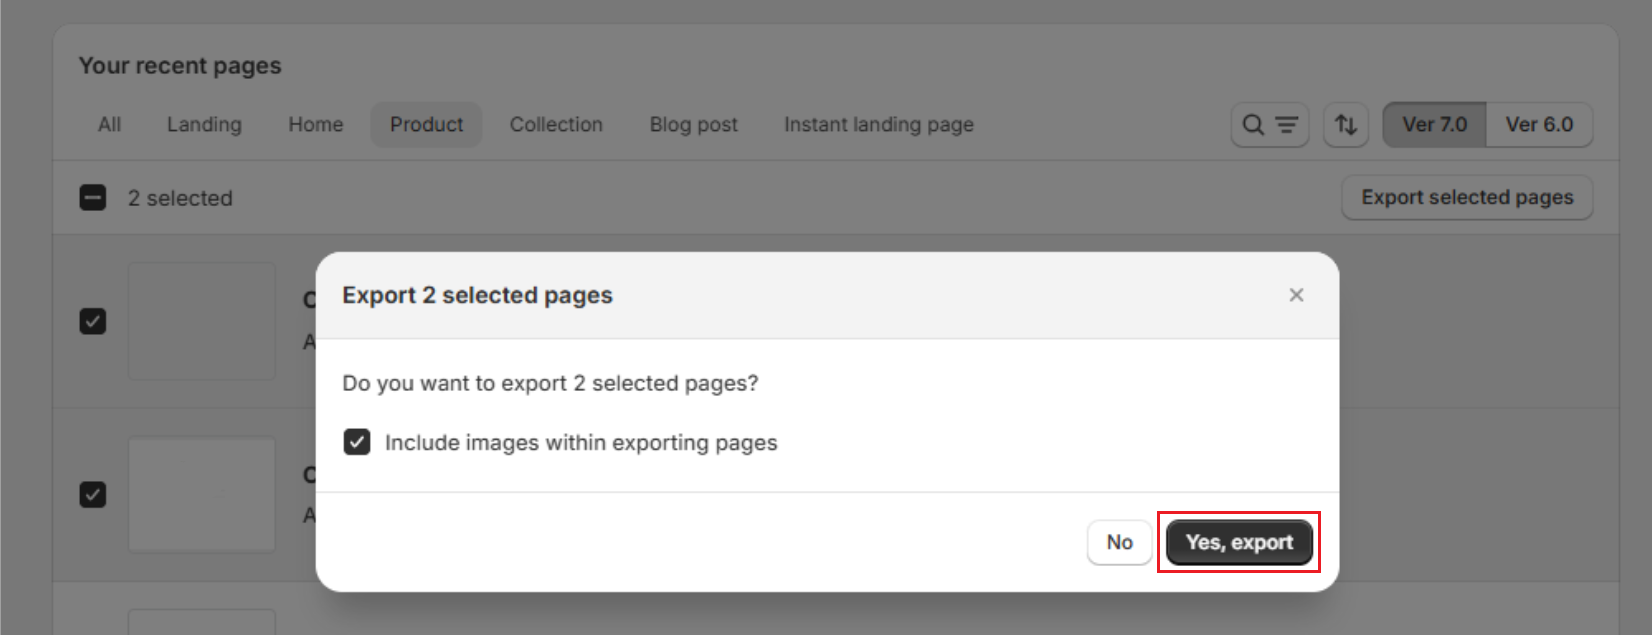
Next, the export file (.gempages) will be downloaded to your device.
How to Import a Template Using GemPages V7?
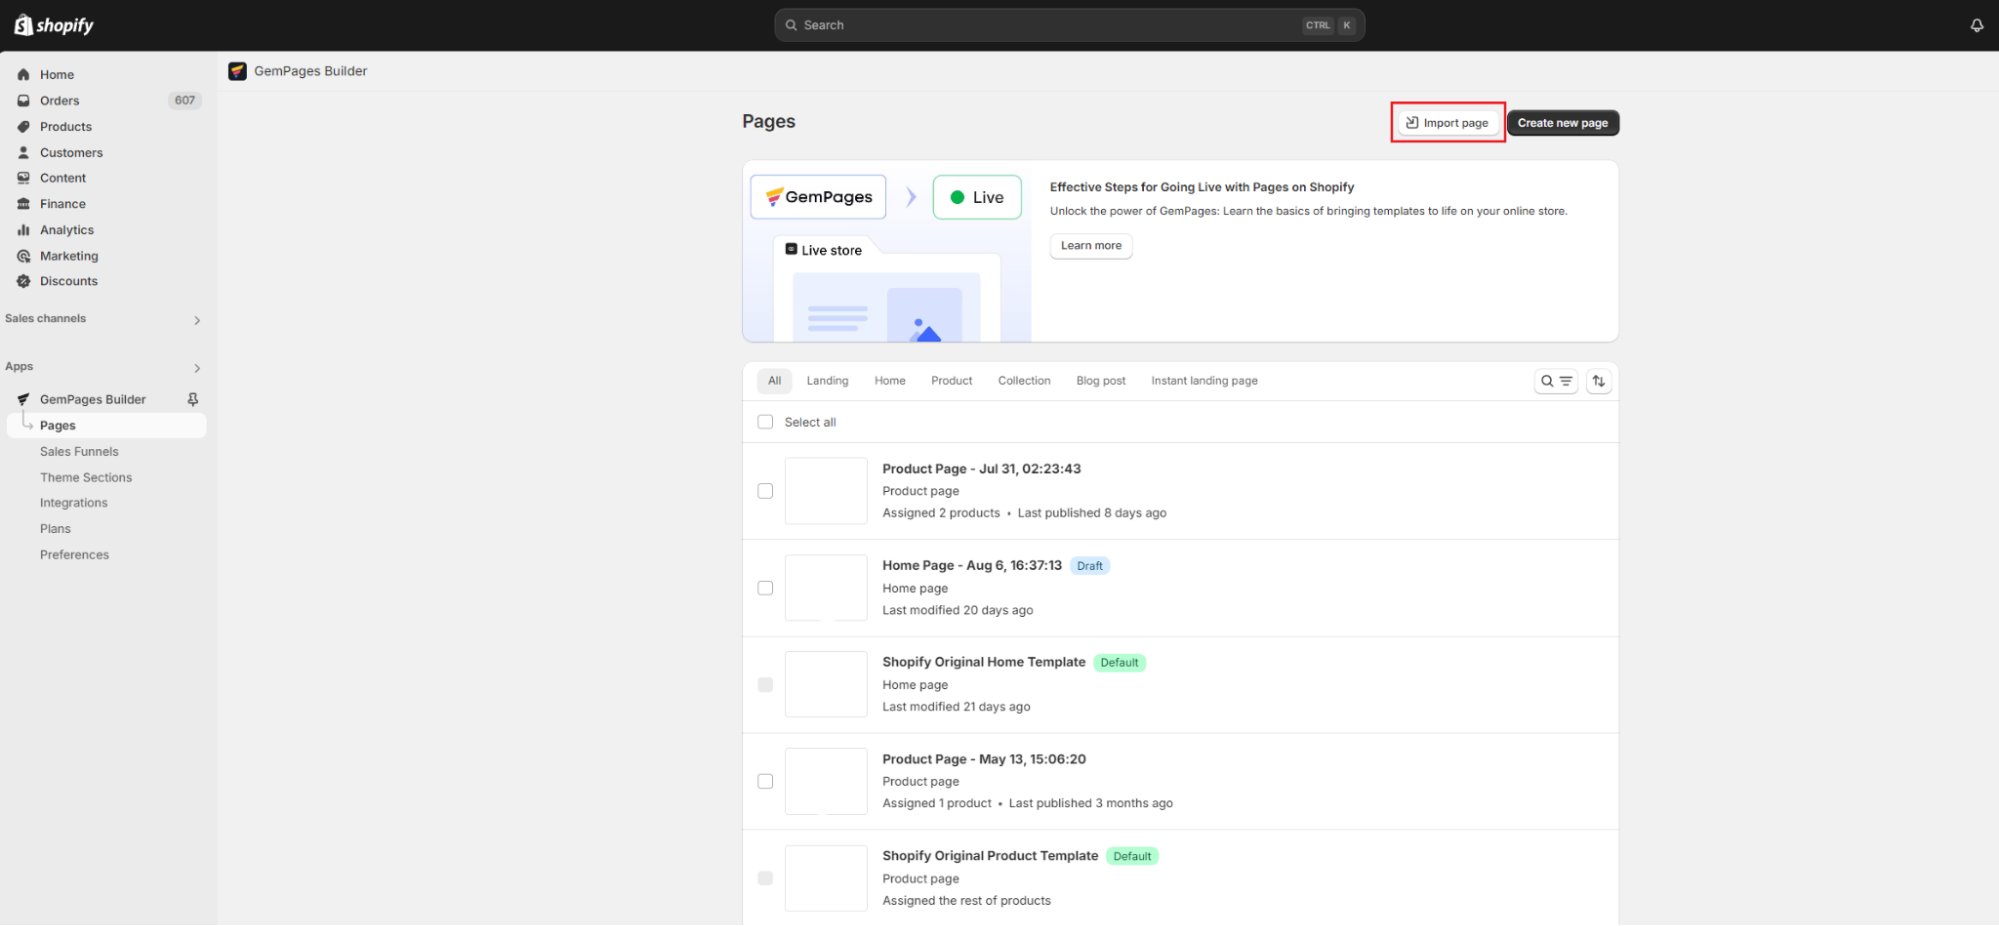
Step 1: Access the GemPages Dashboard and navigate to the Pages section.
Step 2: Click the “Import page” button at the top. Then, choose “Add file” to upload the file from your device.
Step 3: Click “Import” to confirm.
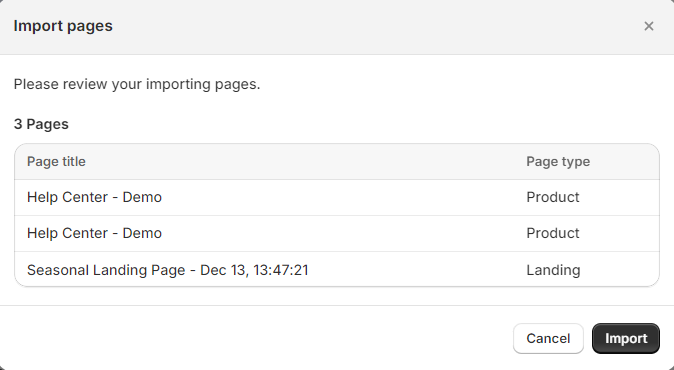
Note:
The status of the imported template will be Draft. You will need to manually publish it if needed.
After importing, GemPages will automatically generate a new page in the page list.
GemPages Version 6
Save Templates and Blocks to the Library
If you would like to transfer specific blocks or elements instead of an entire template, you can use the “Save to Library” feature:
Step 1: Access the page you want to export content from the GemPages Dashboard.
Step 2: Ensure that the latest version of the template will be used for export by clicking on the “Save” button on the top right corner of the Editor page.

Step 3: Click the three-dot button and select “Save Template to Library”.

If you would like to save only a block or an element, just right-click on it and select “Save to Library”.
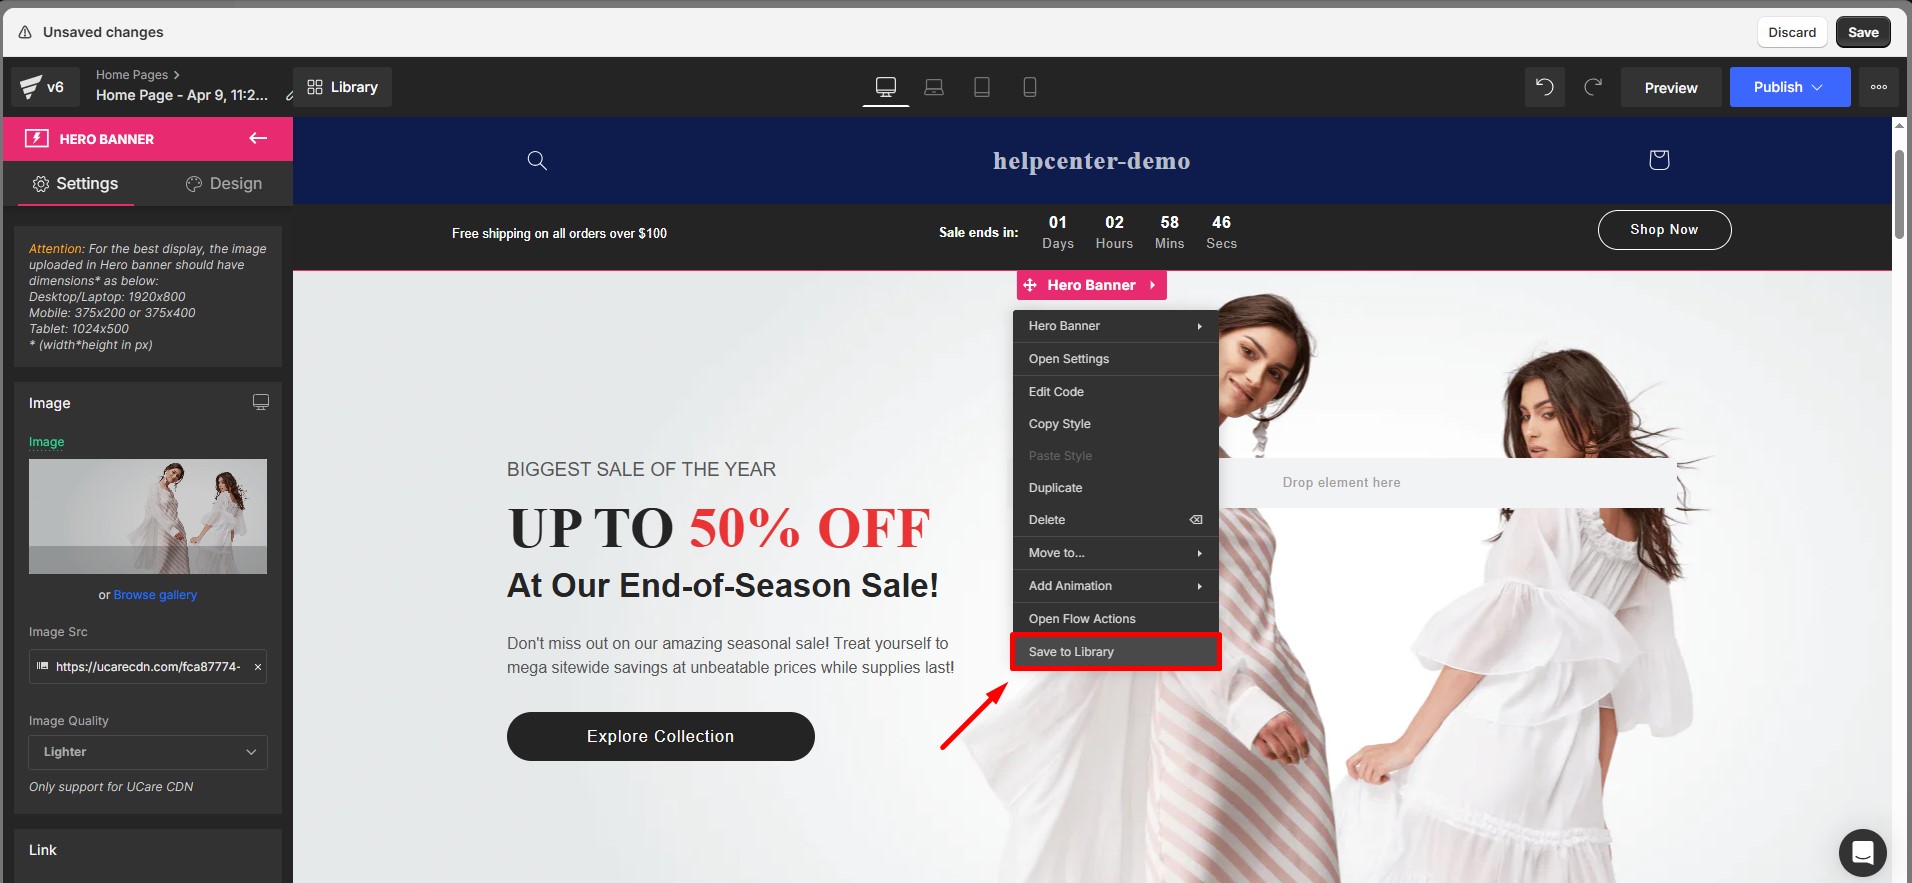
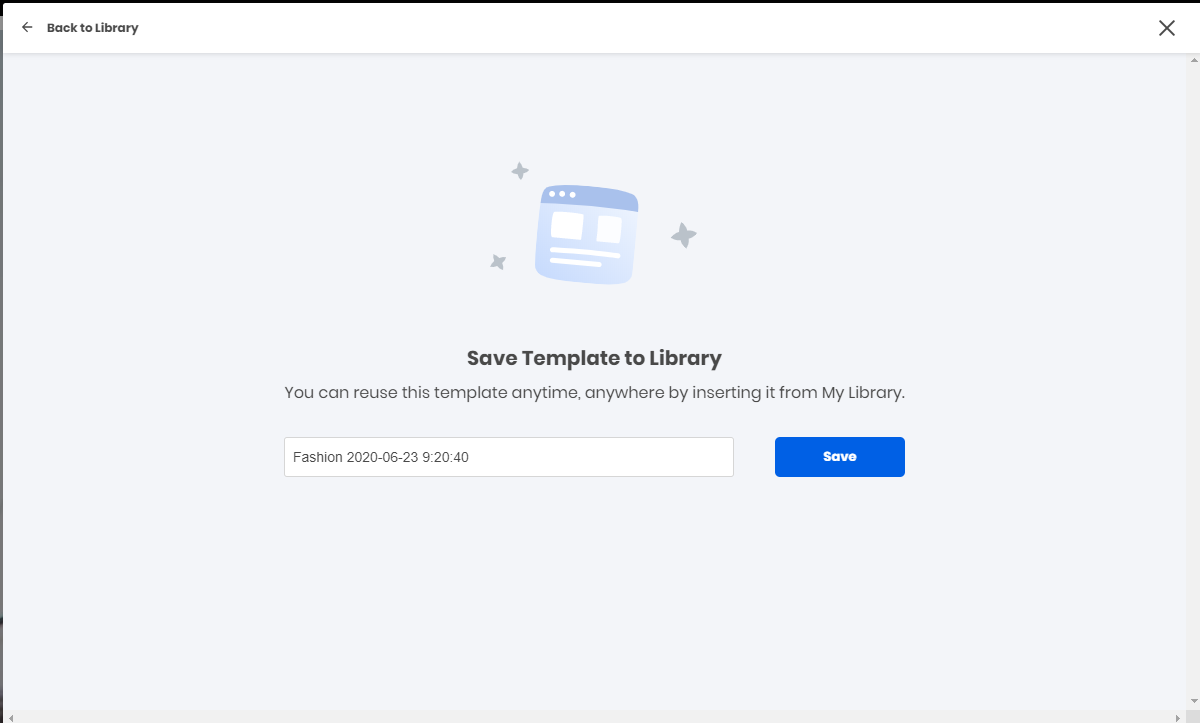
Step 4: A pop-up would appear like below. Click “Save” your current template to the Library.
Transfer templates between two libraries
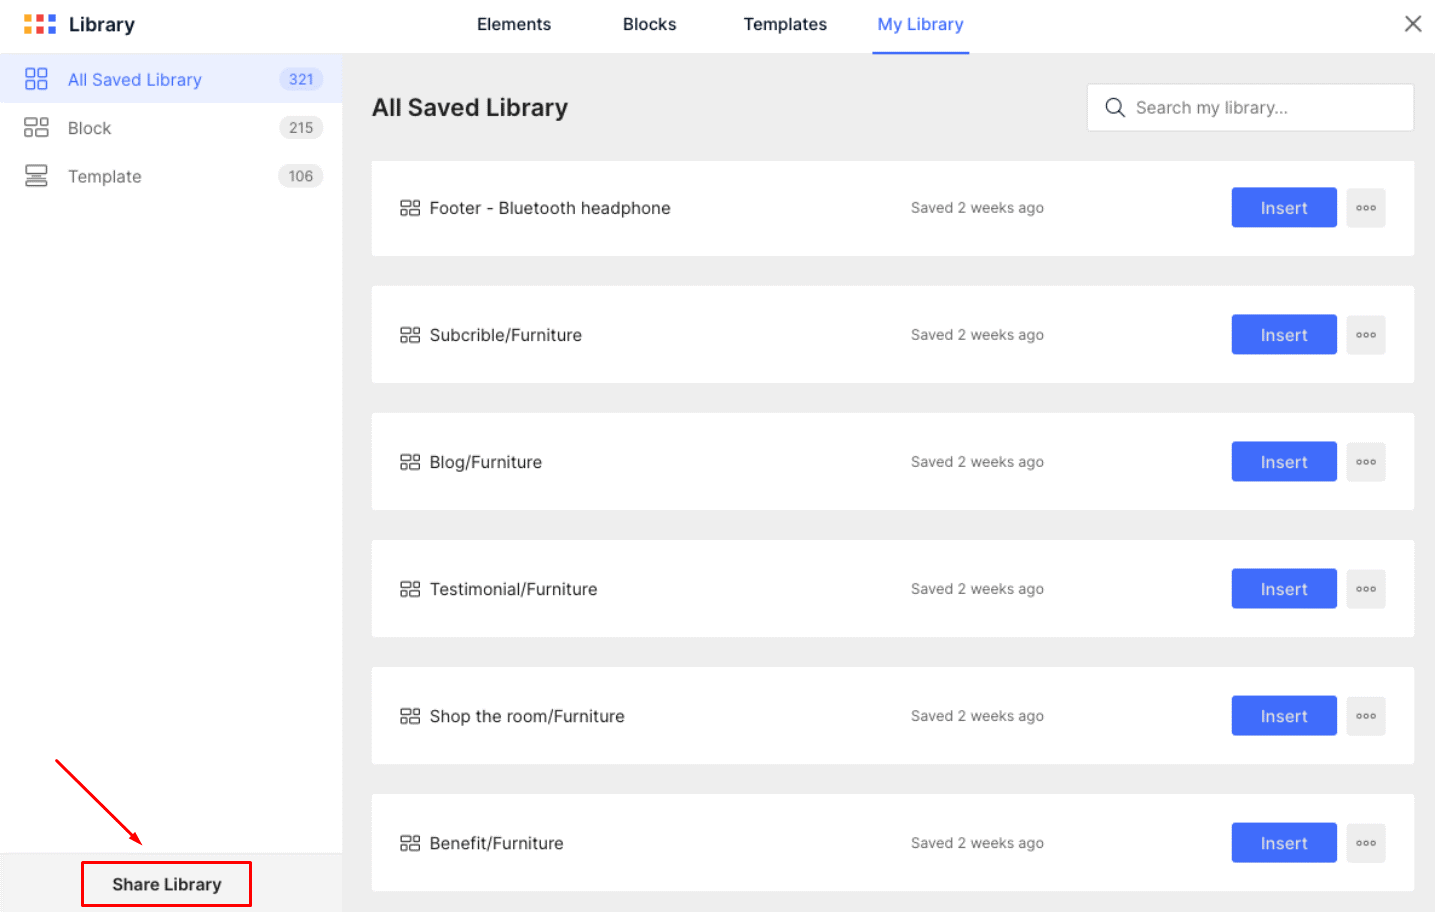
Step 1: After saving the template, you will be redirected to the “Saved Library” section of saved templates and blocks. Select “Share Library” then.
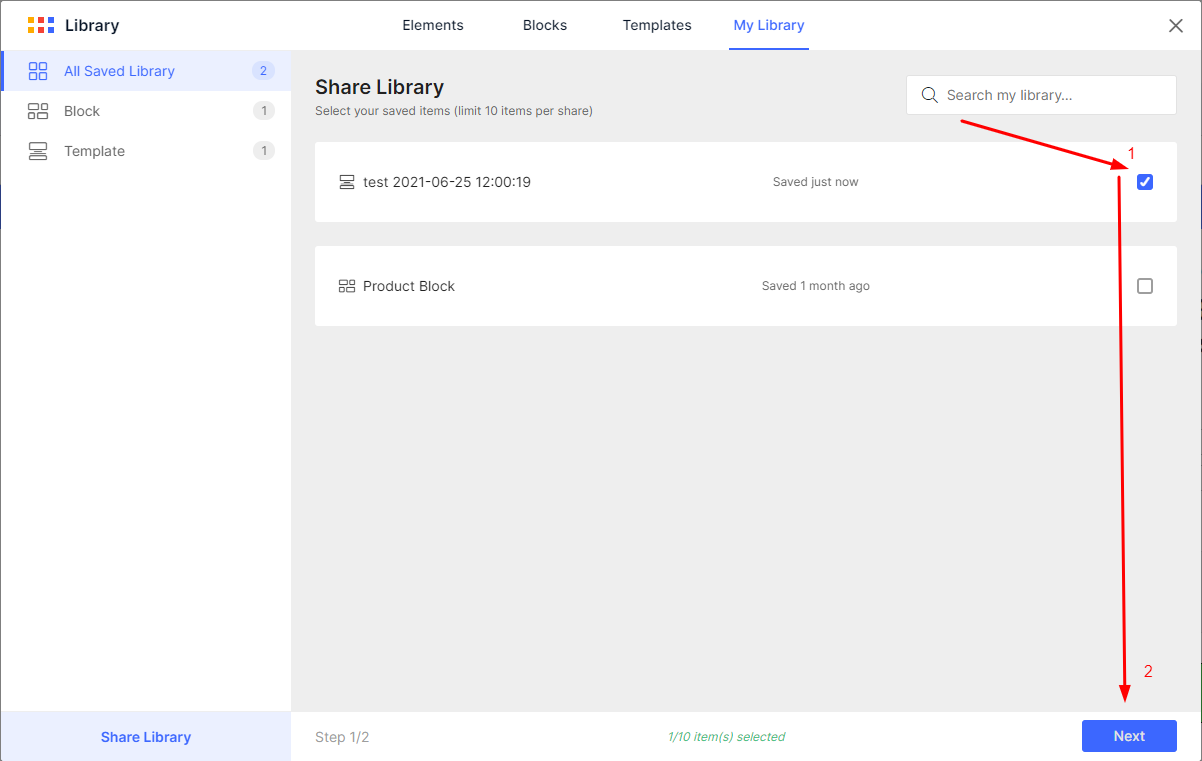
Step 2: Select the templates you would like to transfer by checking on the right side boxes and clicking the “Next” button when finished.
Step 3: Fill in the required information for the Title, Message, Add target store sections, and then click the “Share item” button.
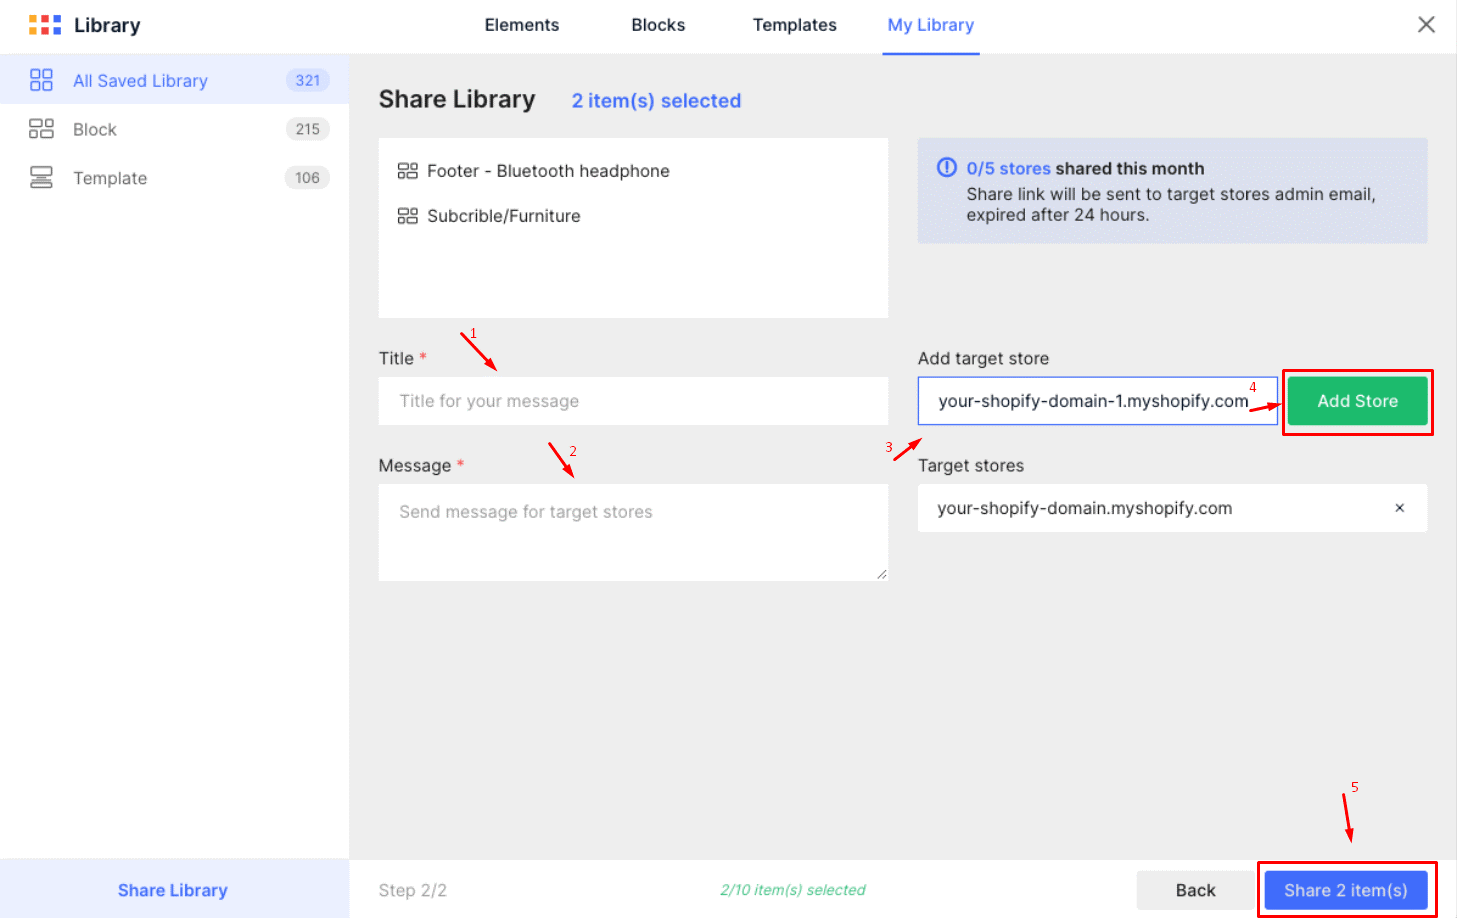
You can transfer the templates to multiple stores at a time with a maximum of 5 stores per month.
Verify your activity
Step 1: Next, a sharable link will be generated and sent to your Shopify registered email. Please be well noted that your shareable link will expire after 24 hours.
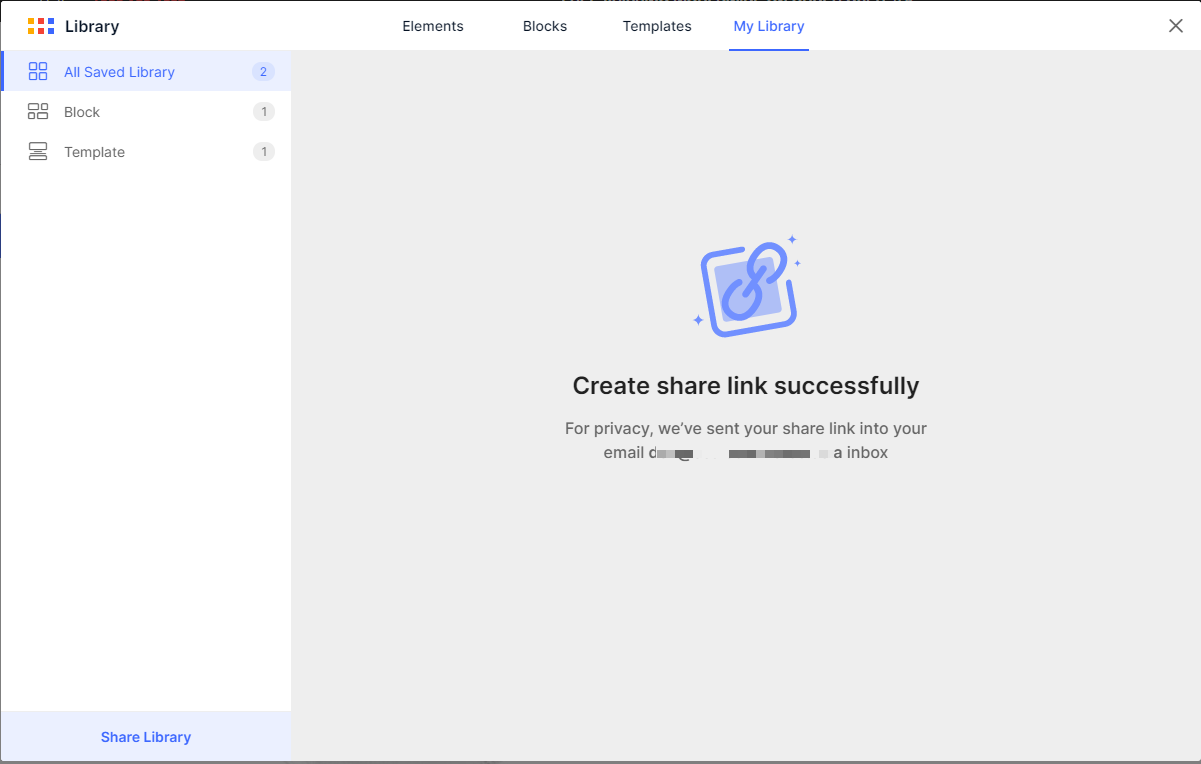
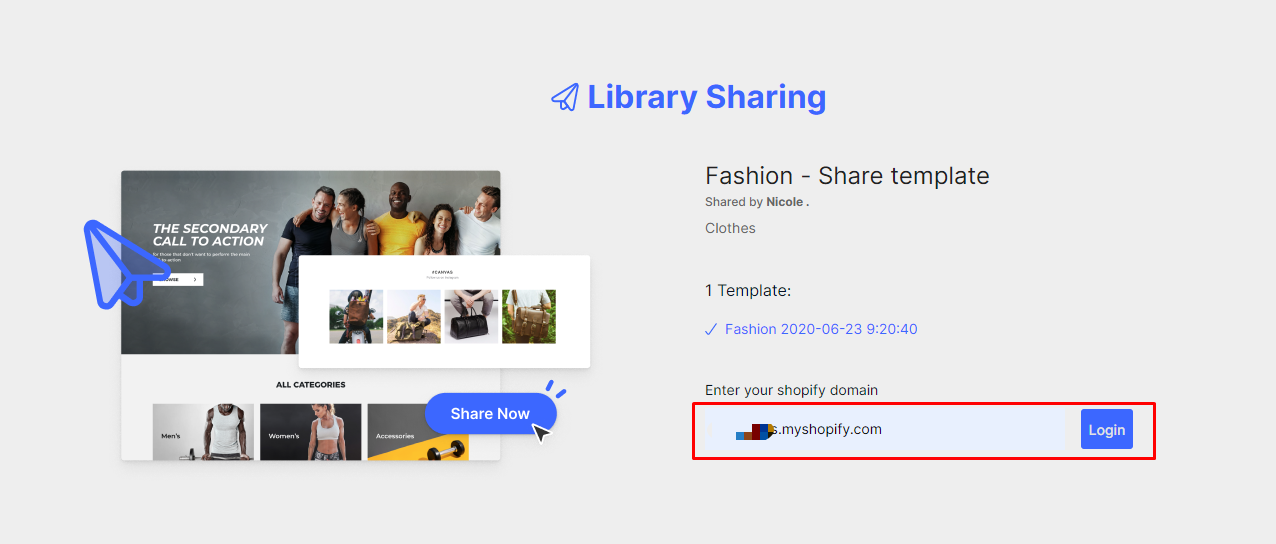
Step 2: Click on the link in your mailbox. The opened window will ask you to enter your destination store domain. Please enter your store domain and click “Login”.
The Sharable template feature is available for the latest version of GemPages only. If your version is not up-to-date, please click “1-click update”.
Import templates
Step 1: After you log in successfully, select “Accept” to import the template to the library of the destination store.
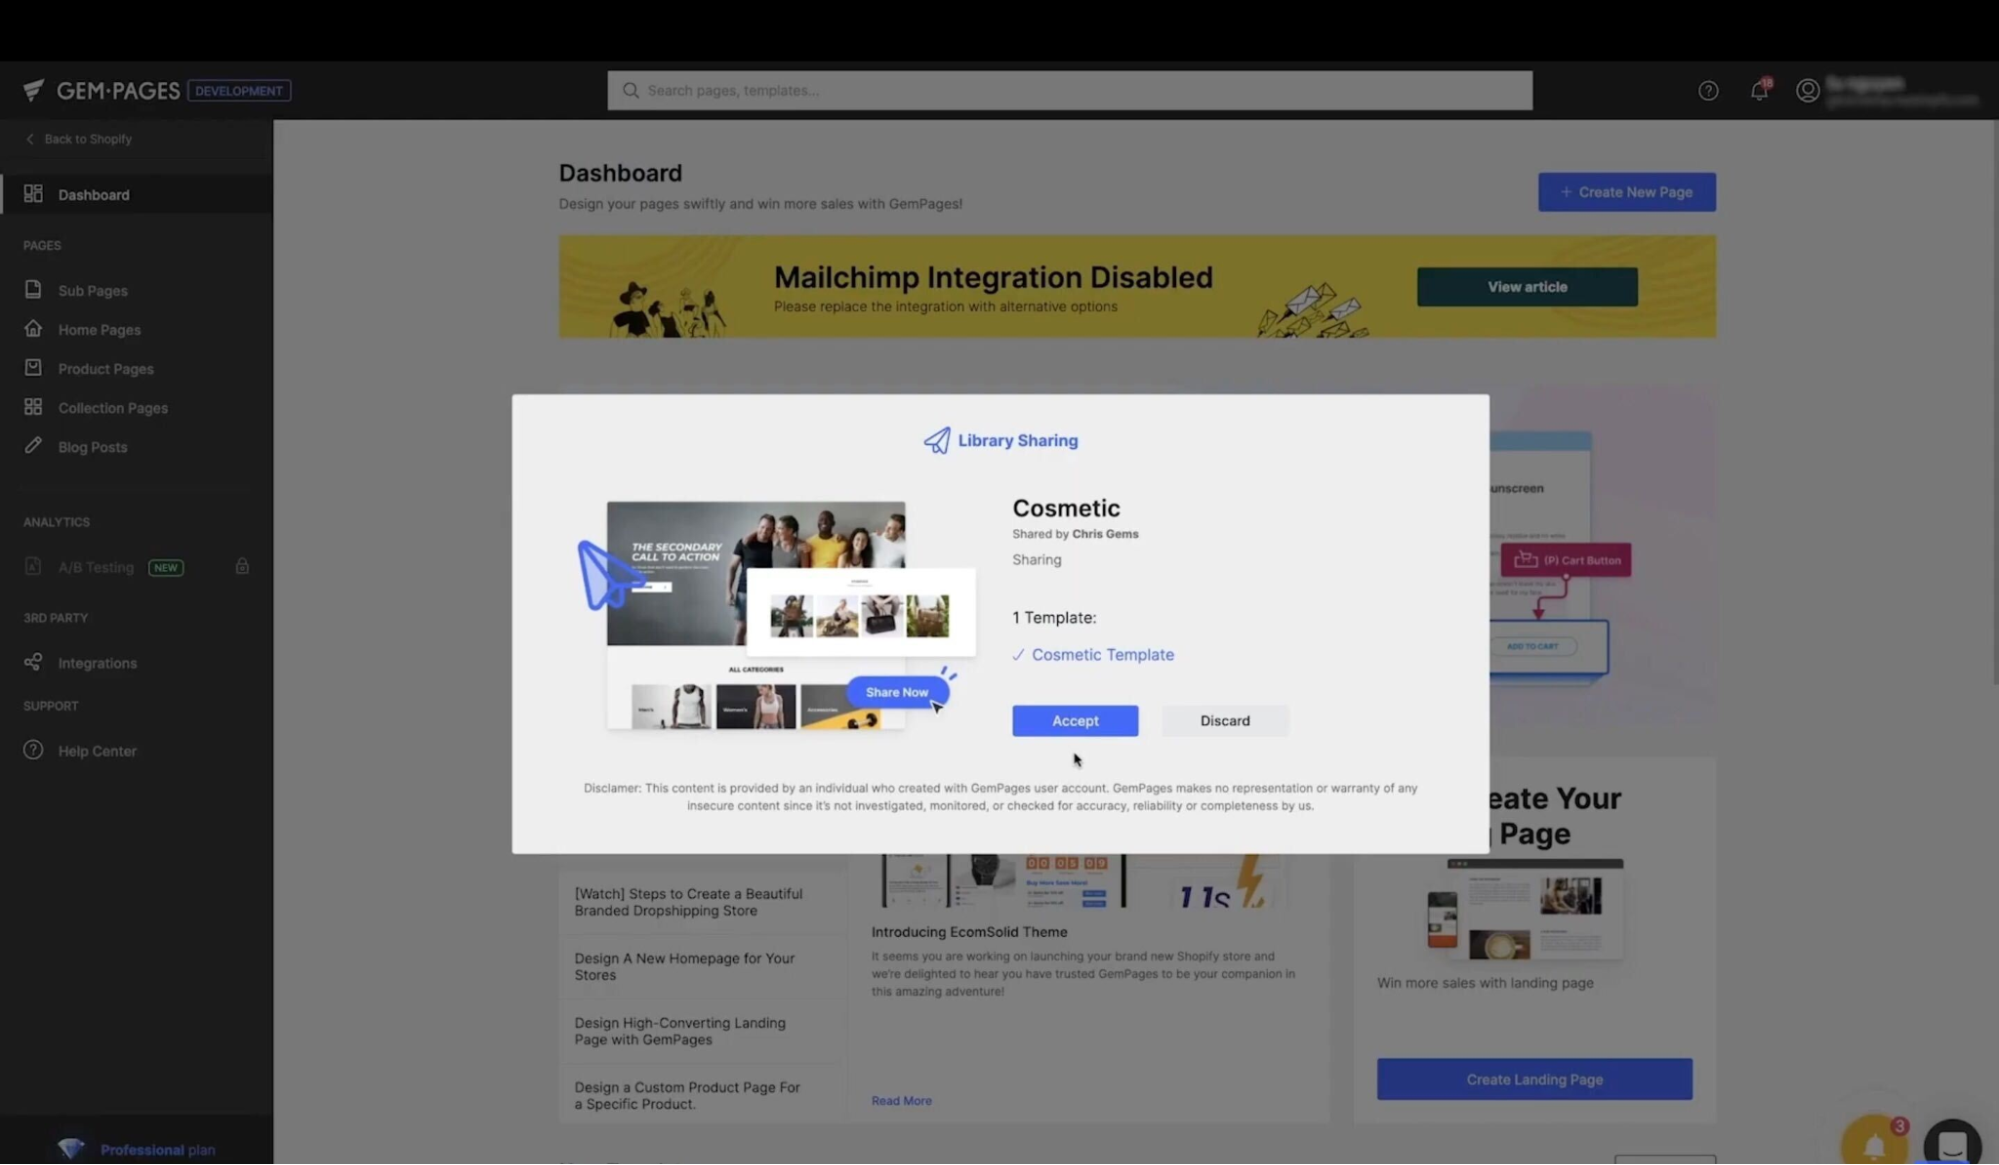
After that, a confirmation box will show up. Kindly click on “Okay, I got it” to finish.
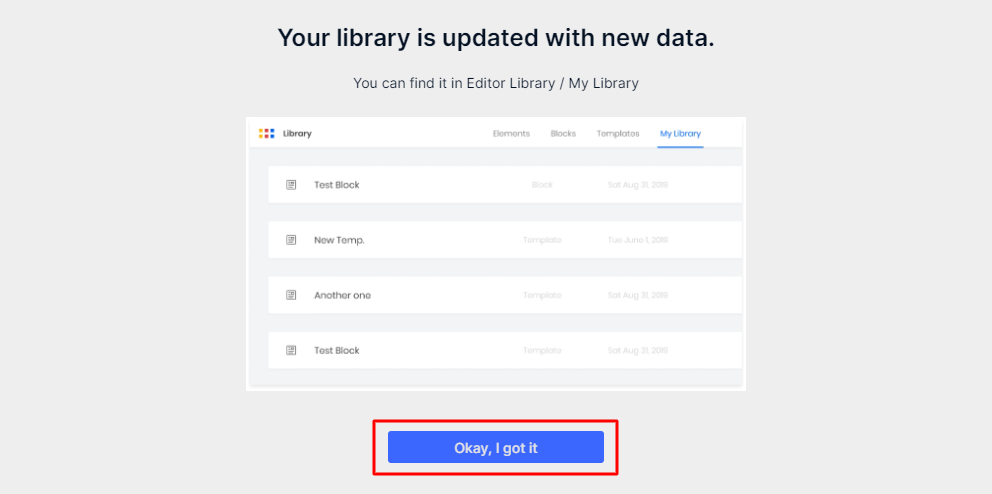
Step 2: Now the template is available in the library of the destination store, you can go ahead and insert the template to use as below.
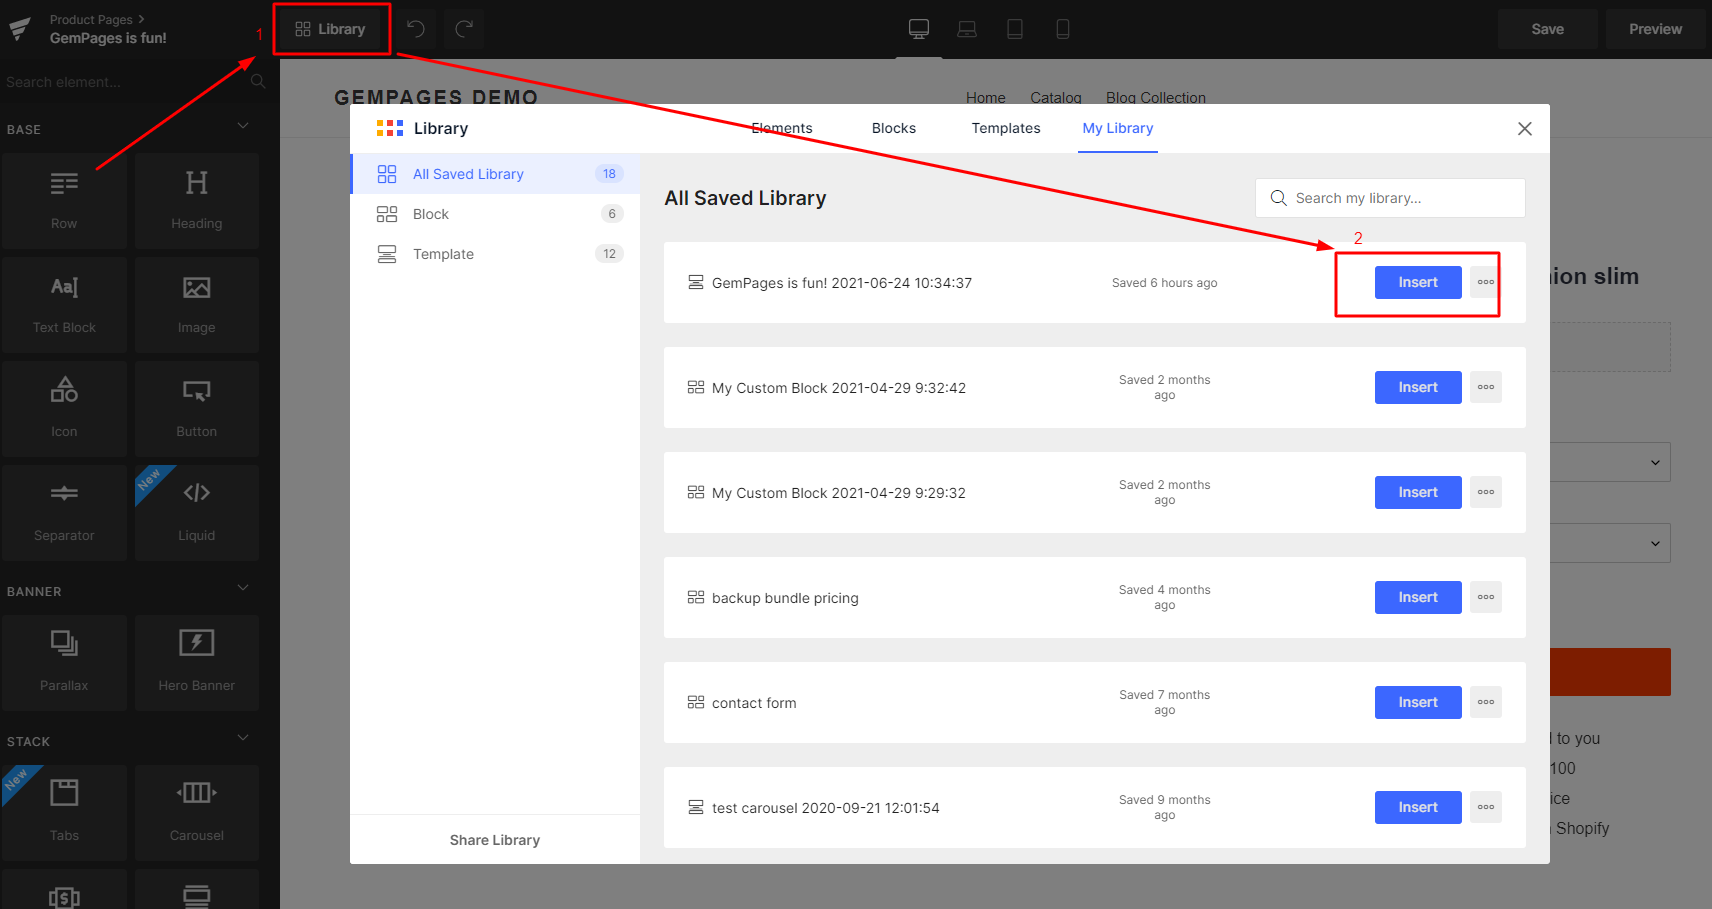
That’s it! With just a few steps, you can transfer and use your templates across multiple stores. Make sure to check out our tutorial video for further guidance.
Video: [GemPages v6] How To Transfer Your Templates To Another Store | GemPages Tutorial


Thank you for your comments