


This article shows you how to add Facebook Pixel (Meta Pixel) to your Shopify store step by step. With this setup, you can track customer behavior, optimize Facebook ads, and boost conversions — no coding required.
What is Facebook Pixel (Meta Pixel)?
Meta Pixel (formerly Facebook Pixel) is a tracking tool provided by Meta that collects data on customer interactions with your Shopify store. With Meta Pixel, you can:
- Track actions customers take on your website (page views, add to cart, purchases).
- Measure the effectiveness of Facebook and Instagram ads.
- Optimize ad delivery to target the right audiences.
- Retarget visitors who didn’t complete a purchase.
To begin, make sure you have a Facebook Ads account. If not, you’ll need to create one before proceeding.
How to Add Meta Pixel to your Shopify Store
Step 1: Remove the previous pixel code from your theme
If you previously added Meta Pixel manually by editing your theme code, you should remove it to avoid duplicate tracking.
How to remove old Pixel code:
- Go to your Shopify admin > Online Store > Themes and select Actions, then “Edit Code.”
![]()
- Look for the “theme.liquid” file under the Layout section or via the search bar. Open the file to locate the Pixel code between the
<head>and</head>lines.

- Remove the code and hit “Save” when finished.
Step 2: Install the Facebook & Instagram Sales Channel
- Install the Facebook & Instagram app from the Shopify app store.
![]()
- After that, you can access Facebook & Instagram on the left sidebar under Sales channels. Click on Get started to start setting up your Facebook account.
![]()
Step 3: Add a Meta Pixel ID to your Shopify store
Hit “Connect account”.
![]()
Select a Facebook personal account for connection. Then a list of available business accounts and Facebook pages will be displayed. Select the desired pages by checking the corresponding box for connection.
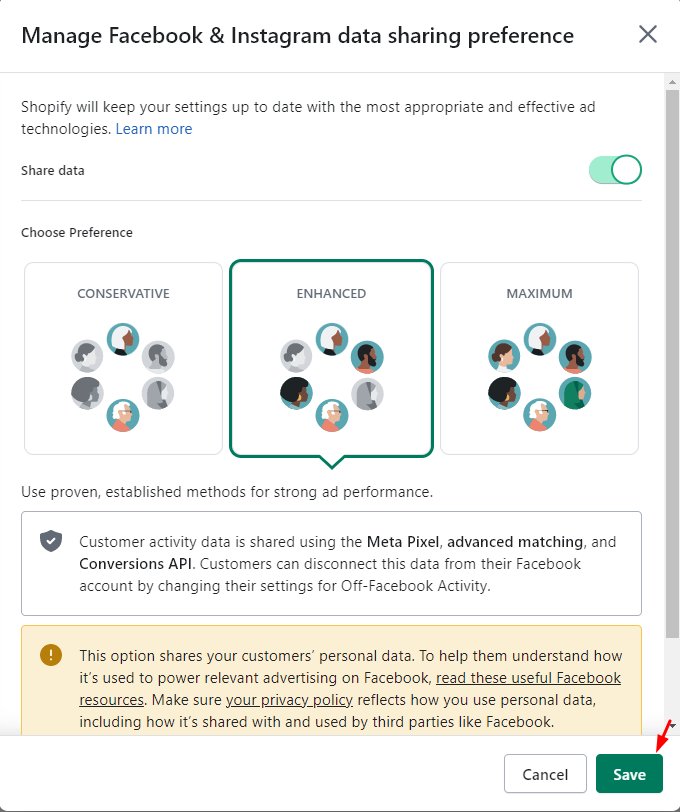
Following that, a window will appear where you can determine the level of data sharing. Simply toggle on the “Share data” option. Then, in the “Choose preference” section, make a selection from Standard, Enhanced, or Maximum. For a detailed understanding of the distinctions between these three levels, refer to this article from Shopify.
Hit save when finished.
- Select the Pixel you want to connect.
All Pixels you have created will be listed here. If you don’t have one, click “Create new” and follow the instructions.

FAQs
1. Is Facebook Pixel the same as Meta Pixel?
Yes. Facebook rebranded it as Meta Pixel, but they are the same tool.
2. Can I add multiple Facebook Pixels to my Shopify store?
No, Shopify only allows you to connect one Pixel per store.
3. Do I need to edit the code to add Pixel?
No. Using the Facebook & Instagram Sales Channel, you can connect Pixel without code.
4. How do I know if Facebook Pixel is working?
Use the Meta Pixel Helper Chrome extension to test your setup.


Thank you for your comments