


With GemPages V7, you can easily display dynamic content on your product pages, allowing product information to update automatically without manual edits.
What is Shopify Dynamic Product Content?
Dynamic Product Content in Shopify allows your pages to automatically display product information directly from your Shopify store without the need for manual updates.
Once you assign a product to a page in GemPages, all relevant product details—such as title, price, images, SKU, inventory, and variants—are pulled automatically and displayed on your live page. This means you don’t have to manually update each product individually whenever there is a change.
This feature is particularly useful when:
- You have multiple products or SKUs and want to maintain a consistent layout.
- You want to save time managing product pages, especially for large catalogs.
- You aim to reduce errors or inconsistencies in product information across your store.
How to display Dynamic Product Content with GemPages?
In GemPages V7, there’s no separate “Binding” or “Data Syncing” toggle like in V6. Everything works automatically once you assign products.
To enable data syncing with the dynamic product feature in V6, refer to this article.
Here’s how to sync Shopify product content with GemPages:
Step 1: Open GemPages Dashboard > Pages > Open the page in GemPages V7 Editor.
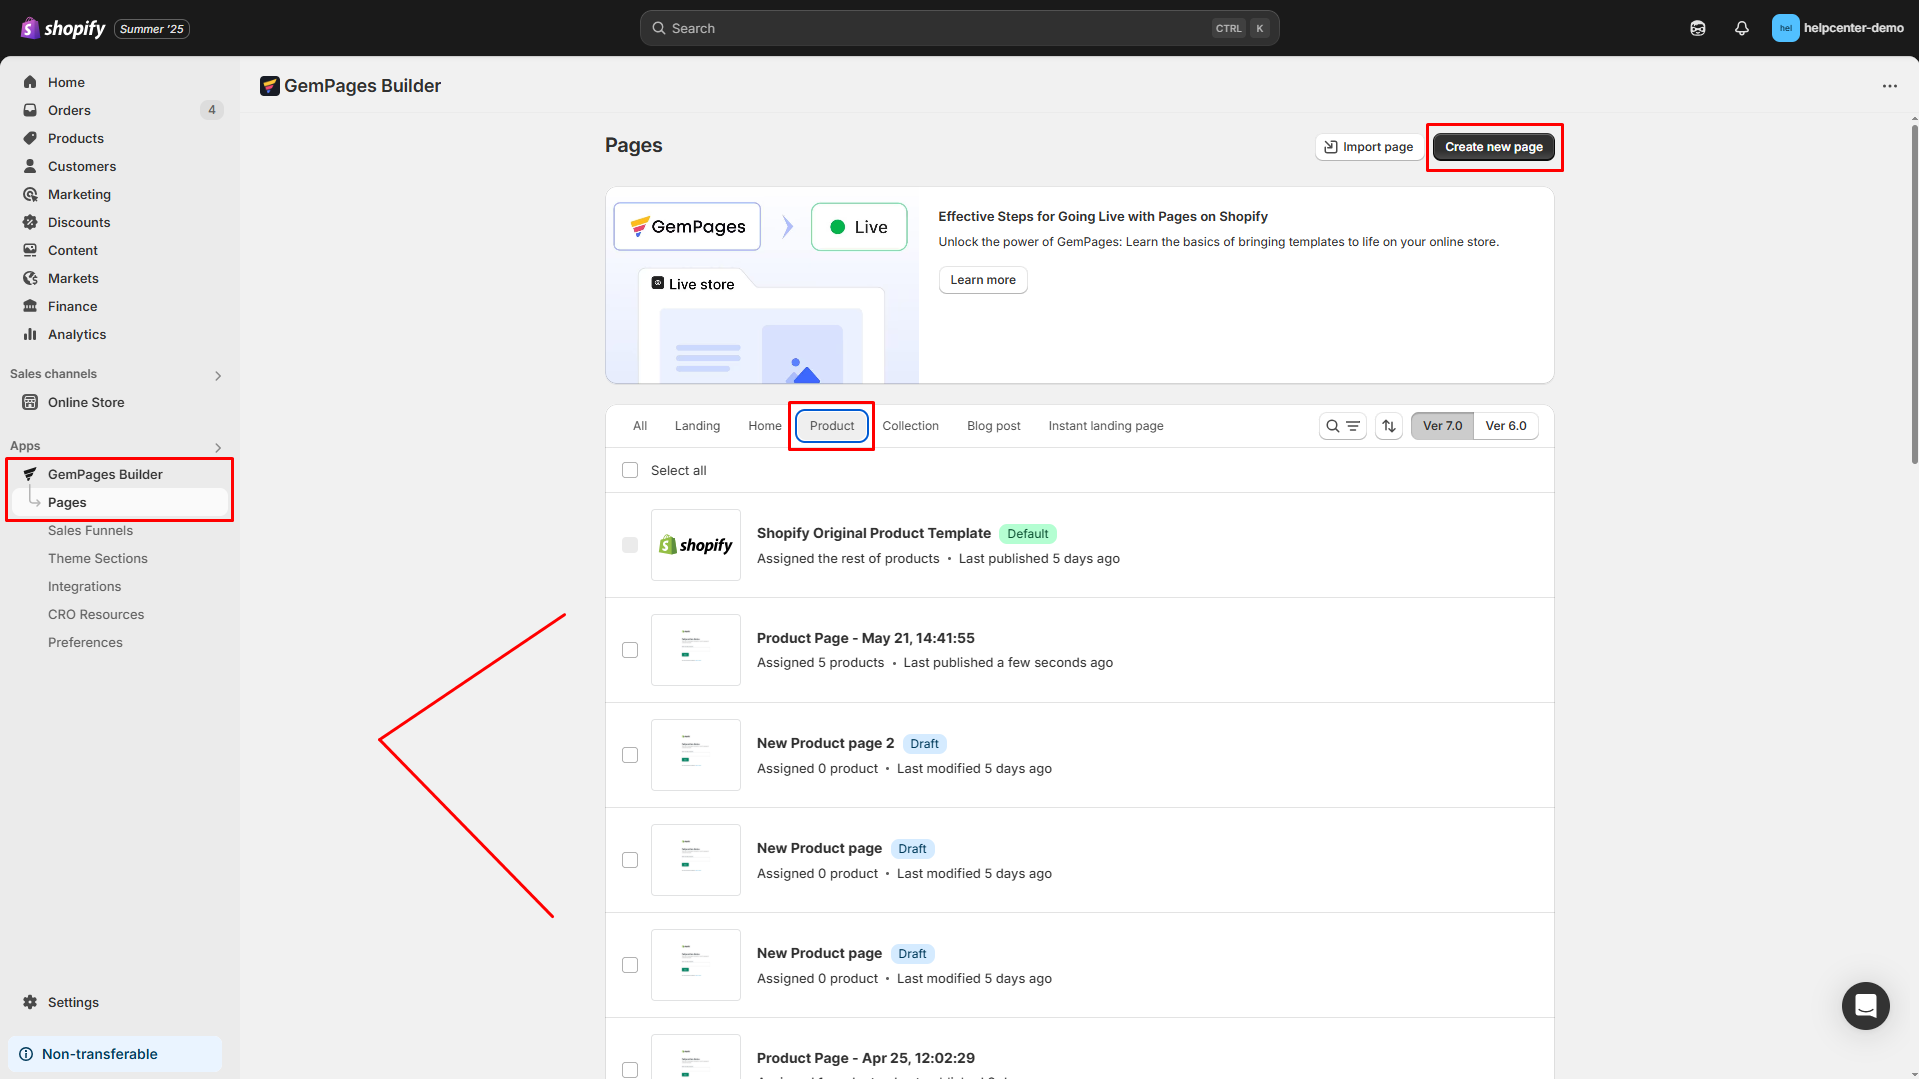
You can hit “Create new page”, select a pre-built template, use GemAI Image-to-Layout, or start from scratch to design a new page.
Step 2: Assign product(s) to the page
- On the top bar, click the “0 Product Assigned” to open the dropdown.
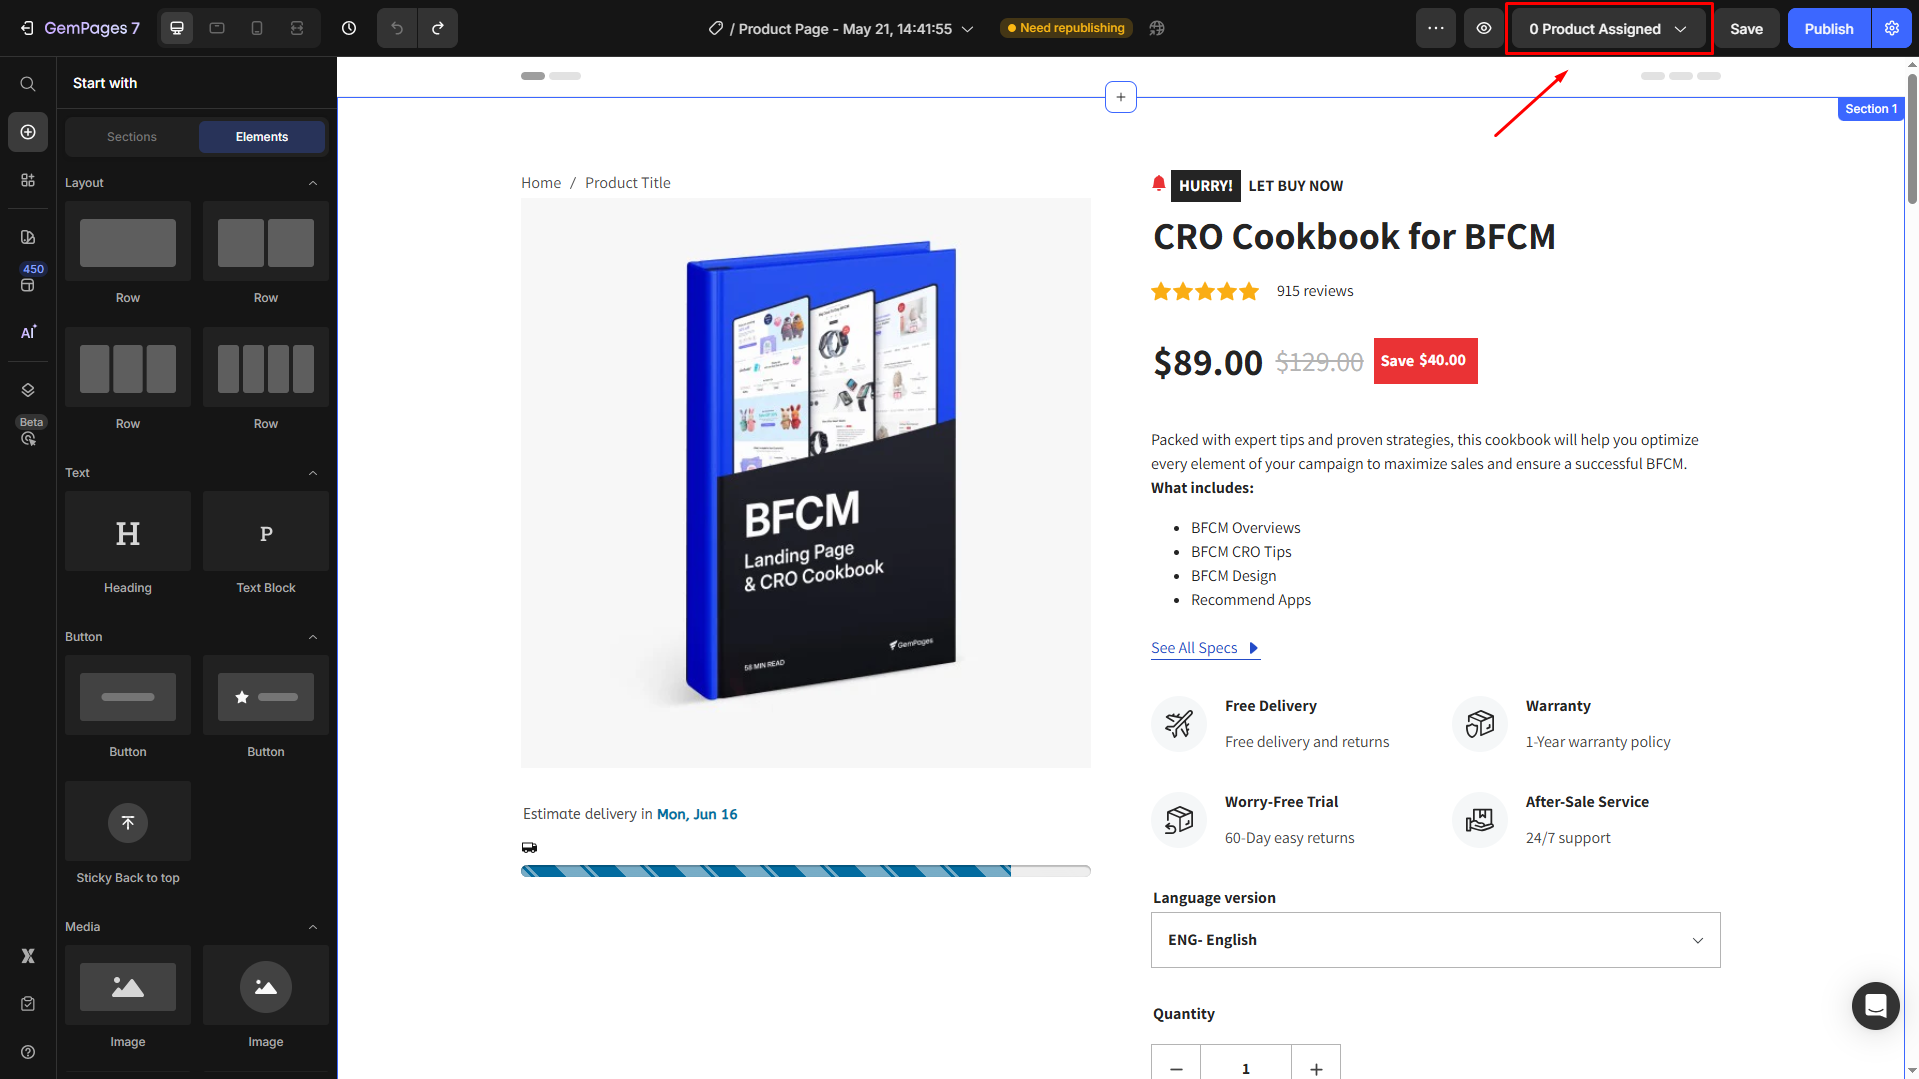
- Choose “Apply to selected products” and select the products you want to assign to the page.
- If you prefer to sync all available products, hit “Apply to all products”.
- Click Confirm once done.
Note: These assigned products serve as the data source for all product-related elements on this page.
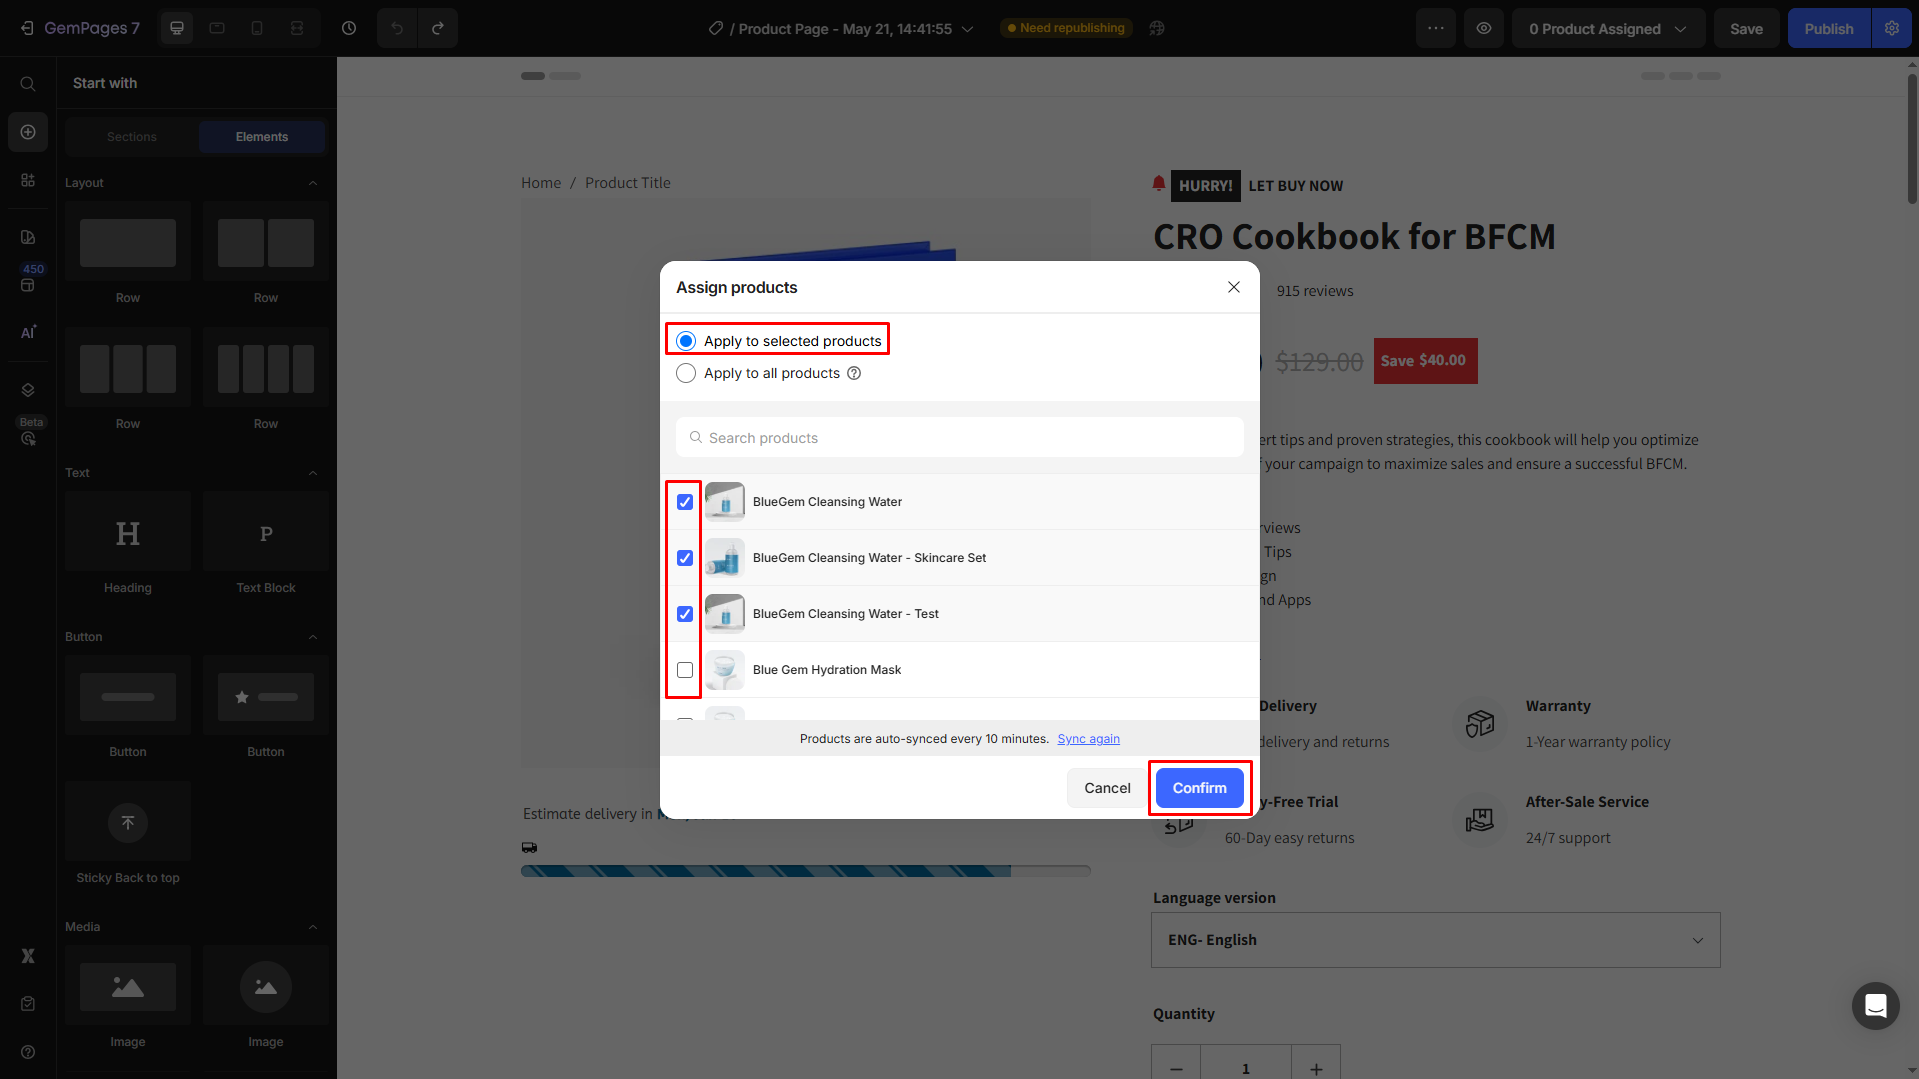
Step 3: Add Product elements
- In the left sidebar, enter “Product” in the search bar
- Drag and drop your preferred Product element(s), such as Product, Product Image, Product List, Related Products, etc.
- Once these elements are added, they will automatically pull data from the assigned products in Step 2.
Step 4: Save, preview, and publish the page
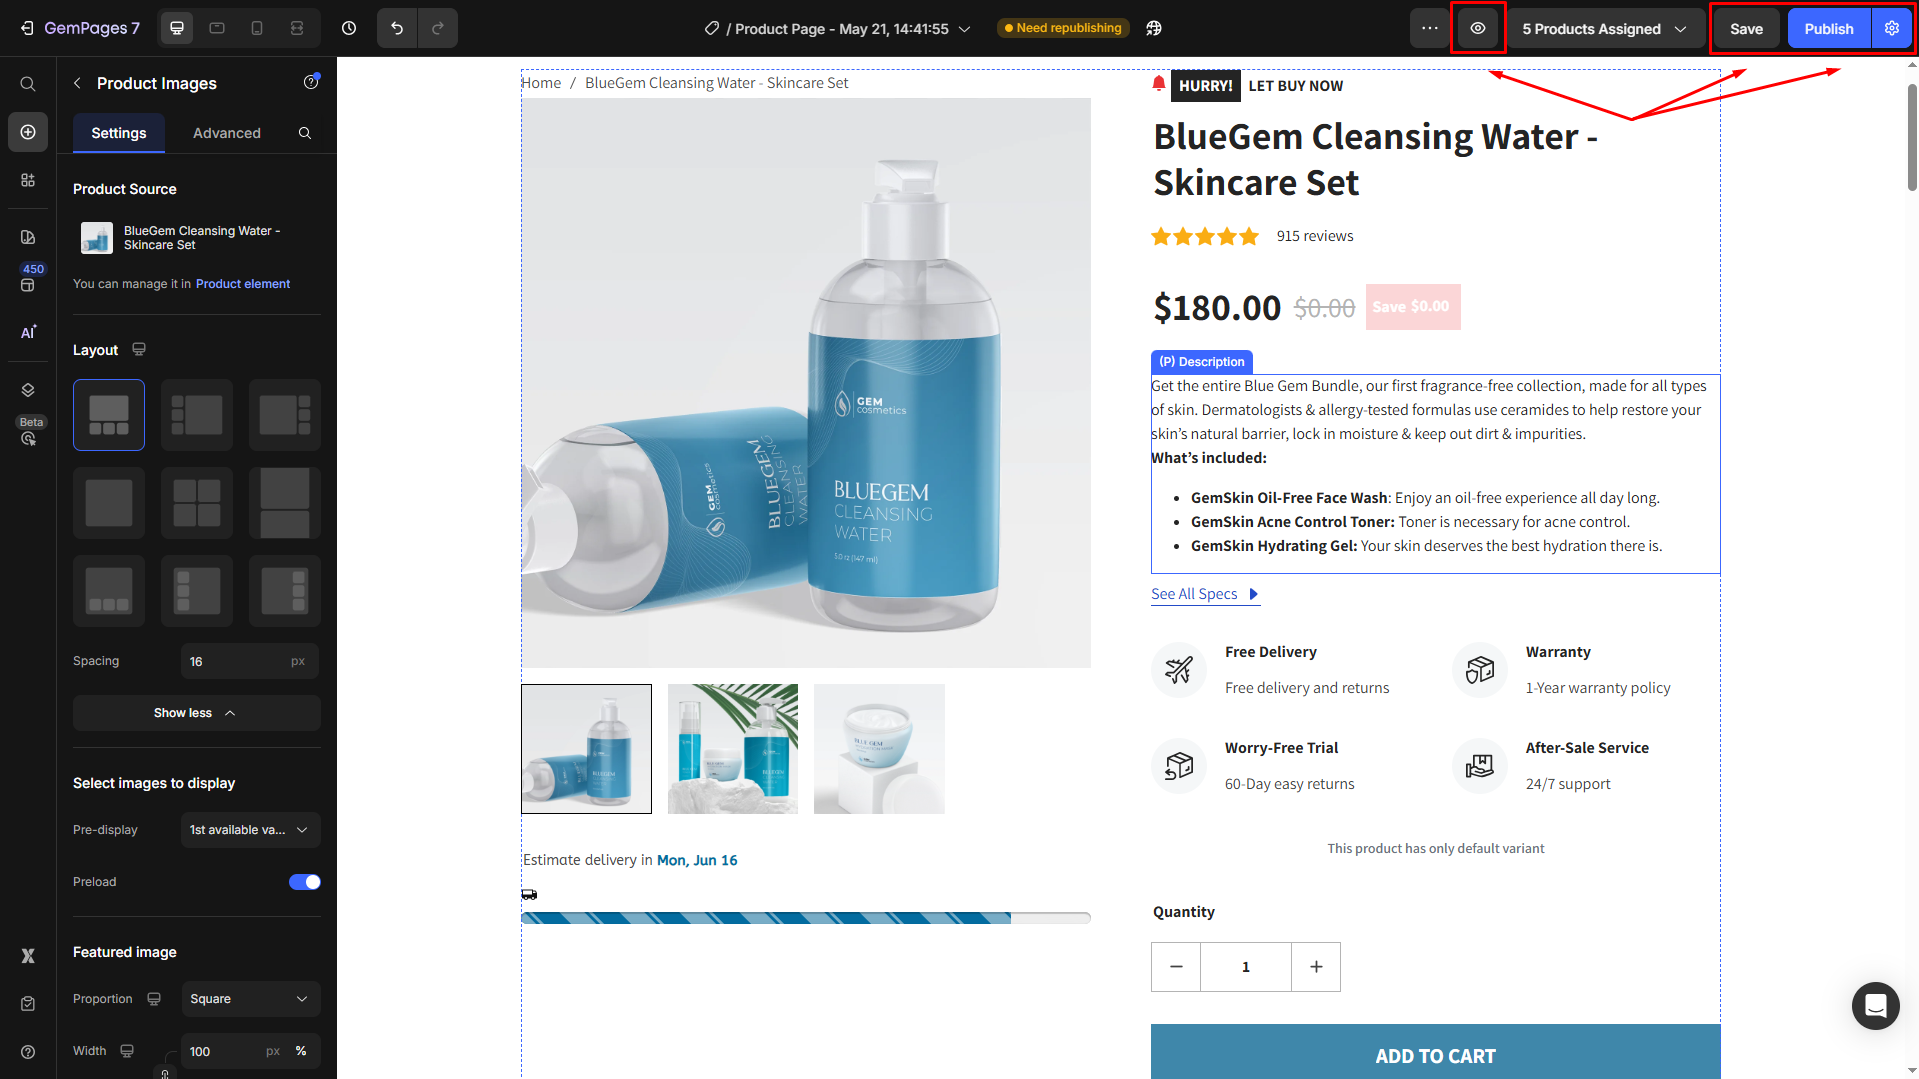
- Although the autosave is running every 10 seconds, you can hit Save to create a version history.
- Click the eye button to preview the page.
- If there are no changes needed, hit Publish to make your page live in the storefront.


Thank you for your comments