


What Is a Product Color Swatch?
A product color swatch is a clickable, colored button displayed on your product page. Each swatch represents a color option for the product. When a shopper clicks on a swatch, the product image and details update instantly to match the selected color.
Instead of navigating through drop-down menus, color swatches make it faster and easier for customers to:
- Visualize product variations (e.g., red, blue, black T-shirts).
- Compare available options at a glance.
- Enhance the shopping experience, which can boost conversions.
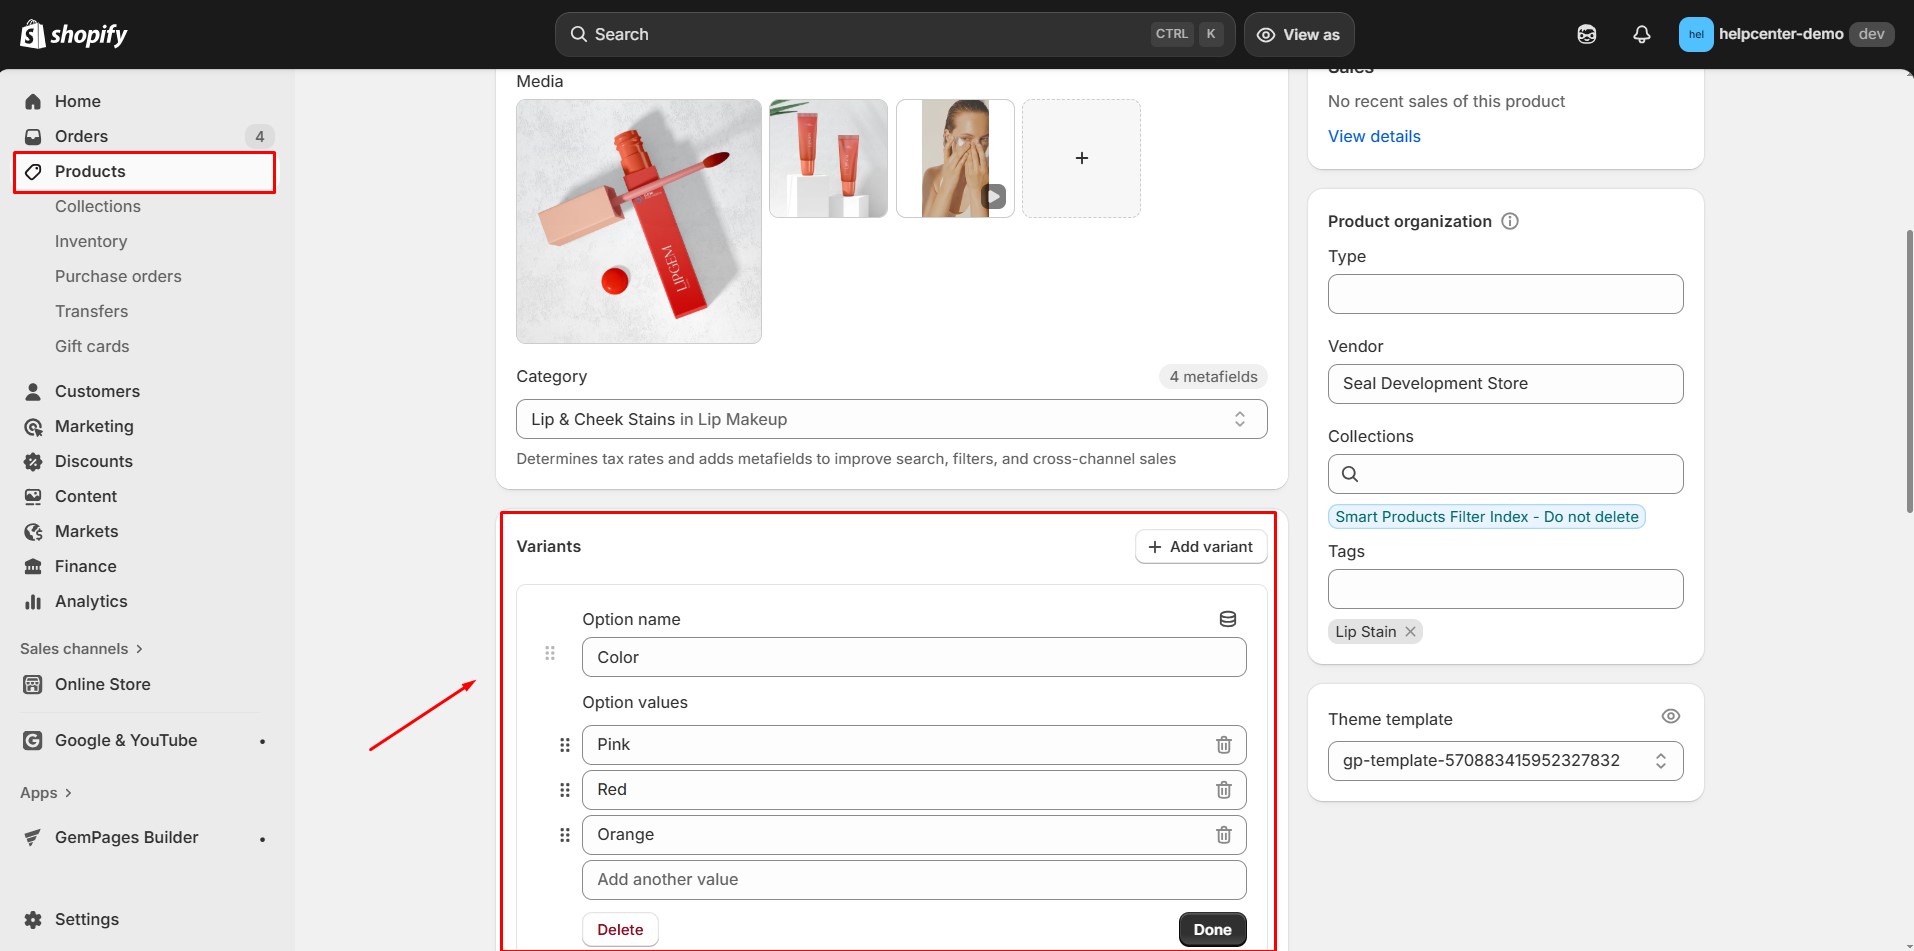
How to Set Up Color Variants in Shopify
GemPages displays product color swatches based on the variants you have already configured in Shopify.
Step 1: Log in to your Shopify Admin.
Step 2: Go to Products > Select a product you want to edit.
Step 3: Scroll down to the Variants section.
Step 4: Add or edit your color options (e.g., Red, Blue, Green).
Step 5: Click Save.
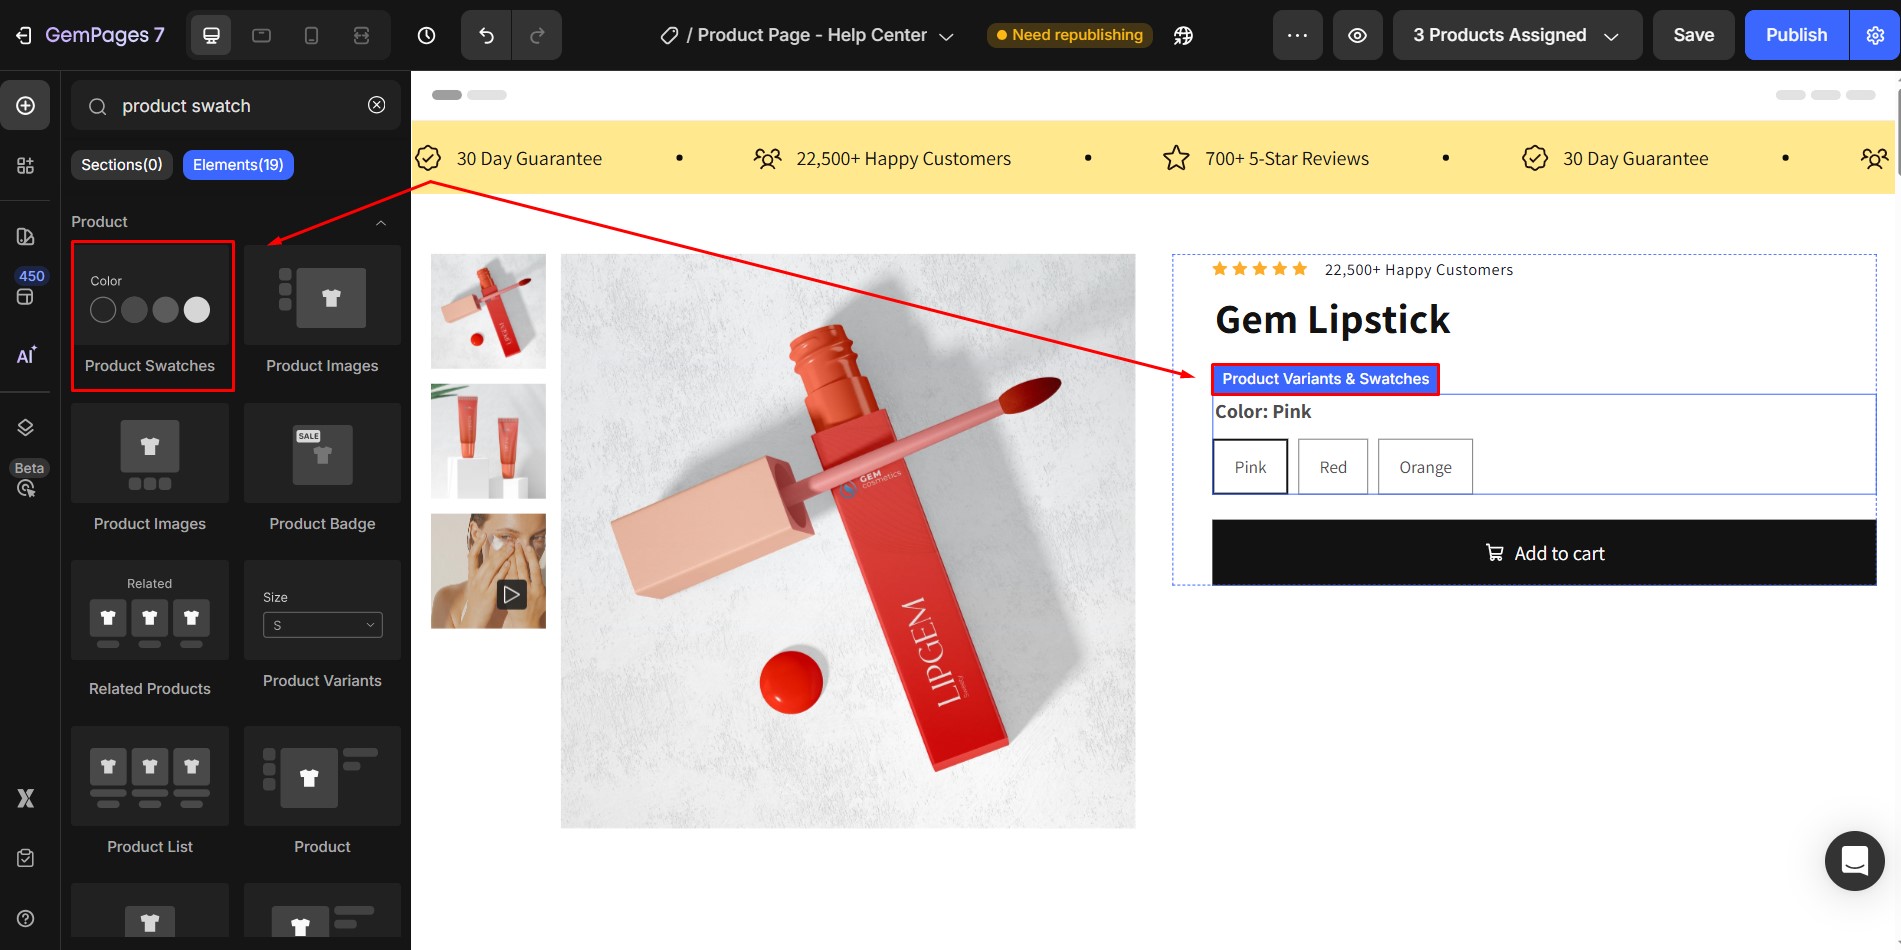
How to Add Product Color Swatches in GemPages
Step 1: Open the Editor
From your GemPages Dashboard, select your preferred template (product page template) and open it in the Editor.
Step 2: Insert the Variants & Swatches Element
- In the left sidebar, go to the Product section.
- Locate the Product Swatches element.
- Drag and drop the element inside your Product Module on the page.
Step 3: Configure Variant Settings
- Click on the element to open the settings panel in the left sidebar.
- Under Variant Settings, make sure the Type is set to Separate.
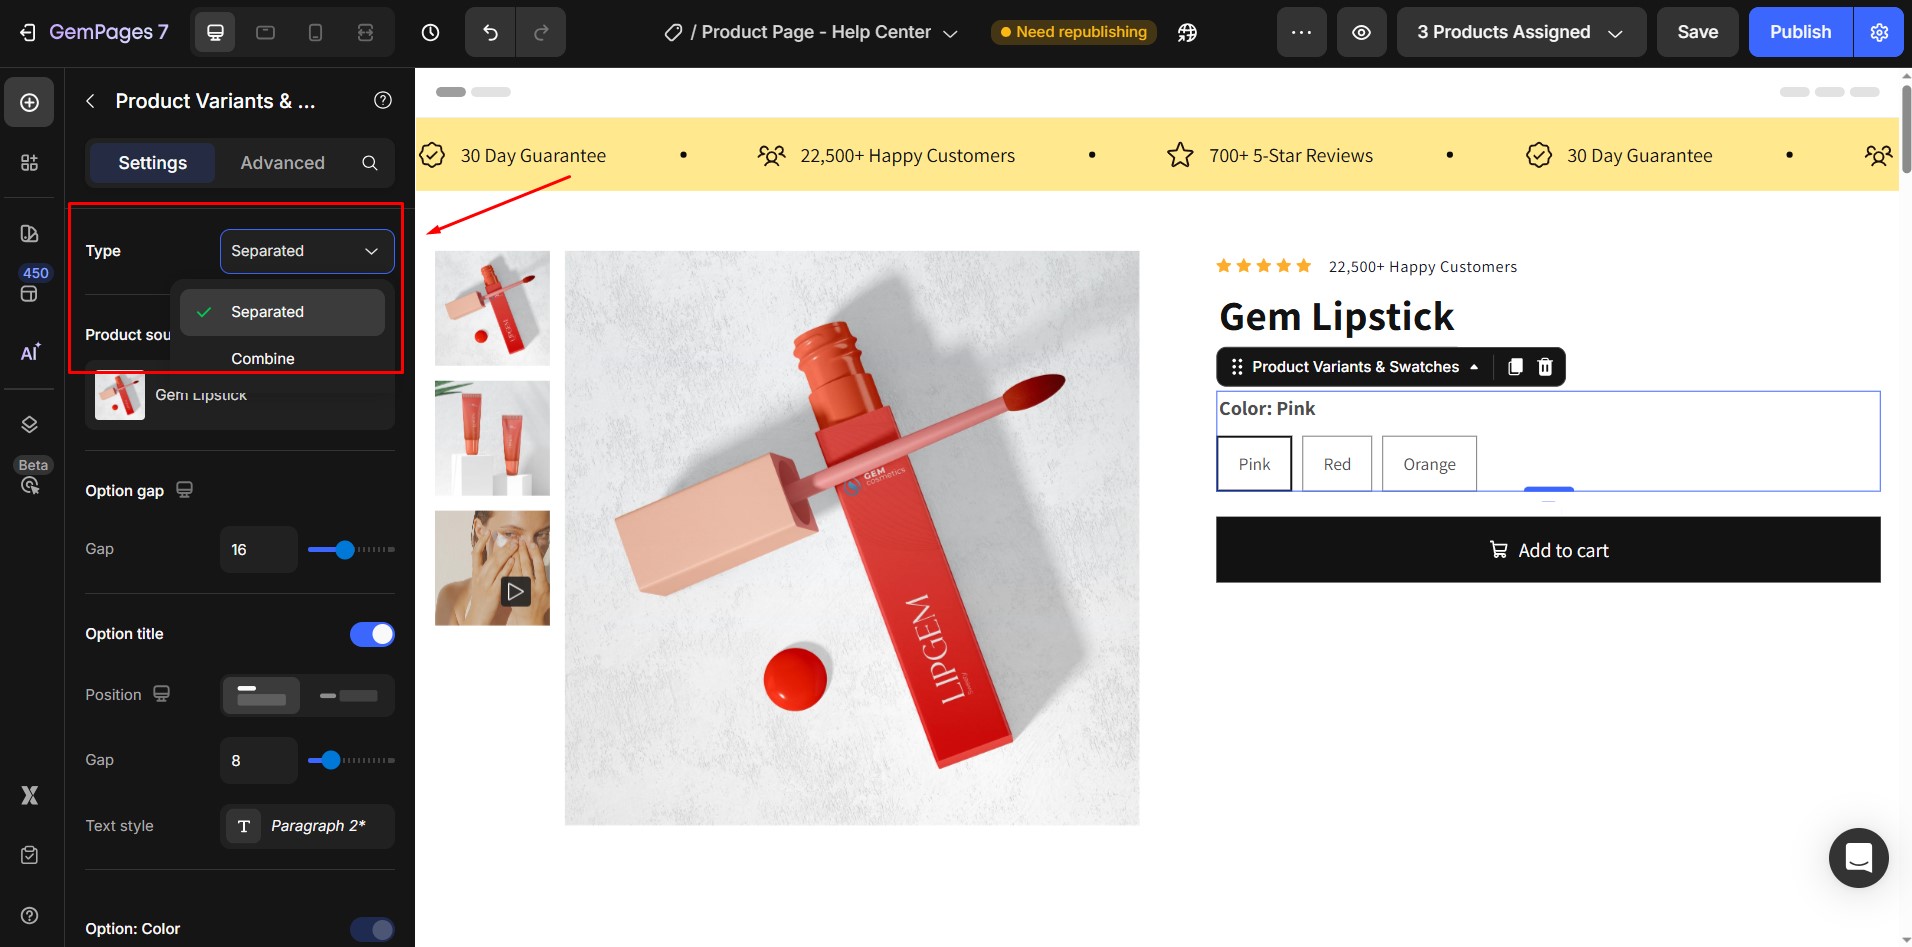
This ensures variants are displayed in distinct categories.
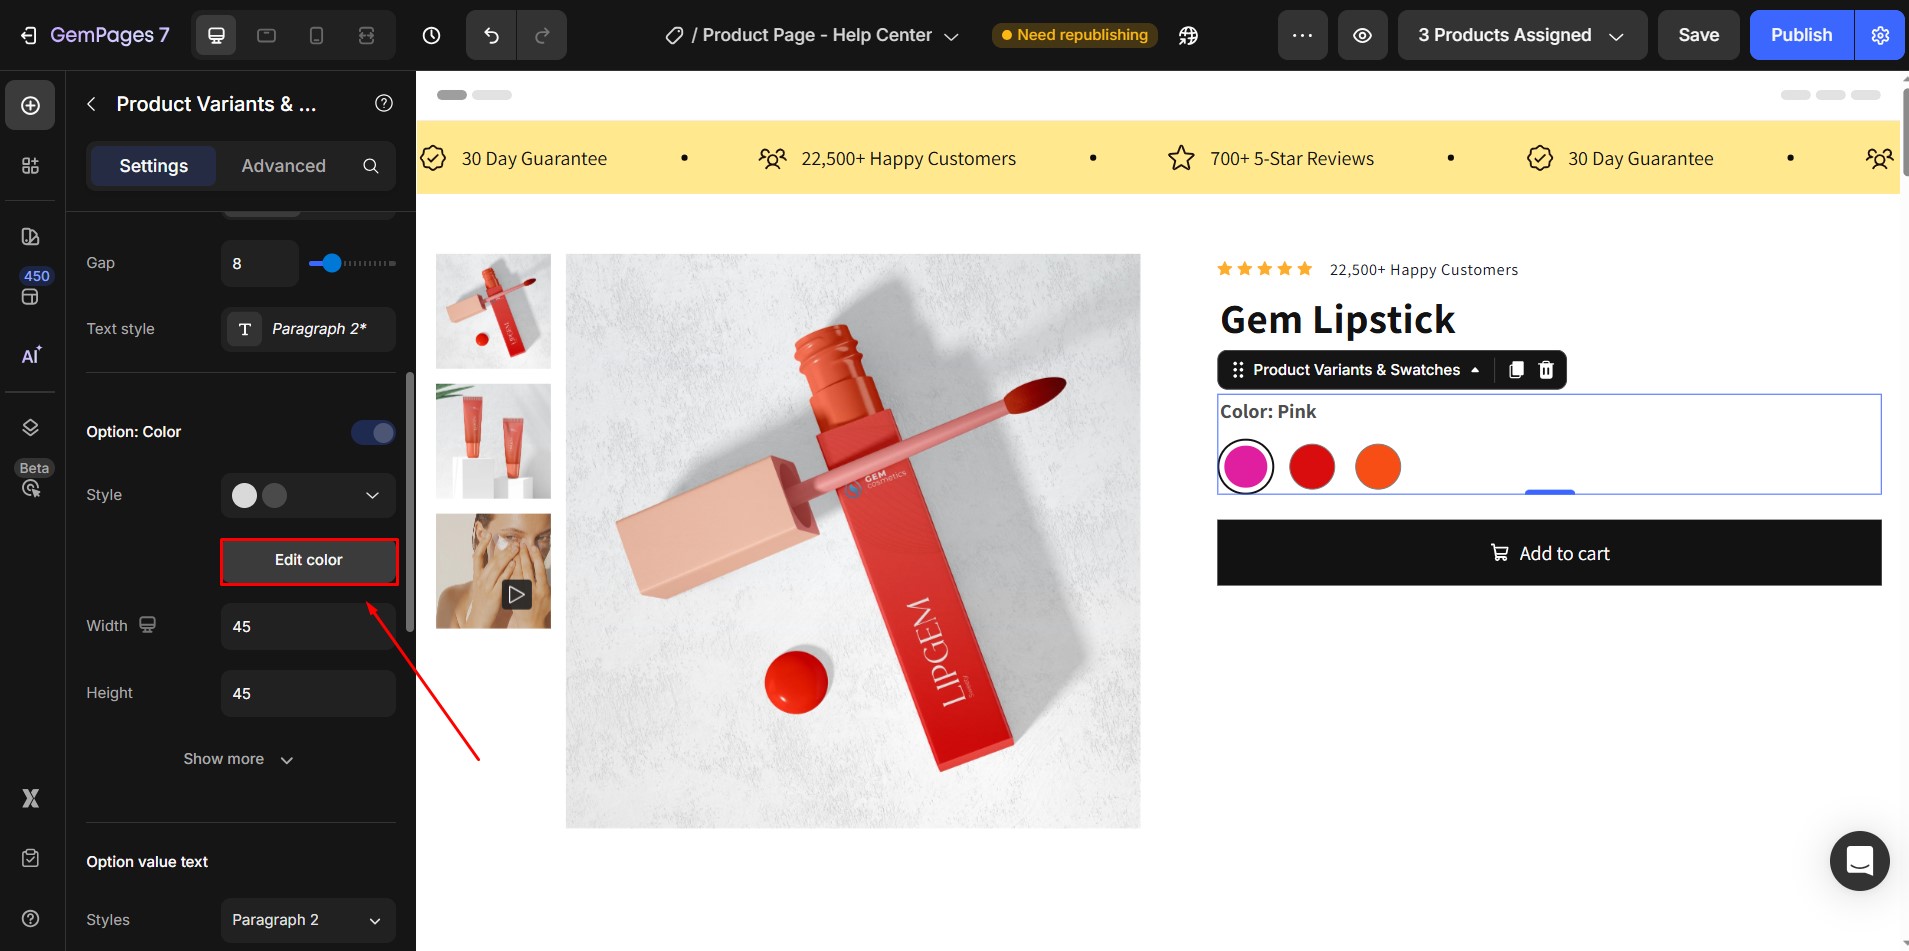
Step 4: Enable Product Color Swatches
- Go to Option > Style in the element settings.
- Select Color Swatch.
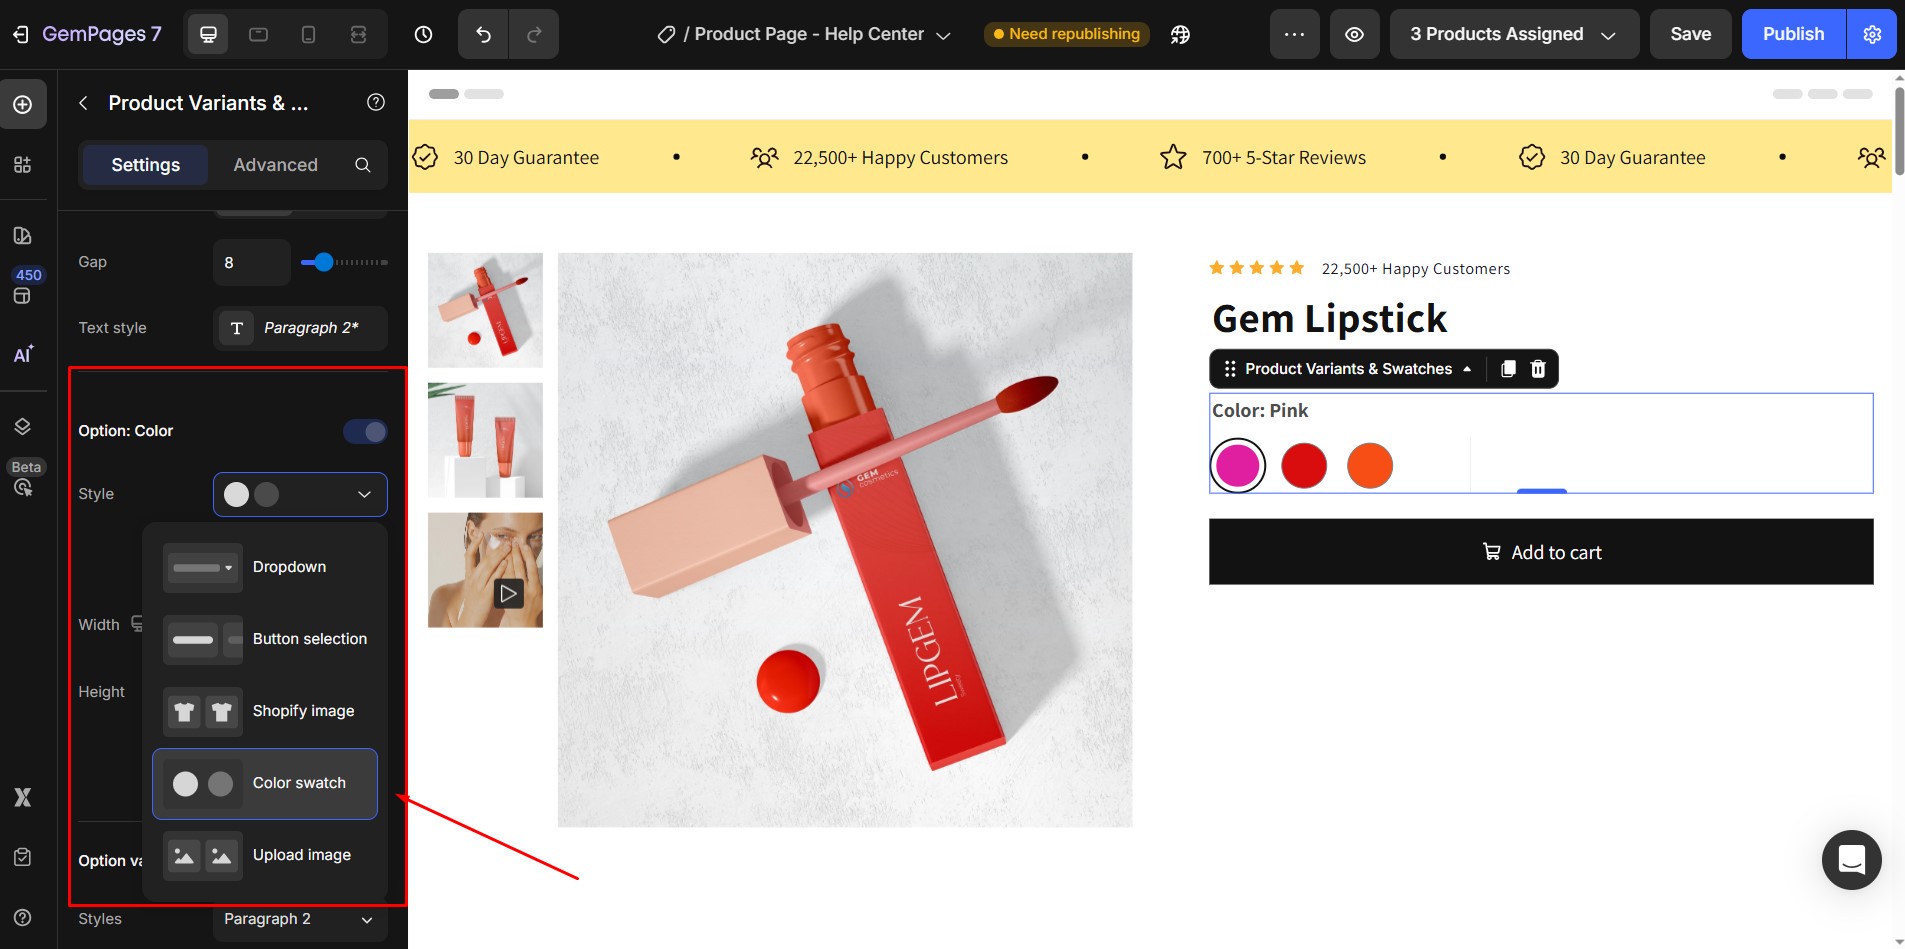
- Click Edit Color to open the Configure Variants Style panel. Here, you’ll find tools to manage and customize how your swatches appear.
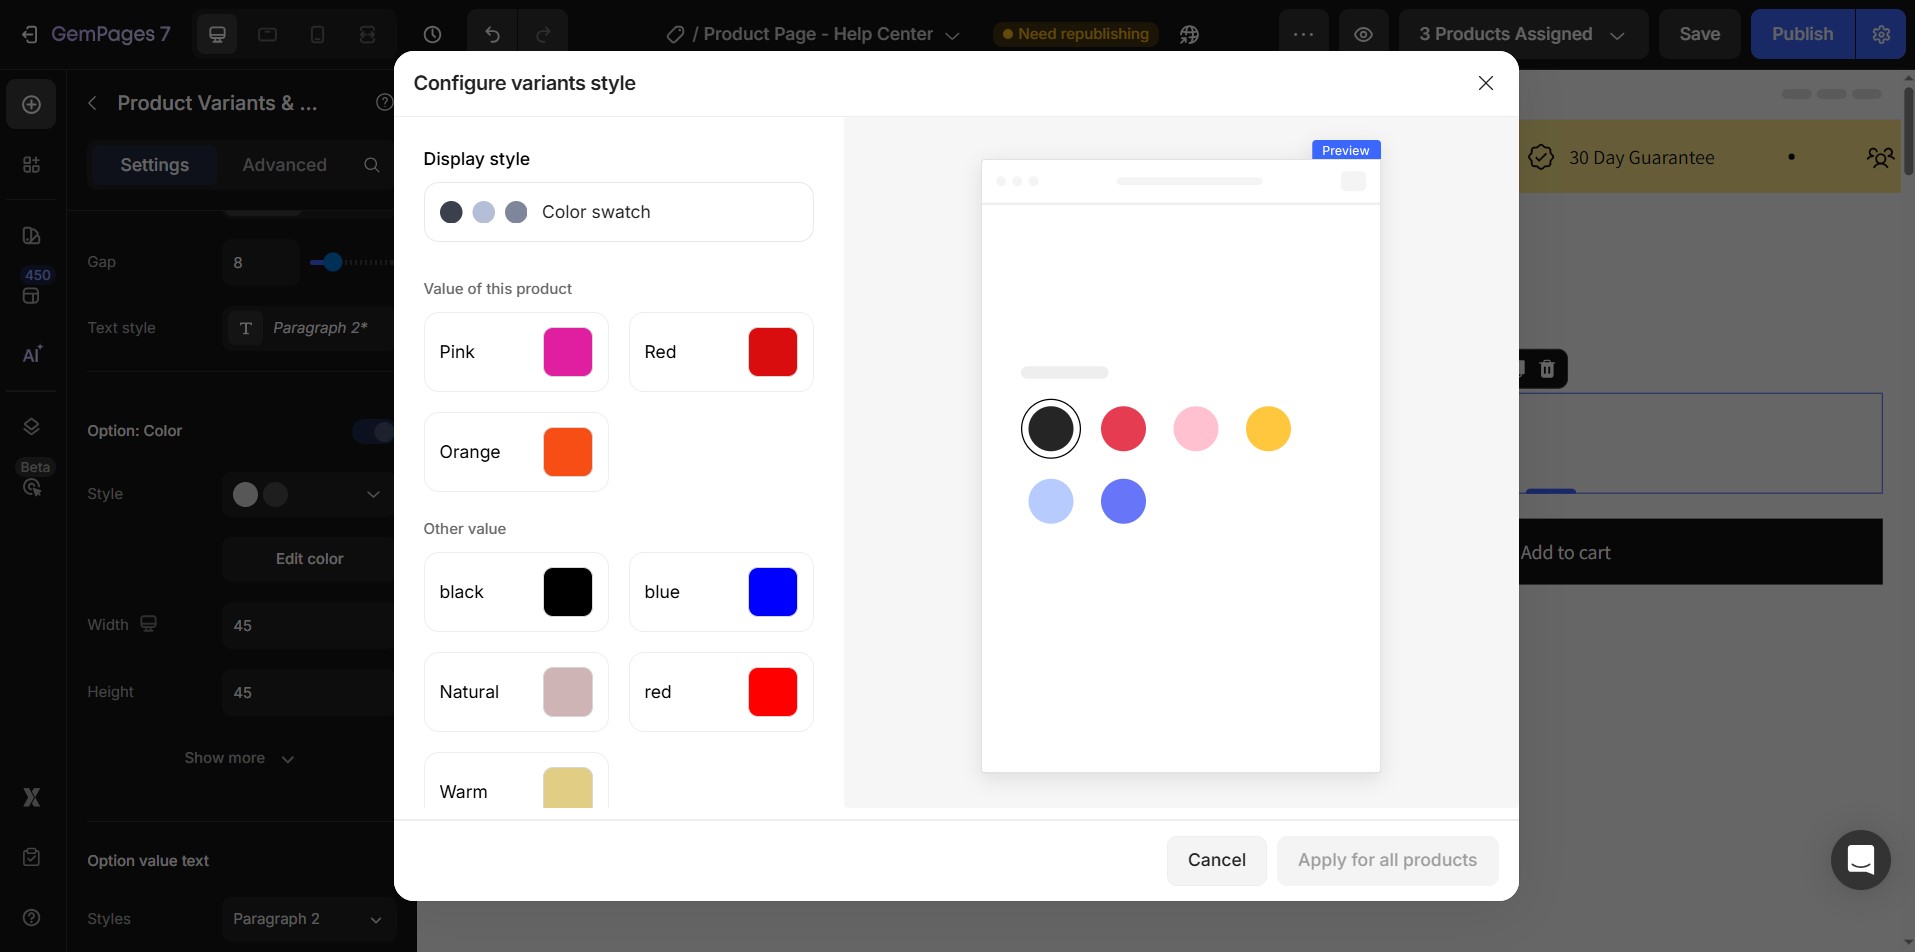
Step 5: Assign Colors to Variants
- Click each variant.
- Choose a color from the palette or manually enter the hex code for precise colors.
- When finished, click Apply for all products.
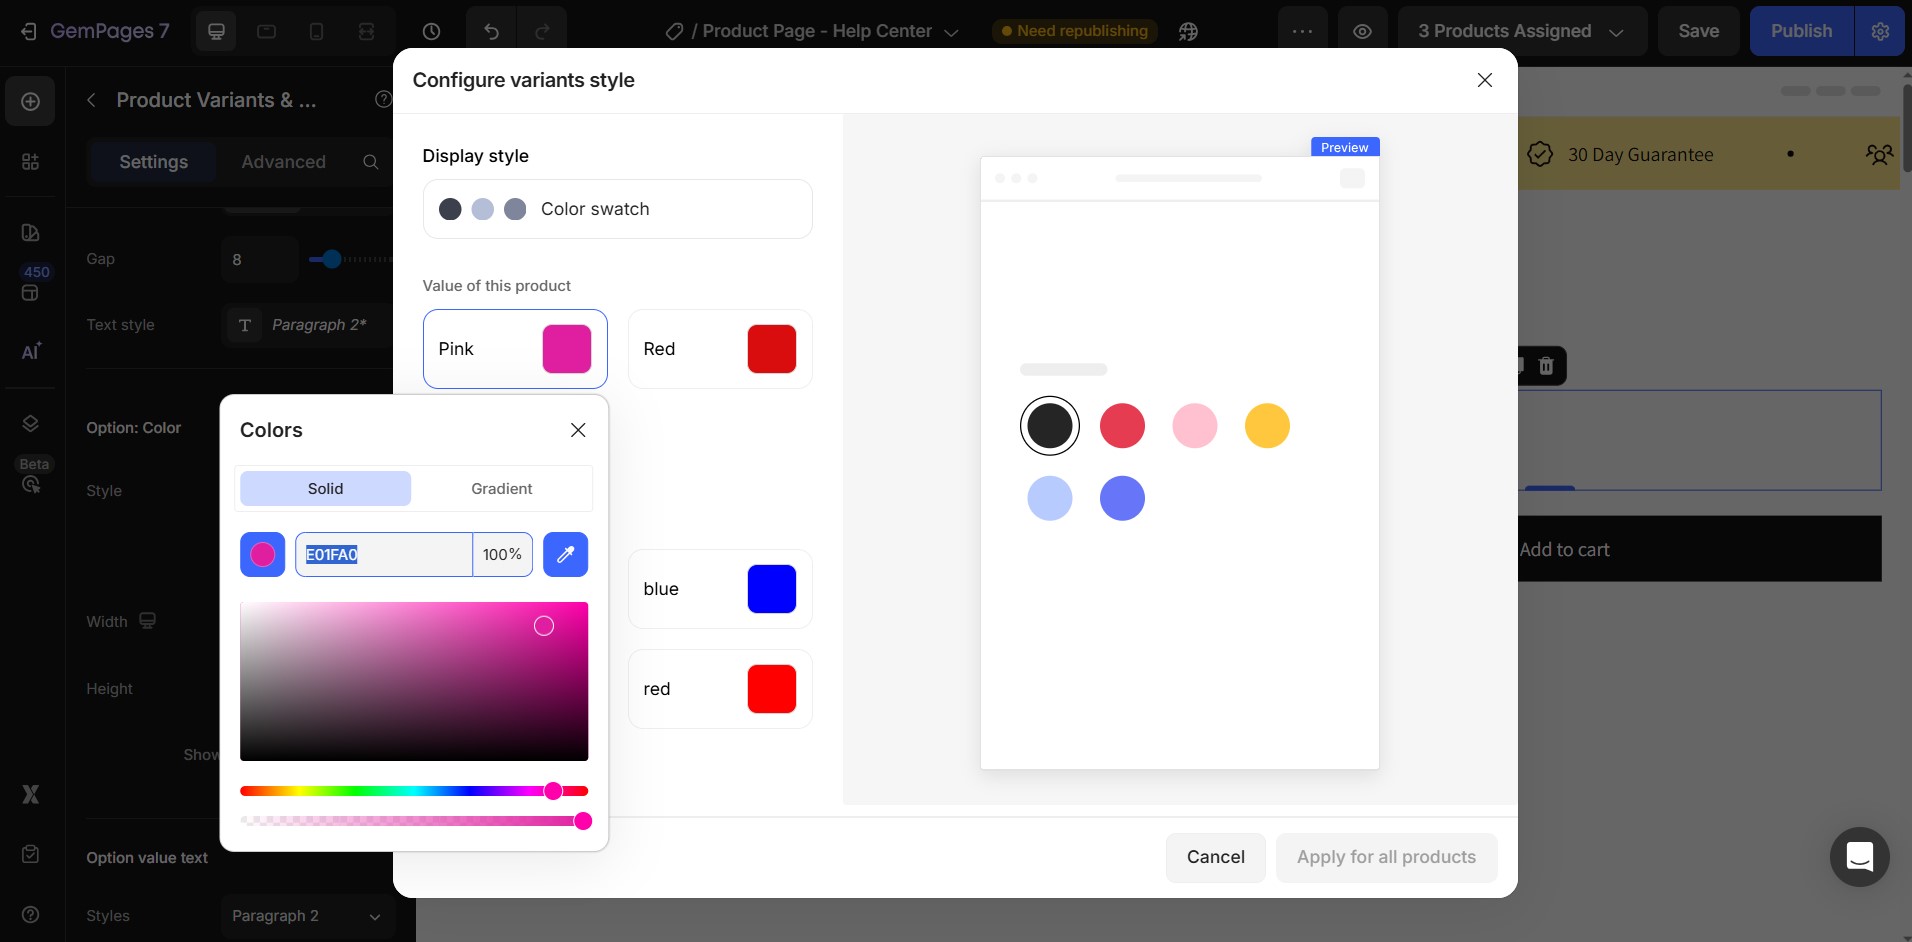
This ensures the selected color value is applied universally across all products with the same variant name (e.g., “Red” will look consistent on every product that has a Red option).
Step 6: Save and Publish
After setting up your product color swatches, click Save in the top-right corner.
Then click Publish to make the changes live on your store.


Thank you for your comments