


About Shipping Estimate or Estimated Delivery Date
Shipping time plays a critical role in customer purchasing decisions and conversion rates, as faster shipping instills confidence and encourages purchases.
The Delivery Date Element provides clear information on delivery timelines, which not only builds customer trust and boosts sales but also reduces the need for customer support by setting transparent expectations for delivery.

Displaying the Estimated Delivery Date near the “Add to Cart” button is a powerful CRO technique recommended by CRO experts. When shoppers see a clear timeline for delivery directly at the point of purchase, it reduces uncertainties, encouraging them to complete the purchase.
How to Create the Shipping Estimation in GemPages?
Follow these steps to design the shipping estimation using GemPages’ Delivery Date Element.
Step 1: Access the GemPages Editor
- From your Shopify admin > Apps > GemPages Builder app.
- Navigate to the Pages > Products to see all your product pages built with GemPages.
- Click on the target page to enter the editor.
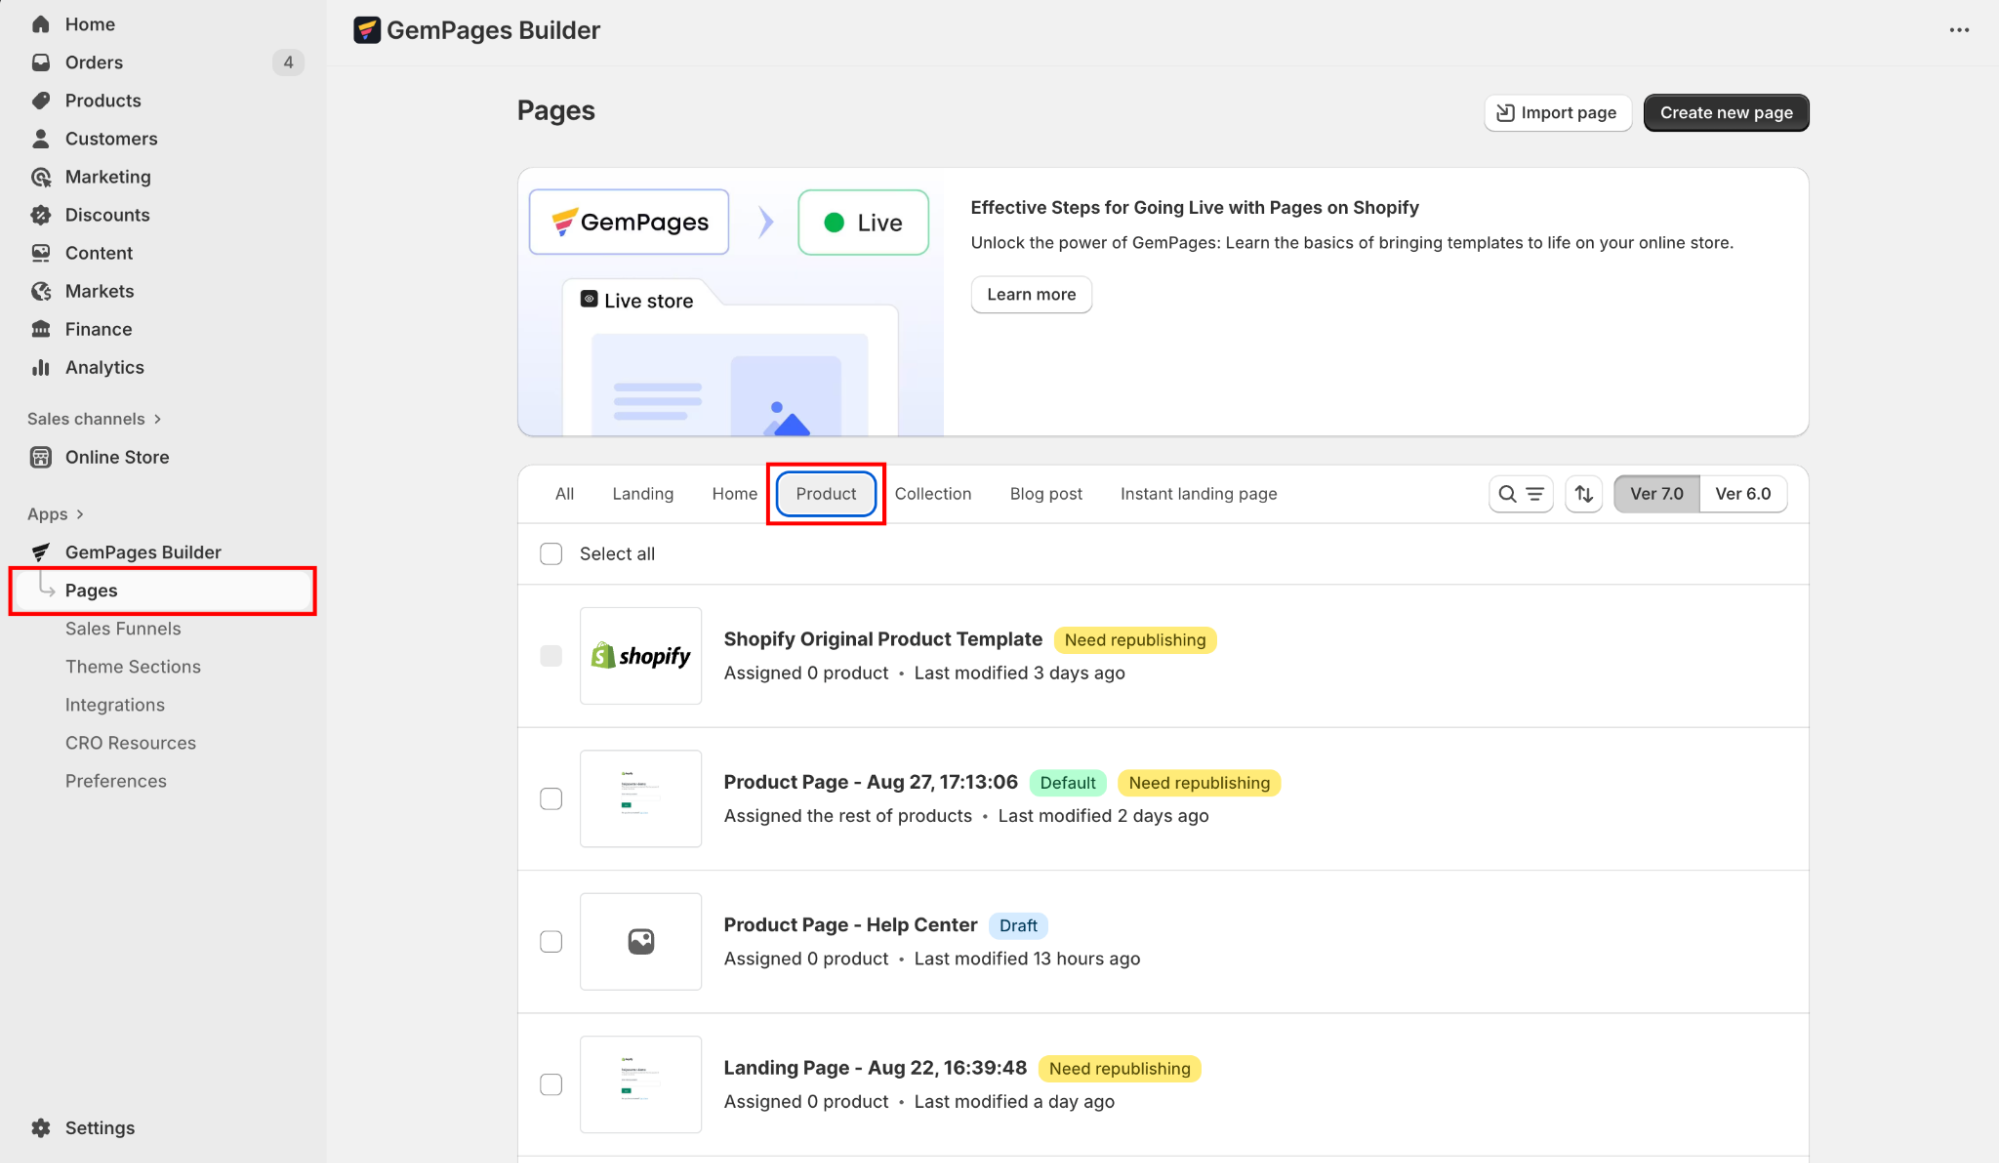
Step 2: Add the Delivery Date Element
- In the left sidebar, search for the Delivery Date element.
- Drag and drop this element to the desired position on your page.
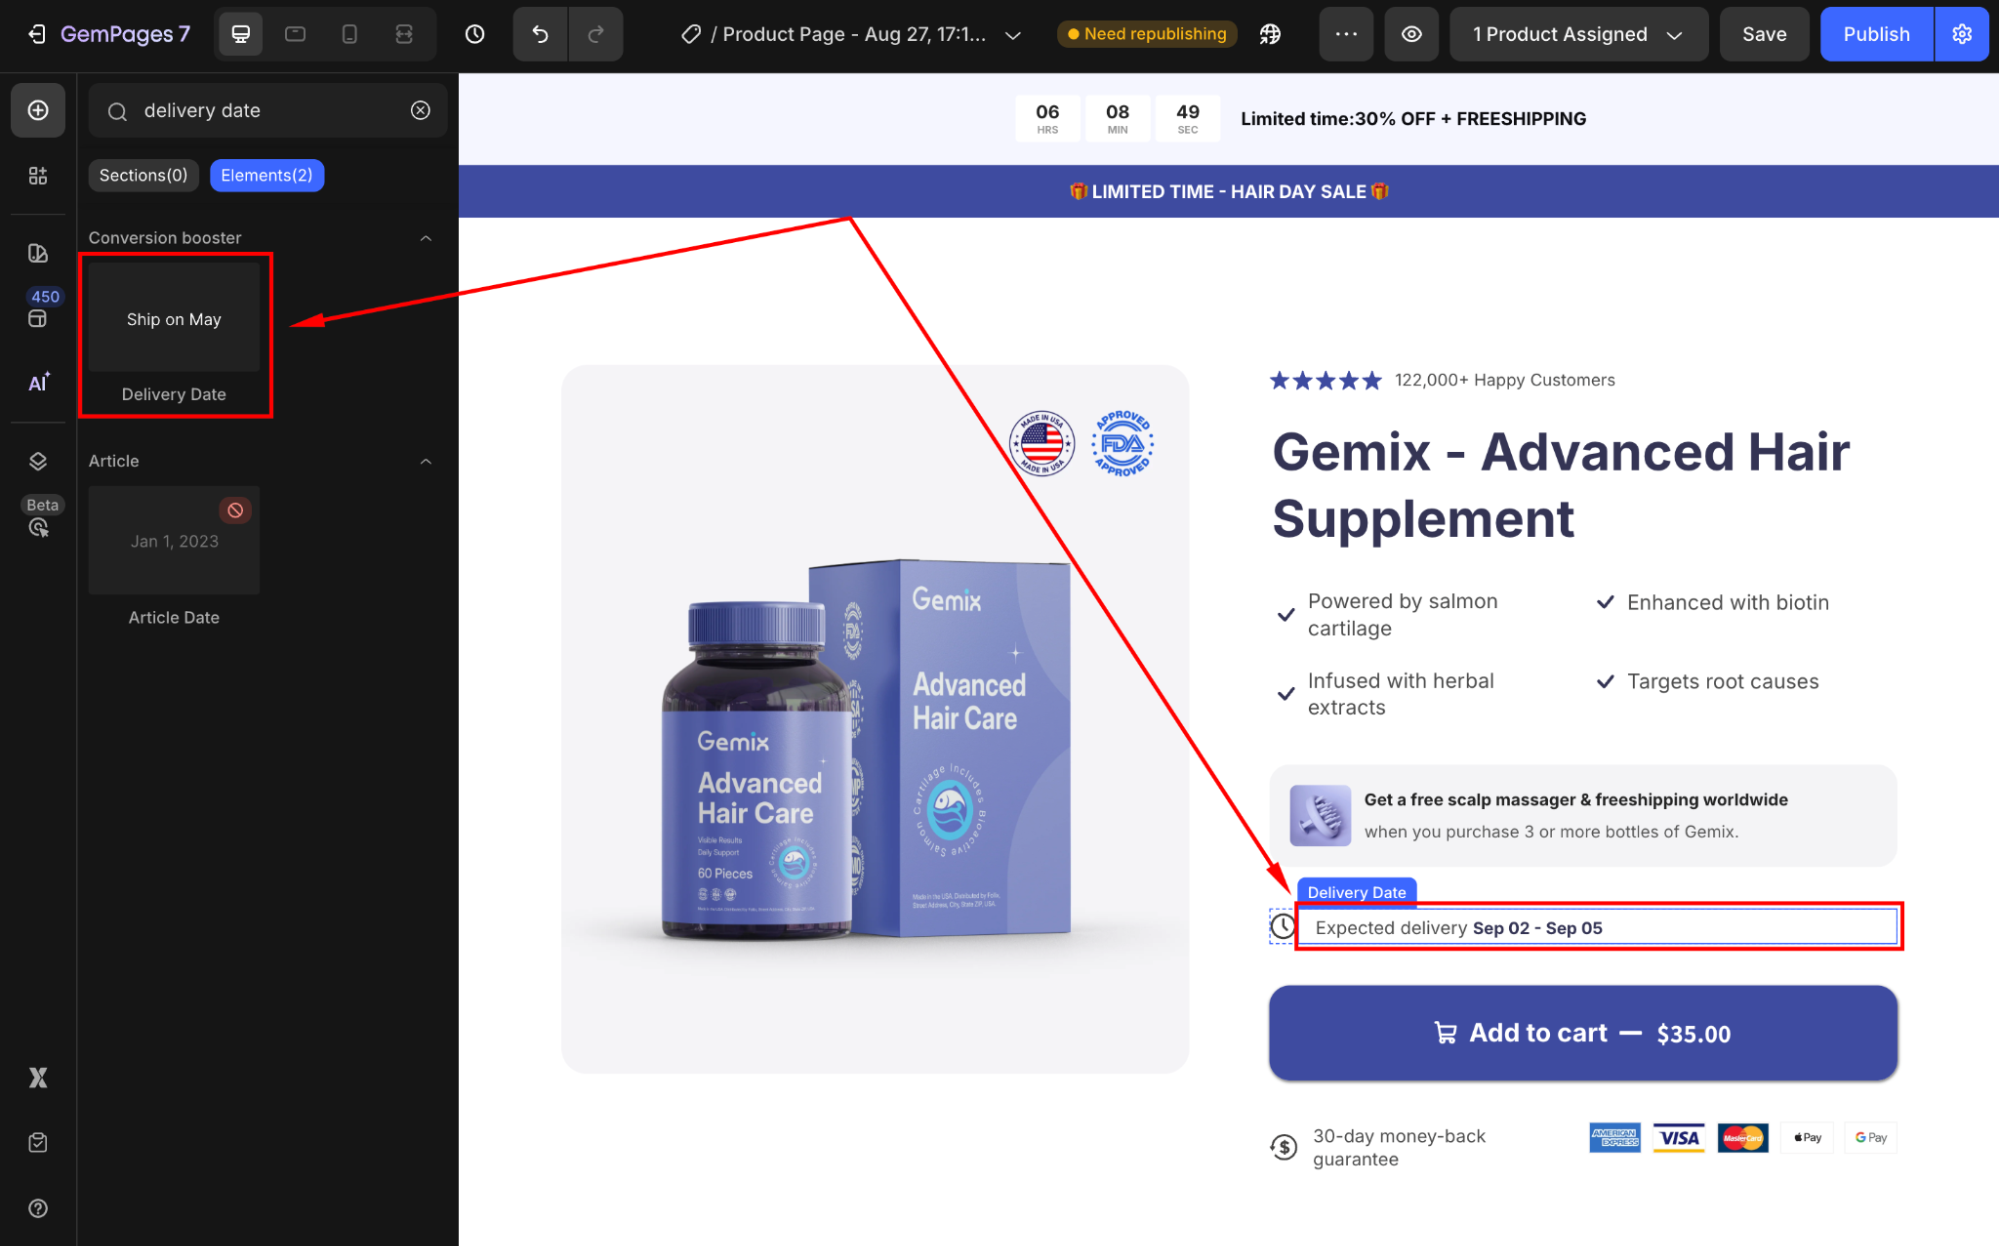
Usually, the delivery date element is placed near the location of the Add To Cart Button.
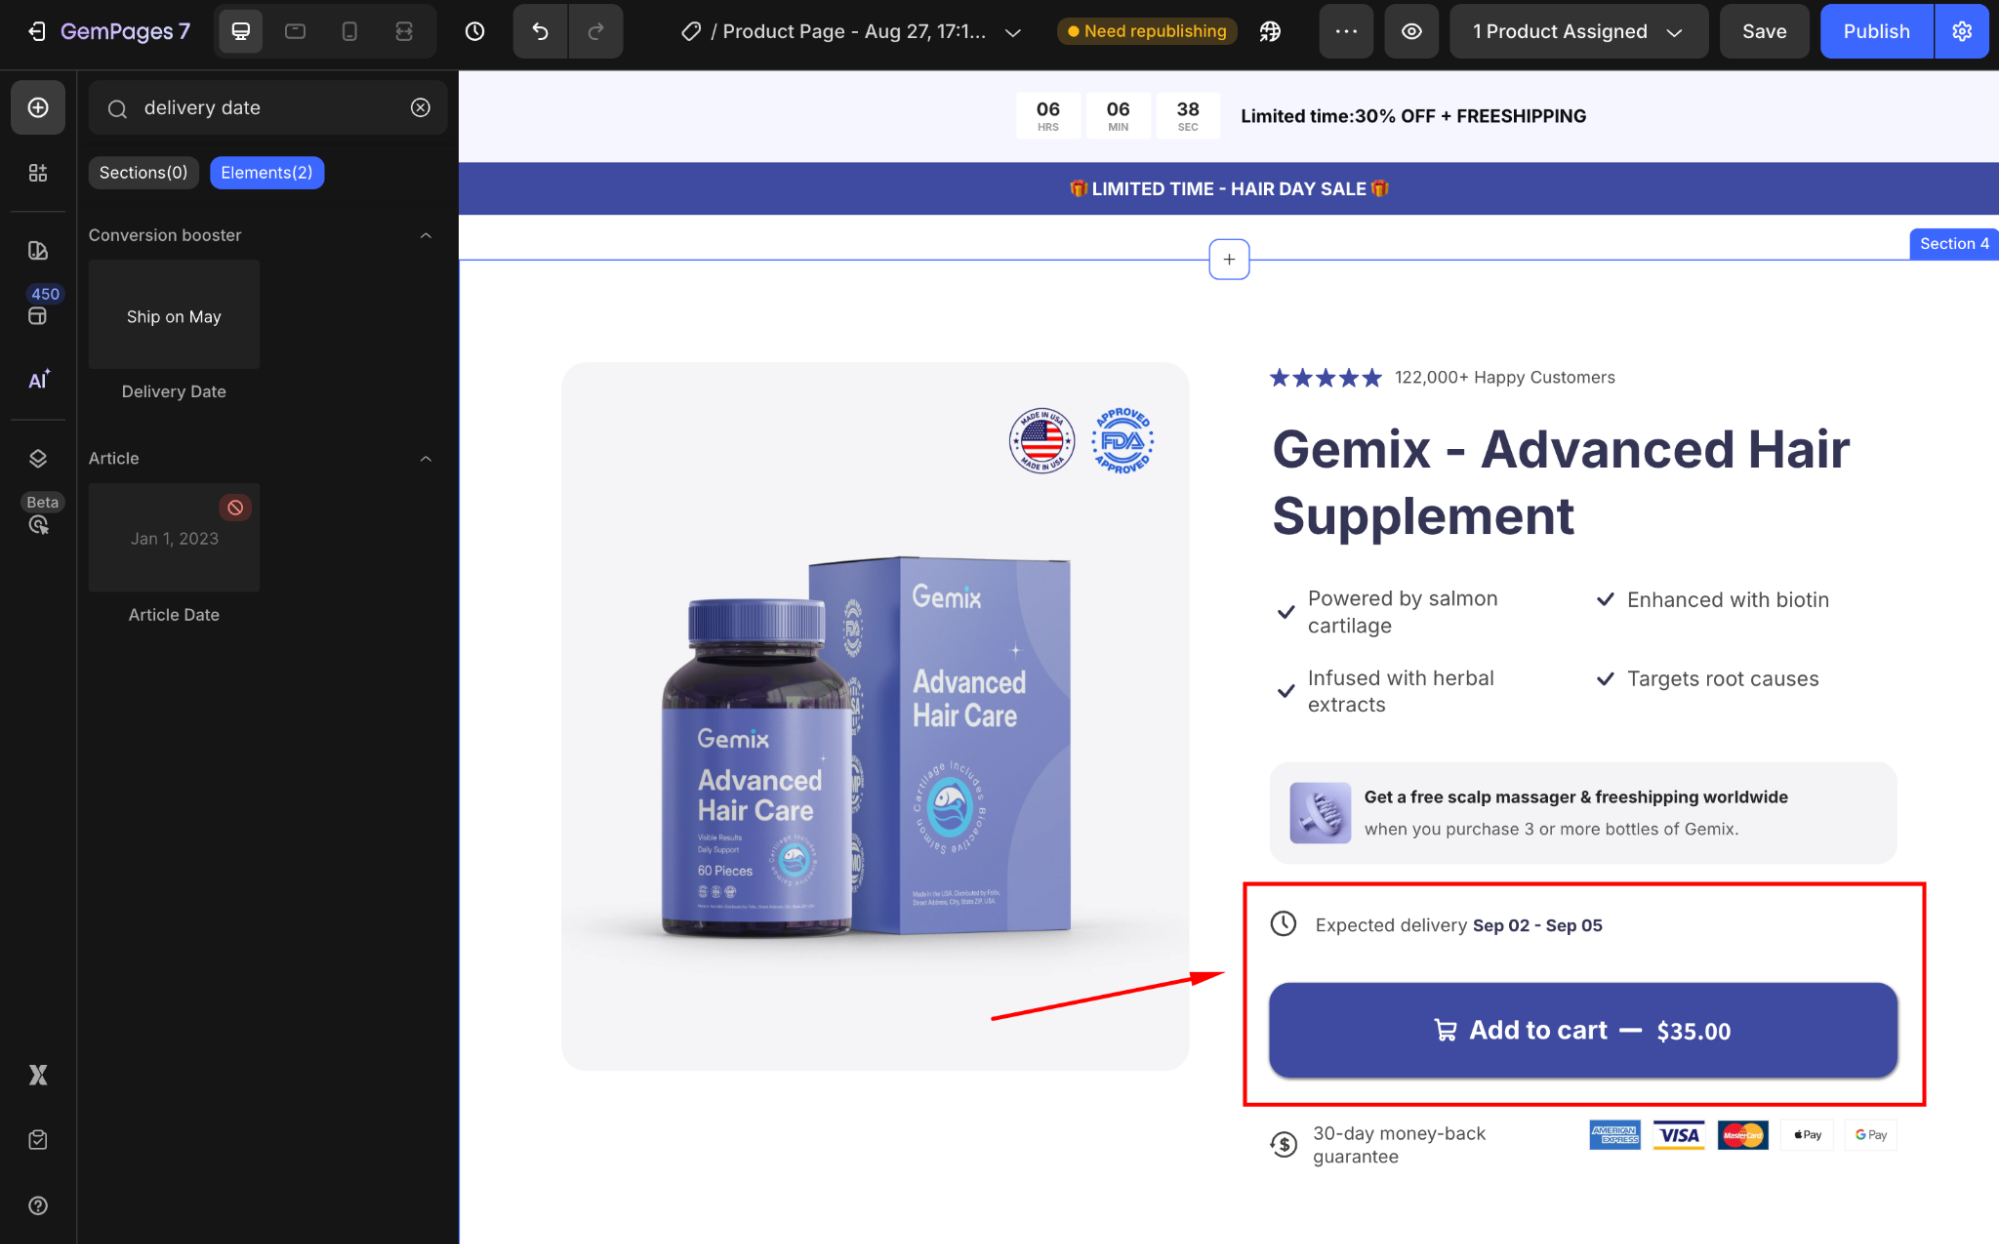
Step 3: Configure the Deliver Date Element
Click on the element to open its settings panel in the left sidebar. From here, you can customize the element’s style as you prefer.
For example, edit the delivery information:
- Custom text: Enter the message you want.
- Estimated Days: Show the earliest and latest possible delivery dates.
- Date Format: Choose the appropriate date format for target customers.
Refer to this article for further information on configuring the GemPages’ Delivery Date Element.


Thank you for your comments