


Sold Out vs. Out of Stock: What’s the Difference?
Before we dive into how to show a Sold Out badge using GemPages, let’s clarify the basics:
- Sold Out typically means a product was available but has now been completely purchased.
- Out of Stock could imply the product was never in stock or hasn’t been restocked.
Both statuses affect customer perception and conversion—so displaying this correctly matters.
When Should You Mark a Product as Sold Out or Out of Stock?
- The inventory quantity is 0 and you do not plan to sell it temporarily.
- You want customers to clearly understand the product is unavailable.
- You plan to restock and want to keep the product page live for SEO and future sales.
- Preserve search engine rankings for the product page.
- Build social proof and urgency by showing demand.
How to Make a Product Sold Out on Shopify
To mark a product as “Sold Out” in Shopify, follow these steps:
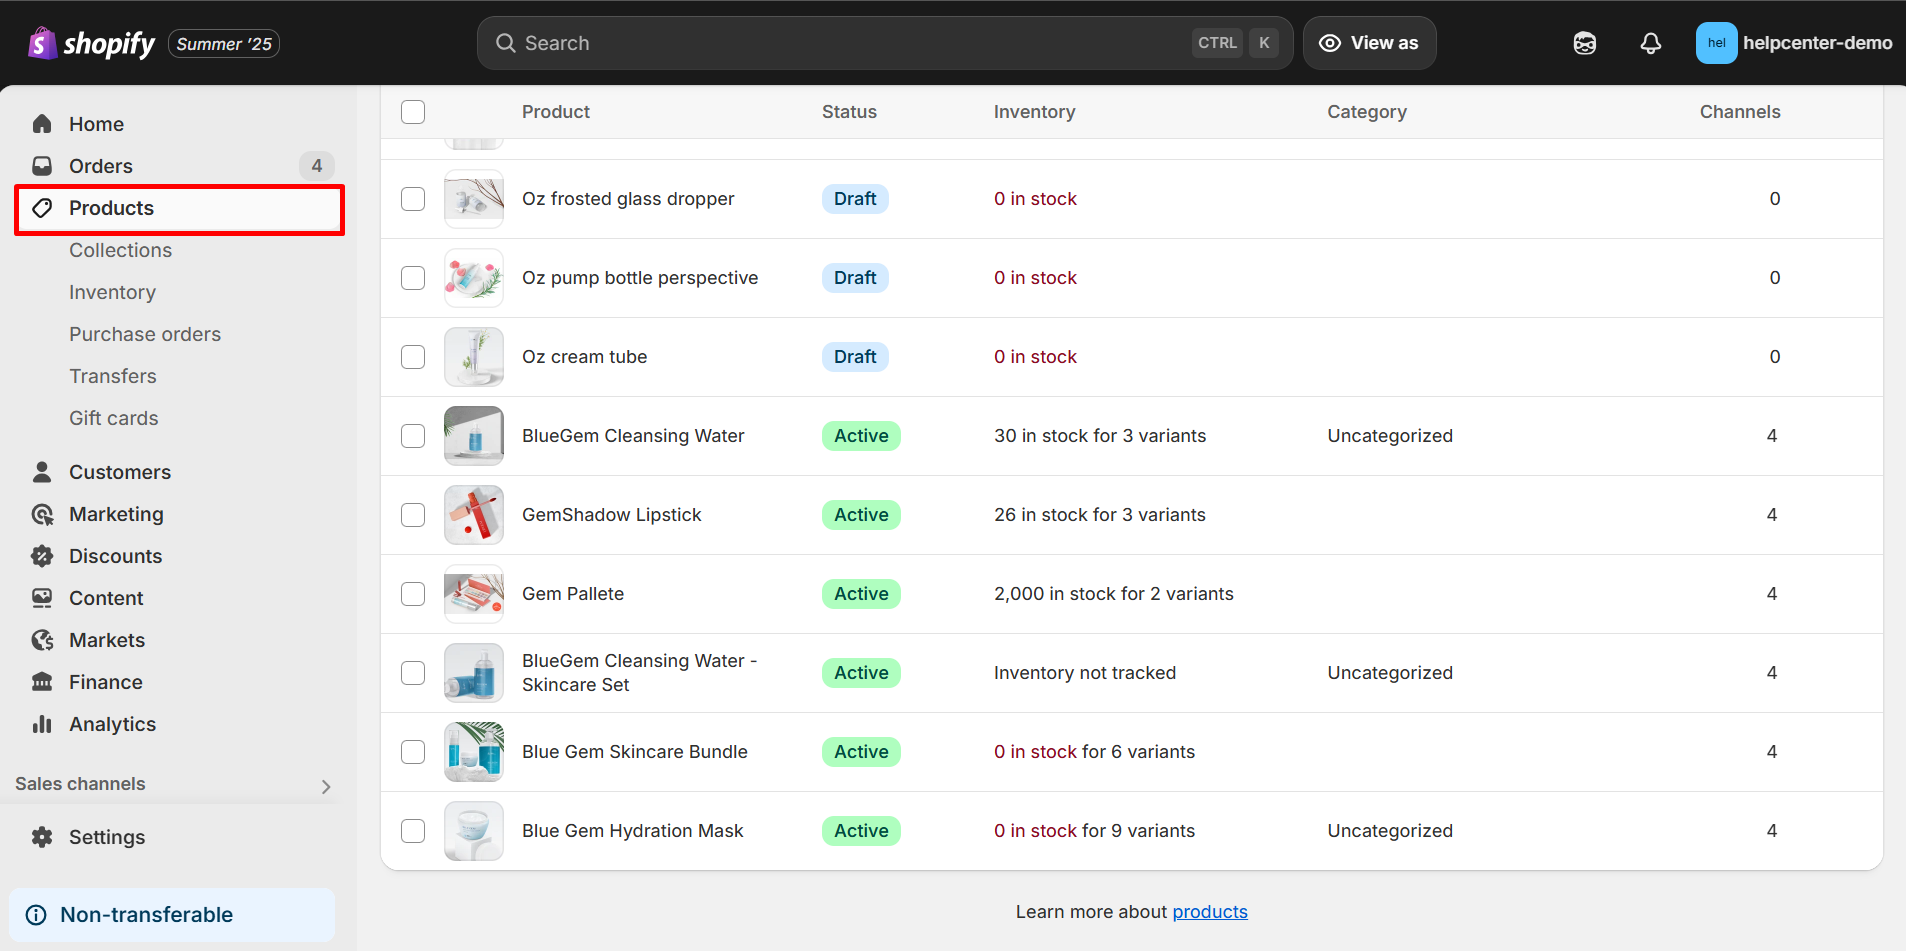
Step 1: Go to Shopify admin, navigate to Products. Select the product you want to update.
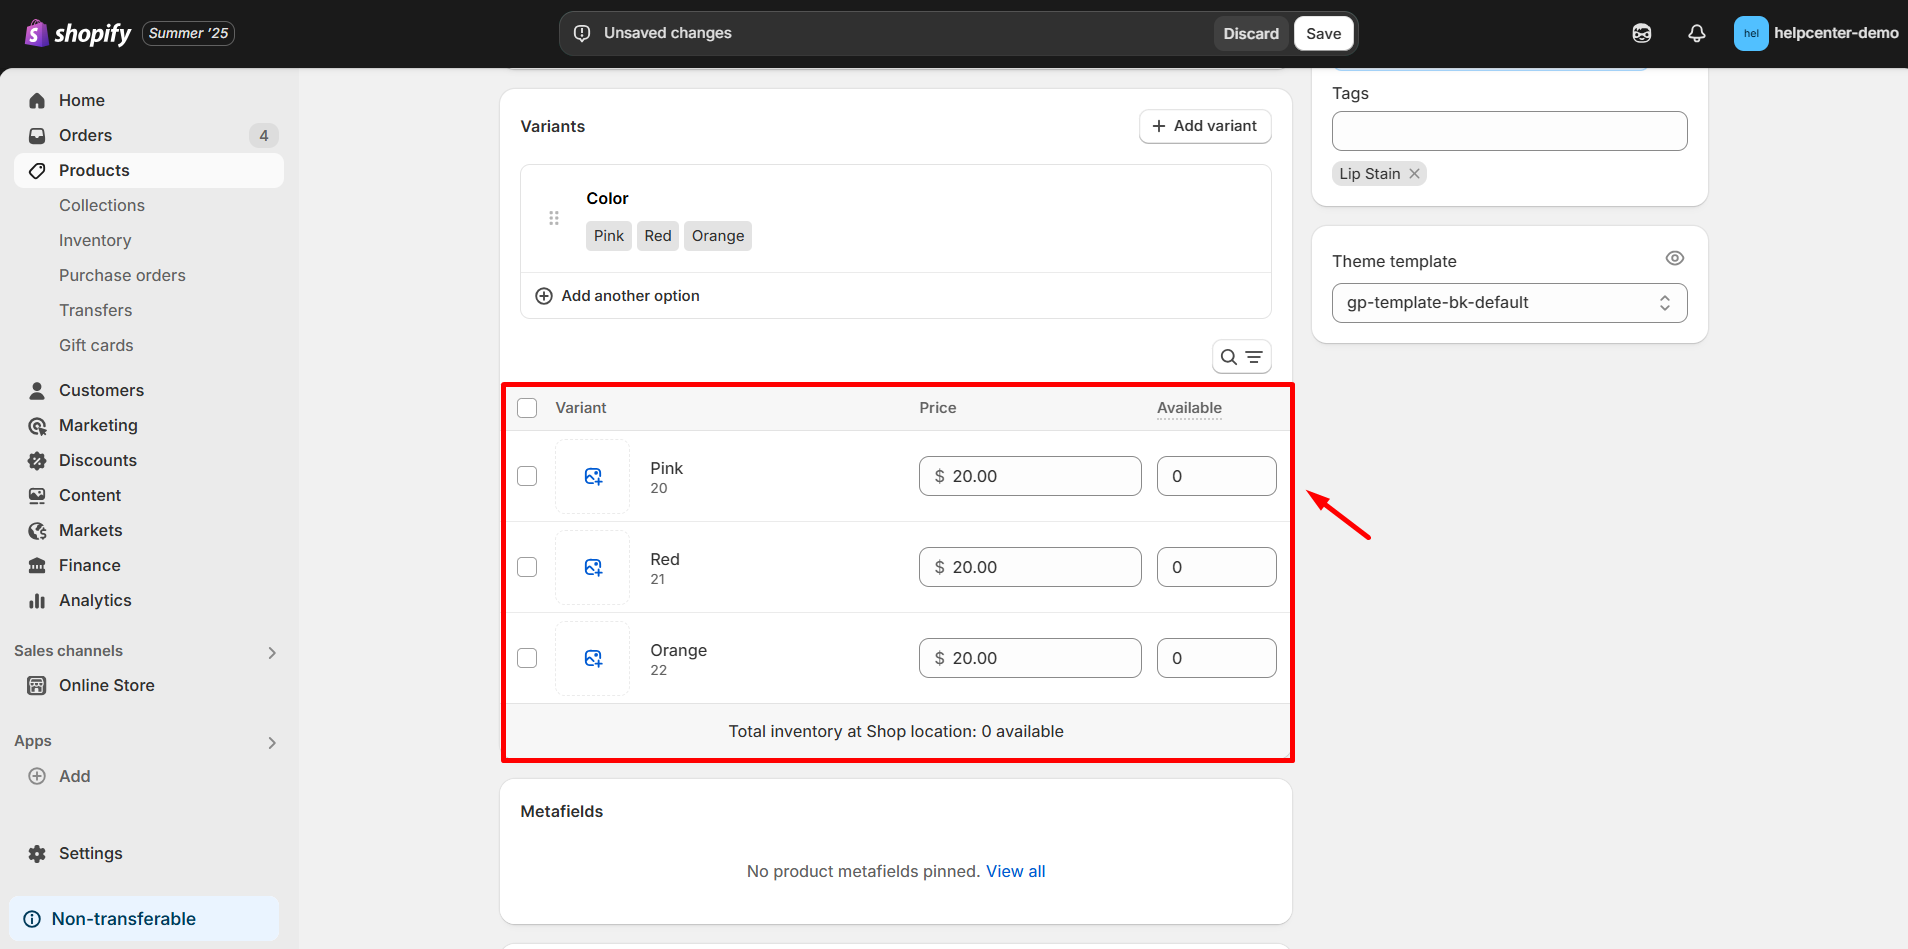
Step 2: In the Inventory section, set the inventory quantity to 0 for each variant.
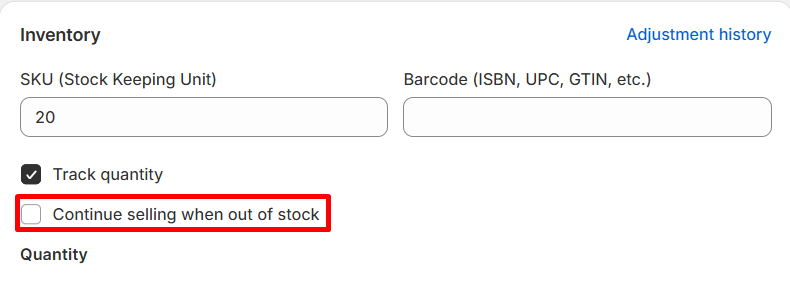
Step 3: Uncheck the box labeled “Continue selling when out of stock.” This ensures the product displays as unavailable on your storefront.
How to Show “Sold Out” Badge with GemPages
Make sure the product is assigned to a specific GemPages template.
If you’re not sure how to assign a product to a template, check out:
Here are two clear, step-by-step options to display a “Sold Out” badge using GemPages in Shopify:
Option 1: Use the Product Badge Element (Recommended for single-variant or simple products)
Best if you want to show a “Sold Out” badge on products with no variants or apply it to the entire product.
Step 1: In the GemPages dashboard, open the page that includes the product you want to update.
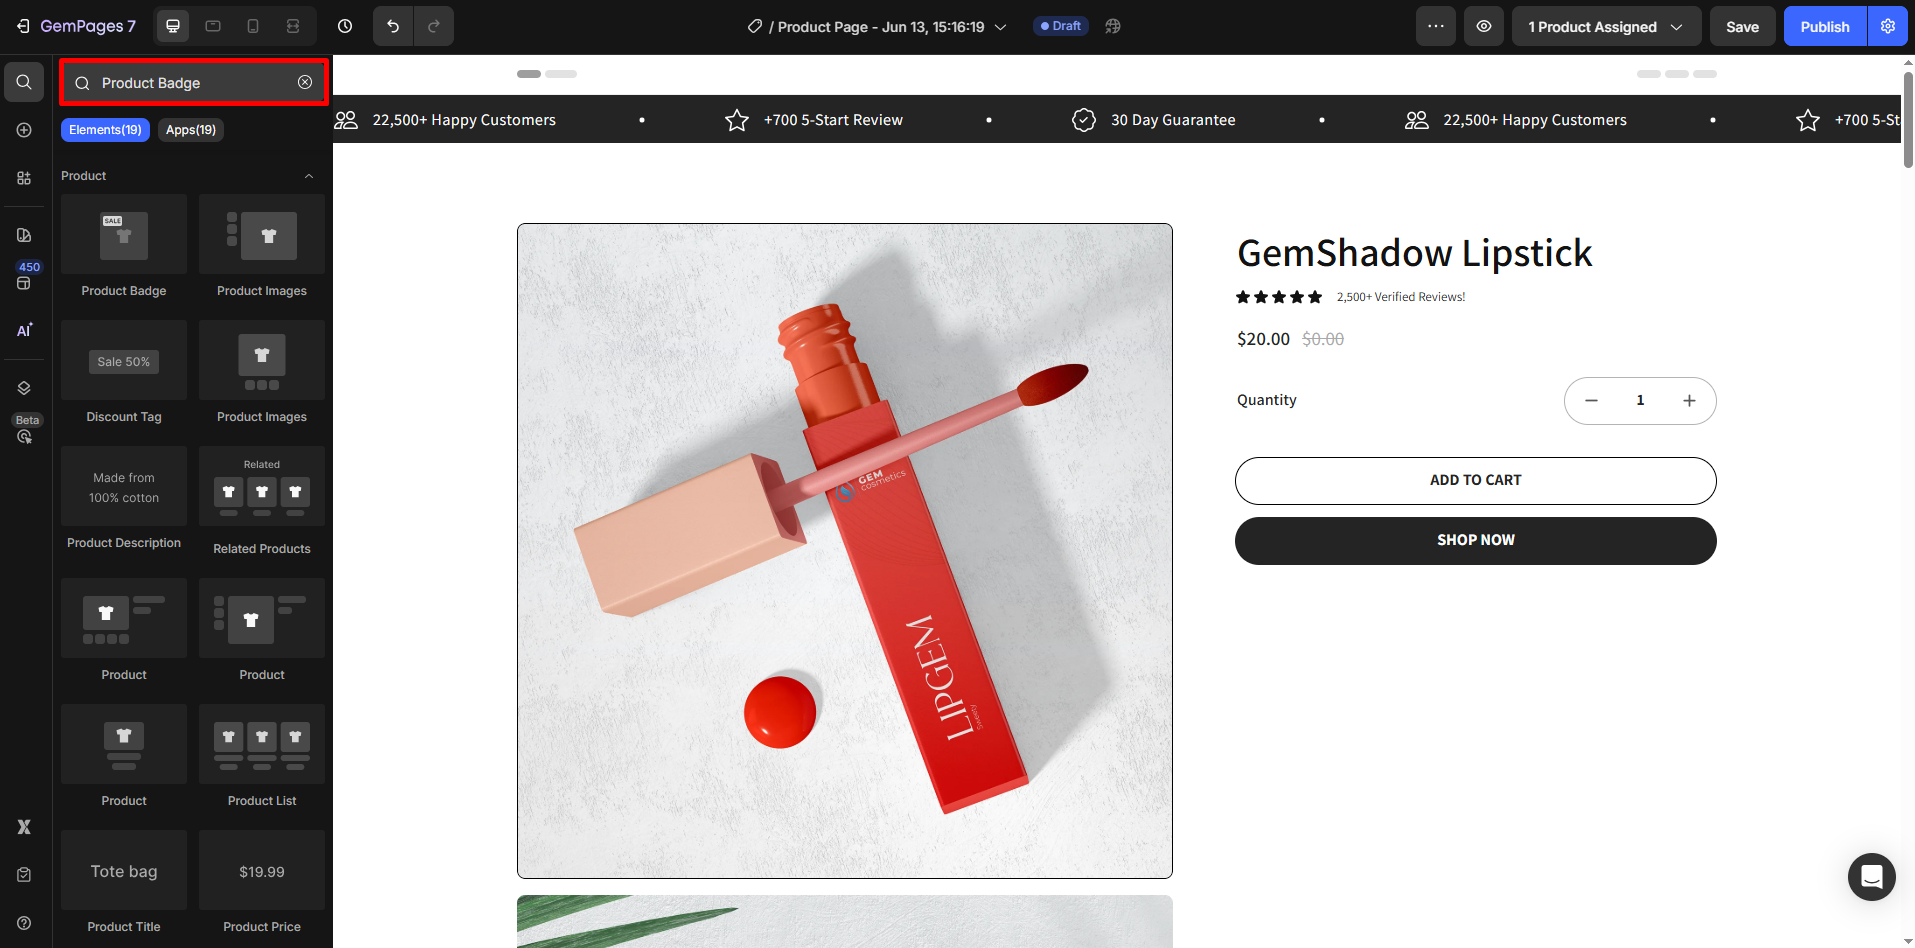
Step 2: From the left panel, drag and drop the Product Badge element into the product block (ideally above the product image).
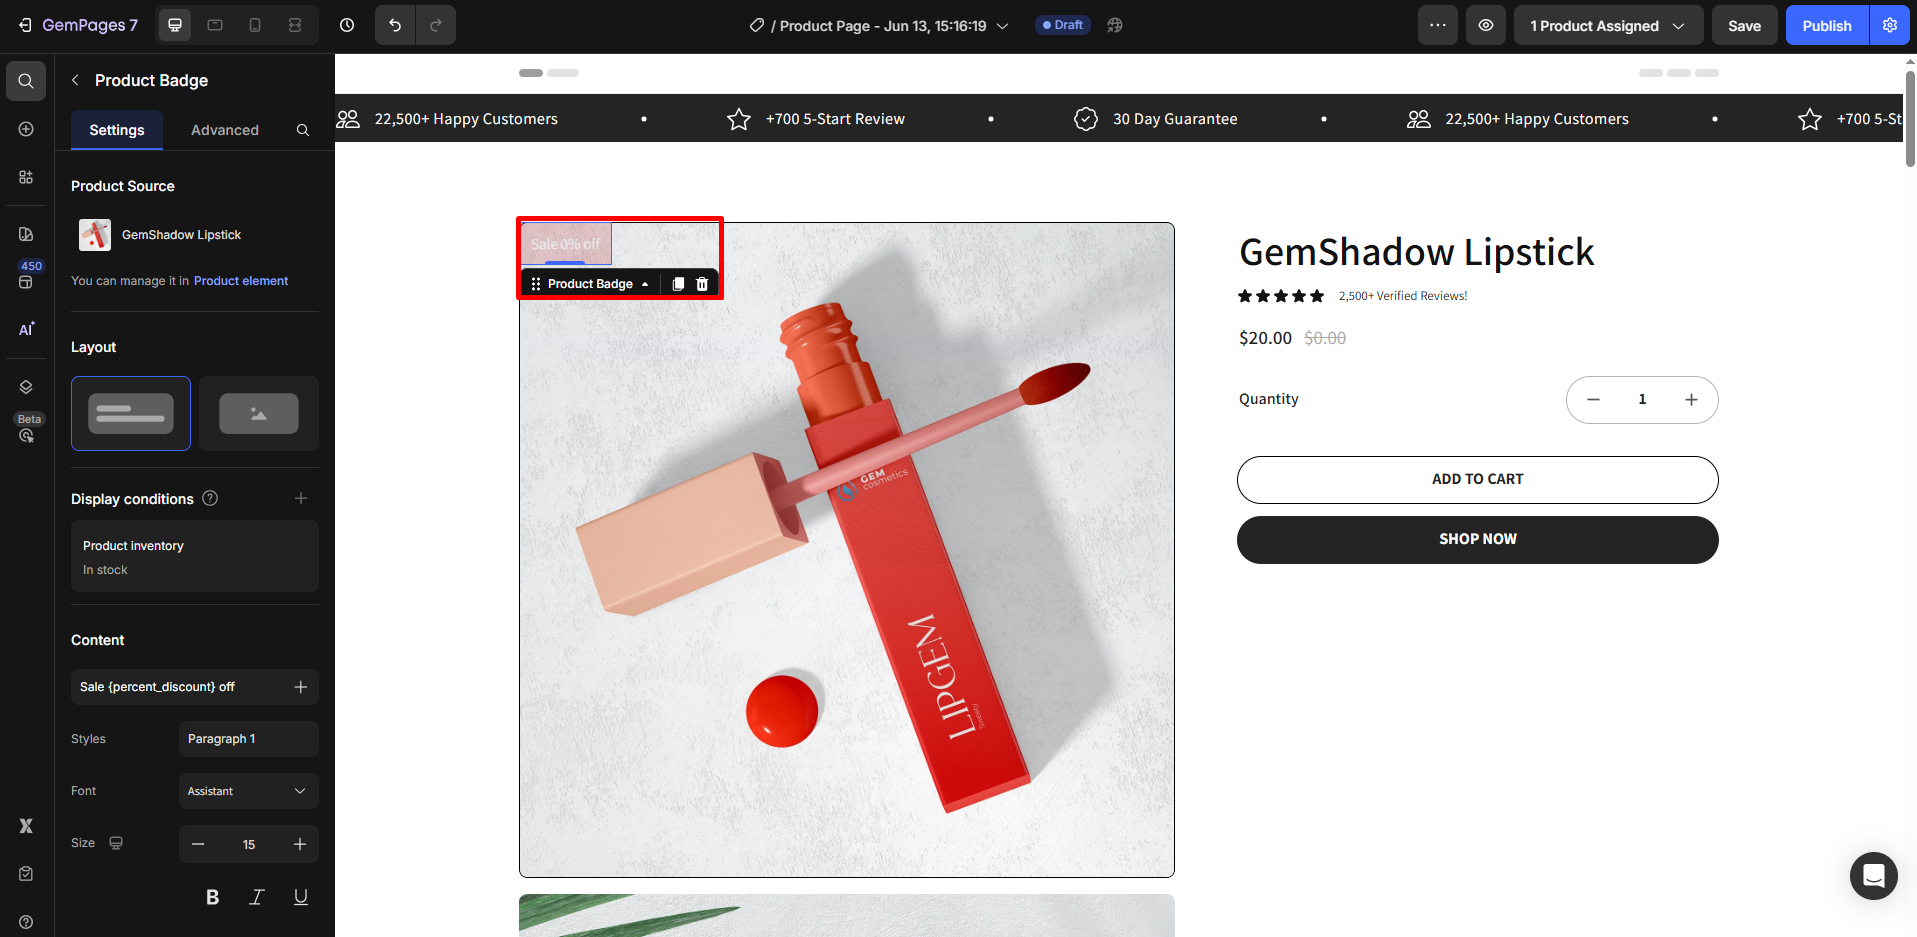
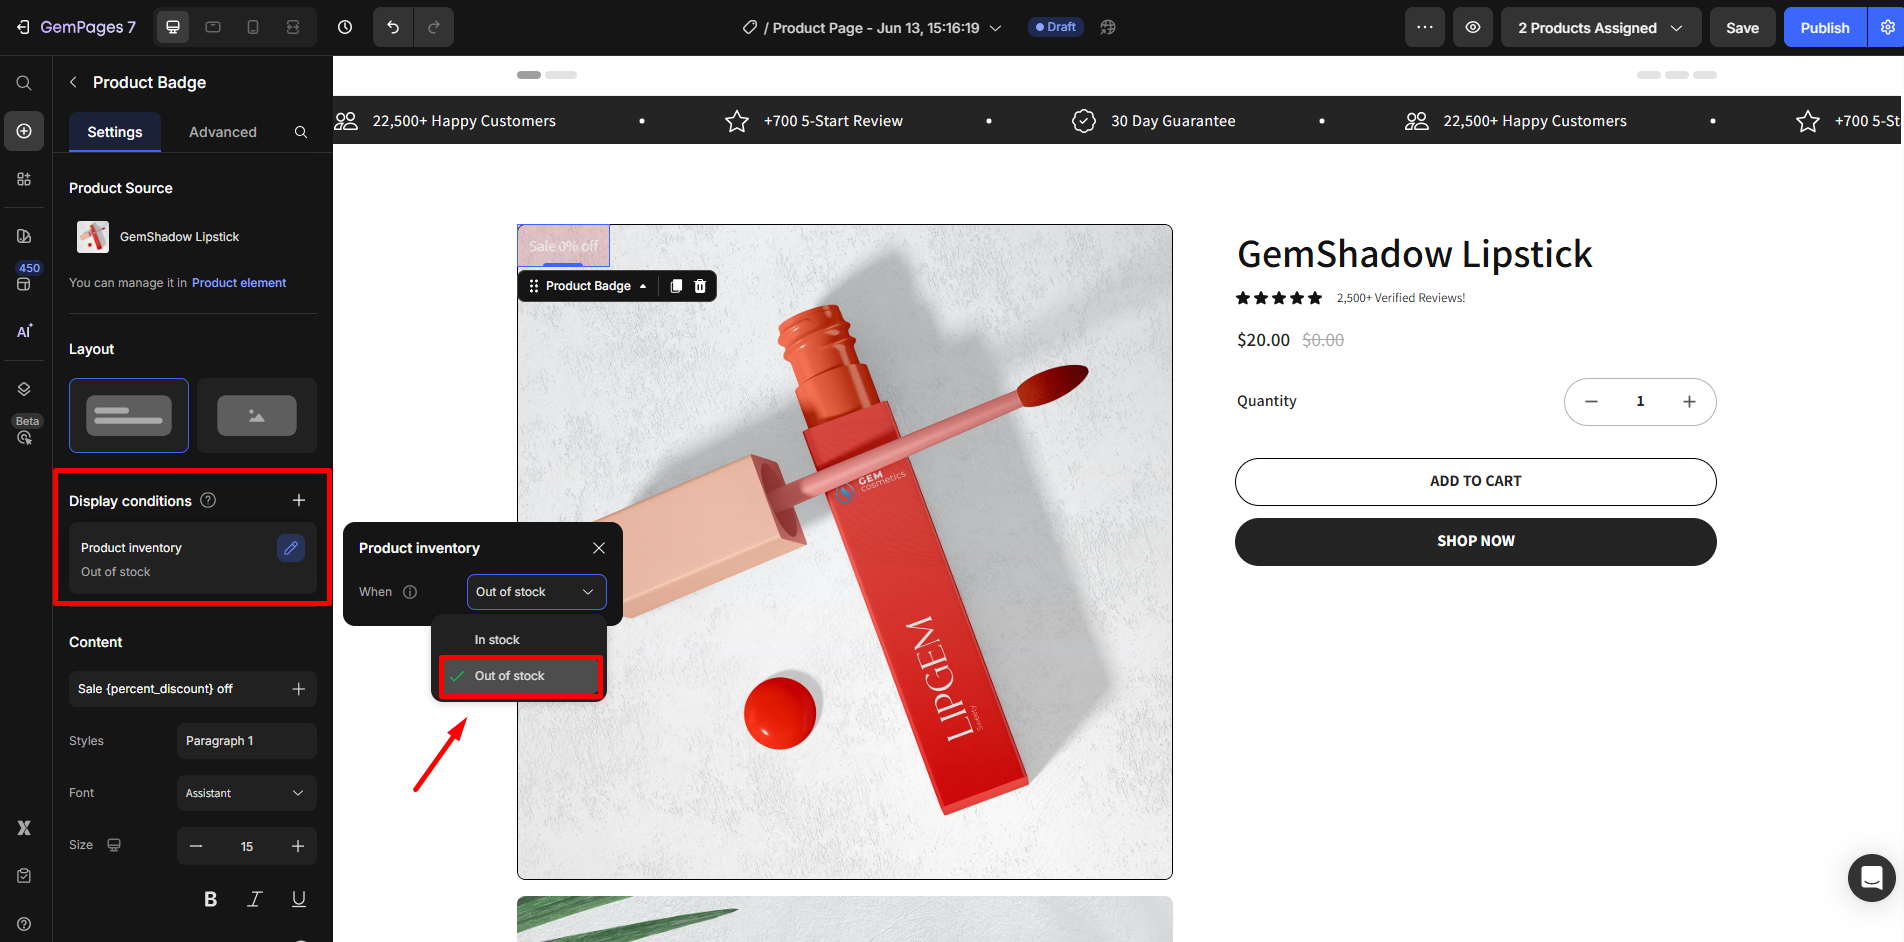
Step 3: Set up the sold-out condition
- Click the Product Badge element.
- In the left panel, go to Display Conditions and set the condition to Product Inventory = Out of Stock.
Step 4: Enter the text you want on the badge, like “Sold Out”. Customize the badge color, font, and position to match your theme.
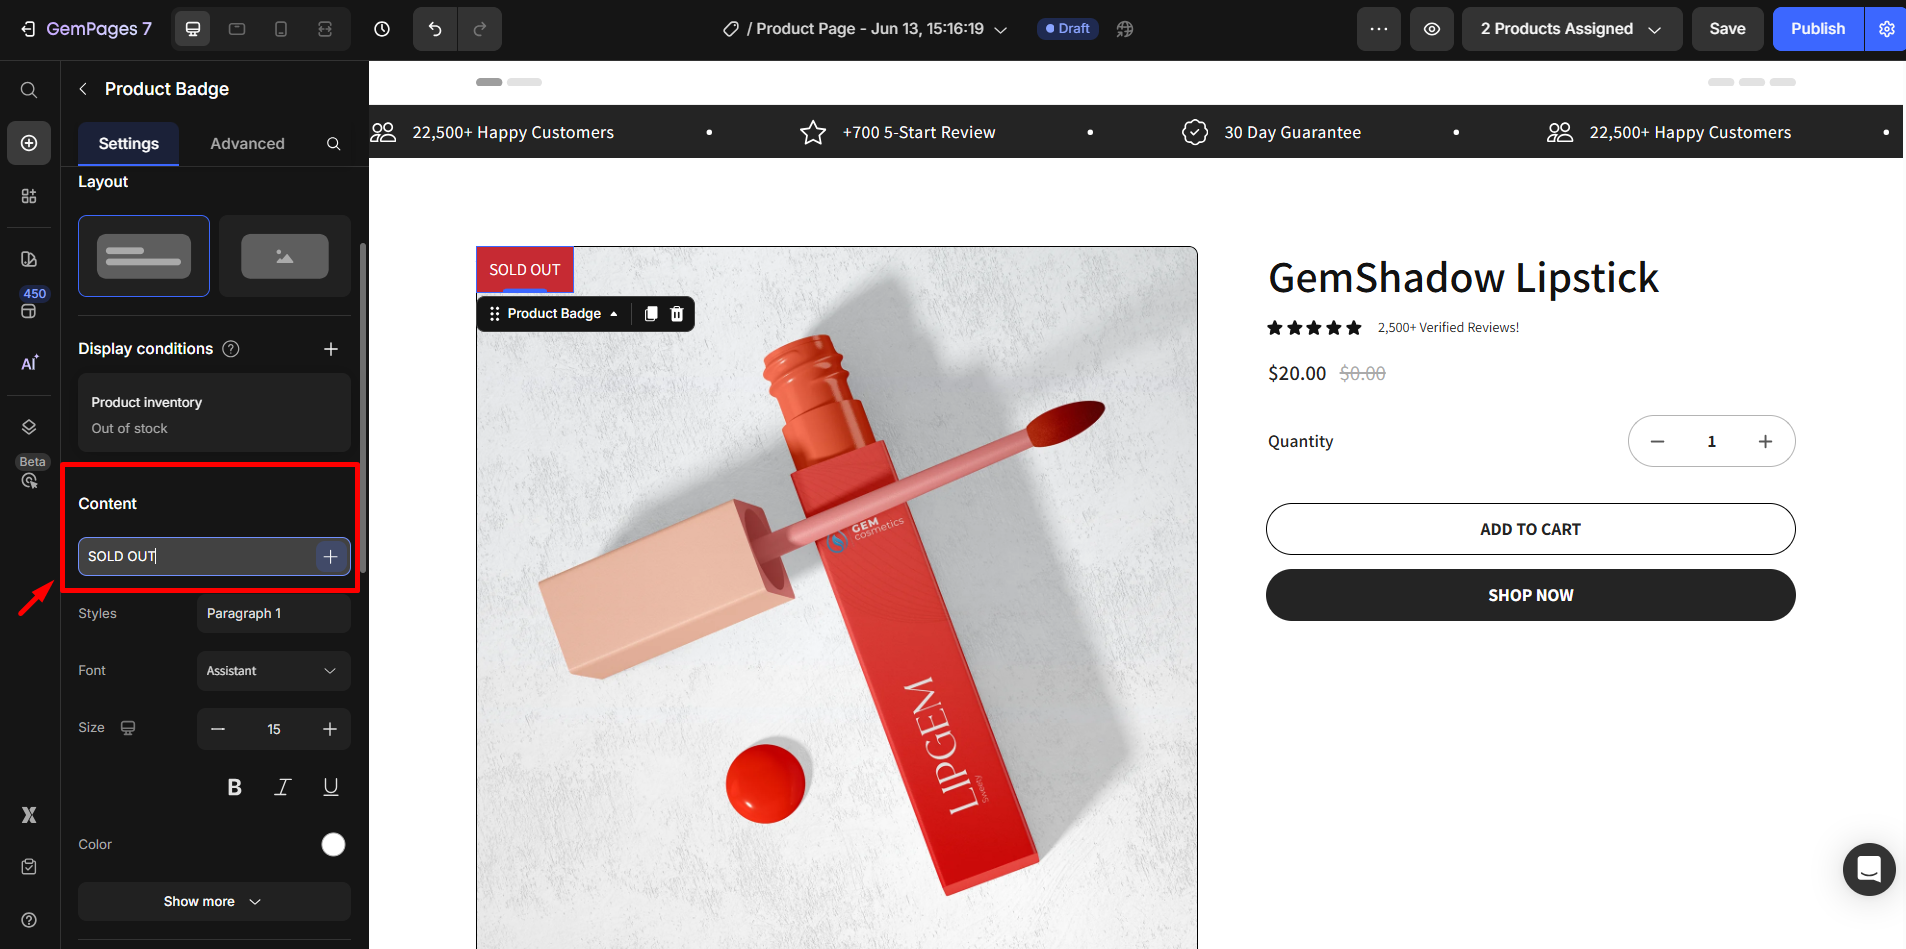
Step 5: Click Save, then Publish.
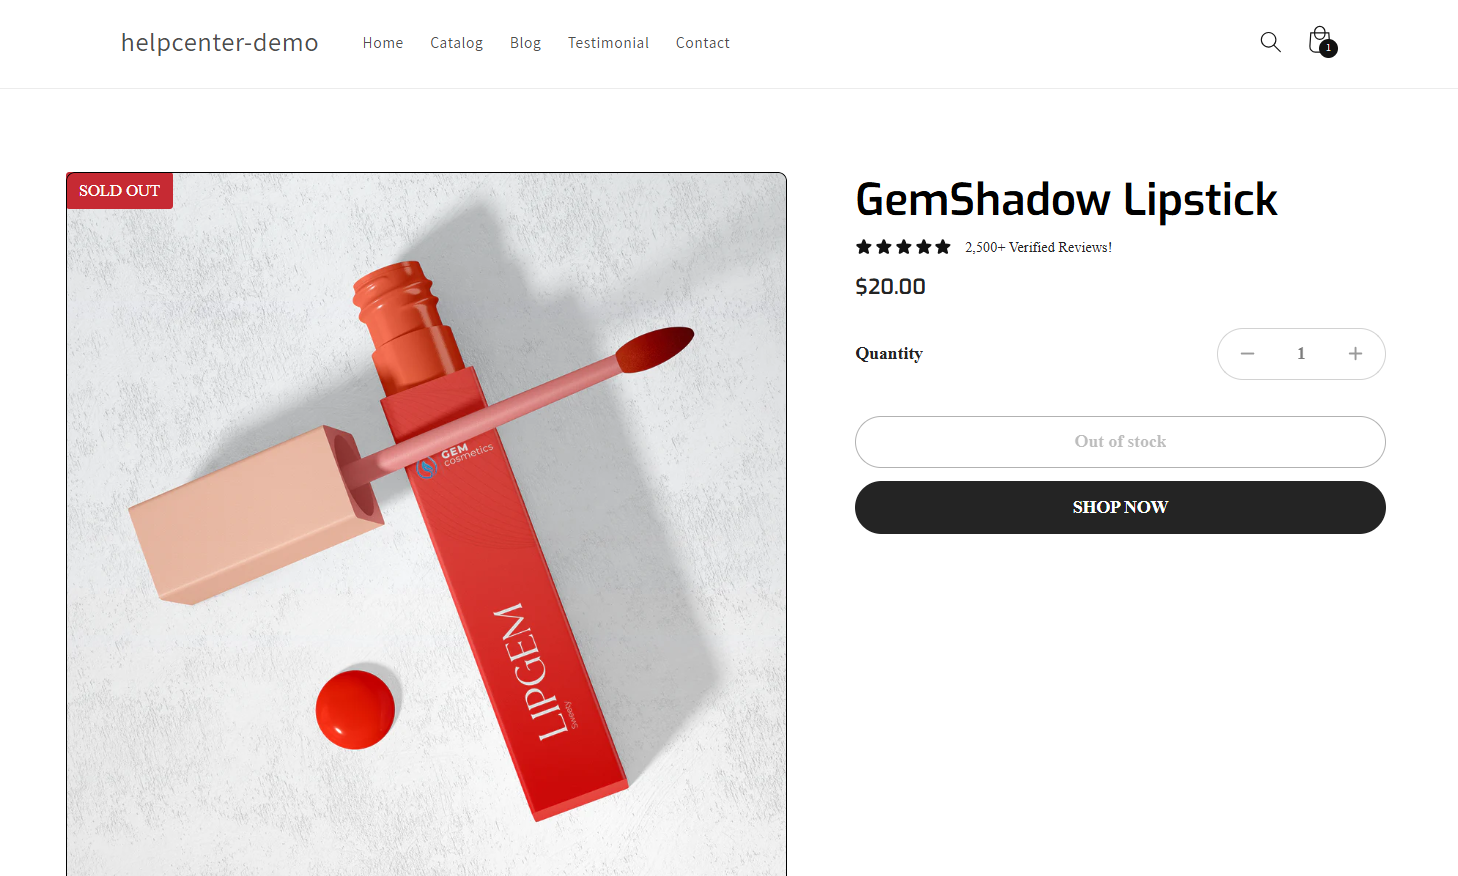
Once published, all products with zero inventory will automatically display the “Sold Out” badge.
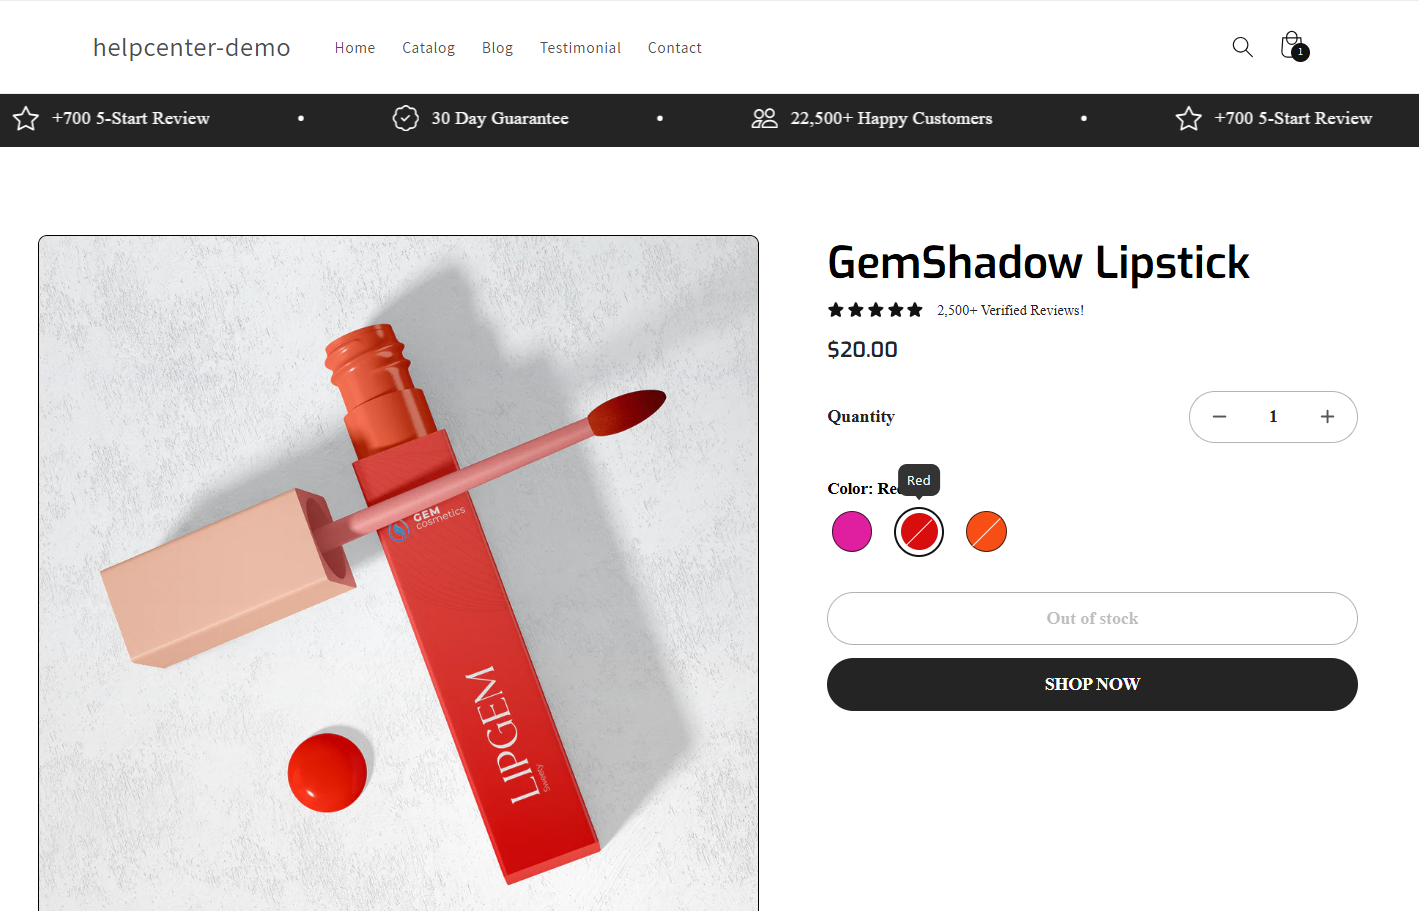
Option 2: Use the Product Variant and Swatches Element
Perfect for products with multiple variants (like color or size). This badge appears on each sold out option.
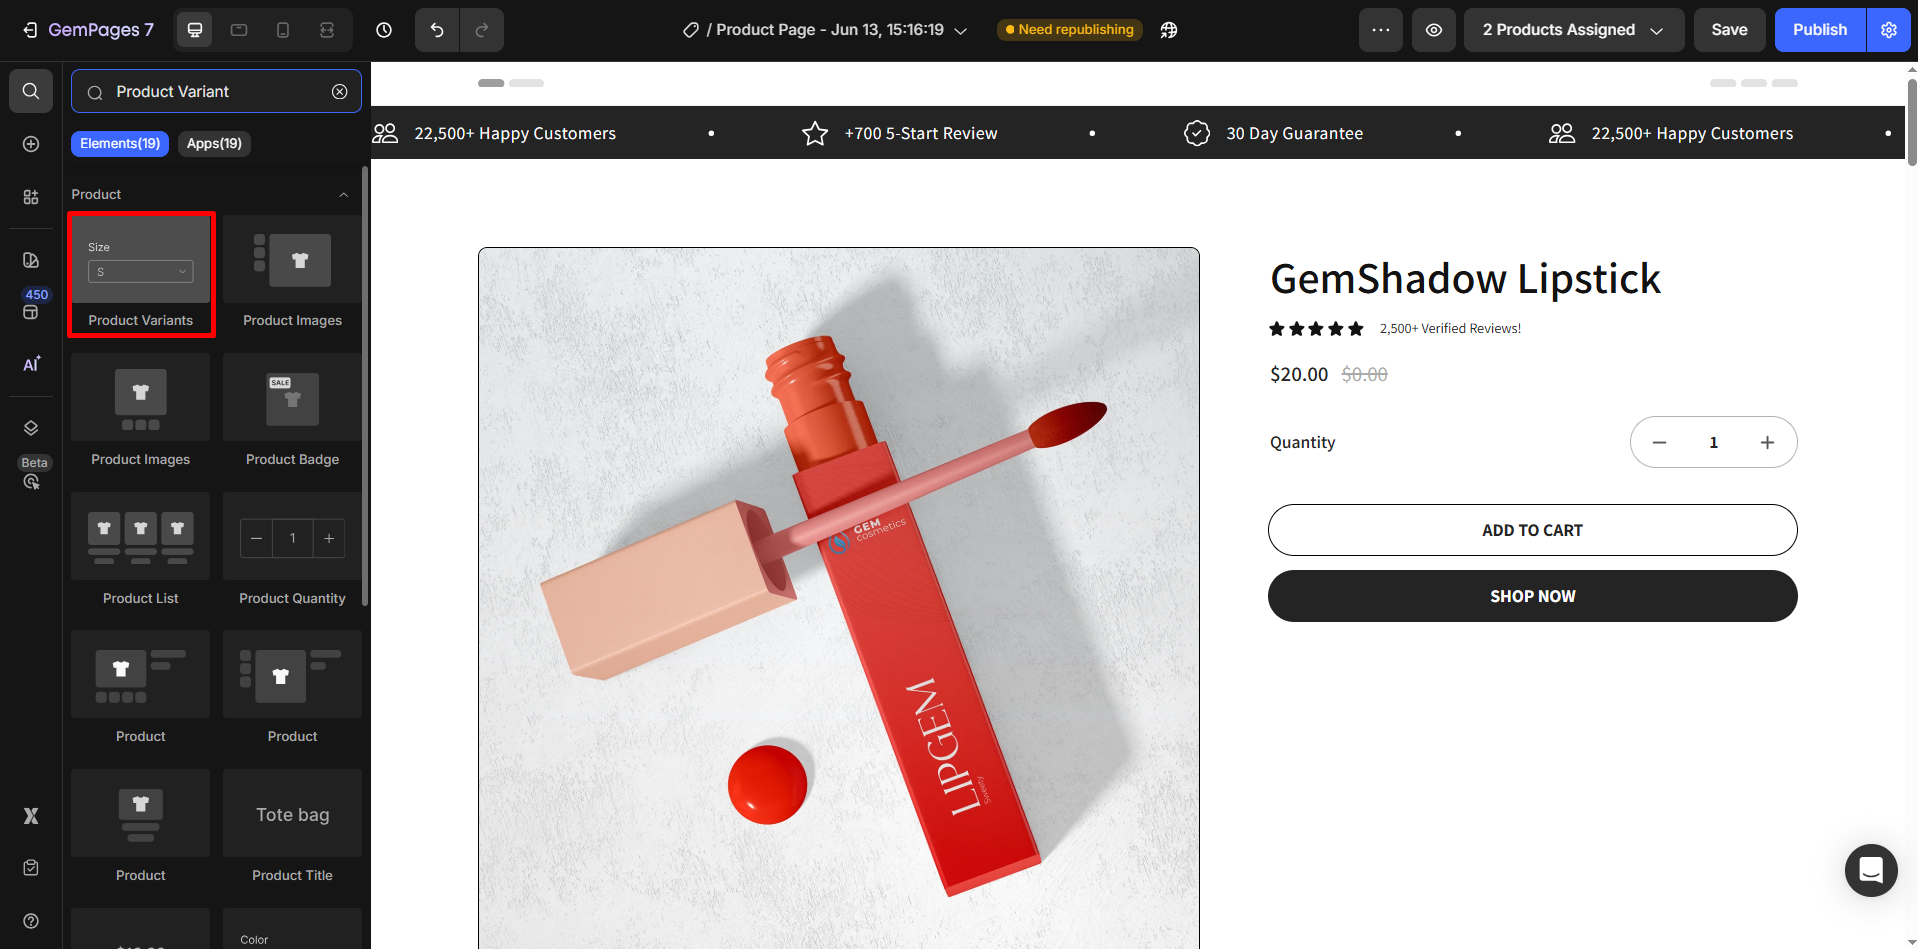
Step 1: Add the Variant & Swatches element
- In your page editor, find the Product Variant and Swatches element and drag it into the Product module.
- This element displays swatch buttons like size or colors.
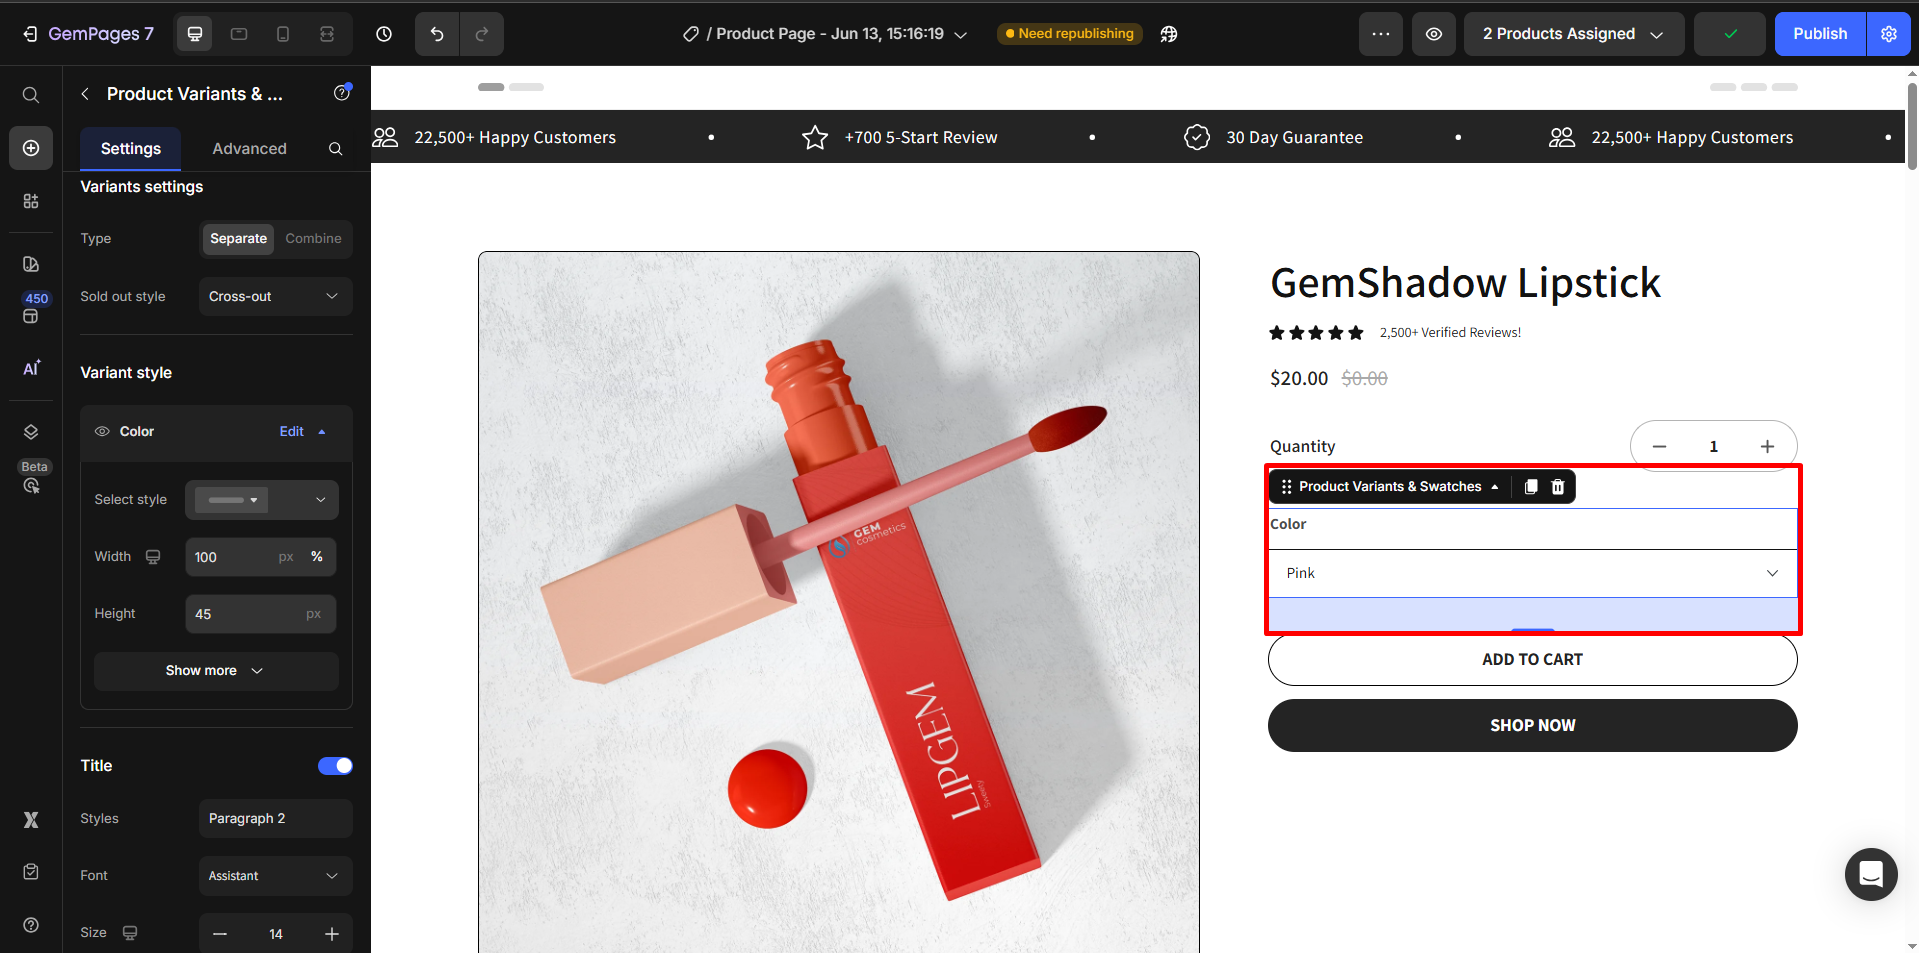
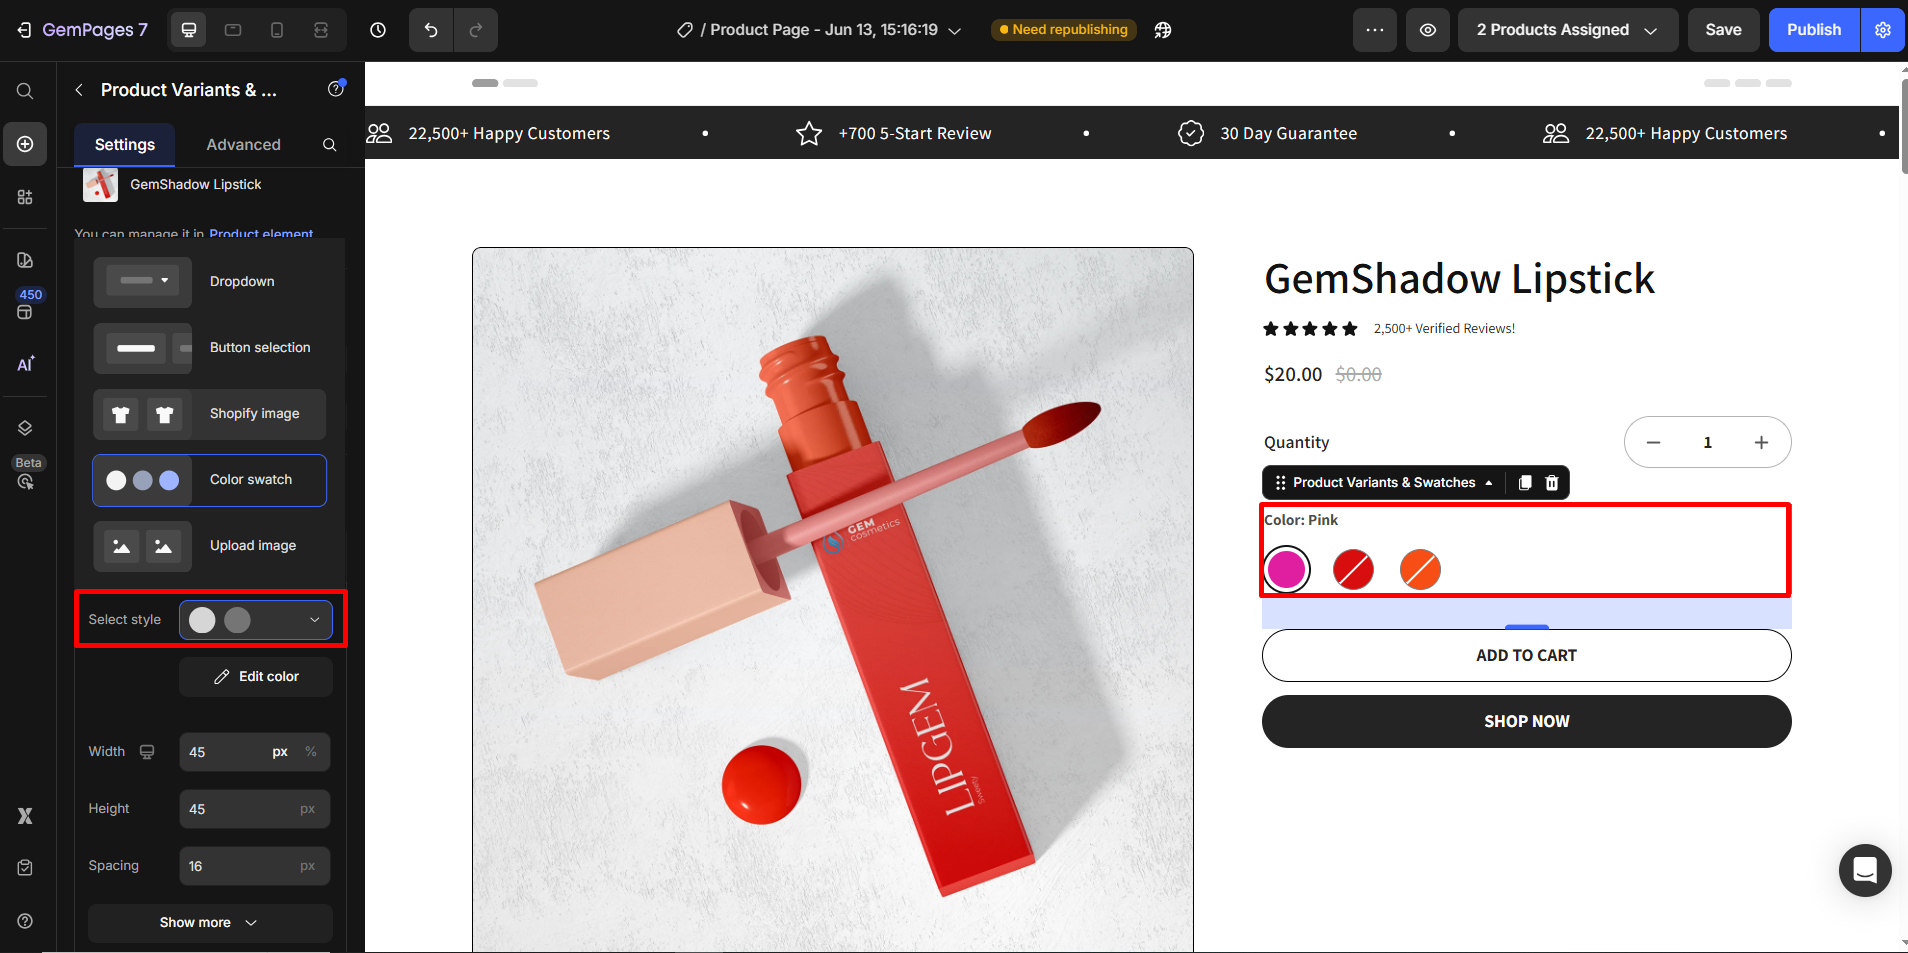
Step 2: Customize styles and display:
- Adjust the layout, labels, pre-selected options, and swatch appearance.
- To dive deeper, refer to the guide: [Product Variants and Swatches Element]
Step 3: In the Variant Settings, set the Sold Out Style to Cross Out. This will automatically display sold-out options with a line through them, making it clear they’re unavailable.
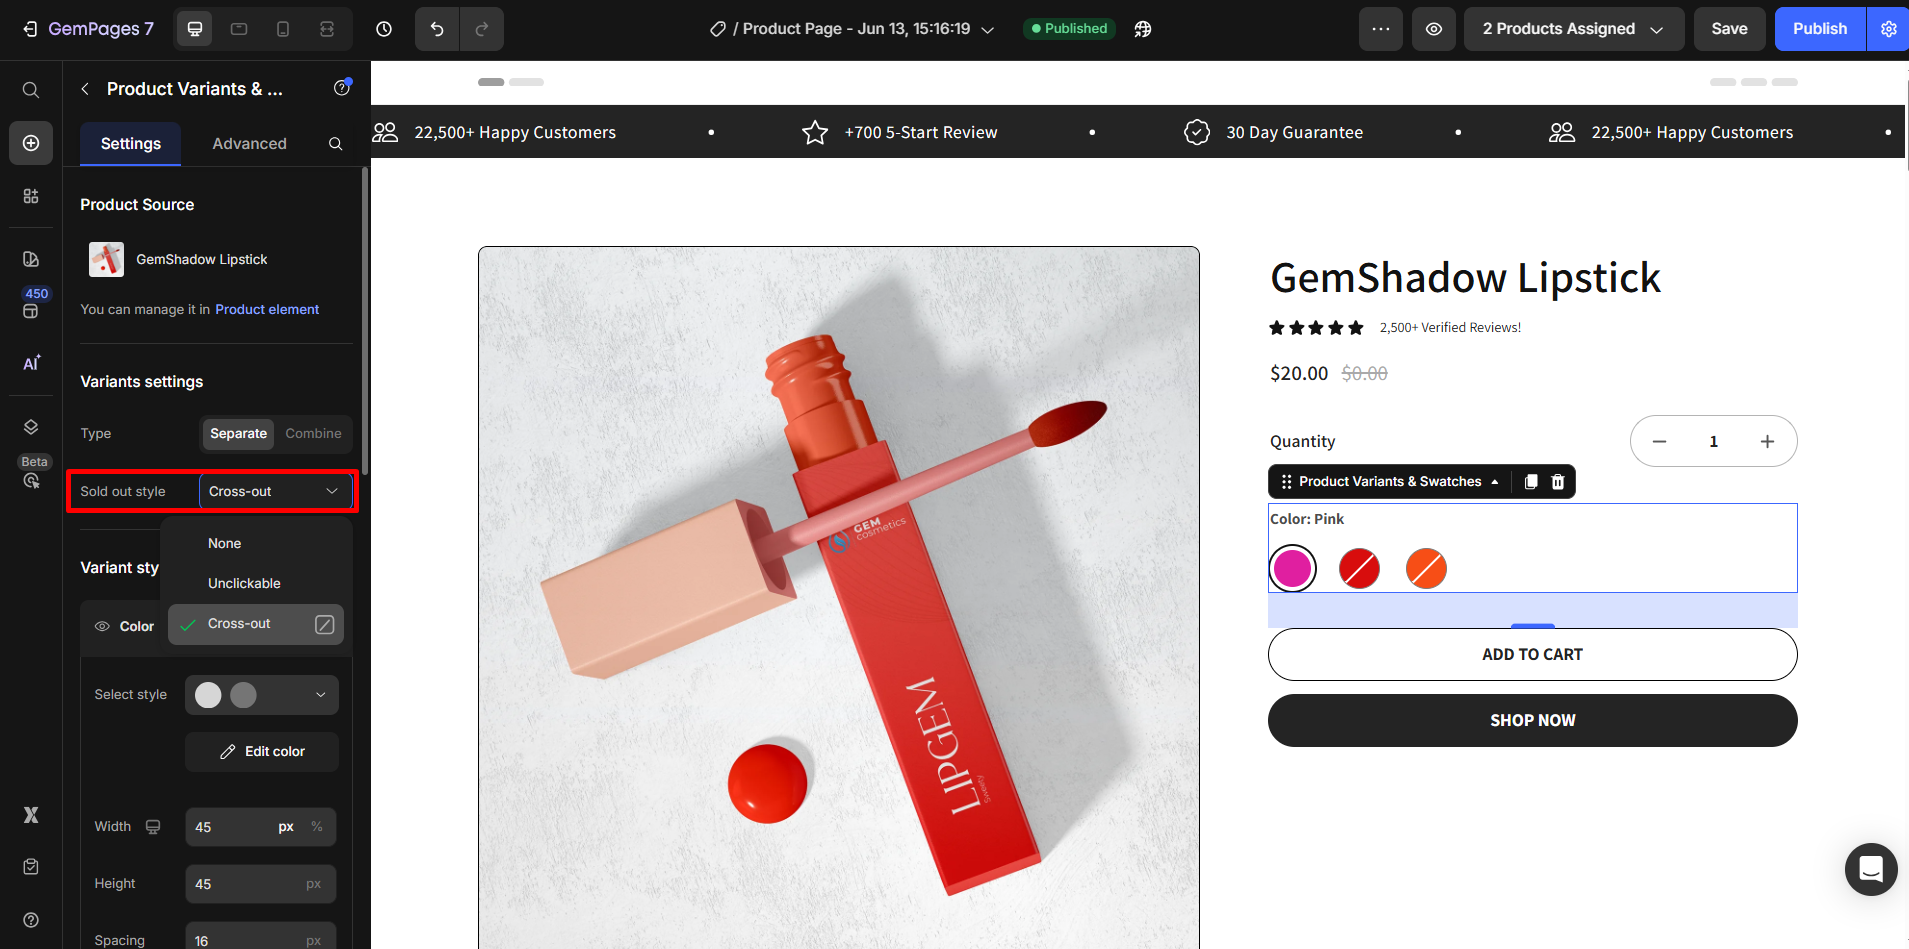
Step 4: Save and Publish.
How to Hide Sold-Out Products from the “Recommended Products” Section?
In such cases, sold-out products may still appear at the bottom of your Product Detail Page.
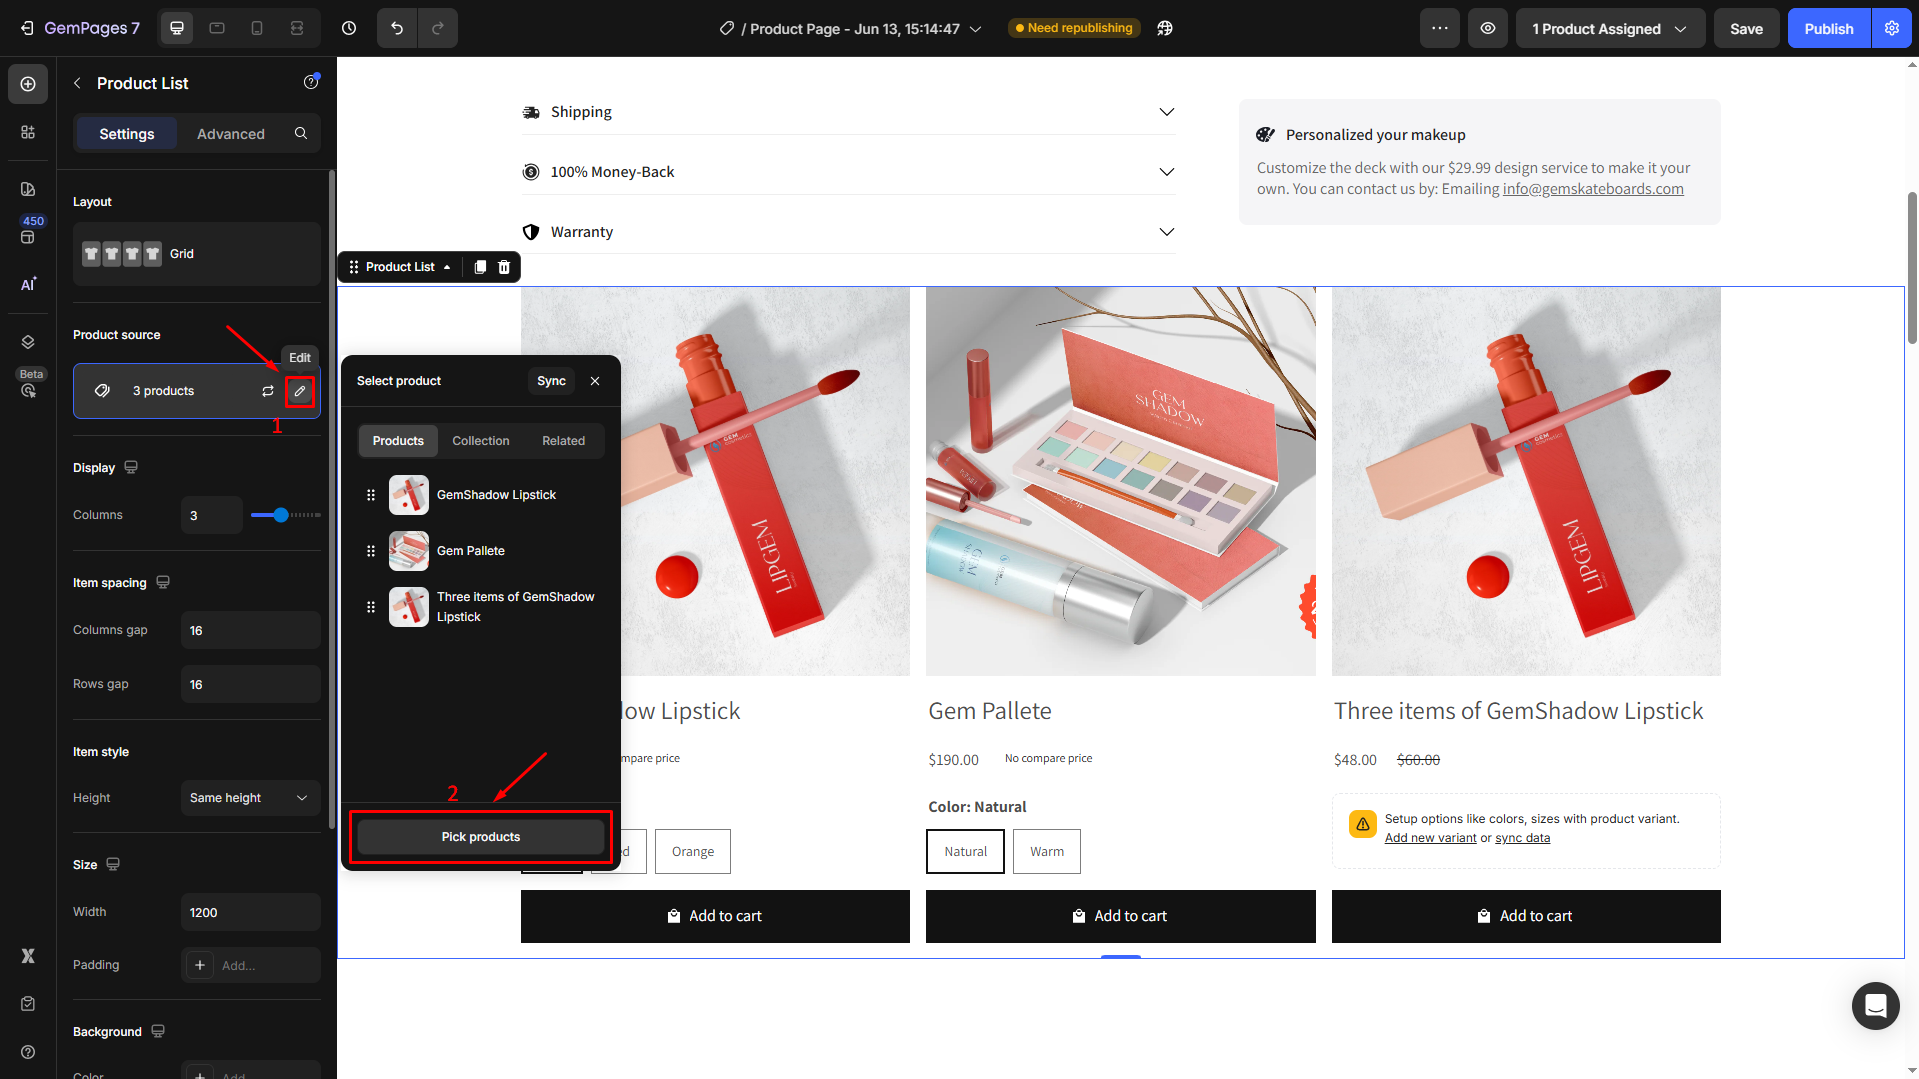
If you’re using the Product List element to display the “Recommended Products” (also known as “People Also Liked”, “Customers Also Bought”, etc.) manually, you can replace the sold-out products with another one.
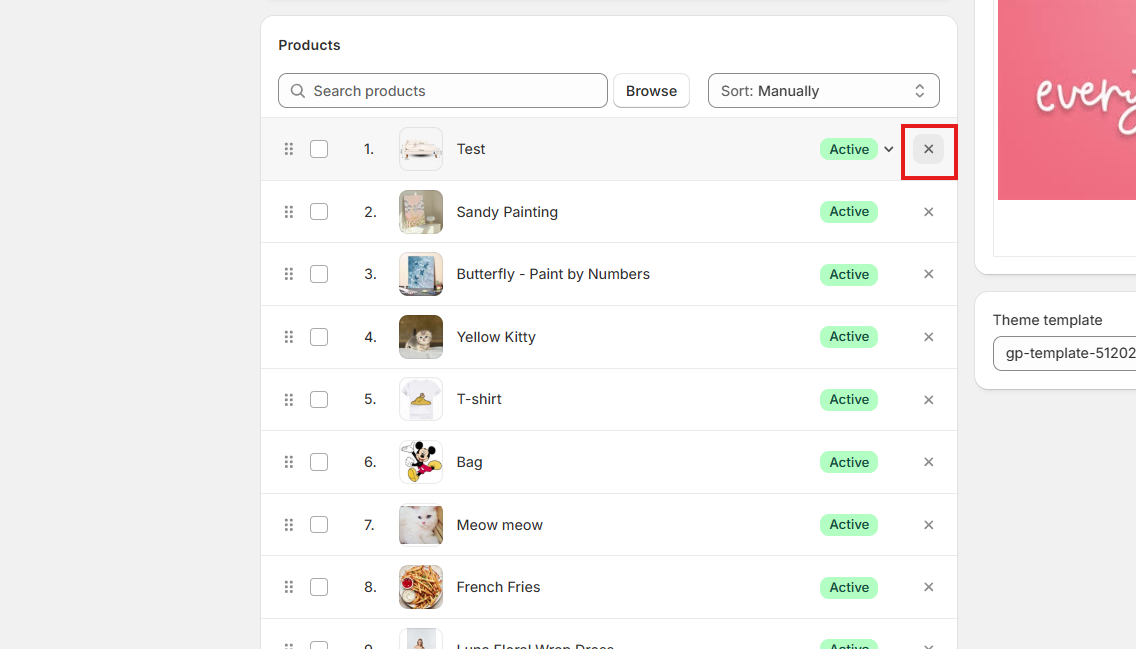
- Click on the Product List element to open its settings.
- Under the Settings tab, click on the product displayed under Product source.
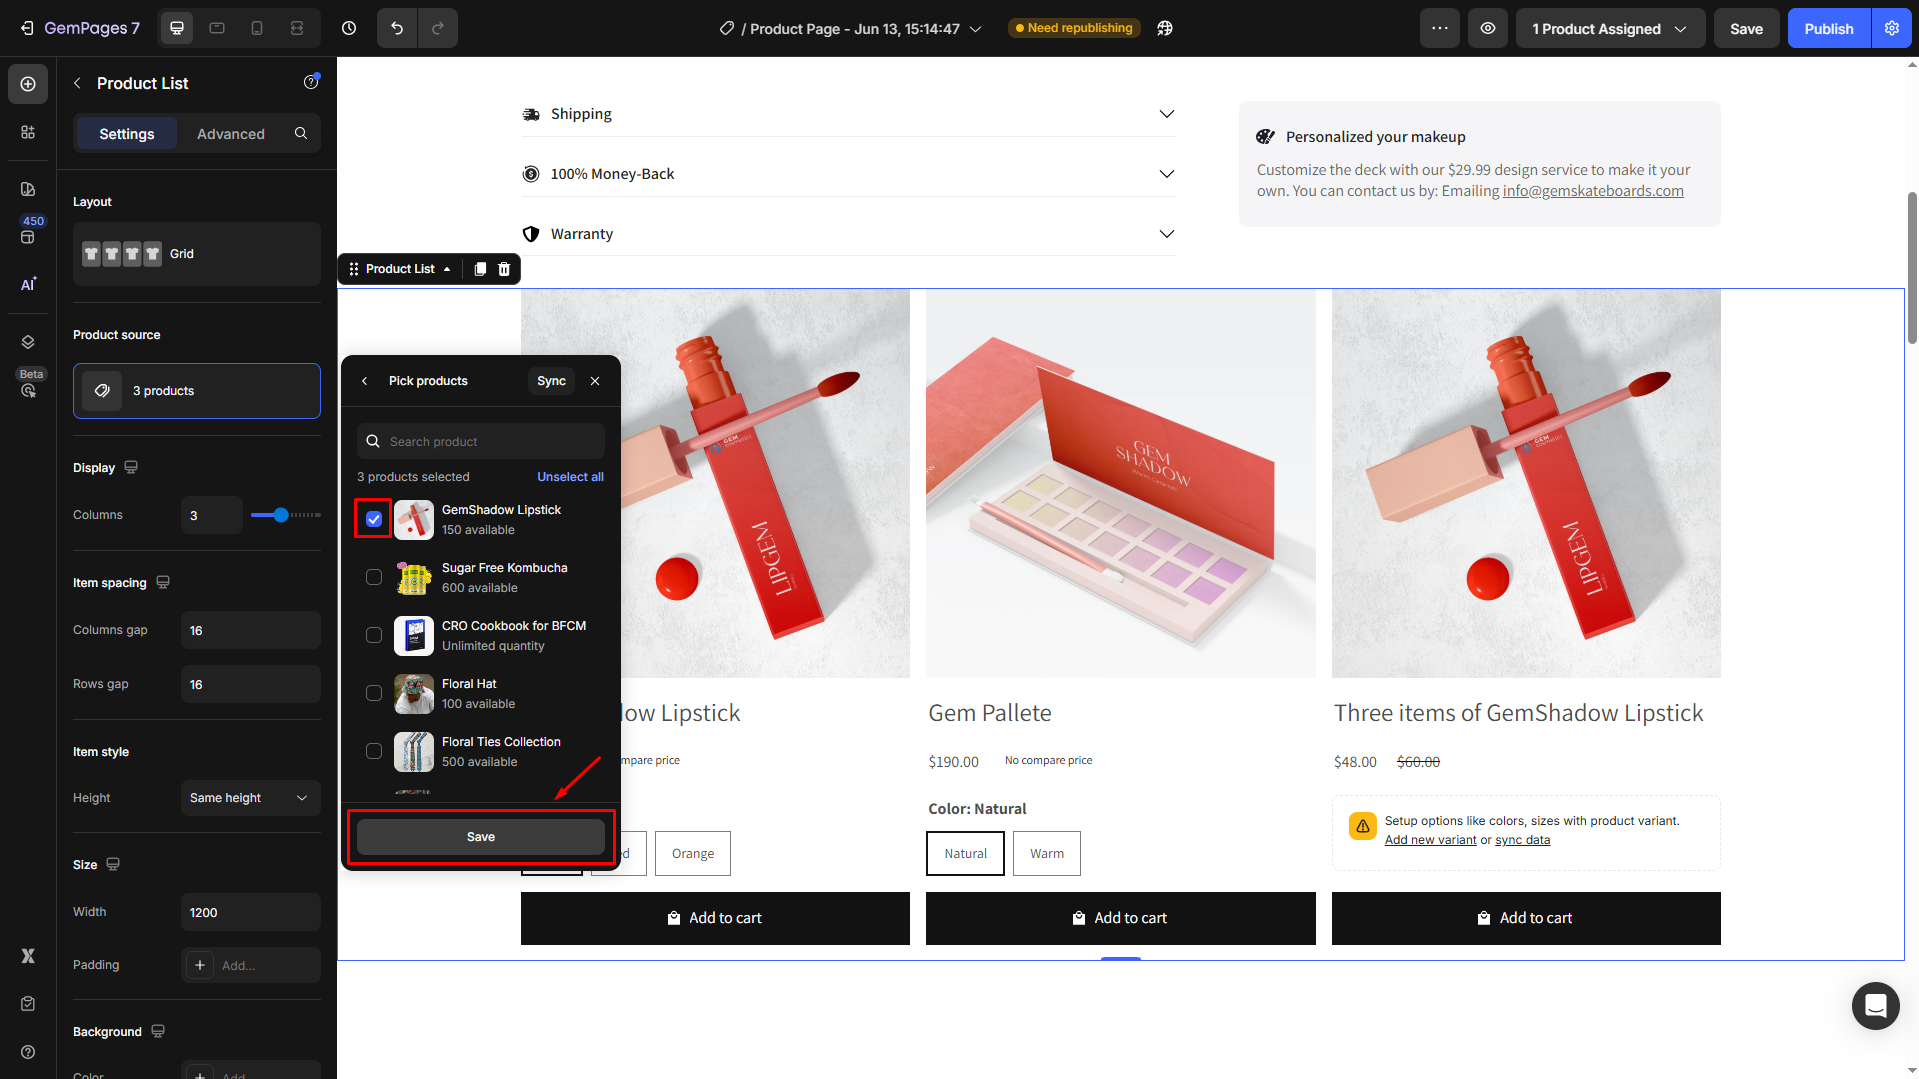
- Hit the pen icon to edit your selected products > Pick products.
- Tick the box next to the target you want to display in the recommended section. Once done, hit the Save button.
If you want to set this section to automatically display related products which in the same collection as the assigned product.
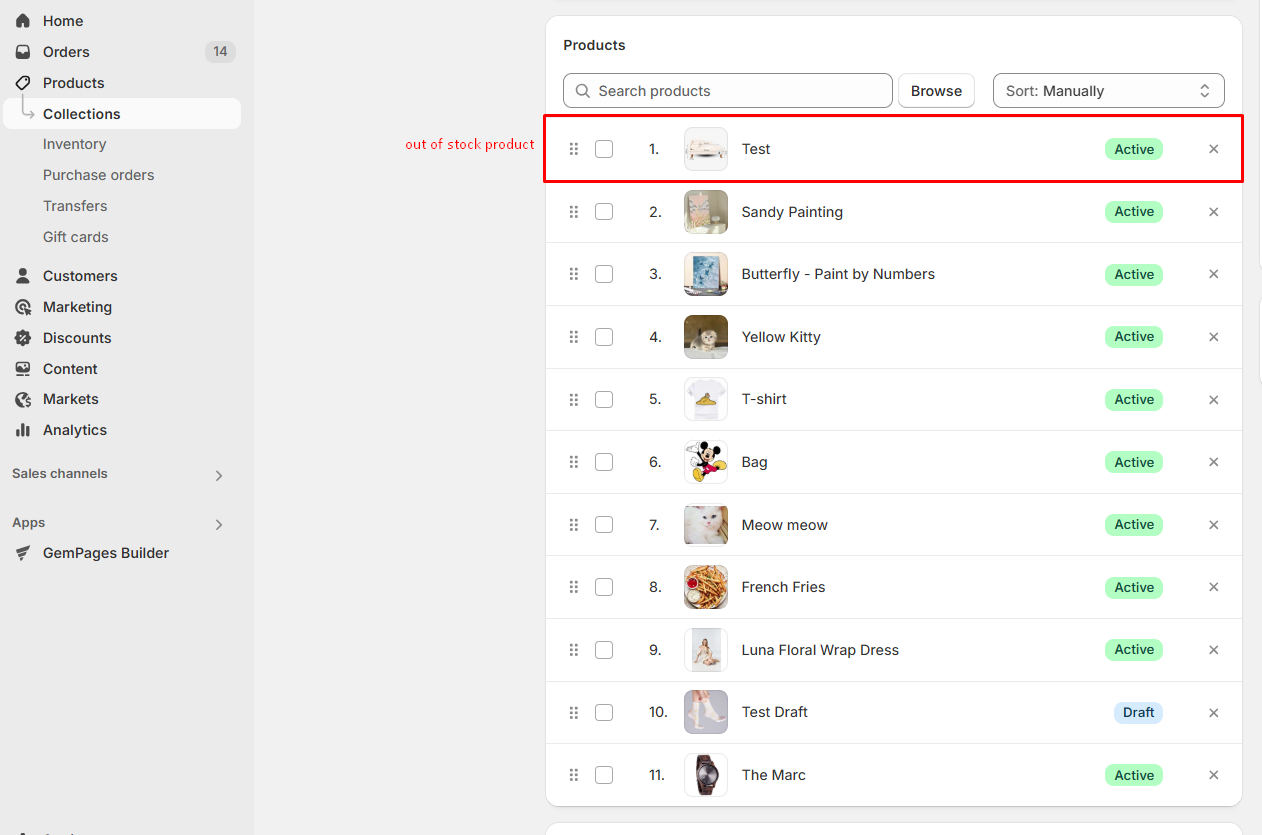
- In this case, you will need to consider removing the out-of-stock product from the collection in Shopify.
- Then, back to the GemPages Editor, and select the Related option in the settings panel.
- In the Condition box: Choose the Same collection as the condition for related products from the dropdown.
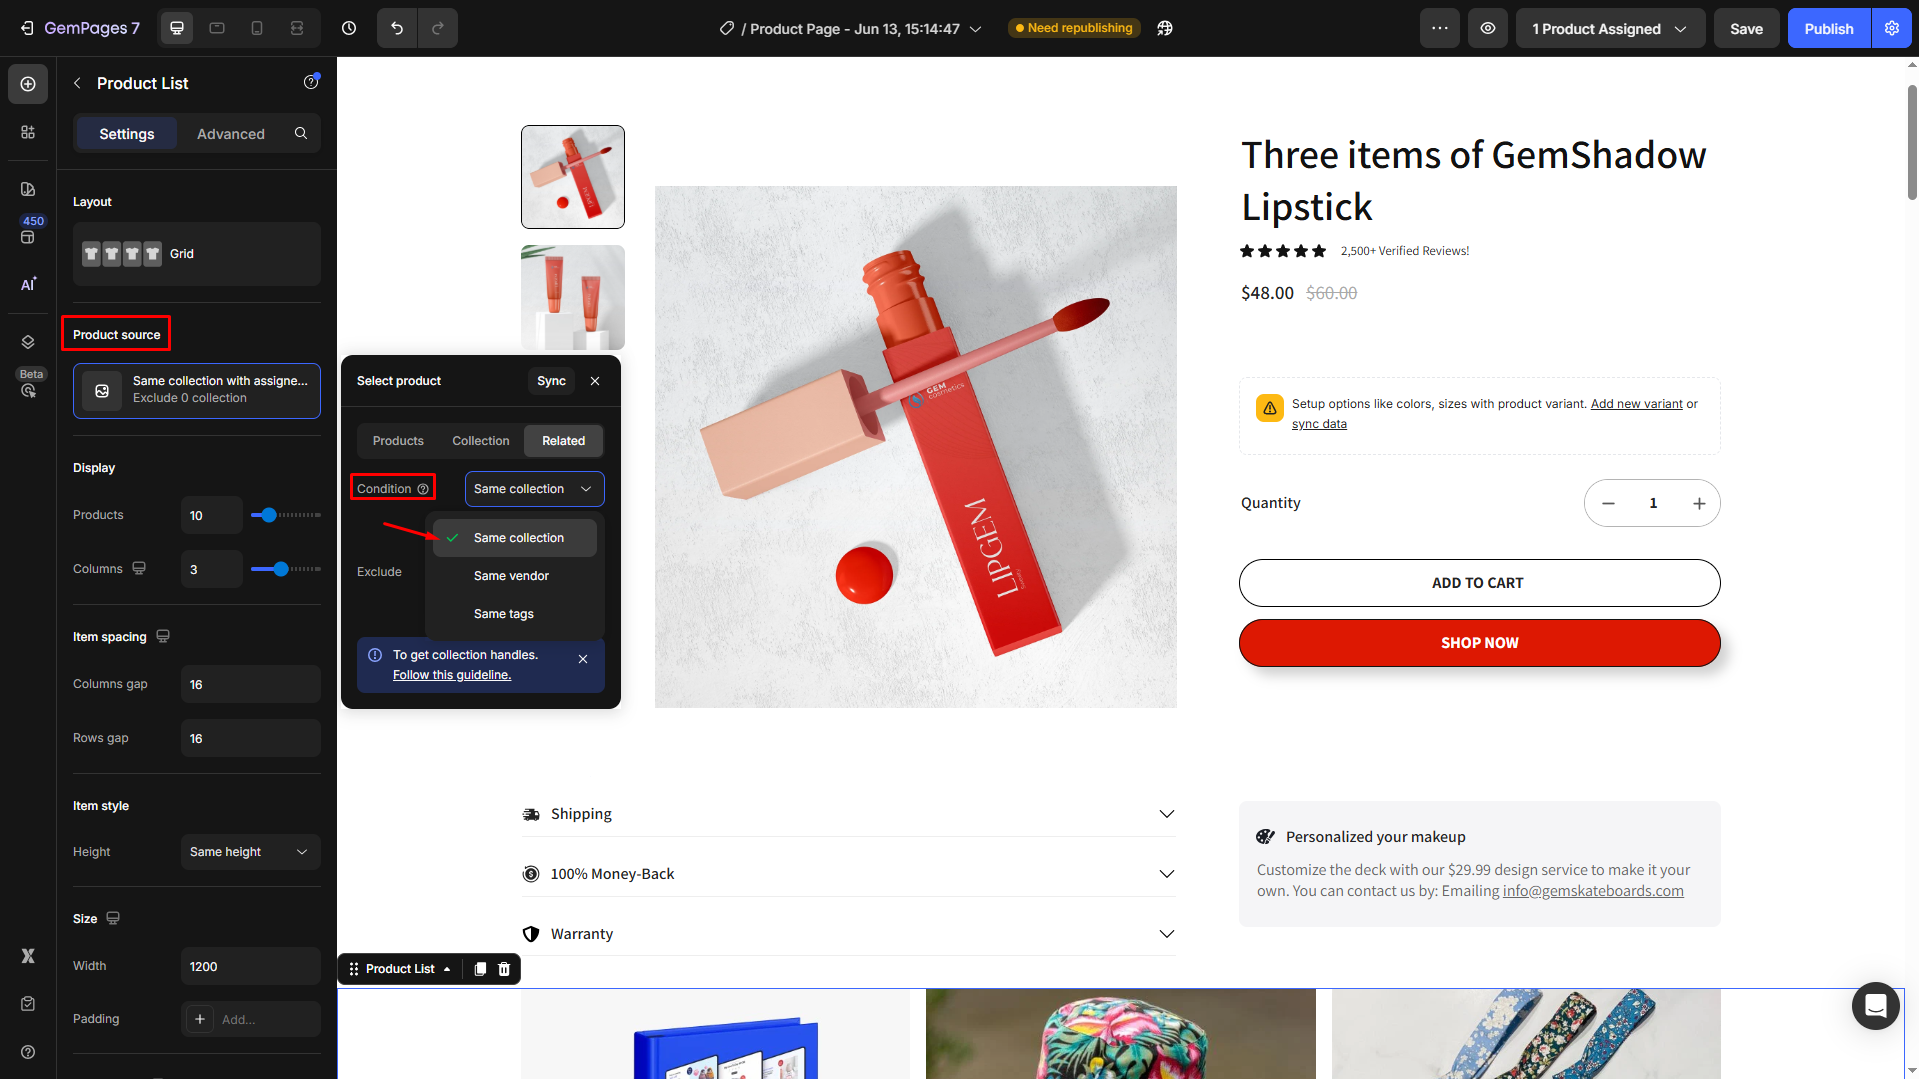
Afterward, all the products in the same collection will be displayed in this section automatically.
Frequently Asked Questions
1. Why are my products showing as “Sold Out” even though I just added them?
There are a few common reasons:
- The product’s inventory quantity is set to 0.
The “Track Quantity” option isn’t enabled. - The product is not available on the Online Store sales channel.
Make sure to check all these settings in the Shopify product details.
2. Can I hide sold-out products from my store?
Yes, but this requires an additional step:
- In Shopify, you can unpublish the product from the Online Store sales channel once it’s out of stock.
- Alternatively, use custom code or a third-party app to automatically hide sold-out products.
3. What’s the benefit of showing a “Sold Out” badge instead of hiding the product?
Displaying a “Sold Out” badge helps:
- Build urgency and FOMO (Fear of Missing Out)
- Showcase product popularity
- Encourage customers to sign up for restock alerts
It also keeps SEO value intact since the product page remains indexed.
4. How do I remove sold-out items from the “You May Also Like” or product recommendations section?
In this case, you’ll need to manually remove the sold-out product from the assigned Shopify Collection that’s powering the recommendation list.
You can update the collection directly in your Shopify Admin under Products > Collections.


Thank you for your comments