


Understanding Price and Compare-at Price
In GemPages, the Product Price element shows the current selling price, while the Compare-at Price element displays the original or higher price before discount. When used together, they emphasize savings and encourage conversions.
Before setting them up in GemPages, make sure your product has both a price and a compare-at price in Shopify:
Step 1: Log in to your Shopify admin panel. Choose the product you wish to edit from the list or add a new product.
Step 2: In the Pricing section, enter the original price in the Compare-at-price field.
Enter the discounted price in the Price field.
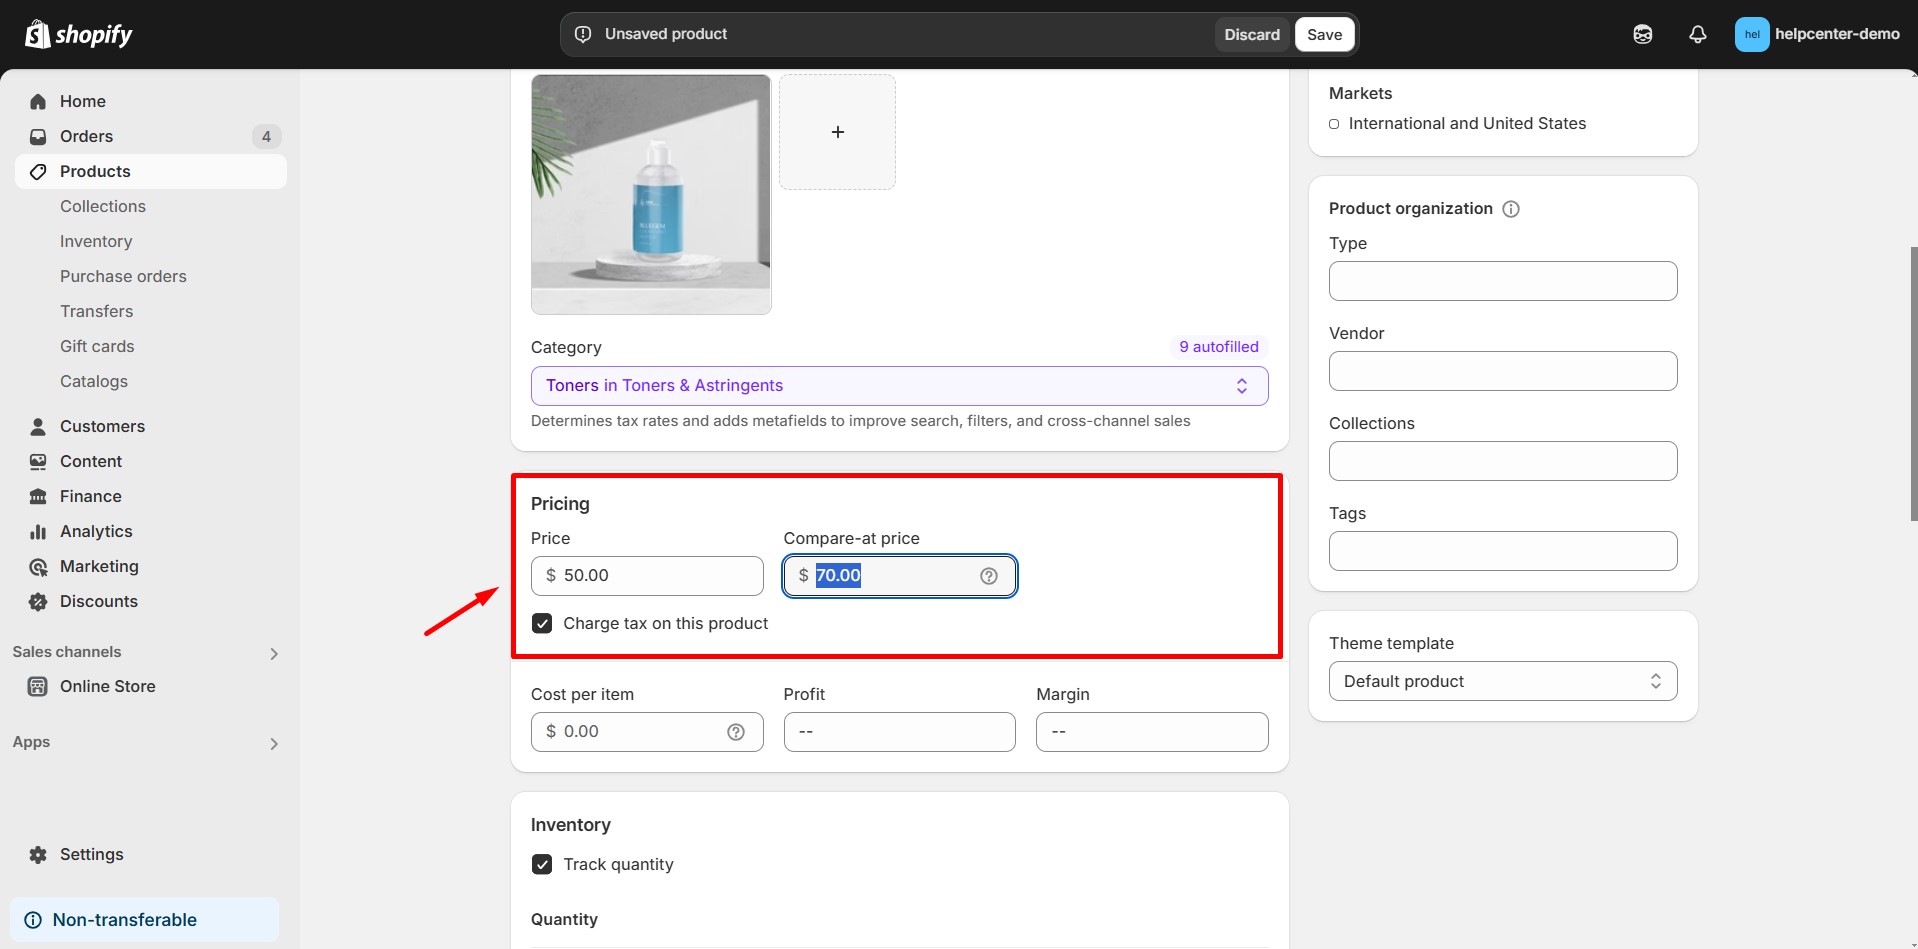
Step 3: Click “Save” to apply your updates.
How to Display Price and Compare Price on the Same Line
Follow these steps to align the Product Price and Compare-at Price neatly on a single row:
Step 1: Open the product page where you want to display both prices.
Step 2: Drag and drop a 2-column row into the product module.
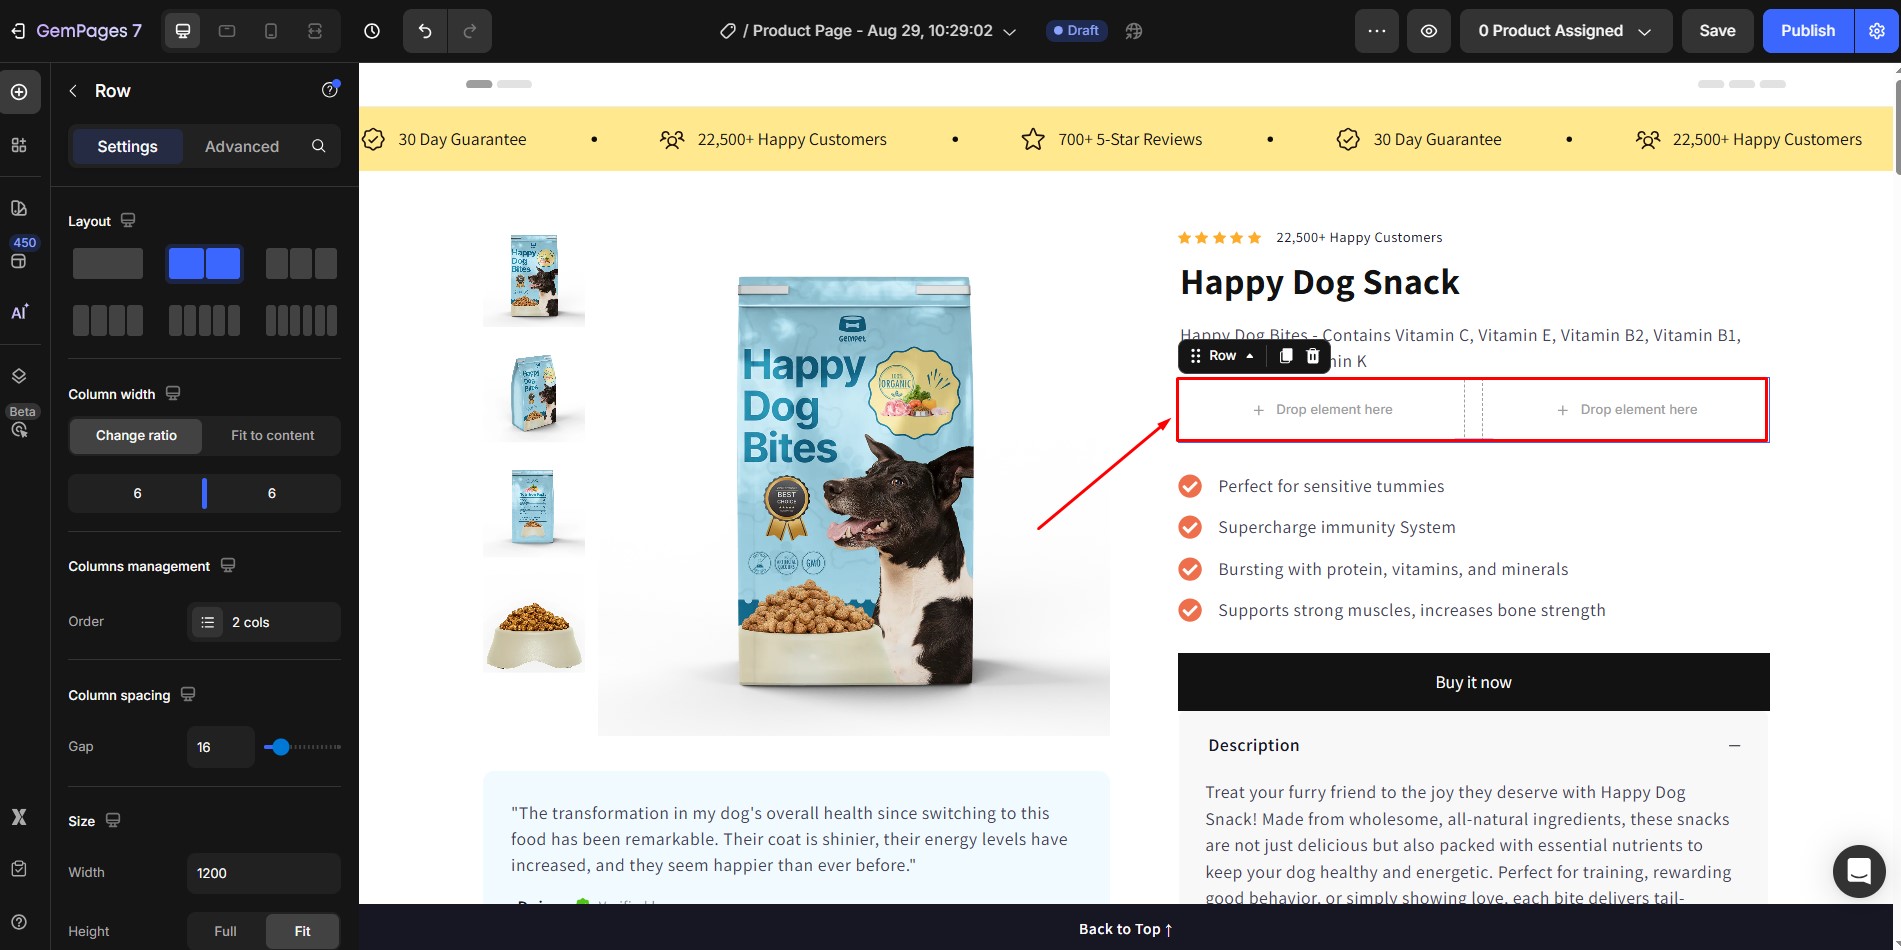
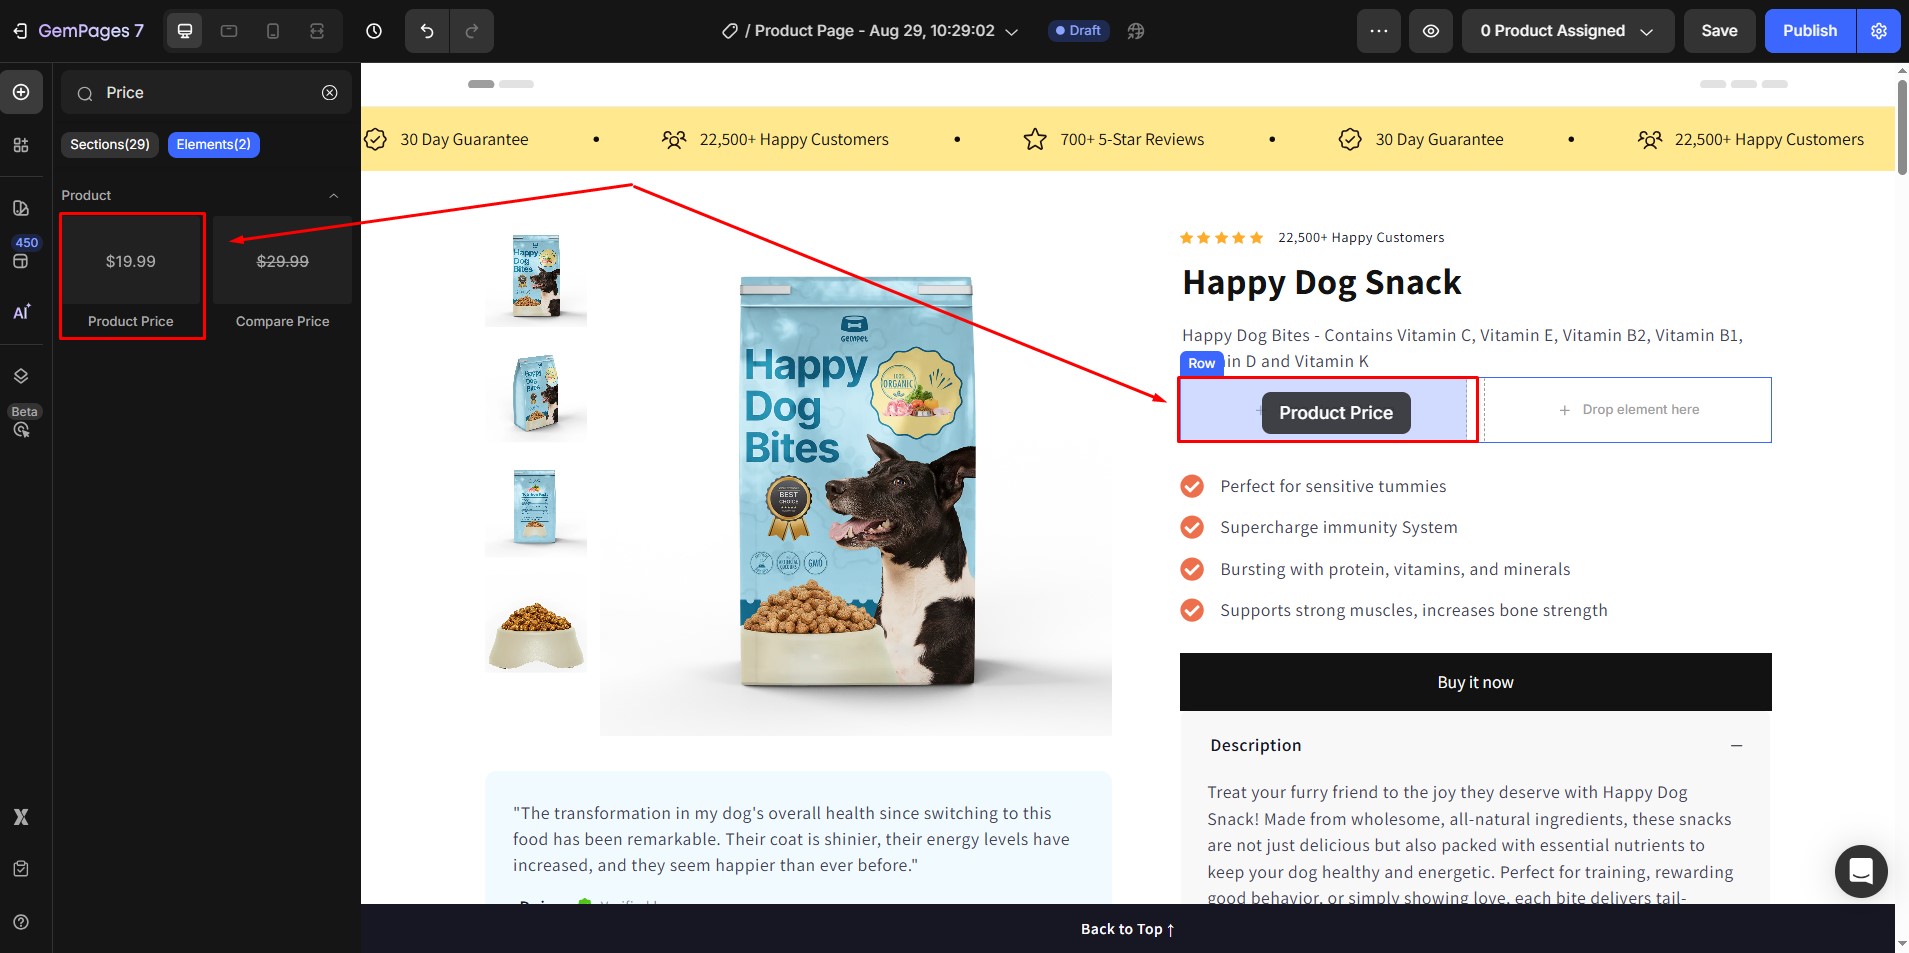
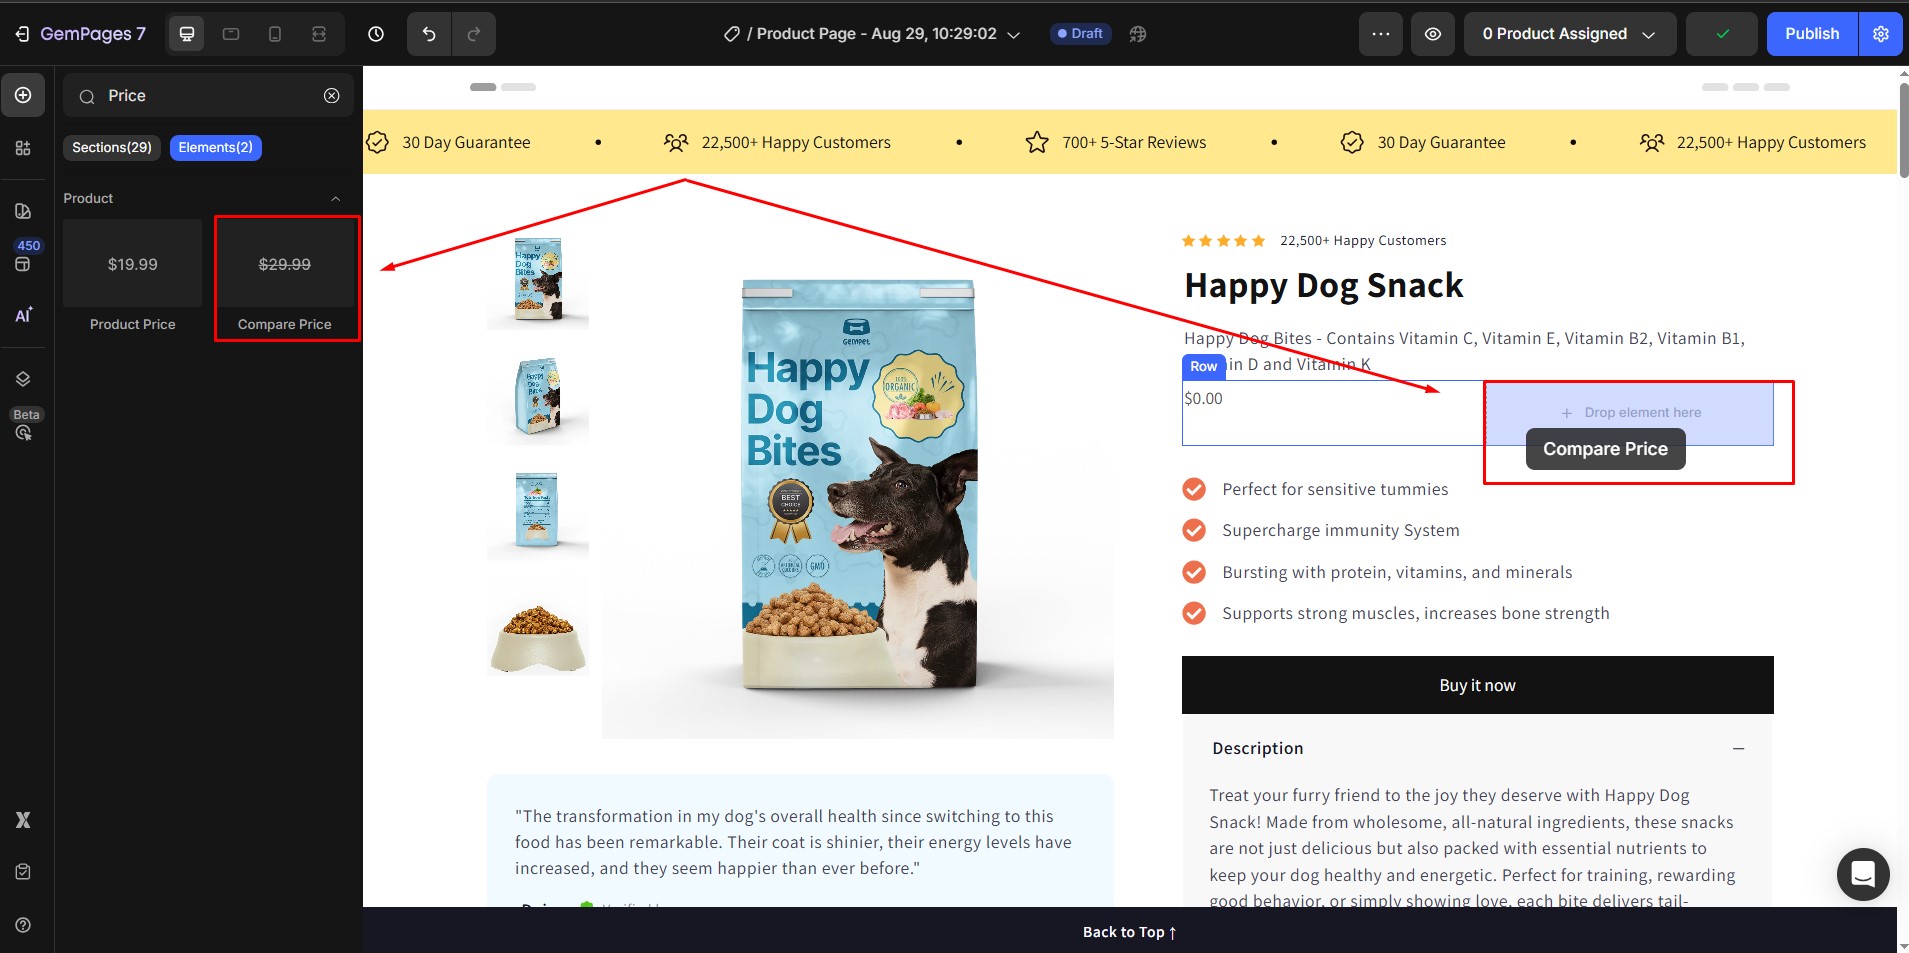
Step 3: Add the Product Price element in one column and the Compare-at Price element in the other. These elements will automatically sync with your product’s pricing data.
Step 4: Select the row containing both elements and set it to Fit to content to align them properly.
Additional Customization Options
You can further customize how you display price and compare price by adjusting styles such as:
- Font type and size
- Font weight and color
- Alignment within the row
- Spacing and line height
For more details, check out the Product Price Element guide.


Thank you for your comments