


About the Product Price Element
In GemPages Editor 7.0, the Product Price element combines two separate elements: Price and Compare Price. The Price element shows the regular price of a product, while the Compare Price element displays the discounted or original price if a sale is applied. Displaying both prices simultaneously makes your offer more appealing and is a proven method to increase conversions.
How to Add Product Price Element?
From the GemPages dashboard, open your preferred template to access the Editor. You can quickly find these two elements on the left sidebar, under the Product section.
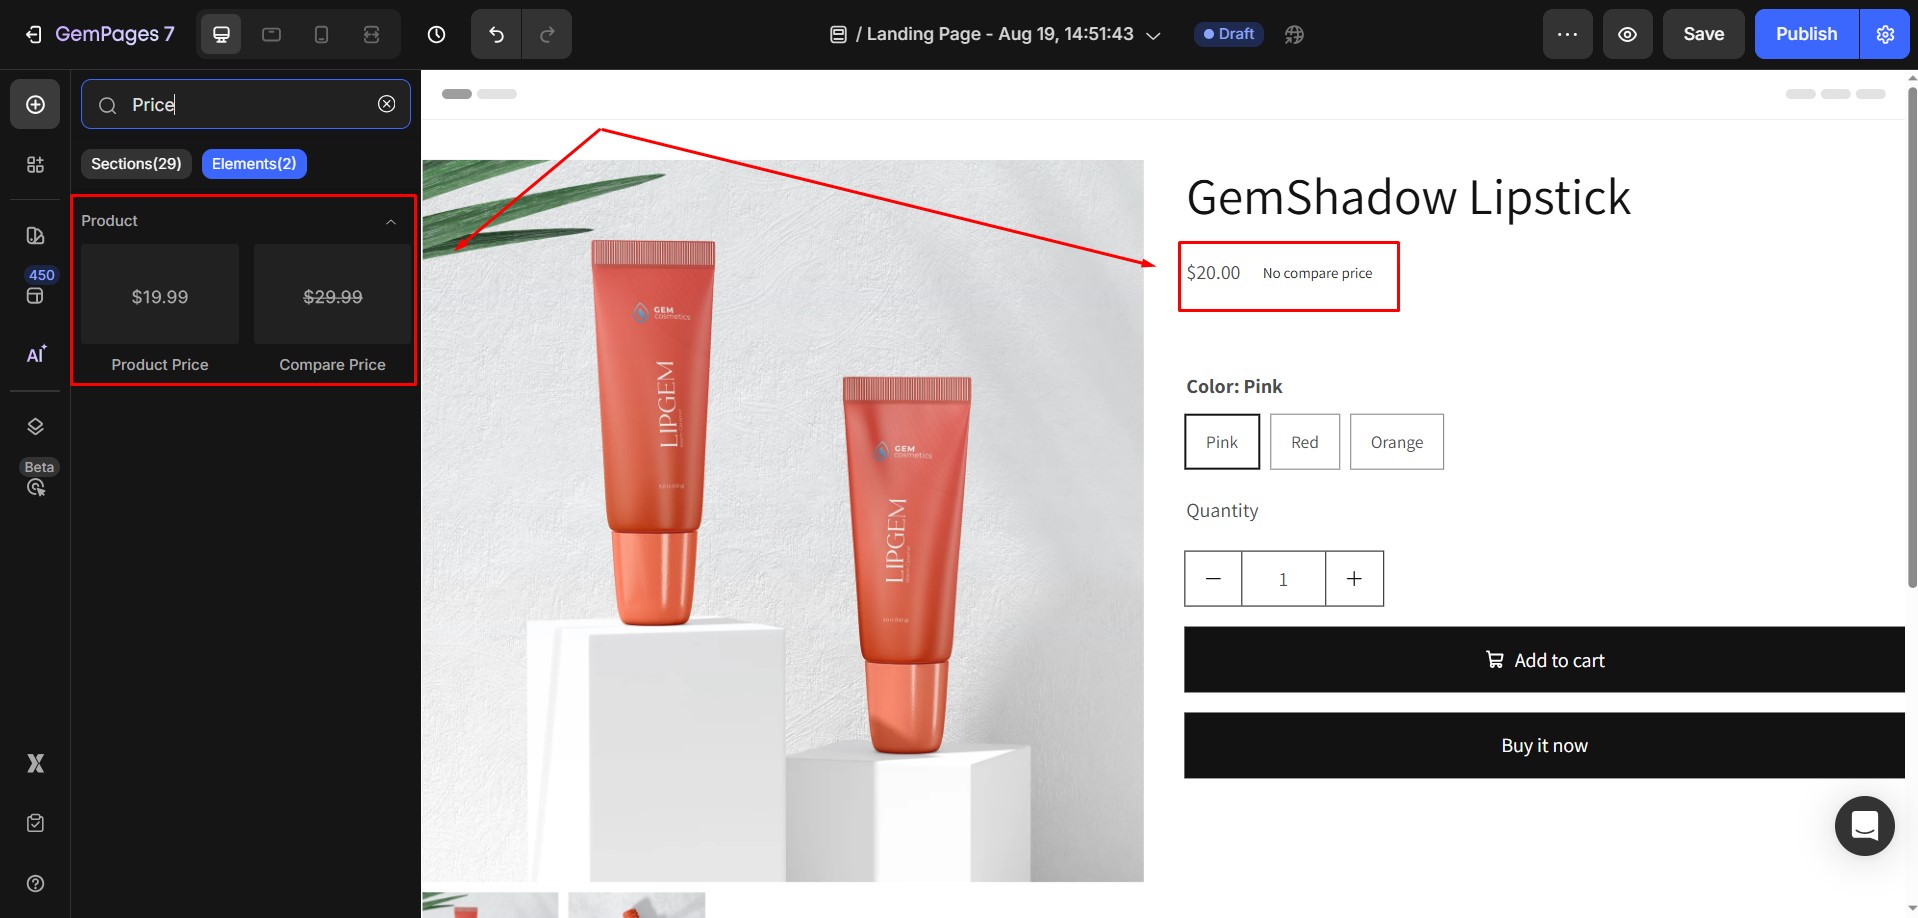
As a child element, the Price and Compare Price element must be located in a Product Module to work correctly.
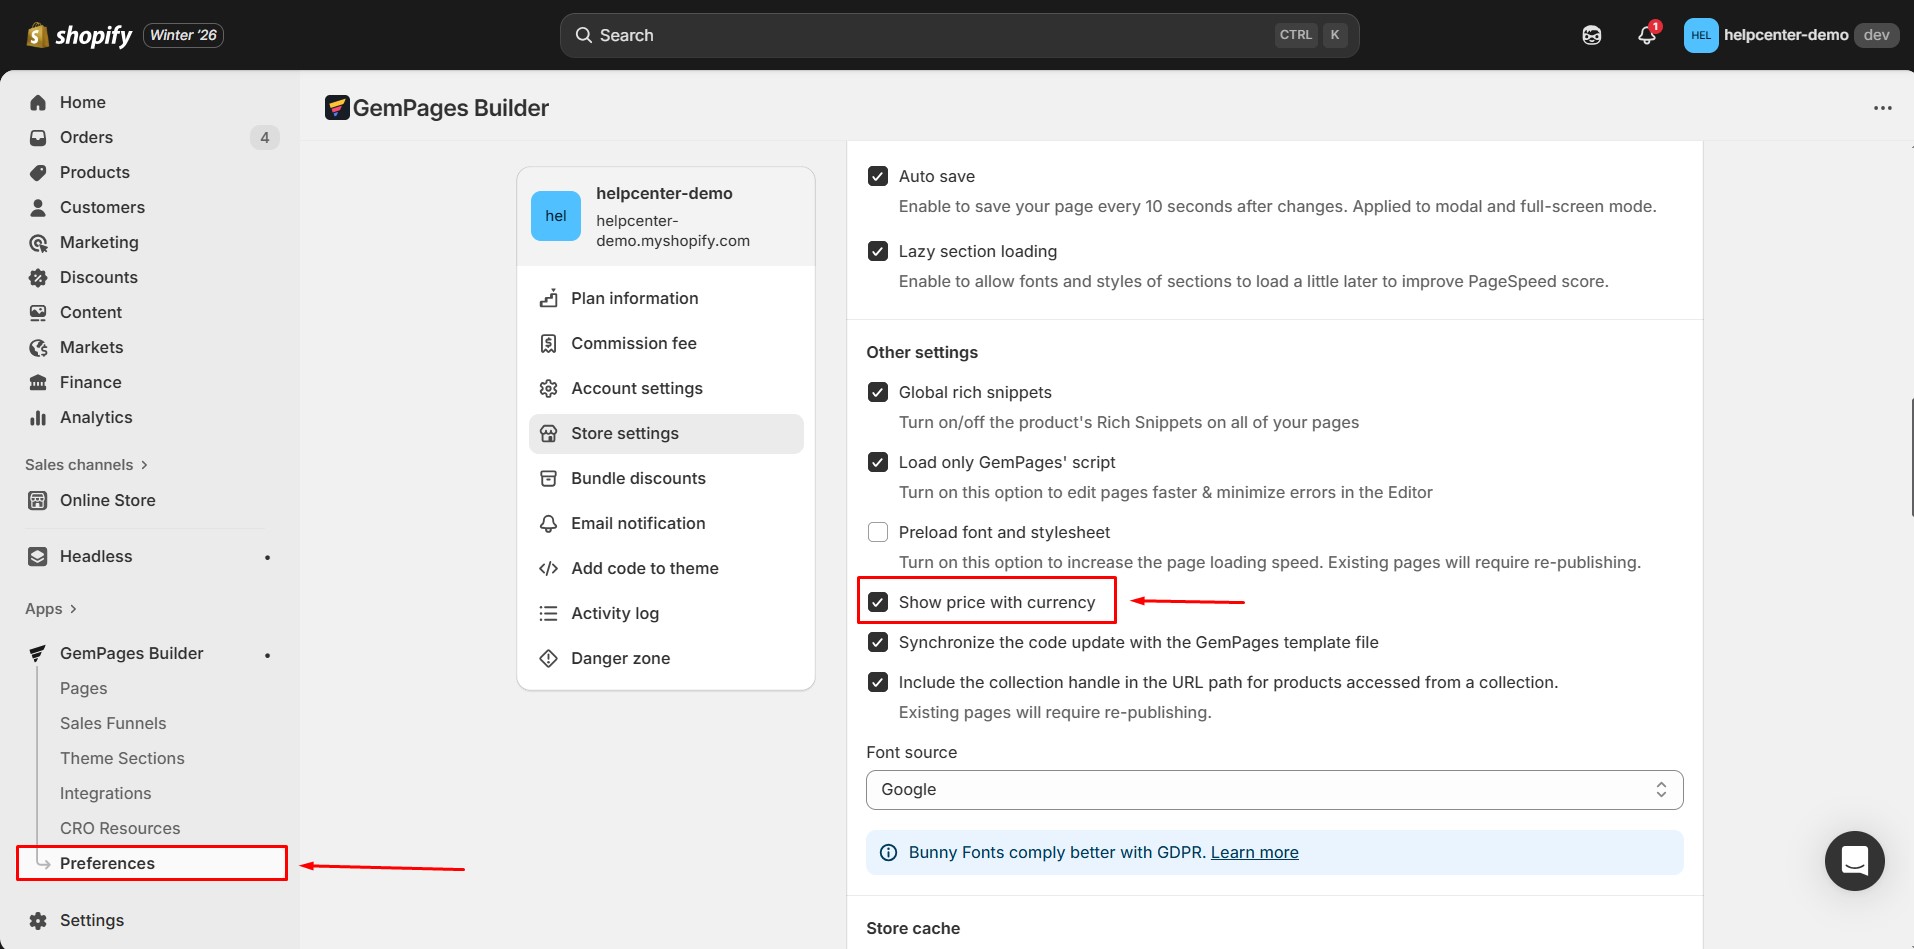
GemPages allows you to change the pricing format to display the currency suffix. To use this format, go to GemPages Dashboard → Preferences and enable Show price with currency.
How to Display Compare Price Next to Normal Price
Typically, the Compare Price is placed next to the Normal Price to highlight discounts and encourage purchases. Follow these steps to set it up:
Step 1: Set Sale Price and Compare Price in Shopify
Before displaying the Compare Price in GemPages, ensure that you have configured both the regular price and the sale price for your product in Shopify. You can follow Shopify’s guidelines to set these correctly.
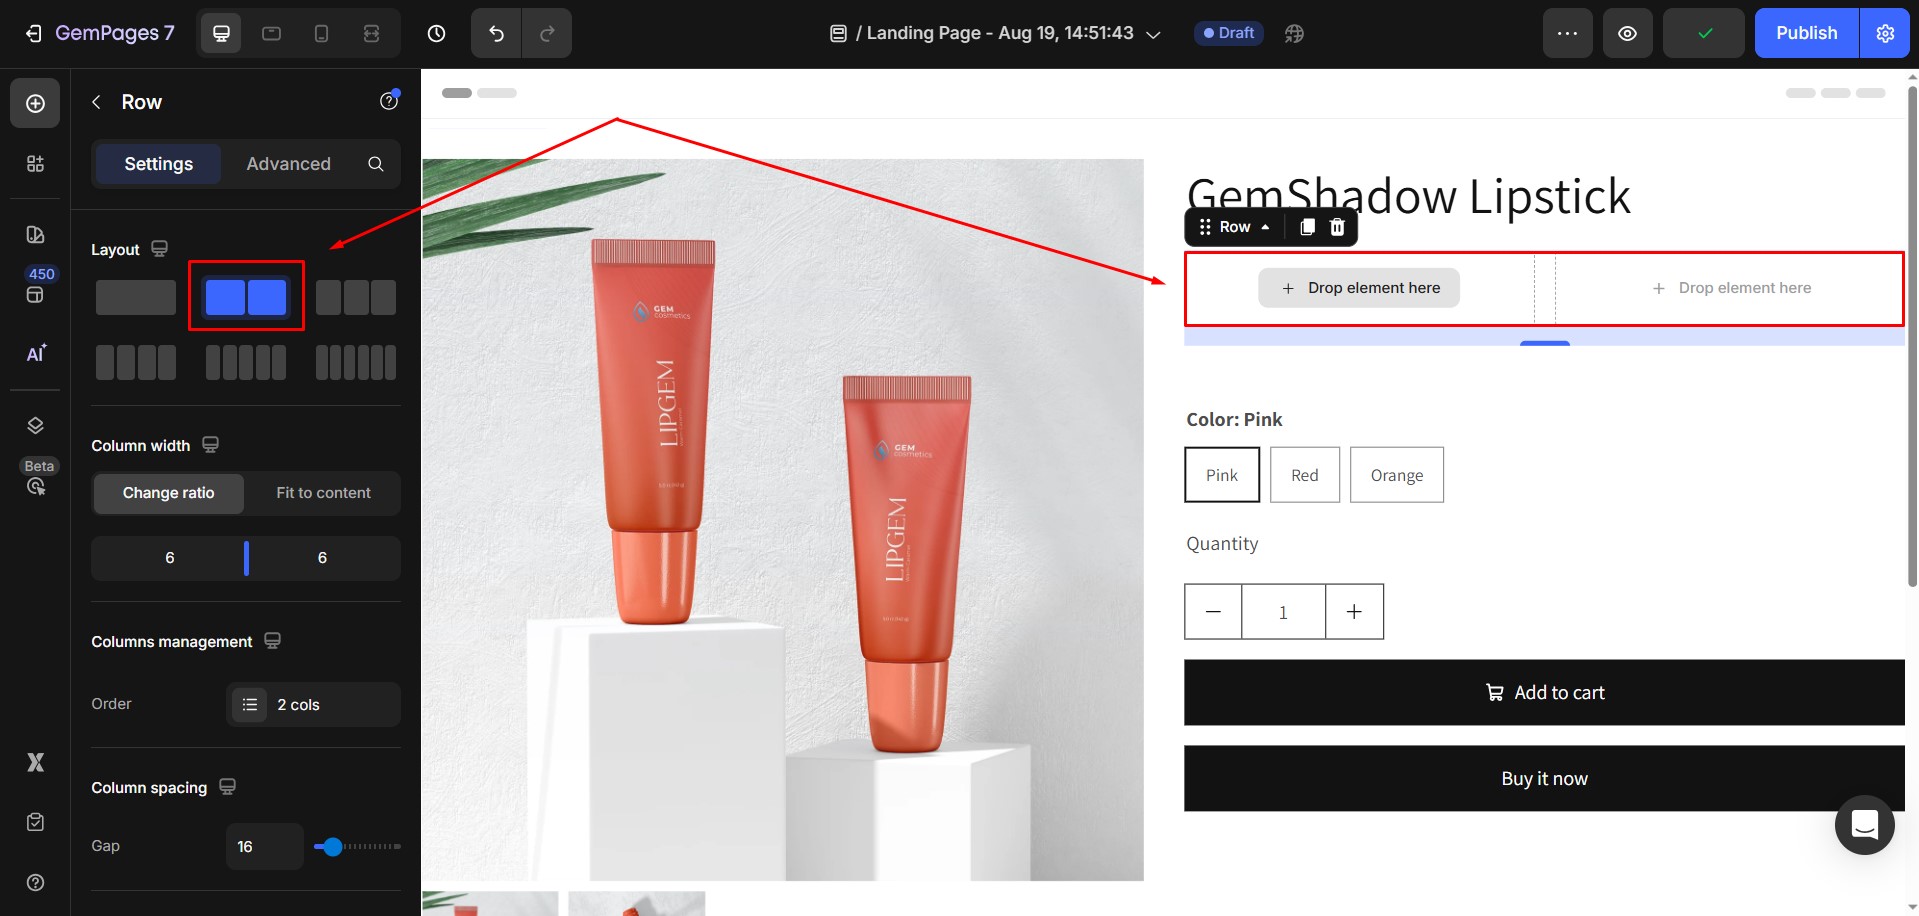
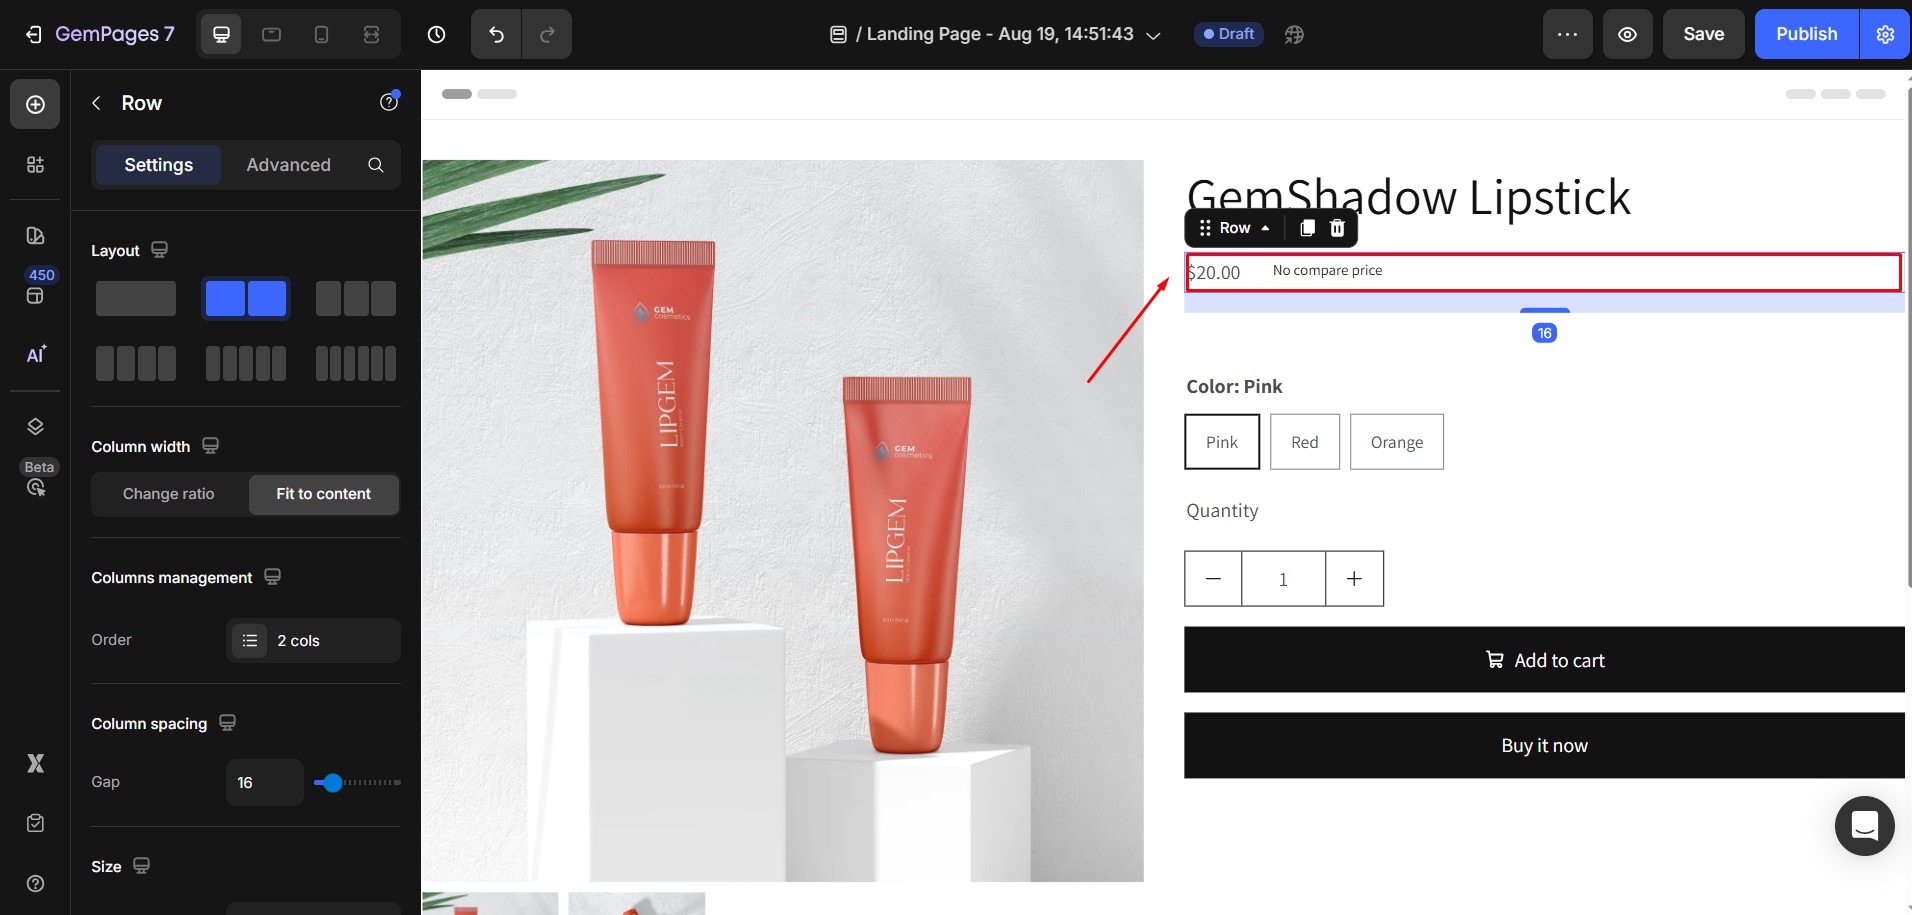
Step 2: Add a Row Element
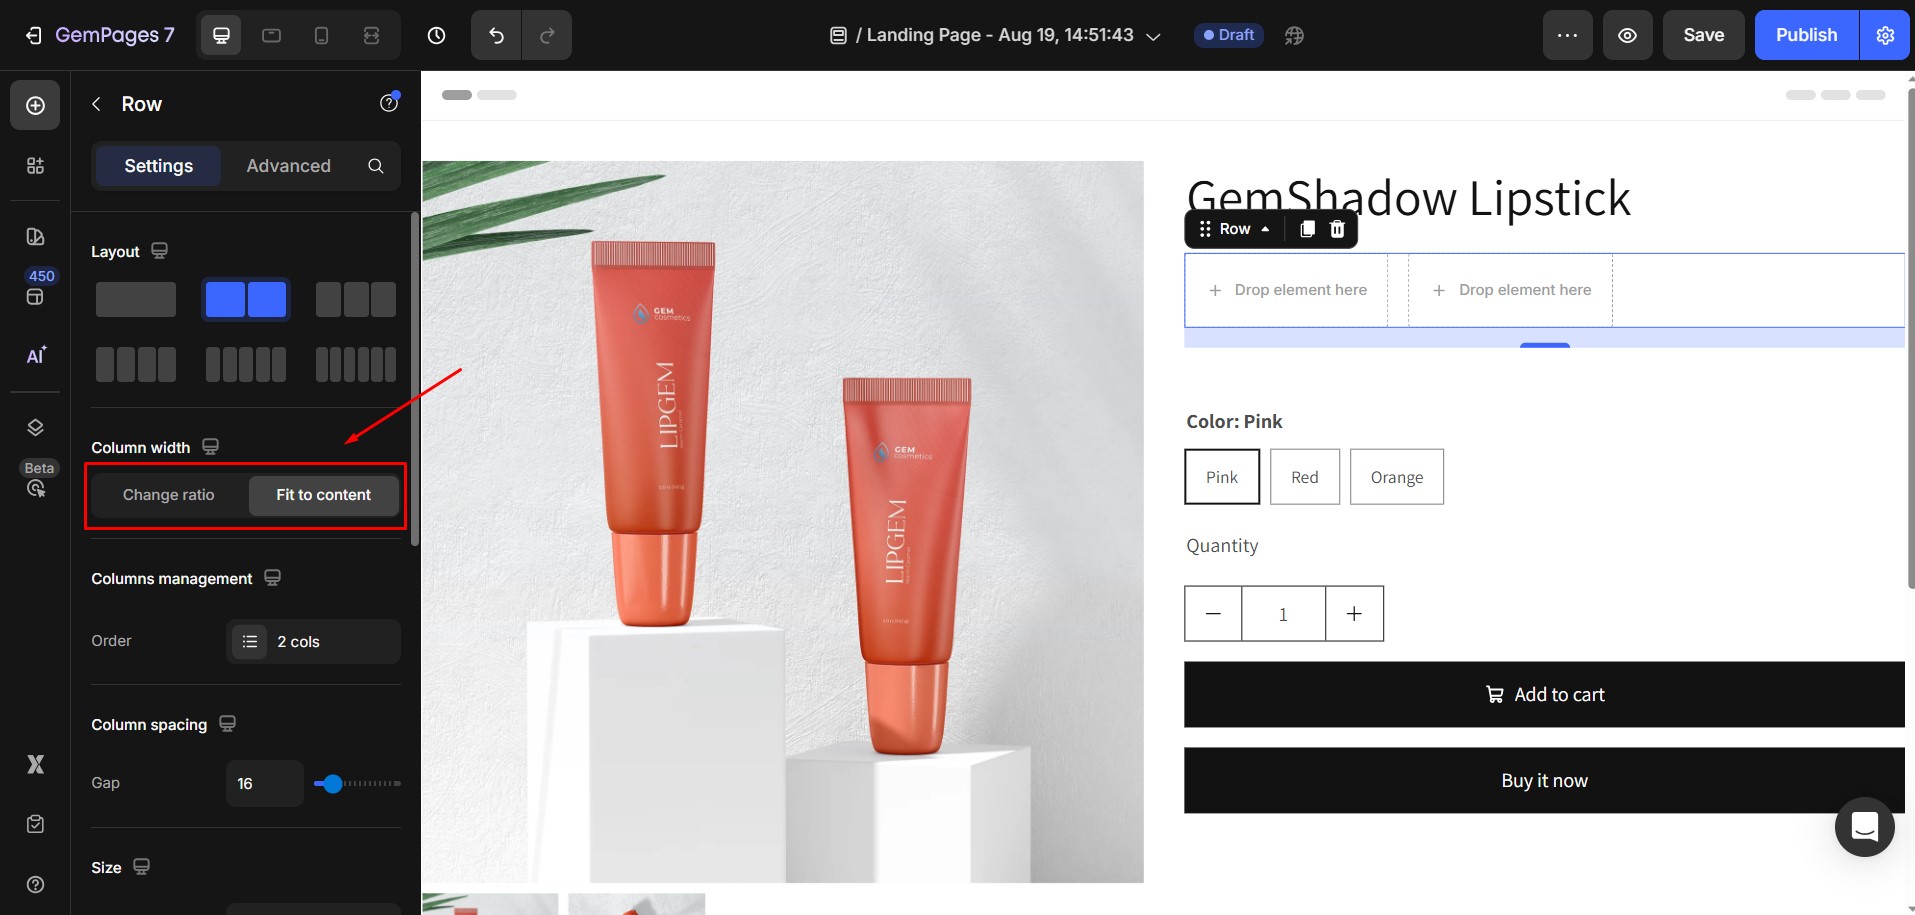
In the GemPages Editor, drag and drop the Row element into the location on your page where you want the prices to appear. Select a 2-column layout and set Column Width to Fit to Content. This allows the columns to adjust automatically to the content inside.
Step 3: Insert Price Elements into Columns
Place the Price element in one column and the Compare Price element in the other column. Adjust the alignment, spacing, or styling as needed to fit your preferred design.
Click on the element, and the settings panel will appear on the left. This panel includes two tabs: Settings and Advanced.
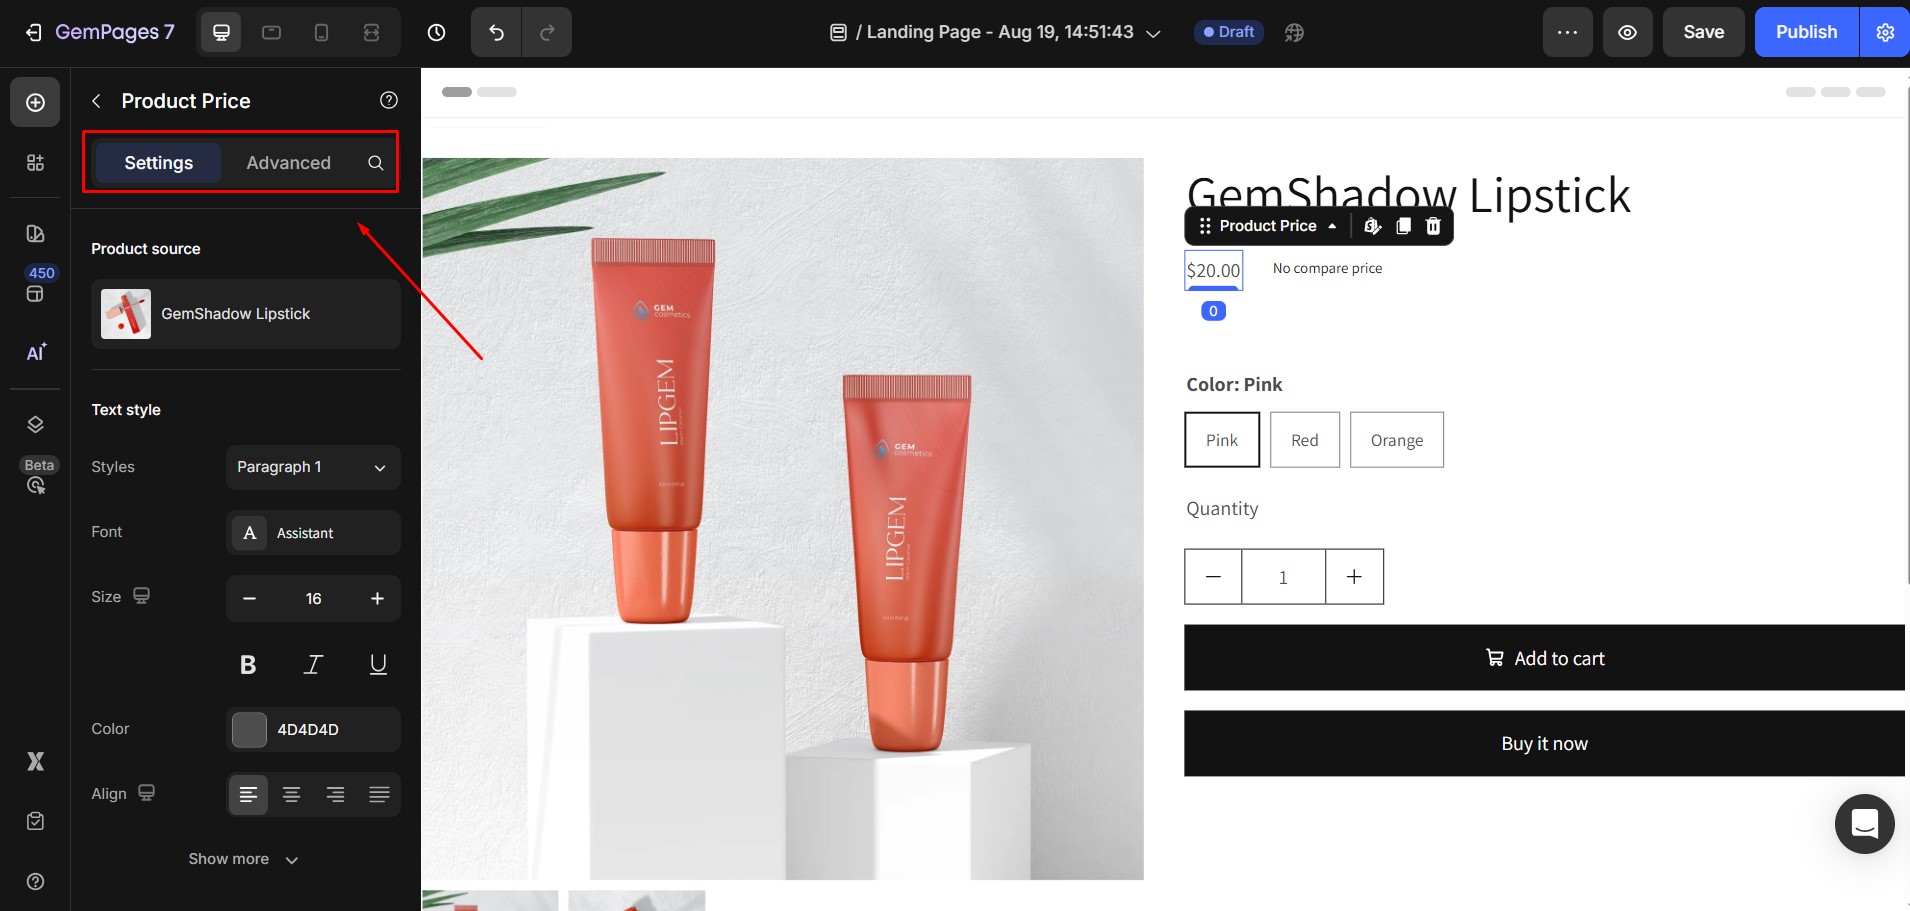
Configure The Settings Tab
Both Price and Compare Price elements share almost identical configuration options, except for the line-through setting that applies to the Compare Price.
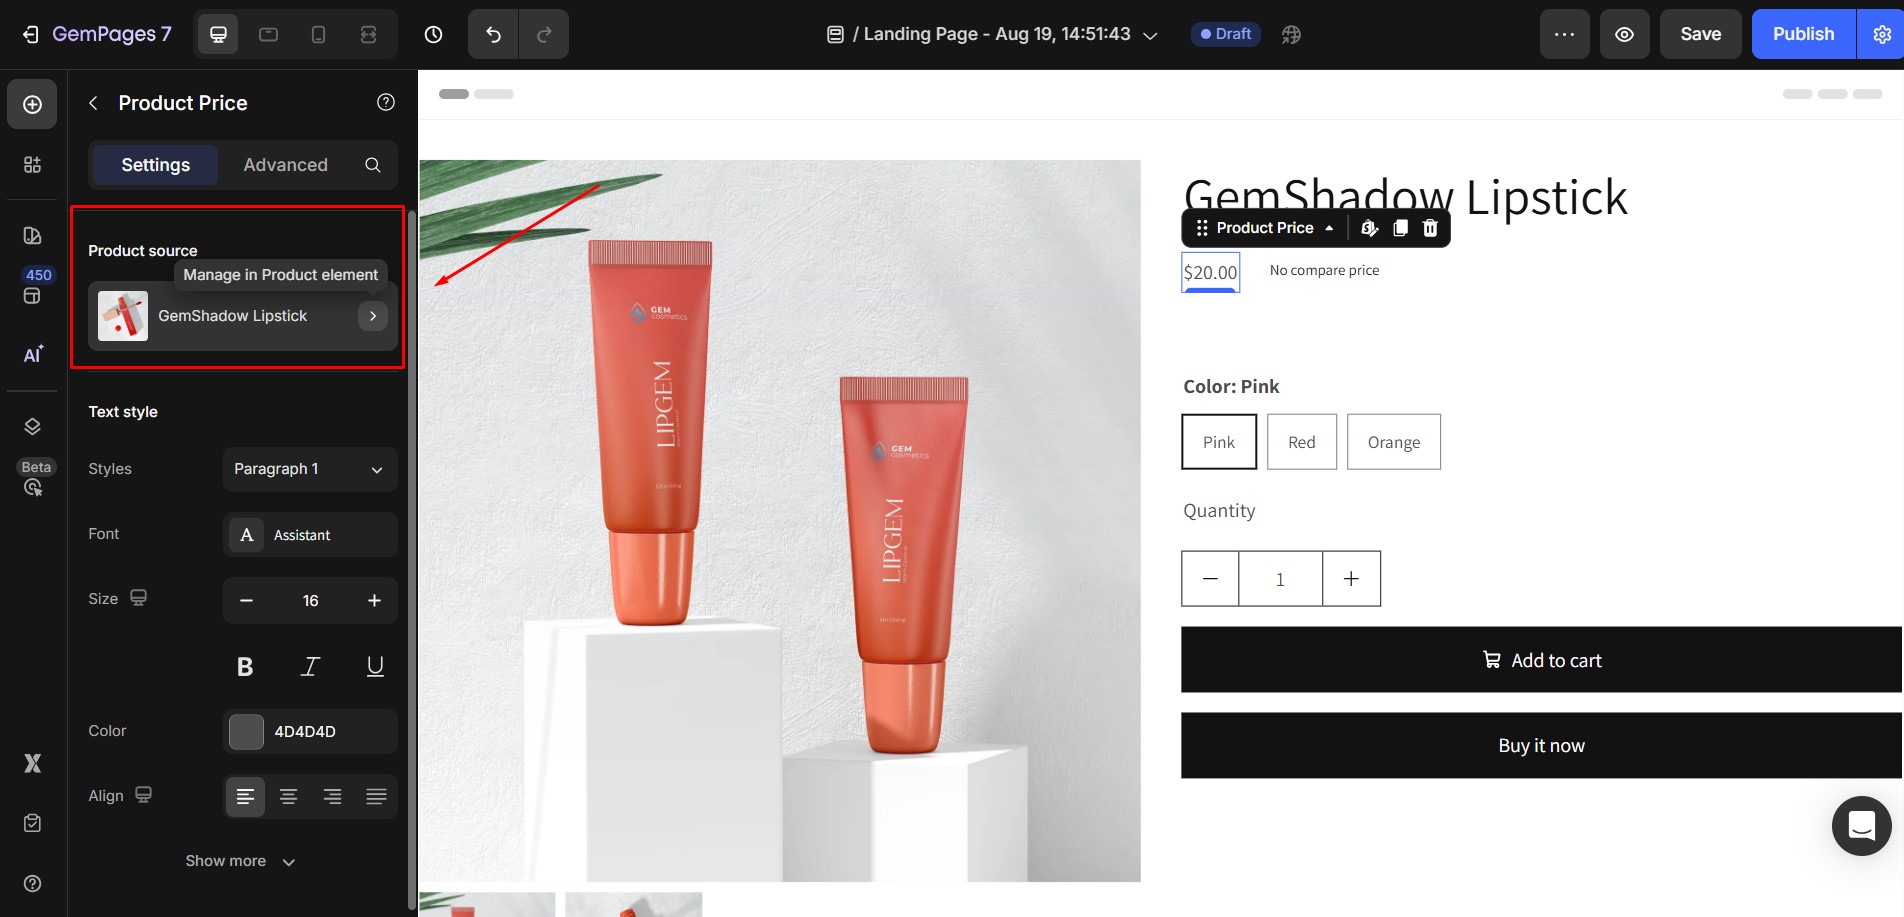
Product source
This setting determines which product the element displays pricing information from. By default, it uses the product assigned in the Product Module. You can change the product by opening the Product Picker in the Product Module settings.
Text styles
At this point, you have the ability to fine-tune the typography of the text. Here are the available options:
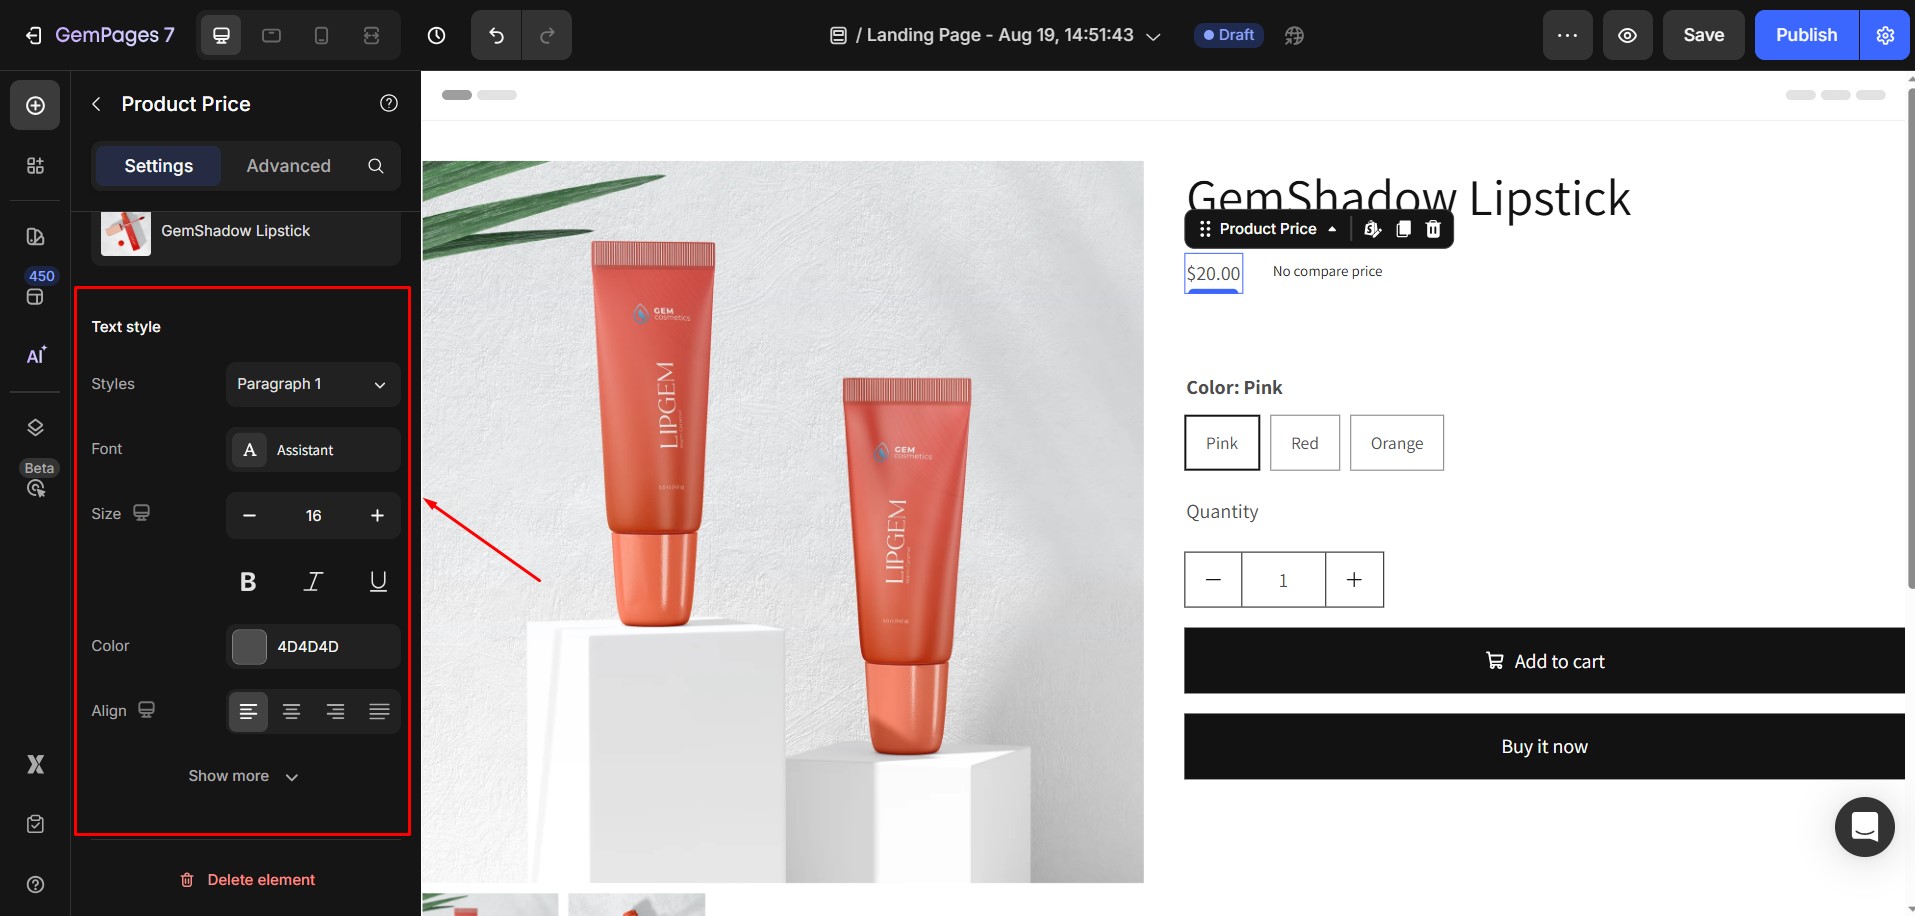
1. Styles: Select your desired style from the pre-defined options, which include 6 heading styles and 3 paragraph styles.
2. Font: Choose the font you wish to use for the text within this text block. If you want to use a font that is not listed, you can refer to the provided guidance on how to add a custom font in Editor v7.
3. Size: Adjust the font size by specifying a value in pixels.
4. Color: Pick a color for the text.
5. Align: Determine how the text is positioned on your page. There are four options to choose from: left-aligned, centered, right-aligned and justify.
Click on the Show more button to reveal more customization options.
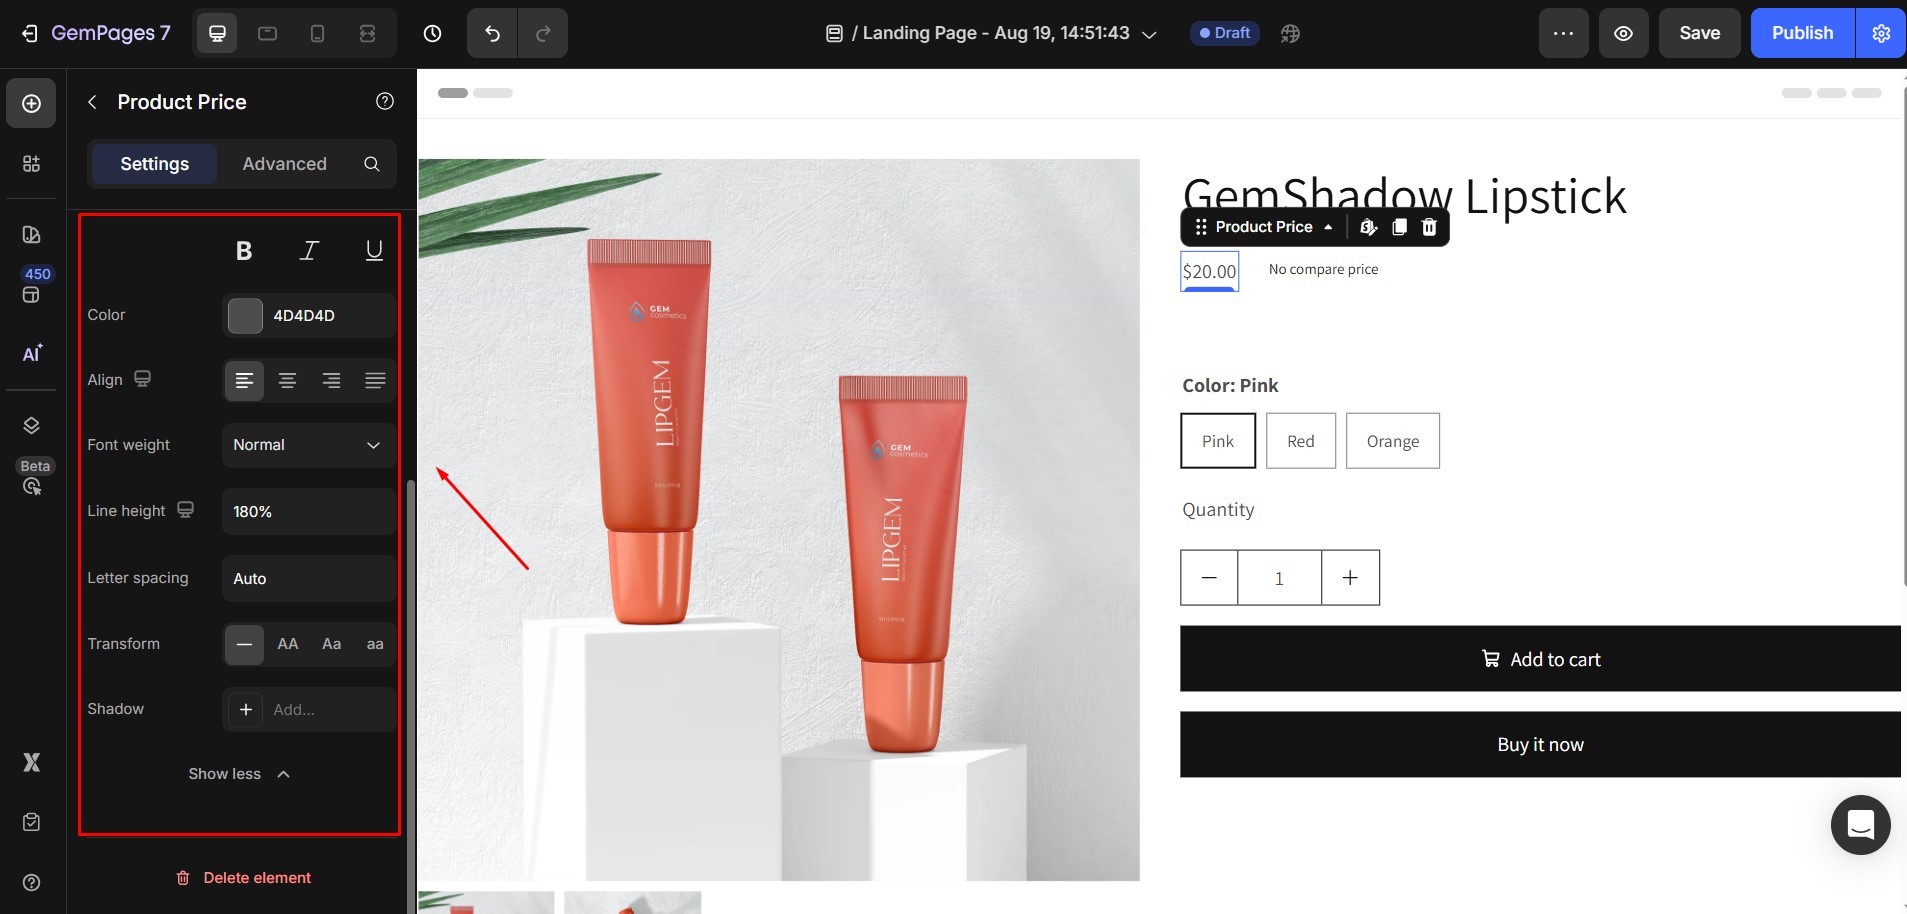
6. Font weight: Choose your desired font weight from the provided drop-down menu.
7. Line height: Adjust the height of the text by specifying a percentage value.
8. Letter spacing: Modify the spacing between letters by inputting a value in pixels.
9. Transform: Transform the text in one of the following ways:
- No transformation applied.
- Uppercase: Convert all text to uppercase.
- Lowercase: Convert all text to lowercase.
- Capitalize: Capitalize the first letter of each word.
10. Shadow:
You can add text shadows for more visual depth:
- Direction: Specify the angle of the shadow.
- Color: Choose the shadow color.
- Distance: Set how far the shadow appears from the text.
- Blur: Adjust the softness of the shadow edges.
Line through
This setting is exclusive to the compare price. Simply switch it on to enable the line through the price.
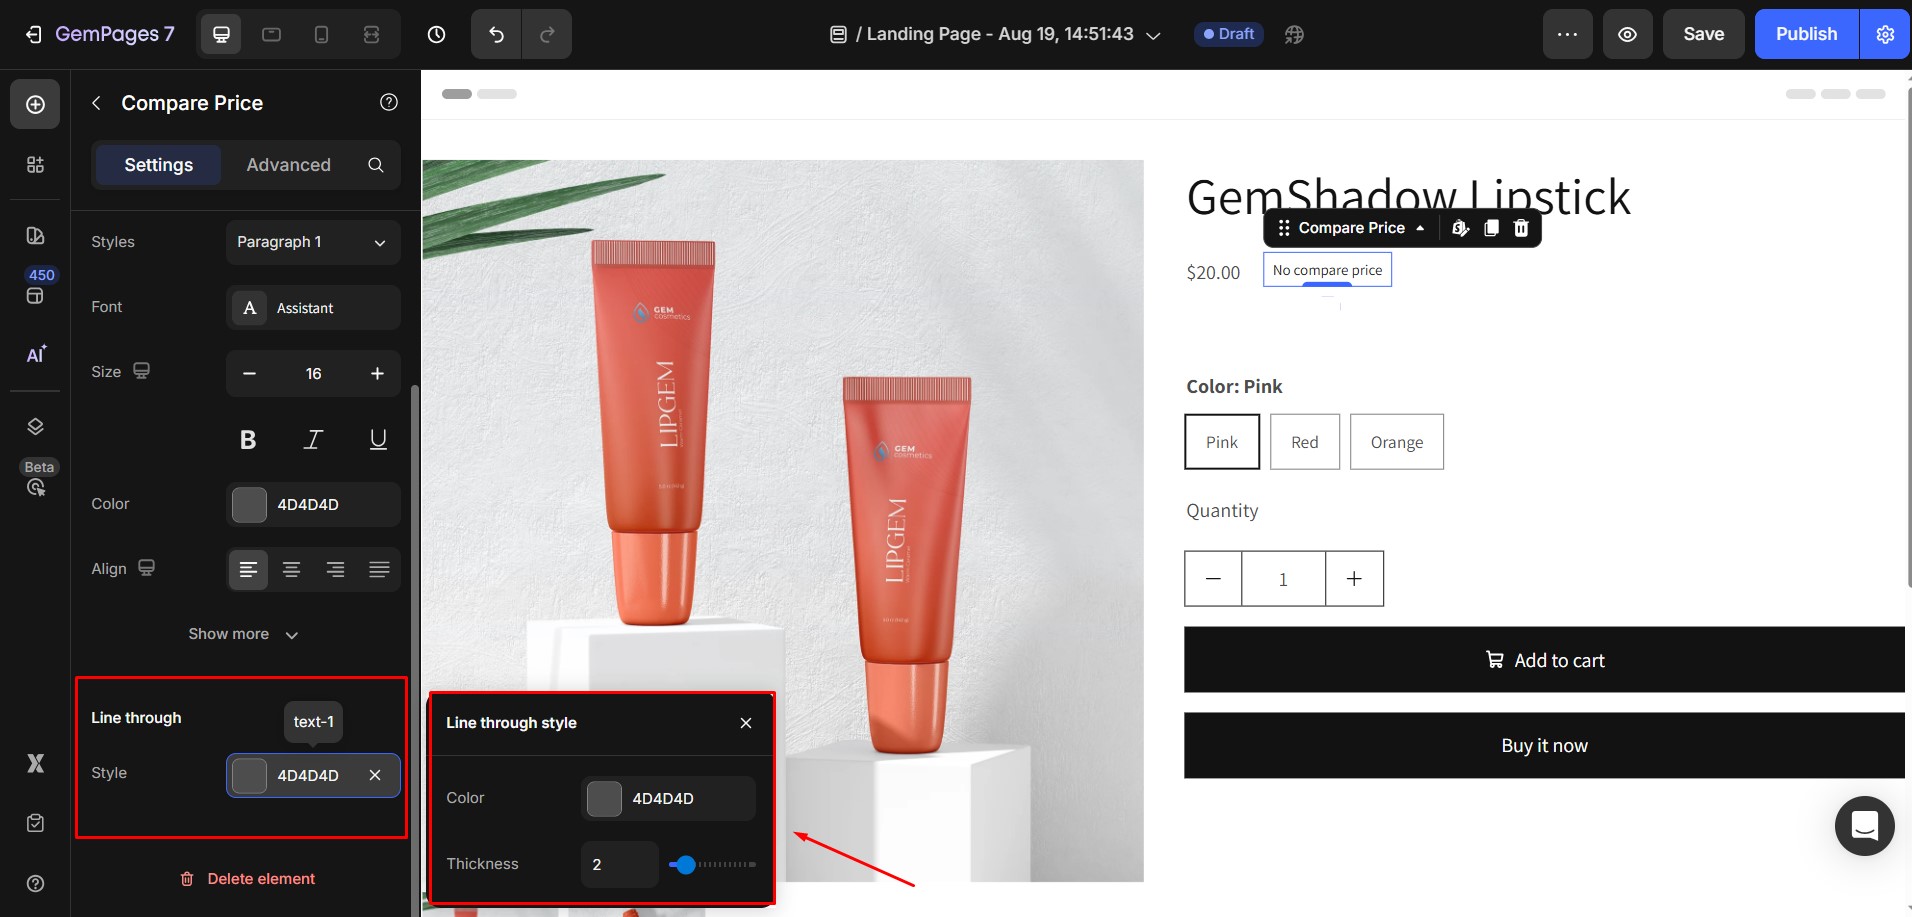
- Color: Choose your preferred line color from the palette or enter the hex color code.
- Thickness: Adjust the thickness using the slider or by entering a specific number in the box.
Configure the Advanced Tab
For more advanced customization, please navigate to the Advanced tab and follow the instructions in this article.
How to Make the Product Price Element Sticky
You can make the Product Price element sticky so it remains visible while customers scroll through the page. This is useful for keeping pricing information accessible at all times, especially on long product pages.
Follow these steps to set the Product Price element as sticky:
Step 1: Select the Product Price Element
In the GemPages Editor, click on the Product Price element that you want to make sticky.
Step 2: Open Advanced Settings
Once selected, go to the Advanced tab in the settings panel on the left.
Step 3: Set Position to Sticky
Scroll to the Position section. Change the Position setting to Sticky.
Troubleshooting: Price Displays Incorrectly
If your product prices are not showing correctly in GemPages, check the following areas:
1. Ensure Proper Placement of the Price Element
- Open your page in the GemPages Editor.
- Ensure that the Price Element is placed inside a Product Module.
- If it’s not, drag a Product Module onto the page and nest the Price Element within it.
2. Verify Product Assignment in the Product Module
- Select the Product Module in the GemPages Editor.
- In the settings panel, ensure that the correct product is assigned.
- You can choose to display by the assigned product or select a specific product manually.
3. Confirm Product Status and Availability in Shopify
- Navigate to your Shopify Admin > Products.
- Select the product in question.
- Ensure that the product status is set to “Active.”
- Under “Sales channels and apps,” confirm that “Online Store” is selected.


Thank you for your comments