


About the Newsletter element
When browsing online, you may encounter forms that offer freebies or newsletters in return for your information.
These forms, commonly known as signup forms, play a crucial role in helping stores expand by gathering data for future marketing and sales efforts. In GemPages, these forms are referred to as Newsletter Elements.

Note: The Newsletter element represents Shopify’s signup form, which has limited fields. If you desire a form with greater customization options, kindly consider using the Contact form element instead.
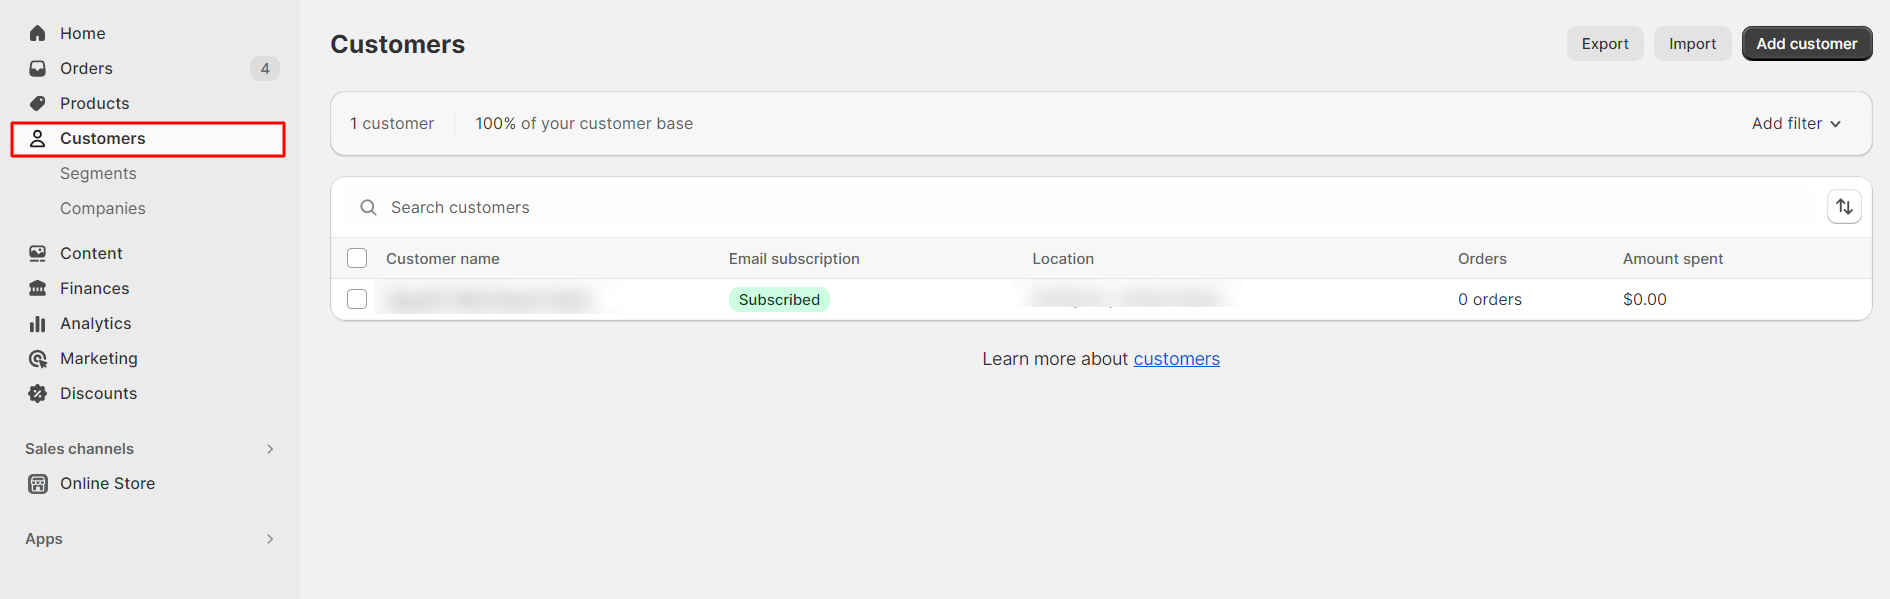
Access your Customers’ email list
Once a customer submits the form, their email address will be collected and stored in the Customer section of your Shopify Admin panel.
Go to Shopify Admin > Customers to see a list of all the emails subscribed through the signup form.
How to Add a Newsletter Element to Your Page?
To add the Newsletter element to your page, you can follow the steps below:
Step 1: Access the GemPages Dashboard > Pages, then click on your target page to locate the editor.
Step 2: From the left sidebar, search for the Newsletter Element and drag & drop it to the preferred position on your page.
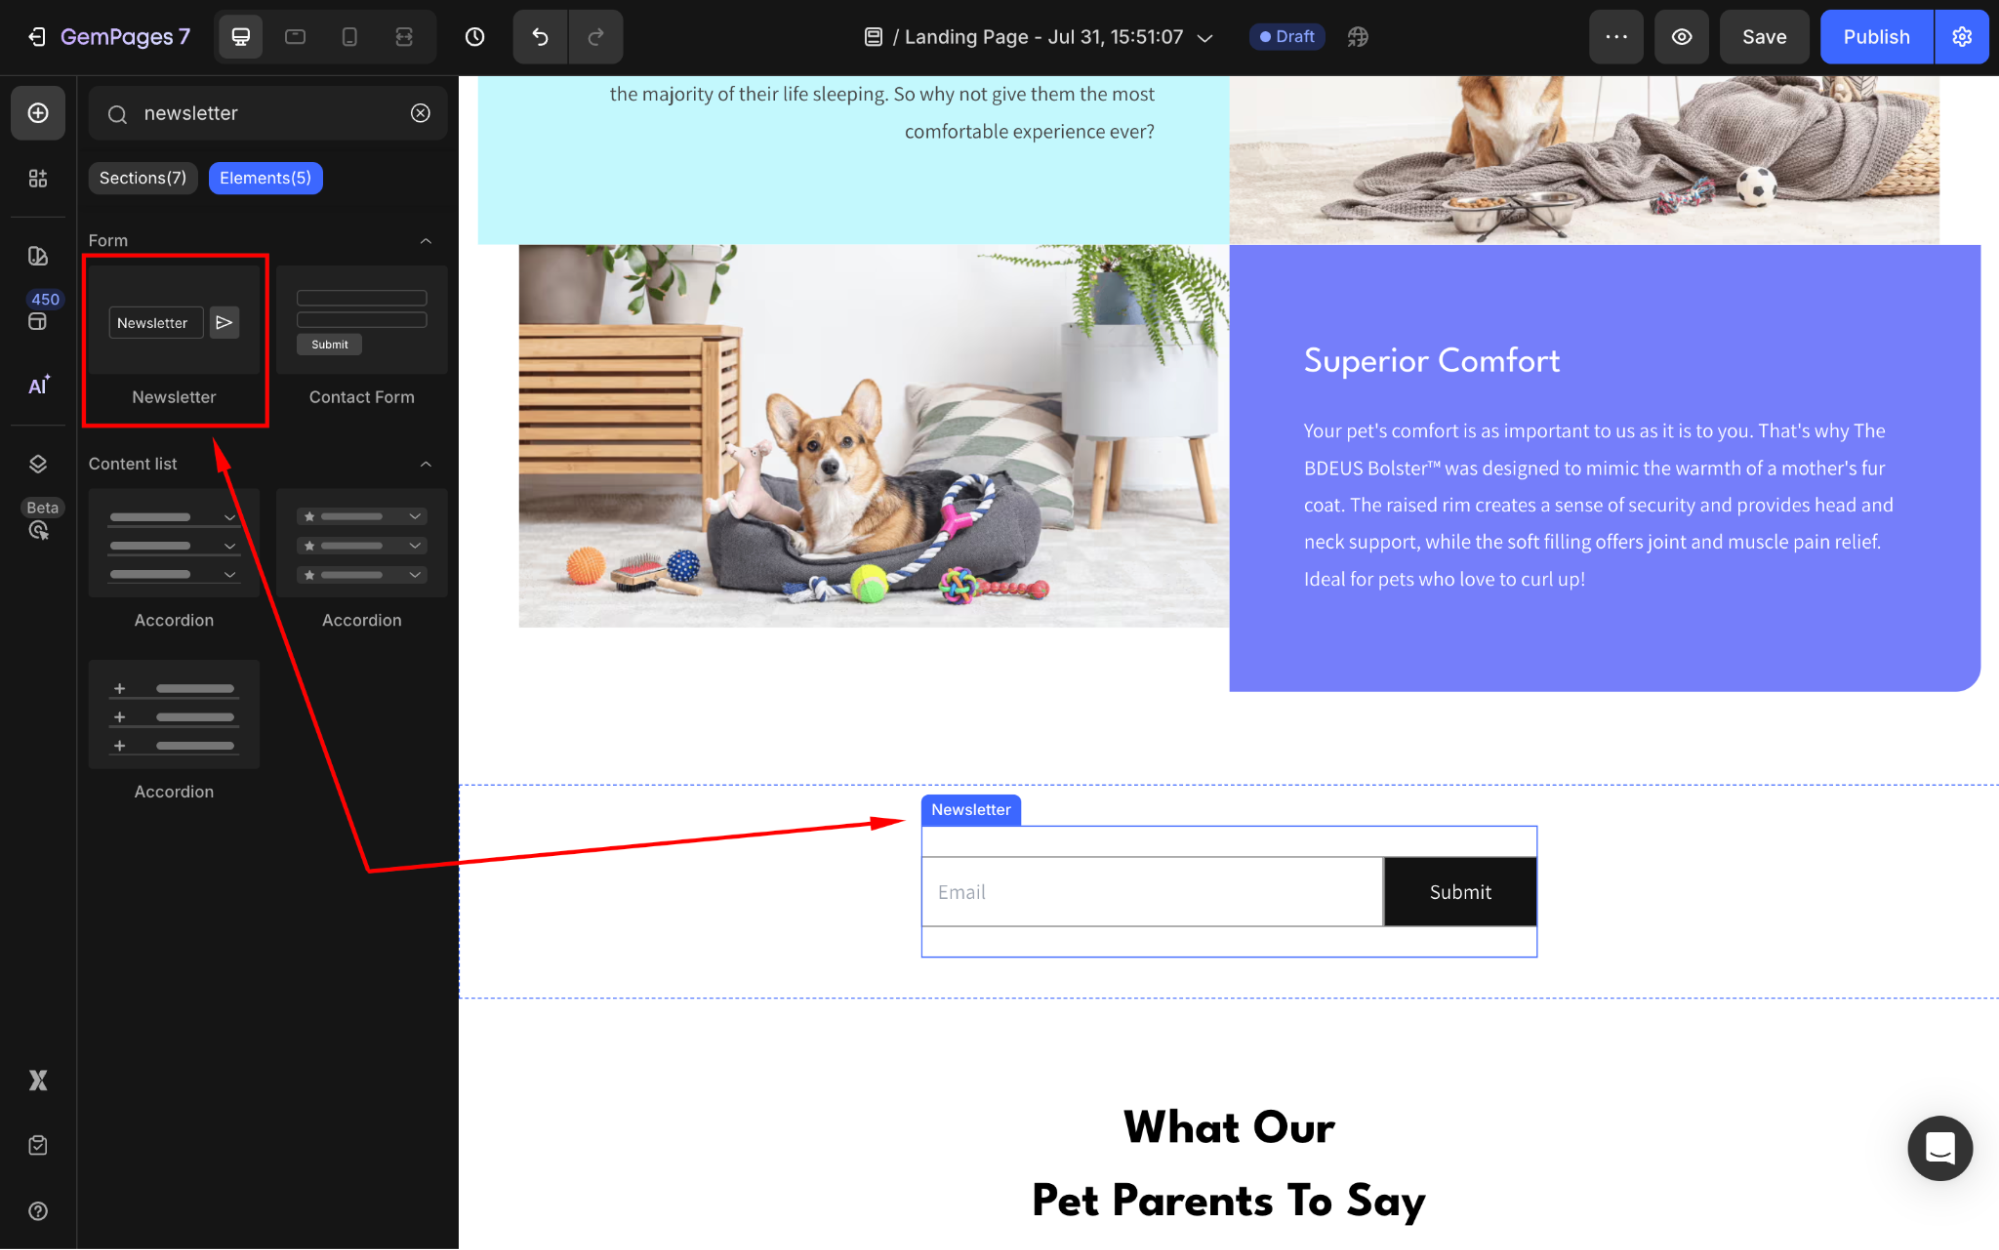
Step 3: Click on the element to open its settings for further customization.
Configure the Settings tab
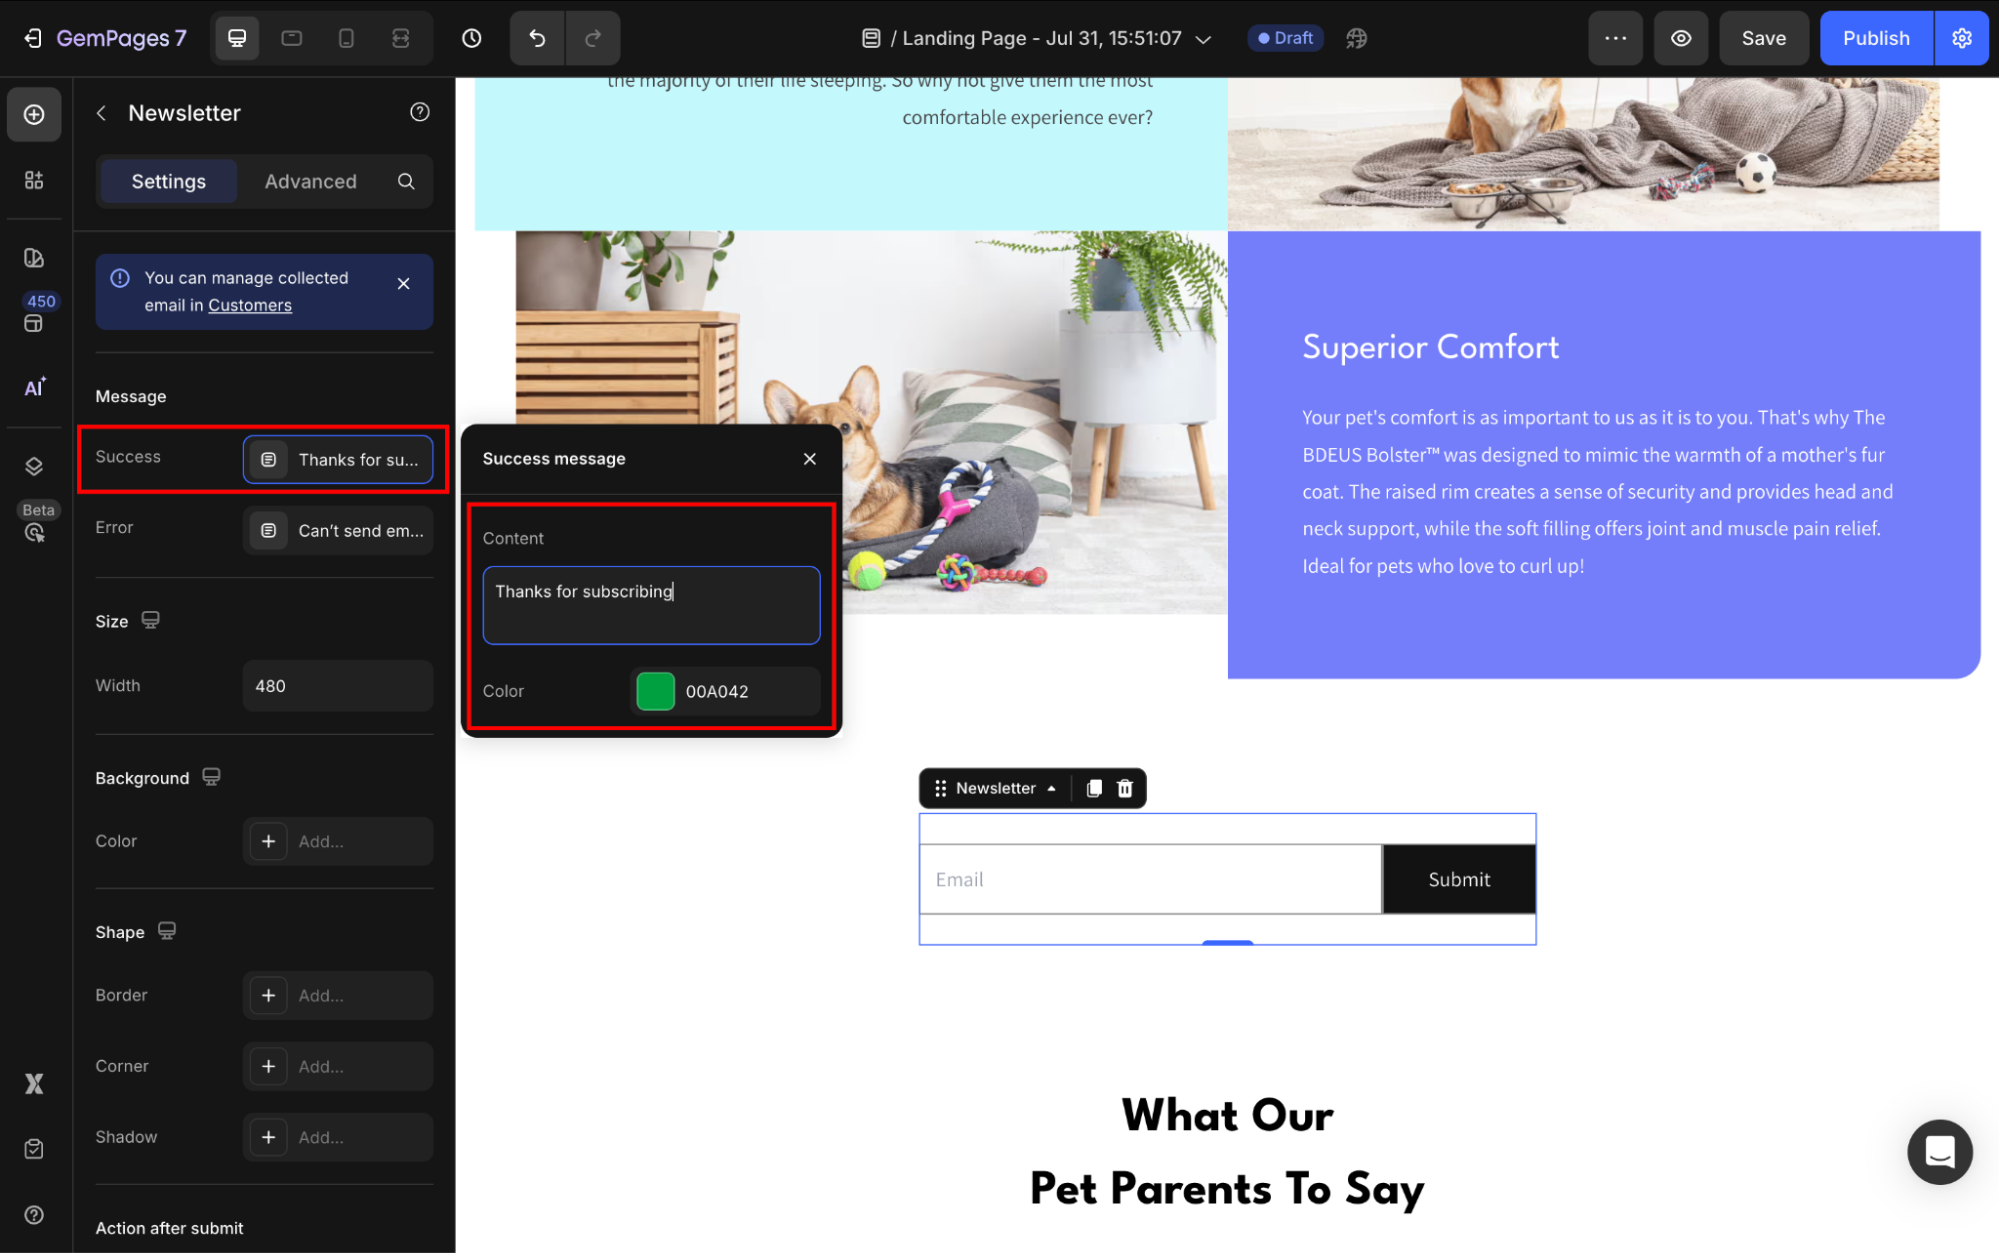
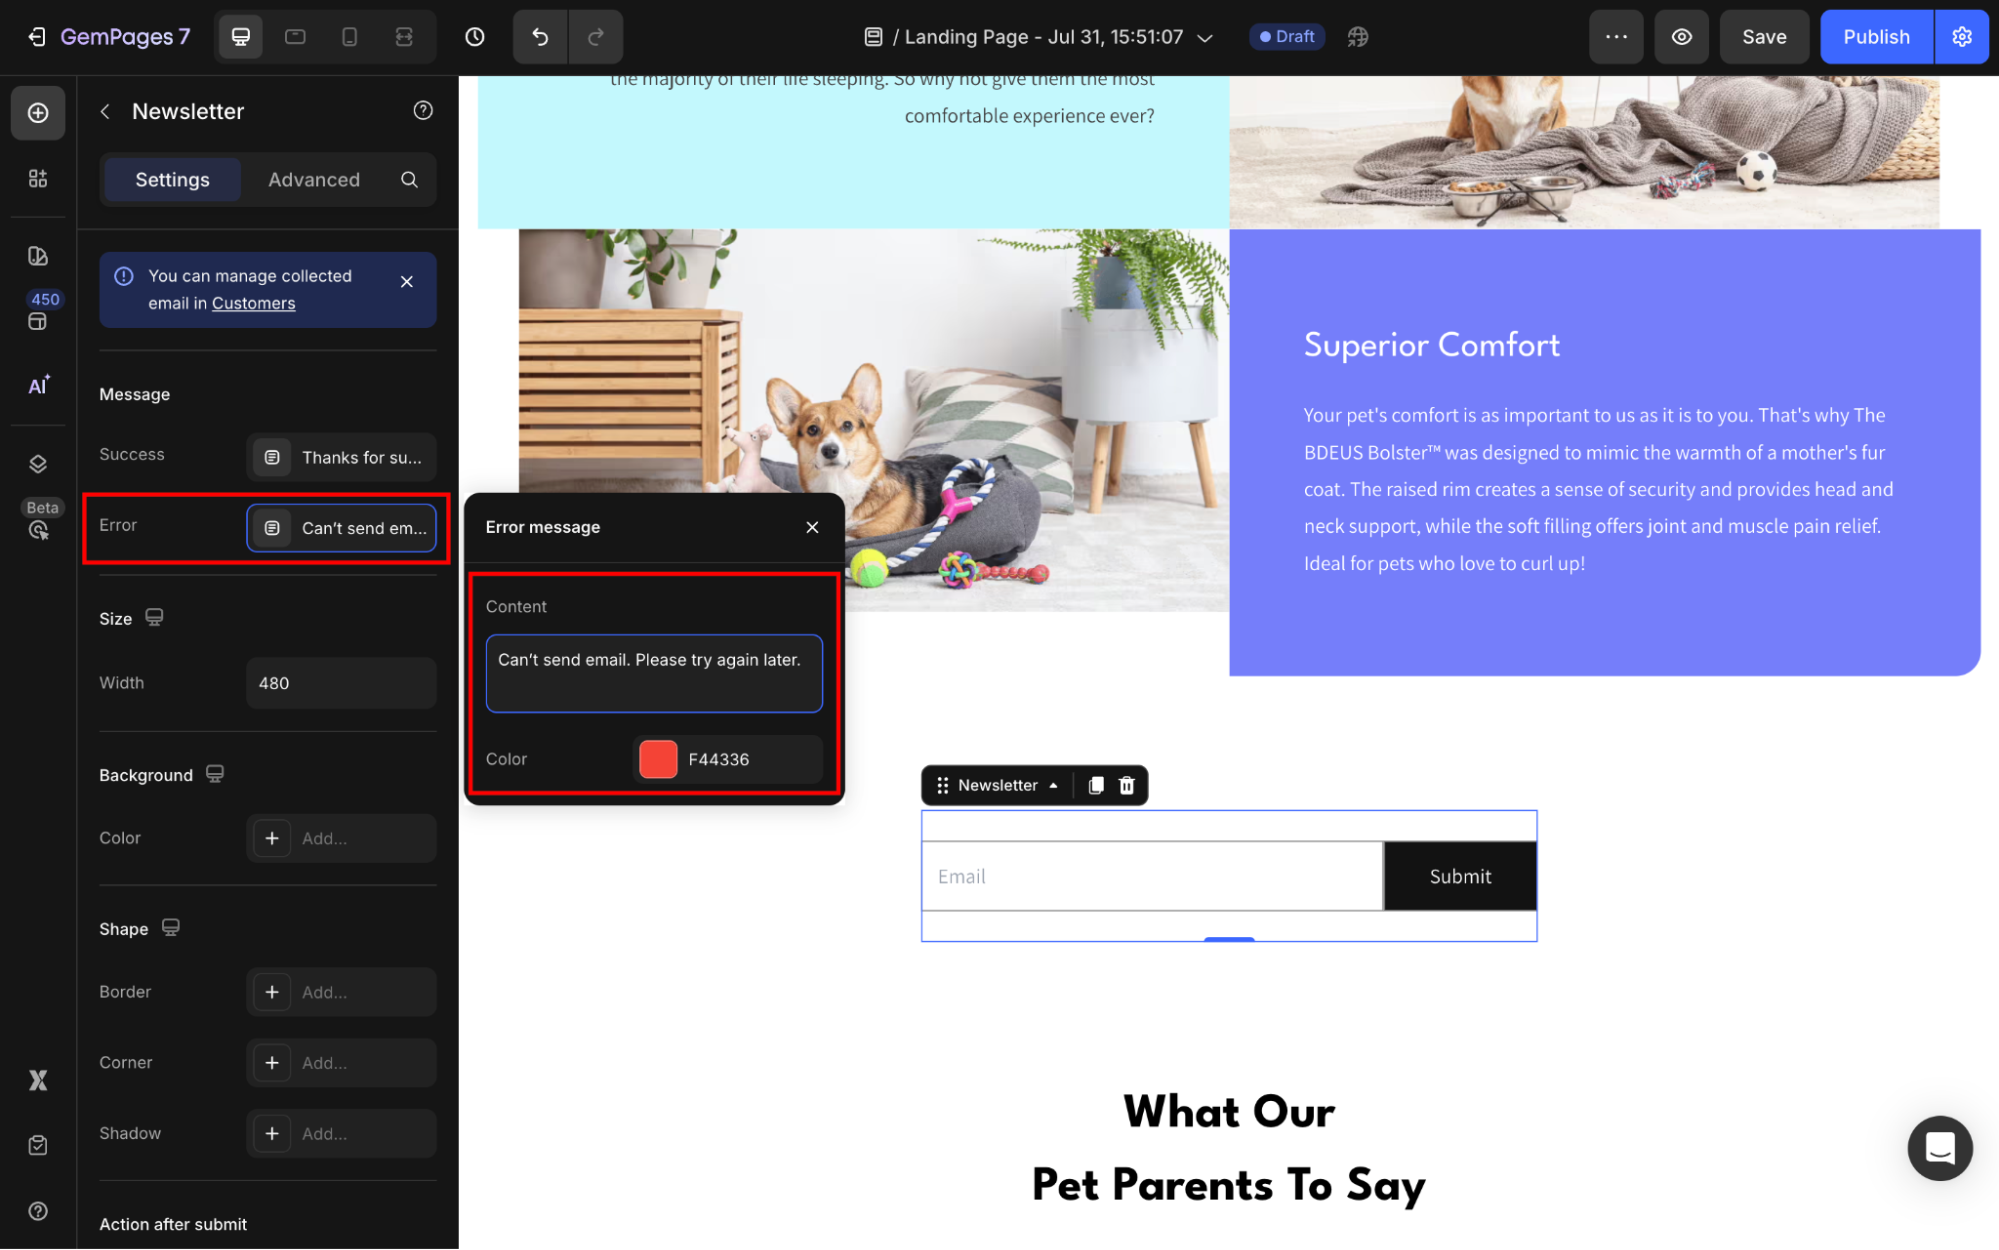
To help you customize the Newsletter Element for your design, here’s a breakdown of its key settings:
Message
- Success: Customize the message displayed after your customers successfully fill in the form.
- Error: Edit the error message when your customers can’t complete the form.
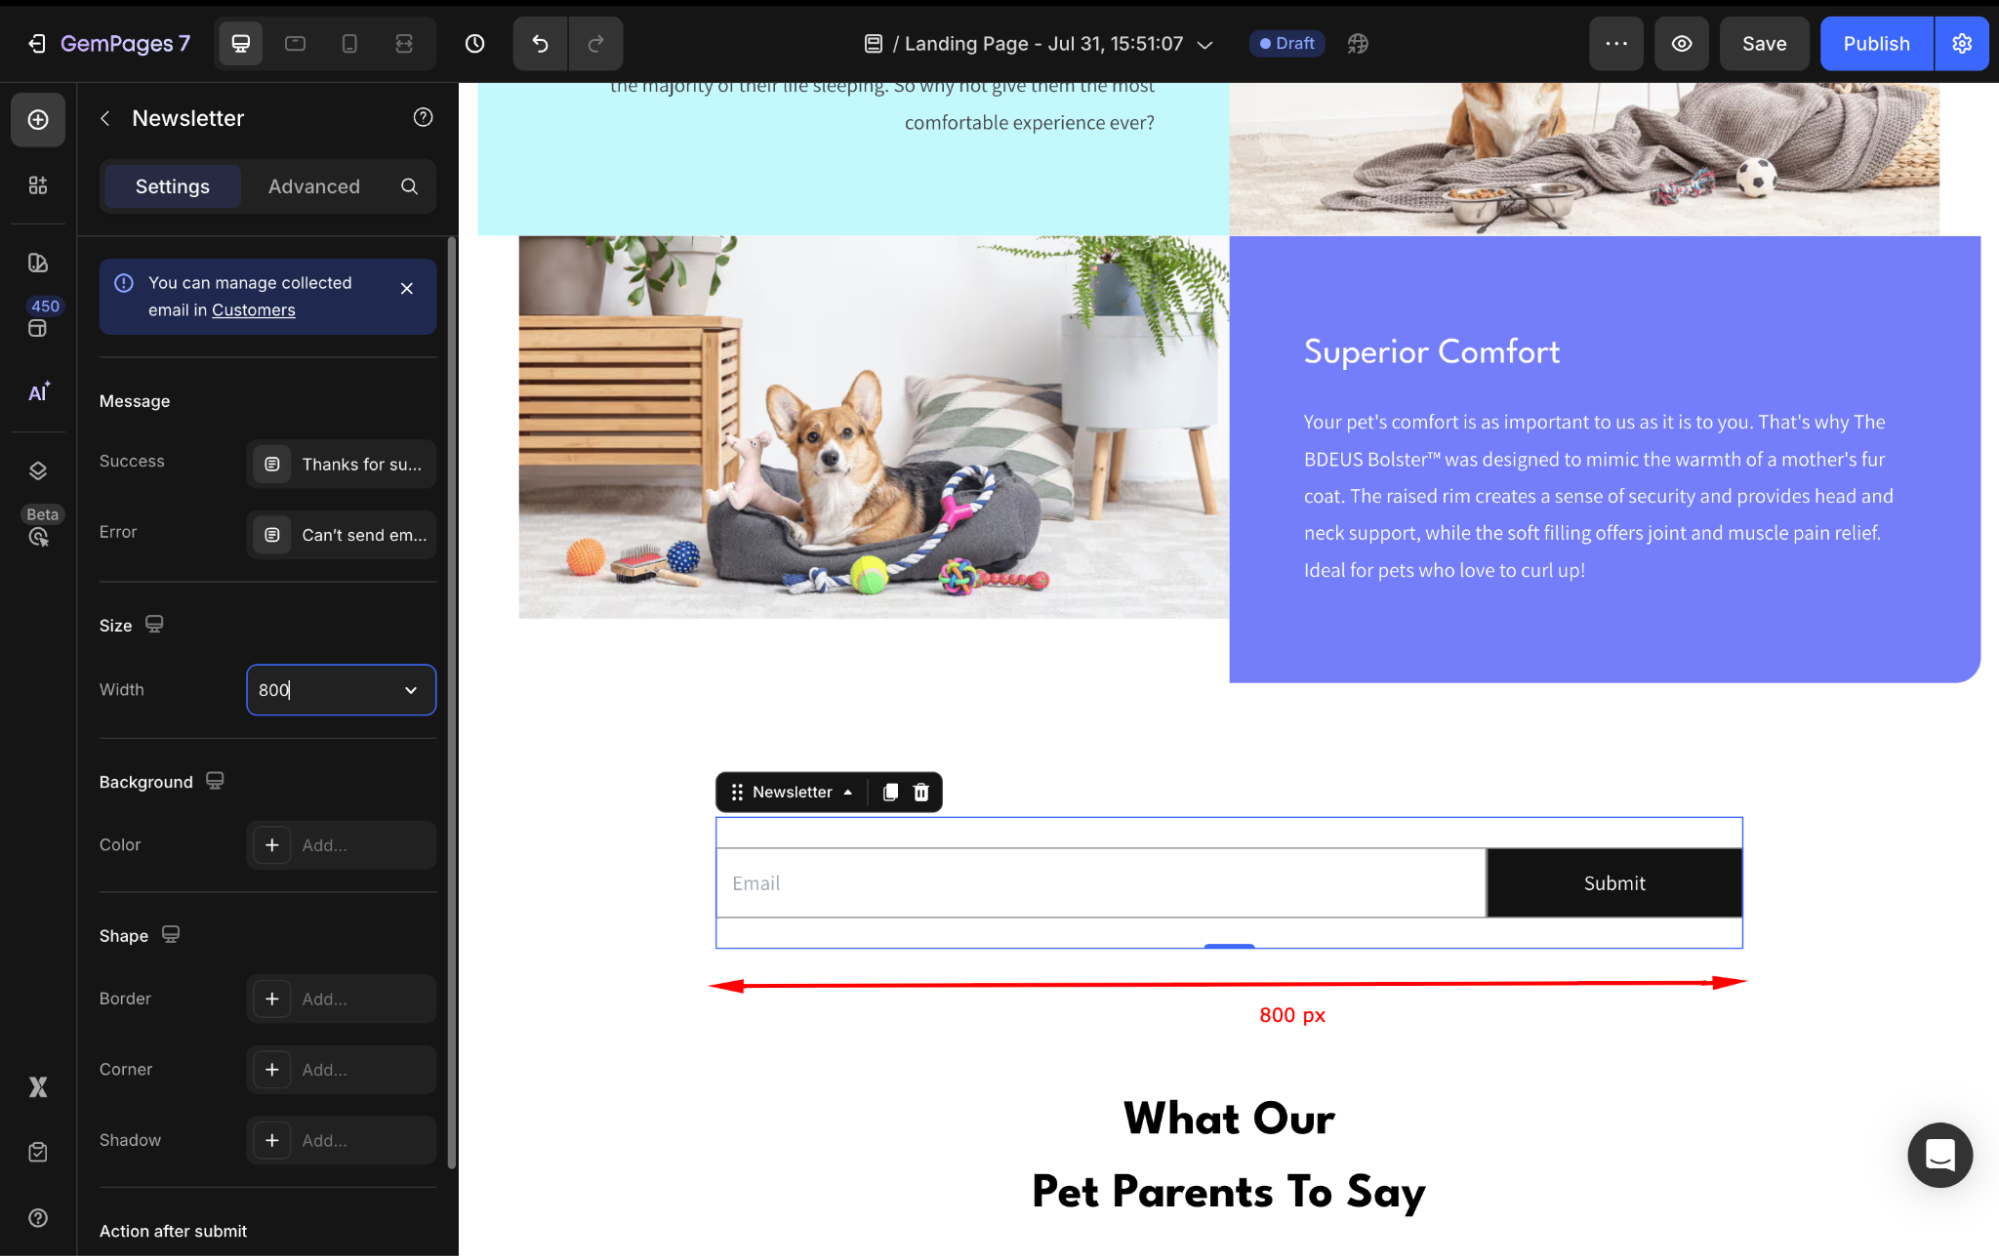
Size
Adjust the width of the Newsletter element to fit with your page design.
Background
In the Background section, you can set a solid or gradient color background to deliver better visibility for this element. Try one of these options to select the color as preferred:
- Enter the color code
- Use the color picker to select any color from your page
- Choose from the color swatch
- Drag the color bar to find the best fit for your branding
- Pick a color from the Recent colors or Suggested for your lists to save effort

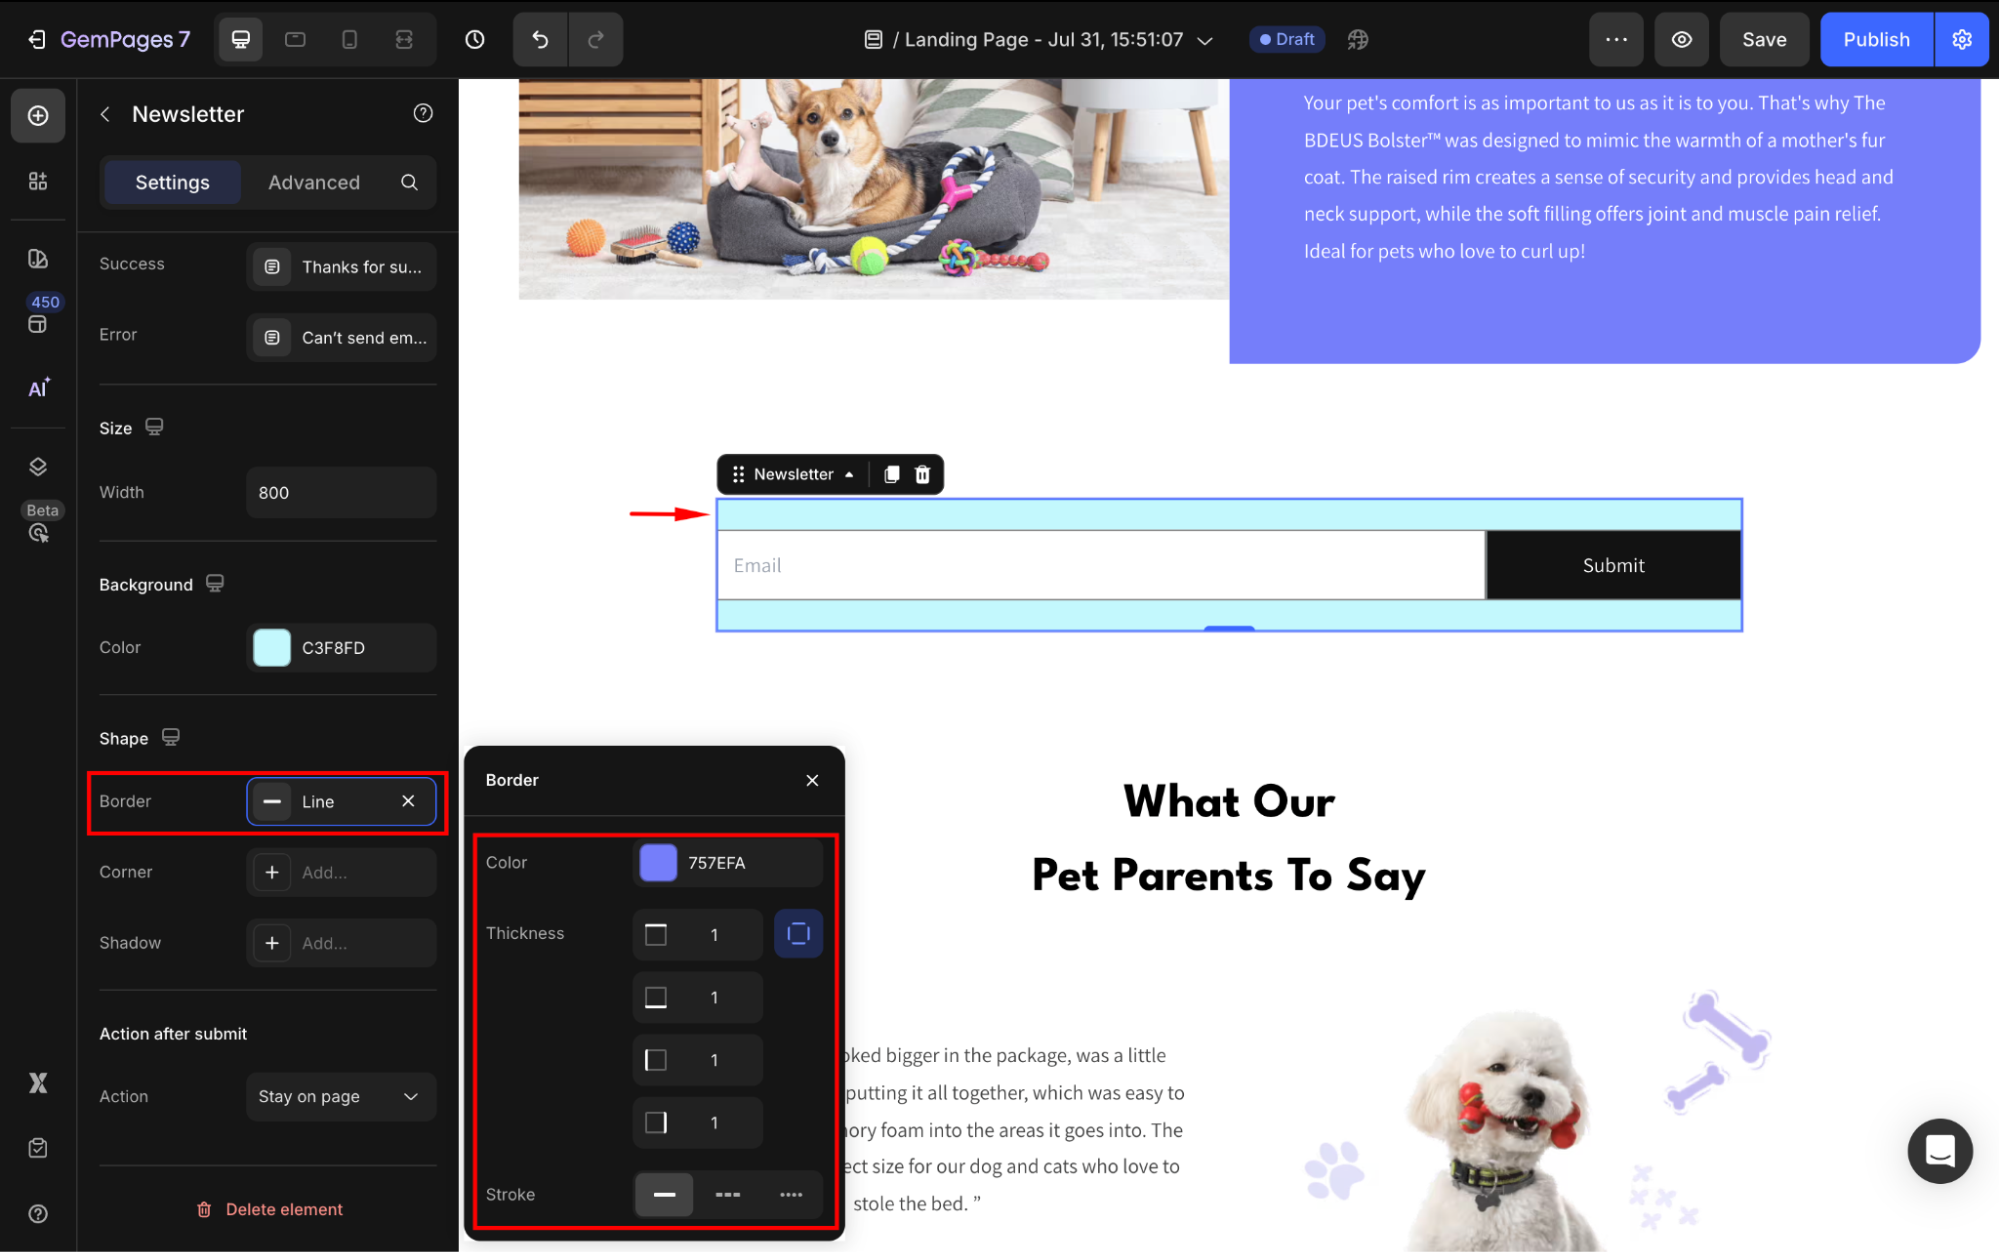
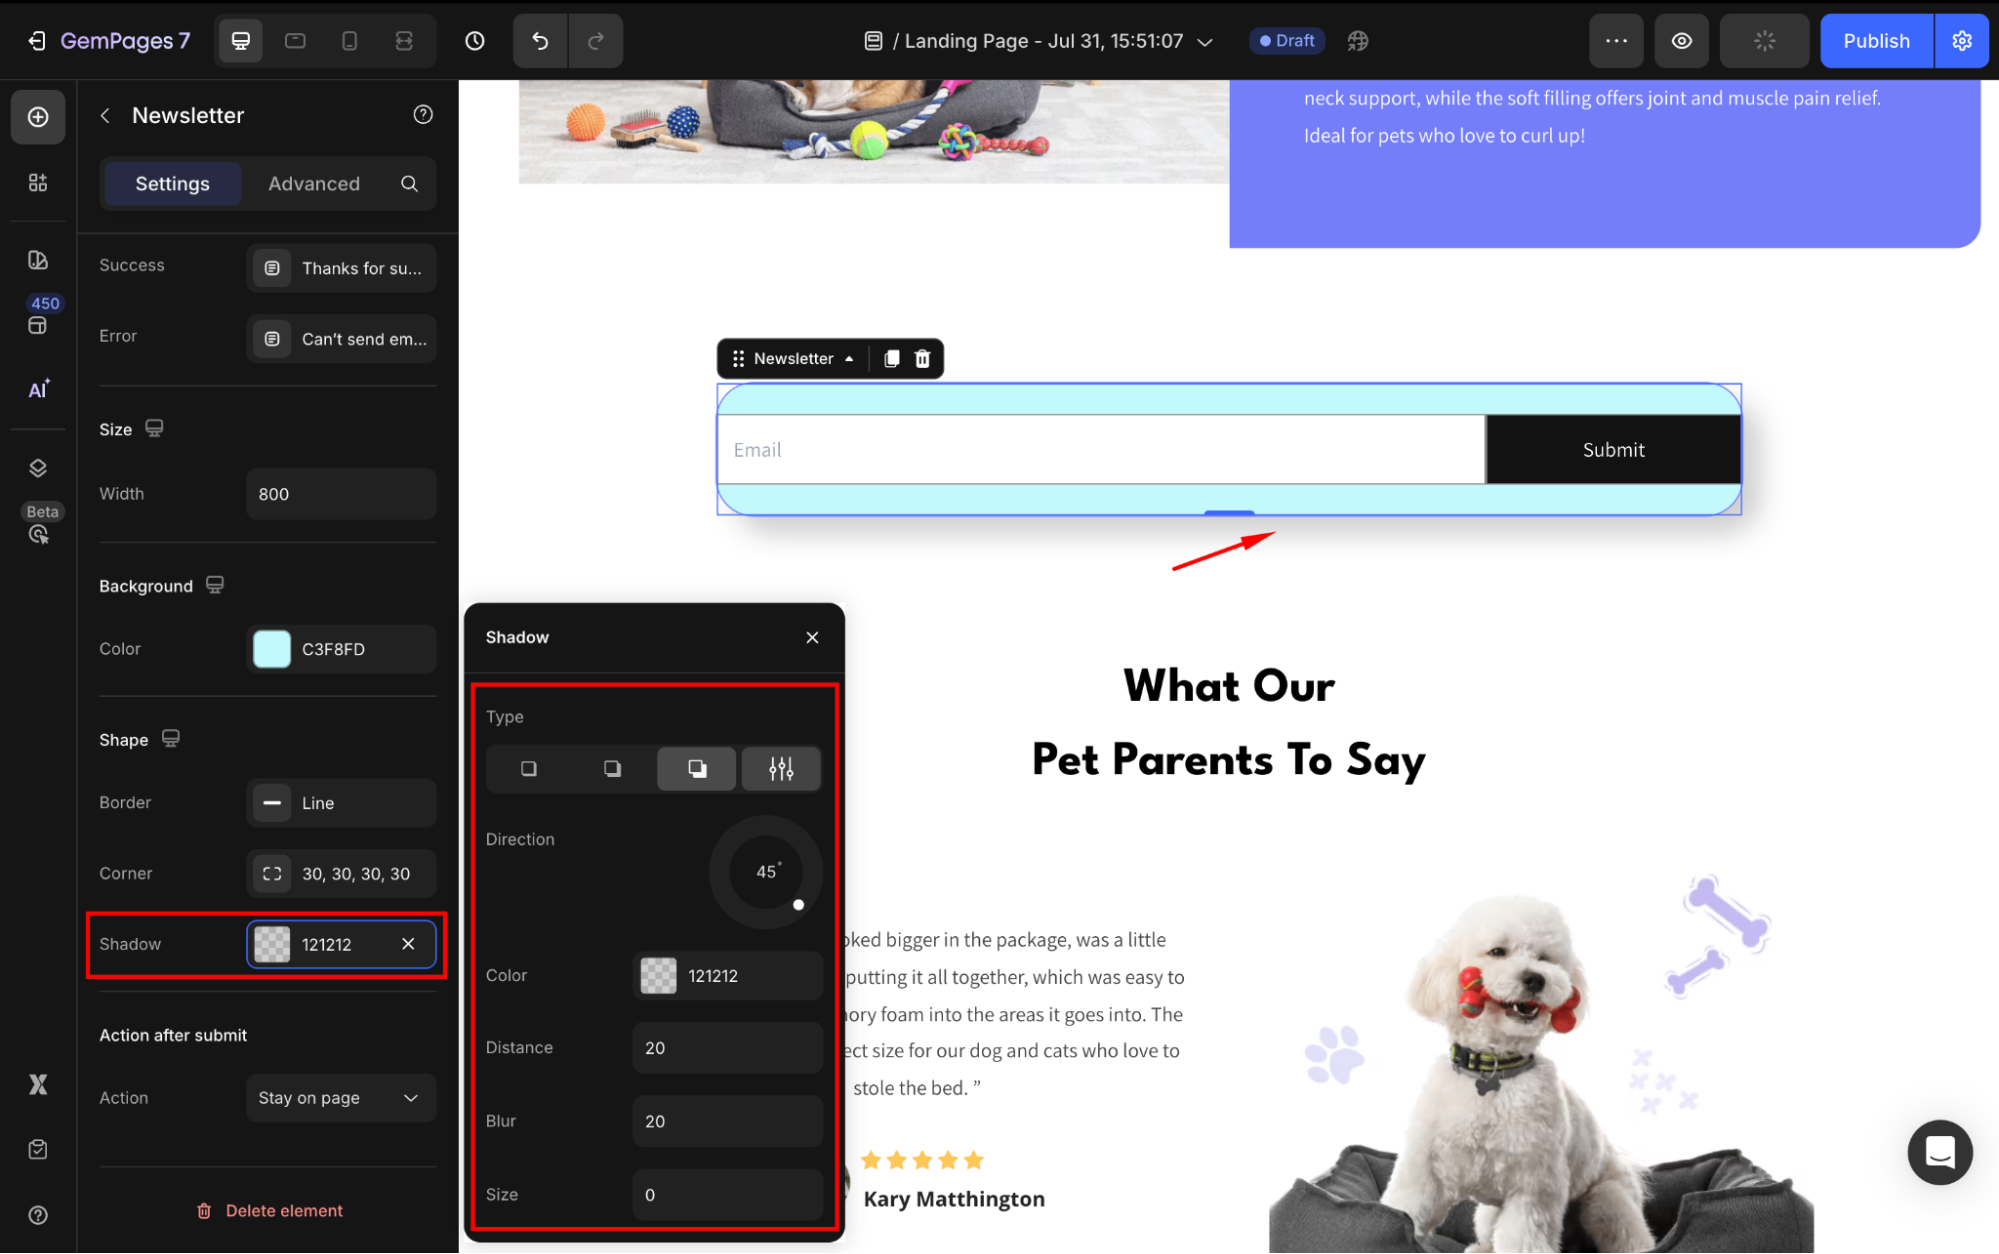
Shape
Shape settings are for the whole section that contains the Newsletter element.
- Border: You can change the border color, thickness, and stroke.
- Corner: The section corner can be square, round, or pill-shaped. Also, you can enter an exact radius to customize the element’s corner your way.

- Shadow: You may add a shadow of the Article List section and adjust the shadow display (size, color, blur, and distance).
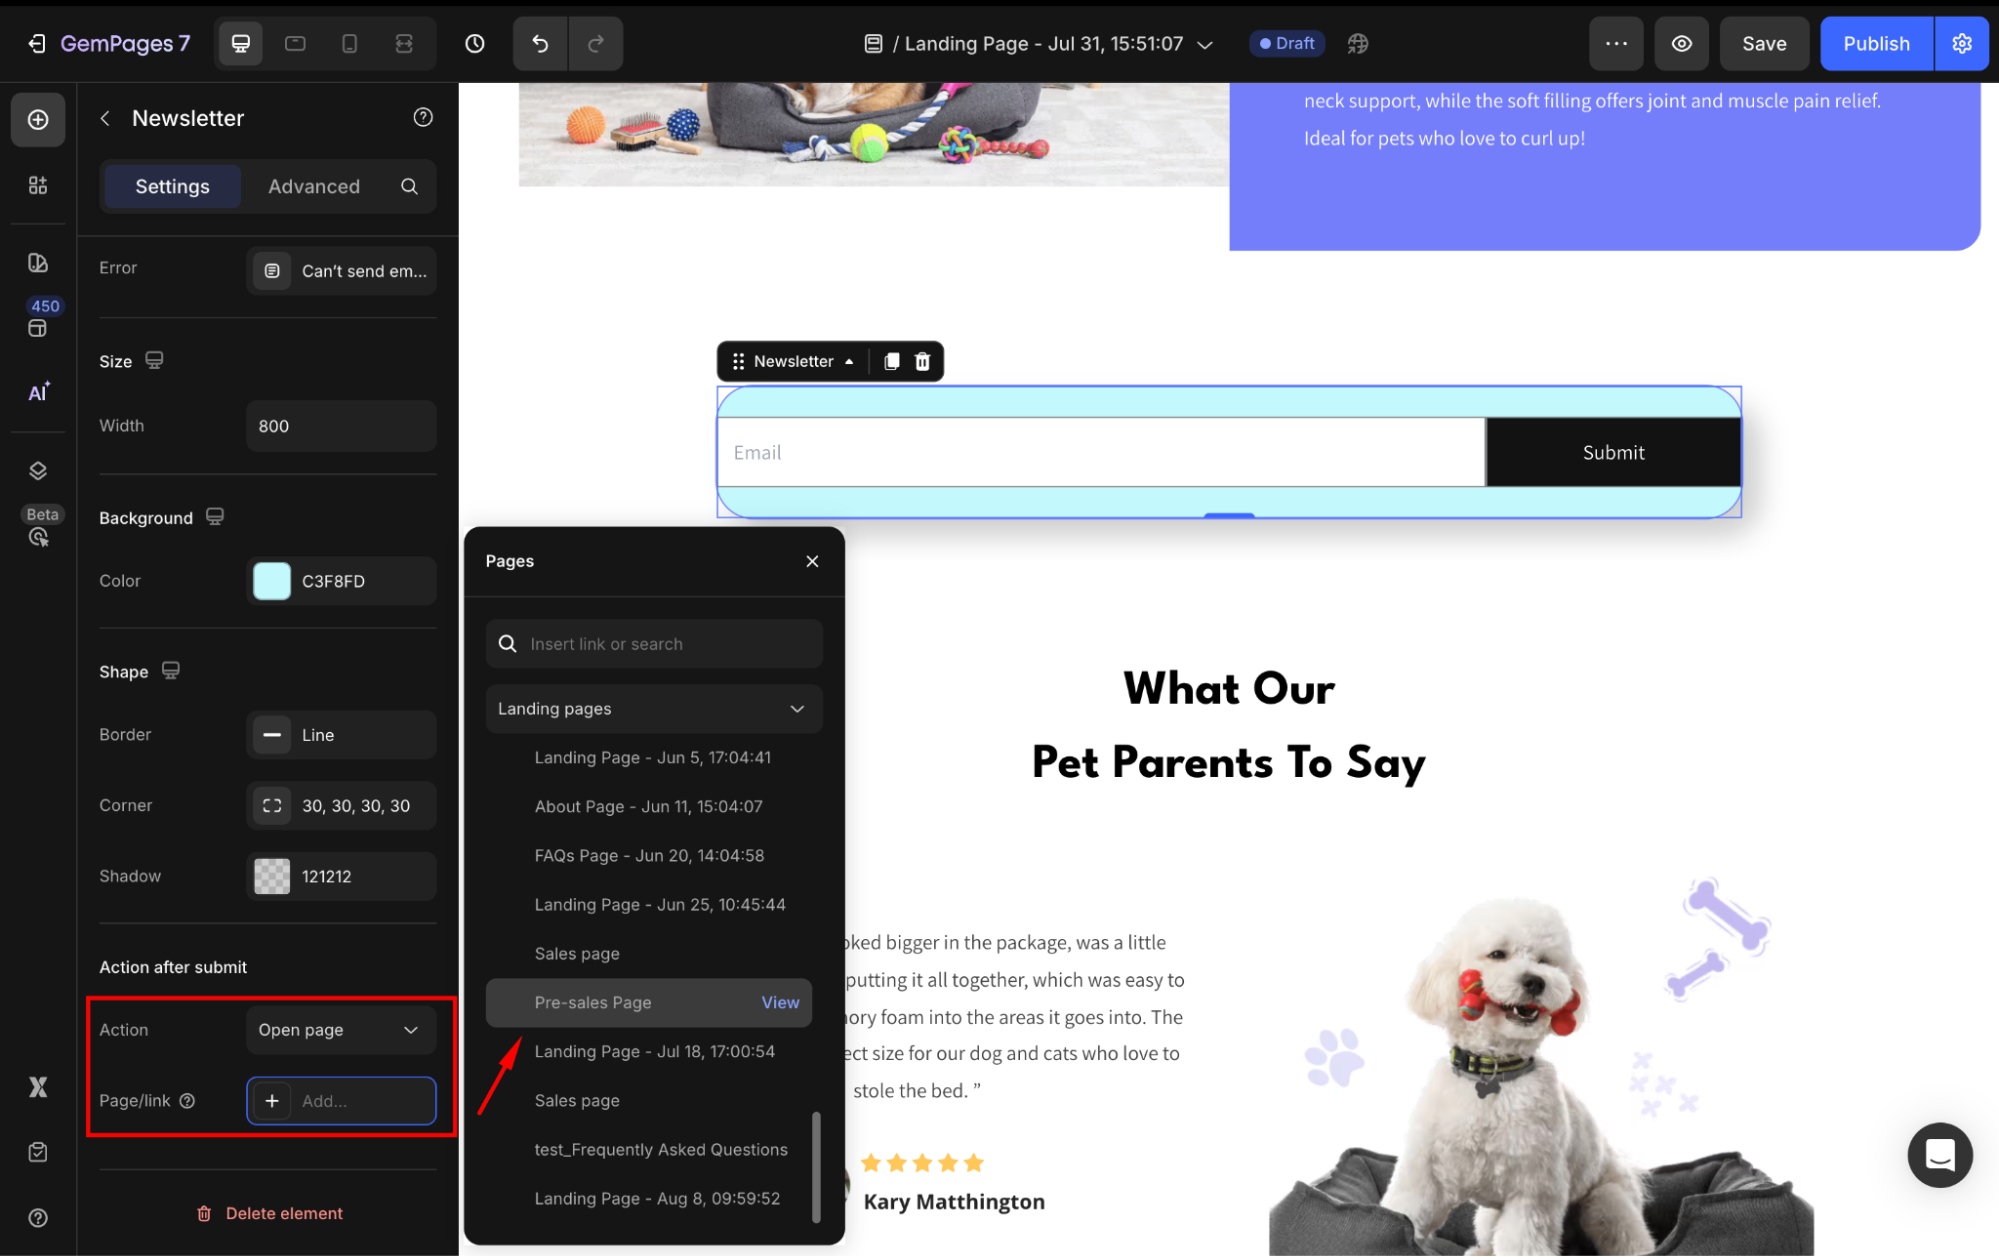
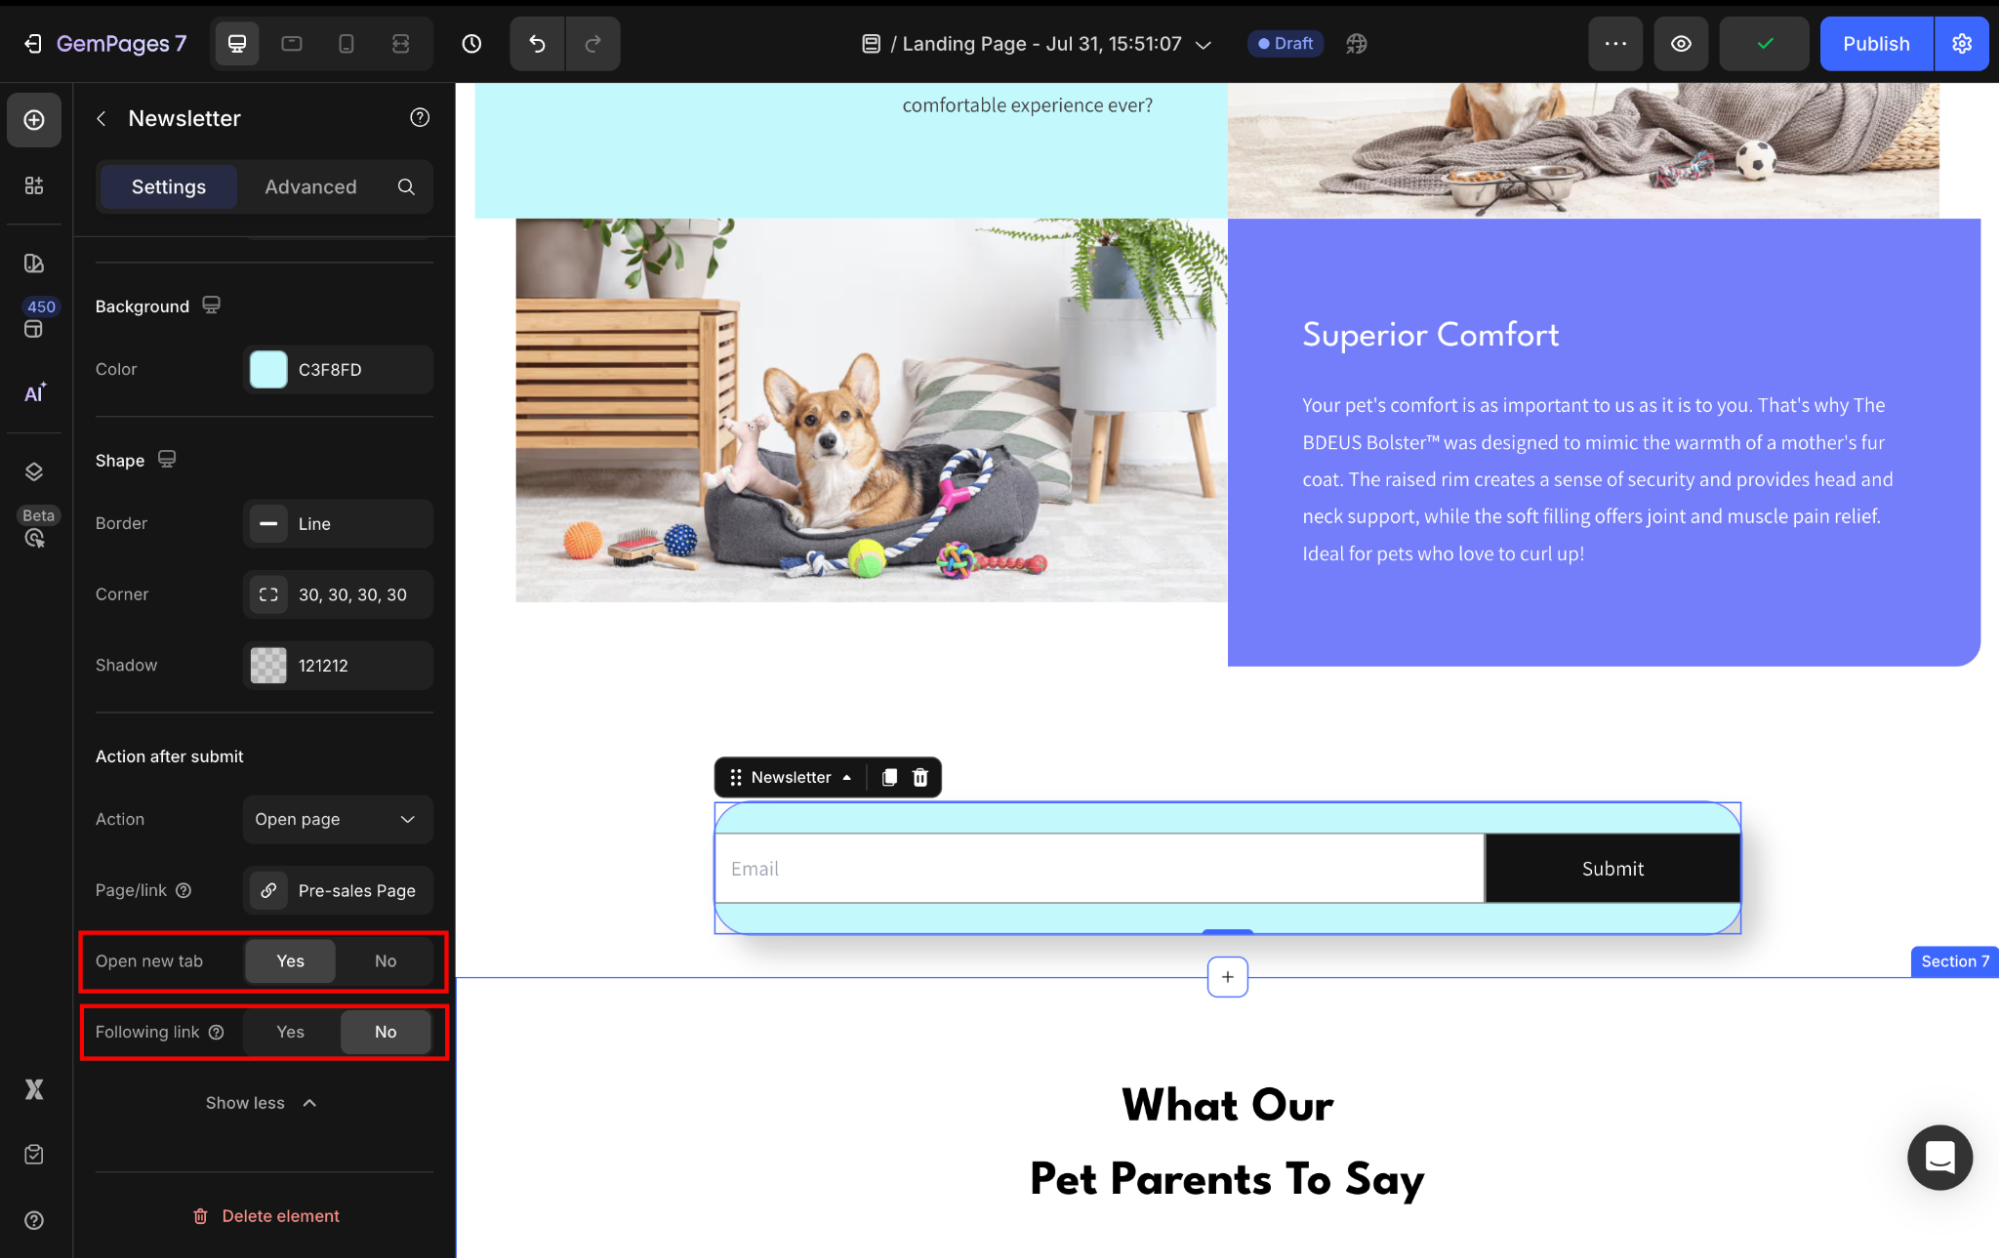
After submit
Action: Determine whether you prefer to guide users to a designated destination page or maintain them on the current page upon completing the form submission.
Choose from the dropdown:
| Stay on page | No action after submission. |
| Open page | Users will be redirected to another page after submitting the form. |
| Scroll to | Scroll to the target sections on your current page. |
| Send email | An email will be sent automatically after users submit the form. |
| Make phone call | A phone number displays to which users can make a phone call. |
For example, if you decide to send customers to another page, select “Open URL” from the dropdown and click on the “Pick Link” button to open the Link Picker panel.
Then, click Show more to expand the full settings.
- Open new tab: Set it to Yes if you prefer to open the new page in a new tab.
- Following link: Set it to No to not allow search engines to follow through this link.
Configure the Advanced Tab
For more advanced customization, please navigate to the Advanced tab and follow the instructions in this article.
Troubleshooting: Newsletter Emails Not Appearing in Shopify Customers
1. Check Double Opt-In Settings
- Shopify may require customers to confirm their subscription via email. Until they click the confirmation link, their email won’t appear in Customers.
- Go to Shopify Admin > Settings > Checkout > Customer accounts to check if double opt-in is enabled.
2. Verify Email Addresses
Invalid or mistyped emails may be rejected. Test the form using a valid email address to ensure proper submission.
3. Check for App or Theme Conflicts
Some apps or custom scripts may block form submissions. Disable other apps or custom code temporarily to see if the issue persists.
4. Review Newsletter Element Settings
Ensure the element is correctly configured:
- After Submit actions (Stay on page, Open page, Scroll to, etc.)
- Advanced settings such as custom scripts or redirects.
5. Clear Browser Cache / Test in Incognito Mode
Cached pages or browser extensions can interfere with submissions.
6. Test the Form
After making changes, submit a test email and check Shopify Admin > Customers to confirm the email is recorded.
Optional: Automatically Add Shopify Tags When Someone Subscribes
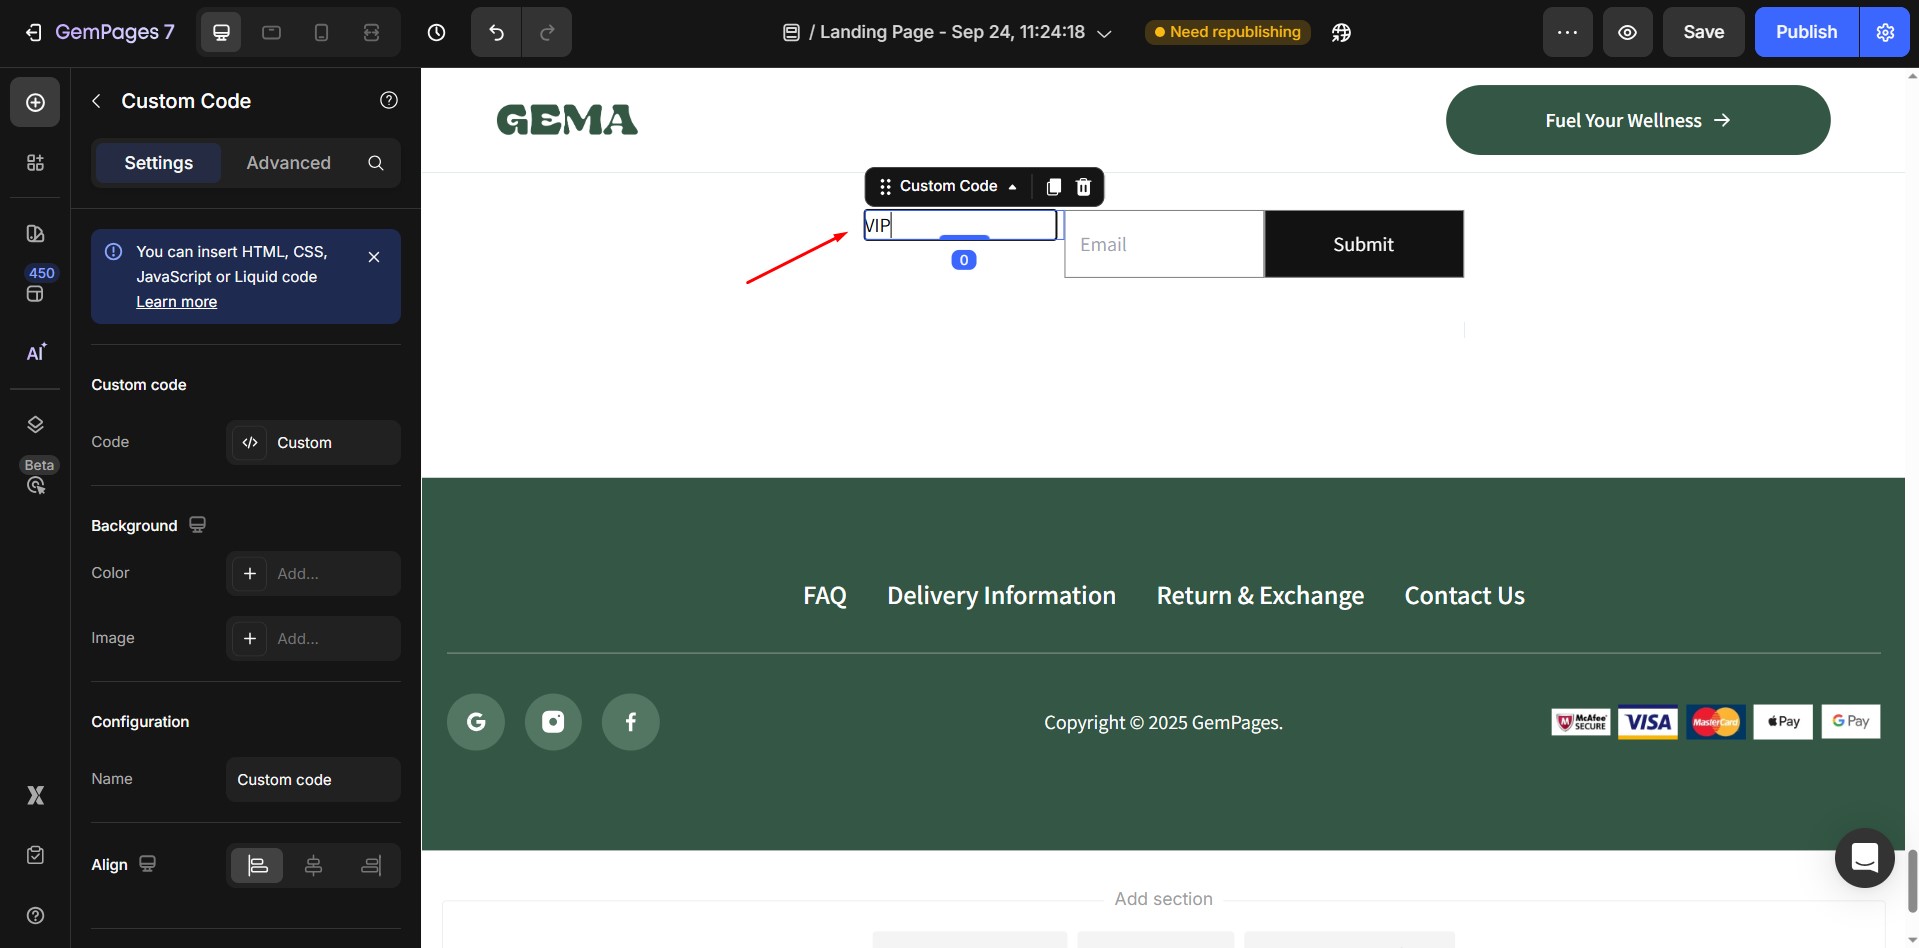
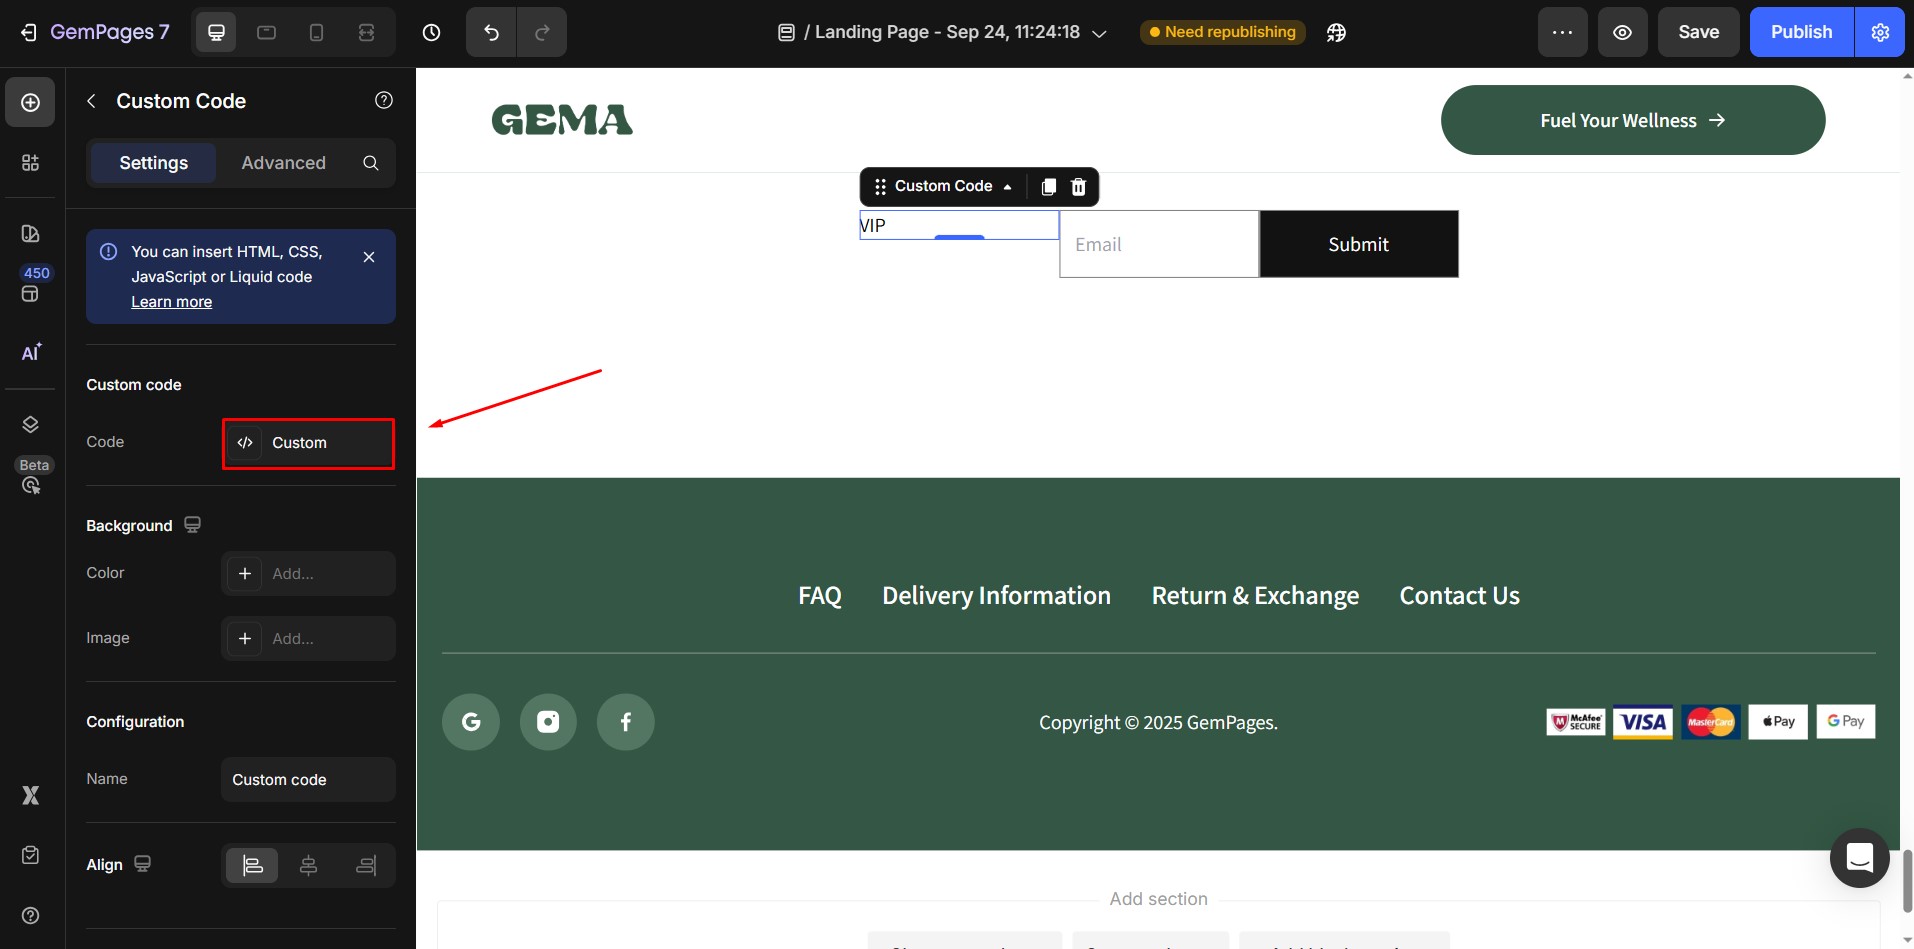
If you’d like Shopify to automatically tag customers who submit the Newsletter form, you can do this with a Custom Code element placed inside the Newsletter element.
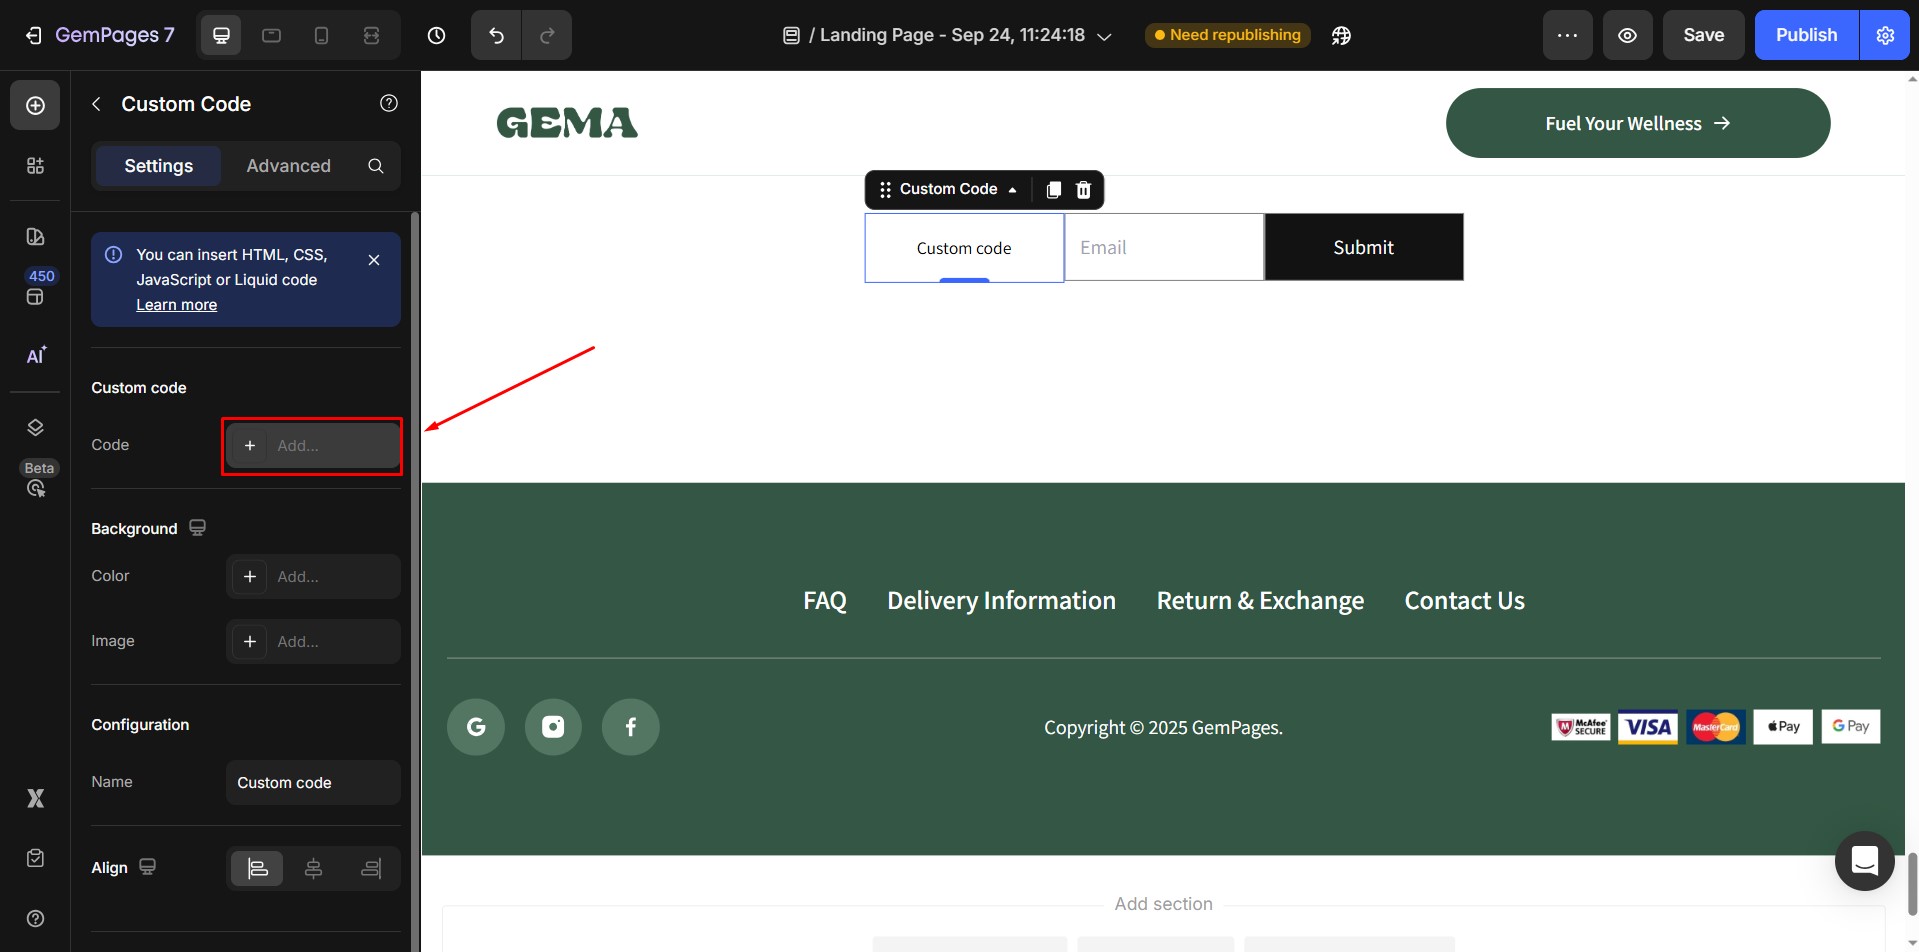
Step 1: Add a hidden input for tags
- Drag a Custom Code element inside your Newsletter form.
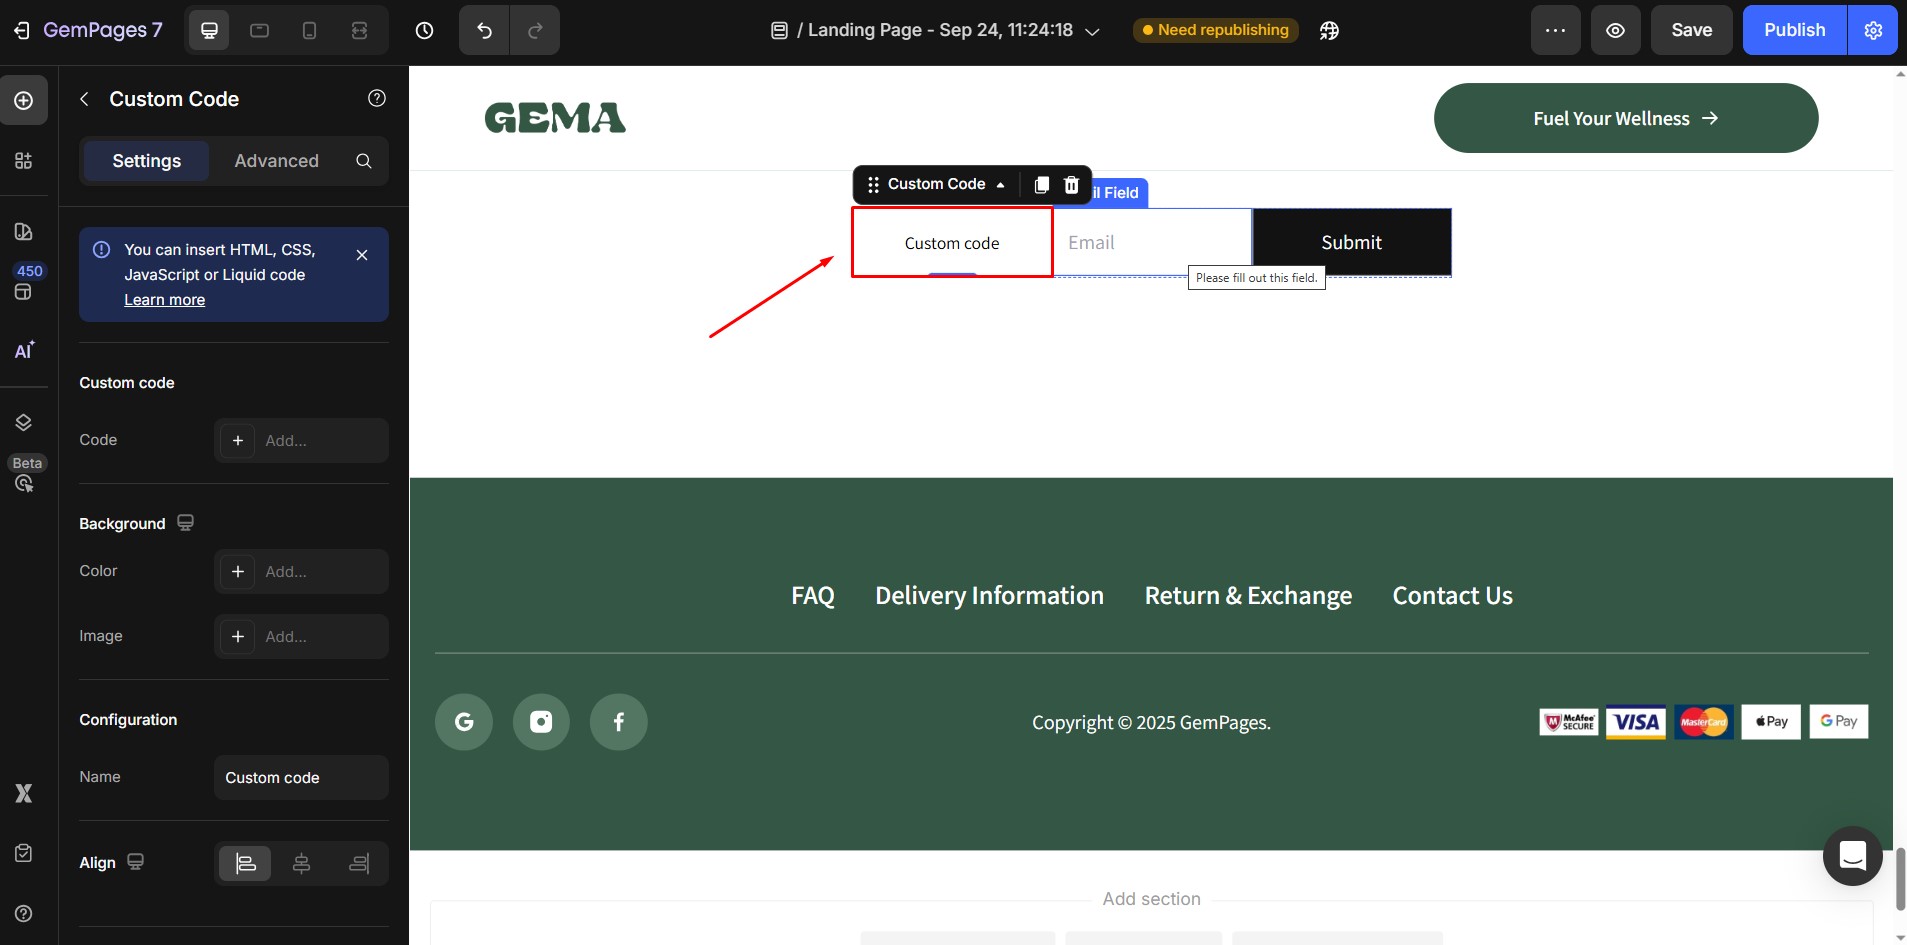
- In the HTML tab, paste the following code:
<input type="text" name="contact[tags]" value="tag value">
Replace “tag value” with the tag you want.
Example:
<input type="text" name="contact[tags]" value="VIP">
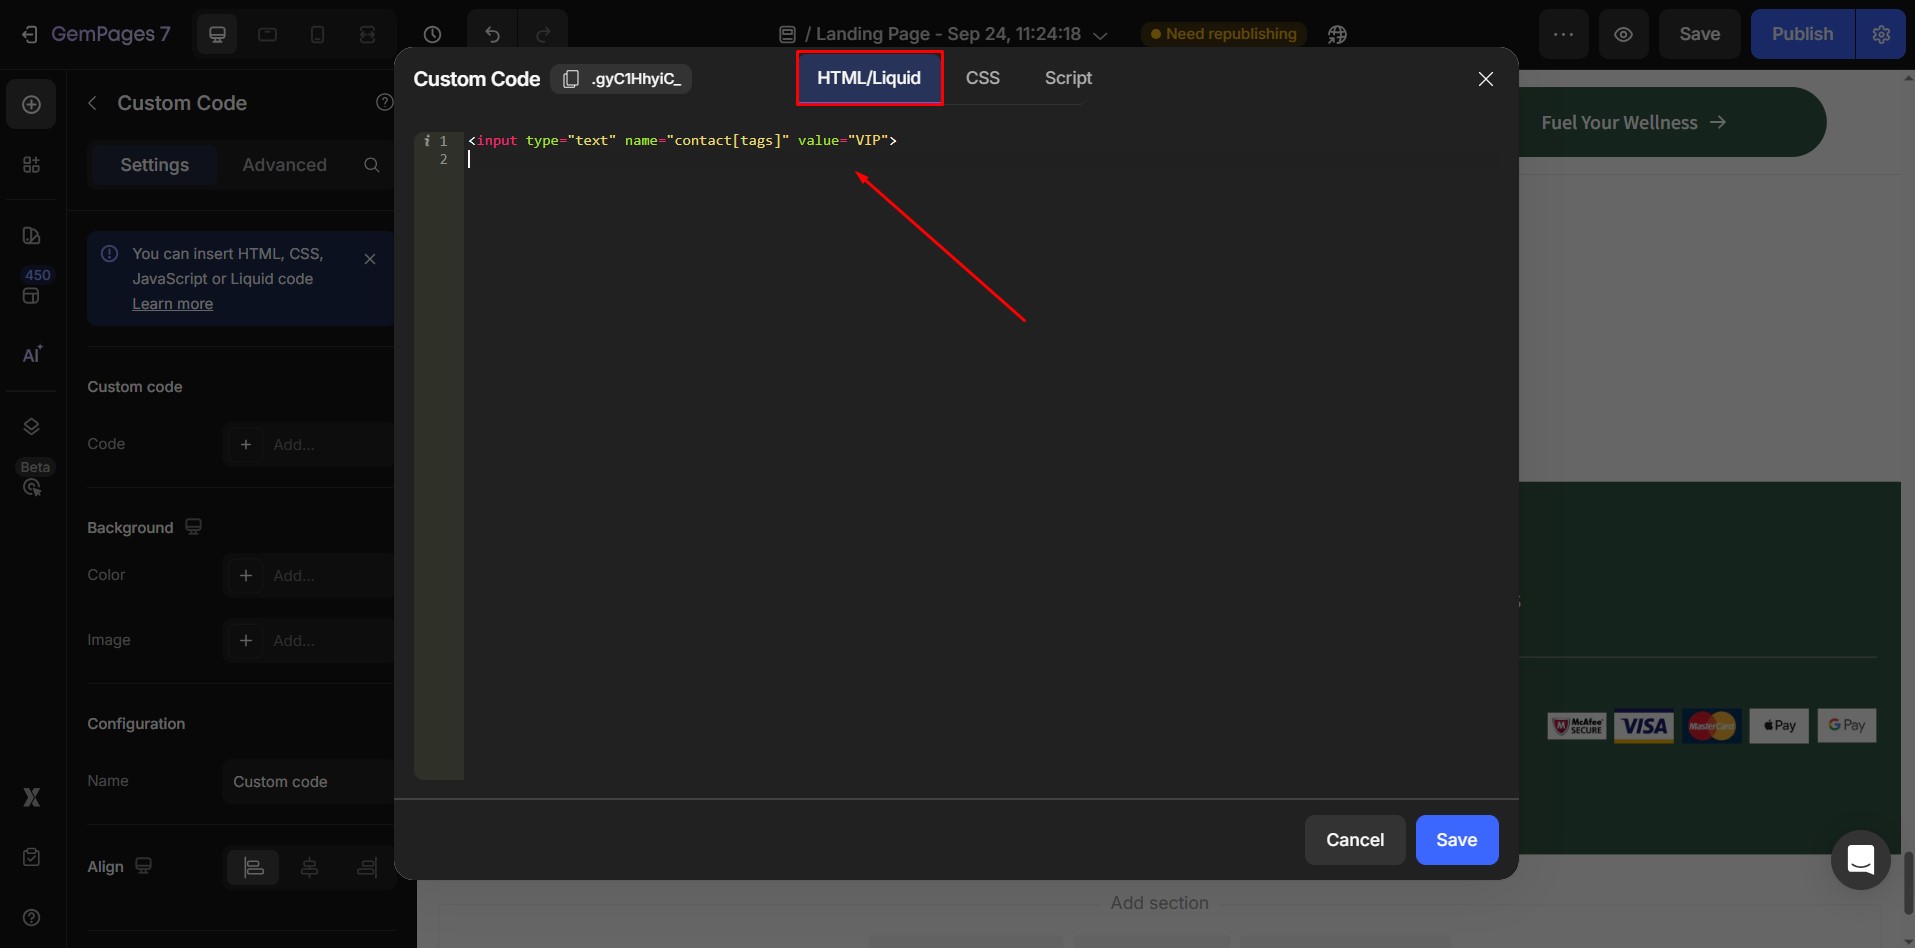
When a customer signs up, Shopify will automatically add the tag VIP to their profile.
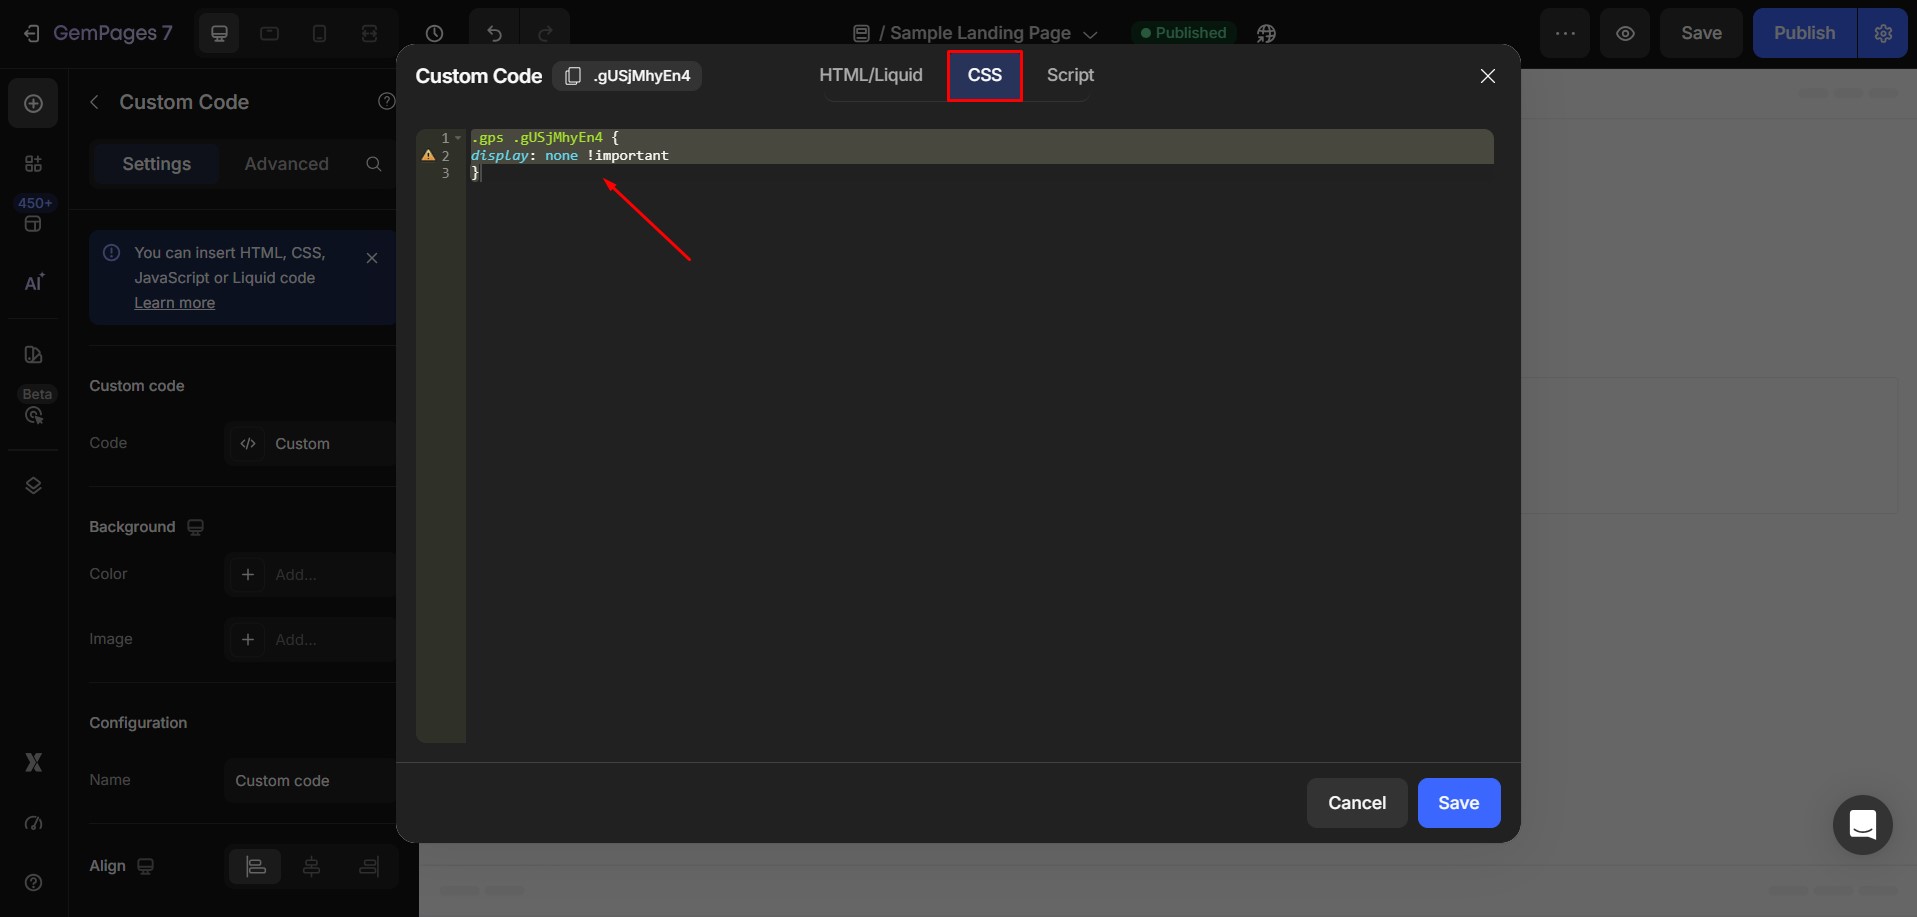
Step 2: Hide the field on your live page
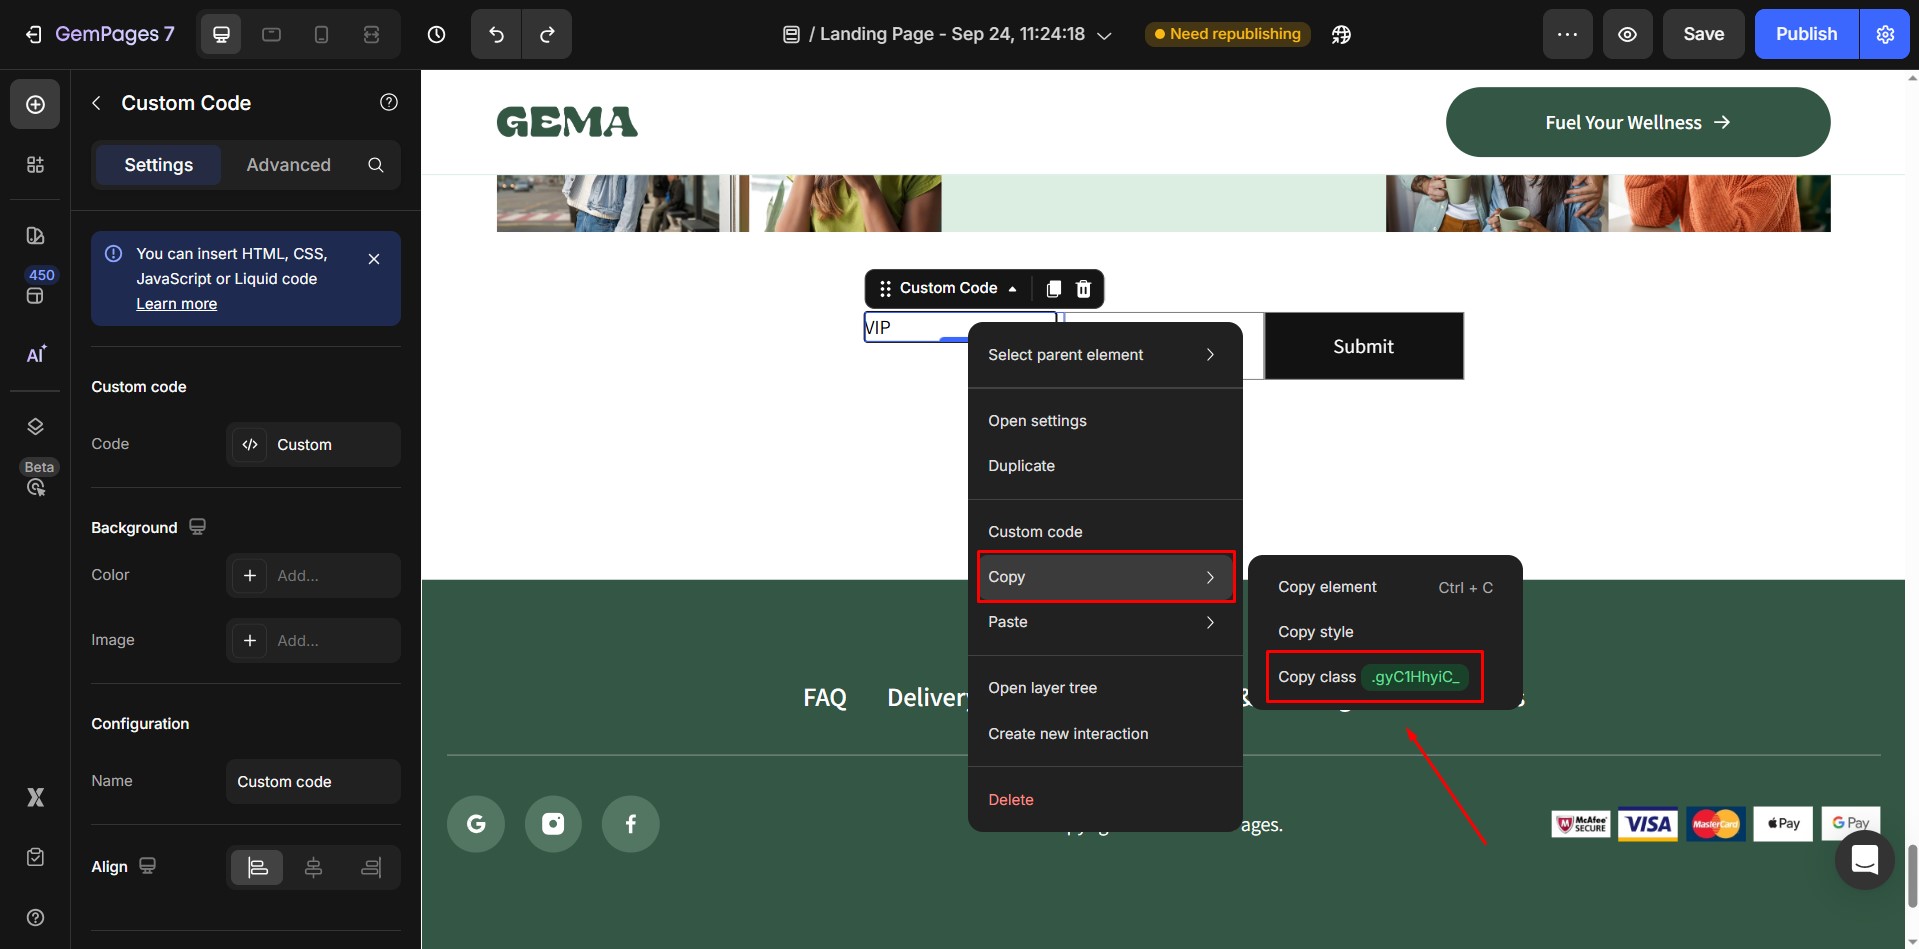
Since you don’t want customers to see this input box, go to the CSS tab of the same Custom Code element and add:
.gps .ElementClass {
  display: none !important;
}


Thank you for your comments