


About the Line (Divider) Element
The Line (Divider) Element in GemPages allows you to visually separate sections of your page.
It enhances readability, organizes content, and ensures a clean, professional layout.

Here are some common use cases for the Line (Divider) Element:
- Section Separation: Use lines to divide different sections of your page, such as testimonials, product descriptions, or FAQs. This ensures that content flows smoothly and remains easy to navigate.
- Visual Breaks: A divider line can act as a subtle visual break between elements, helping to prevent information overload and guiding users’ attention to key areas.
How to Add a Line (Divider) Element to Your Page?
Follow these steps below to drag and drop a Line (Divider) Element into your page using GemPages Editor v7:
- Log in to your Shopify admin > GemPages Builder app > Pages.
- Click on the page where you want to add the Line (Divider) Element to enter the editor.
- From the left sidebar, search for this element, and drag and drop it to the desired position on your page.

- Locate the element to open its settings for further customization.

Configure the Settings tab
Under the Settings tab, you can configure the icon’s visibility as you prefer:
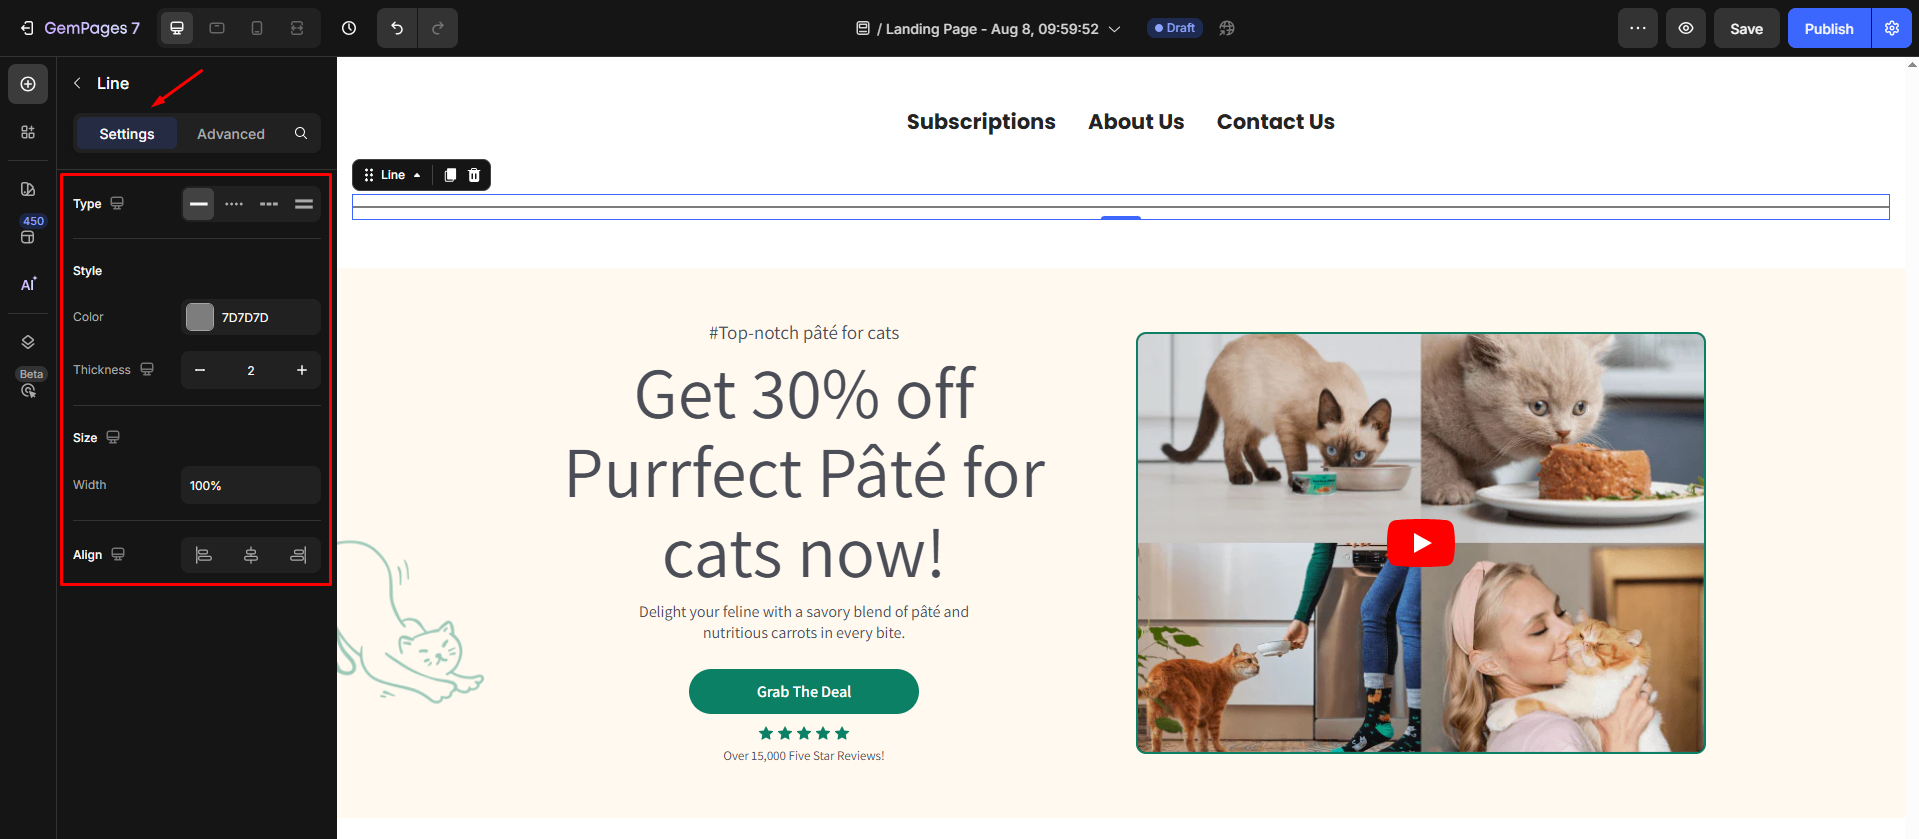
Type
Select the line style:
- Solid: A continuous line for a clean look.
- Dashed or Dotted: For a more decorative or modern appearance.

Style
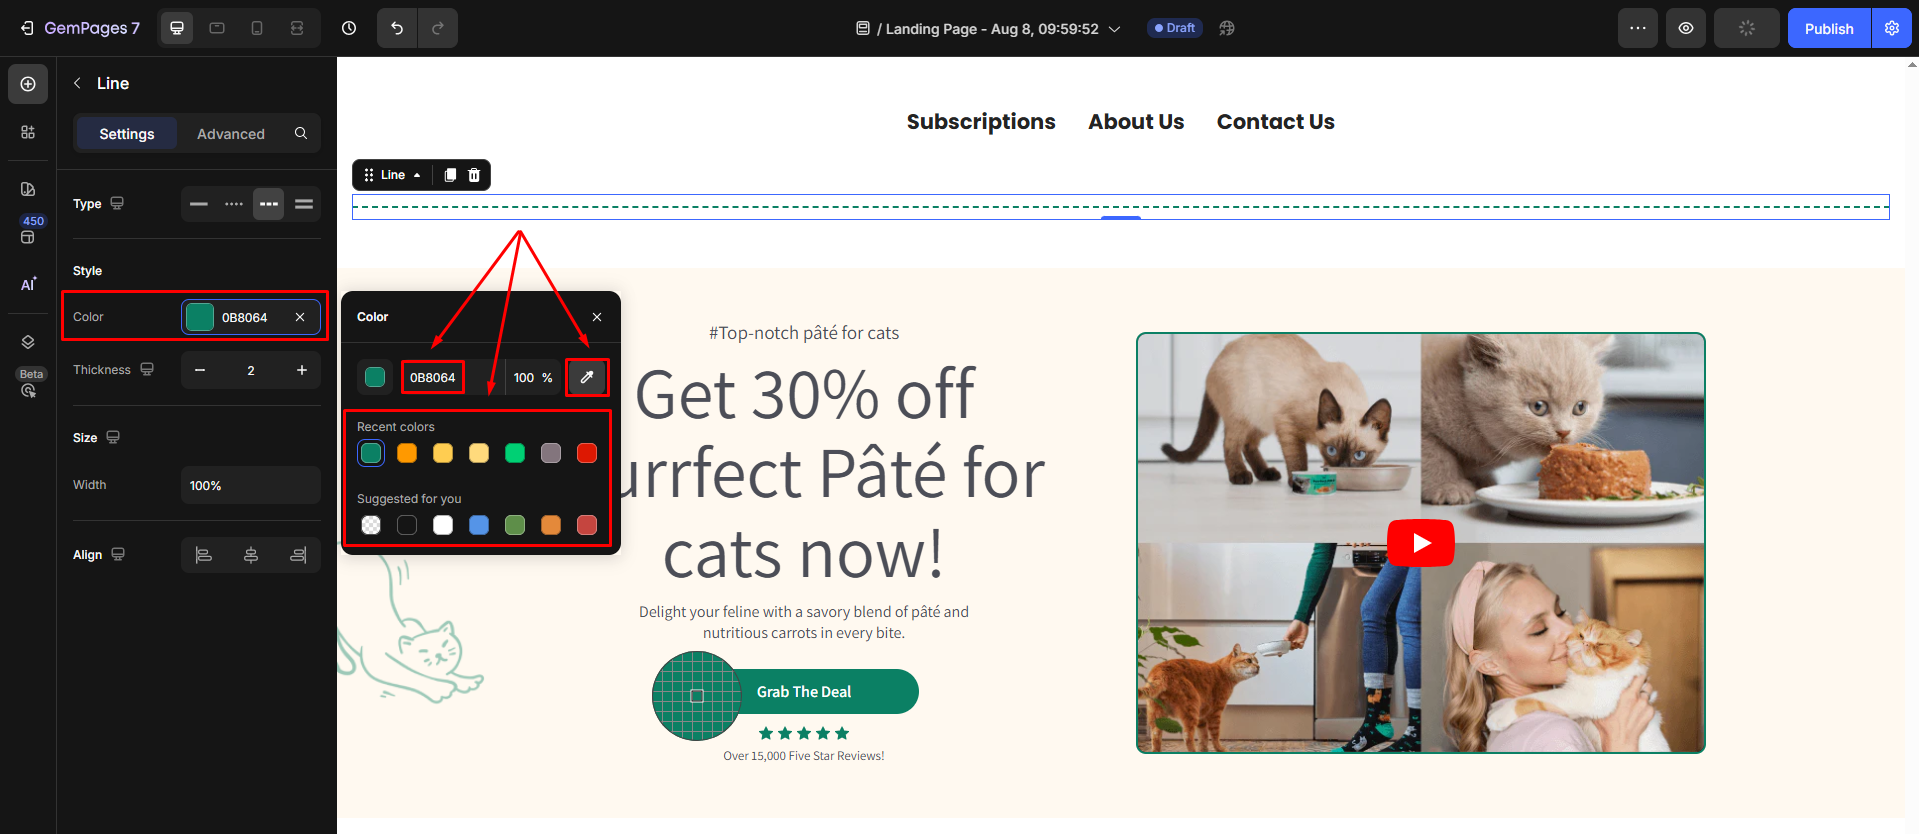
Choose a color for the line that complements your page design and branding from one of these options:
- Enter an exact color code
- Use the color picker
- Choose from the Recent colors or Suggested for you list
Also, adjust the thickness of the line to make it subtle or prominent based on your design needs.

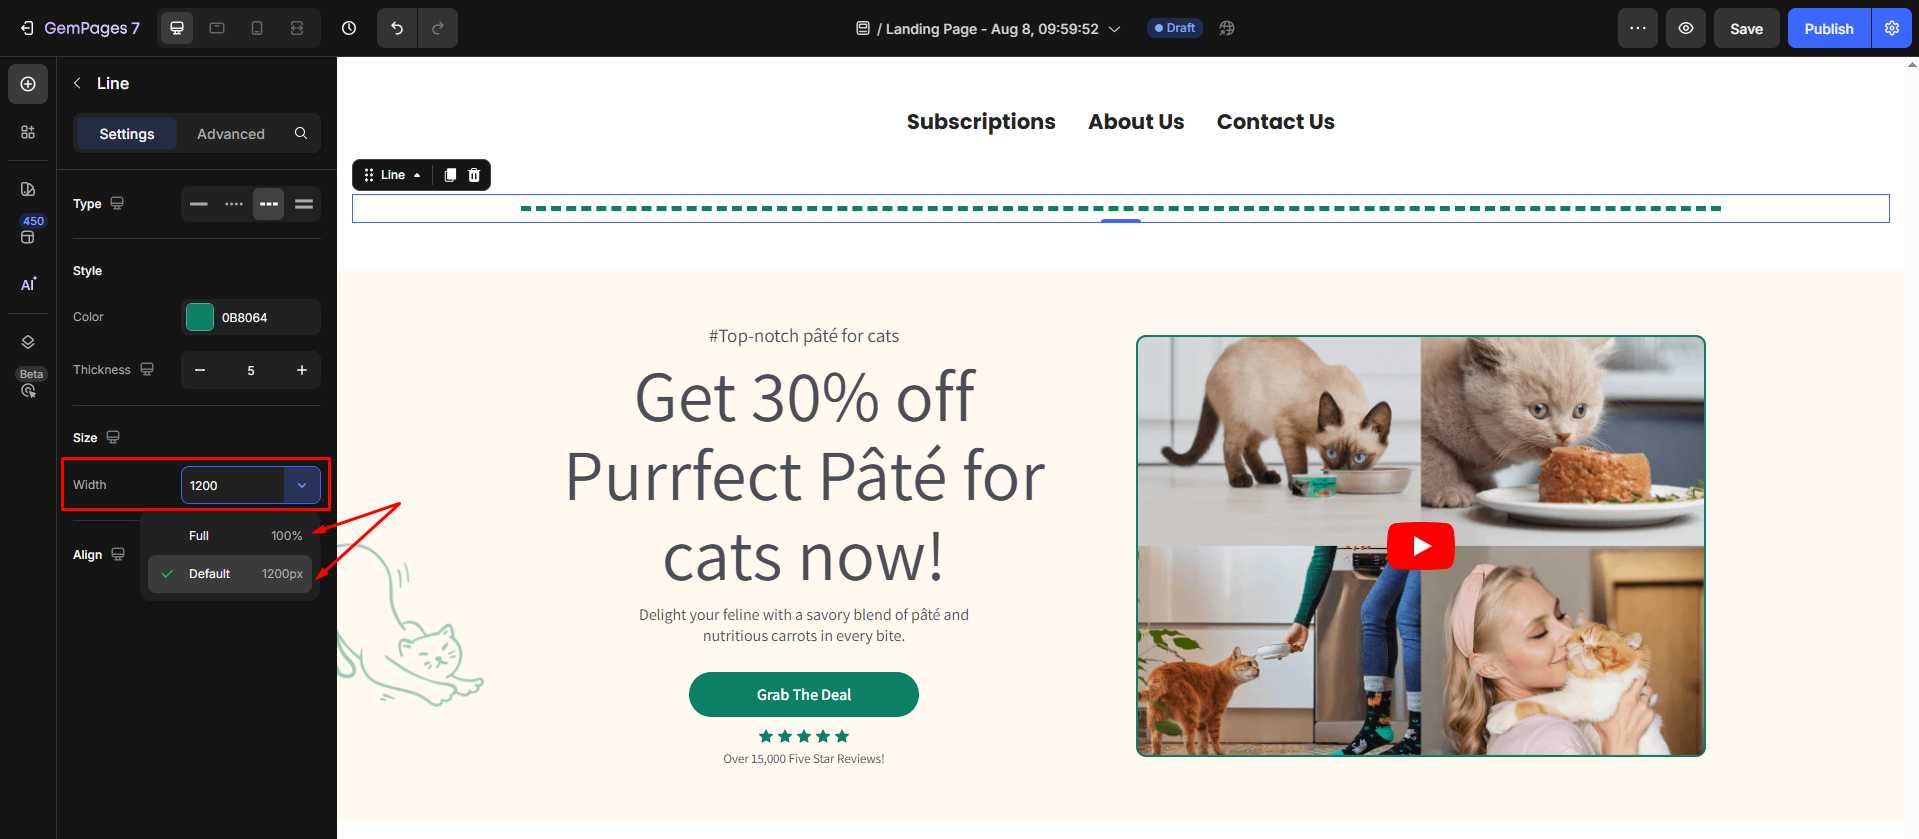
Size
Customize the line’s width depending on whether you want the line to span across the entire section or just a specific portion.
Align
Align the line to the left, center, or right to match your layout and content alignment.

Configure the Advanced tab
For more advanced customization, please navigate to the Advanced tab and follow the instructions in this article.
How to Add Spacing Above and Below the Divider?
To customize the spacing above and below the Line element in GemPages, you can easily adjust its margins. Follow these simple steps:
Step 1: Navigate to the Advanced tab.
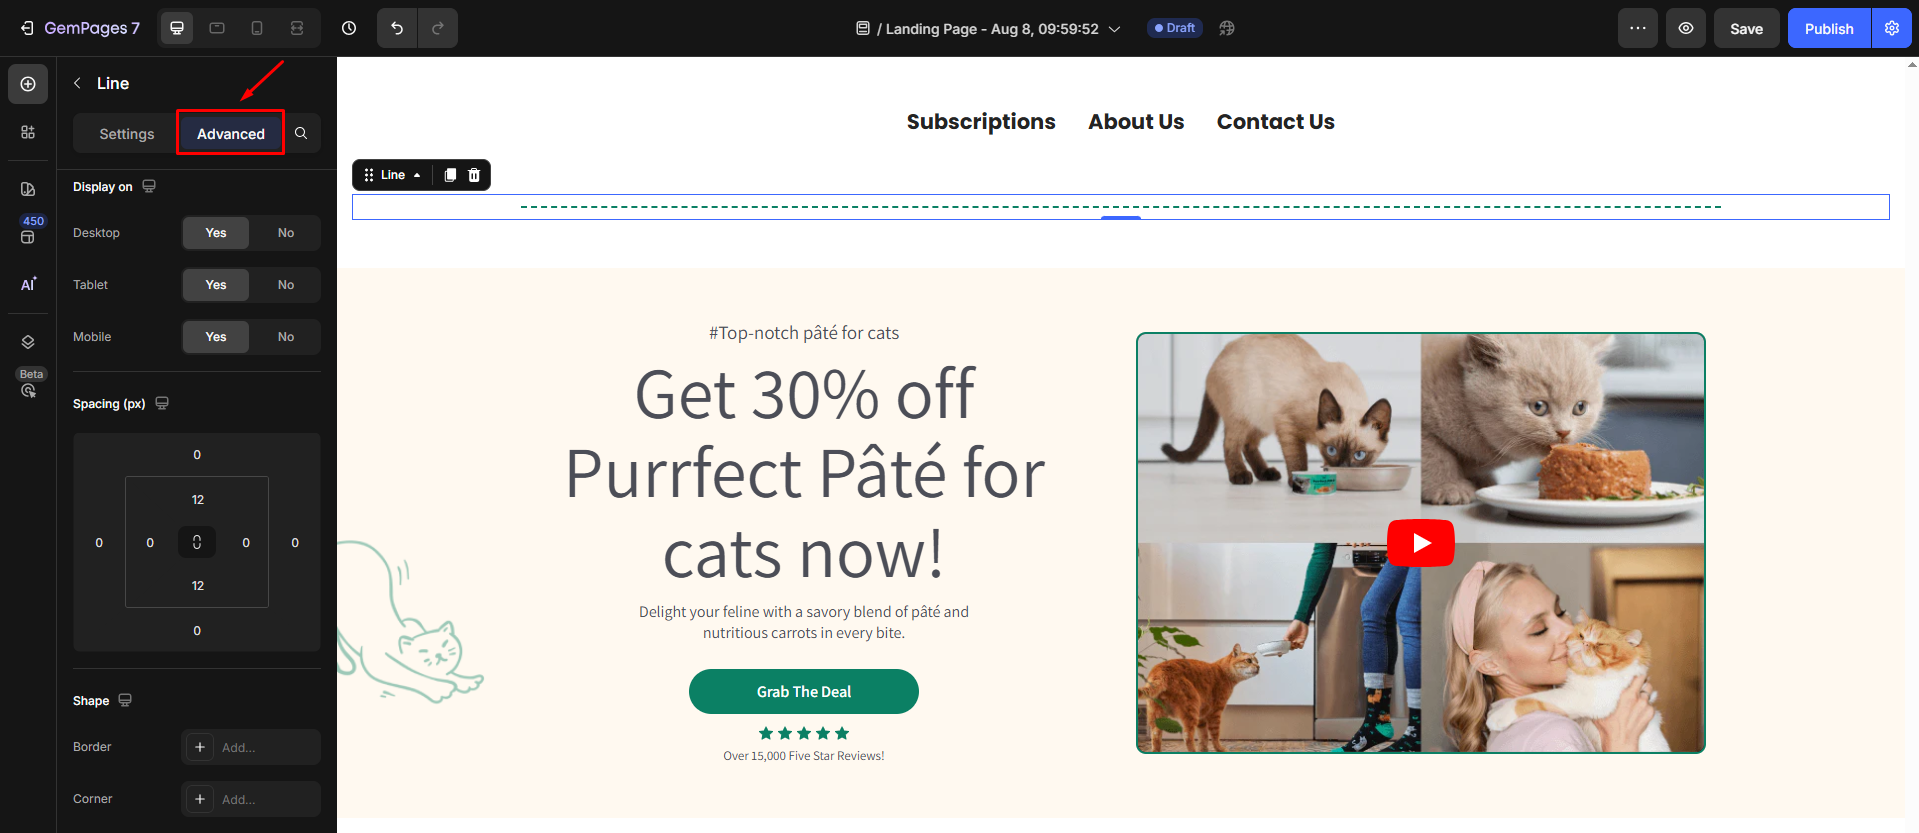
Step 2: Locate the Spacing settings under the Advanced tab.

Step 3: Modify the values for Margin Top and Margin Bottom to add the desired spacing above and below the divider.
For more information on margin and padding, refer to this article.


Thank you for your comments