


Overview of Product Assignment in GemPages
By default, Shopify only lets you use one product page template for all products. This can be limiting if you want unique layouts for different product types. With GemPages, you can easily assign a product to a template or set a default template for your entire store.
This flexibility is especially useful if you’re customizing a single bestseller, building campaign-specific landing pages, or adding products to an already-made page.
Instead of sticking with Shopify’s single-template setup, this Product Assignment feature gives you control over which products display with your custom design.
In GemPages version 7, you can:
- Set a product template as the default to apply the template to all products.
- Assign products individually to apply the template to specific products only.
This gives you full control over the layout and messaging for each product or product group, ideal for promotions, bestsellers, or unique product types.
Important note:
- The Product Assignment feature is only shown in Product Pages.
- If you prefer to assign a product to other page types, you need to add a Product Element, then select the target products under the Source/Product source section.
#1. Assign a Product to the Product Page template
Step 1: Go to Pages > Product to locate all your product pages built with GemPages’ Product Page Templates.
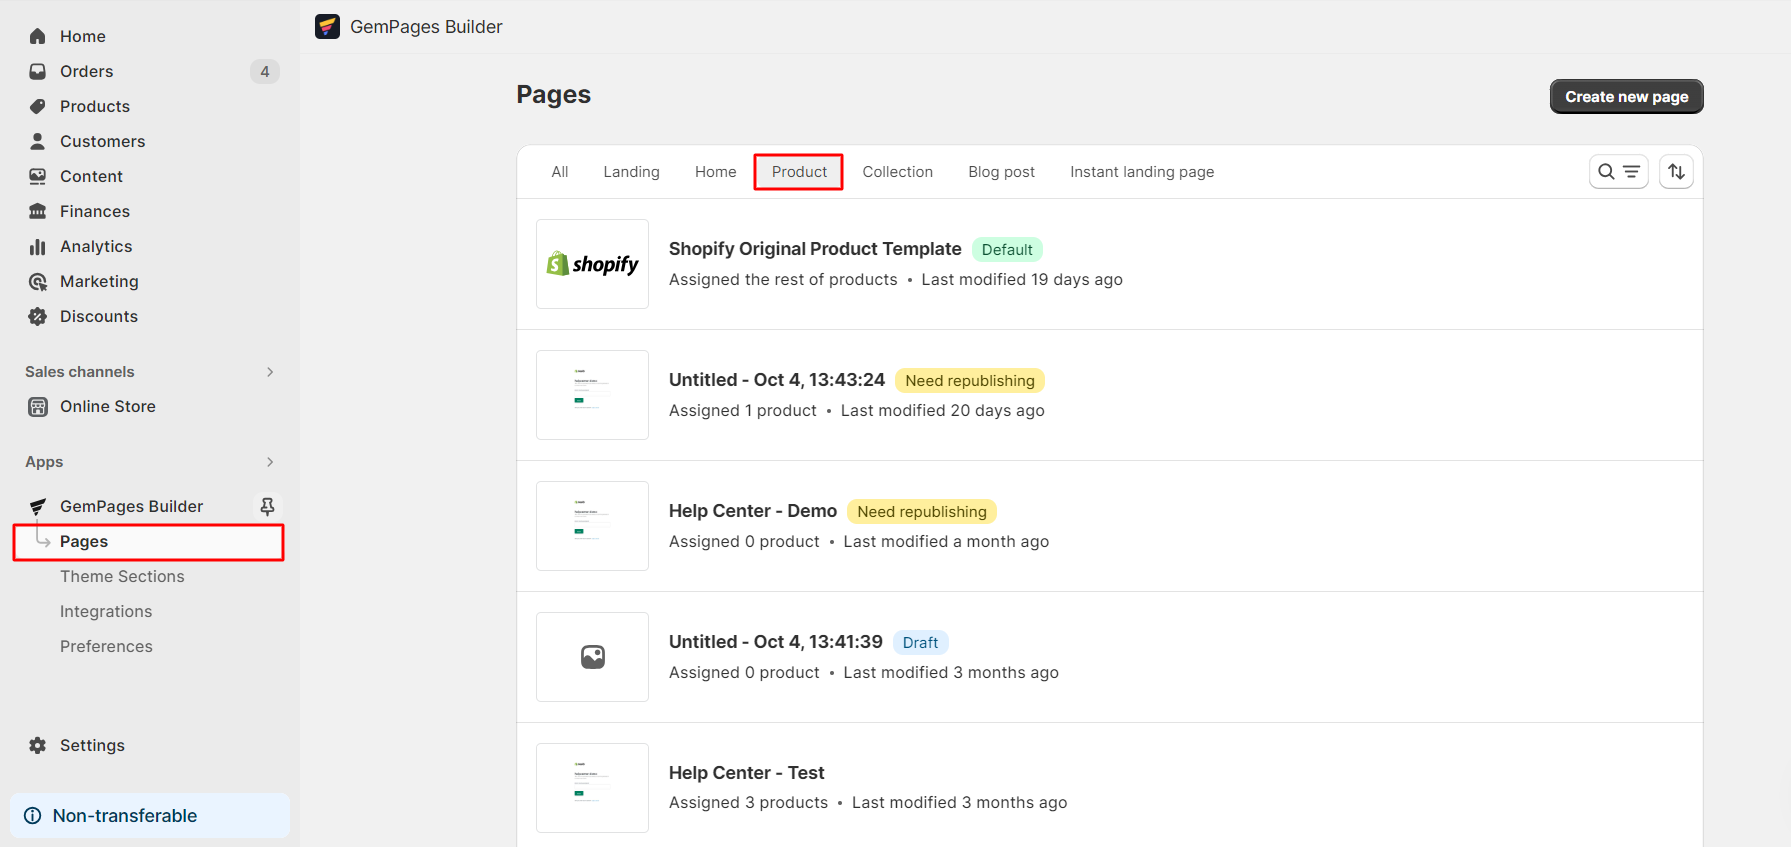
Click on your target template to which you want to assign a product to enter the editor.
Step 2: On the top bar in the GemPages Editor, you’ll see the 0 Product Assigned button.
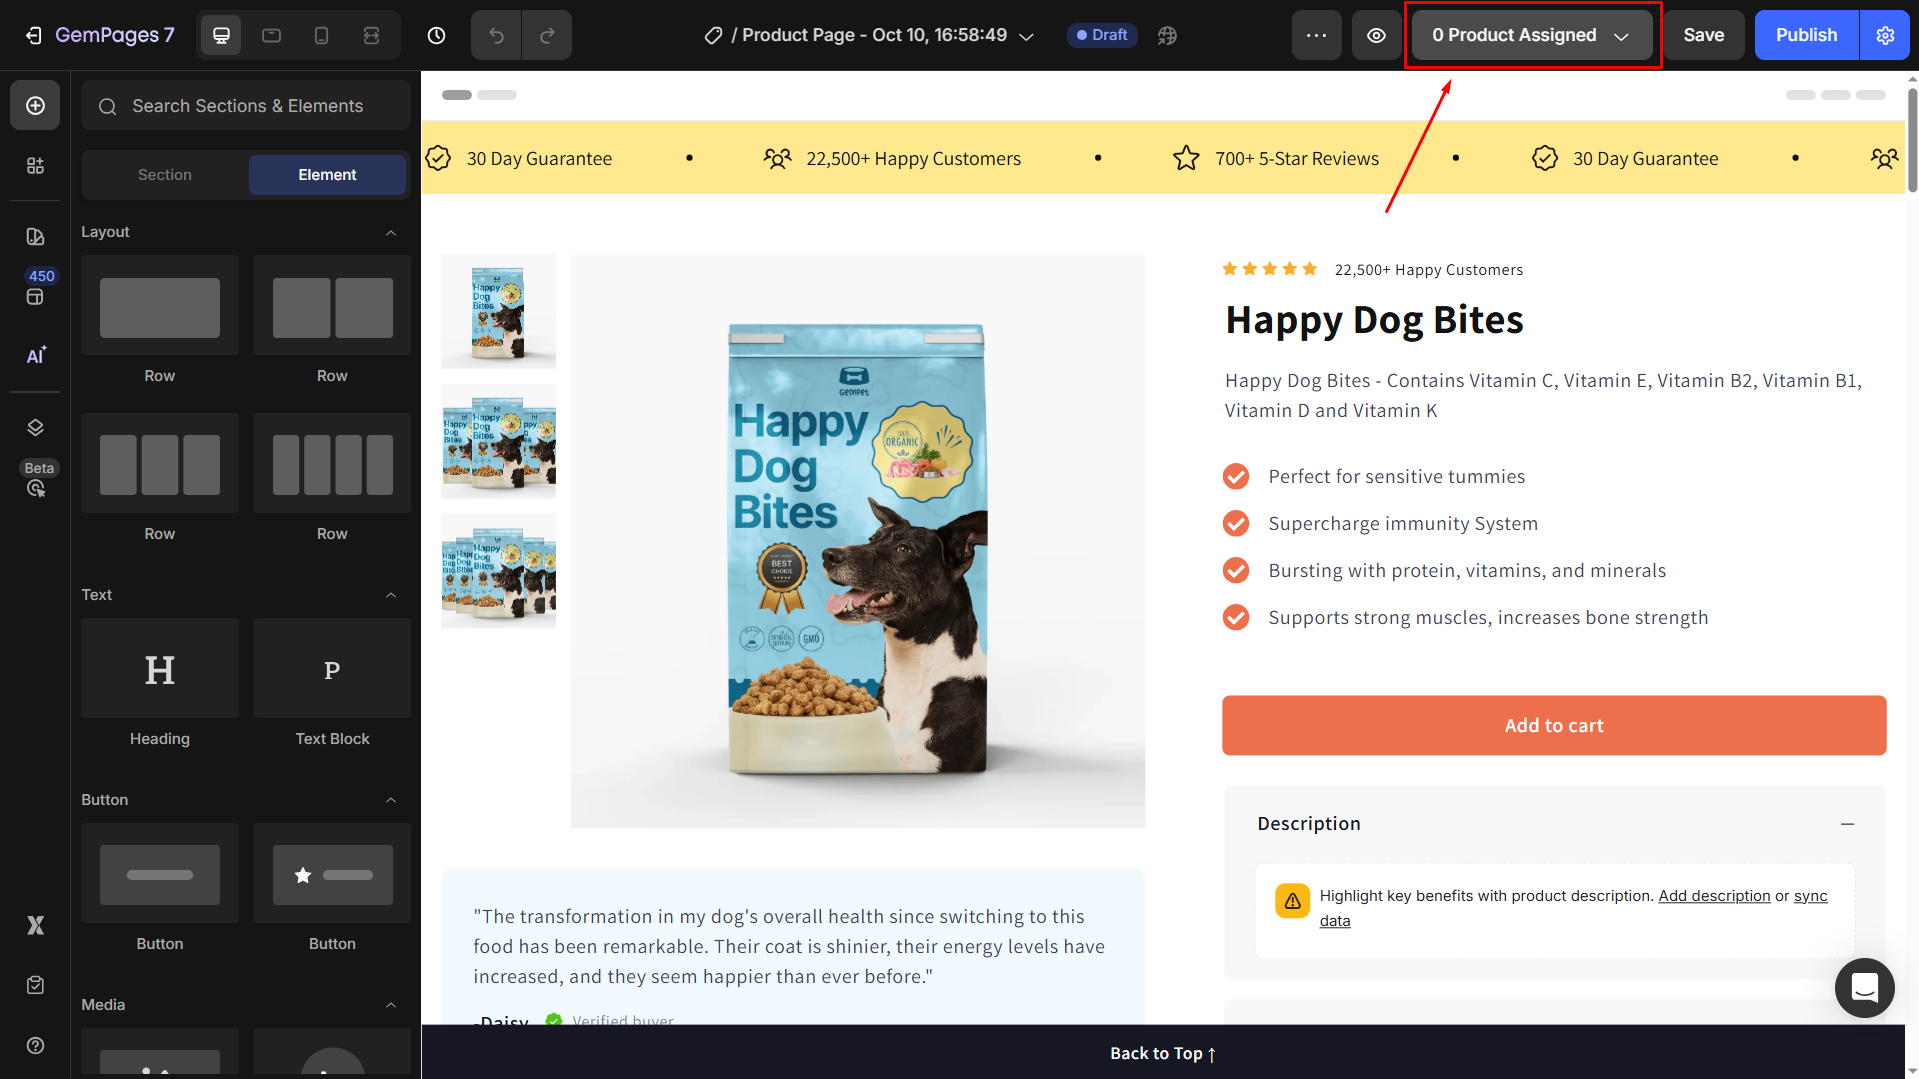
Click on it to open the product assignment settings panel.
Step 3: Select your preferred option to assign your preferred product(s) to this template.
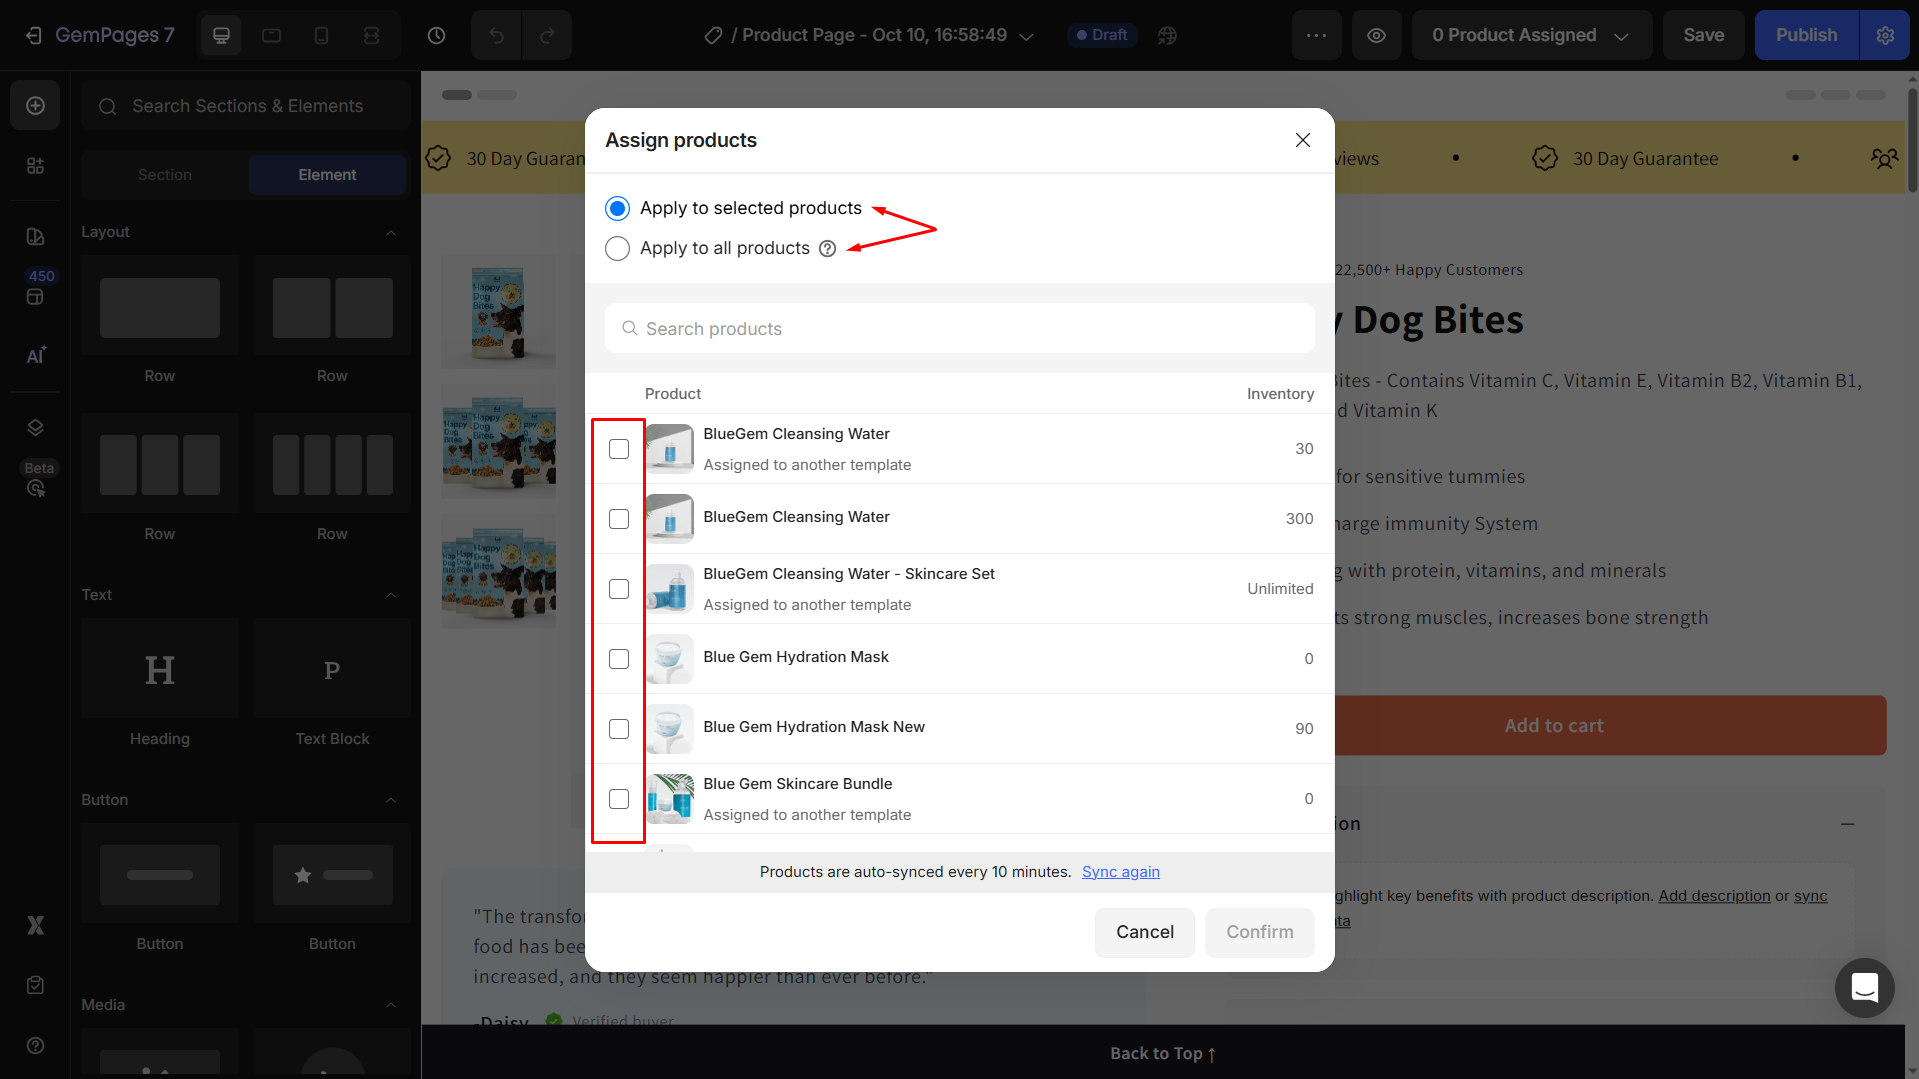
You can choose from:
- Apply to selected products
Apply this current product page template to your selected products.
After selecting, your selected products will be assigned to this template.
- Apply to all products
Apply this current template to all products on your Shopify.
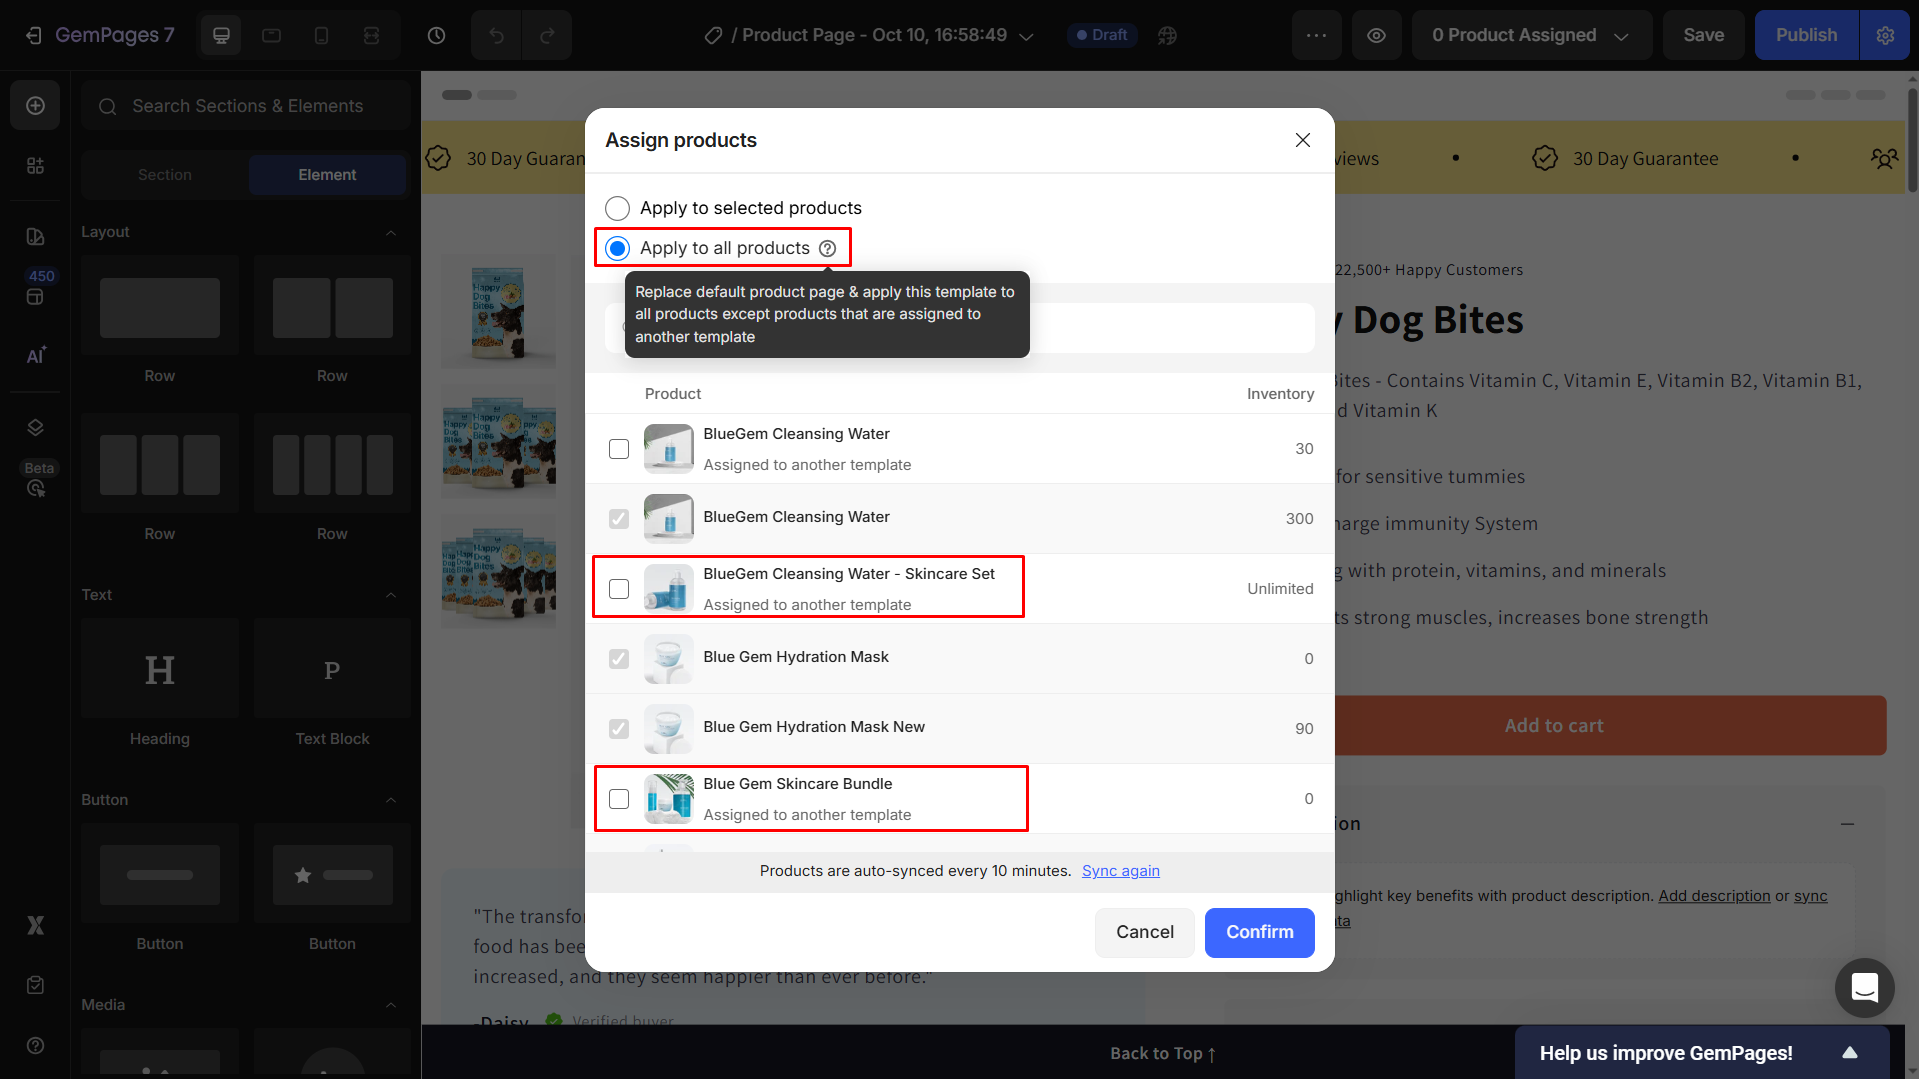
After selecting, all products (except the ones assigned to another template) will be assigned to this template.
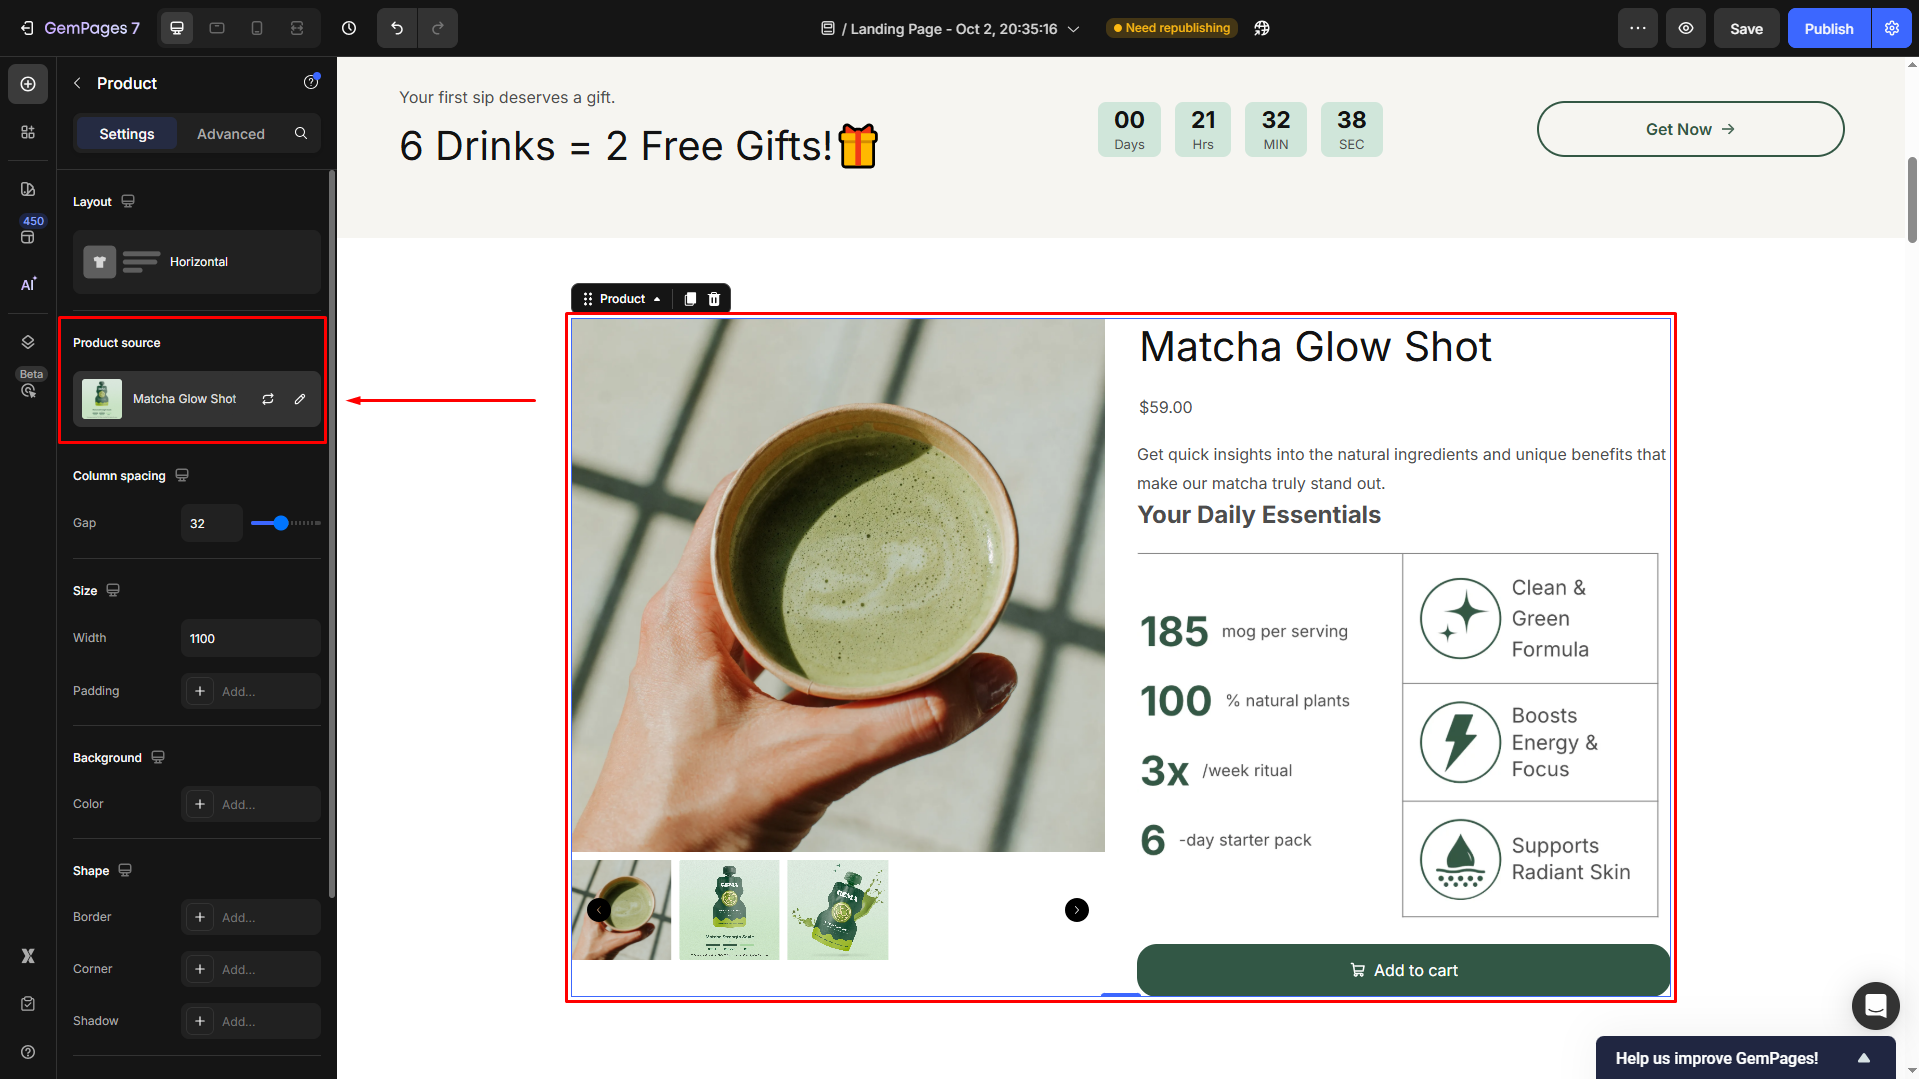
Step 4: Click on the Product Element and locate the Product source section in the settings panel.
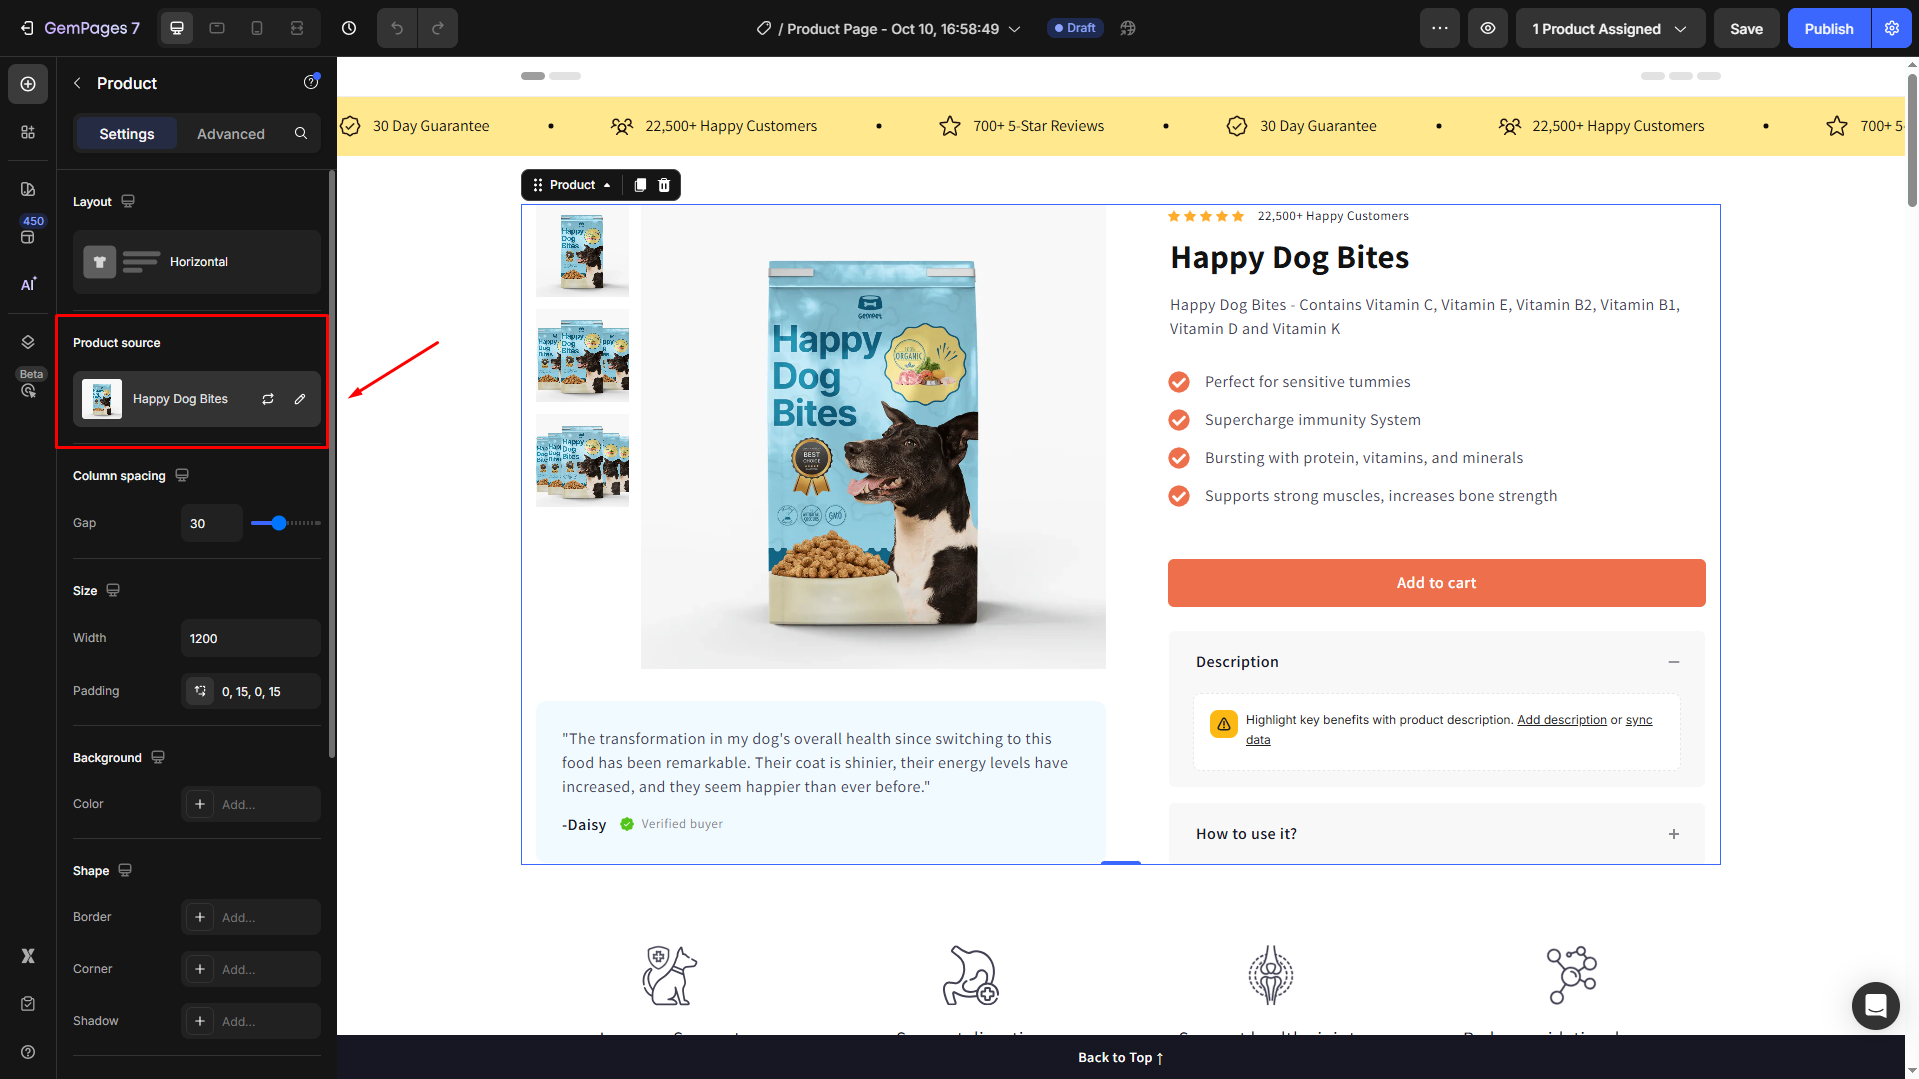
Step 5: Click on the current product and hit the Assigned tab.
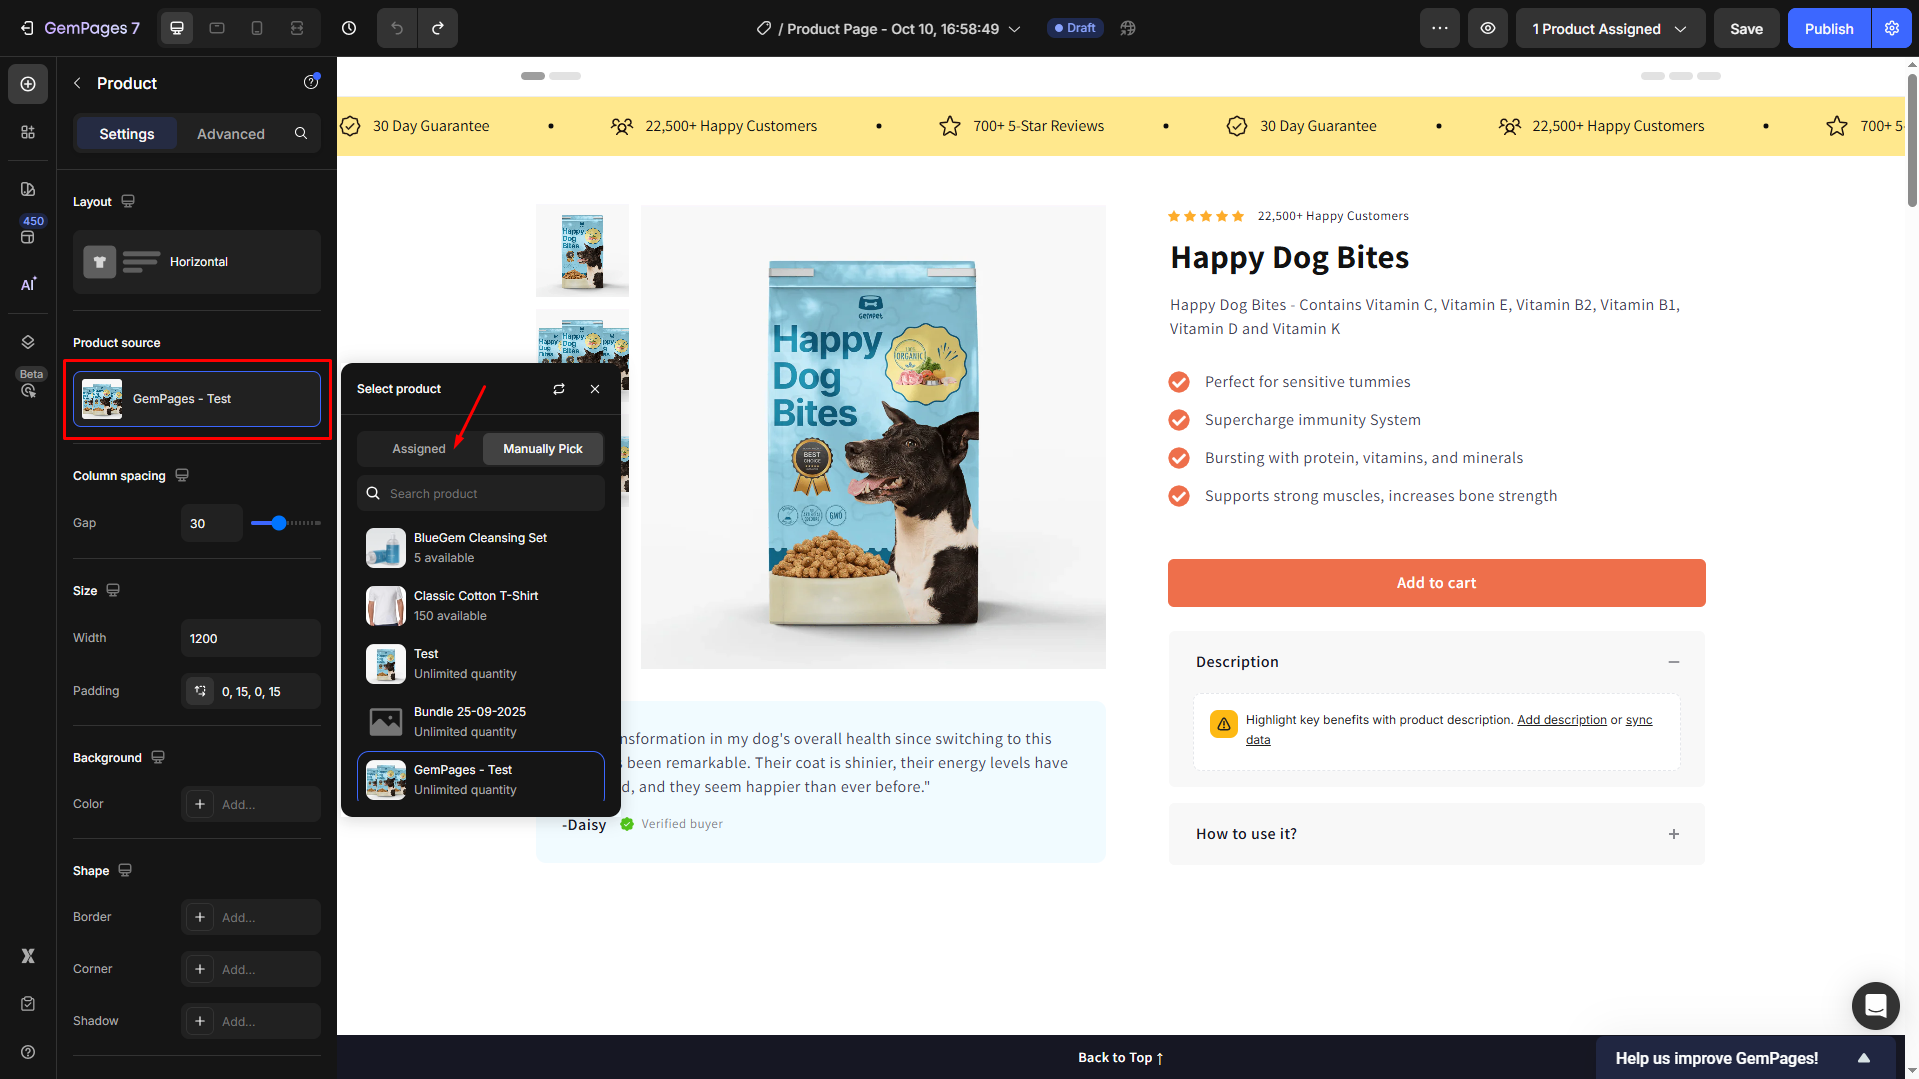
The product source will be automatically synced with the assigned product you selected in Step 3.
#2. Assign a Product to Other Page Types
Due that the product assignment feature only works on the product page template, you cannot assign a product to other page types directly.
To assign your product to other page types (i.e., landing page, homepage, etc.), you need to add a Product Element first.
Then, select the target products under the Product source section in the Product Element’s settings panel.
Can I Use the Product Assignment in the GemPages Dashboard?
For a quick assignment, you can either assign your products to a product page template in the GemPages Dashboard.
Option 1: Set a Template as the Default for All Products
Follow these steps to apply a single product template to all of your store’s products:
Step 1: From your Shopify admin, go to GemPages Builder under the Apps section.
Step 2: Navigate to the Pages section, select the Product page type, and click on your preferred template.
Step 3: Click on the three-dot button next to the template name. Choose “Make default”.
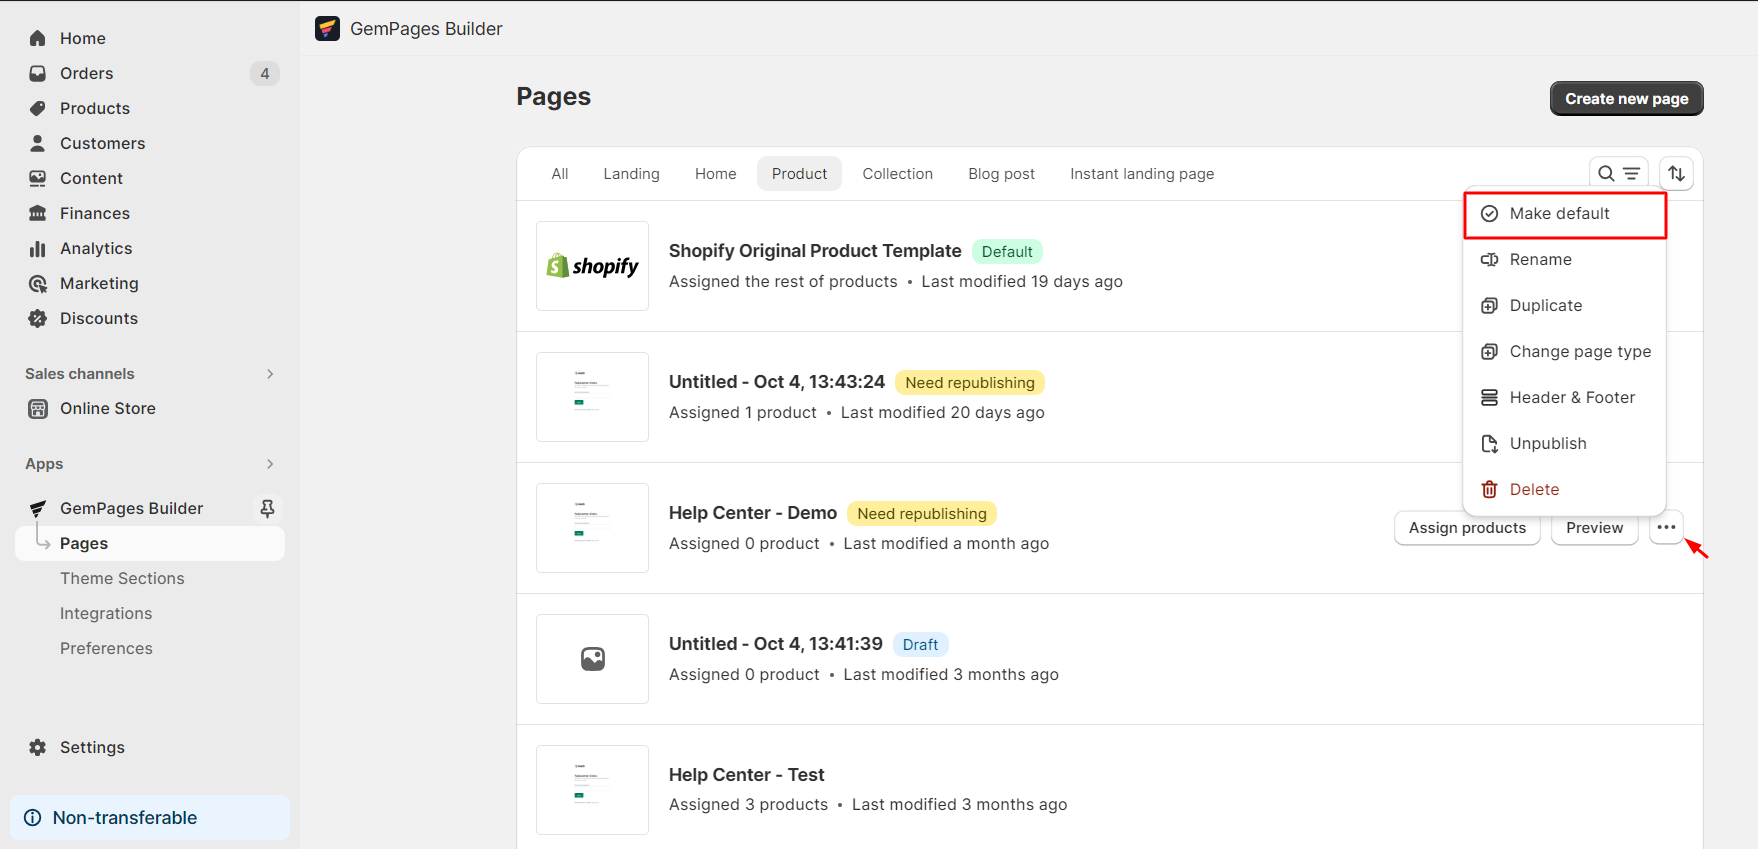
Click on “Confirm“.
Option 2: Assign Specific Products to a Template
You can also assign a custom template to selected products only, without affecting the rest of your store.
Step 1: From the GemPages Dashboard, navigate to the Page section. Select the Product page type and locate your preferred template.
Step 2: Click on the “Assign Product” button next to the template name.
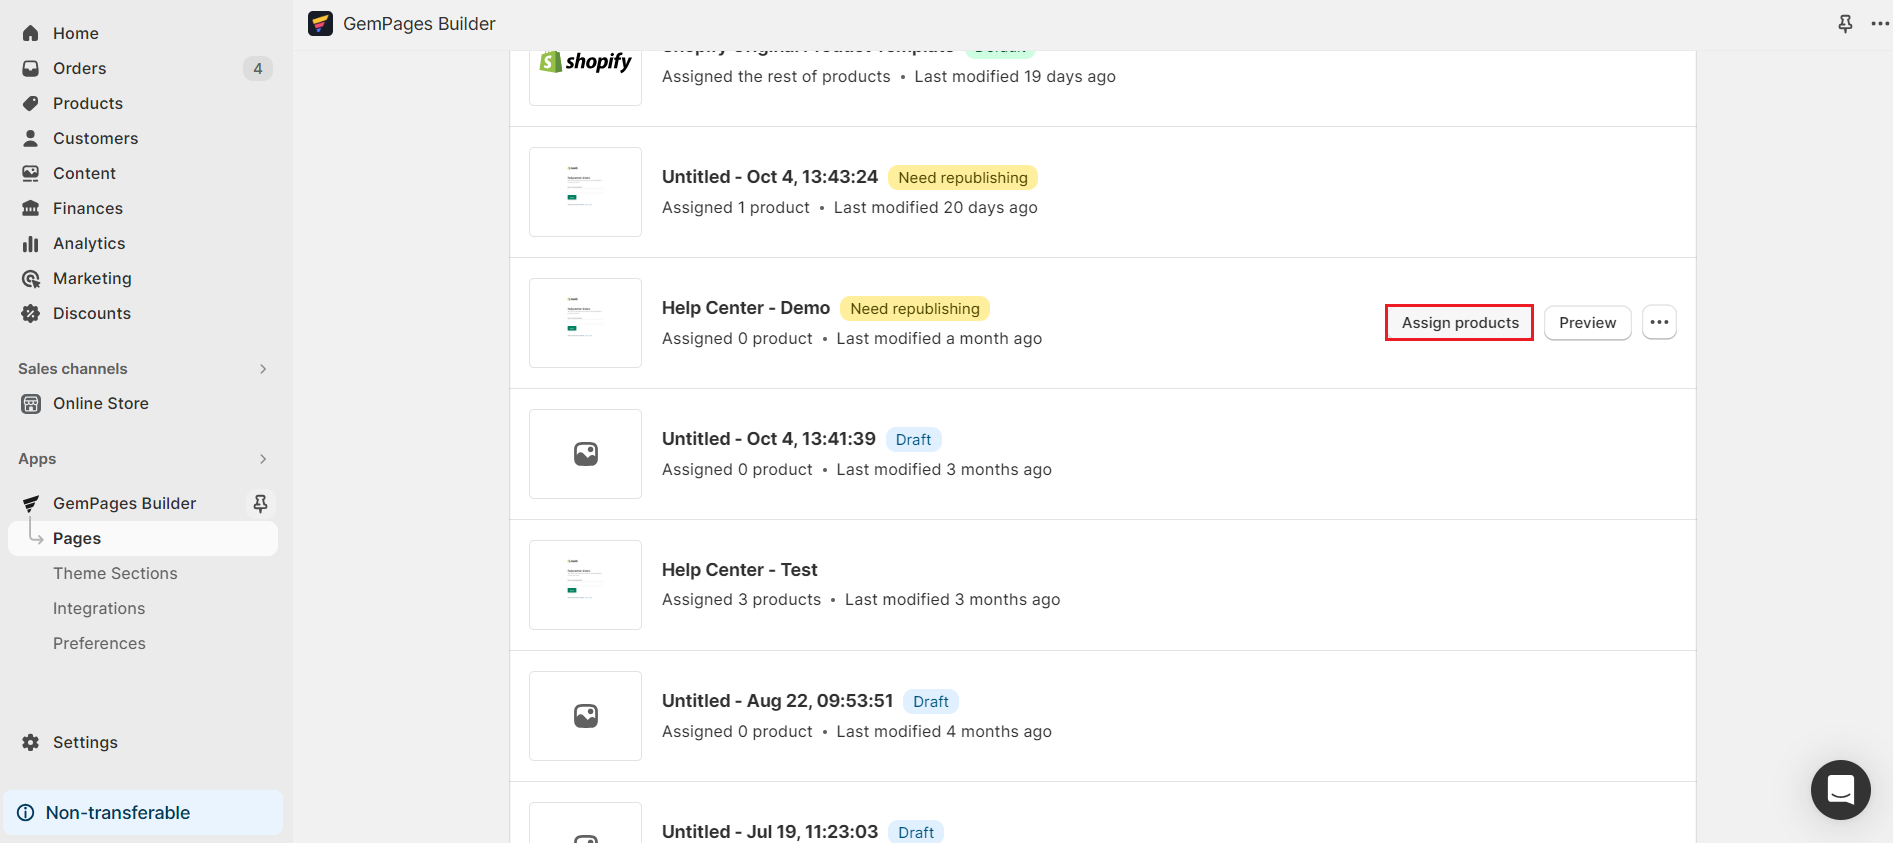
An open window will appear, allowing you to select the products.
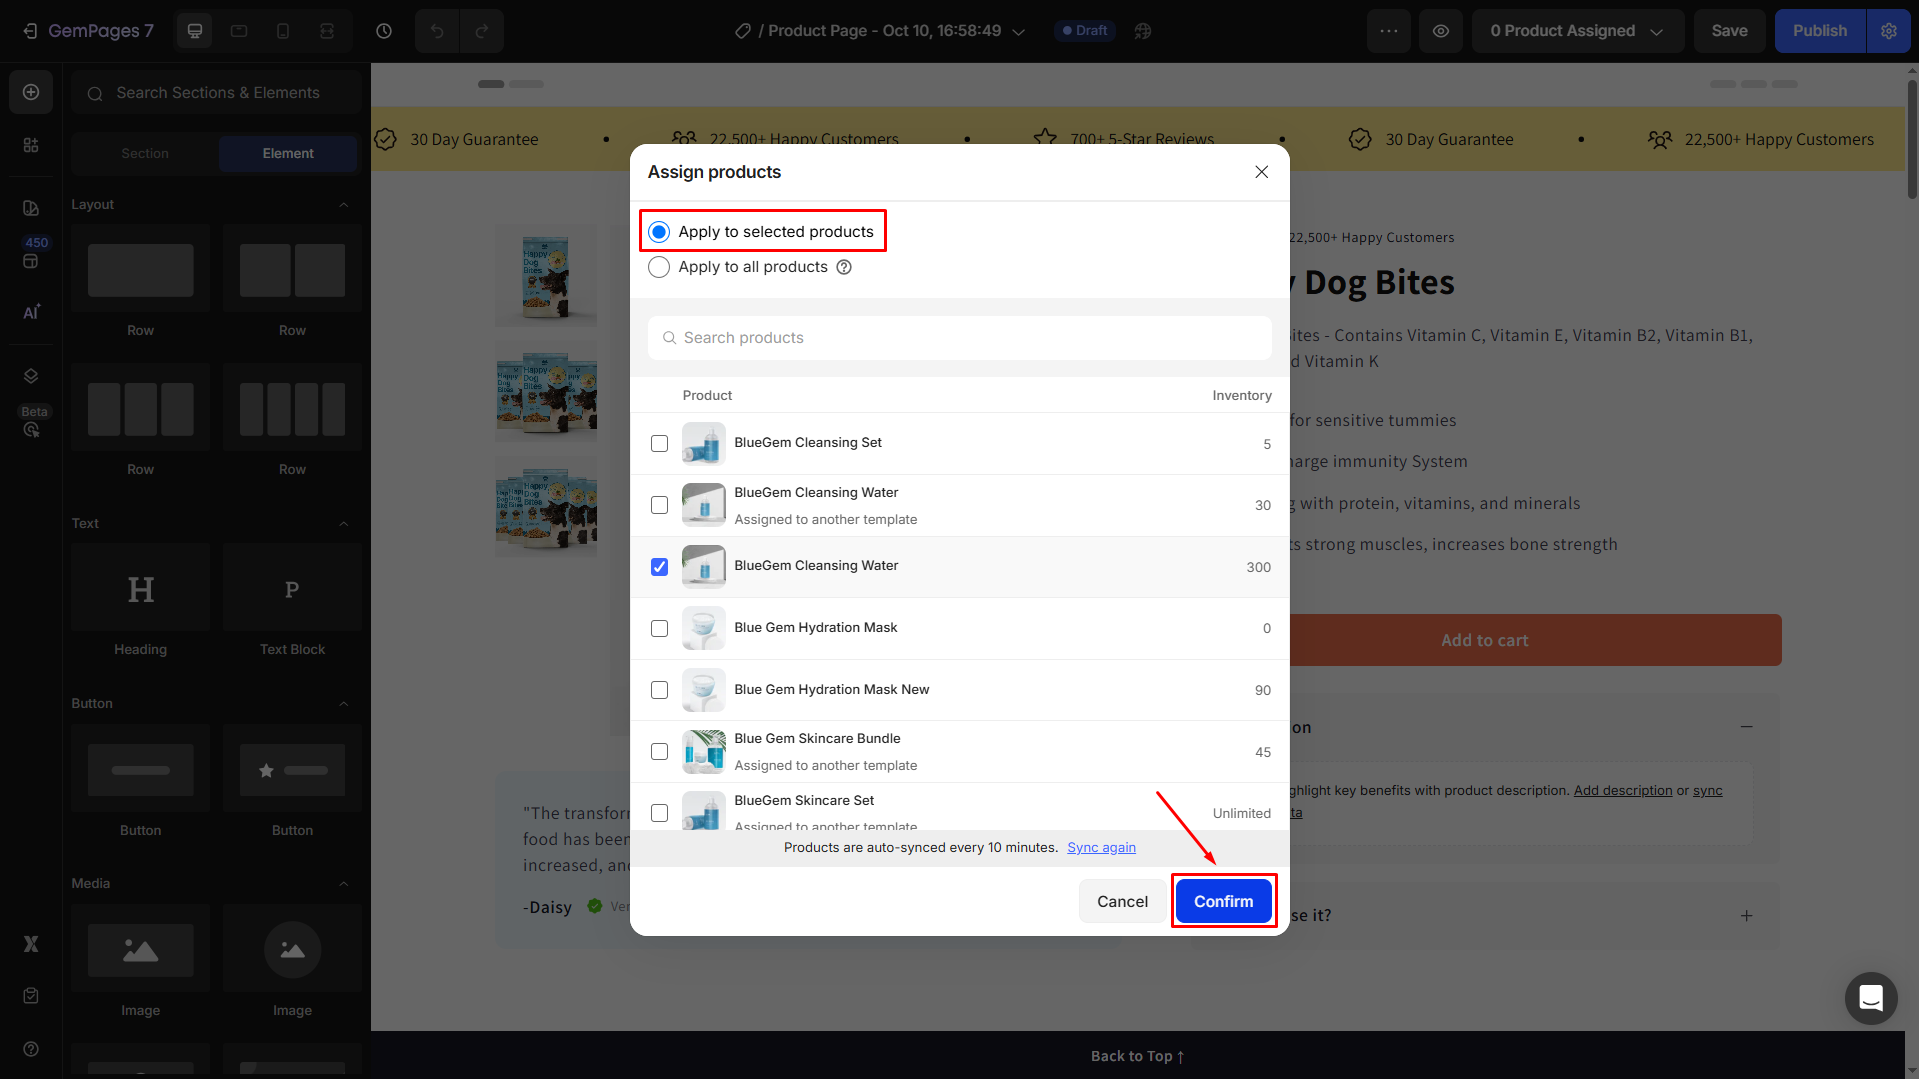
Check the box next to the products you want to assign to the template.
To find products faster, you can use the search bar.
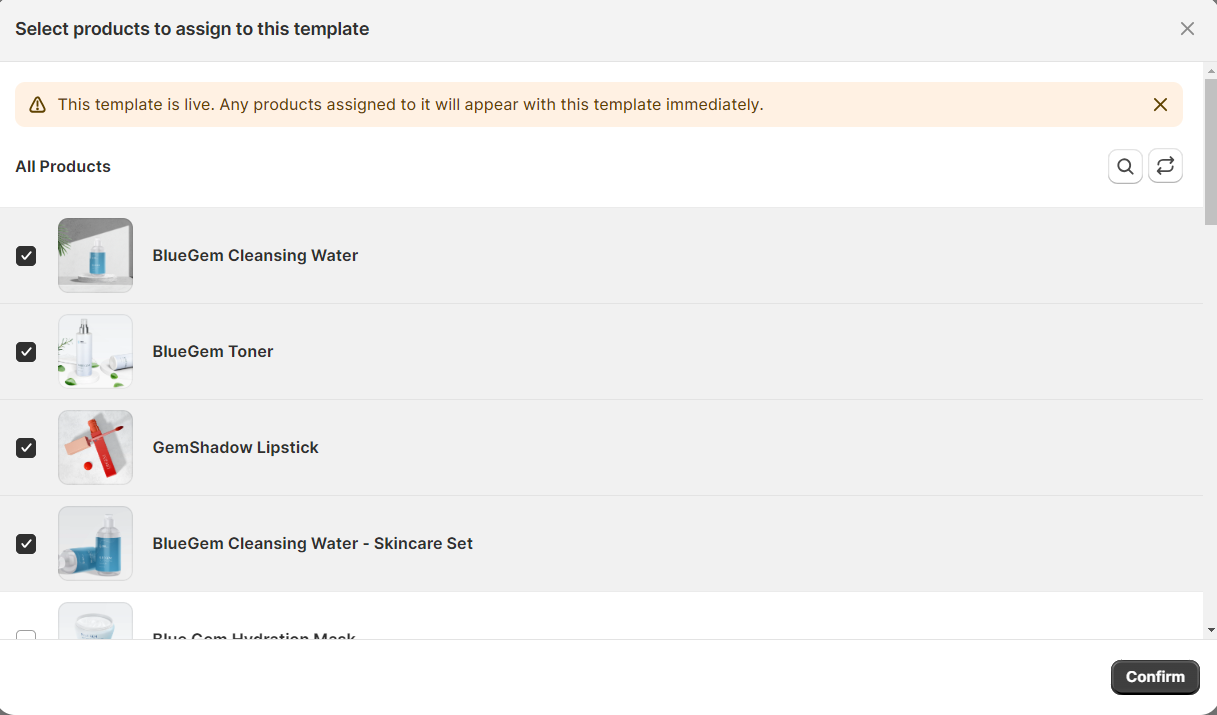
Hit “Confirm” when finished.
How to Find Which Product Is Assigned with a GemPages Template
Step 1: Open the product in Shopify
From your Shopify Admin, go to Products. Click on the product you’d like to check.
Step 2: Check the Theme Template name
- In the product details page, you will find the Theme template.
gp-template-123456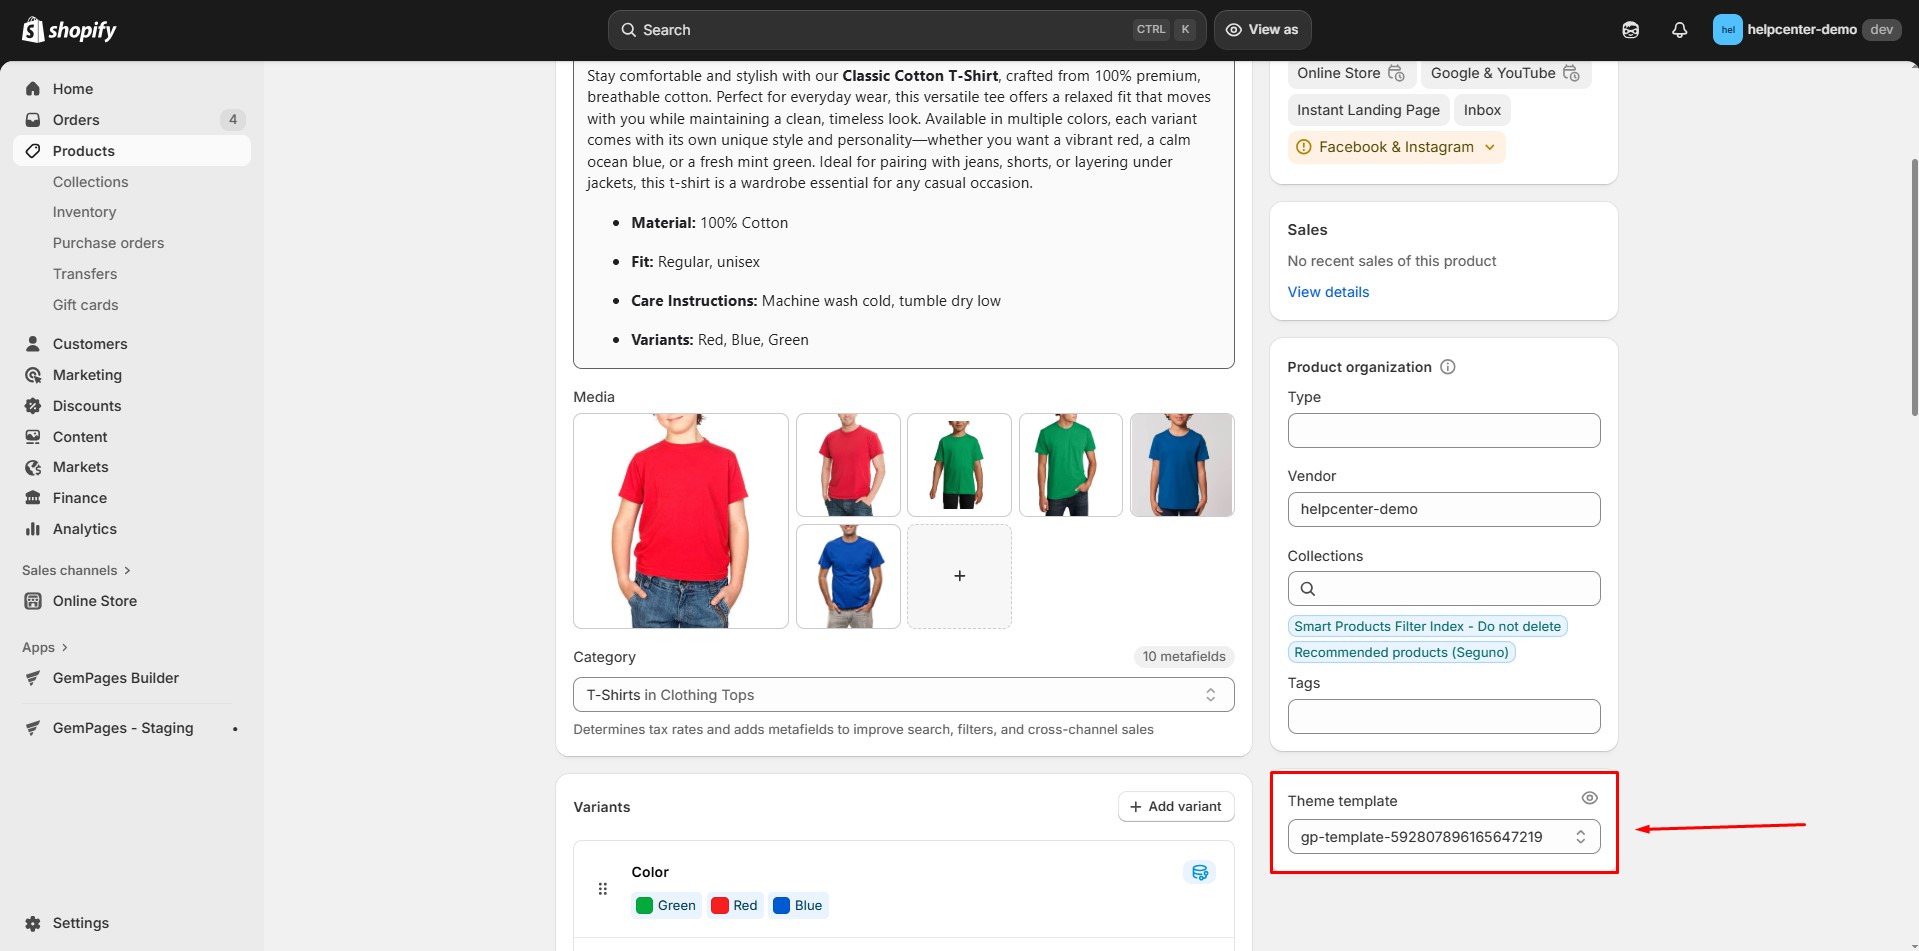
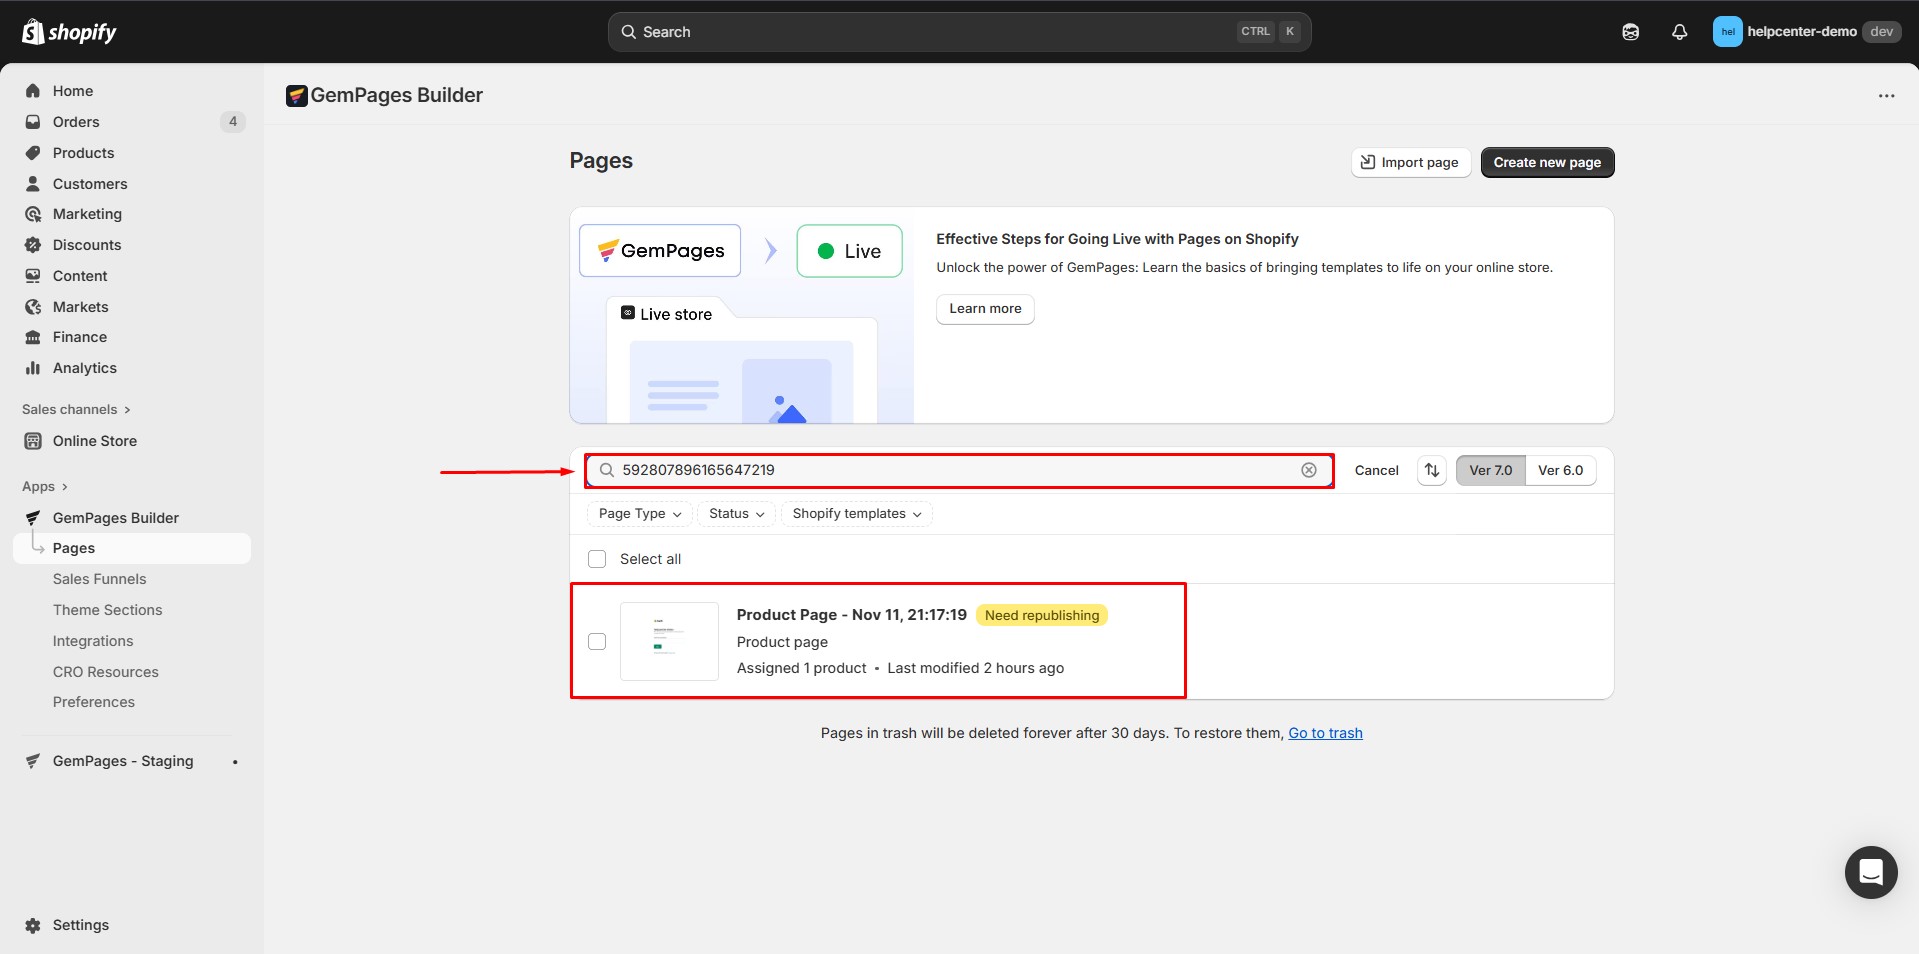
Step 3: Match the template in GemPages
Go to your GemPages Dashboard → Pages. In the search bar, paste the number you found (e.g., 123456). You’ll see the exact GemPages template that your product is using.
FAQs about Product Assignment in GemPages
1. What’s the difference between “Make default” and “Assign product”?
- Make default: Apply the template to all product pages.
- Assign product: Apply the template only to selected product(s), without affecting the others.
2. Why isn’t my assigned product showing on the live page?
If your assigned product doesn’t appear on the live page after linking it to a template, try these steps:
- Ensure the template is published (live).
- Double-check that “Display by assigned product” is enabled in the Product Element. If not, products may not display correctly, and you’ll see the system warning: “Your products may not display correctly on the live store, due to the product source of one product element hasn’t been set to ‘assigned’.”
- Make sure the product is active and available on the Online Store channel in your Shopify Admin.
If the issue persists, try reassigning the product or syncing the product again, then republishing the page.
3. Can I assign the same product to multiple templates?
No. A product can only be linked to one GemPages template at a time. Reassigning it to another template will override the previous assignment.
4. Will changing the default template override product-specific assignments?
Yes. Setting a new default template will apply it to all products, including those previously assigned to other templates. Use this action with caution.
5. Can I show different products on different landing pages using the same template?
Yes. However, you need to duplicate the landing page template manually. Then, on each page, add a Product Element and select the target product in the Product source section.


Thank you for your comments