


This article shows you how to make your product image full-width, covering the entire screen width (and optionally height) for a modern, clean, and visually impactful design.
Step 1: Access the GemPages Editor
- Log in to your Shopify Admin.
- Go to Apps > GemPages Page Builder > Pages.
- Select Product to locate all your product pages built with GemPages.
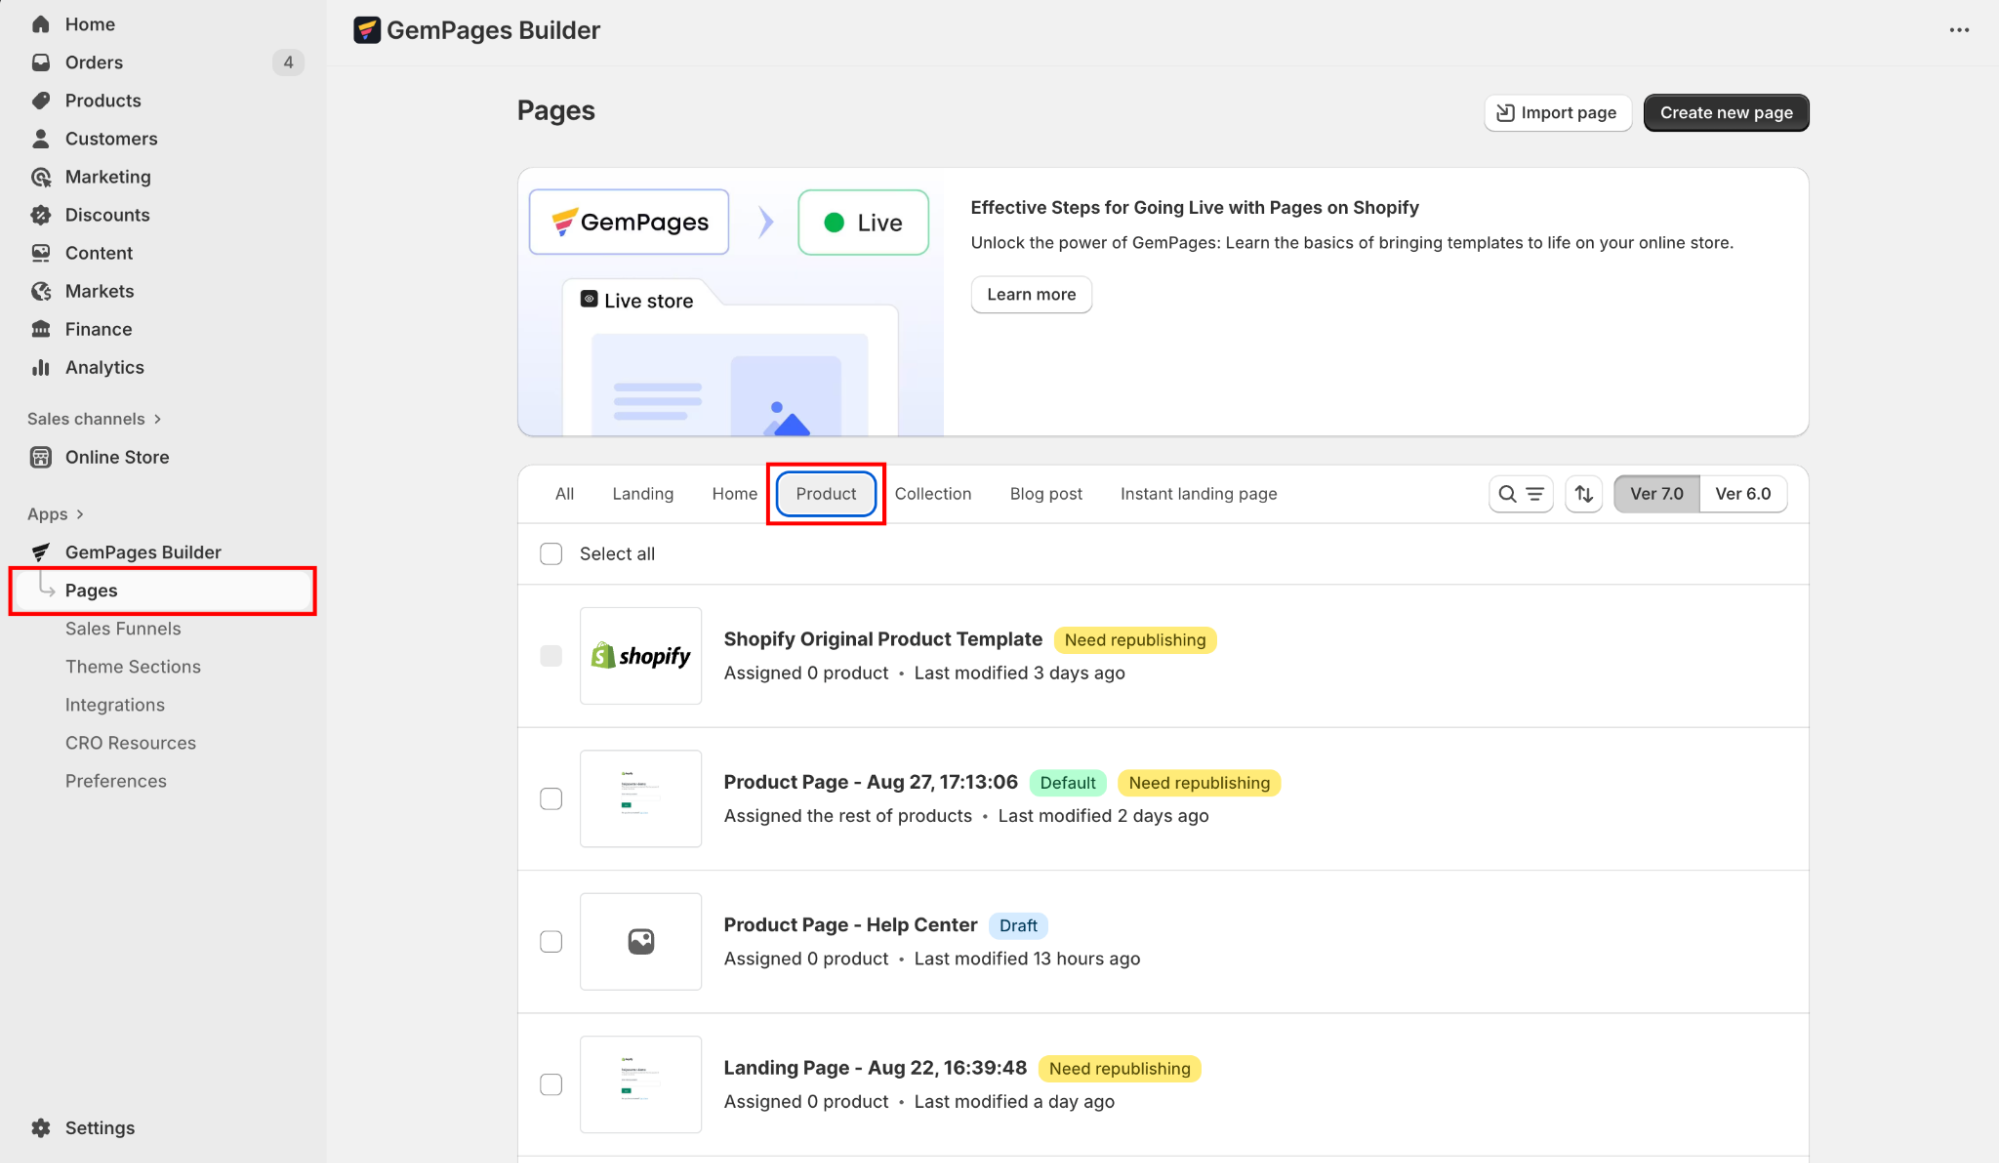
- Click on the target page to enter the editor.
Step 2: Use a Full-Width Section
Everything starts with the container. If the section isn’t full-width, the image won’t be either.
- Click on the Row containing the product image.
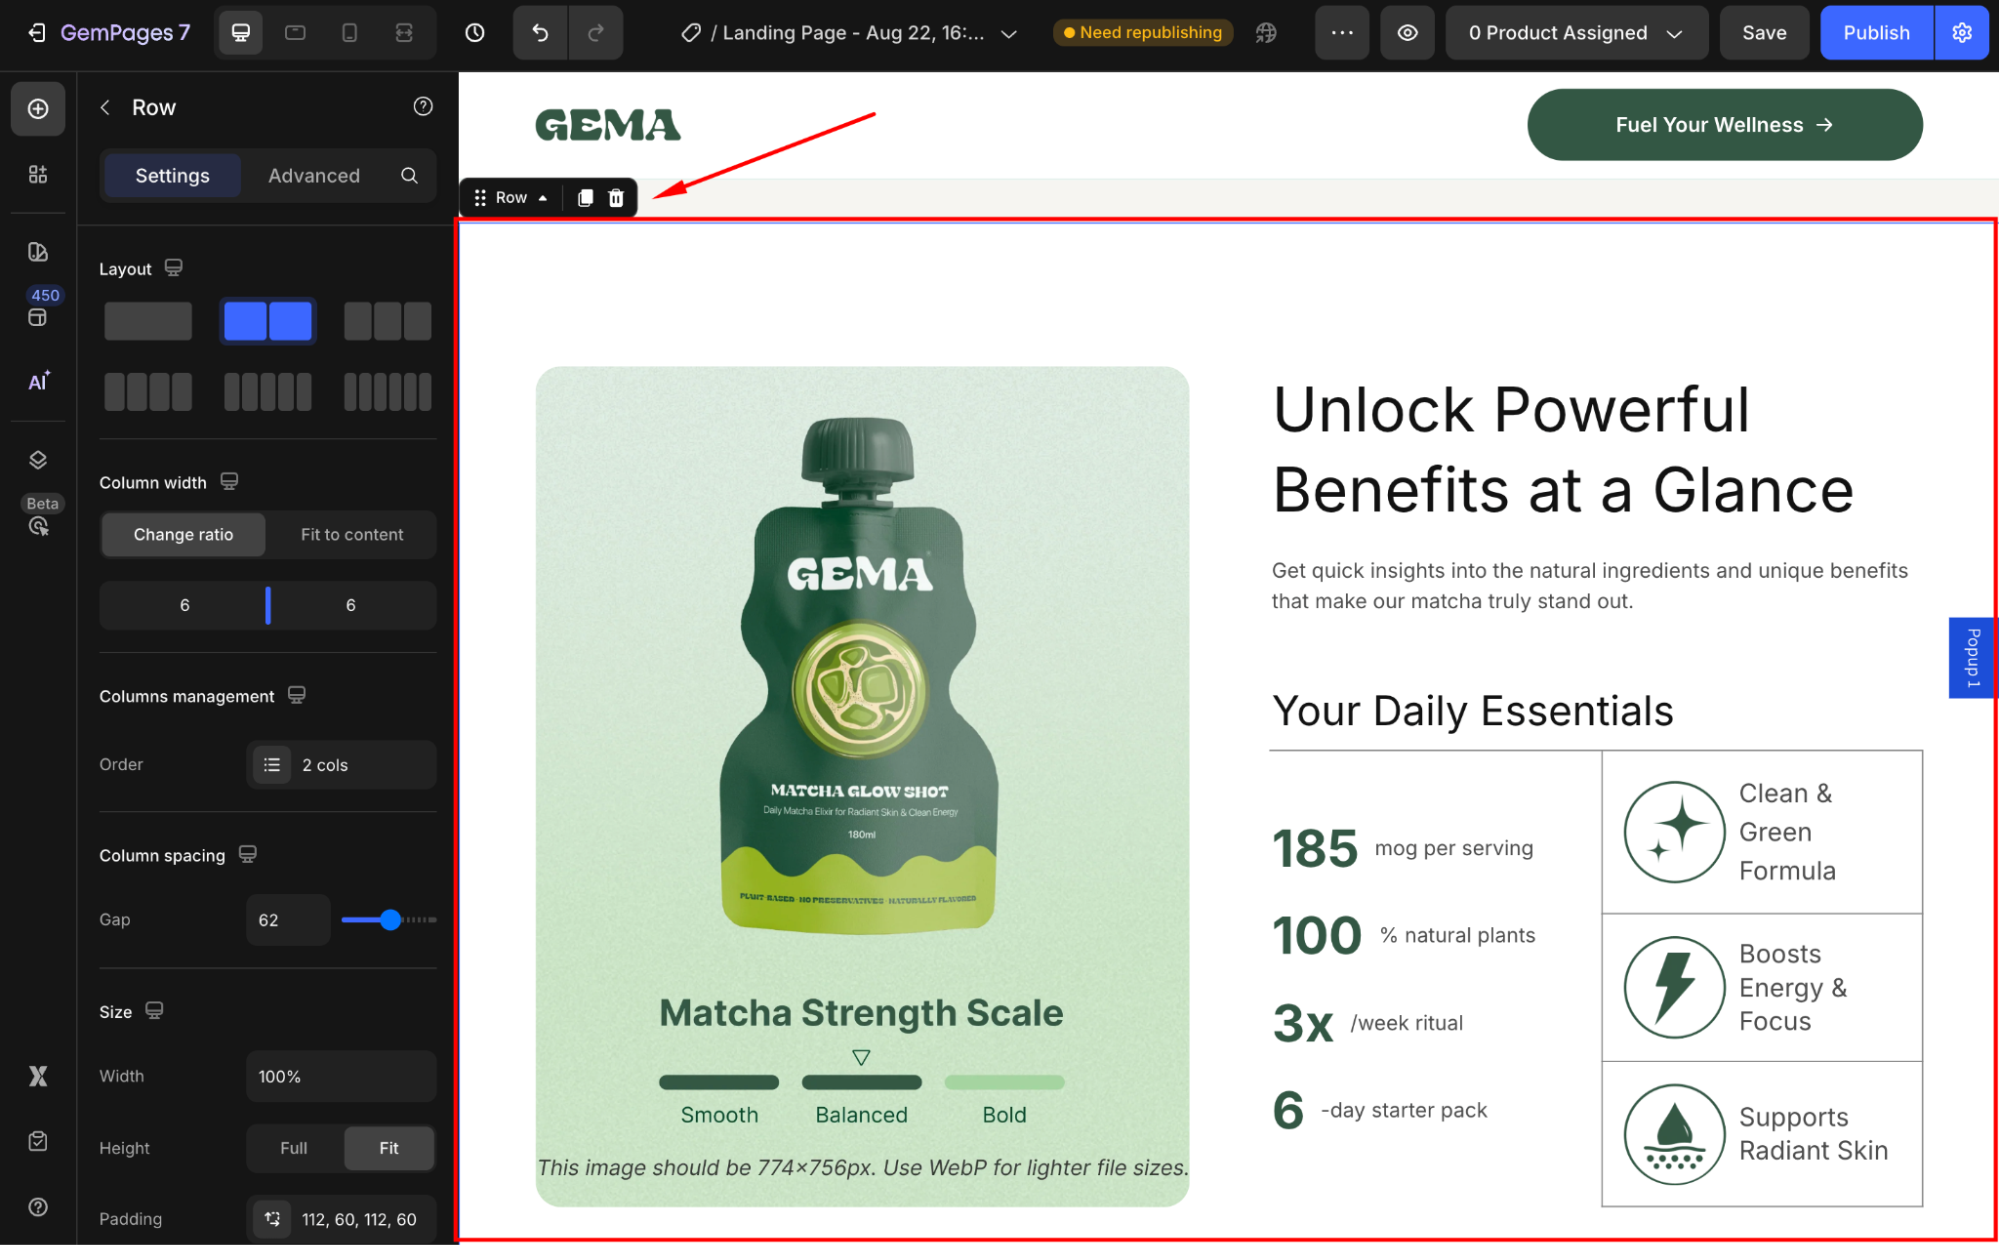
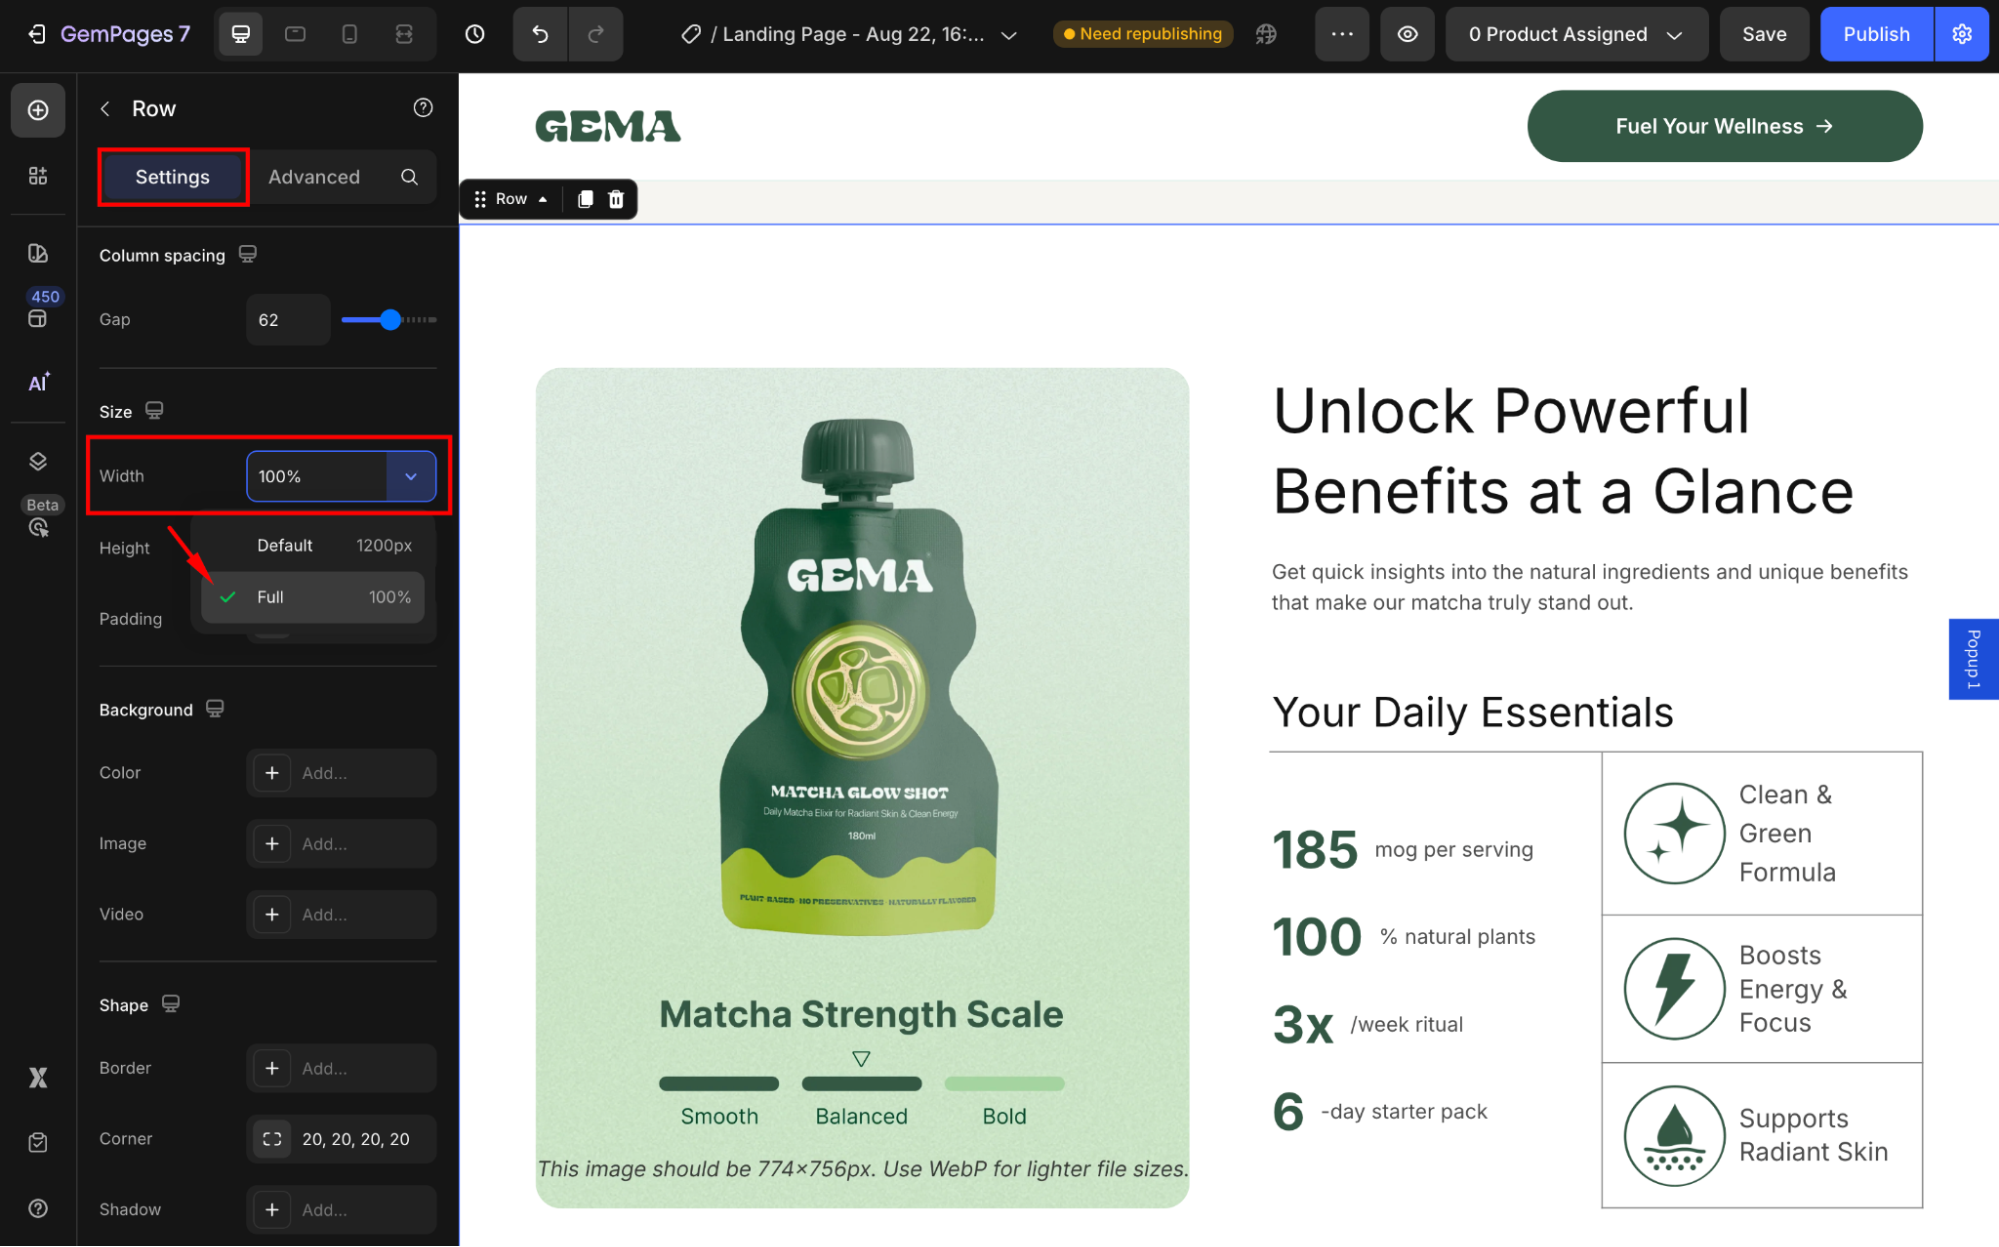
- Under the Settings tab on your left sidebar, scroll down to the Size section and ensure the Width = Full (100%).
Note: The section stretches across the browser window.
Step 3: Insert or Edit the Product Image Element
You can either:
- Customize the built-in Product Image Element in your Product Module, OR
- Use a standalone Image Element for more control and add a dynamic product image as content.
Inside a Product Module
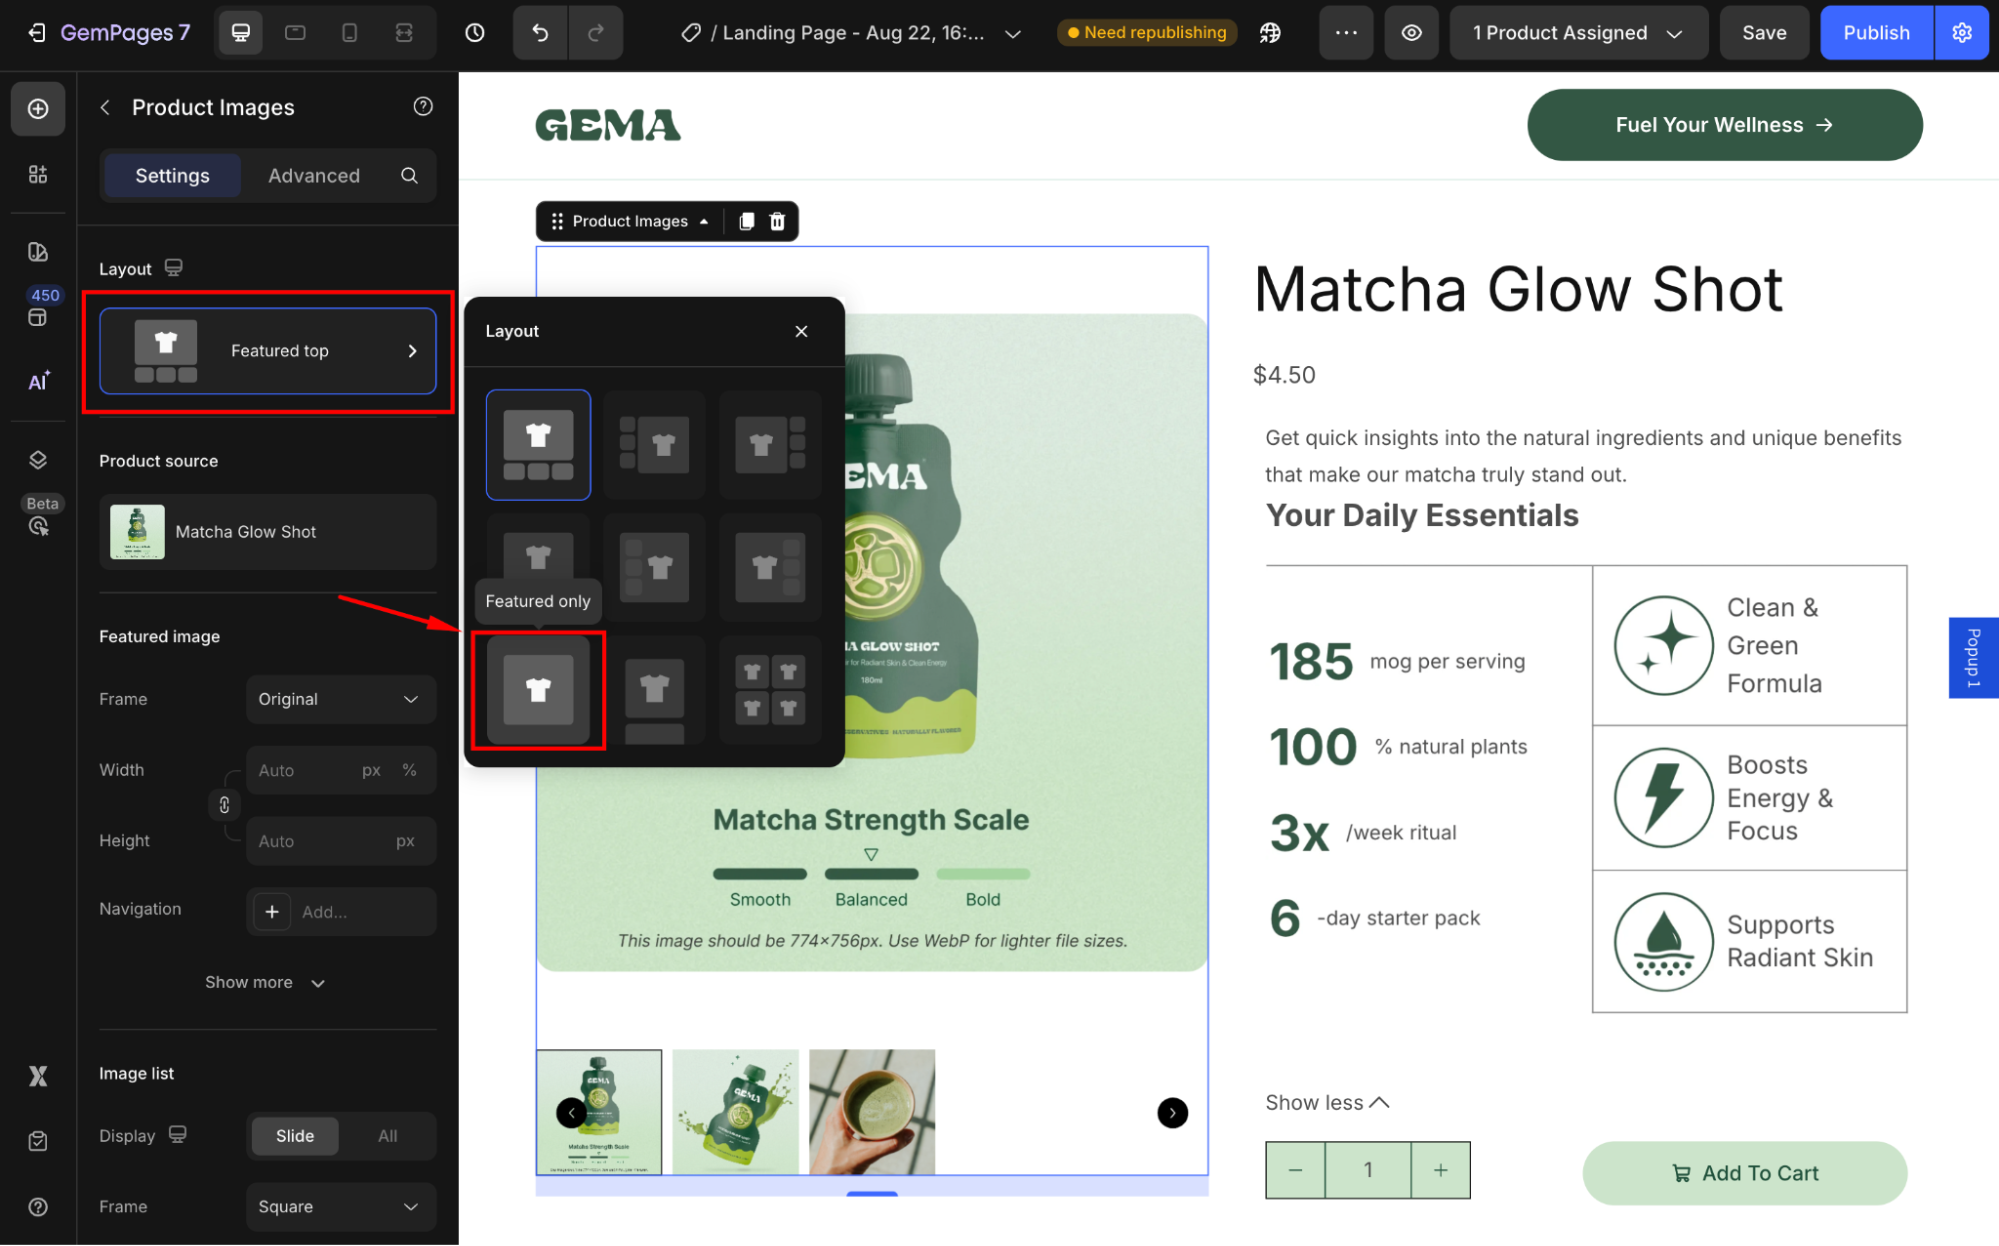
1. Select the Product Image Element.
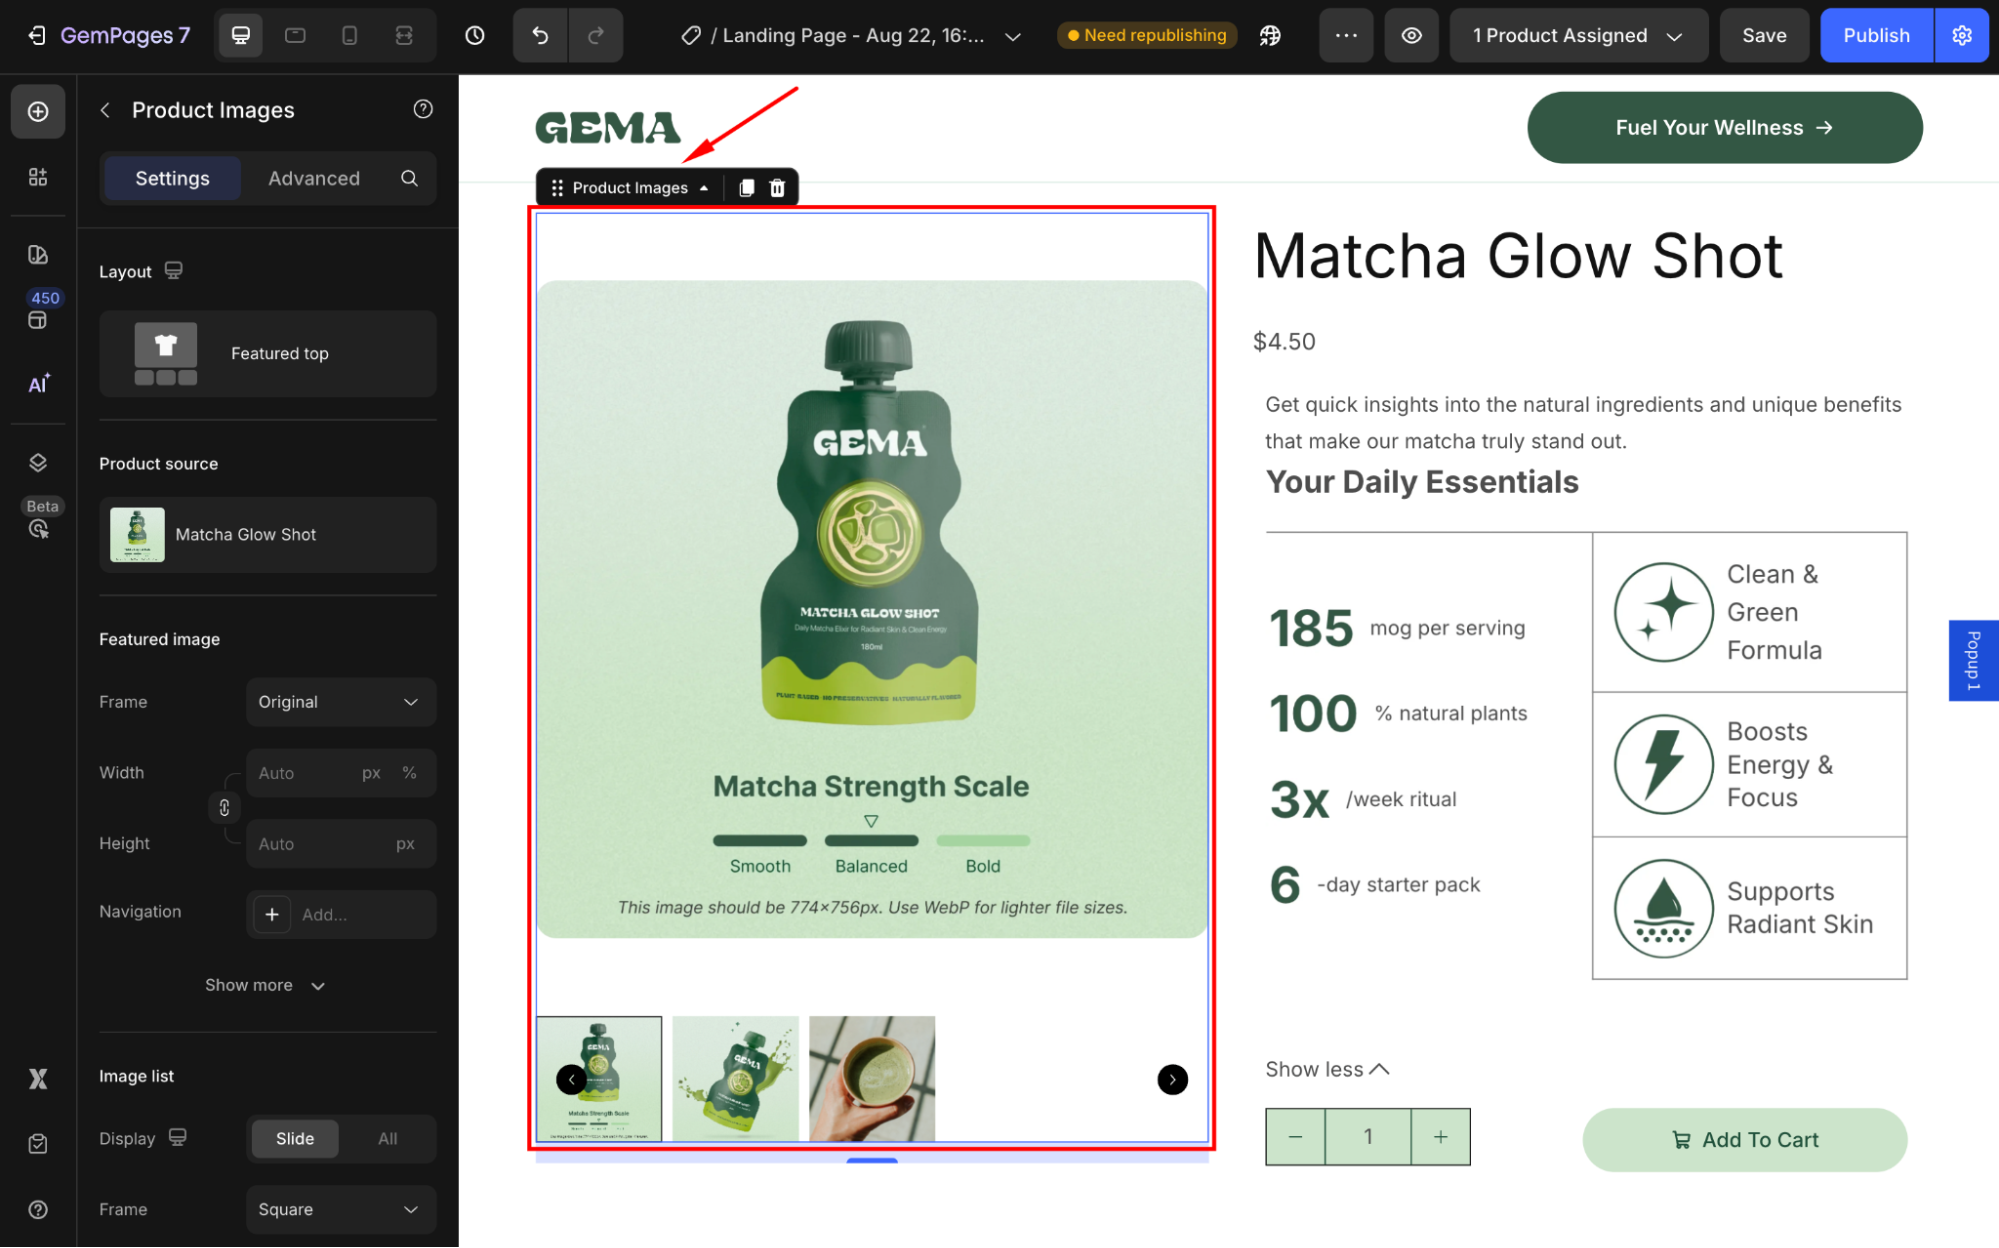
2. Go to the Settings tab in the left sidebar:
- Under the Layout section, select the Featured only layout option.
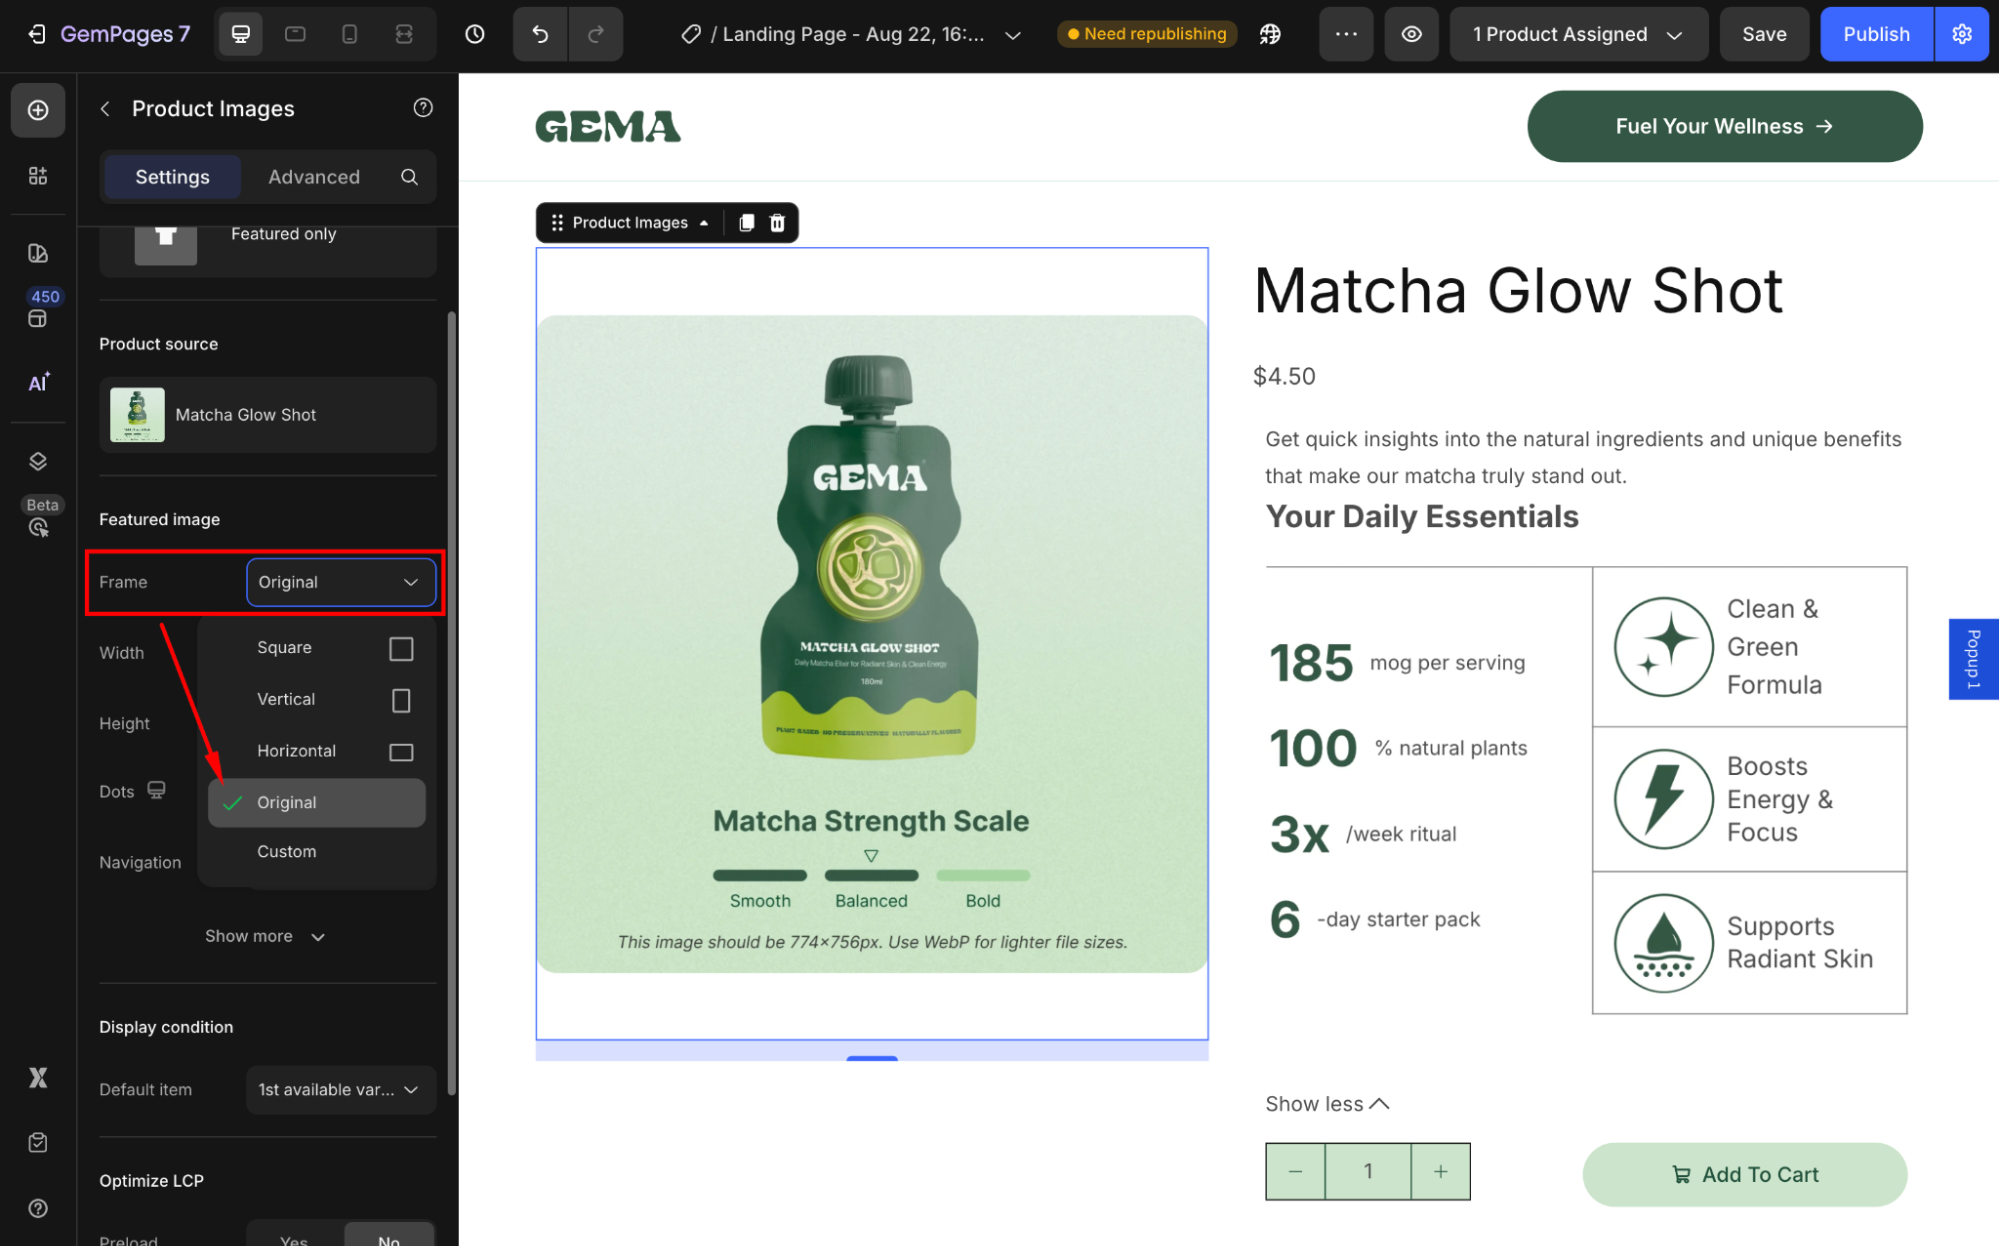
- Under the Featured image section, set the Frame = Original and the Width = 100%.
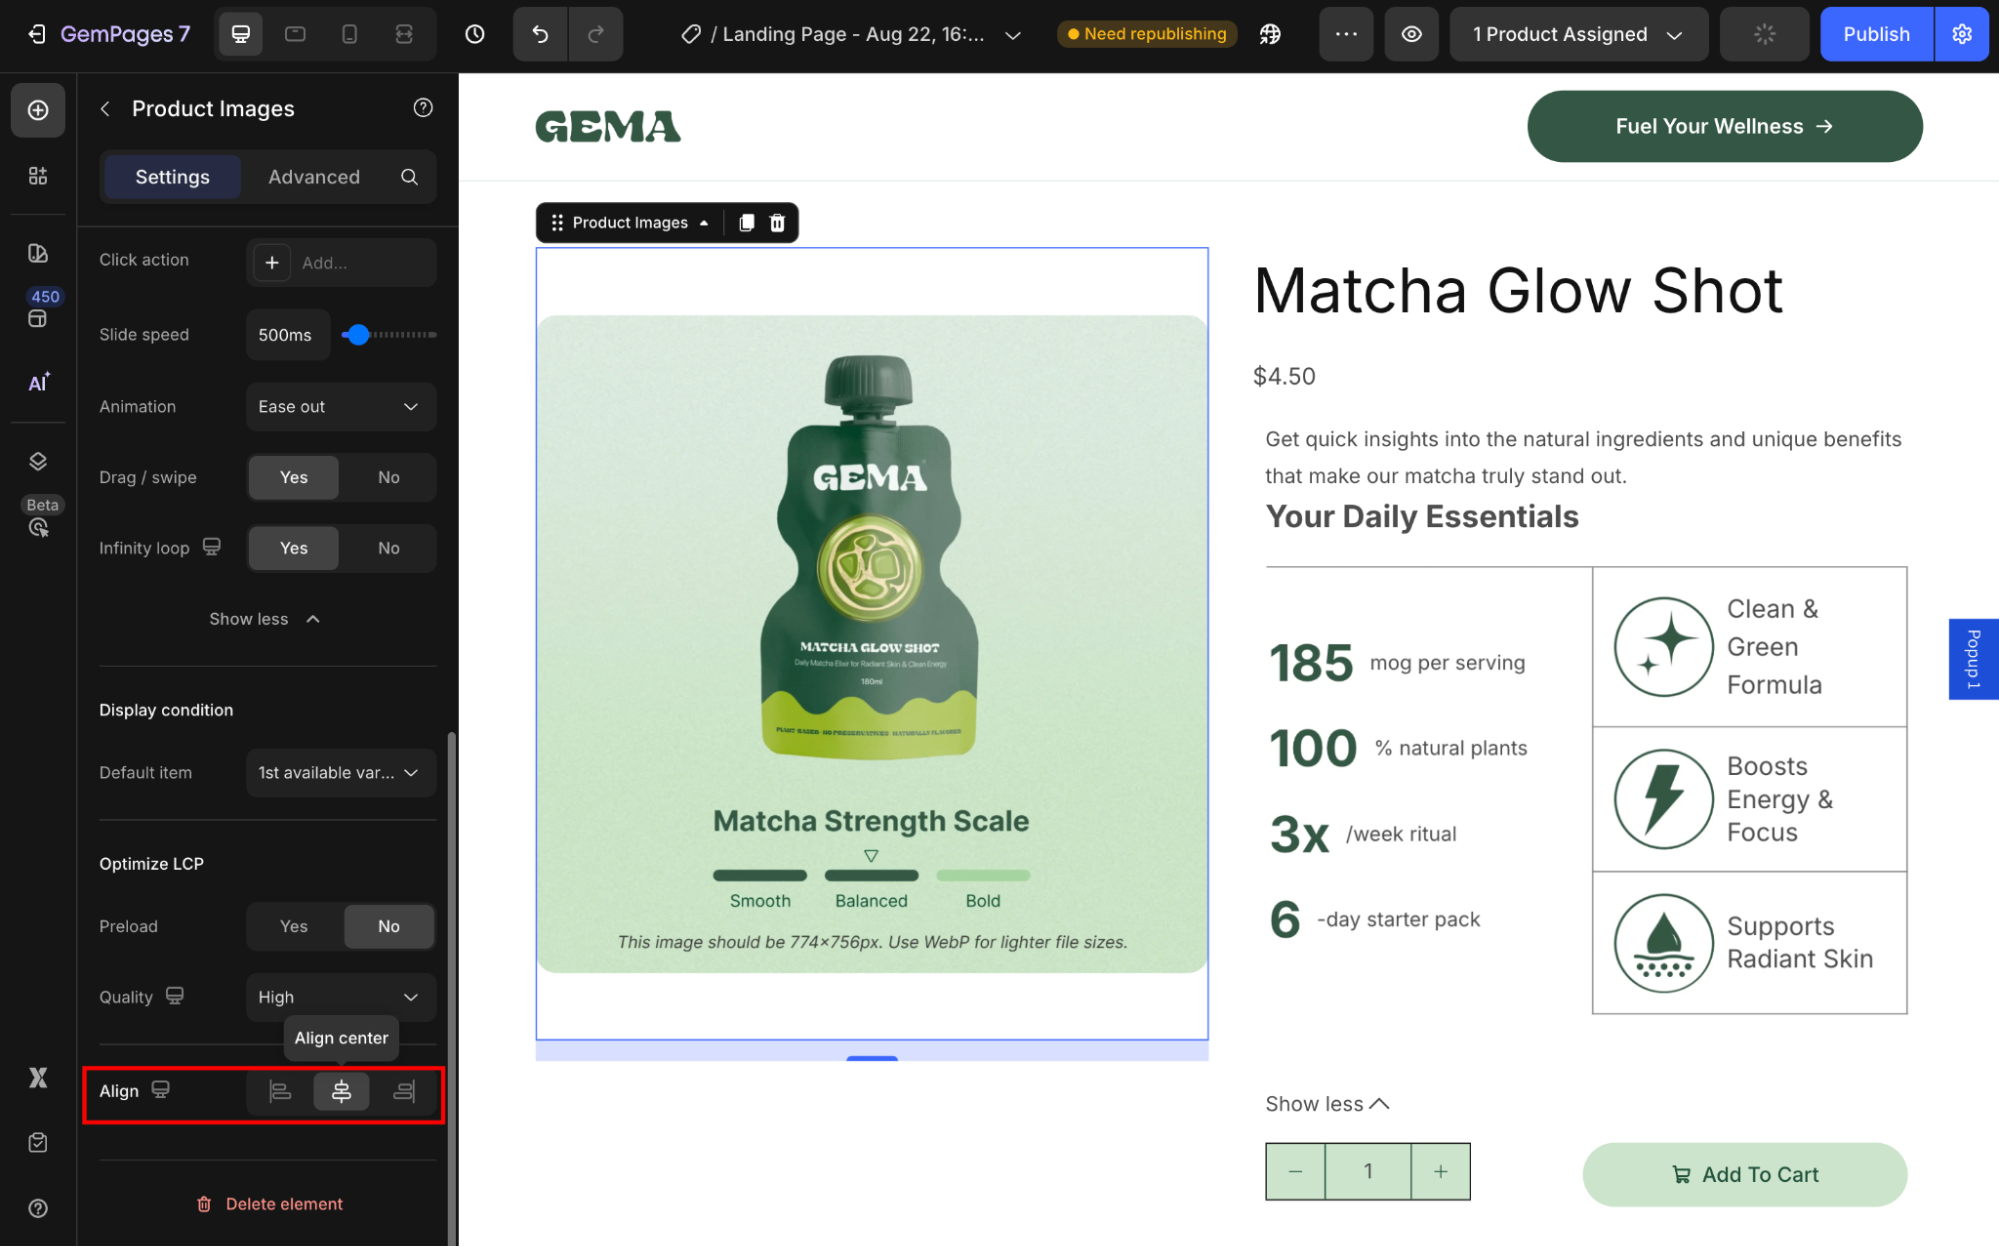
- Scroll down to the Align section, and select center-aligned.
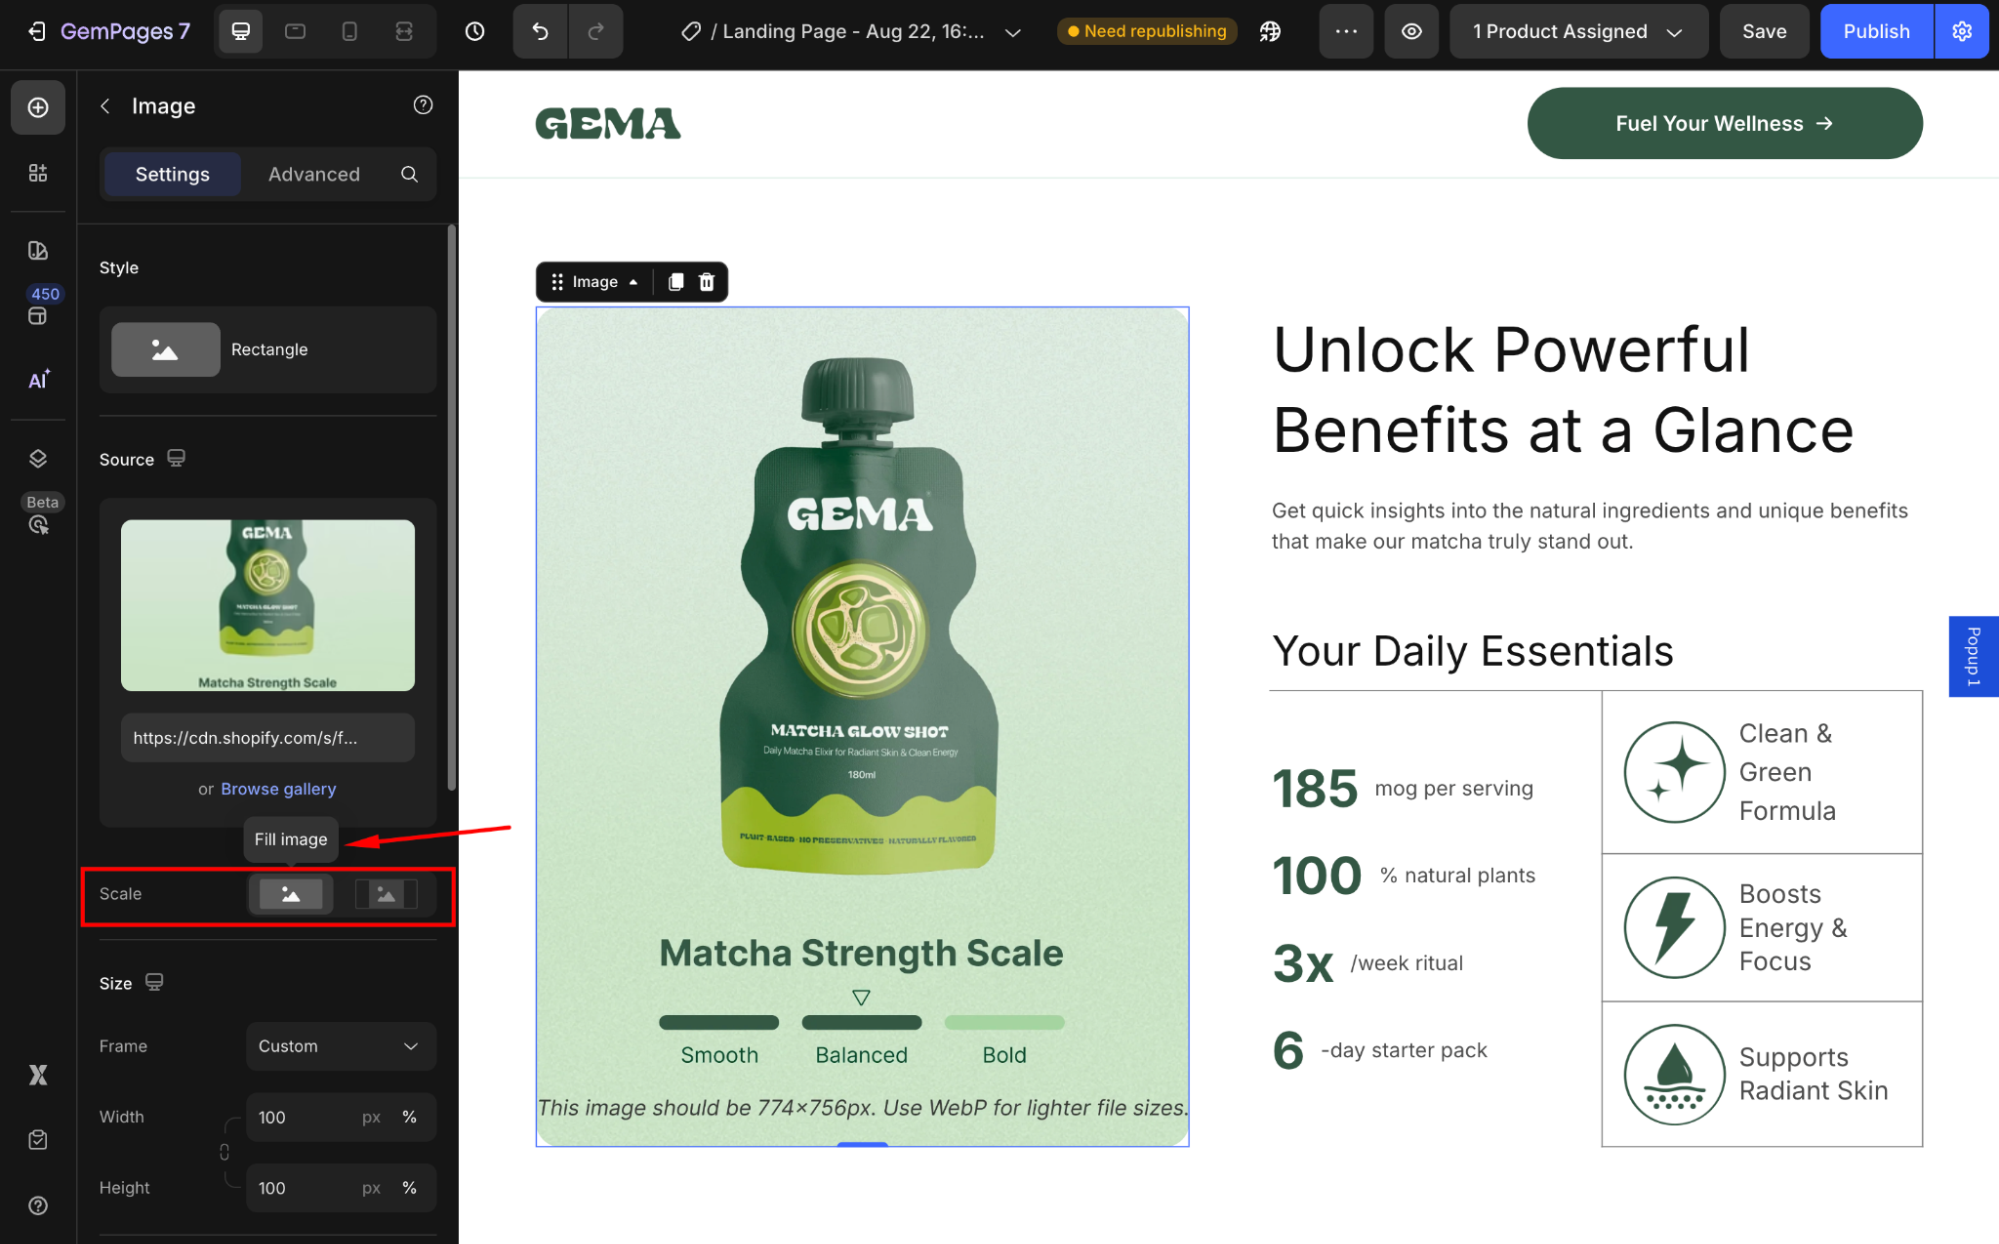
Inside an Image Element
1. Select the Image Element.
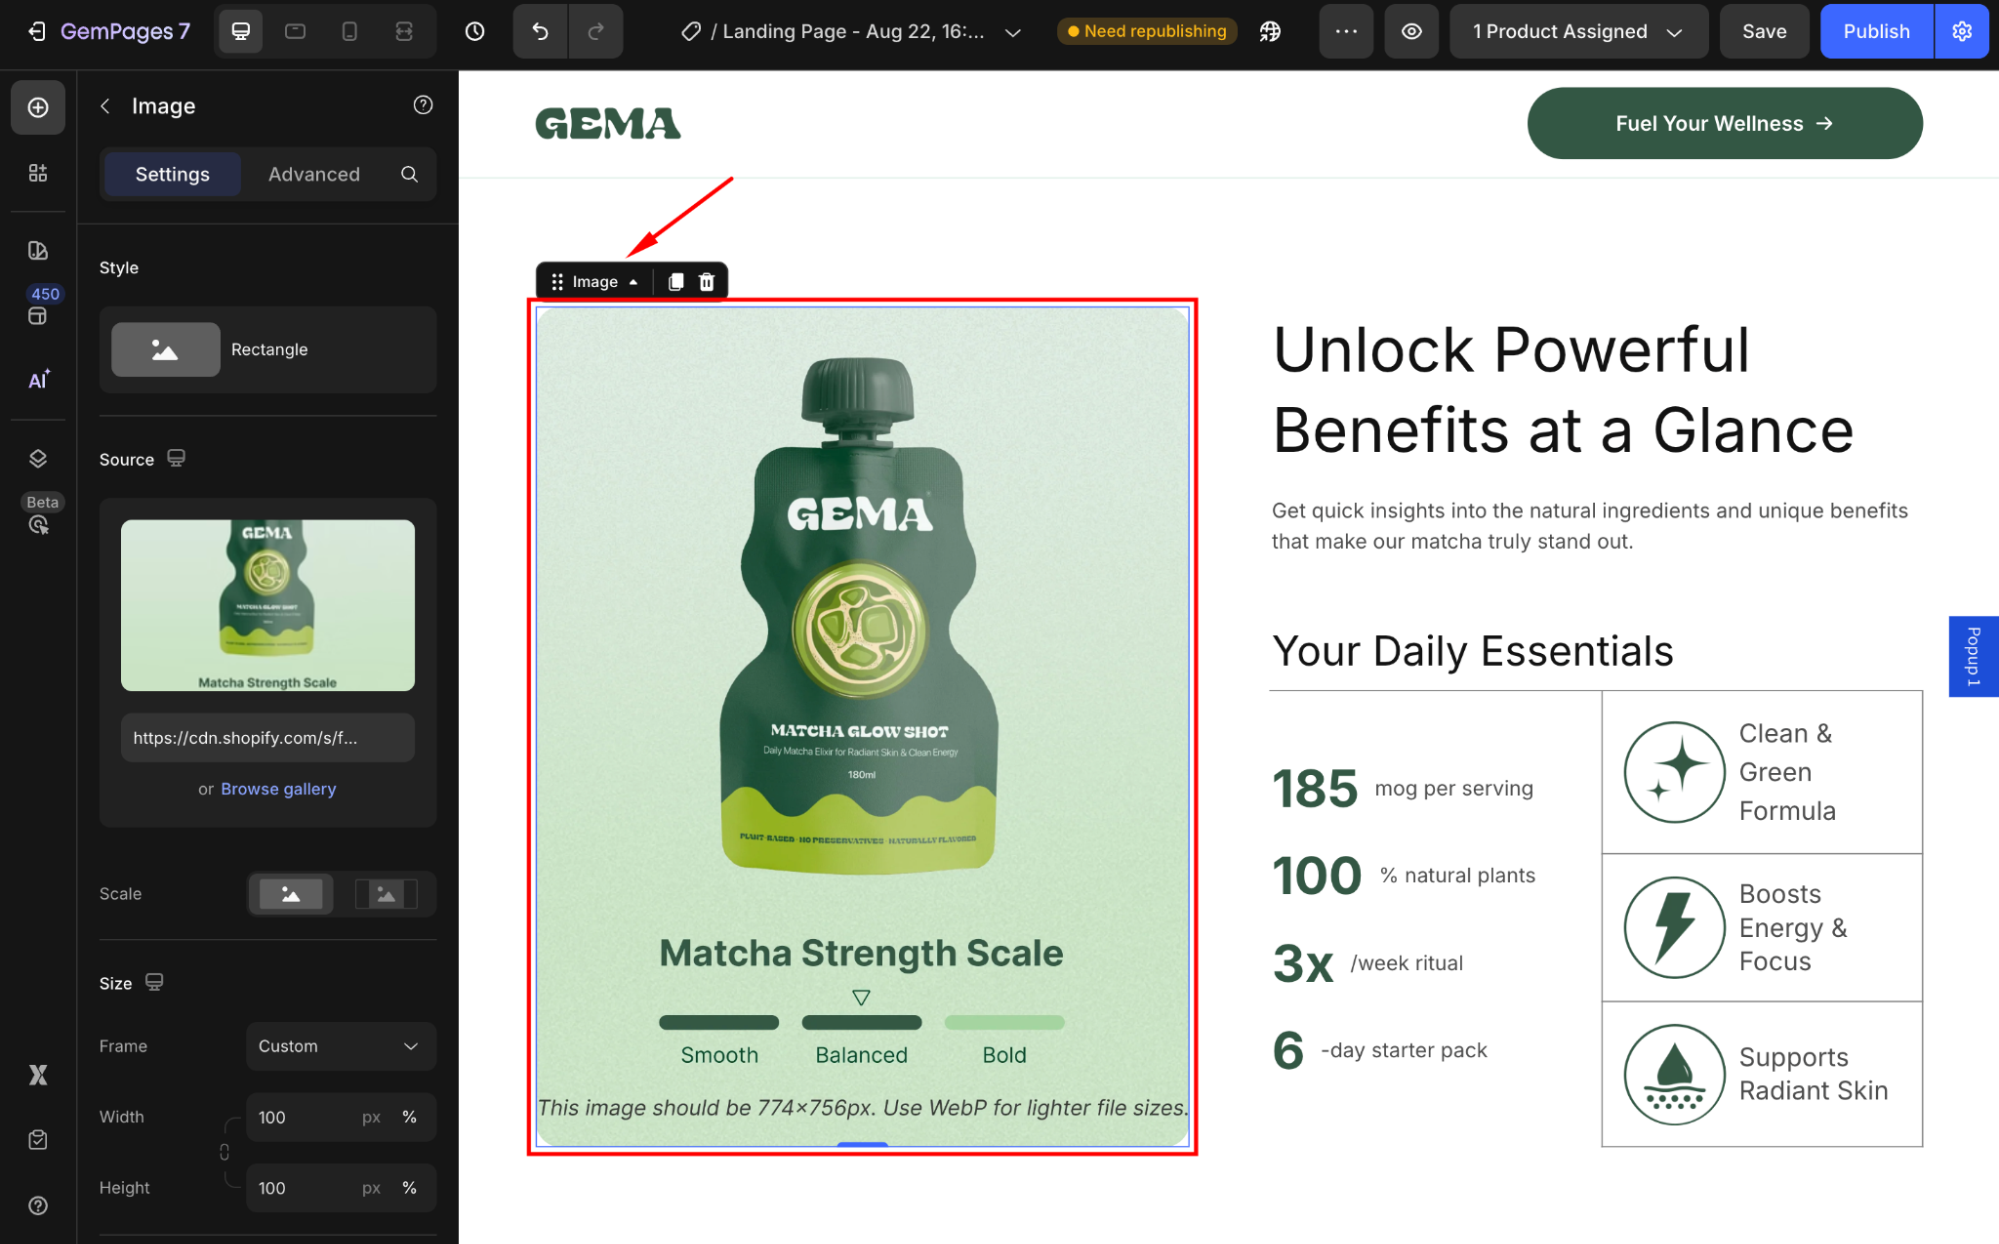
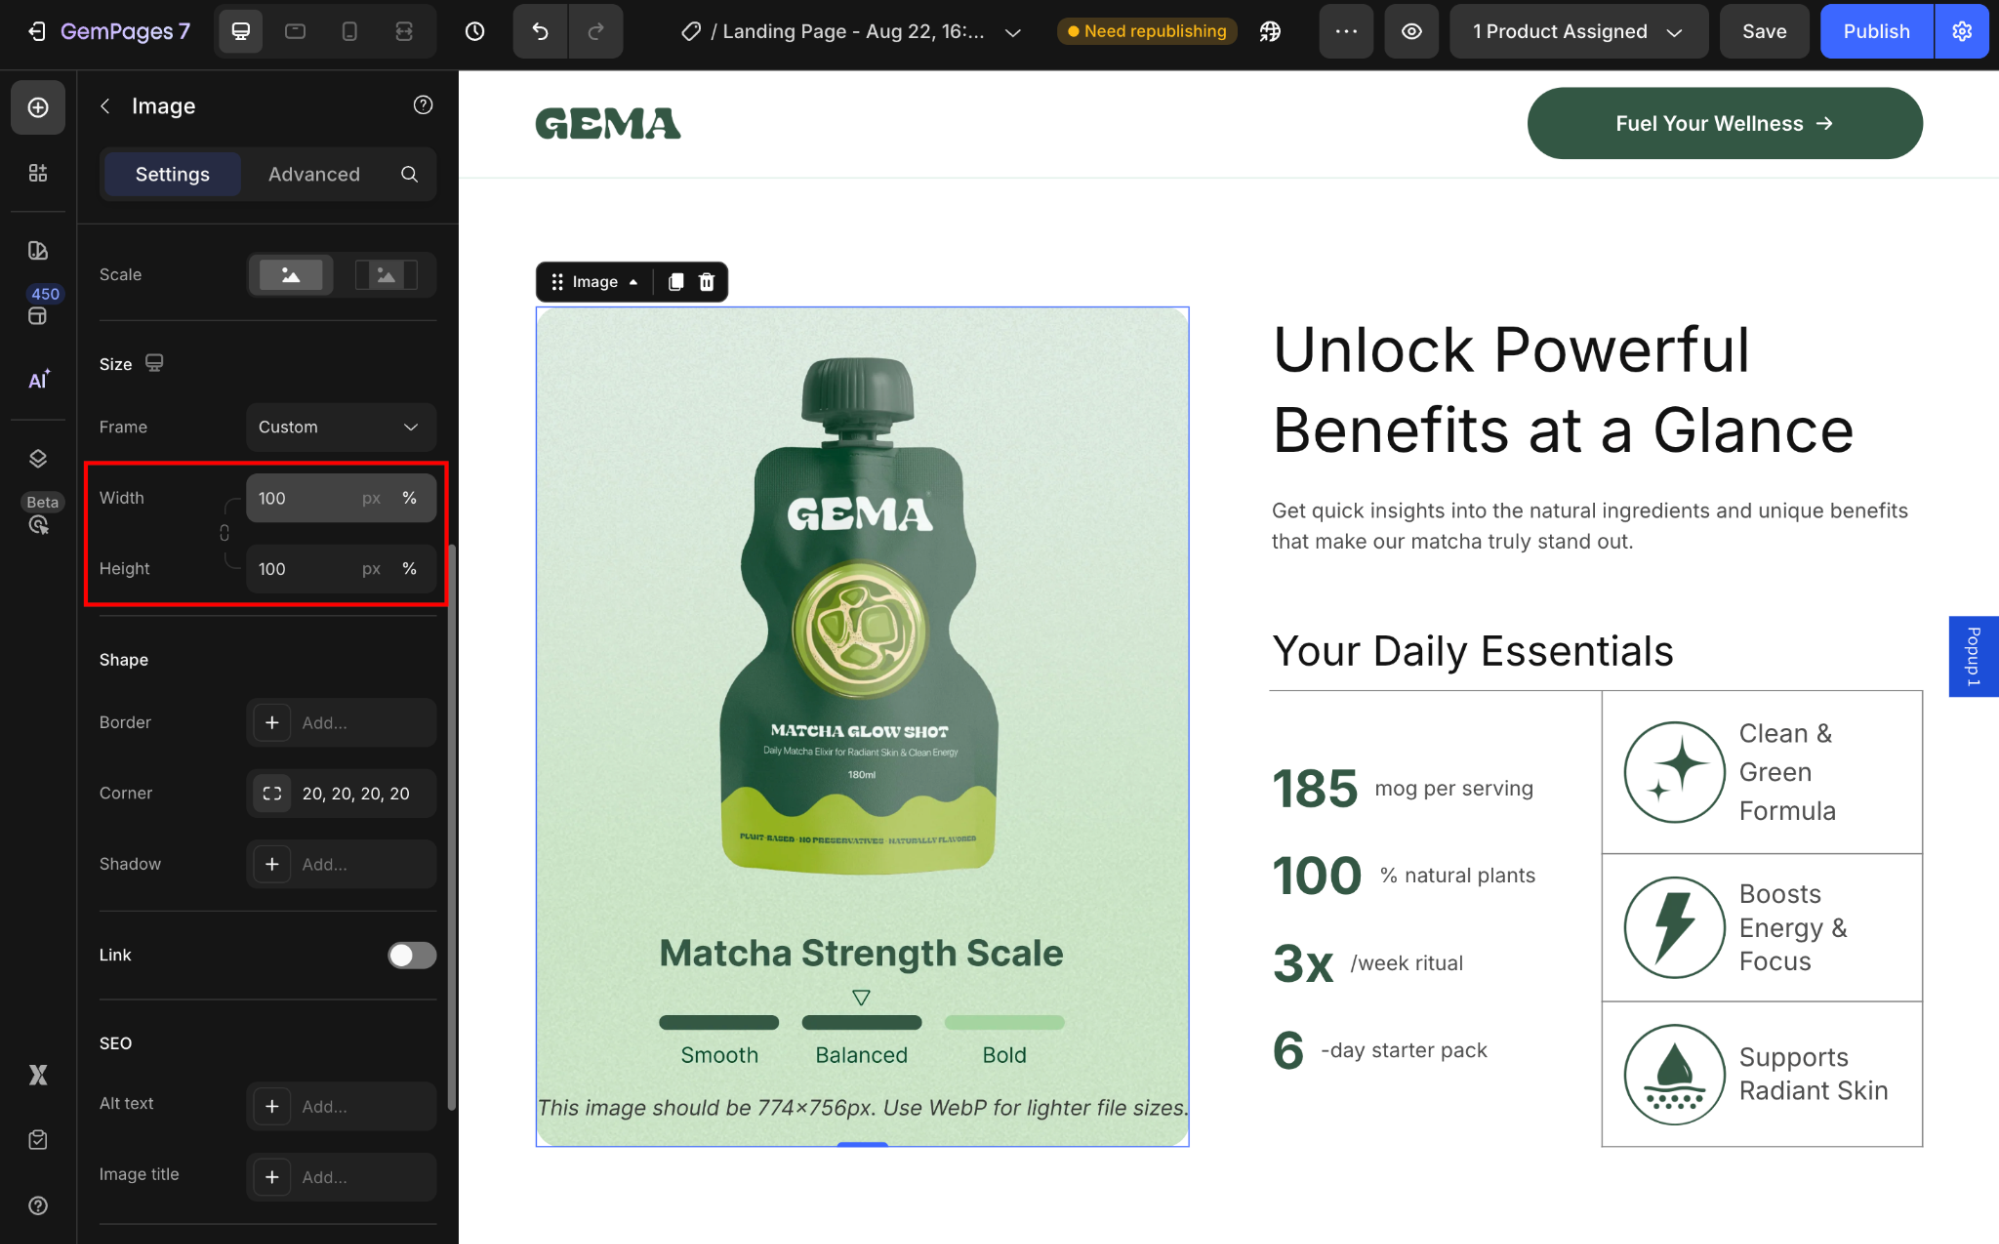
2. Go to the Settings tab in the left sidebar:
- Under the Scale section, choose Fill image to make your image fill this element.
- Under the Size section, ensure that the Width & Height are set to 100%.
Step 4. Save and Publish
- In the top right corner, hit Save to save your changes.
- You can click the eye icon to preview your page before publishing.
- If everything is fine, publish the page to make it live on your storefront.


Thank you for your comments