


Want to add a review or comment section to your Shopify blog post? This guide shows you how to enable and manage comments so readers can share their feedback and engage with your content.
Adding a blog review section to your Shopify blog posts can significantly increase engagement and build trust with your audience. Whether you publish tutorials, product roundups, or industry insights, collecting comments and reviews from readers provides social proof and encourages interaction.
While Shopify doesn’t include built-in features for star-rated blog post reviews, you can still create a comment or review section for general feedback using Shopify’s native comment settings or a third-party app.
How to Add a Blog Comment Section
When you create a new blog in Shopify, comments are turned off by default. You need to manually enable them and decide how you want to moderate incoming feedback.
Shopify offers three comment settings:
- Comments are disabled
Visitors can’t leave comments on your posts. - Comments are allowed, pending moderation
Visitors can submit comments, but you must approve them before they appear. - Comments are allowed and automatically published
Visitors can comment, and their messages appear right away.
Steps to Enable Comments on a Blog Post
Follow these instructions to activate the comment feature on your Shopify blog:
Step 1: Go to your Shopify Admin
In your Shopify dashboard, click Content > Blog posts.
Step 2: Click “Manage blogs”
This opens your list of blogs.
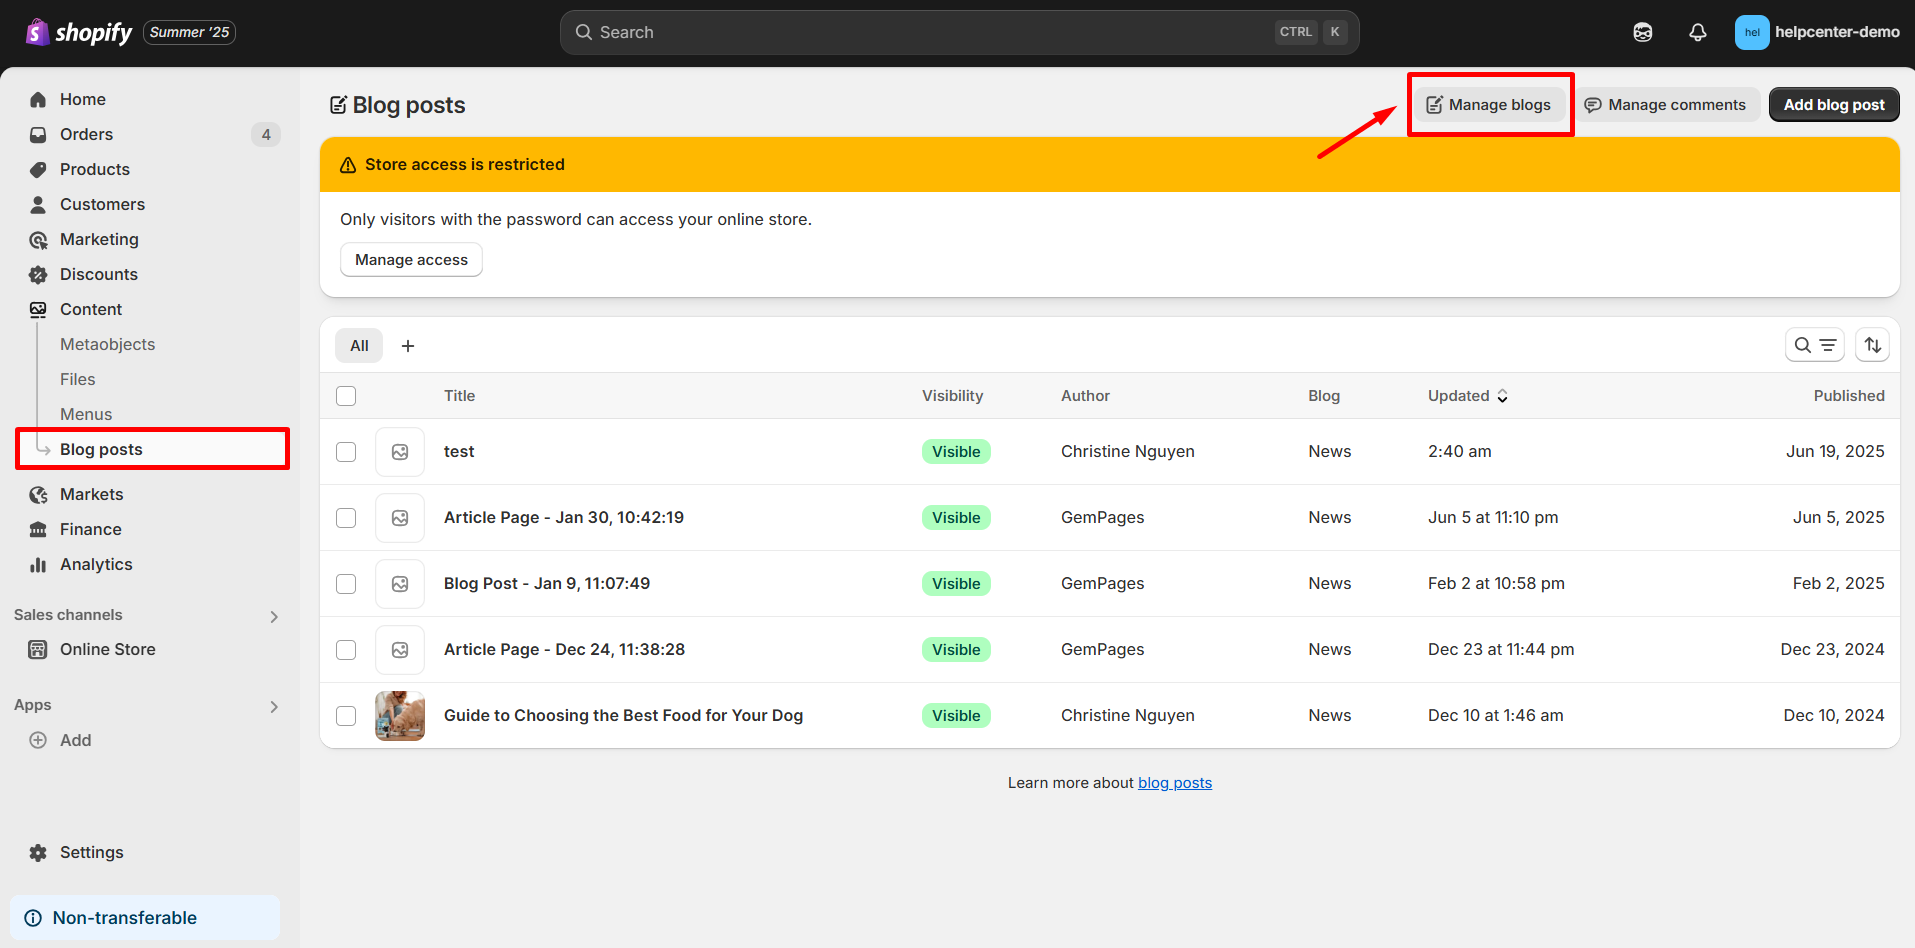
Step 3: Select the blog you want to edit
Click on the specific blog where you’d like to allow comments.
Step 4: Adjust the comment settings
In the Comments section, choose your preferred option:
- Disabled
- Allowed with moderation
- Allowed and automatically published
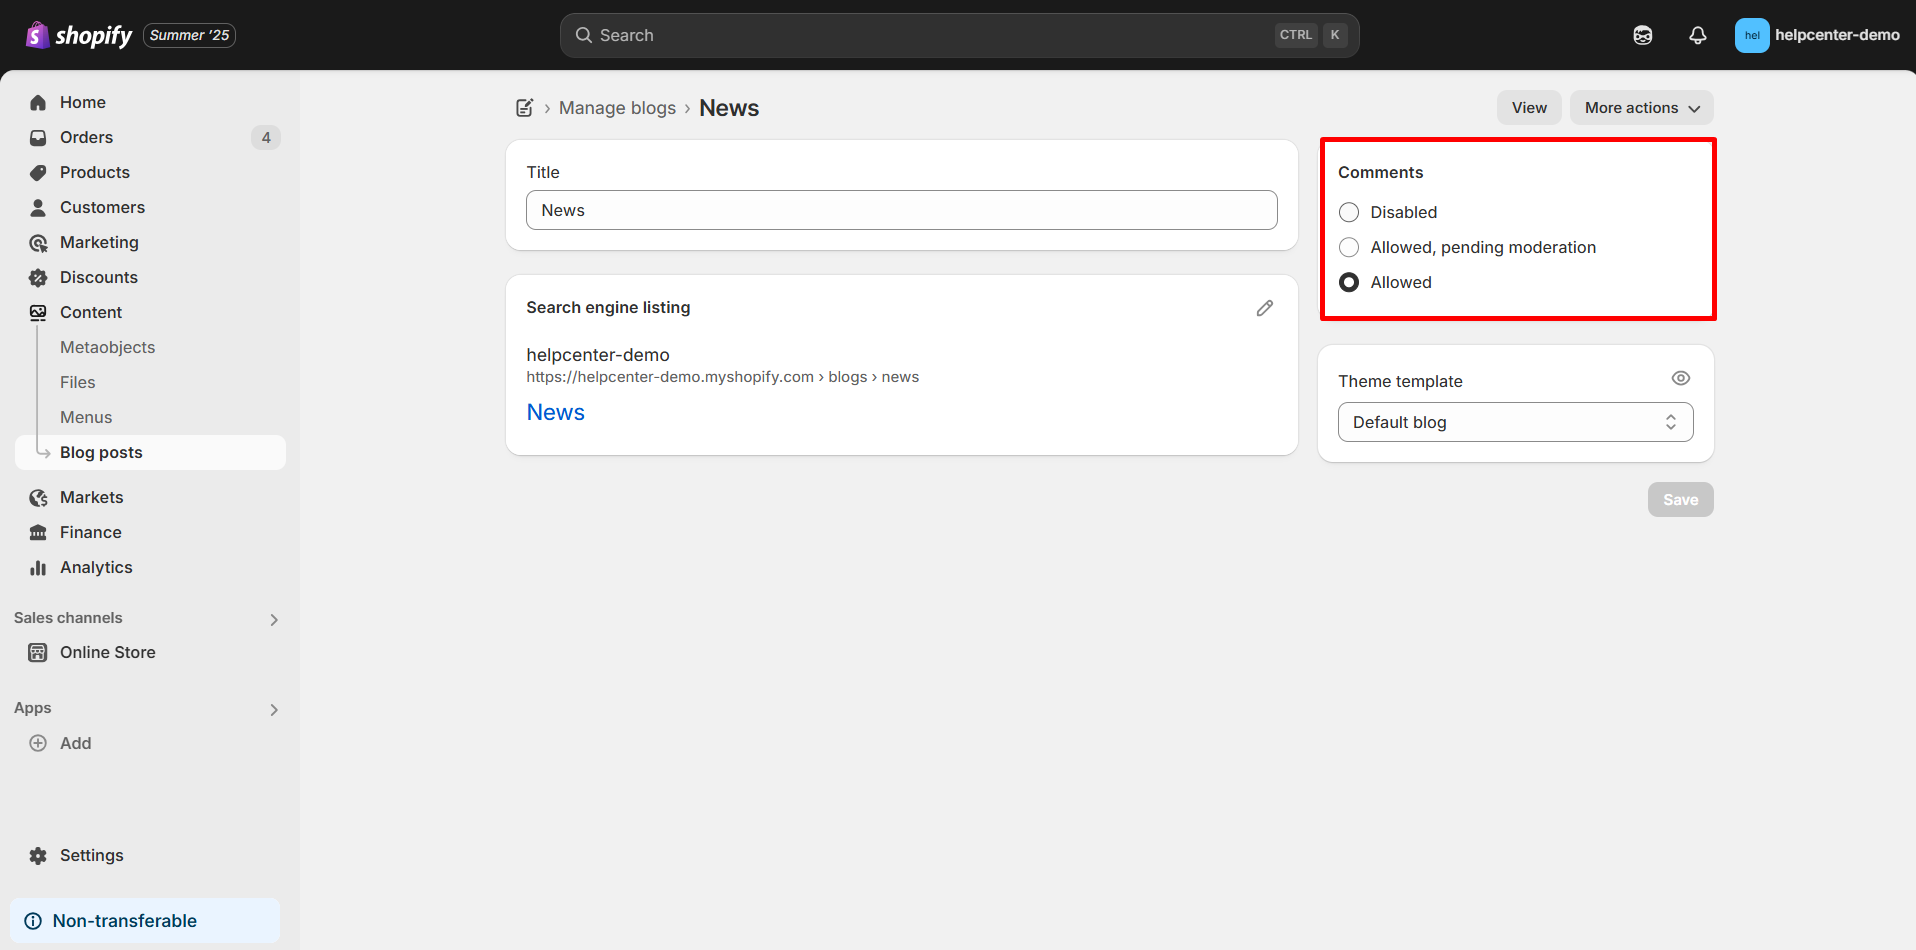
Step 5: Save your changes
Click Save to confirm and apply your settings.


Thank you for your comments