If you need help linking your pages to Shopify menu items, we’ve prepared an article for you.
Before You Begin
Make sure you’ve already created and your menu and menu items in Shopify Admin > Content > Menus.

Refer to this article if you need help creating a navigation menu.
Link to the Header
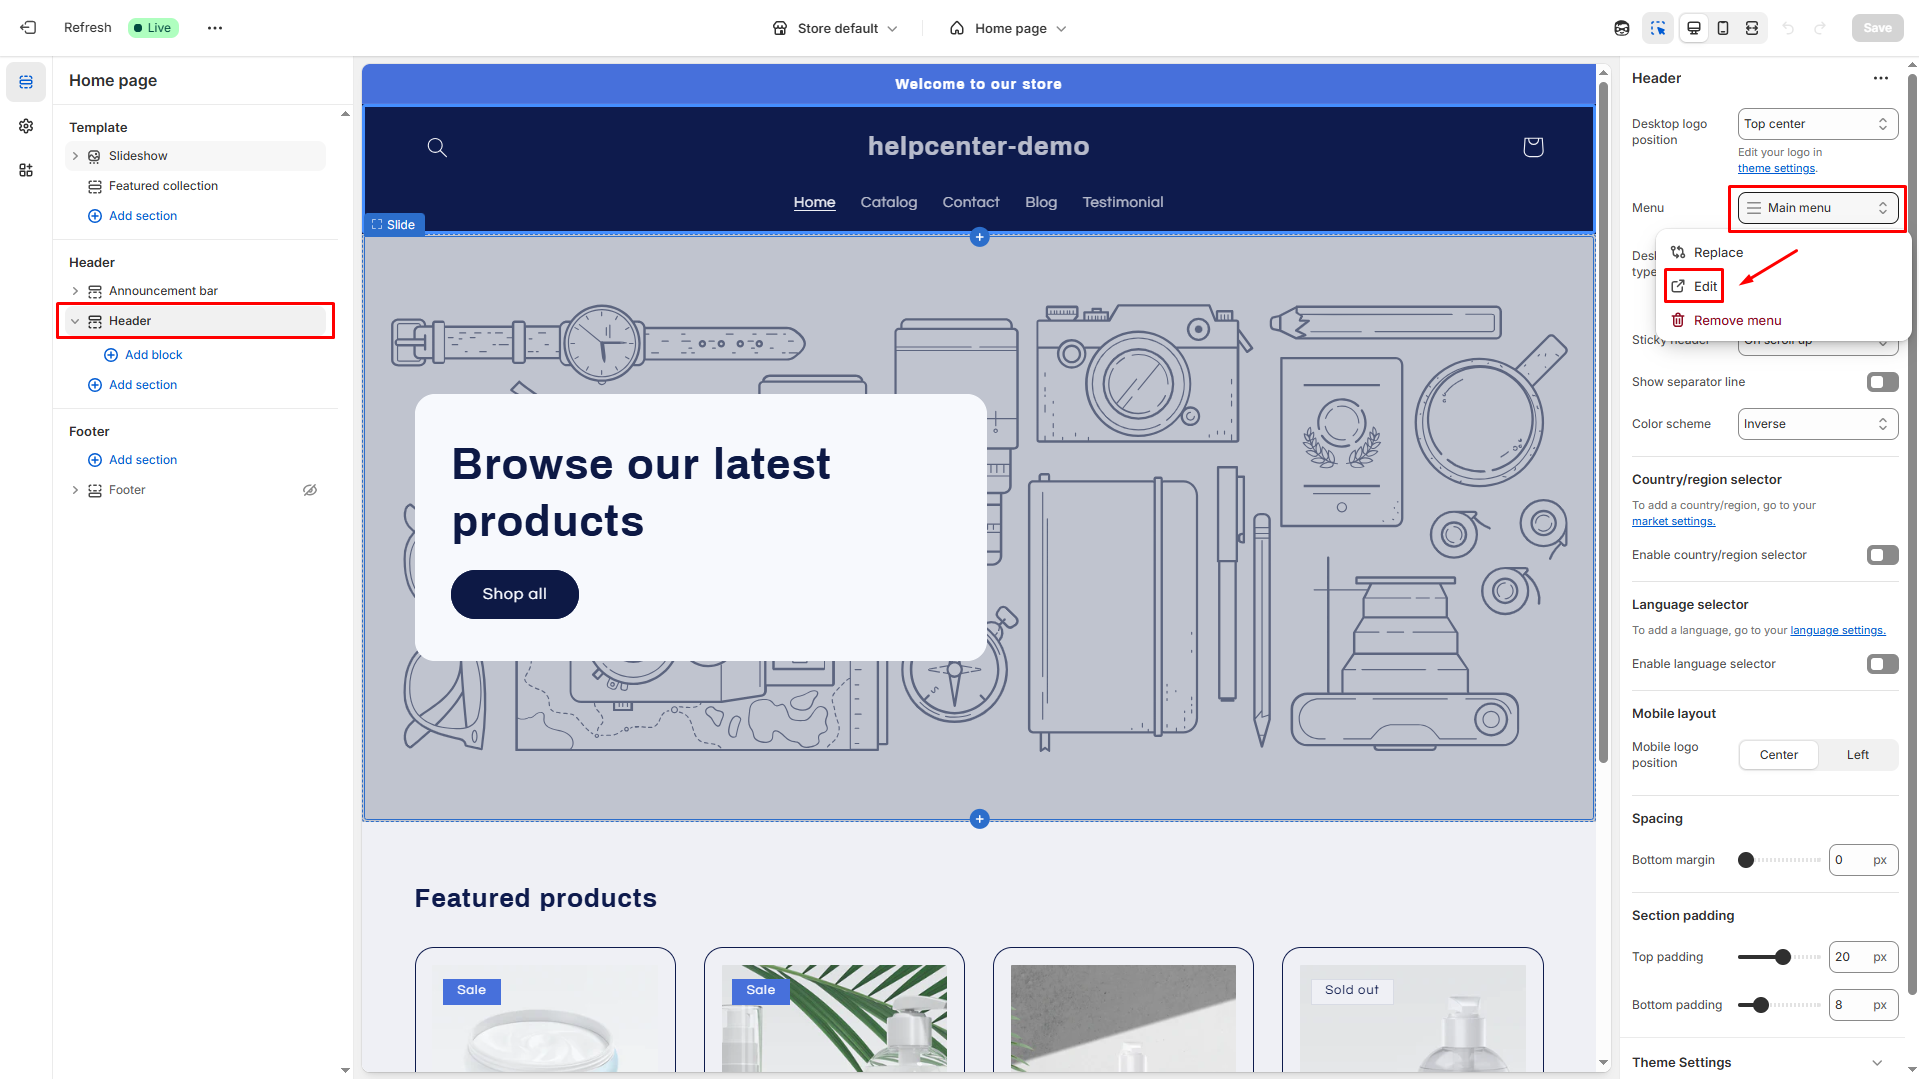
Step 1: Select Header on the left sidebar to start editing the section.
Step 2: On the right sidebar, look for the “Menu” section. Select Change > Change menu

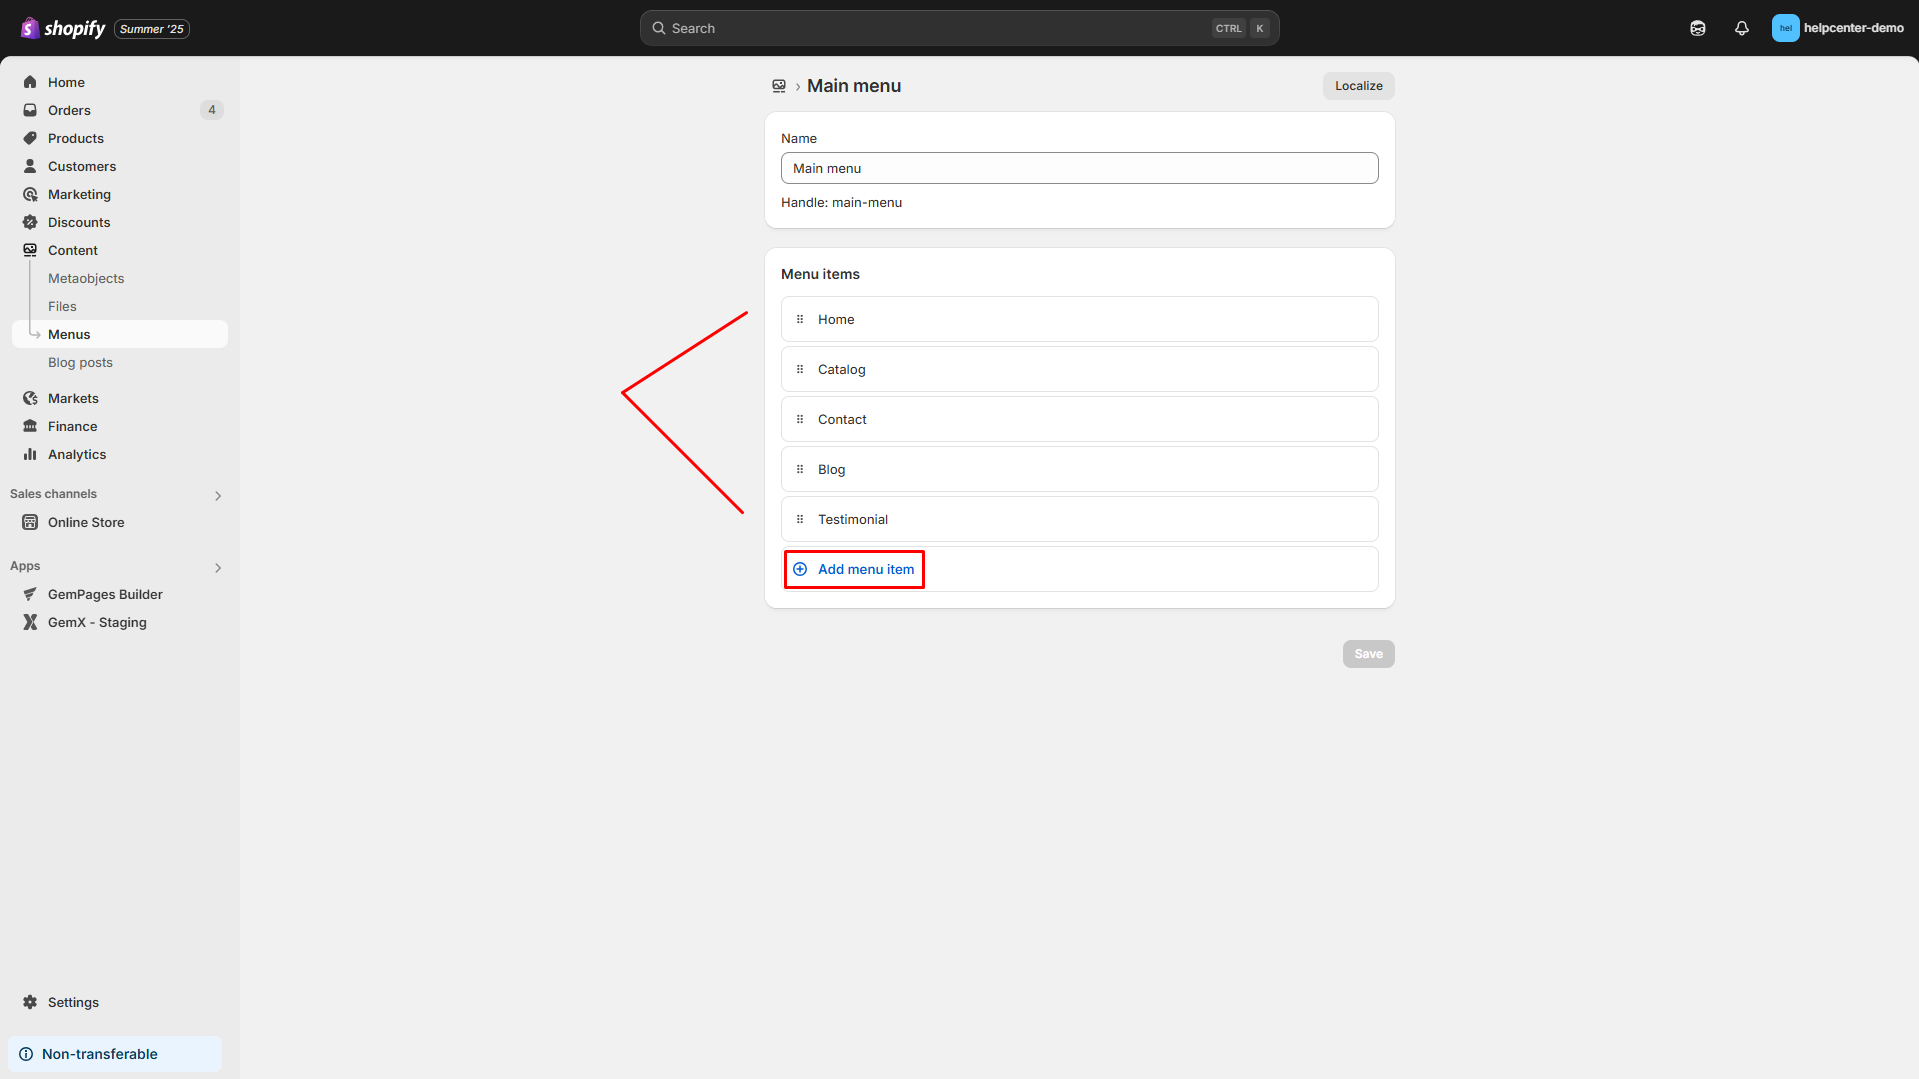
Step 3: Select the menu item you created earlier or hit “Add menu item” to add a new one to your navigation menu. Click “Save” to save the settings.

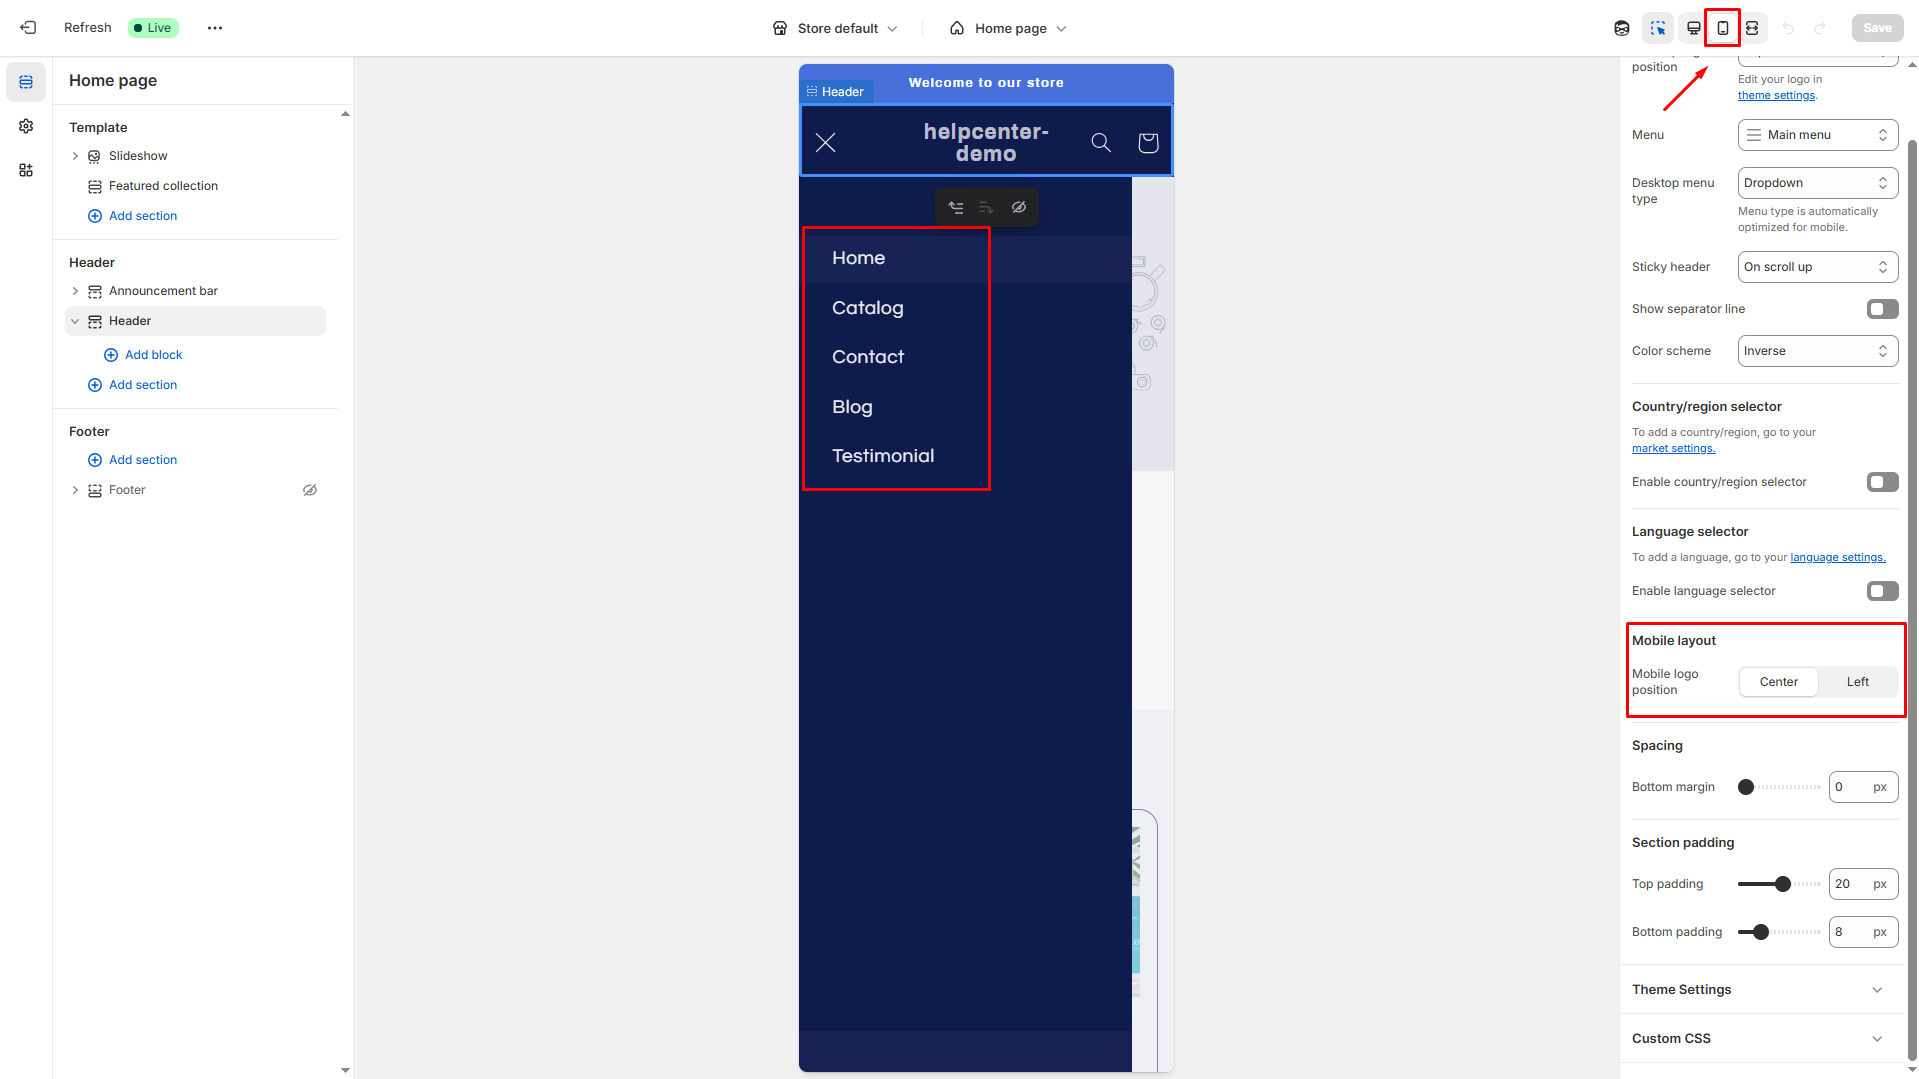
Step 4: For mobile view, select the mobile icon in the upper right corner. You can change the mobile layout to center or left position in the left sidebar.

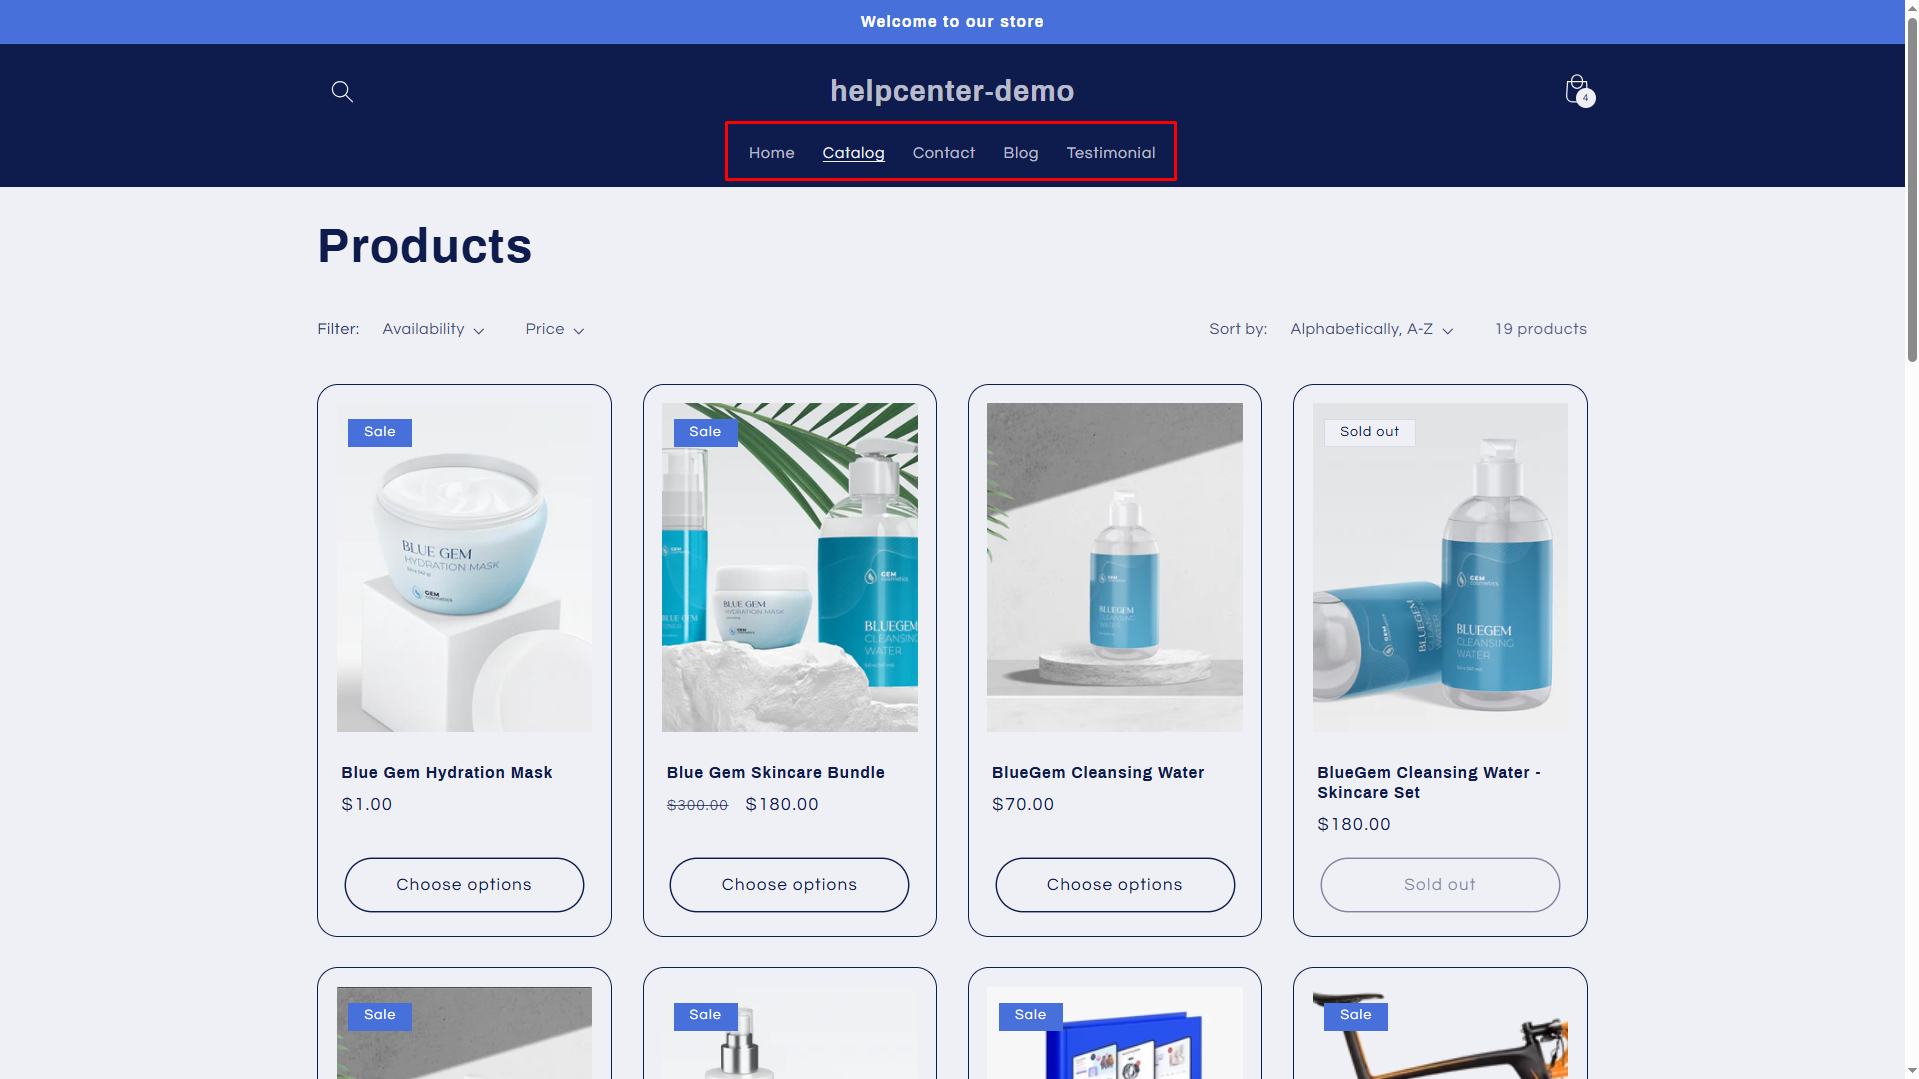
Here’s how the result should look on your live store.

Link to the Footer
To link your menu item to the Footer, you can add a new block or edit an existing block.
Add/Remove a block
Step 1: Select Footer on the left sidebar to start editing the section.
Step 2:
- To remove a block: Select the block and hit the “Remove block” button at the bottom of the right sidebar.

- To add a block, hit the “Add block” button on the left sidebar in the Theme editor and select the Menu block type.

A new block will be created and named Quick links by default.

Next up, we will link our page to this block by editing it.
Edit a block
Click on a block to start editing it. On the right sidebar, you can:
- Edit the block’s name in the Heading field.

- Edit the menu item: Click on the Edit menu link to be redirected to the Menus section of the Shopify Admin.
- Select a menu item to link to this block: Click the “Change” drop-down menu, then choose “Change menu.”

Pick a menu item you have prepared and hit “Select.”

Hit “Save”.

The result should look like this:


Thank you for your comments