


Google Analytics
As a temporary solution, you can attempt to integrate Google Tag Manager with ILP by following these steps:
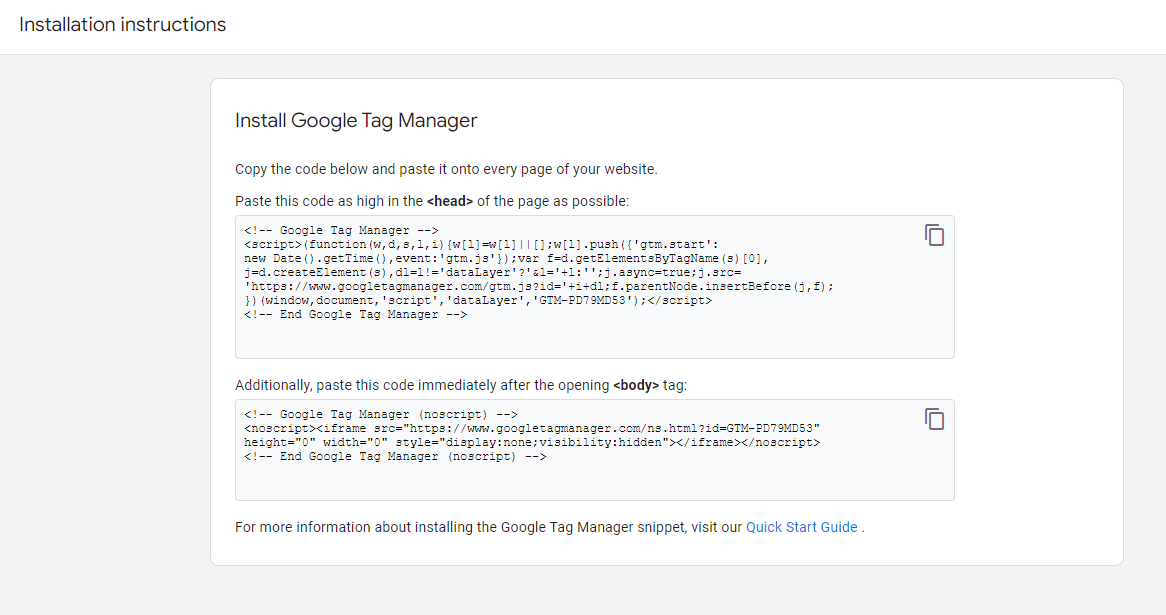
Step 1: Set up Google Tag Manager
- Create and setup your Google Tag Manager account.
- Once that’s done, Google Tag Manager will provide you with the container snippet code that you need to insert into your pages. Copy the codes for later use.
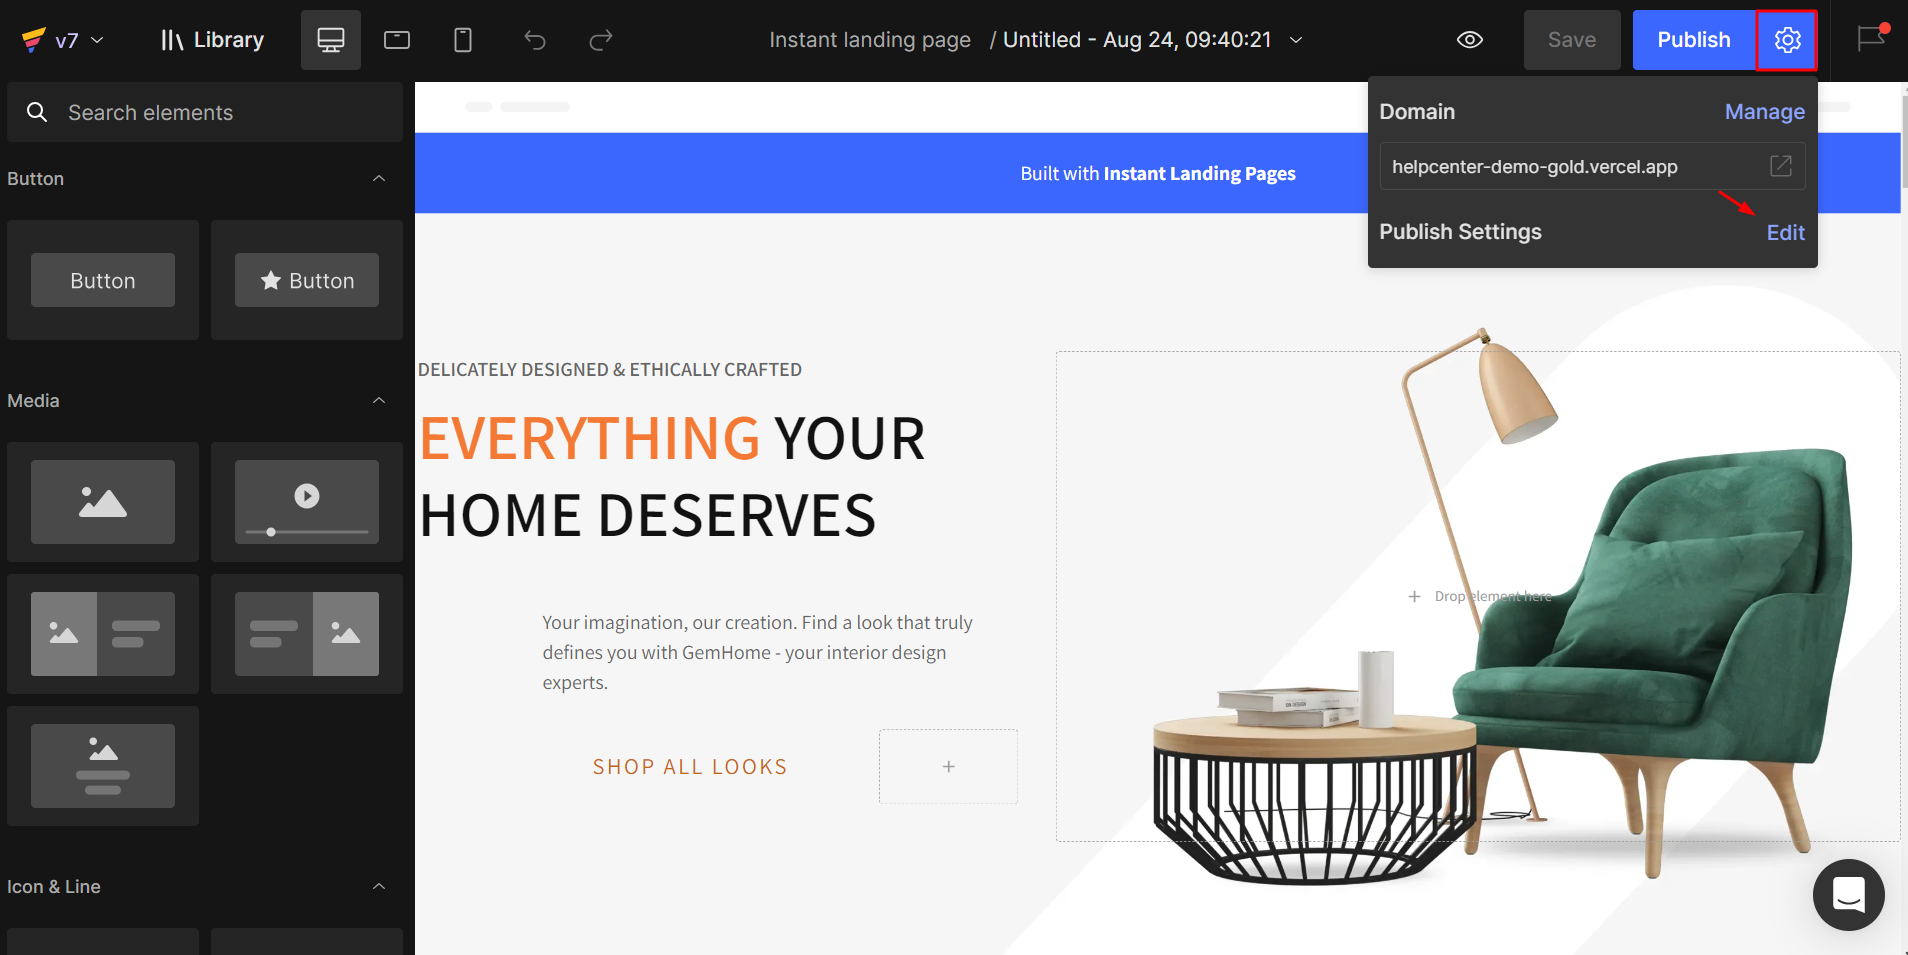
Step 2: Open Publish Settings in ILP
- From the GemPages Dashboard, go to the Instant Landing Pages Editor.
- Click on the Settings icon and select Edit on Publish Settings.
Step 3: Insert the container snippets
- Scroll down to the “Install Tracking Code > By other tracking tools” section.
- Then, paste the code you acquired in the previous step into the designated box here.
- You’ll find two snippet codes: one for the <head> tag, and another for the <body> tag.
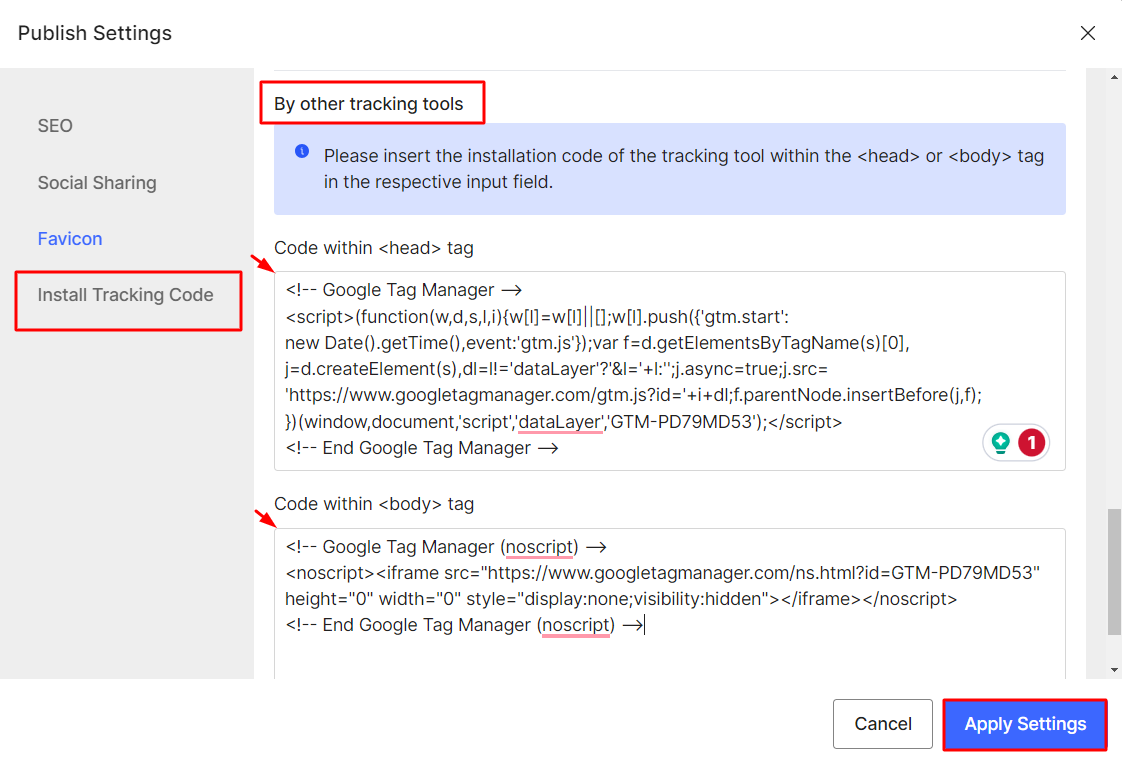
- Hit “Apply Settings” when finished.
Facebook Pixels
Step 1: Create a Facebook ad account
Before getting started with Pixel creation, make sure you are the admin of your Facebook Business Manager, a tool that helps manage ad accounts, Pages, people who have access to them in one place. In case you don’t have an account yet, follow these steps to create one: (if you do have an account, proceed to Step 2).
Step 2: Create FB Pixel
Once you have your business account, do the following in your Business Manager to create a Meta Pixel:
1. Open Settings, then go to Business Settings

2. Choose your business in the dropdown menu above and click on Data Sources. Choose Pixels
 |
 |
3. Click on the Add button in the tab on the right.

4. Write in the name of the Pixel to avoid possible confusion in the future.
Here you can also enter the URL of your website to verify your domain name. Domain verification is an important step that allows you to effectively integrate Pixel. Remember that you can use only one Pixel for each verified domain name.
When you’re ready, click Continue.

5. This is the last step of creating a Meta Pixel. Next, we need to add it to your Shopify store. So click on “Set up the Pixel Now” and meet us in the next paragraph.

Step 3: Add your Pixel ID to Shopify
1. To install Pixel onto a store on Shopify on Facebook, choose the first option in the menu

2. Select Shopify among the Partner options.

Once it’s done, go back to Facebook to continue with the setup. Tick the box next to I’ve completed the setup on Shopify, and click Next

Step 4. Verify Meta Pixel Integration
Now you need to make sure your Pixel is connected to your store. For this, in the next window, enter your domain address to verify the Pixel is working correctly and click Send test traffic. If everything is set up correctly, your status will change to Active.

Later, you will see a confirmation window. From there, you can Test Events in the Event Manager, Create Ad or go to Facebook Analytics. We highly recommend going to Test Events in Events Manager, as you will have to select 8 standard events you want to optimize the ads for.

TikTok Pixels
Step 1: Create a TikTok Business Account
The first thing that we need to do is to create a TikTok business account.
With a TikTok business account, you can check your ad performance on the platform
Step 2: Connect Shopify and TikTok Business
- On your Shopify Admin, click the Apps located on the left side, click the App and Sales channel settings button.
- On the next page, click the Shopify App Store button.
- Search for TikTok Ads in the search field and look for the app that’s by TikTok Inc.
- Add the app and add it to your sales channel.

- On the TikTok Channel Overview, click Set Up Now so we can connect both of the accounts.
Step 3: Connect your TikTok for Business Account
Enable Pixels in the ILP Editor
Step 1: From the GemPages Dashboard, go to the Instant Landing Pages Editor. Click on the Settings icon and select Edit on Publish Settings.
Step 2: A new panel will appear. Click on the “Install Tracking Code” tab, it includes 3 inputs: Google Analytics, Facebook Pixel, and Tiktok Pixel.

Step 4: Confirm applying the tracking code by clicking the Apply Settings button.
FAQs
1. Can I connect Google Analytics 4 directly to ILP?
Not yet. Currently, GA4 integration requires Google Tag Manager. Our team is working on a direct GA4 connection that will be available soon.
2. Where do I paste my Google Tag Manager snippets in ILP?
You need to paste the snippets under Settings > Publish Settings > Install Tracking Code > By other tracking tools in ILP. Make sure to add both the <head> and <body> codes.
3. Can I use multiple Pixels (Facebook and TikTok) on the same ILP page?
Yes, you can install more than one tracking tool by pasting the codes into their designated fields inside the Install Tracking Code tab.
4. Why is my Pixel not tracking events correctly?
This usually happens if your Pixel ID or code snippet was entered incorrectly, or if the domain verification hasn’t been completed. Double-check your setup in Meta Business Manager or TikTok Ads Manager.
5. Do I need to edit the ILP page code manually?
No. All integrations can be done from the ILP Editor under Publish Settings, without modifying the page source code.


Thank you for your comments