


About Shopify Custom Navigation
A clear and intuitive website navigation menu helps customers find what they need faster, which improves the browsing experience and boosts conversions.
In Shopify, the navigation bar (often located in your store’s title bar or header) is built from menus you create in the admin. You can add multiple menu items and organize them based on your store structure.
To create a header drop-down, simply nest one or more menu items under a parent item. Shopify will automatically display the nested items as a drop-down in the header, as long as your theme supports multi-level navigation.
This lets you group related collections, products, or pages into clear categories for smoother browsing.
Create Menu items in Shopify
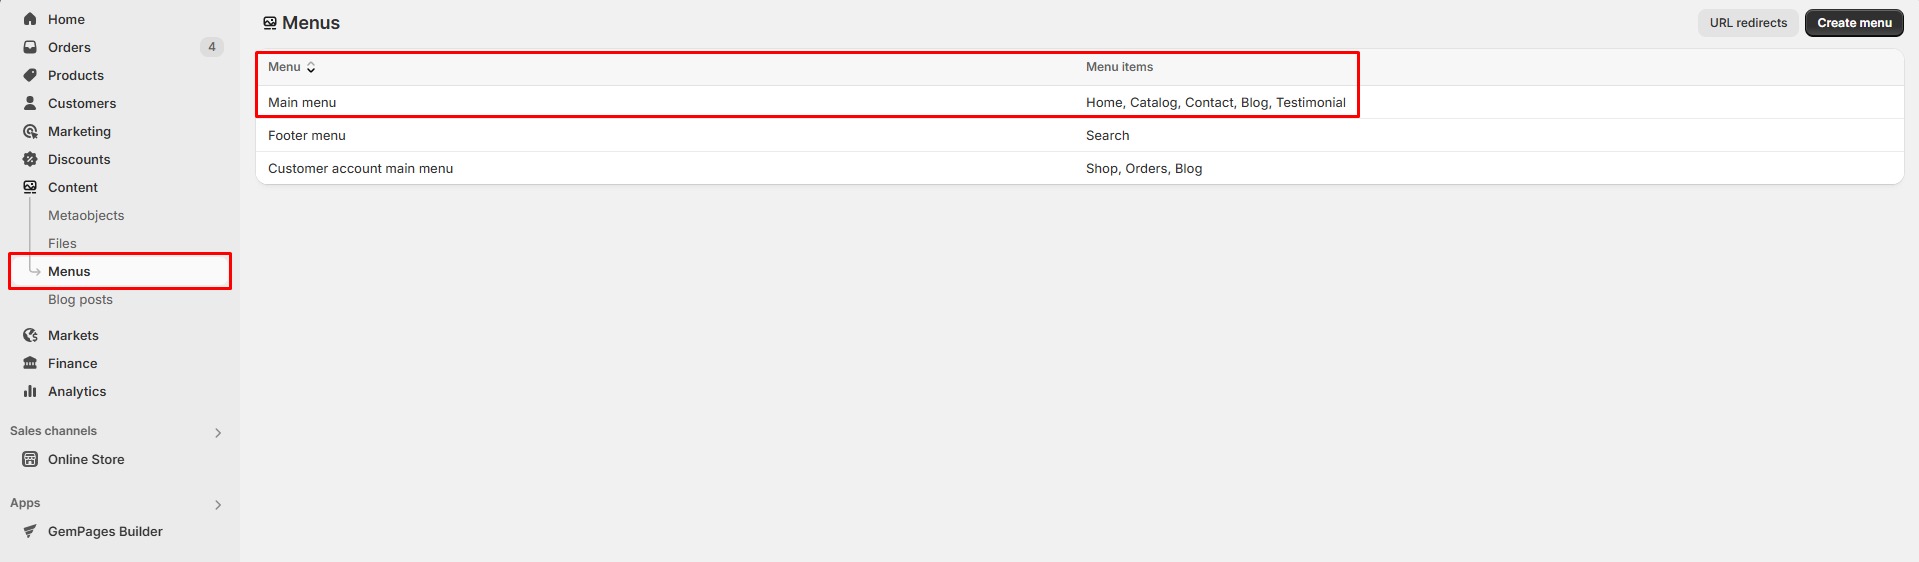
- Go to your Shopify admin > Content > Menus > Main menu.
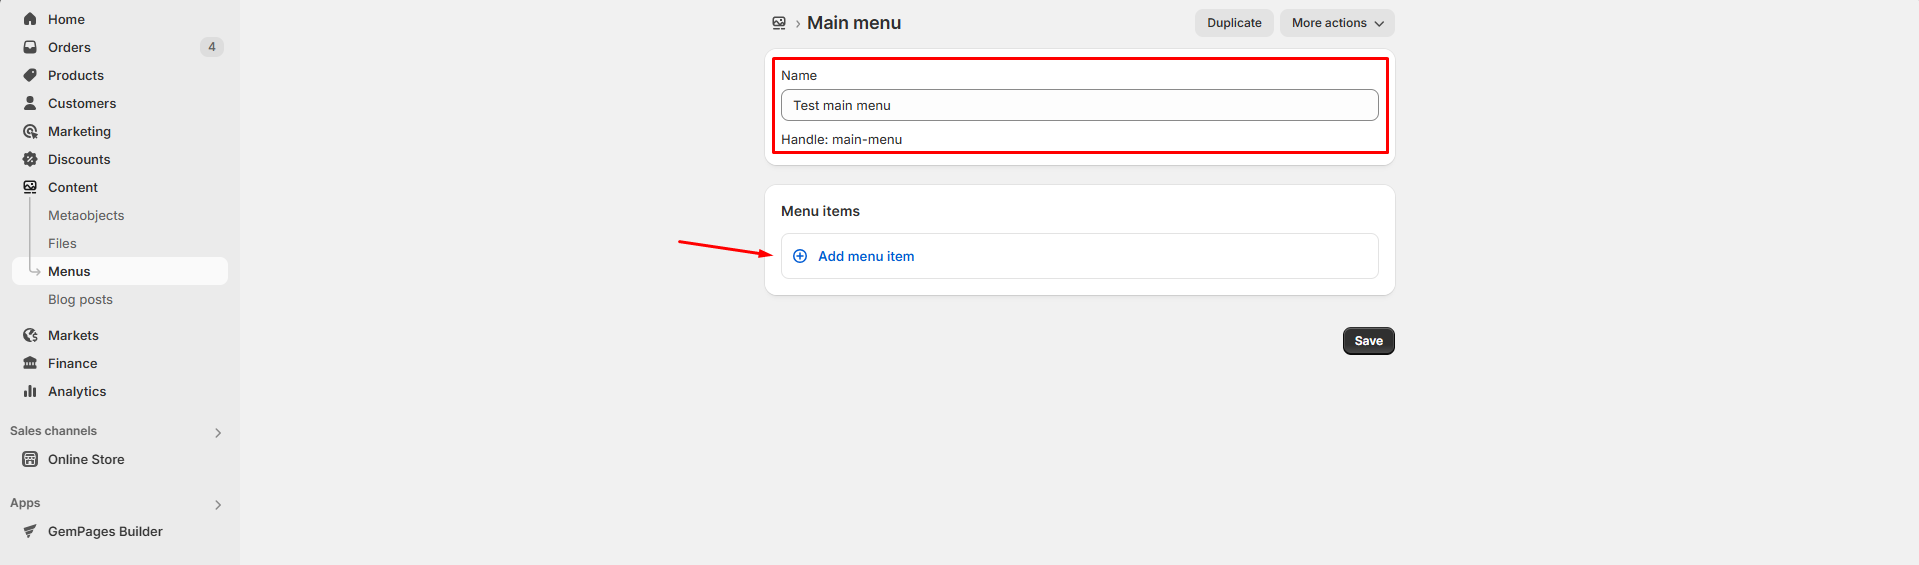
- Enter the menu name in the name box (i.e., “Test main menu”)
- Hit Add menu items in the Menu Items box to add items that display in the navigation menu.
- Enter the label for the item, and choose the destination page from the dropdown under the Link box.
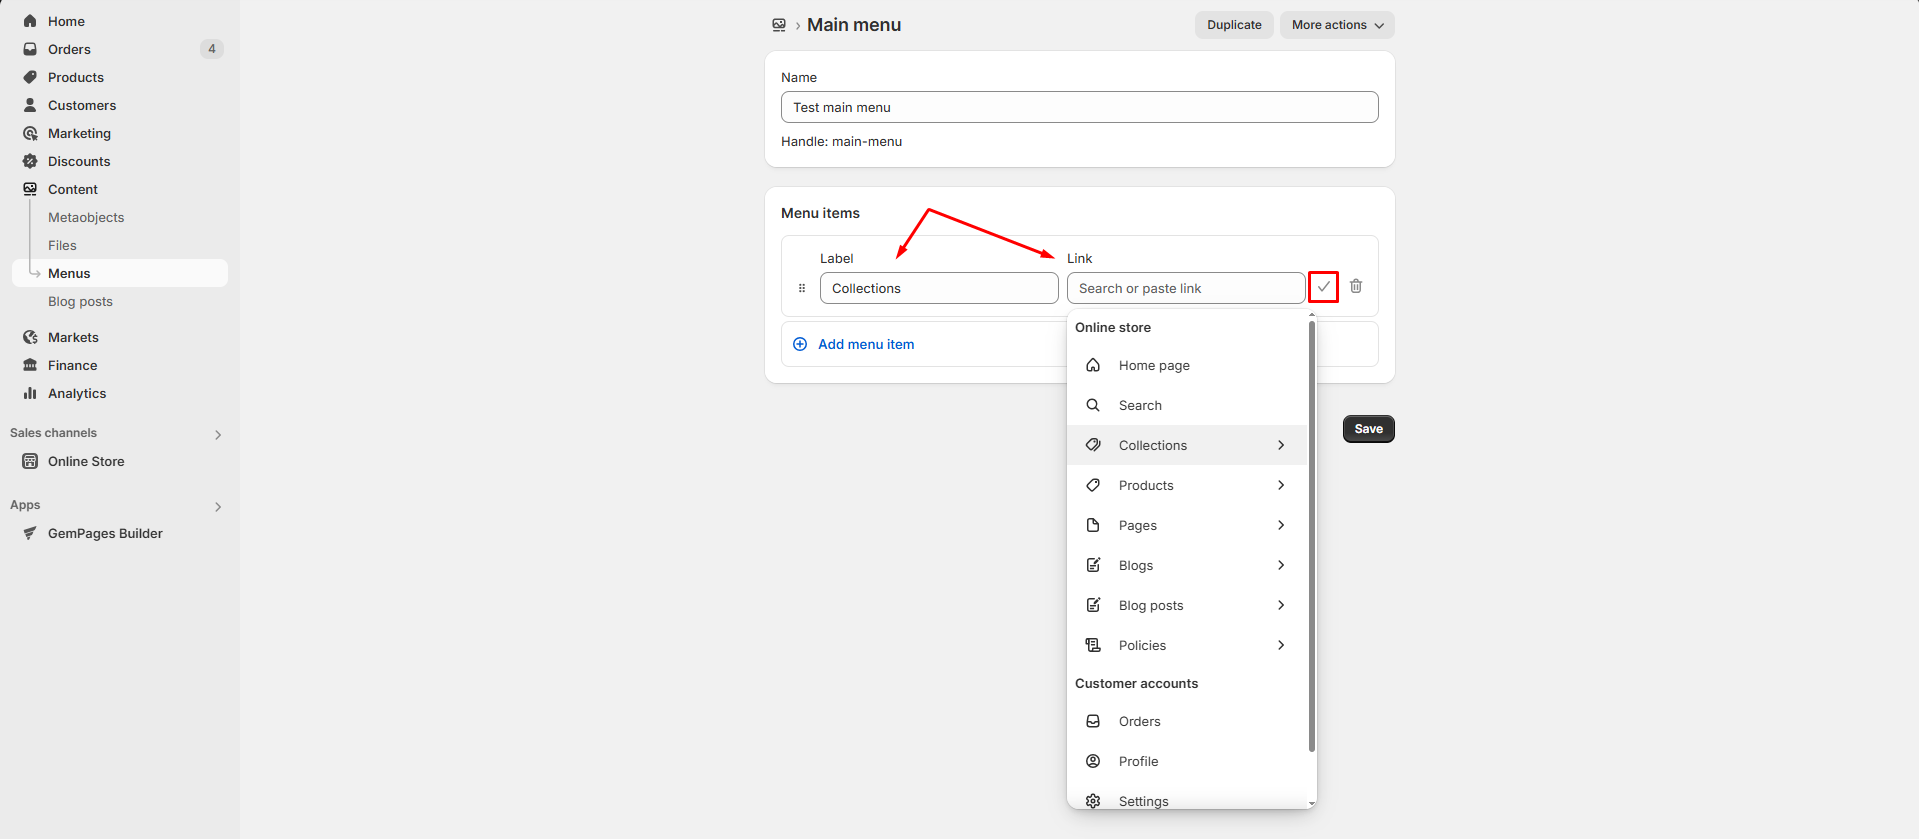
- Click the “tick” icon next to the Link box to save the item, and continue adding others.
- When you’re done, hit the Save button to save your changes.
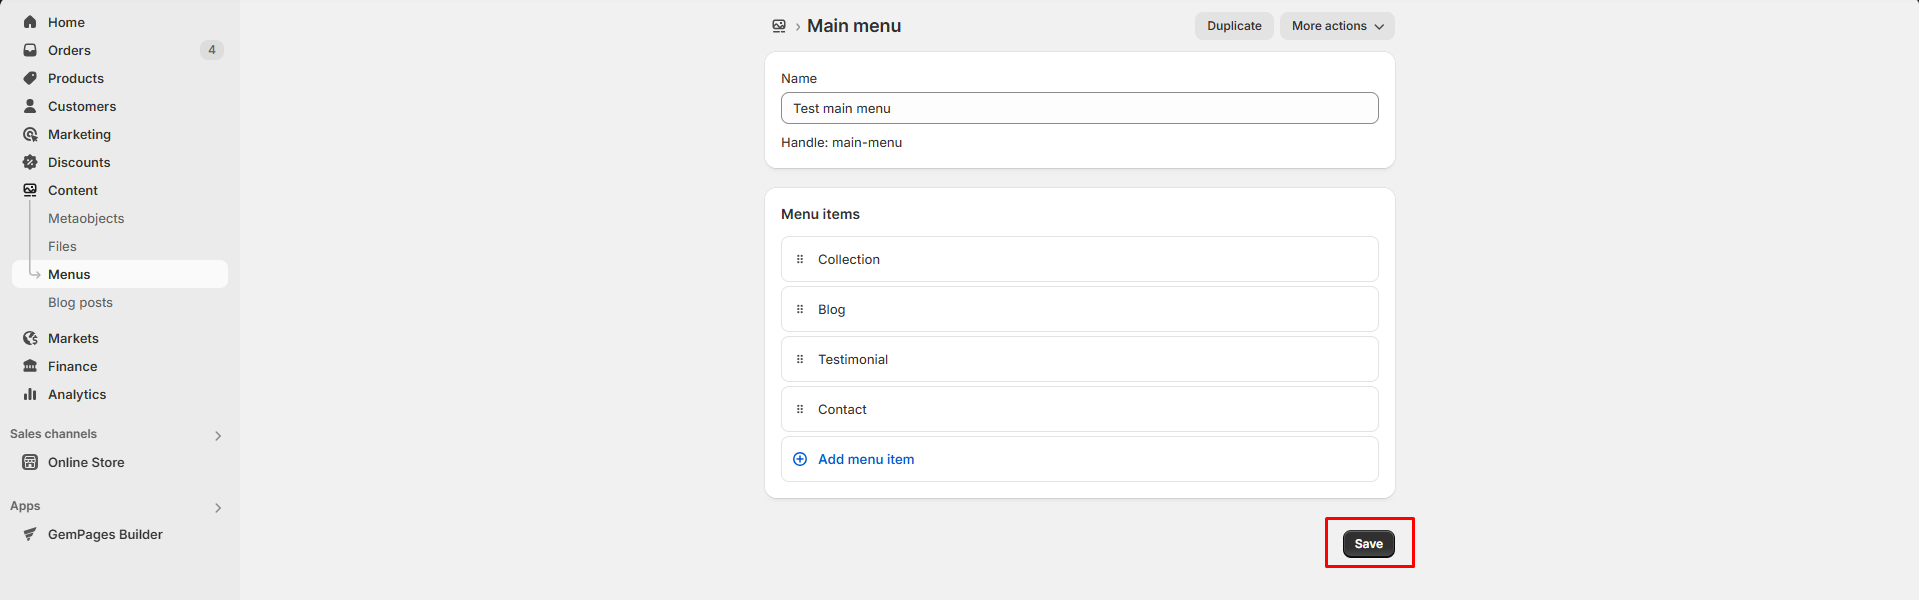
You can edit the existing items by hovering over the item and clicking Edit beside the item or hitting the trash icon to delete it. Also, click and drag the ⠿ handle icon beside each item to change its position.
To create a header drop-down menu, nest one or more items under a parent menu item in the Shopify admin. This structure is what tells Shopify to display a drop-down in your header.
If your theme supports it, the drop-down will appear automatically.
Display the Menu on your storefront
To show your menu on your live store, assign it to your theme’s header or footer:
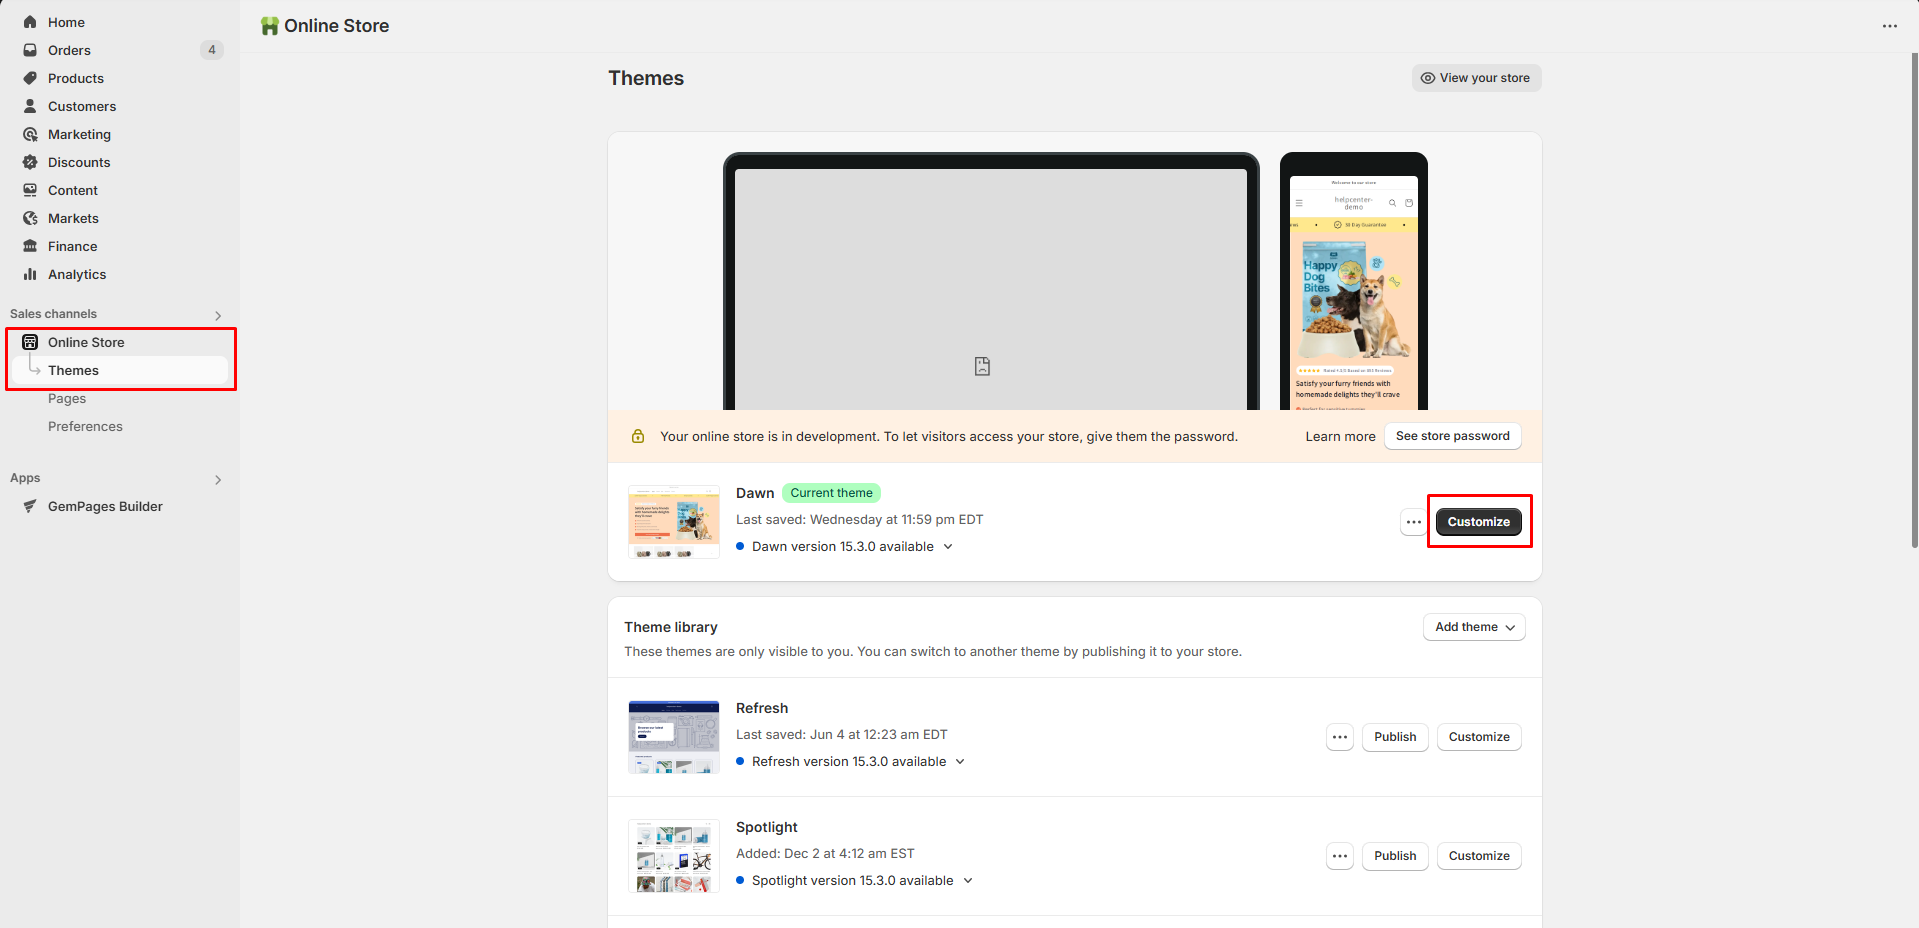
- Go to Online Store > Themes > click Customize on your active theme.
- In the theme editor, select the Header or Footer section.
- Find the Menu setting and select the desired menu from the dropdown.
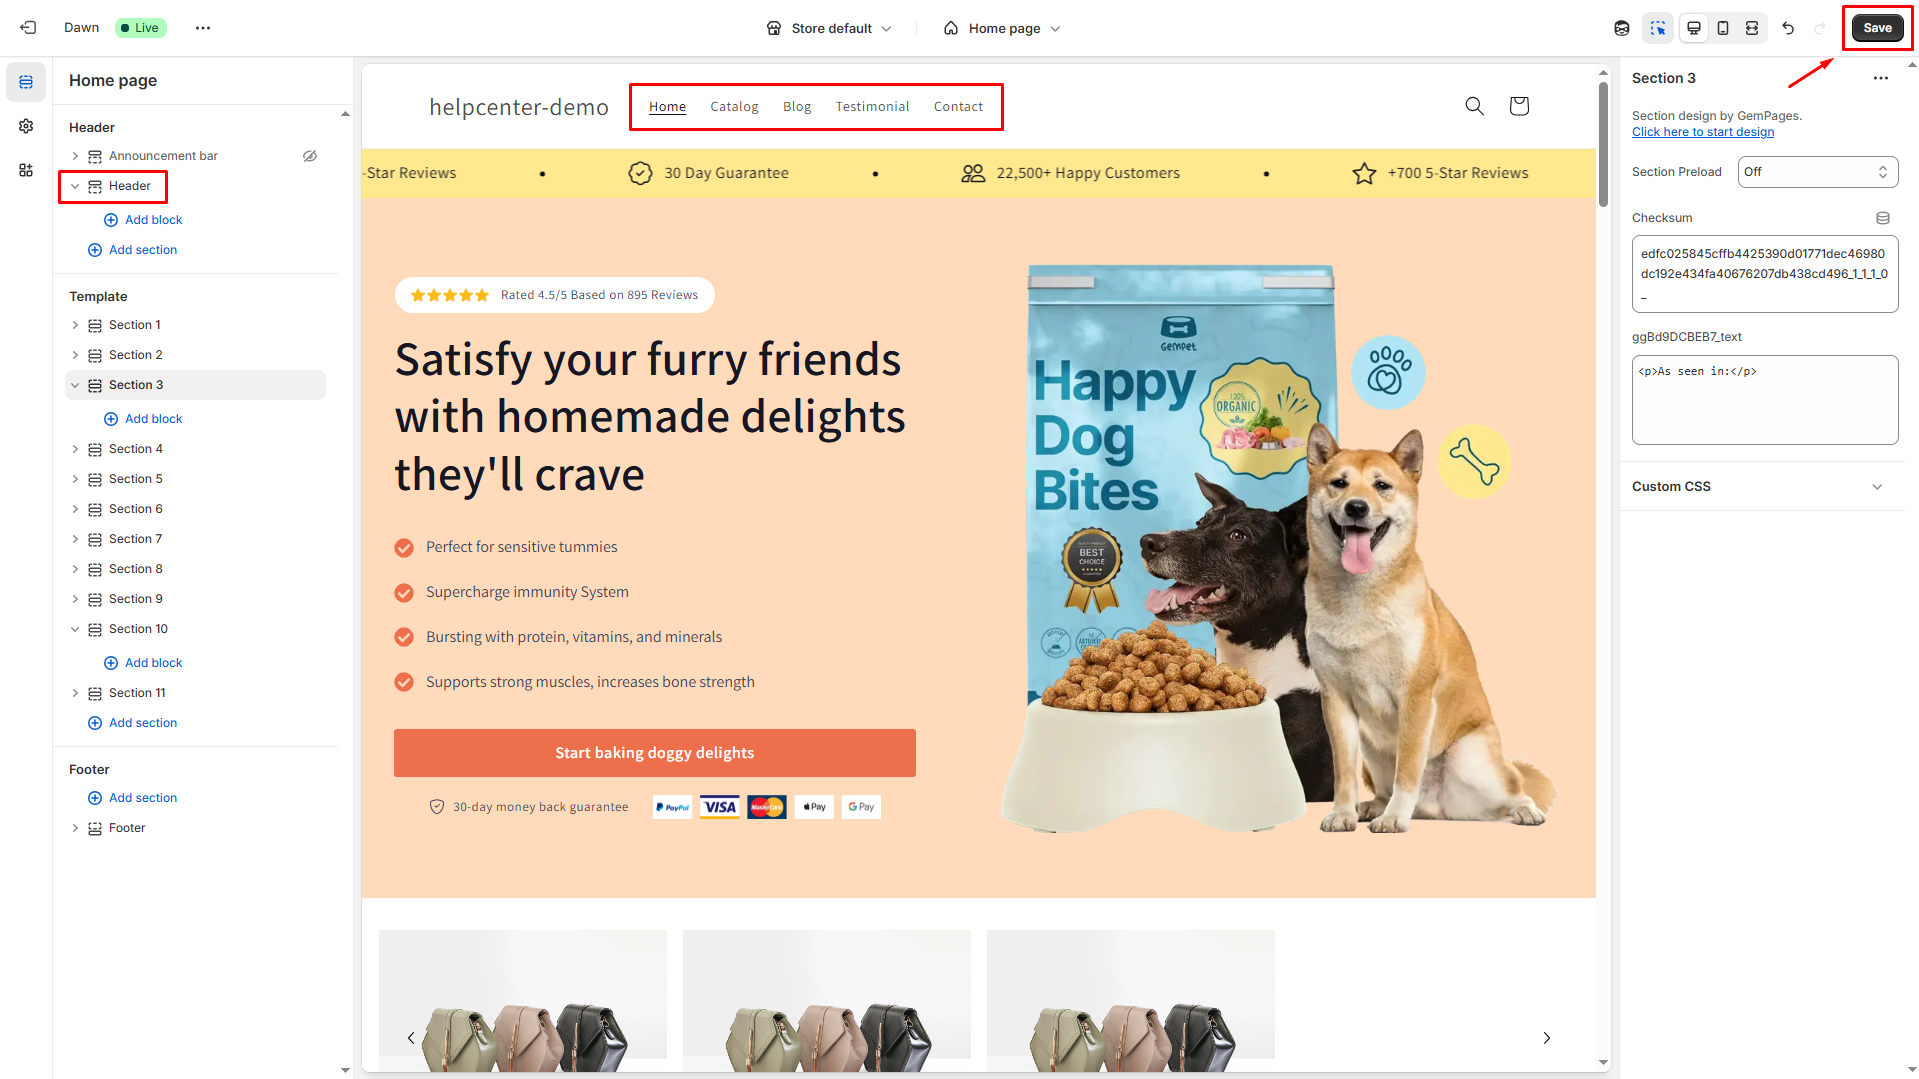
- Click Save in the upper right corner.
Can I Use GemPages to Create a Navigation Menu?
GemPages doesn’t currently support building a full navigation menu directly in the Editor. Text and button elements can only scroll to sections within the same page, not link to other pages in your store.
However, you can still display your Shopify navigation menu (including dropdowns) on any GemPages-built page, as long as the Shopify header is enabled.
Follow these steps to show the navigation bar on a GemPages page:
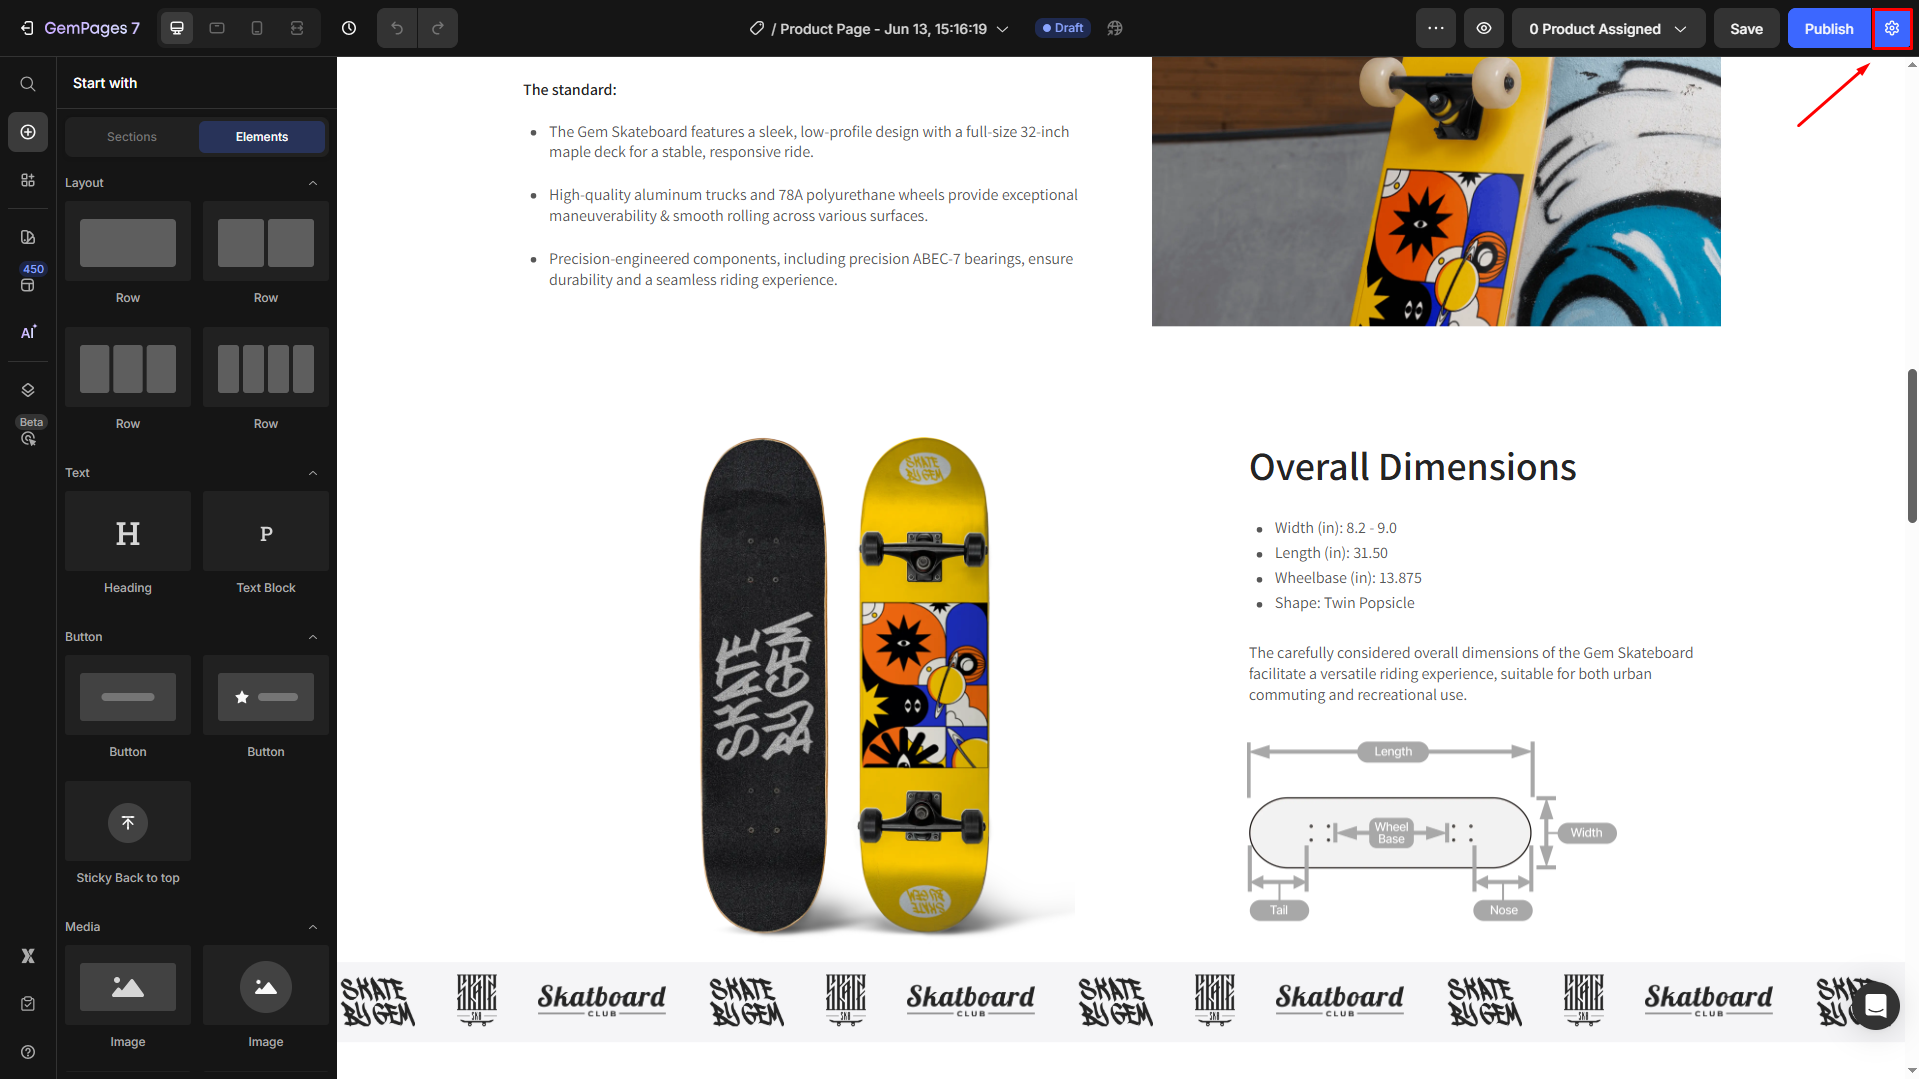
- Access the GemPages app in your Shopify and open the page in the GemPages Editor.
- Click on the Settings tab at the upper right corner of the top bar.
- Toggle on the option to show Shopify theme Header & Footer, then hit Apply Settings.
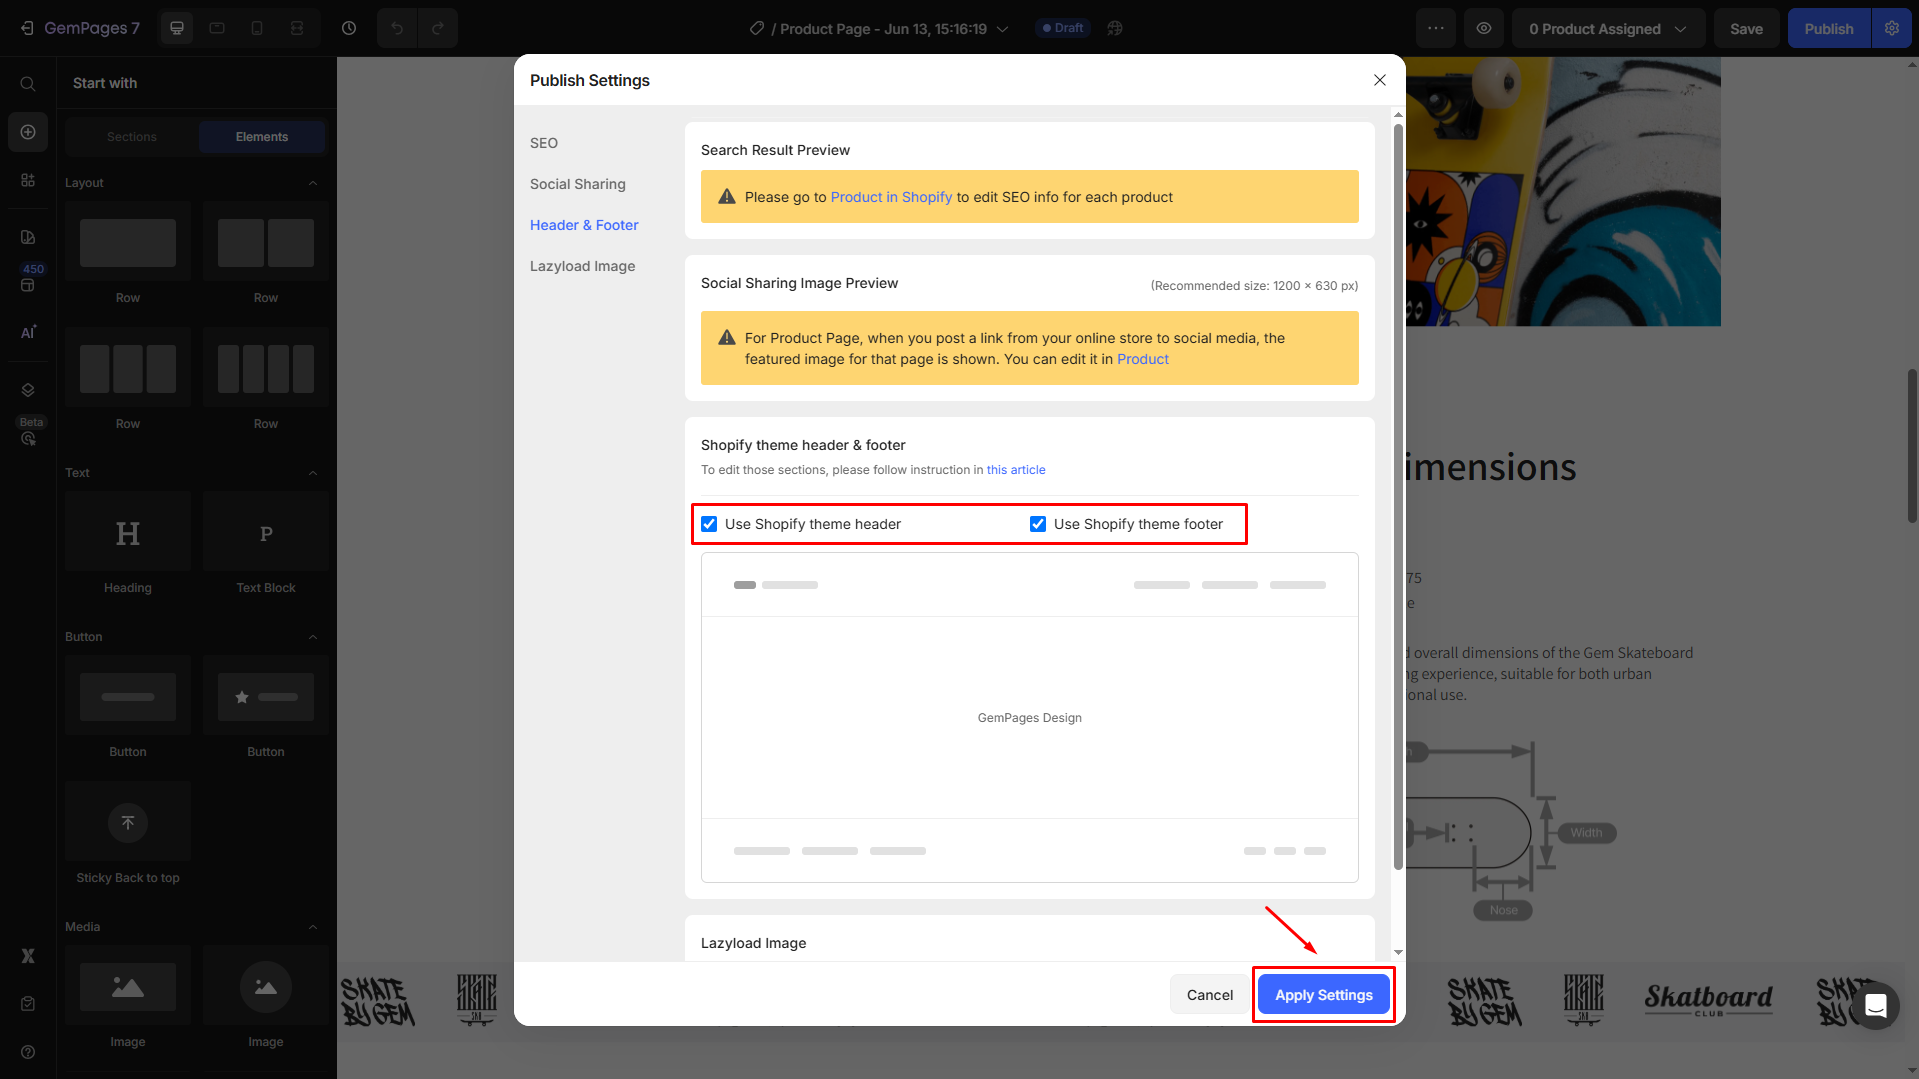
- Save and publish your page.
Best Practices for Navigation Customization
- Limit top-level items to 5–7 to avoid clutter.
- Use dropdowns to group related content (e.g., product categories).
- Double-check that all links work and lead to active pages.
- Use simple and clear labels like “Shop All”, “About Us”, or “Track Order.”
FAQs about Custom Navigation on Shopify
How do I add a drop-down menu to the title bar in Shopify?
Create nested menu items in the Shopify admin. Shopify automatically turns nested items into a header drop-down if your theme supports multi-level navigation.
Can I reorder menu items in the navigation?
Yes. In Shopify admin, drag and drop items using the ⠿ handle to rearrange their order.
Why is my drop-down menu not showing?
Check if your theme supports drop-downs and ensure you’ve enabled the header in your Shopify theme or GemPages settings.
Can I use GemPages to create navigation menus with dropdowns?
Not directly. GemPages displays the navigation bar from your Shopify theme when the header is enabled. You’ll need to build the menu in Shopify admin first.
What’s the difference between header navigation and footer navigation?
Header navigation usually appears in the title bar at the top of your site, while footer navigation displays links at the bottom. Both are managed through the Shopify admin.
Why is my Shopify header drop-down not appearing on GemPages pages?
GemPages relies on your Shopify theme to render the header. If the Shopify header is disabled in the GemPages Editor, the drop-down menu won’t display. Make sure “Show Shopify Header & Footer” is turned on.


Thank you for your comments