


What Is GemAI?
GemAI is the AI engine inside GemPages that helps merchants generate page layouts automatically. Instead of designing pages manually, you can use AI to convert images, URLs, or design references into editable sections inside the GemPages editor.
One of the most powerful GemAI tools is the Image-to-Layout feature, which allows you to turn screenshots, landing page URLs, or Figma exports into customizable layouts in seconds.
What is the Image-to-Layout Feature?
The Image-to-Layout feature is designed to simplify page design. Instead of dragging and dropping elements manually, you can:
- Upload an image of a layout.
- Paste a URL of an existing page or design.
- Import images exported from Figma.
GemPages’ AI will then automatically generate a similar, editable layout that you can fully customize.
For a more in-depth look at GemAI and its capabilities, check out our introduction video:
Each month, more than 80,000 sections are generated using GemAI, helping merchants quickly build landing pages and product pages without manual design. To learn more, visit GemPages AI Image-to-Layout.
How to Use the AI Image-to-Layout Feature?
The Image-to-Layout feature is a default functionality available within the GemPages app. It is accessible to all V7 users.
1. Access the Image-to-Layout Feature
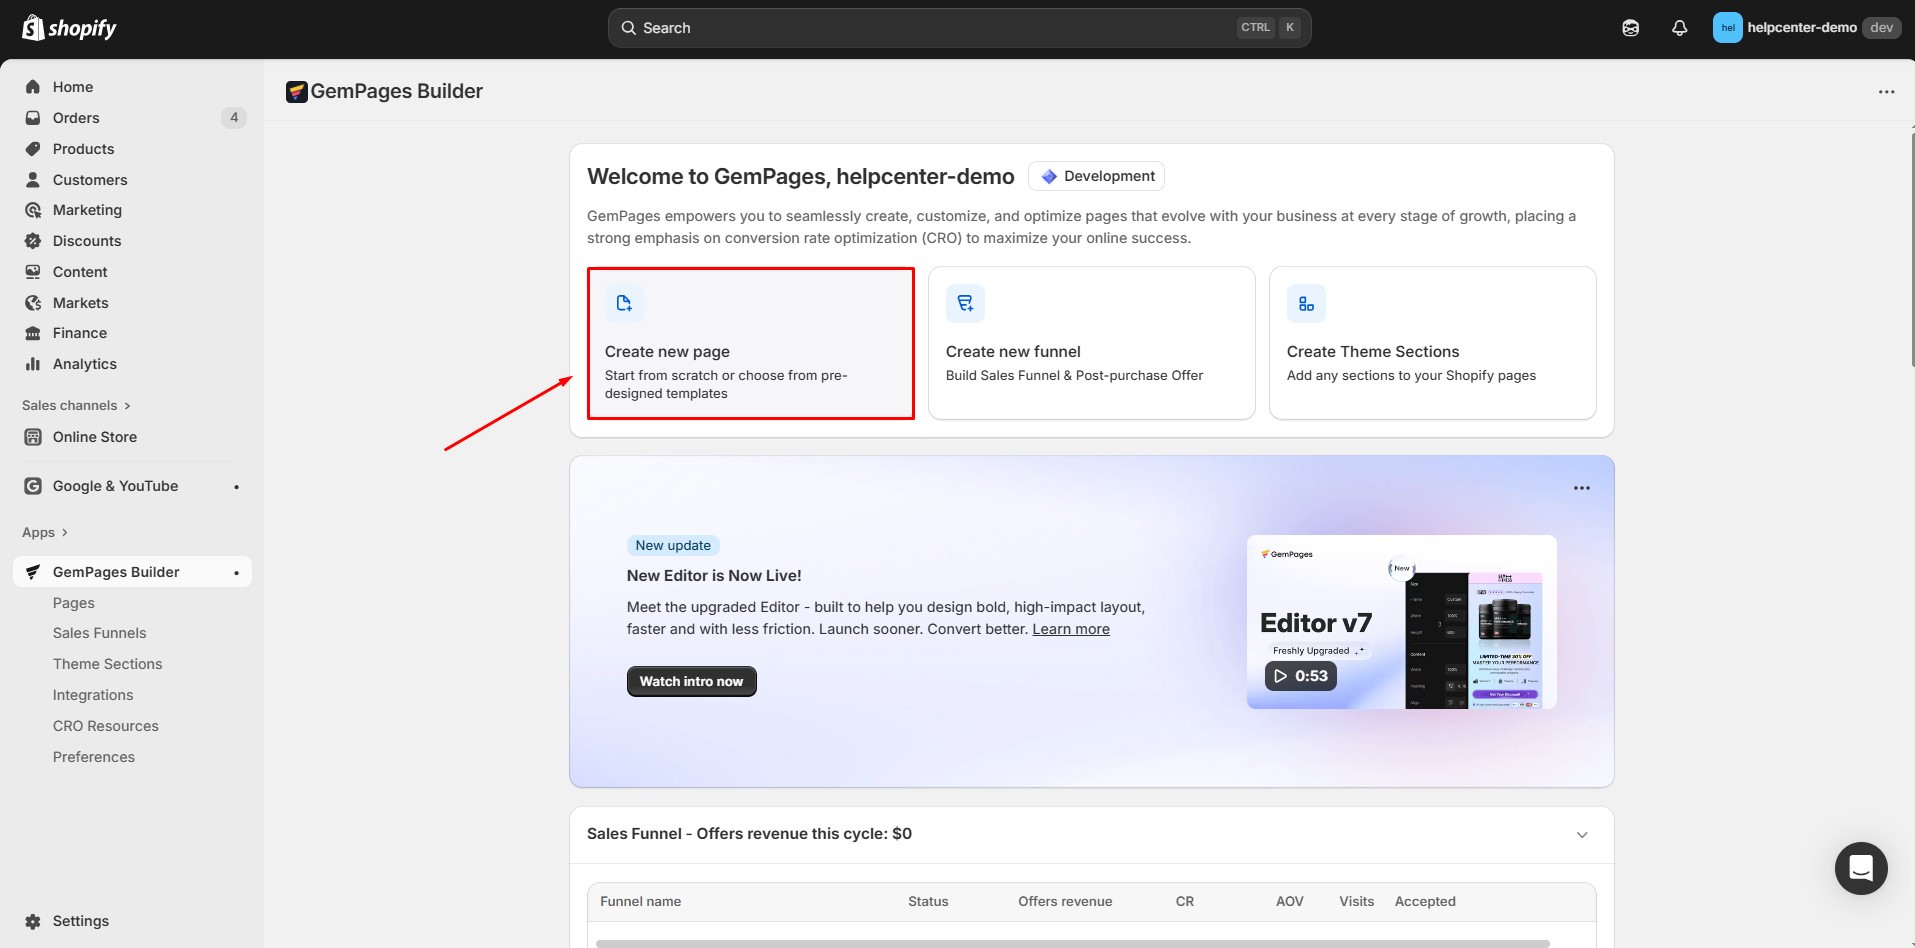
Step 1: To create a new page with the “Image-to-Layout” feature, in the GemPages Dashboard, click on the “Create new page” button. Please keep in mind that this feature is only available in GemPages Editor V7.
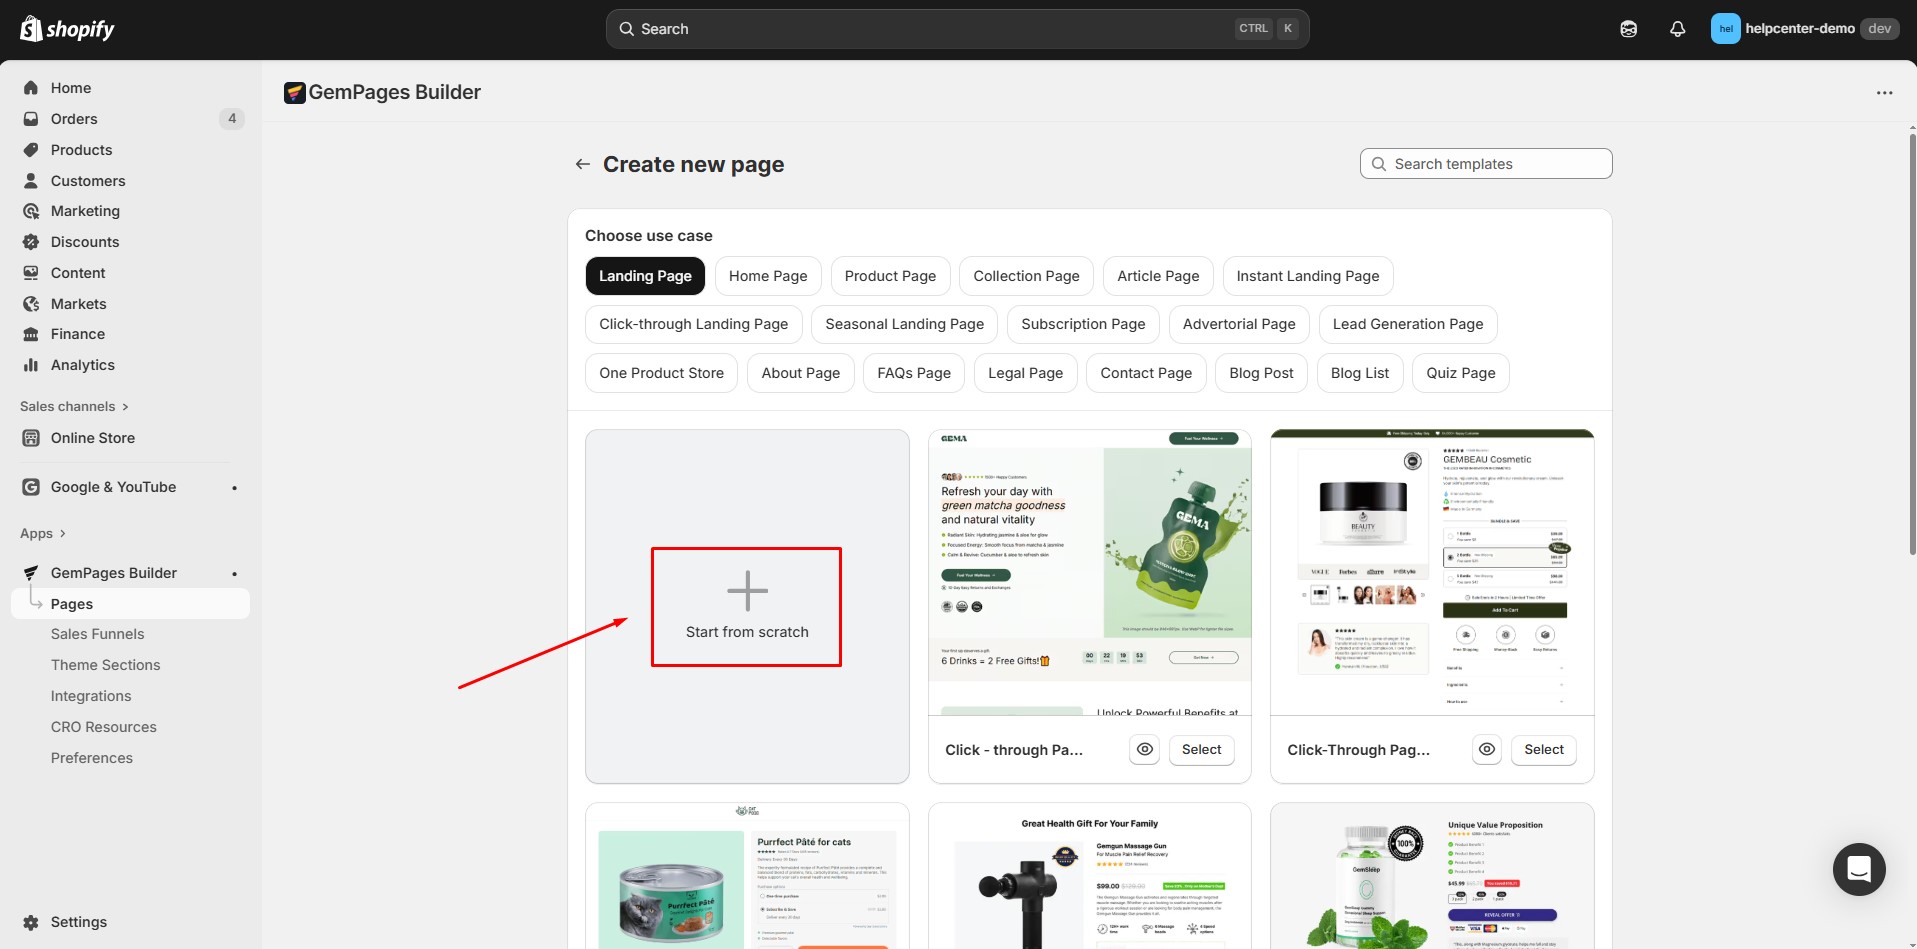
Step 2: Create a new page from the ground up by selecting the “Start from scratch” button. Once you enter the Editor, you will see options to convert a URL or an image into a page layout.
Step 3: Upon accessing the GemPages Editor, you will find the option to convert a URL or an image to a page layout.
You can also find the Image to Layout feature by clicking the AI icon in the left sidebar.
![]()
2. Upload and Analyze
At this stage, you will have two options:
- Paste a URL to generate a layout
- Upload an image to create a layout
For the URL Input, follow these steps:
Step 1: Paste the URL into the input box.
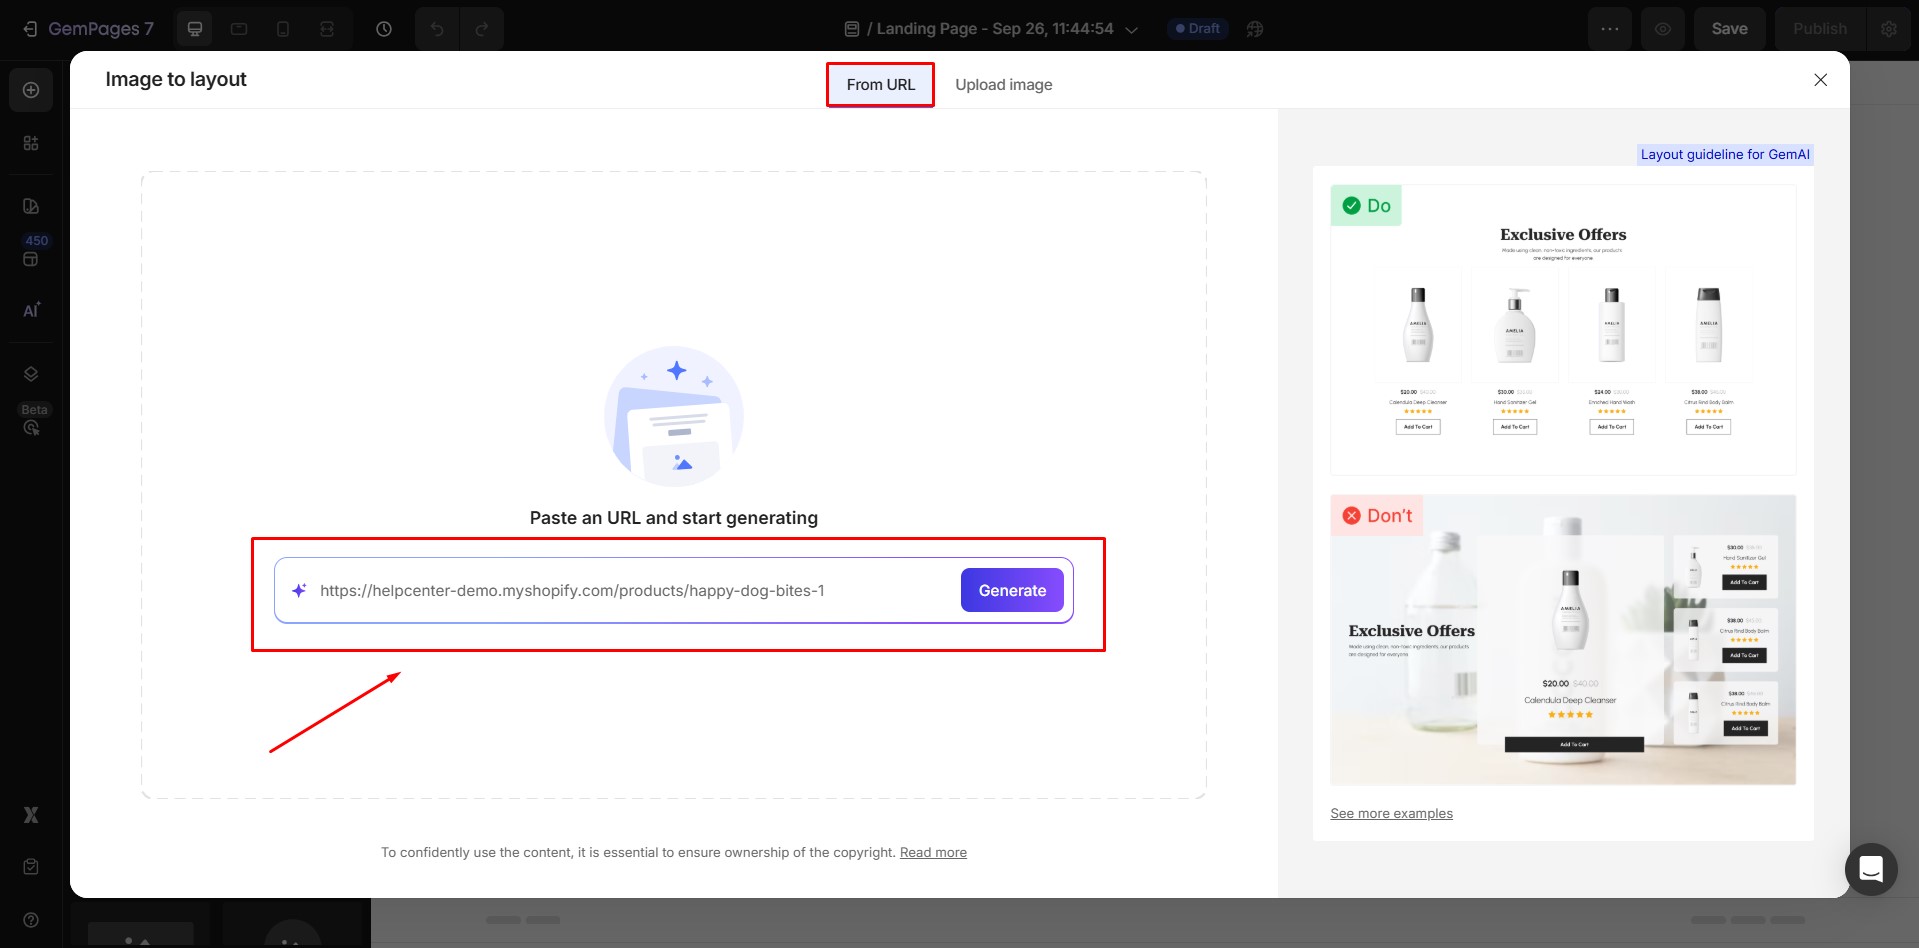
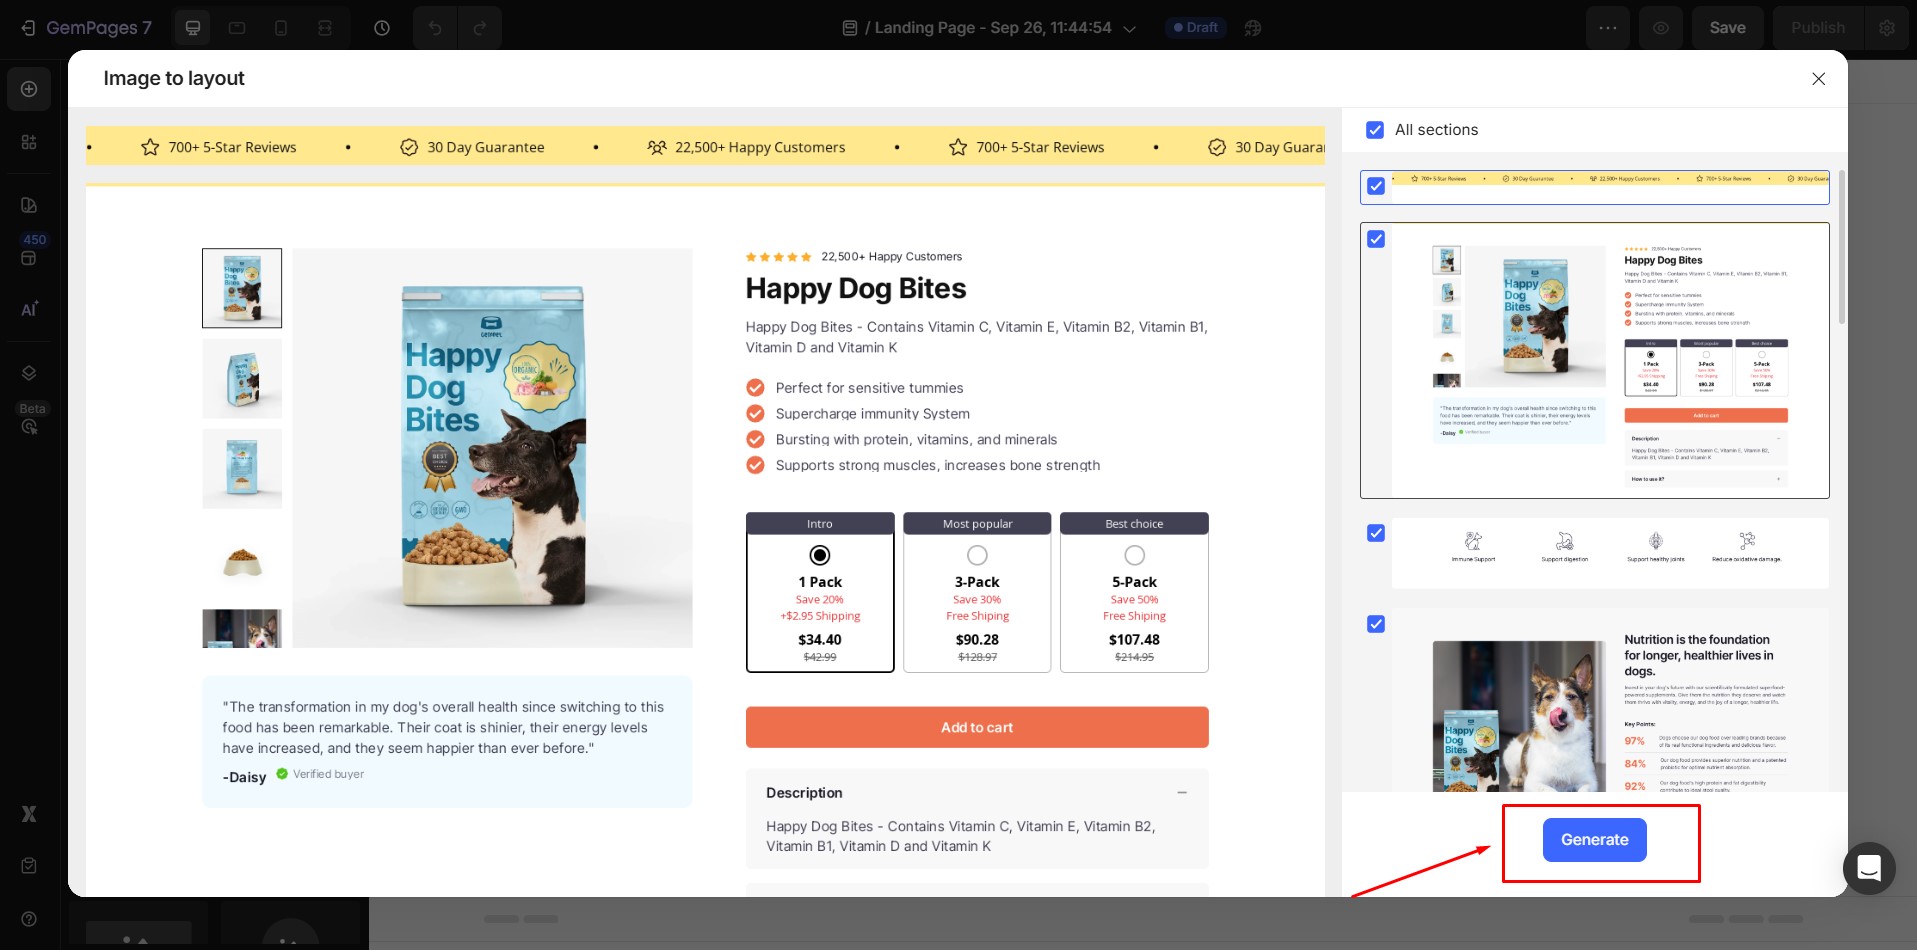
Step 2: After the detection process is finished, the system will show all available sections on the right side of the screen. Choose the sections you want to generate and then click “Generate.”
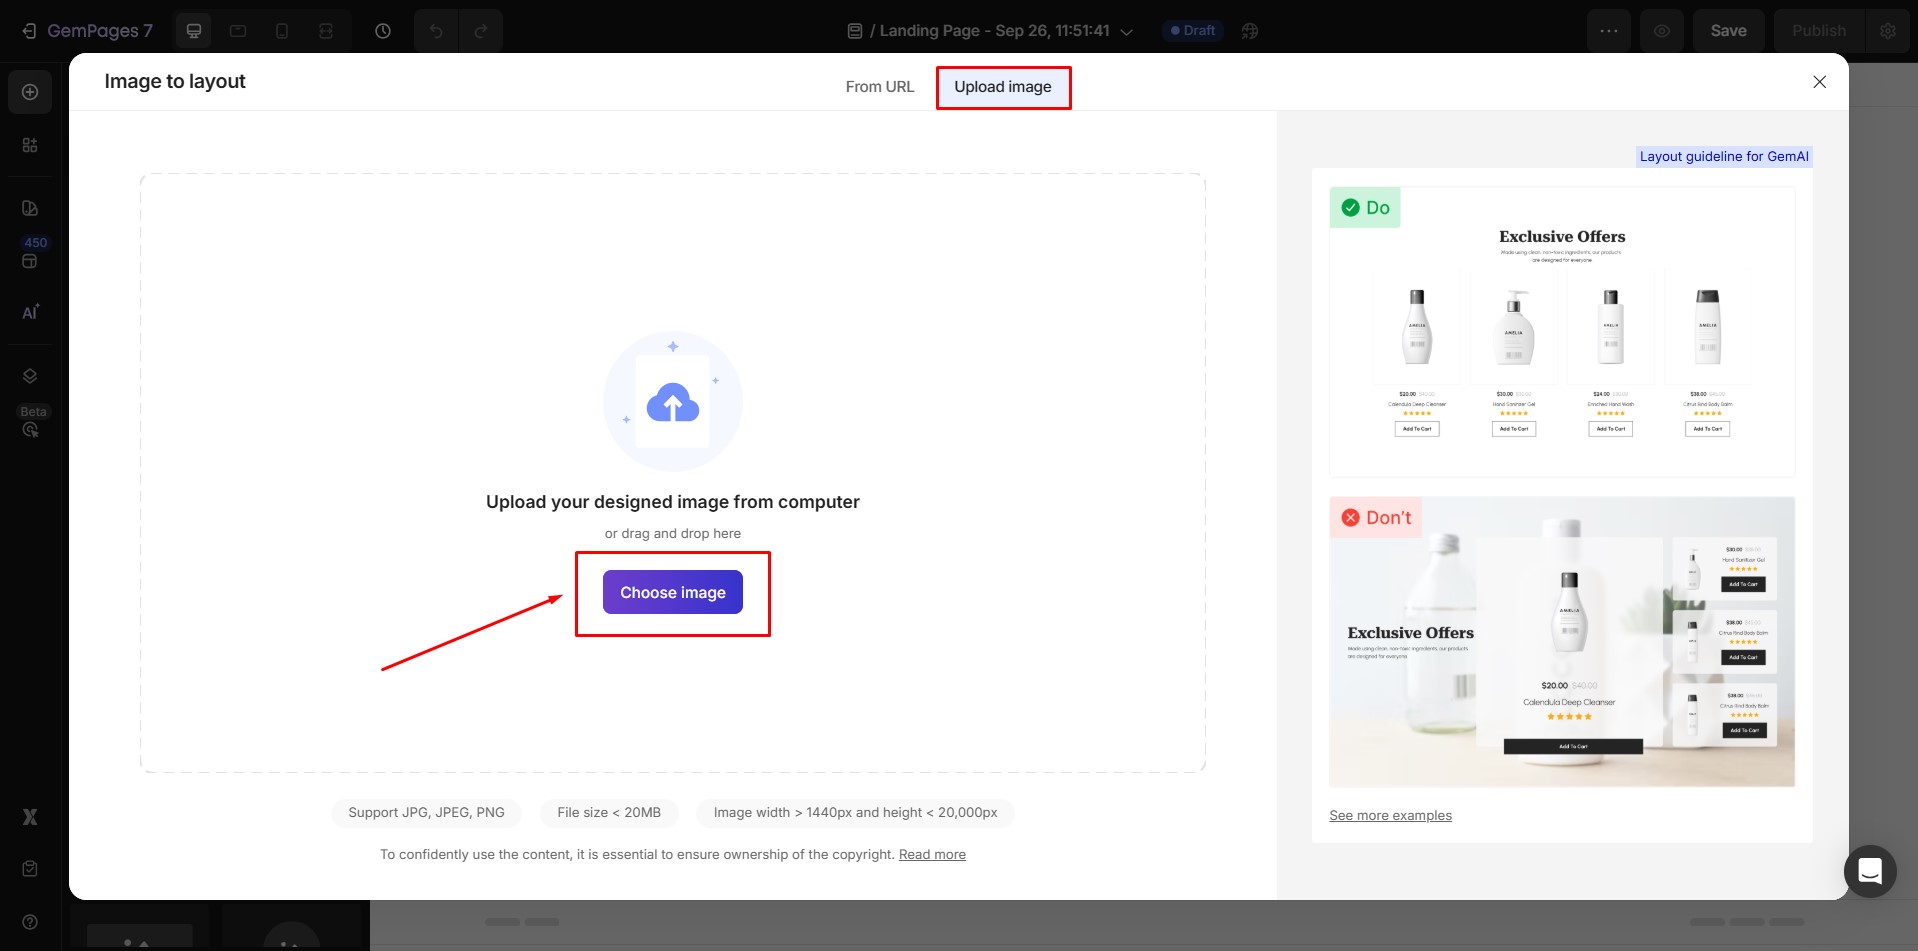
For Image Input, follow these steps:
Step 1: Click “Upload image” to begin, and then select “Choose image.”
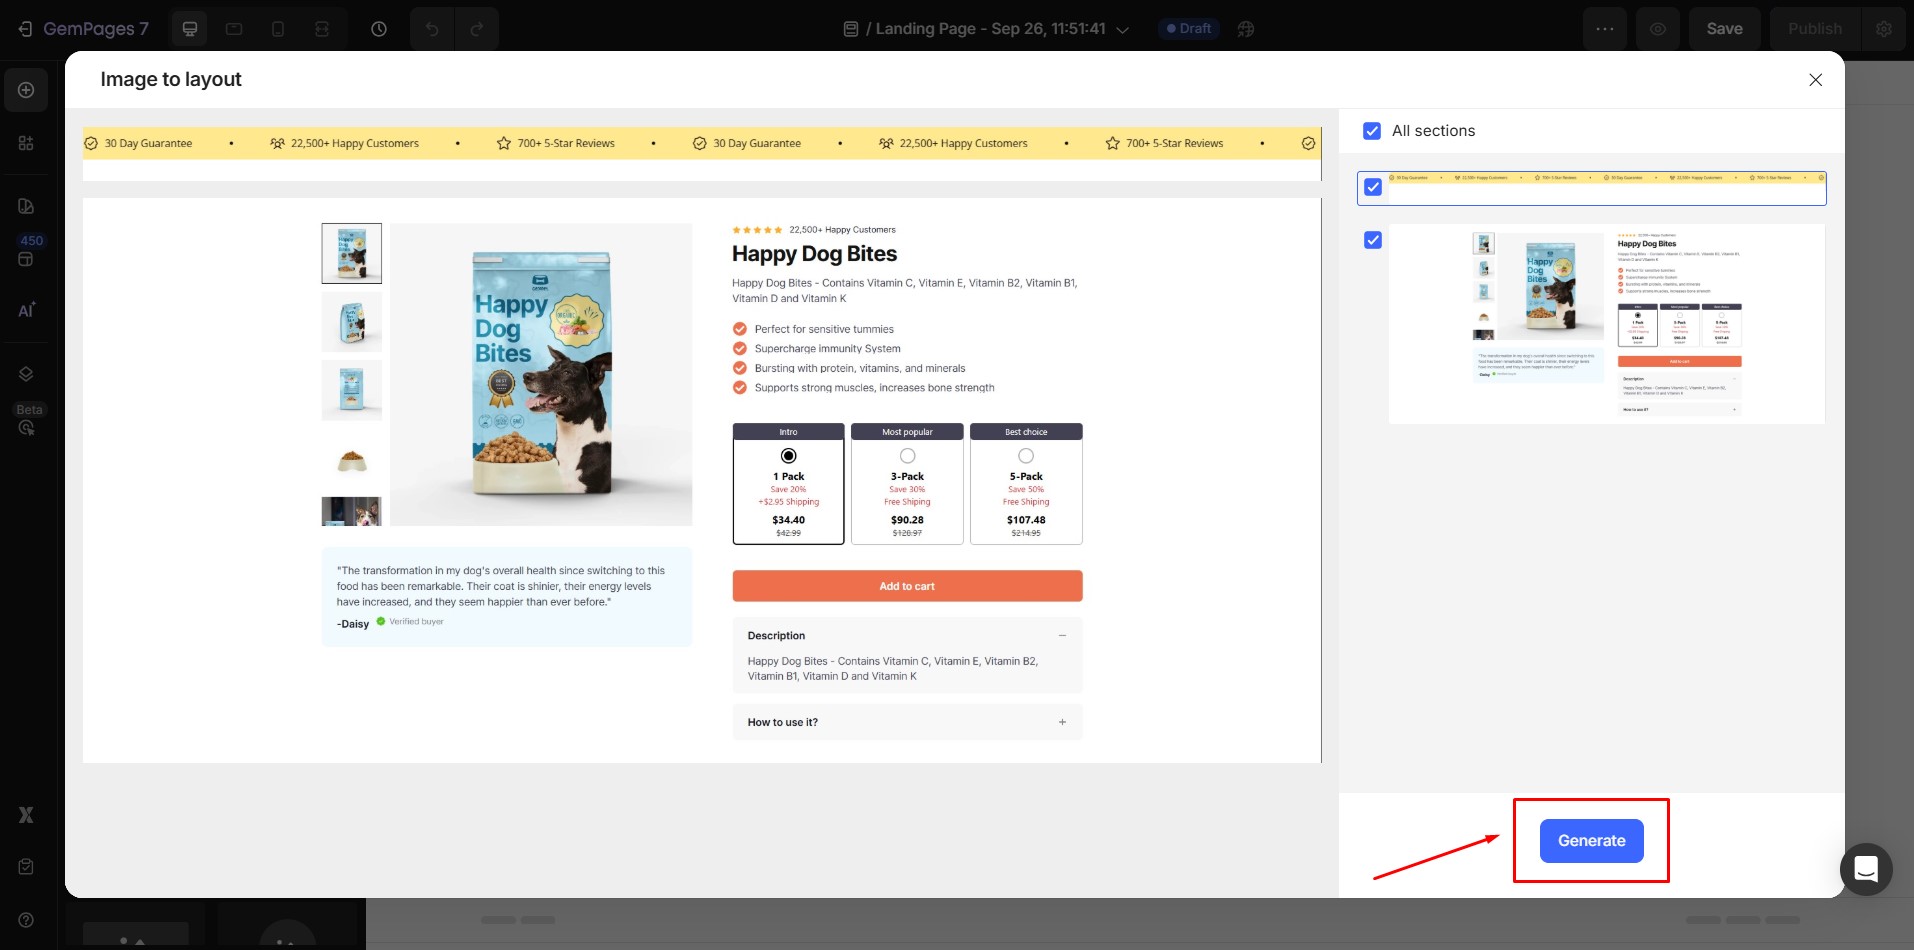
Step 2: After the detection process is finished, the system will show all available sections on the right side of the screen. Choose the sections you want to generate and then click “Generate.”
Note: Image Requirement
- Maximum file size: 20MB
- No minimum file size requirement
- Minimum Width: 1440px
- Maximum Height: 20000px
- Supported formats: png, jpg, jpeg
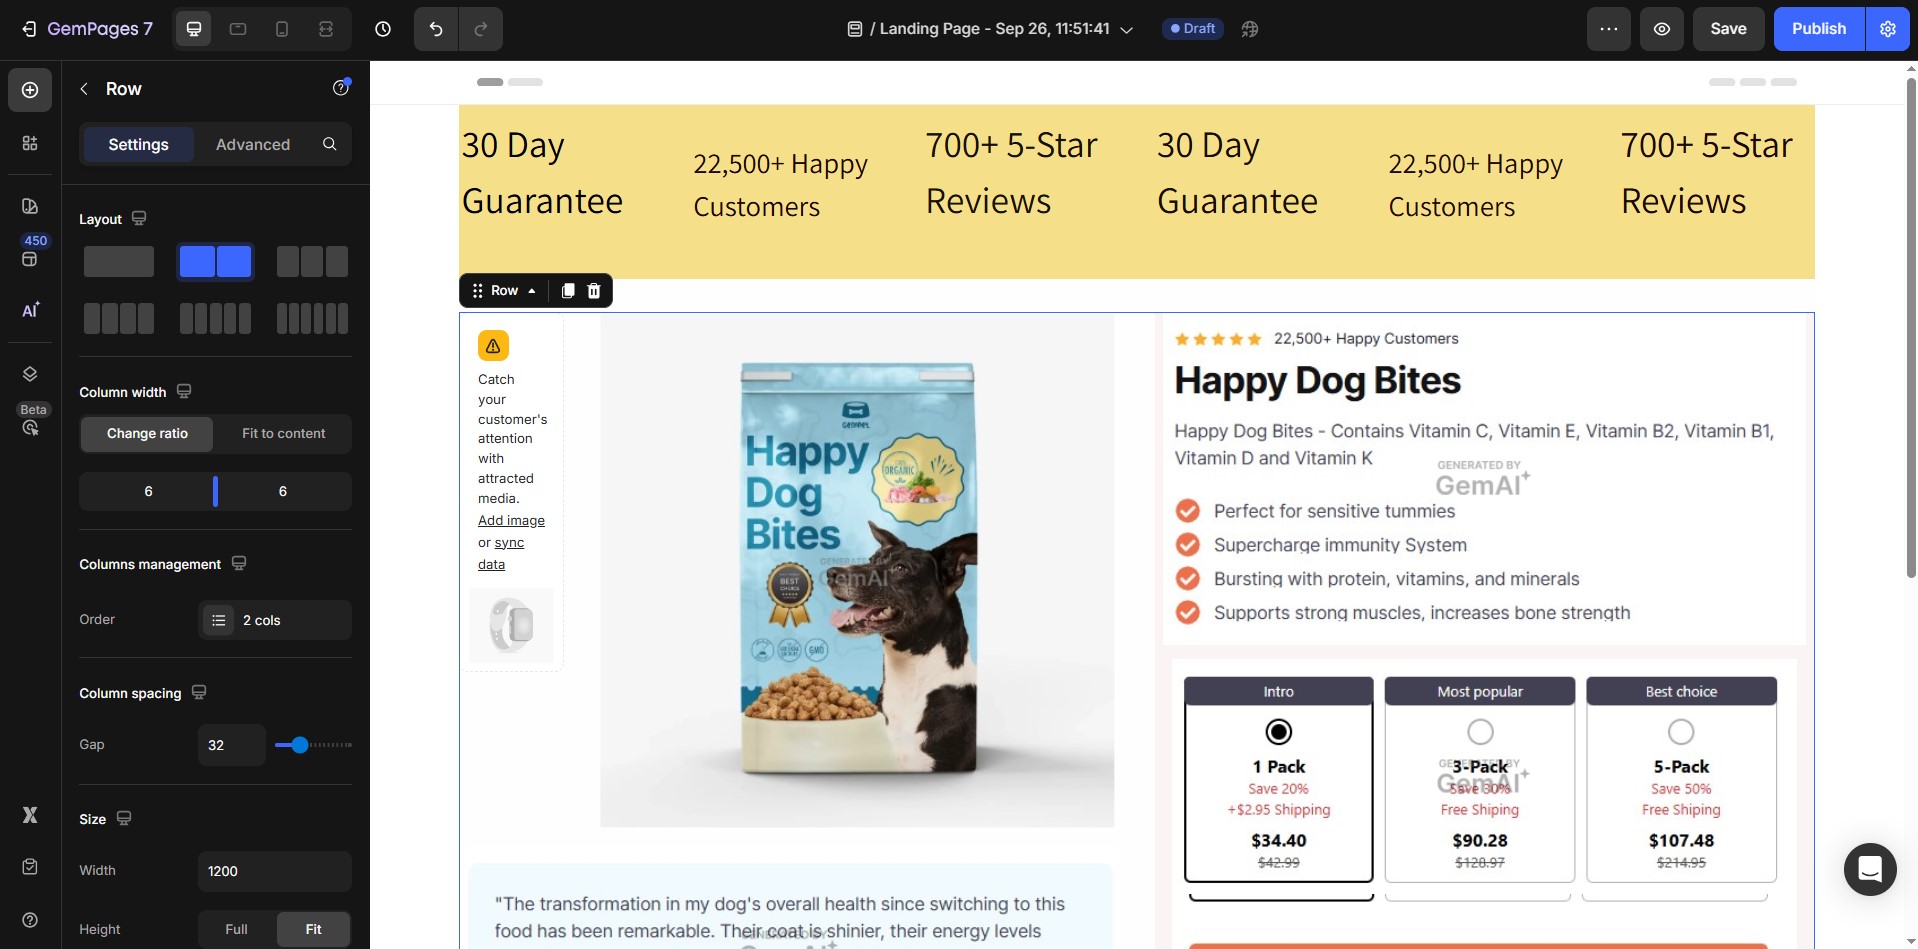
3. Customize the generated layouts
You can effortlessly click on any element within the layout to customize the content according to your preferences. To add more sections to your page, just drag and drop elements from the left sidebar.
FAQs
1. What is GemAI in GemPages?
GemAI is the AI system built into GemPages that helps generate page layouts automatically from images or URLs.
2. Can GemAI generate a layout from an image?
Yes. With the Image-to-Layout feature, GemAI can analyze an image and generate an editable layout inside the GemPages editor.
3. Can GemAI convert a website URL into a layout?
Yes. You can paste a webpage URL and GemAI will detect the page structure and generate similar sections automatically.
Should you encounter any issues, please provide your feedback at https://feedback.gempages.net.


Thank you for your comments