Install the App from the Shopify App Store
Step 1: Install the Searchanise Search & Filter app from the Shopify app store.

Step 2: Click the Install button in the appearing window.

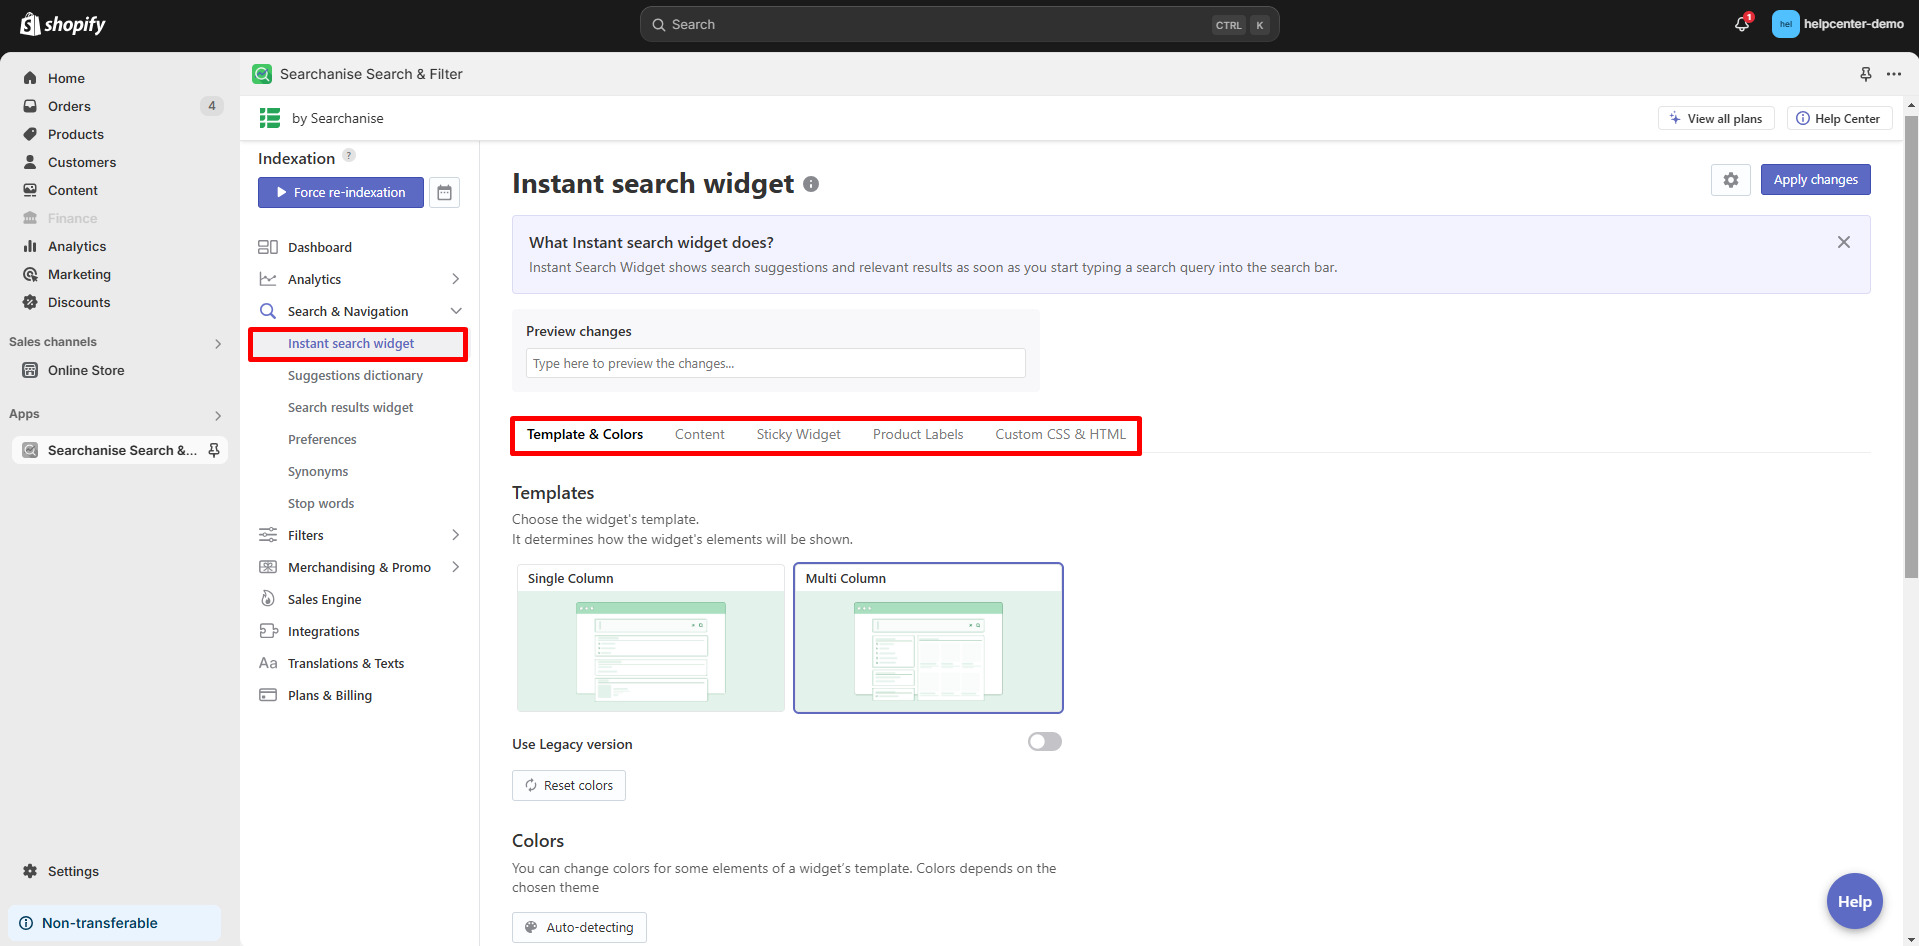
Step 3: Go to Search & Navigation and configure the Instant Search Widget.

Step 4: Go to Search & Navigation and configure the Search Results Widget.

Step 5: Navigate to Filter > Filter List to edit or add filters (e.g., price, vendor, product type).

Step 6: Adjust filters for collections. For a more detailed guide on setting up filters on collections, refer to this article.

Step 7: Search & Navigation > Preferences to refine search relevance.

Step 8: From the app dashboard, click Force re-indexation to index your collections. If the status is Up-to-date, it should work appropriately.

Step 9: In the Dashboard section, copy the API key.

How to Add Searchanise Search & Filter in GemPages?
Version 6
Step 1: Access the Library by clicking on the Library button on the toolbar of the editor page.

Step 2: In the pop-up window, under the Elements tab of the third-party item, enter Searchanise Search & Filter in the search box.
Toggle on the switch to add the element to your editor.

Version 7
Step 1: In the GemPages Editor, locate your target page to open the editor.
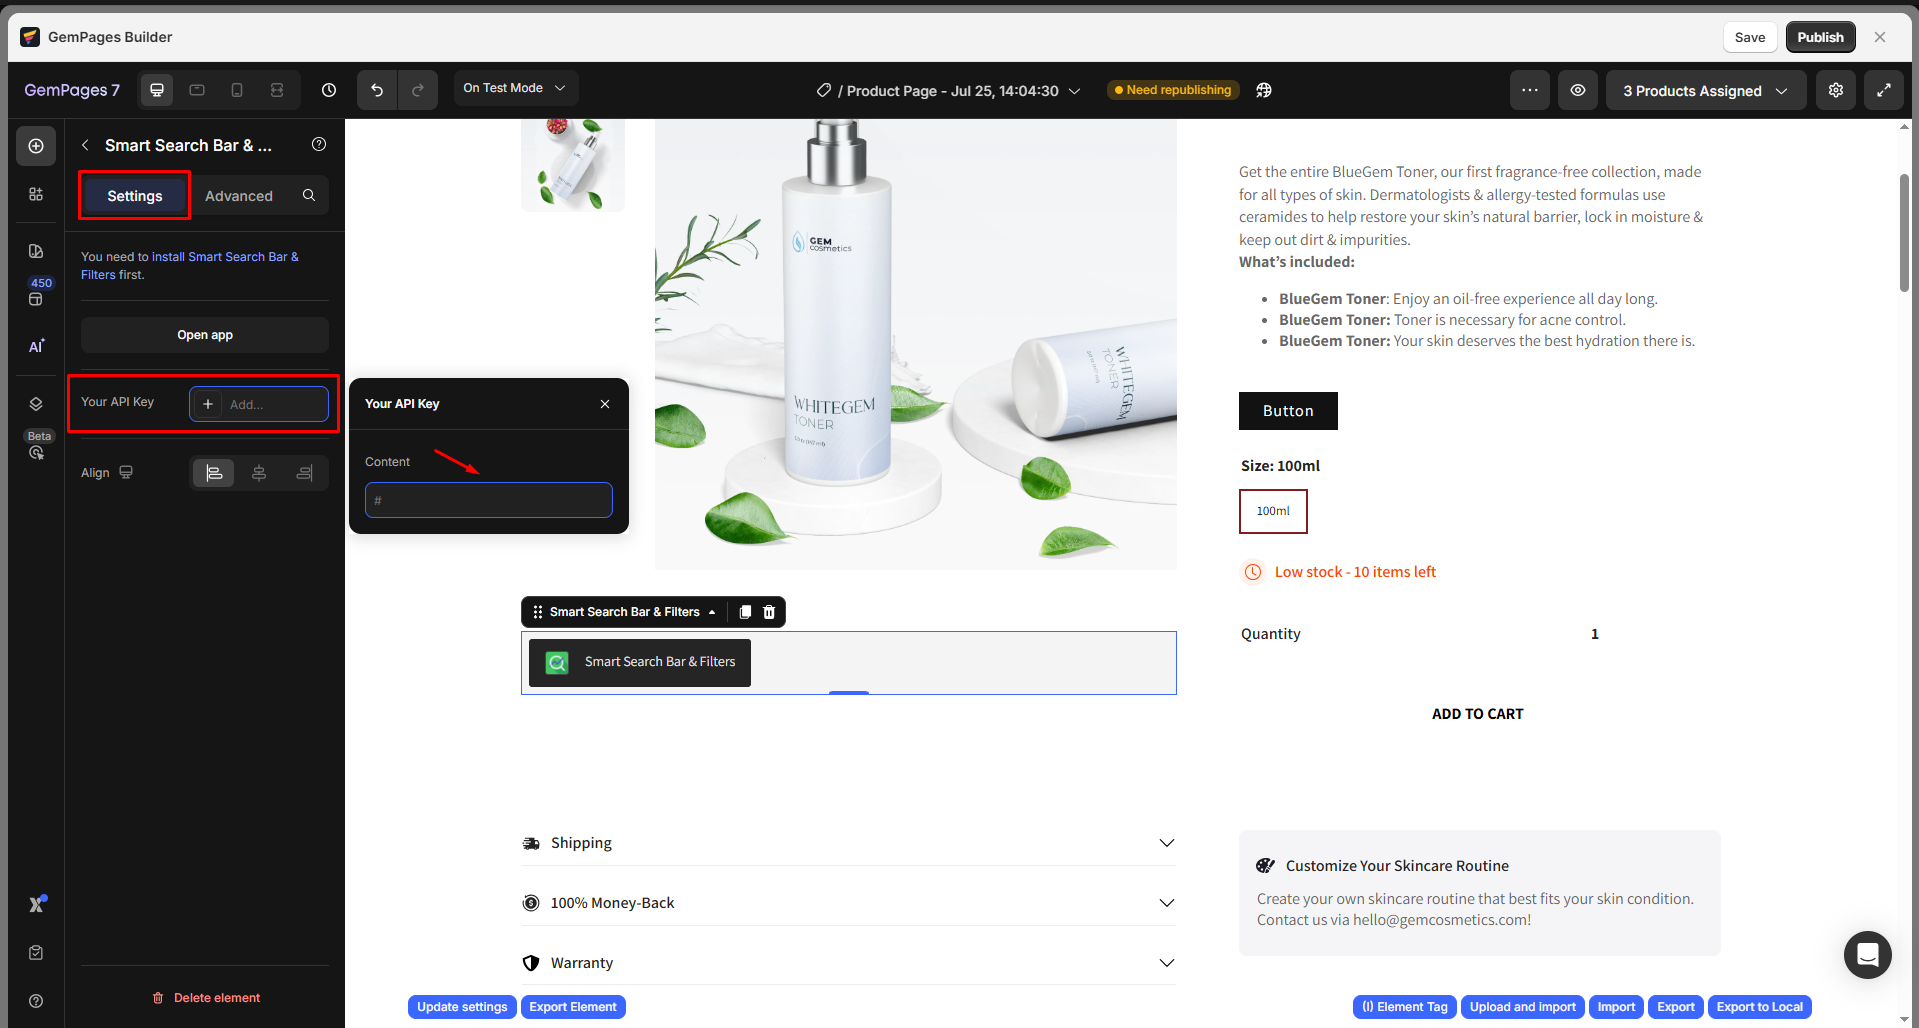
Step 2: In the left sidebar, use the search bar to find the app, then drag and drop the element onto the design area.

Step 3: Click the element to open its settings. Paste the API key that you copied earlier in the Your API key box.

Step 4: Save your changes and hit Publish.


Thank you for your comments