Why is the Newsletter Signup Form Important?
A newsletter signup form is one of the easiest ways to start building a long-term relationship with your customers.
Instead of relying only on ads or one-time visits, you can use the form to grow your own email list, which is a valuable channel that you fully own.
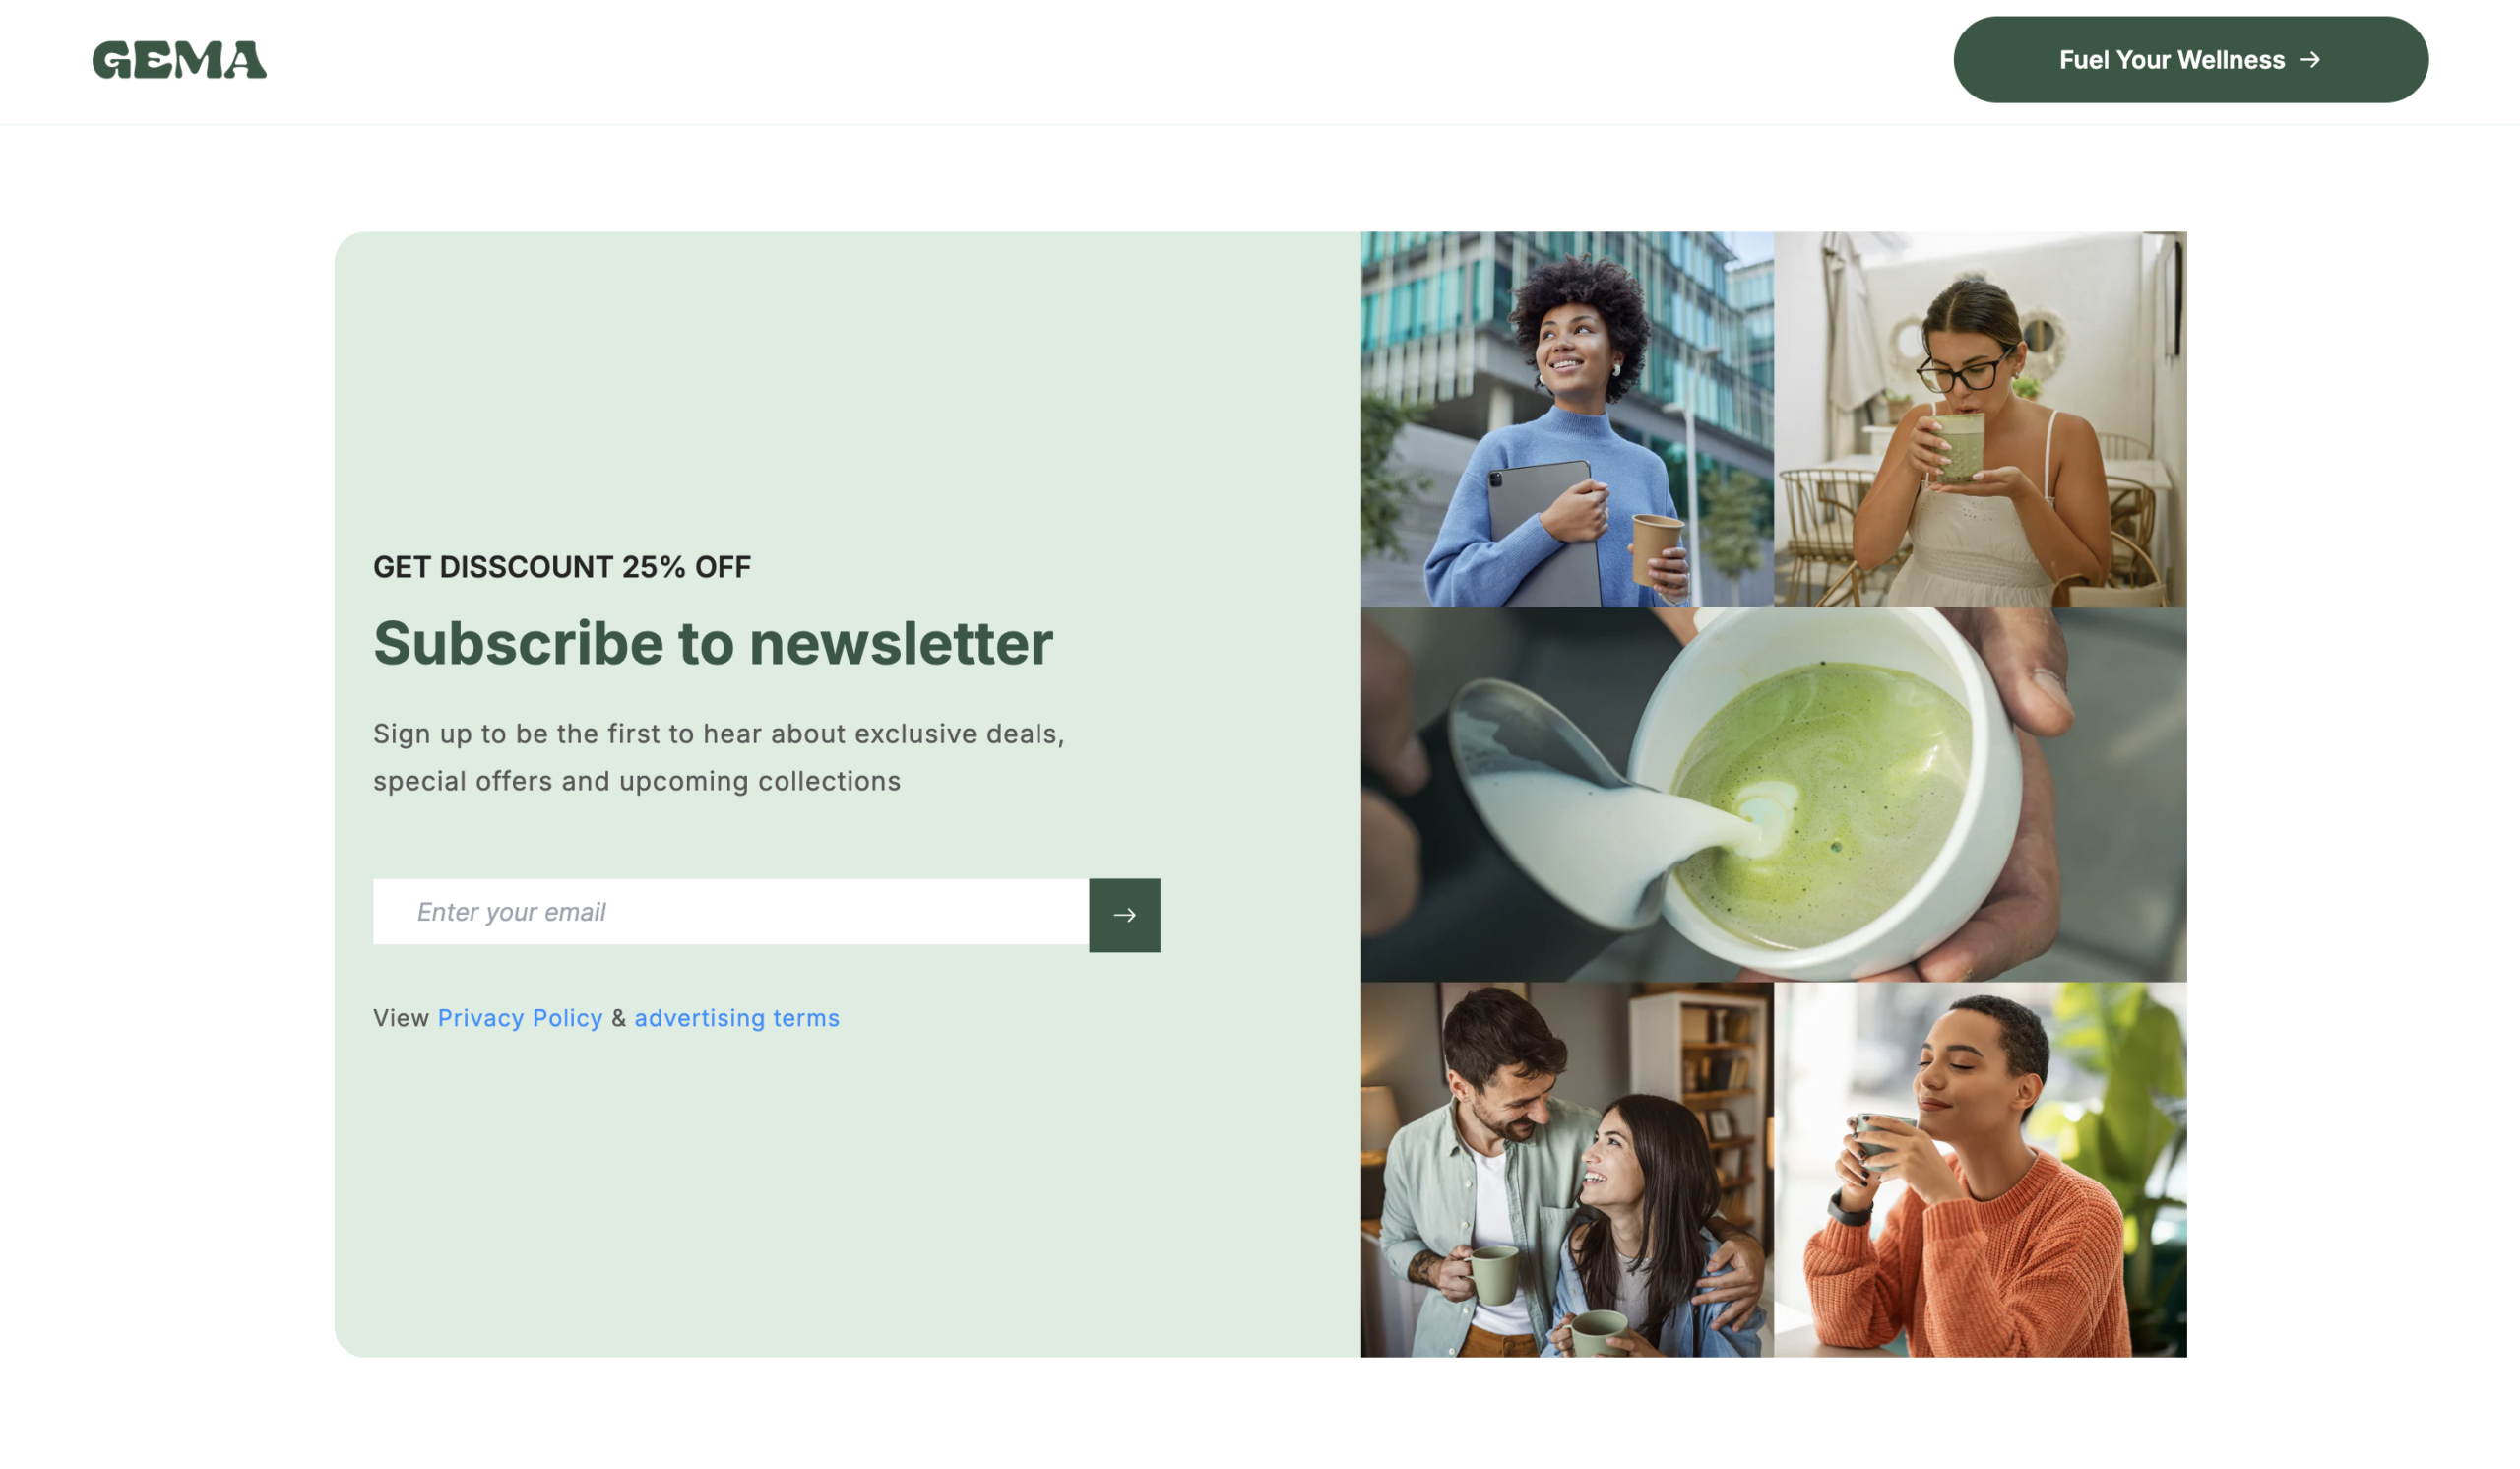
Here’s why it matters:
- Collect customer emails: Build a direct communication channel with people who are genuinely interested in your products.
- Drive repeat sales: Share promotions, product launches, or exclusive discounts to encourage customers to come back and shop again.
- Boost engagement: Keep your brand top-of-mind by sending regular updates, stories, or tips.
- Strengthen loyalty: When customers feel connected through personalized emails, they’re more likely to stay loyal in the long run.
How to Design a Newsletter Signup Form in GemPages?
Within GemPages Editor v7, it’s easier than ever to create a newsletter signup form tailored for your store’s design and branding.
First, follow these steps to access the GemPages Editor:
- From your Shopify admin, navigate to Apps > GemPages Builder App.
- Go to the Page where you can find all your pages built with GemPages.
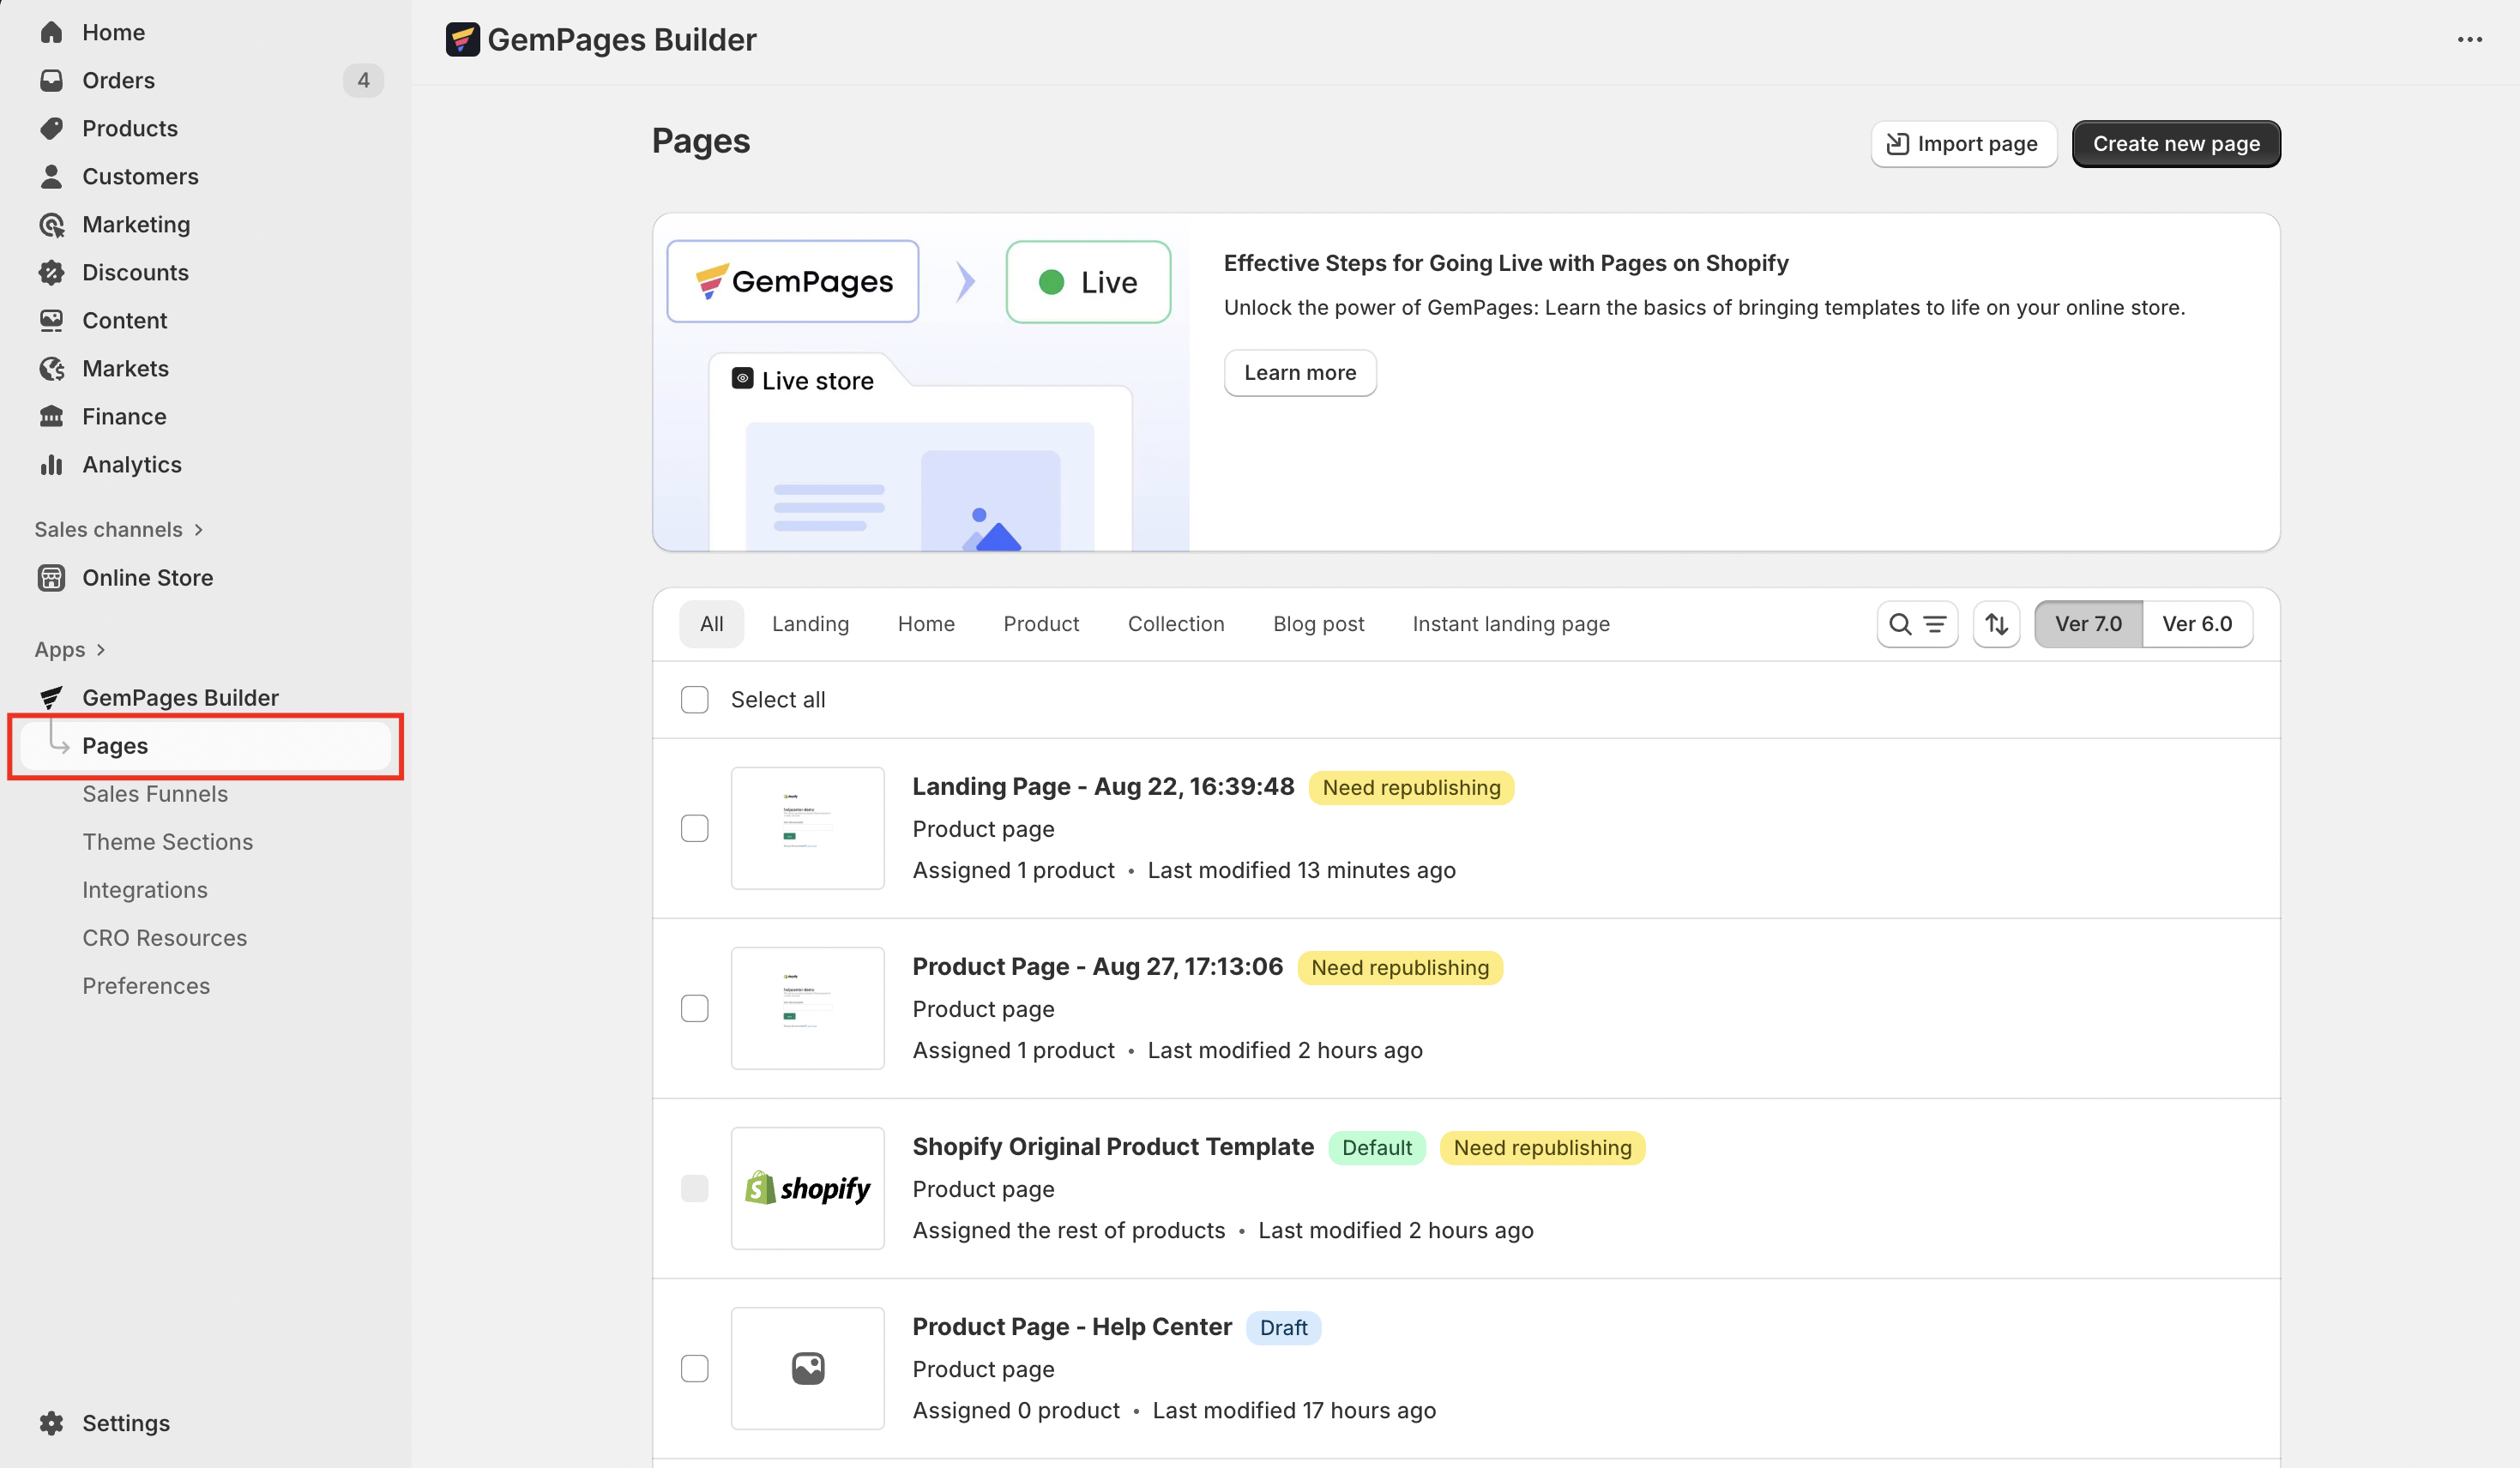
- Click on the target page to enter the editor.
Then, you can customize a form from our Newsletter element, or just drop our pre-built Newsletter section to save time and effort.
Option 1: Using Newsletter Element
- In the left sidebar, search for the Newsletter element.
- Drag and drop this element to the desired position on your page.
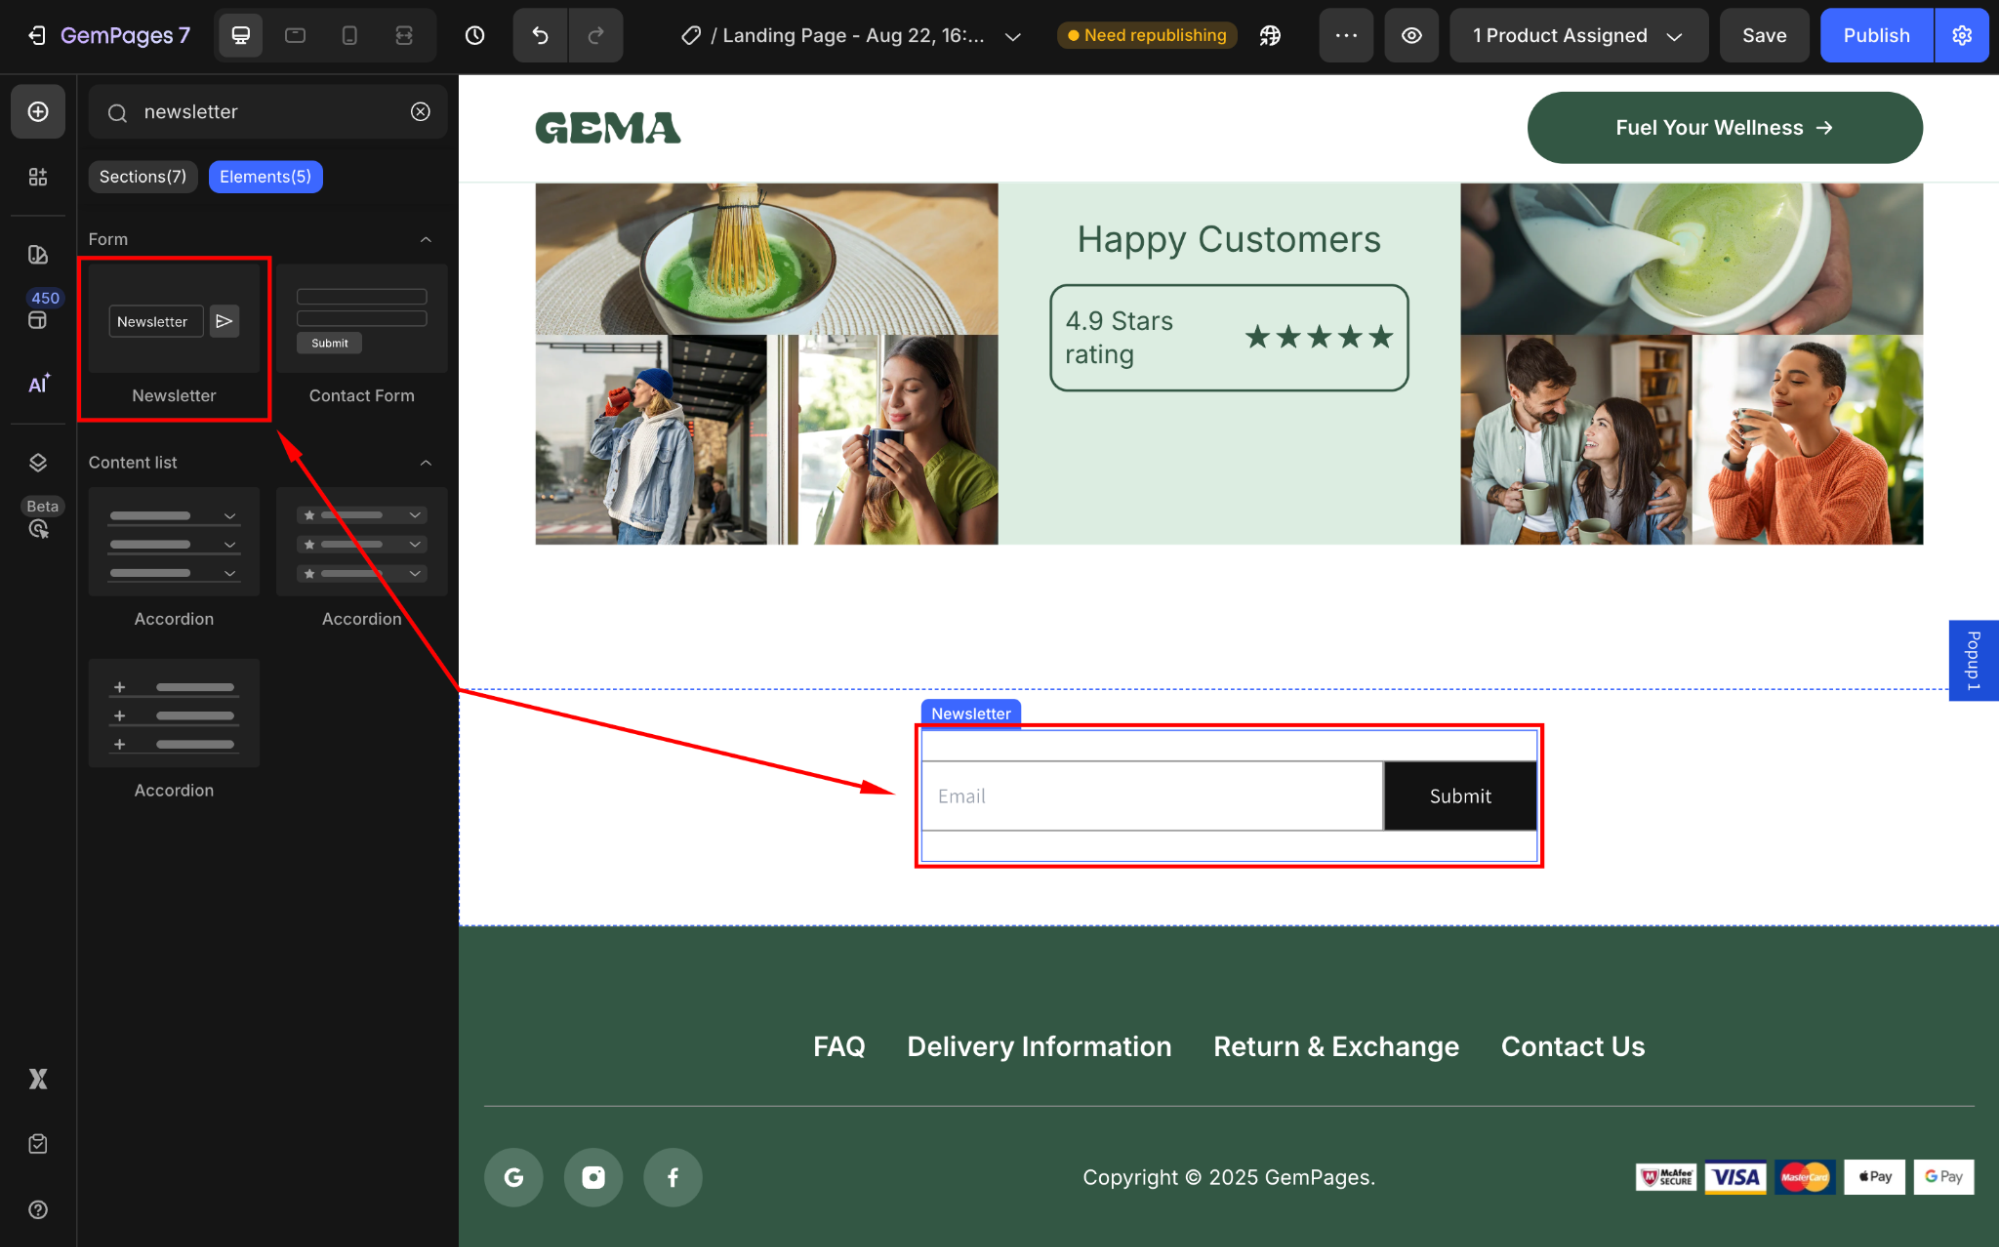
By default, the Newsletter element already has the basic components. However, you can completely customize it as you prefer.
For example, you can configure the following options:
- Success Message: Display a message to confirm successful form submission.
- Error Message: Show an alert if an error prevents the Shopify system from sending the email.
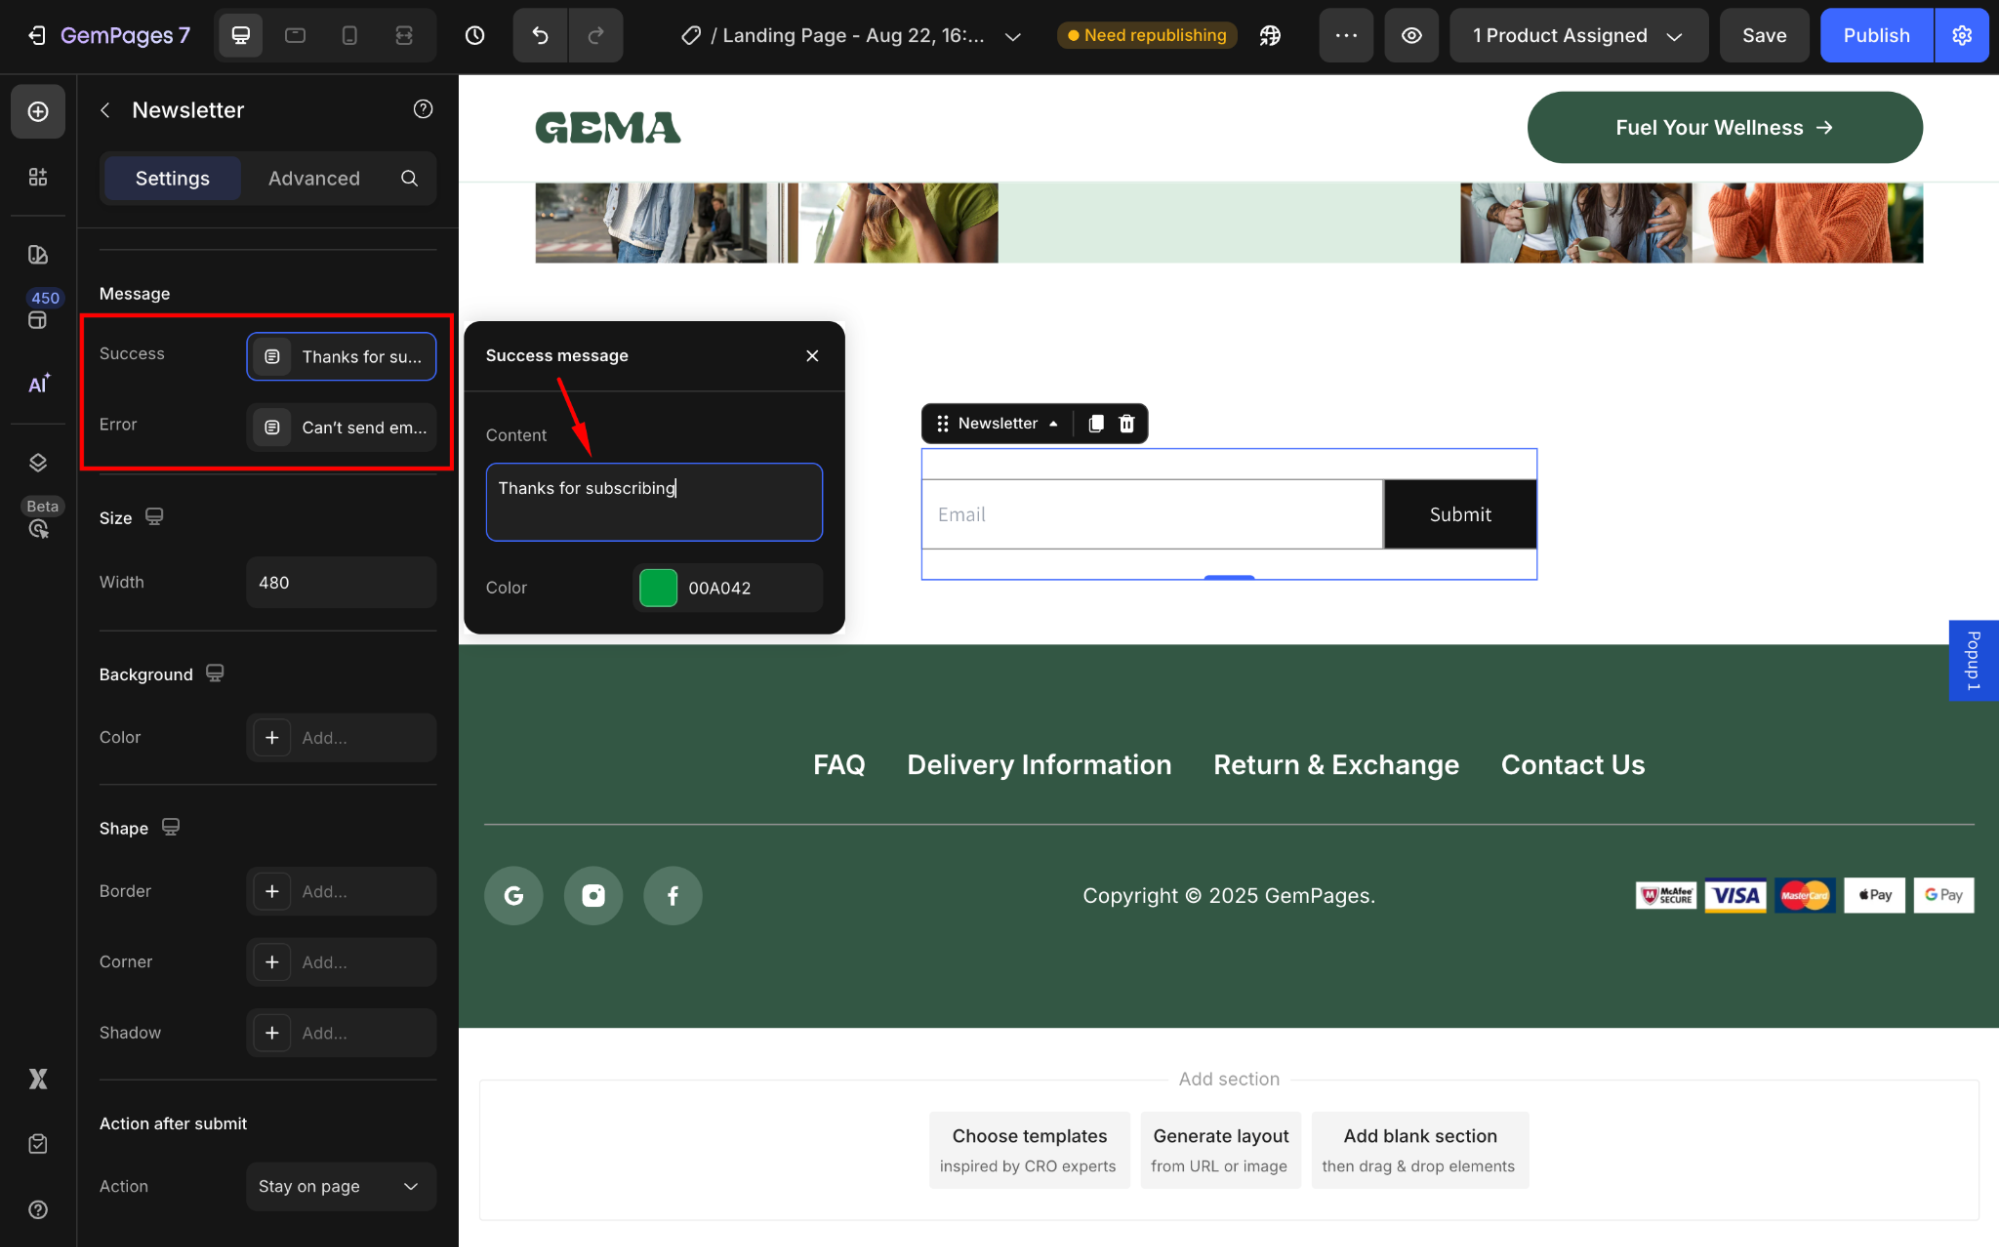
- After Submit: Choose whether customers stay on the current page or are redirected to a specific URL or page after submitting the form.
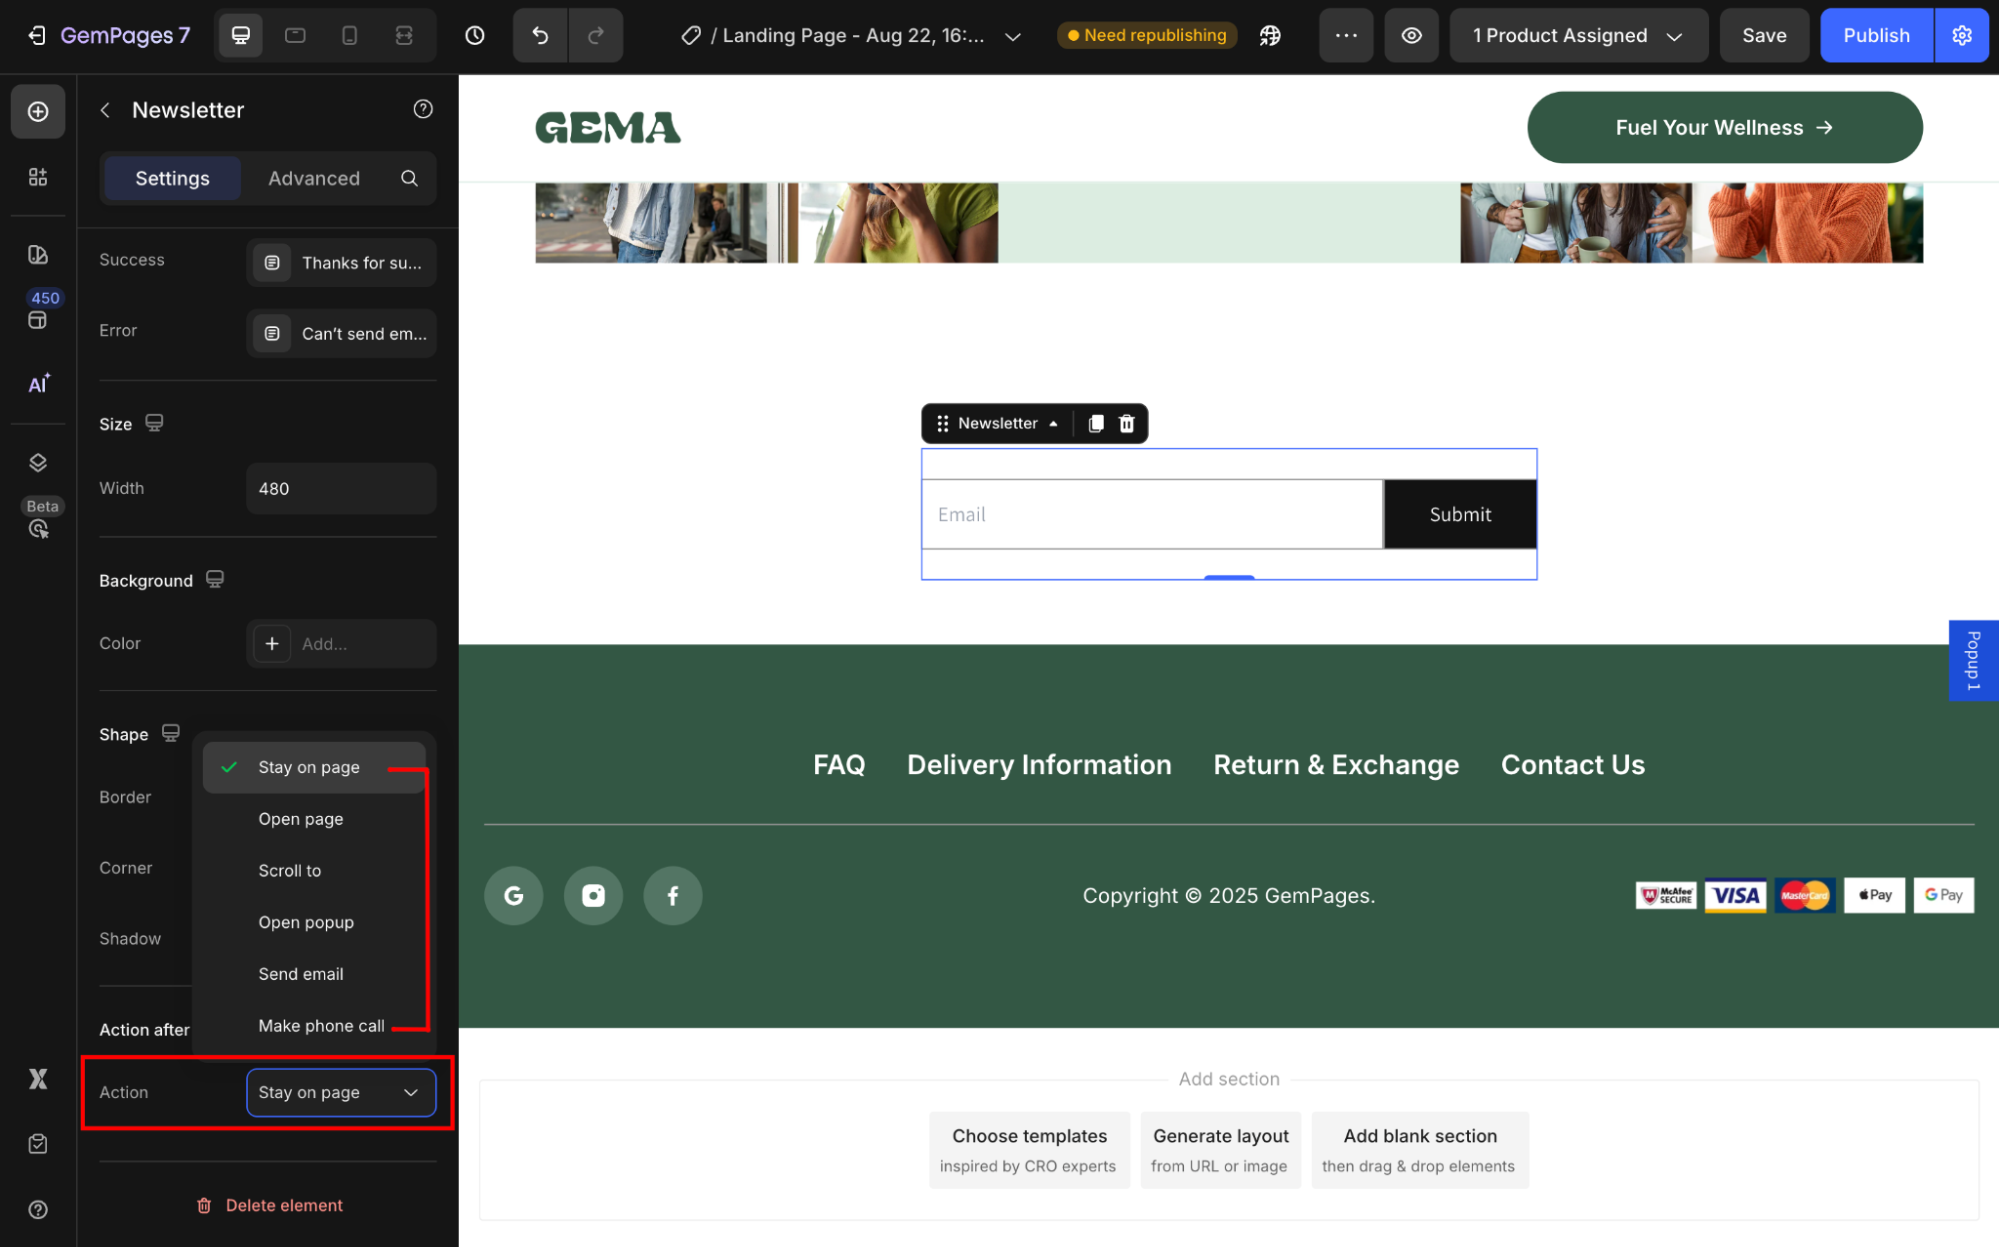
For further information about configuring the Newsletter element, refer to this article.
Option 2: Using a Pre-built Newsletter Section
You can also create a contact form from the pre-built sections in the GemPages Library:
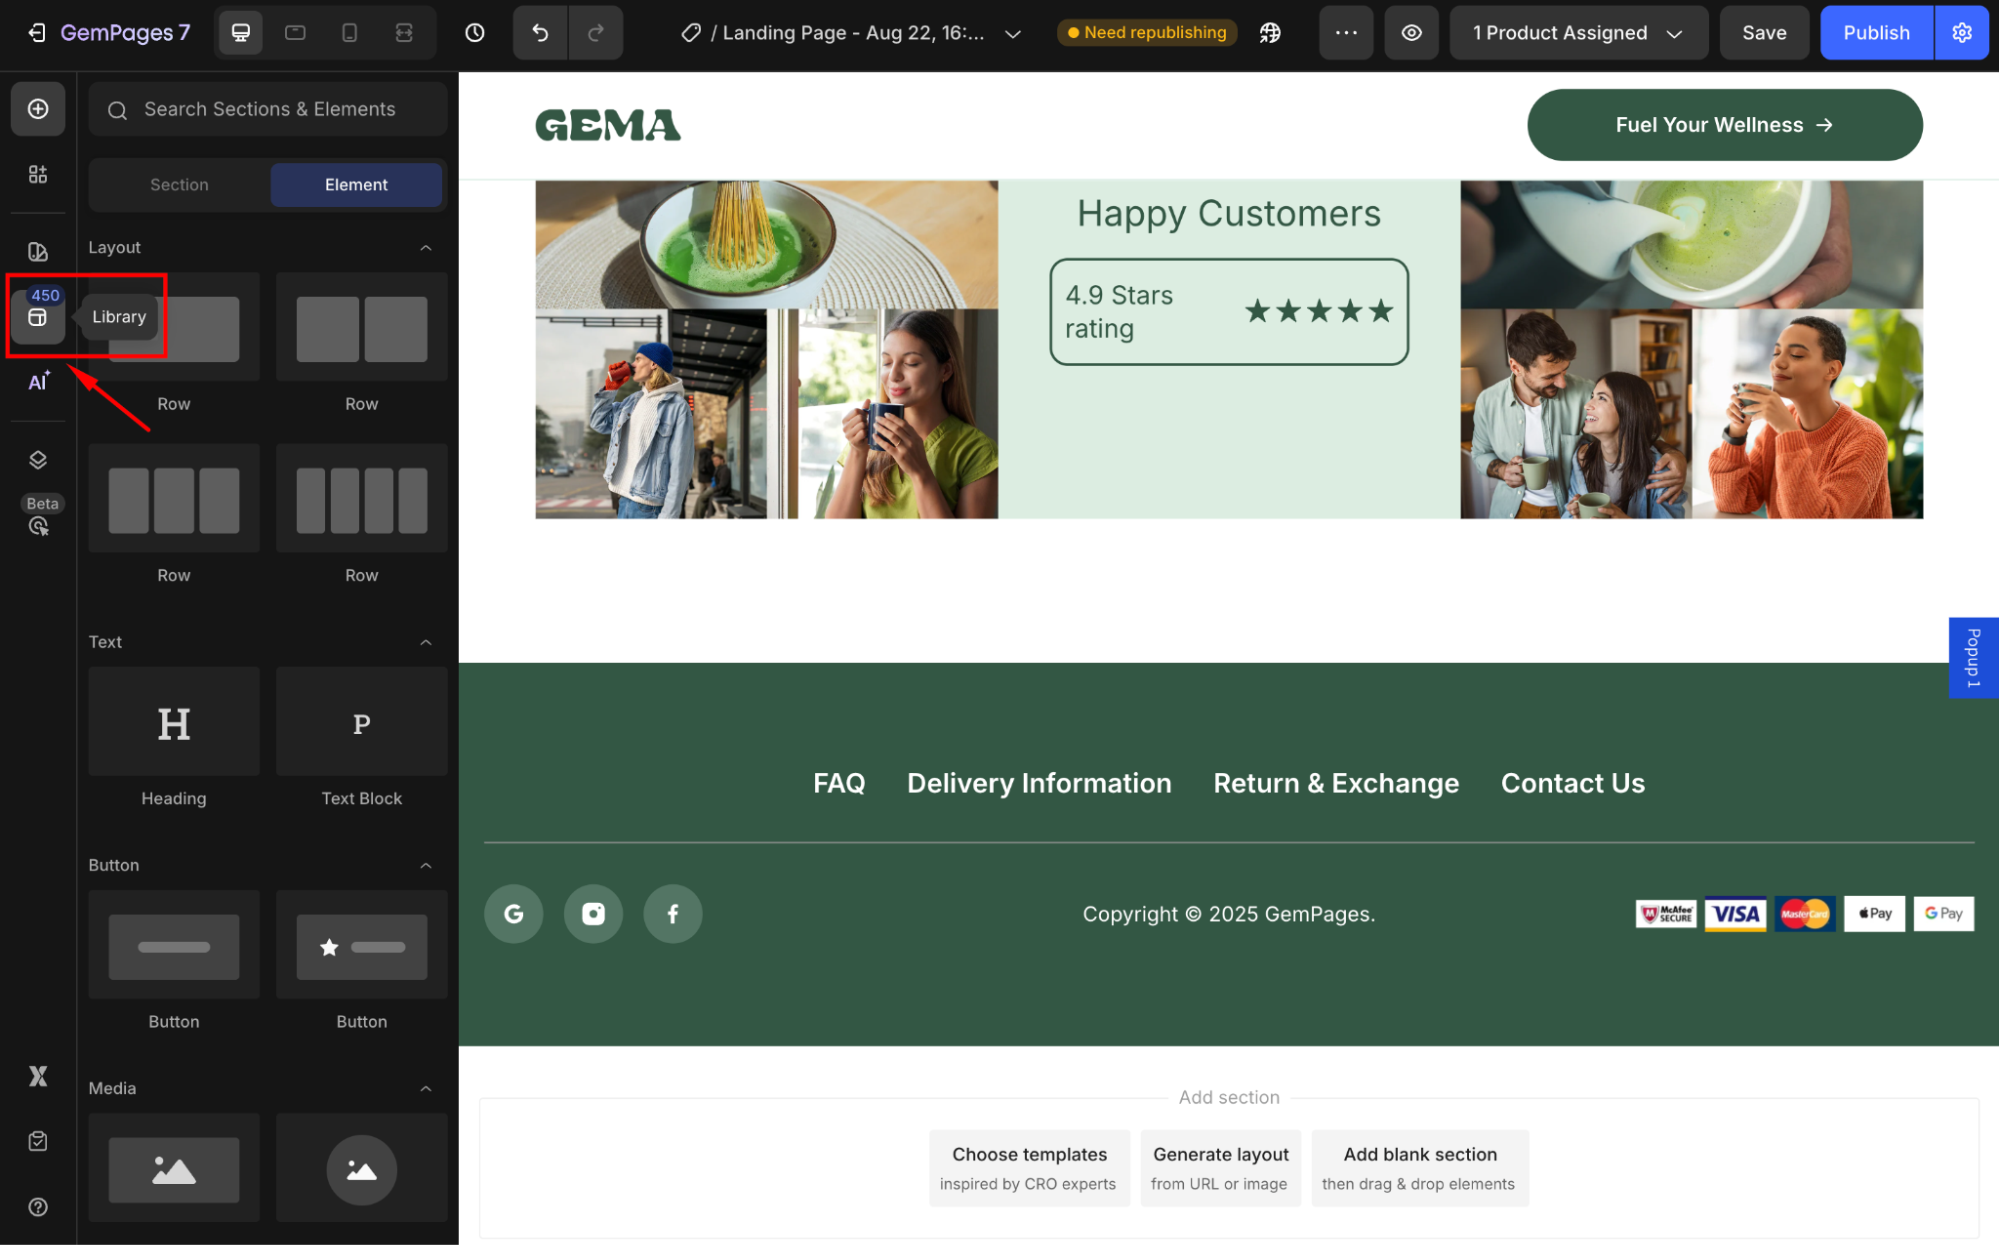
- From the left sidebar, click on the library icon to access our library.
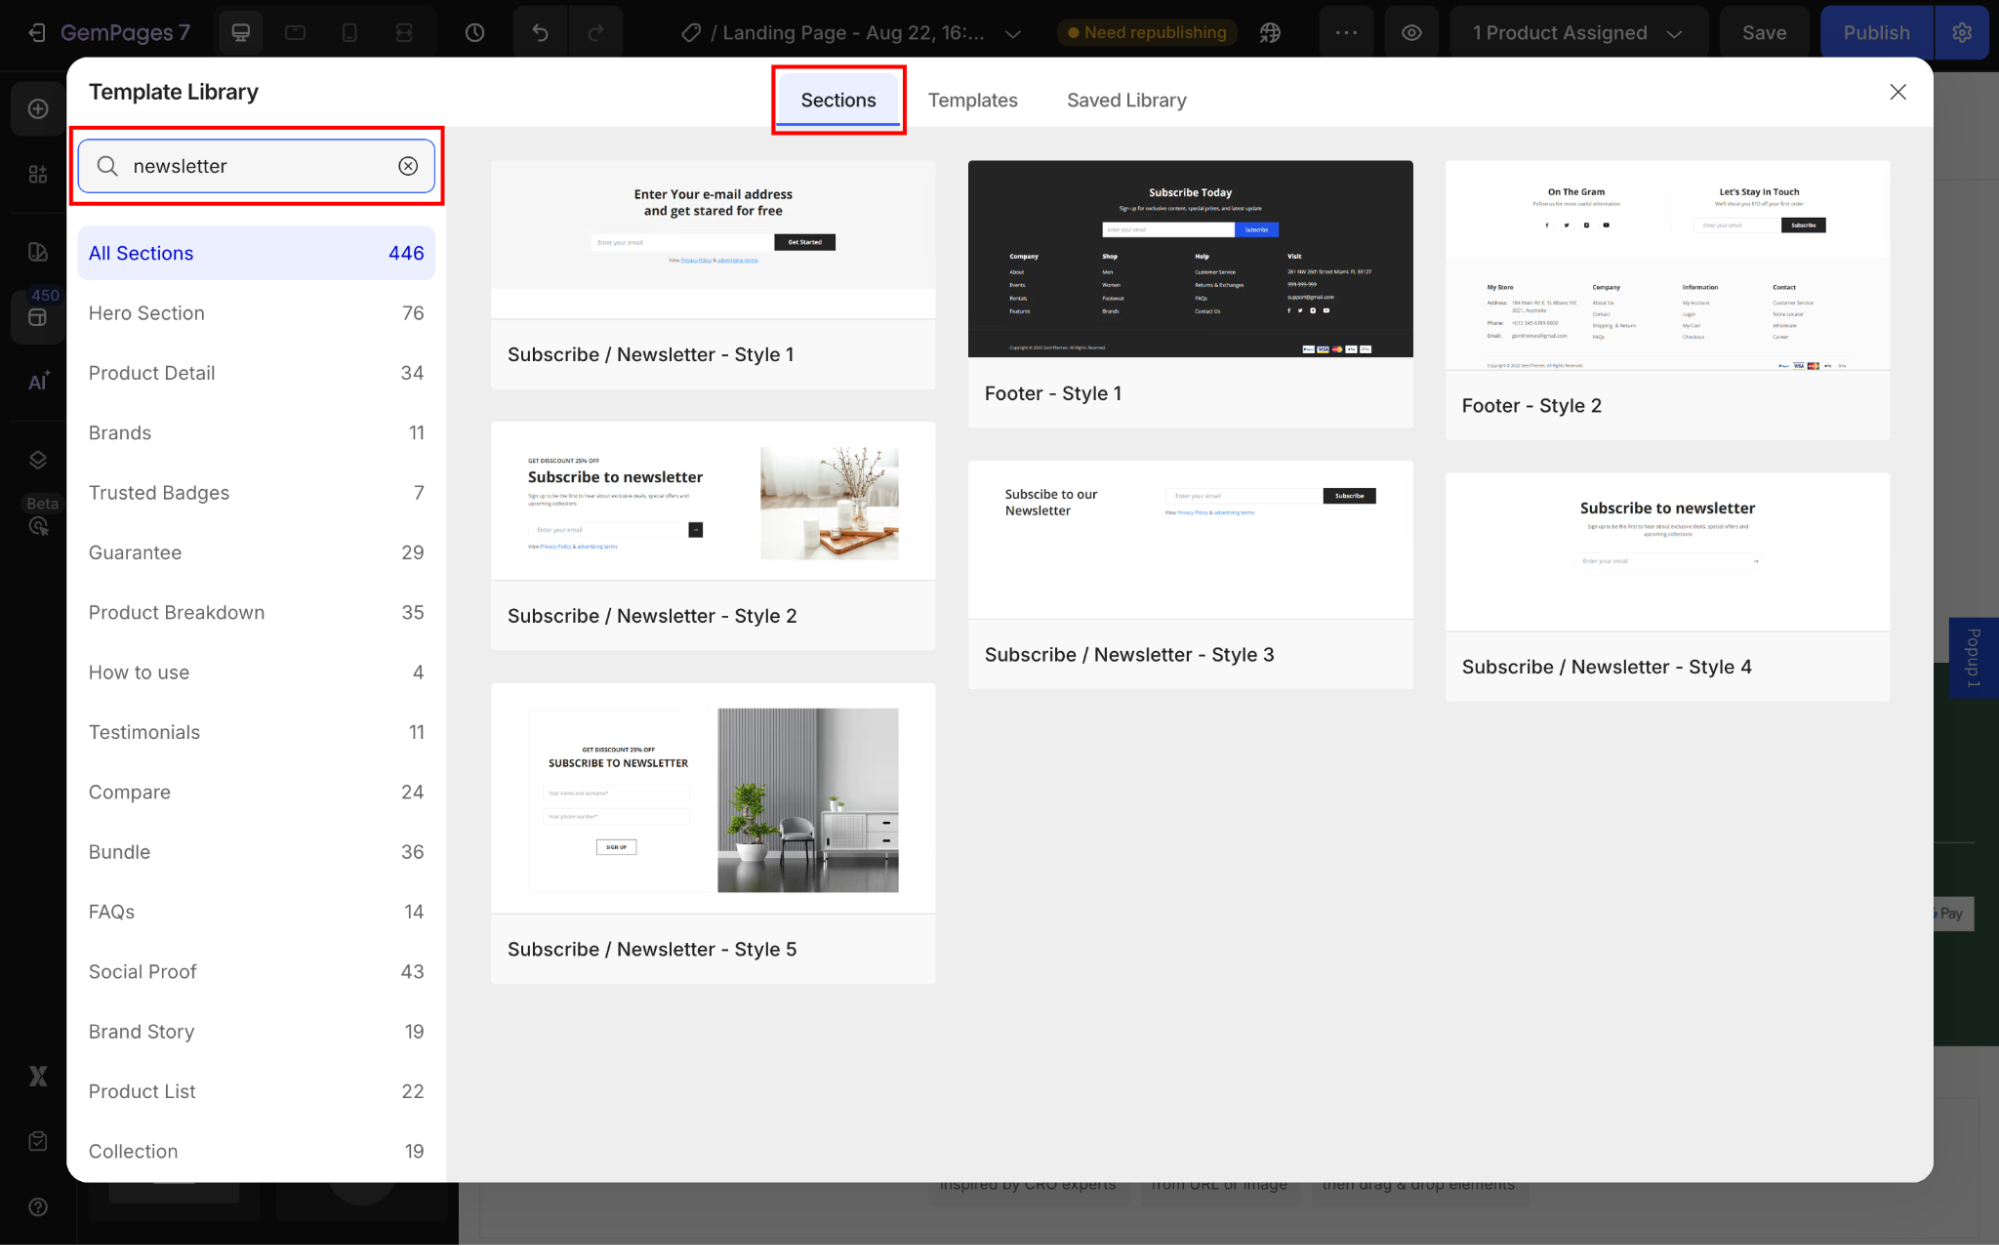
- Navigate to the Section and enter “newsletter” in the search bar.
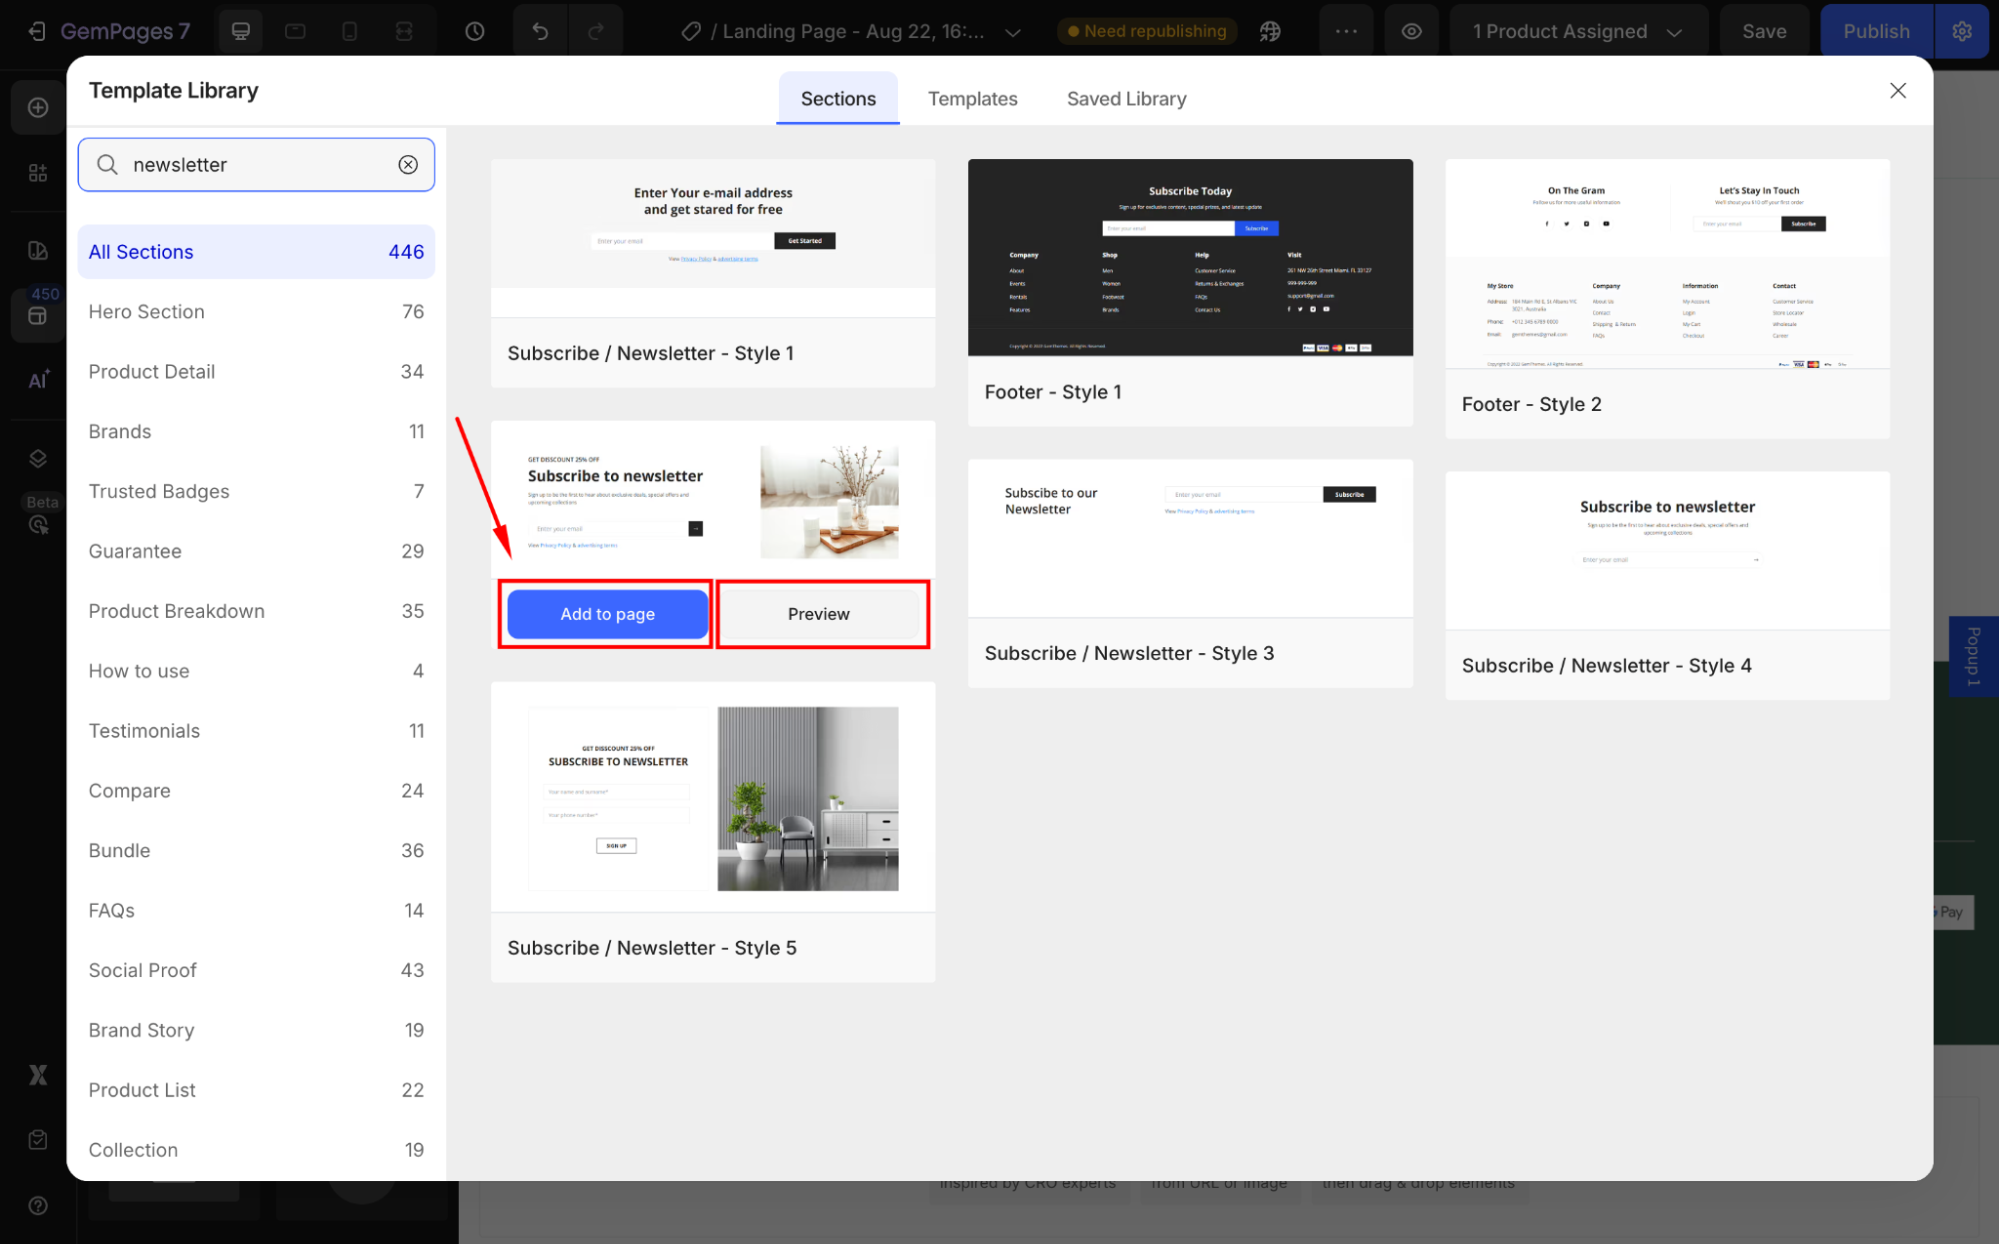
- Hover over any available sections to preview this section or add it to your page.
- The section will appear on your page, and you can further customize text, colors, button styles, and layout to fit your store branding.
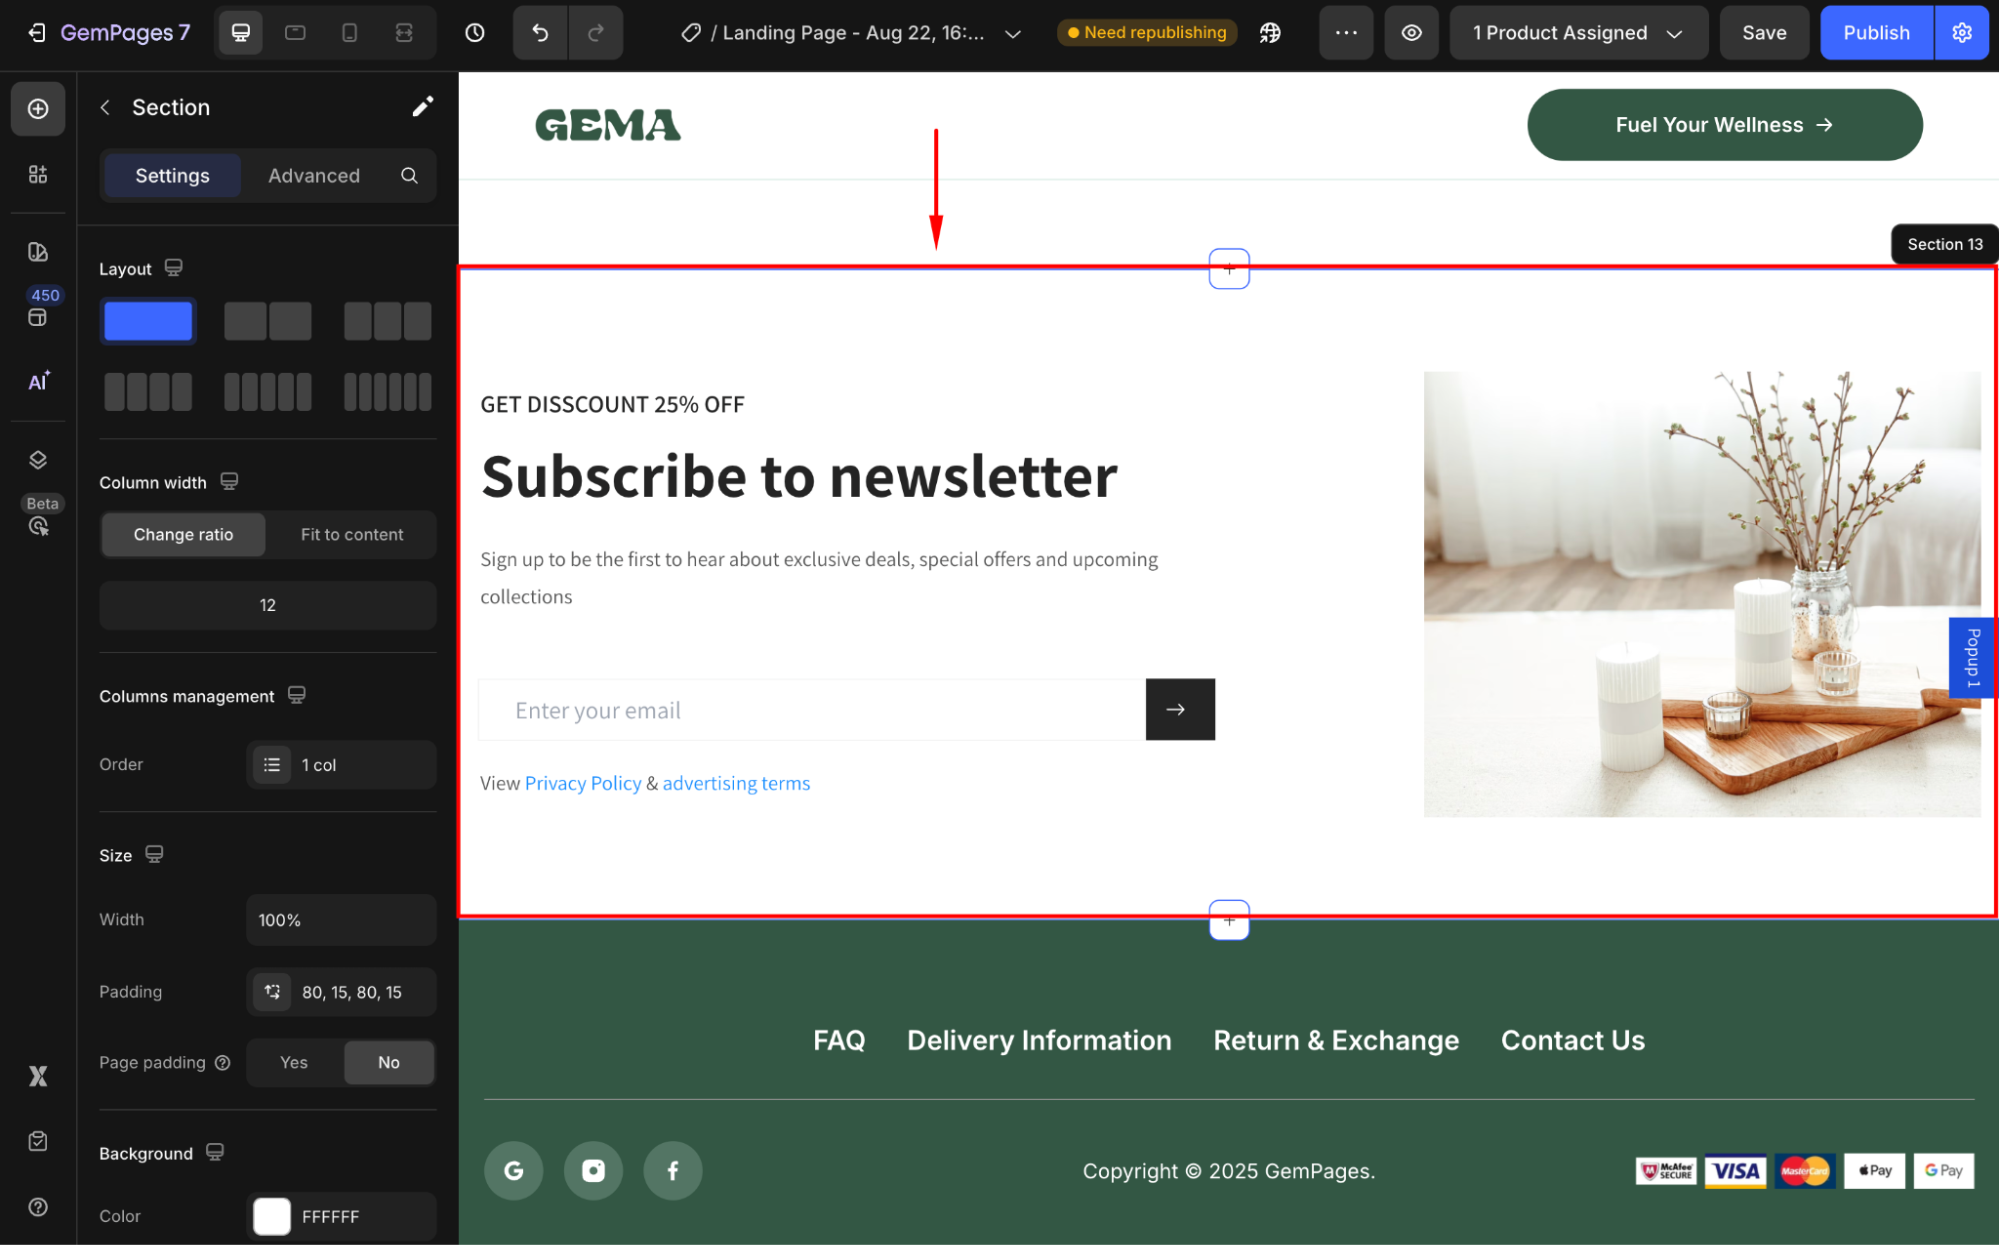
If you’d like to see specific styles or features, feel free to submit your request here.


Thank you for your comments