What is A/B Testing?
A/B testing is a method that allows you to test two variants of a webpage (variant A and variant B) to determine which variant performs better in achieving specific goals, such as increasing conversion rates, improving user engagement, or boosting the time users spend on a page.
By conducting A/B testing, you can make data-driven decisions instead of relying on intuition or assumptions.
For more information on A/B testing, you can refer to the following article: Introduction to GemX
How to Set Up A/B Testing
Previously, you could use GemPages V6 to run marketing campaigns, but this version had several limitations. For example, it required integration with Google Analytics as it lacked a built-in tracking system, making it difficult to track and assess the effectiveness of marketing campaigns.
In response to the growing demand for conversion rate optimization (CRO) from GemPages users, as of September 2024, GemPages launched a new product: GemX, an A/B testing platform for Shopify. By installing GemX, you can start performing A/B testing between:
- Existing (live) Shopify pages and pages created using GemPages.
- Two pages created by GemPages with ease.
You can learn more about GemX use cases here.
Additionally, we are continuously developing the product to offer useful features such as theme testing, pricing testing, and more.
Step-by-Step Guide to Setting Up and Running A/B Testing with GemPages & GemX
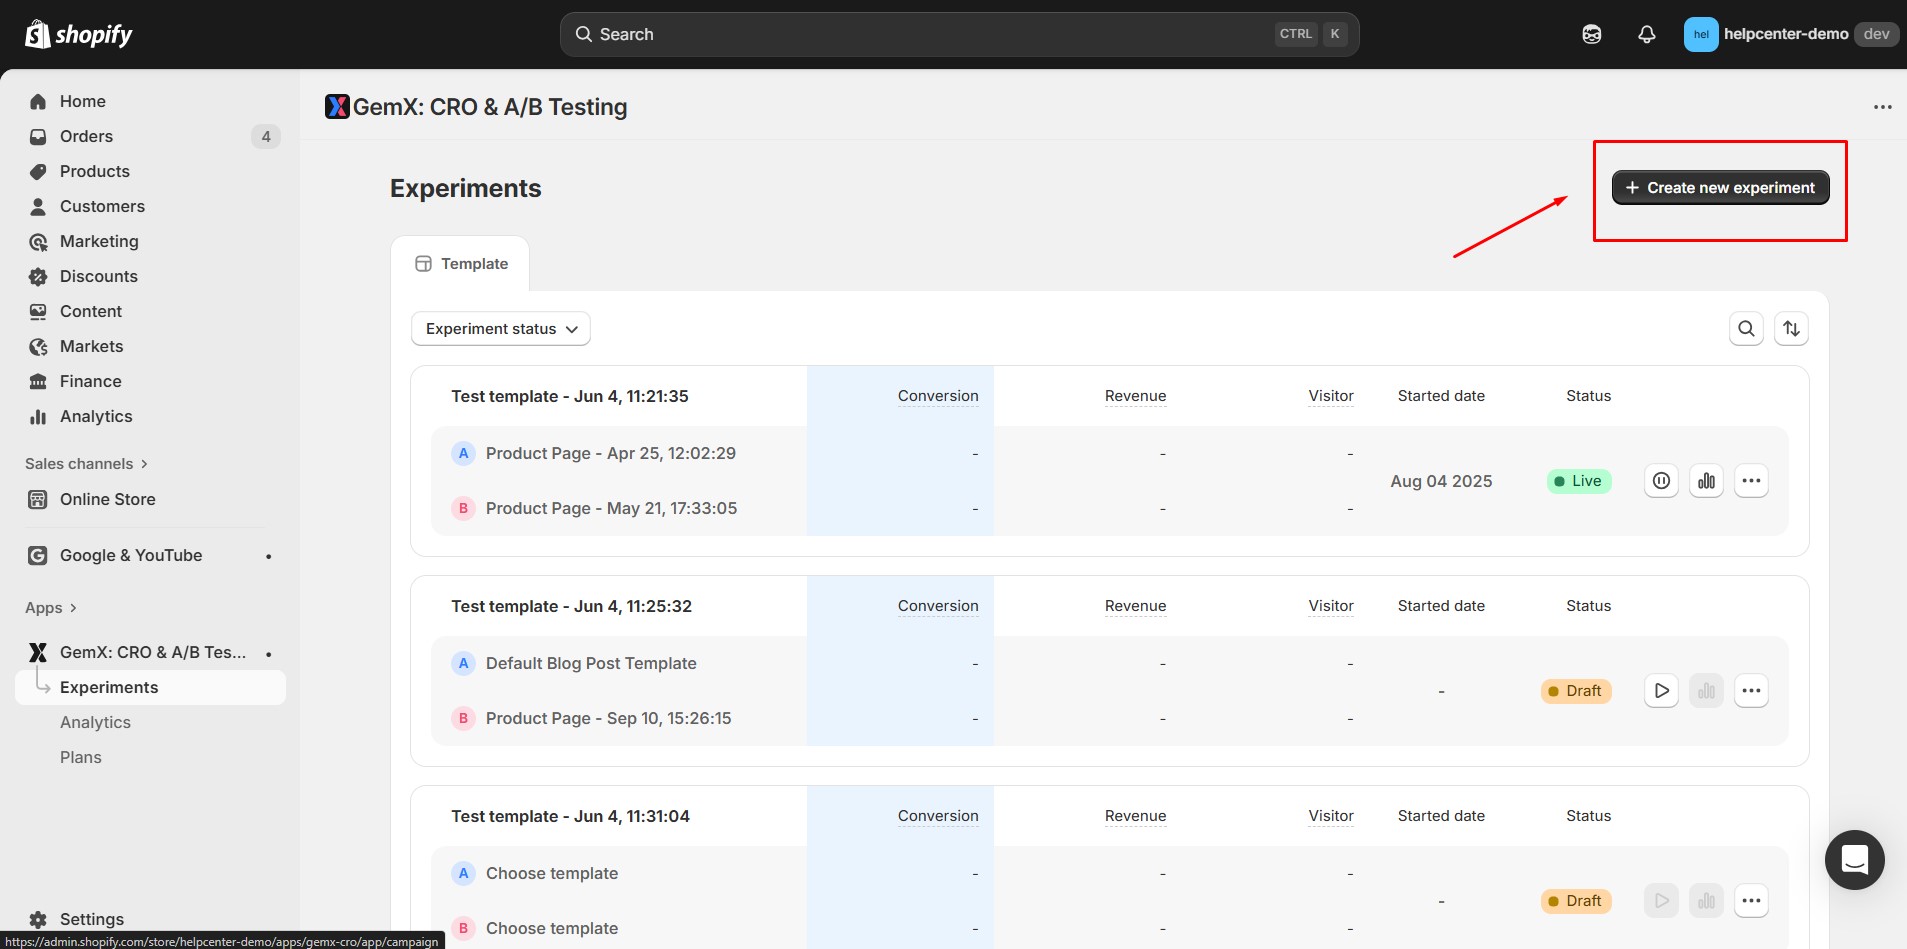
Step 1: To create a new campaign in GemX, click the “Create new test” button.
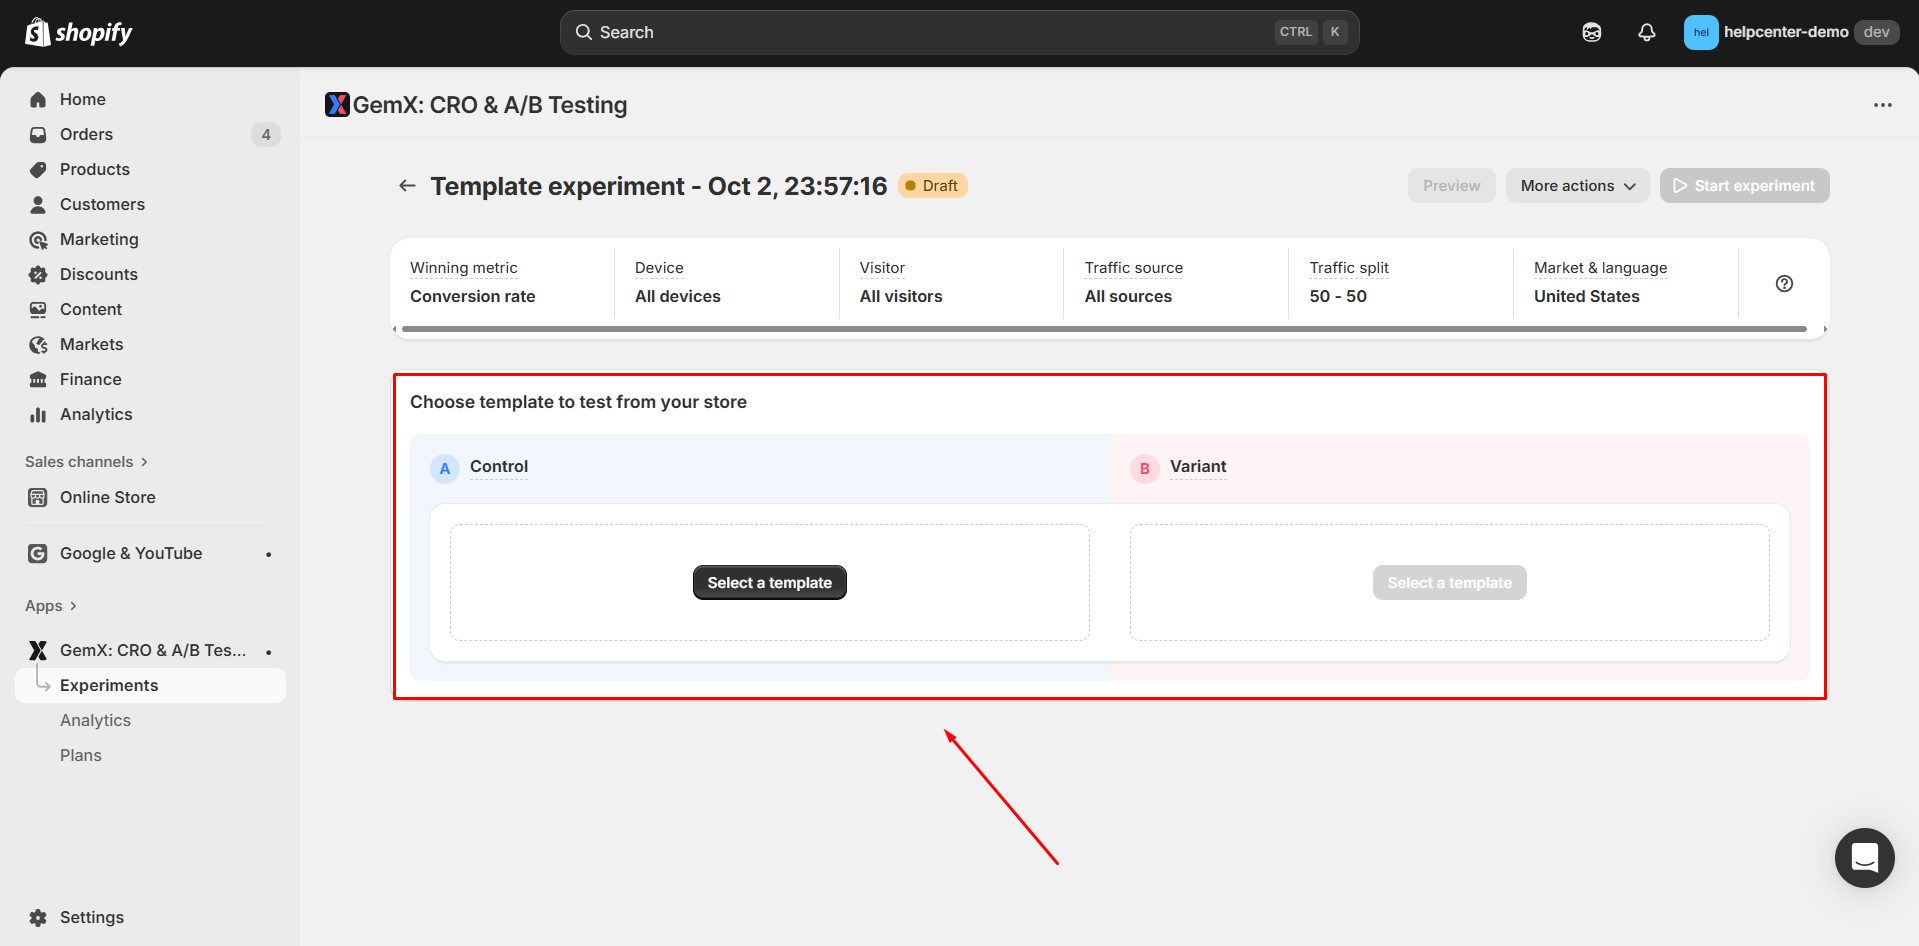
Step 2: Choose two templates for A/B testing
For detailed instructions on specific cases, follow these steps:
Option 1: Test between two Shopify Pages
- In Shopify, duplicate your current page into another duplicated one, and use the Shopify theme editor to customize your pages, like changing text messages, button color, etc.
- Log in to GemX, and pick the original page as version A and the duplicated one as Version B.
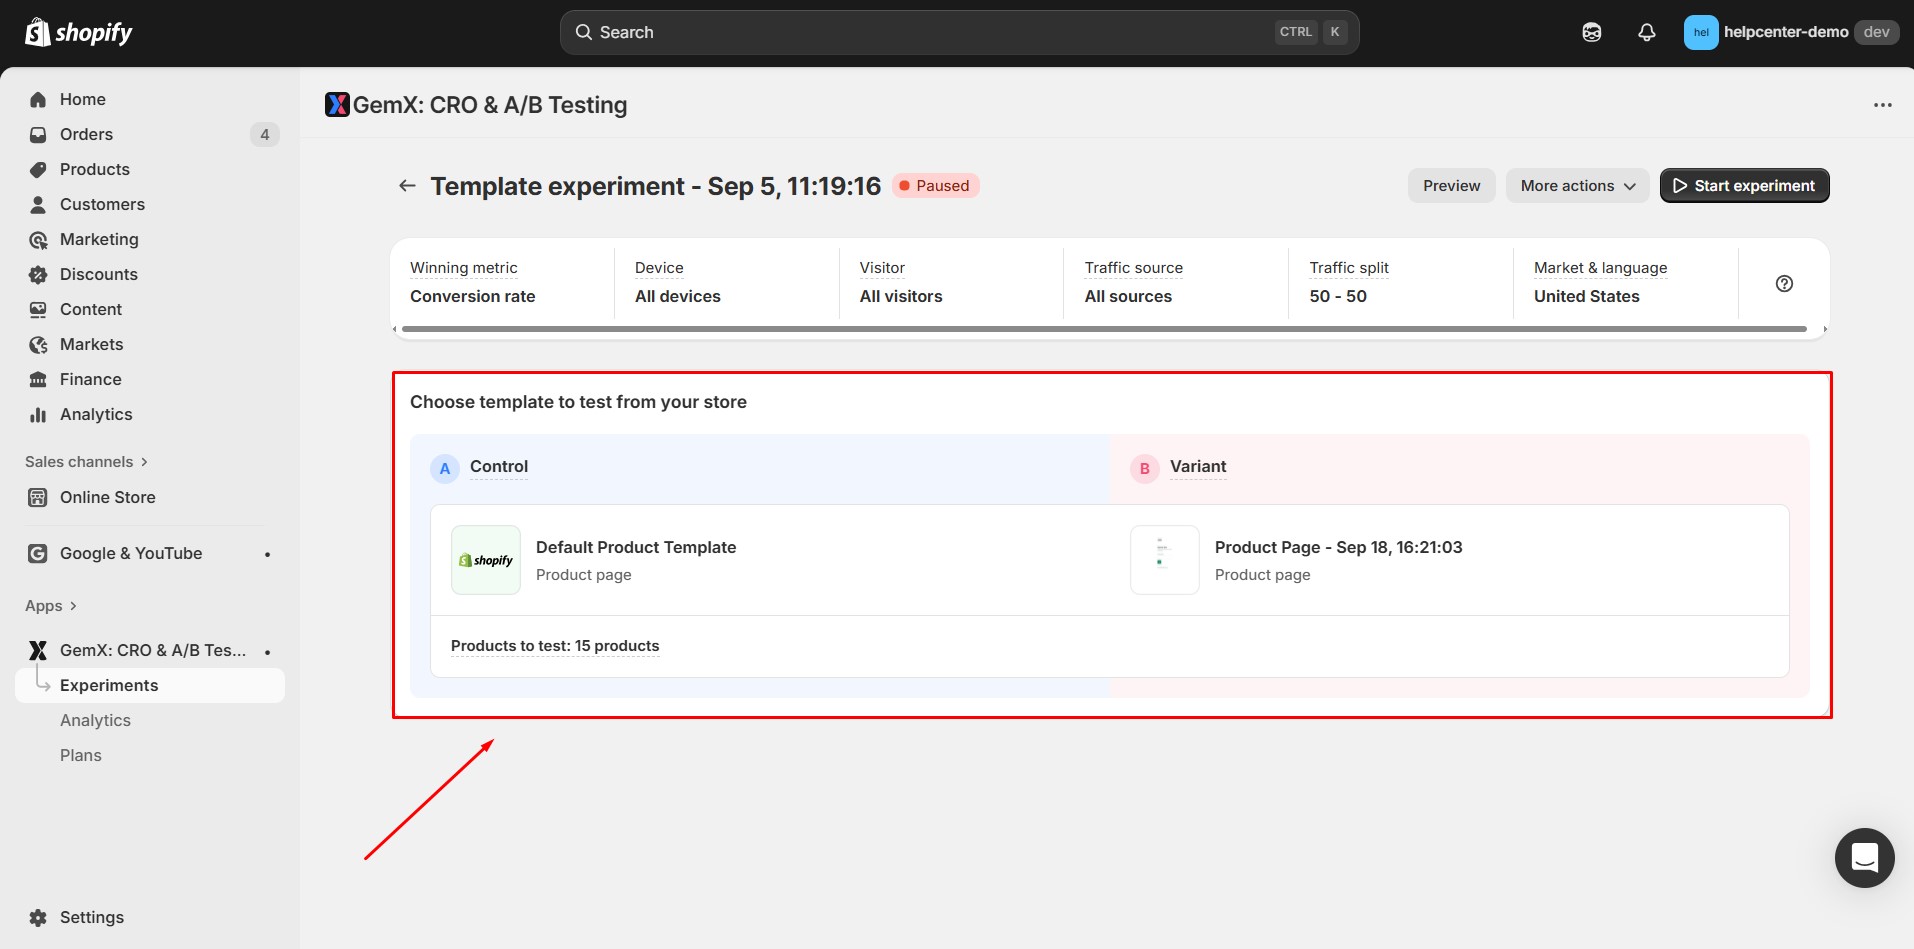
Option 2: Test between the default Shopify product page and the Product Page built by Page Builder (Shopify x GemPages)
While the Default Shopify theme is effective, its customization options are limited. You may want to leverage the power of a page builder to build a better product page layout.
Assume that you are coming from GemPages. Following these steps:
- Create a product page in GemPages.
- Go to GemX and pick Shopify default product page as A version and GemPages product page as version B.
Option 3: Test between pages built by Page Builders (ie GemPages)
Assume that you are coming from GemPages, and now you want to create different variants of your pages and test to see which is the winner.
- Duplicate your GemPages page into another version.
- Go to GemX and pick the original page and the duplicated page as the A&B.
Step 3: Set traffic for each variant
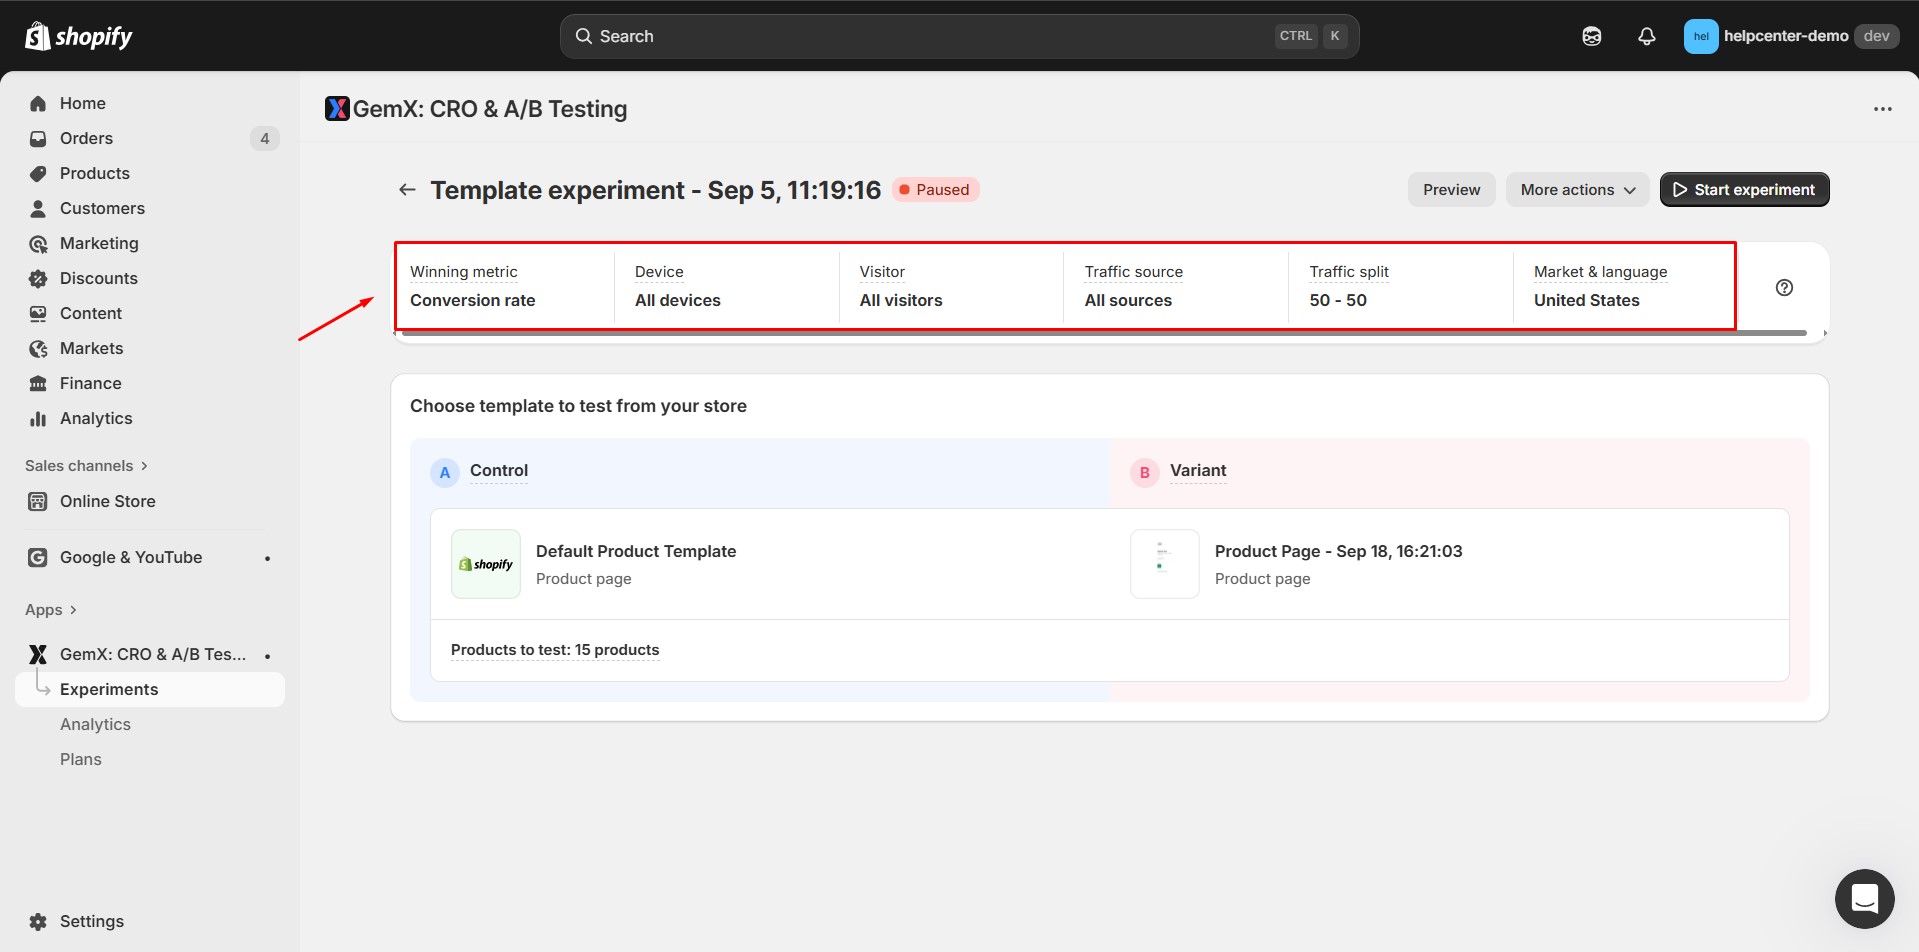
You’ll allocate the percentage of traffic that each variant will receive during the A/B test. This distribution determines how many visitors will see the origin template versus the variant template when they visit the associated page.
Step 4: Set traffic for device type
You can choose to target specific device types including Desktop, Tablet, Mobile, or All devices. This ensures that the variant templates are shown only to visitors on the selected devices. The default is All devices.
Step 5: Set target for visitor type
- All Visitors: This option includes both new and returning visitors, allowing you to test the templates across your entire audience.
- New Visitors: Target only first-time visitors to your website. This is useful if you want to see how your templates perform with visitors who have no prior experience with your site.
- Returning Visitors: Focus on visitors who have previously visited your website. This can help you understand how familiar visitors react to the changes in the template compared to their past experiences.
Step 6: Set target for traffic source
How to Update Campaign Details?
1. Pause Campaign
After pausing the campaign, the live page will continue to function normally, but it will no longer display the dynamic layouts from the A/B test. Instead, it will revert to consistently showing the Origin template to all visitors.
2. Rename Campaign
Step 1: Access the Campaign Dashboard
Step 2: Locate the campaign you wish to rename from the list. Click on the three-dot menu icon (⋯) or options button associated with the selected campaign.
Step 3: From the dropdown menu, click on “Rename“. This will open a dialog box where you can modify the campaign name.
Step 4: Enter the New Campaign Name. The campaign name cannot exceed 255 characters
Step 5: Click “Save” to confirm the new name.
3. Delete Campaign
Deleting a campaign effectively ends the A/B test, ensuring that the live page returns to its default state while allowing you to manage and clean up your list of campaigns.
All Sources: Include all traffic sources in your A/B test. This option is ideal if you want to get a comprehensive view of how your templates perform across all channels.
Specific Source: Target traffic from specific channels to see how your templates perform with visitors coming from particular sources. The specific sources you can target include:
- Referral: Visitors who arrive at your site through links from other websites.
- Organic Social: Traffic from unpaid social media posts or shares.
- Organic Search: Visitors who find your site through unpaid search engine results.
- Email: Traffic generated from email campaigns.
- Paid Social: Visitors coming from paid social media ads.
- Paid Search: Traffic from paid search engine ads.
- SMS: Visitors who access your site via links sent through SMS campaigns.
Step 7: Activate the campaign
Once you click the activate button, your campaign will go live. The live page will start functioning according to the settings you’ve established, such as the selected templates, traffic allocation, targeted devices, visitor types, and traffic sources.