


How to Create a Carousel with Text in GemPages?
Within GemPages v7, it’s easy to design a carousel layout with text to fit your branding. Follow these steps:
Step 1: Add a Carousel Element to your page
- Access the GemPages Dashboard > Pages, and click on your target page to open the editor.
- In the left sidebar, search for the Carousel Element.
- Drag and drop it onto your page where you want it to appear.
- Click on the carousel to open its settings and adjust the Items per slide.
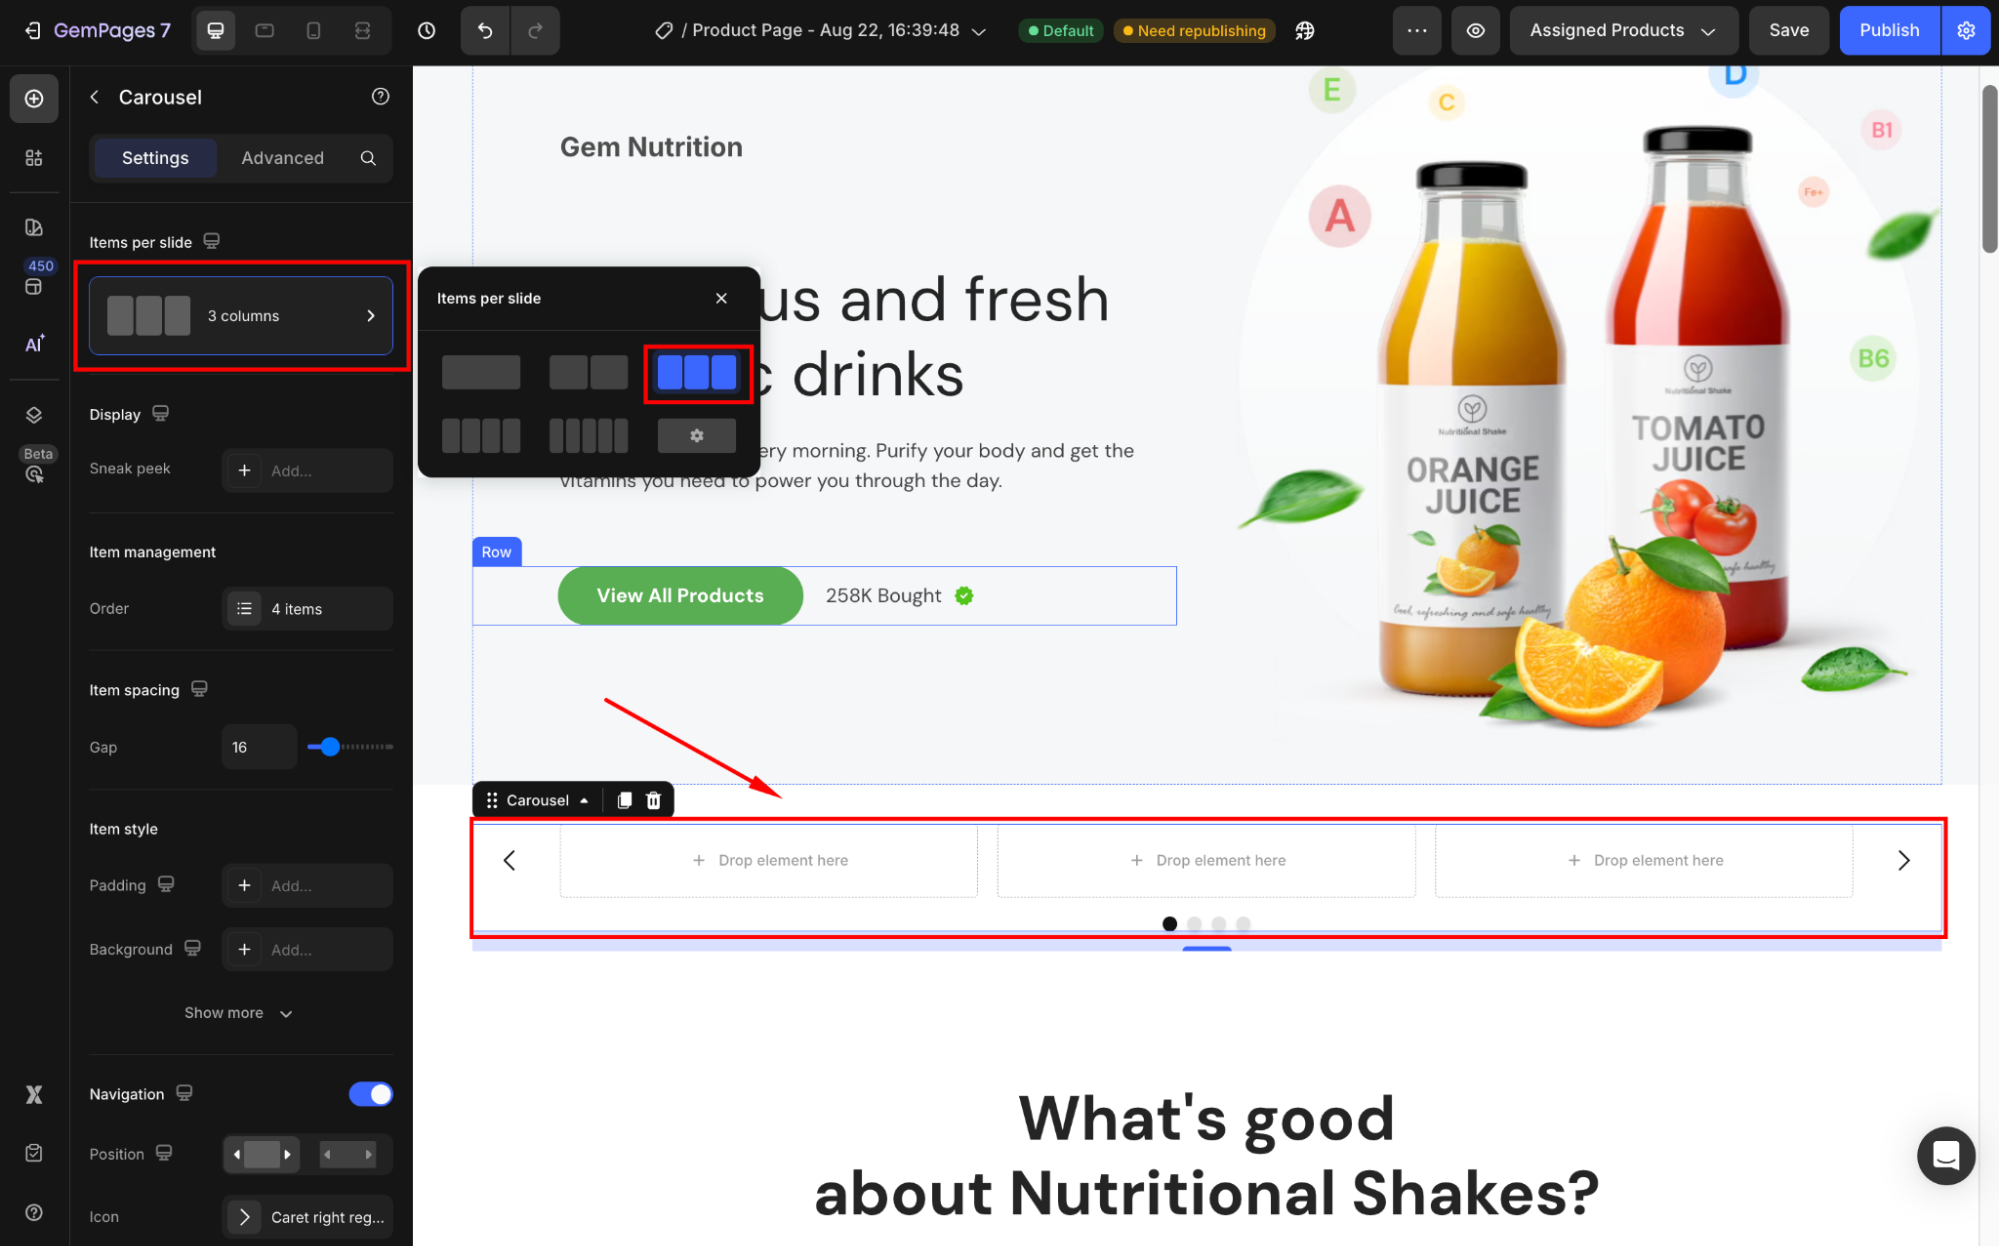
Through this article, we will use the 3-column slide for example.
Note: If you’re new to using the Carousel Element, check out this guide for more details on its general functionality.
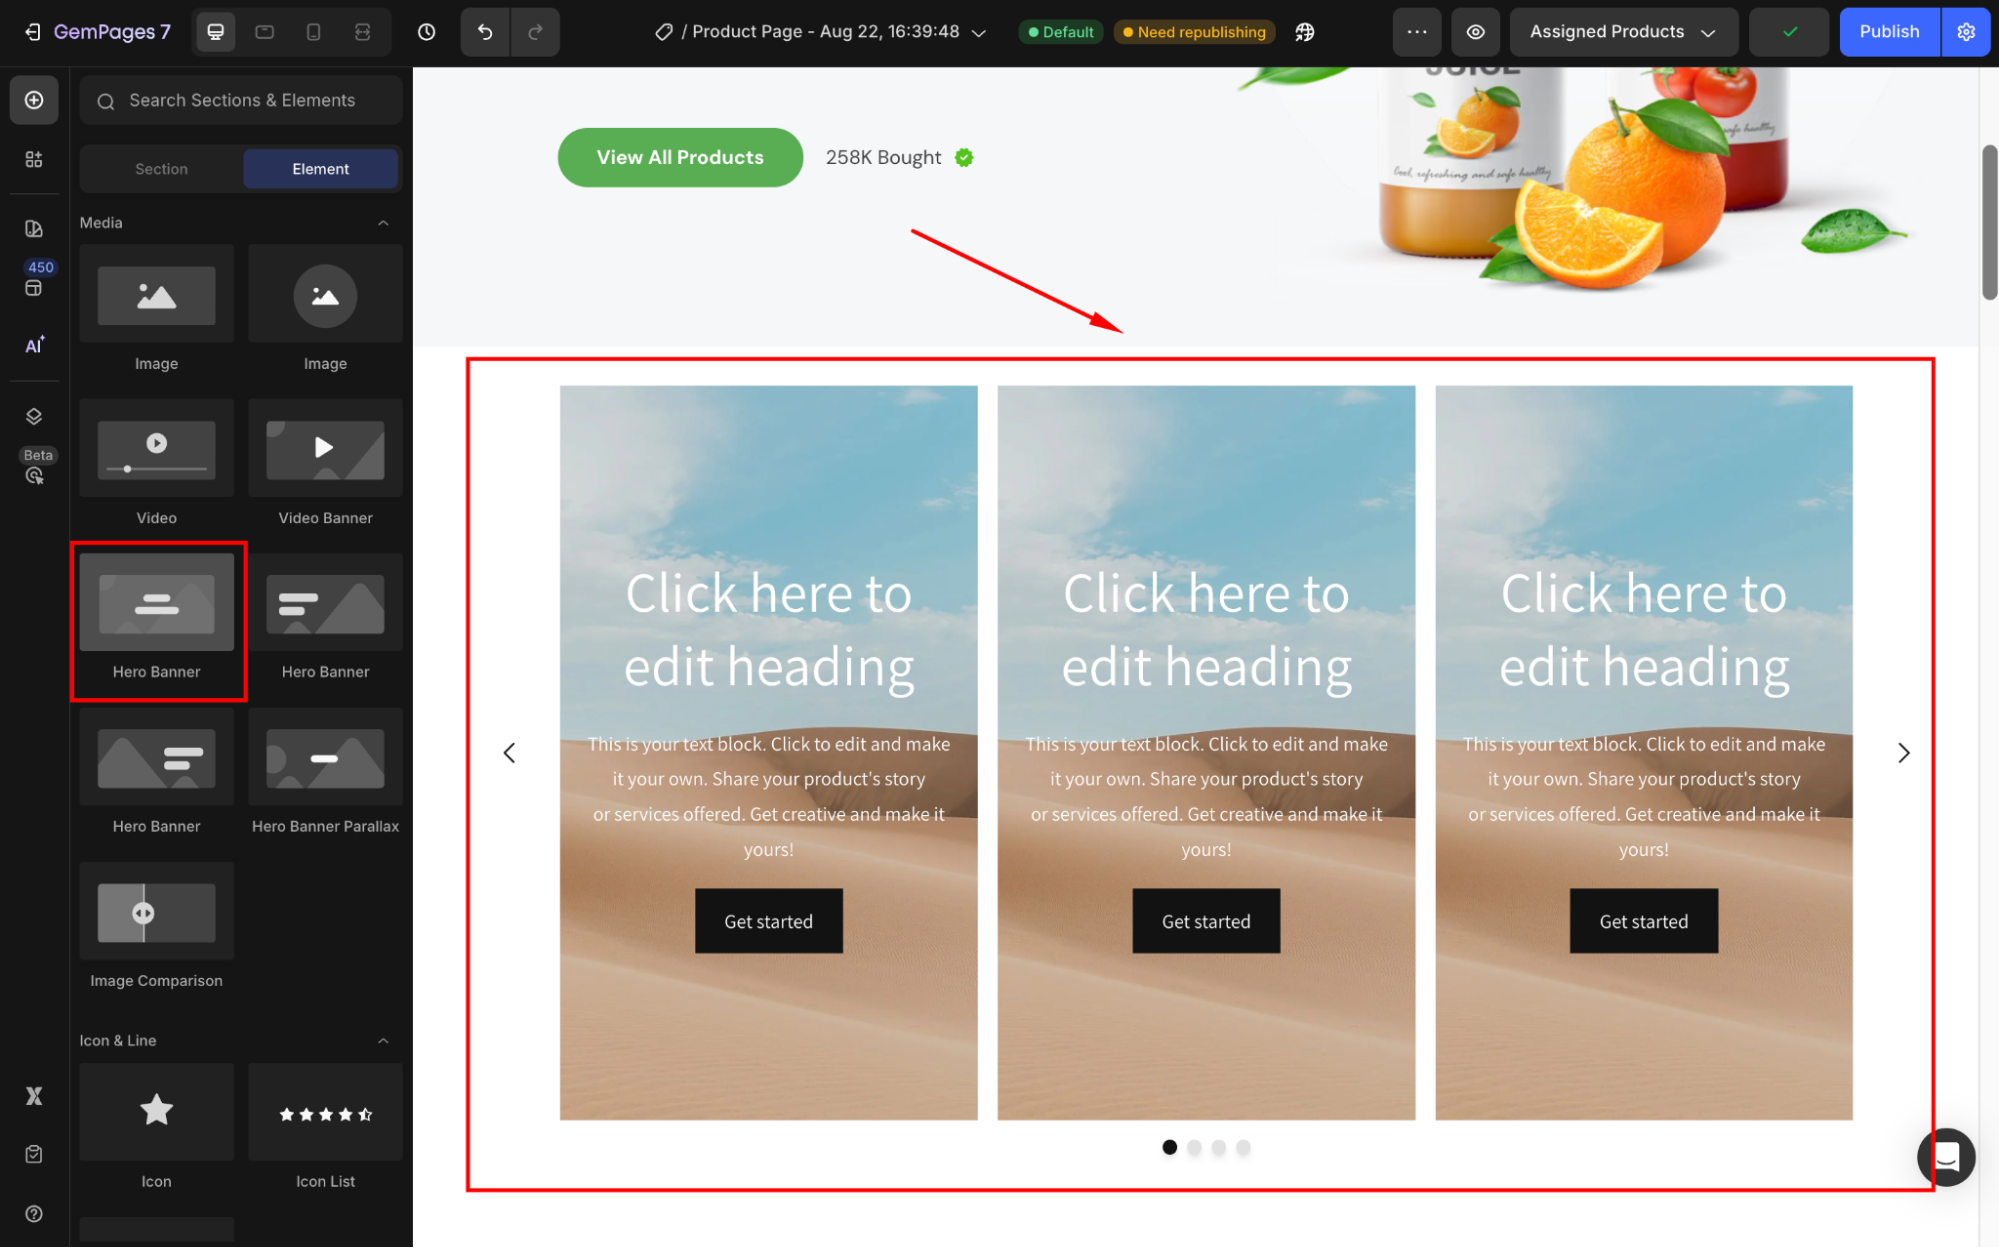
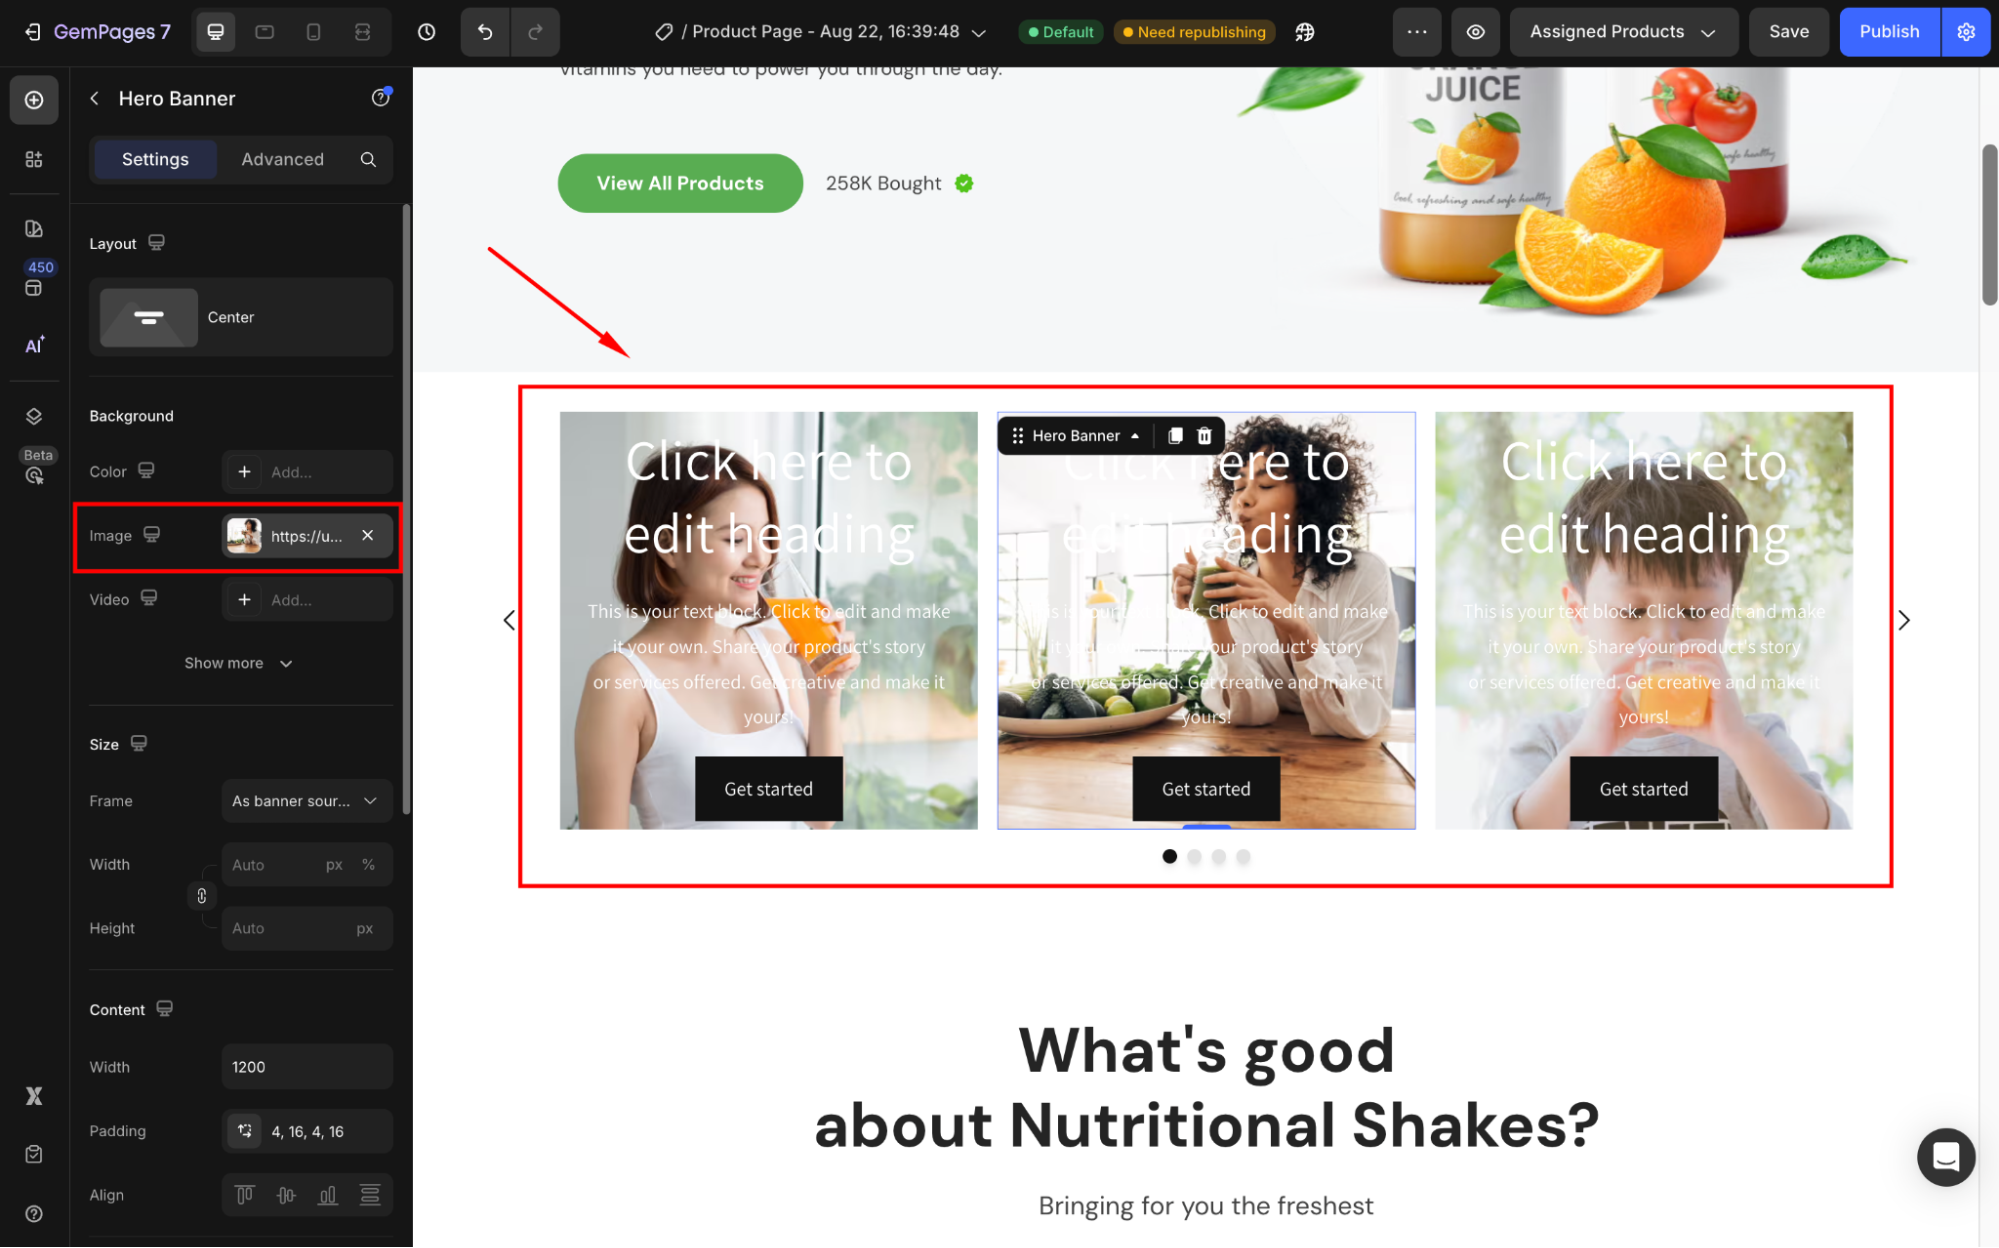
Step 2: Insert a Hero Banner on each column
A Hero Banner allows you to overlay text on an image, making it the best element for designing a text-based carousel.
To do this:
- Click on the first column of the carousel.
- Drag and drop a Hero Banner element into the column.
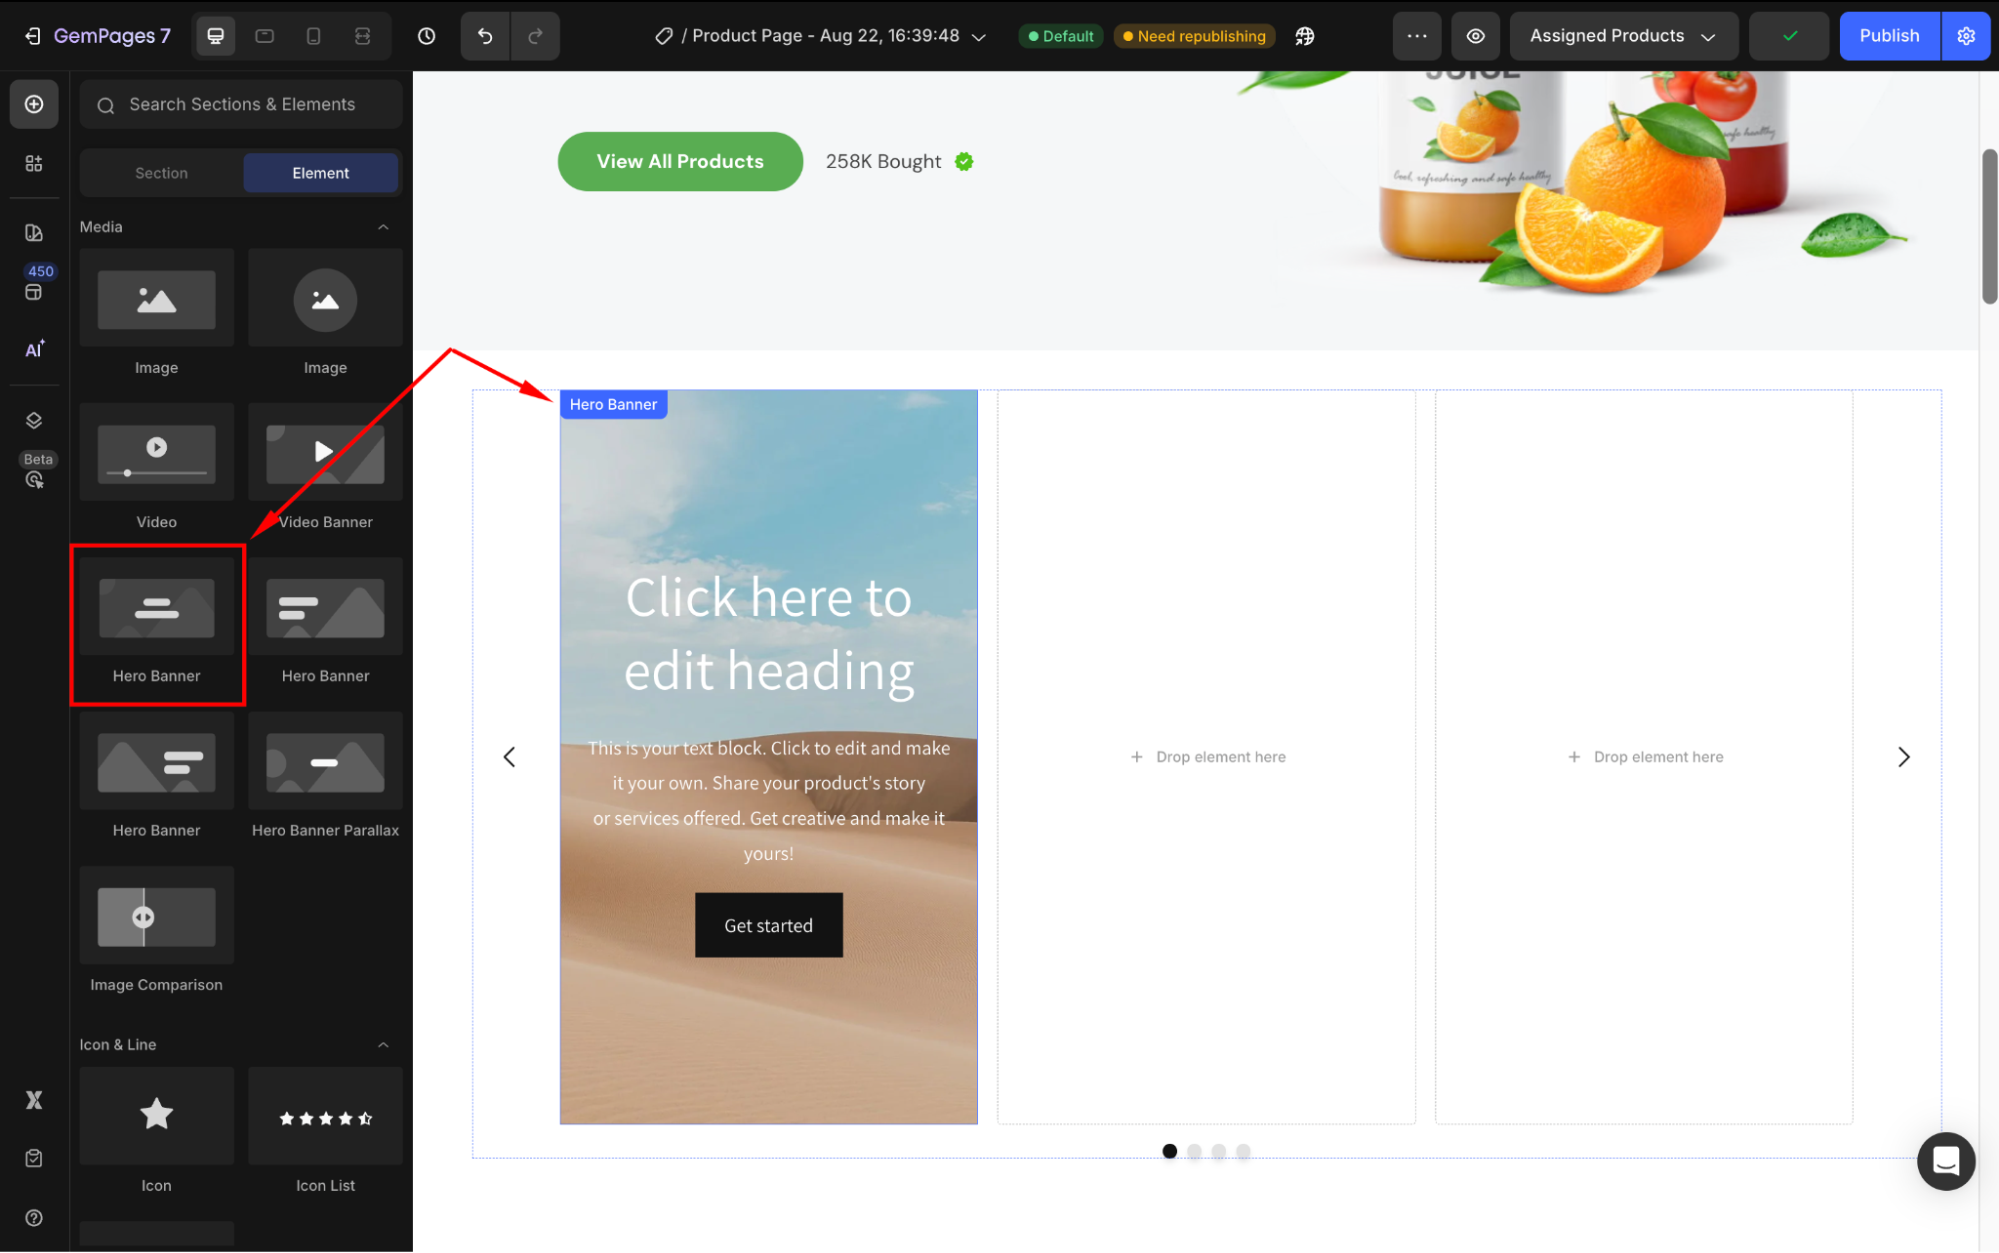
- Repeat this process for the others.
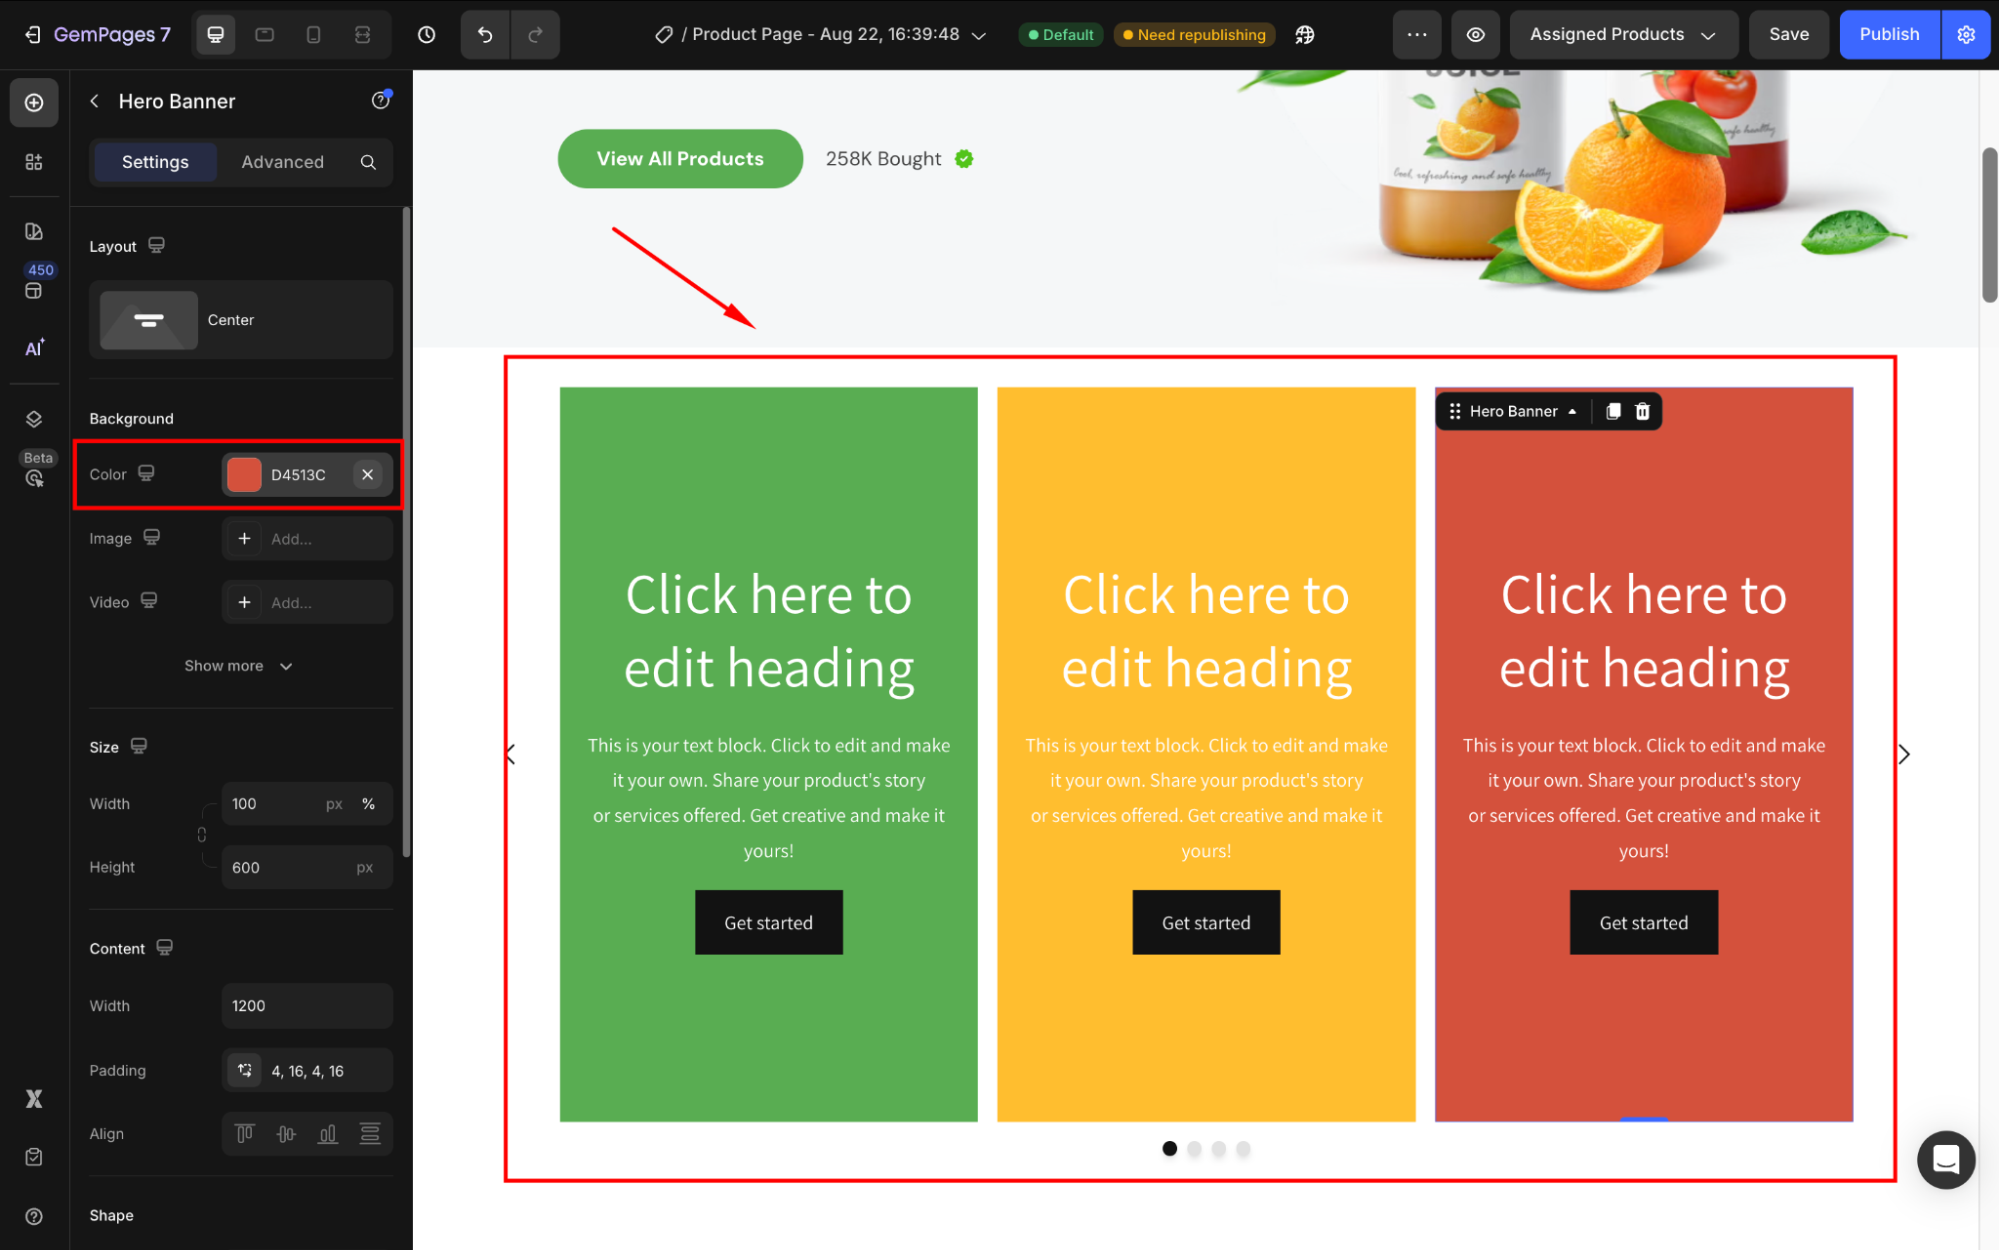
Step 3: Customize the Background
To make your carousel visually appealing, you can set different types of backgrounds under the Background section, including:
- Color: Choose a solid or gradient color for a minimalist look.
- Image: Choose an image from your media library or upload a new one. The images should be the same size for consistency.
- Video: Use a video from YouTube or media library (Video hosting) to create an engaging effect.
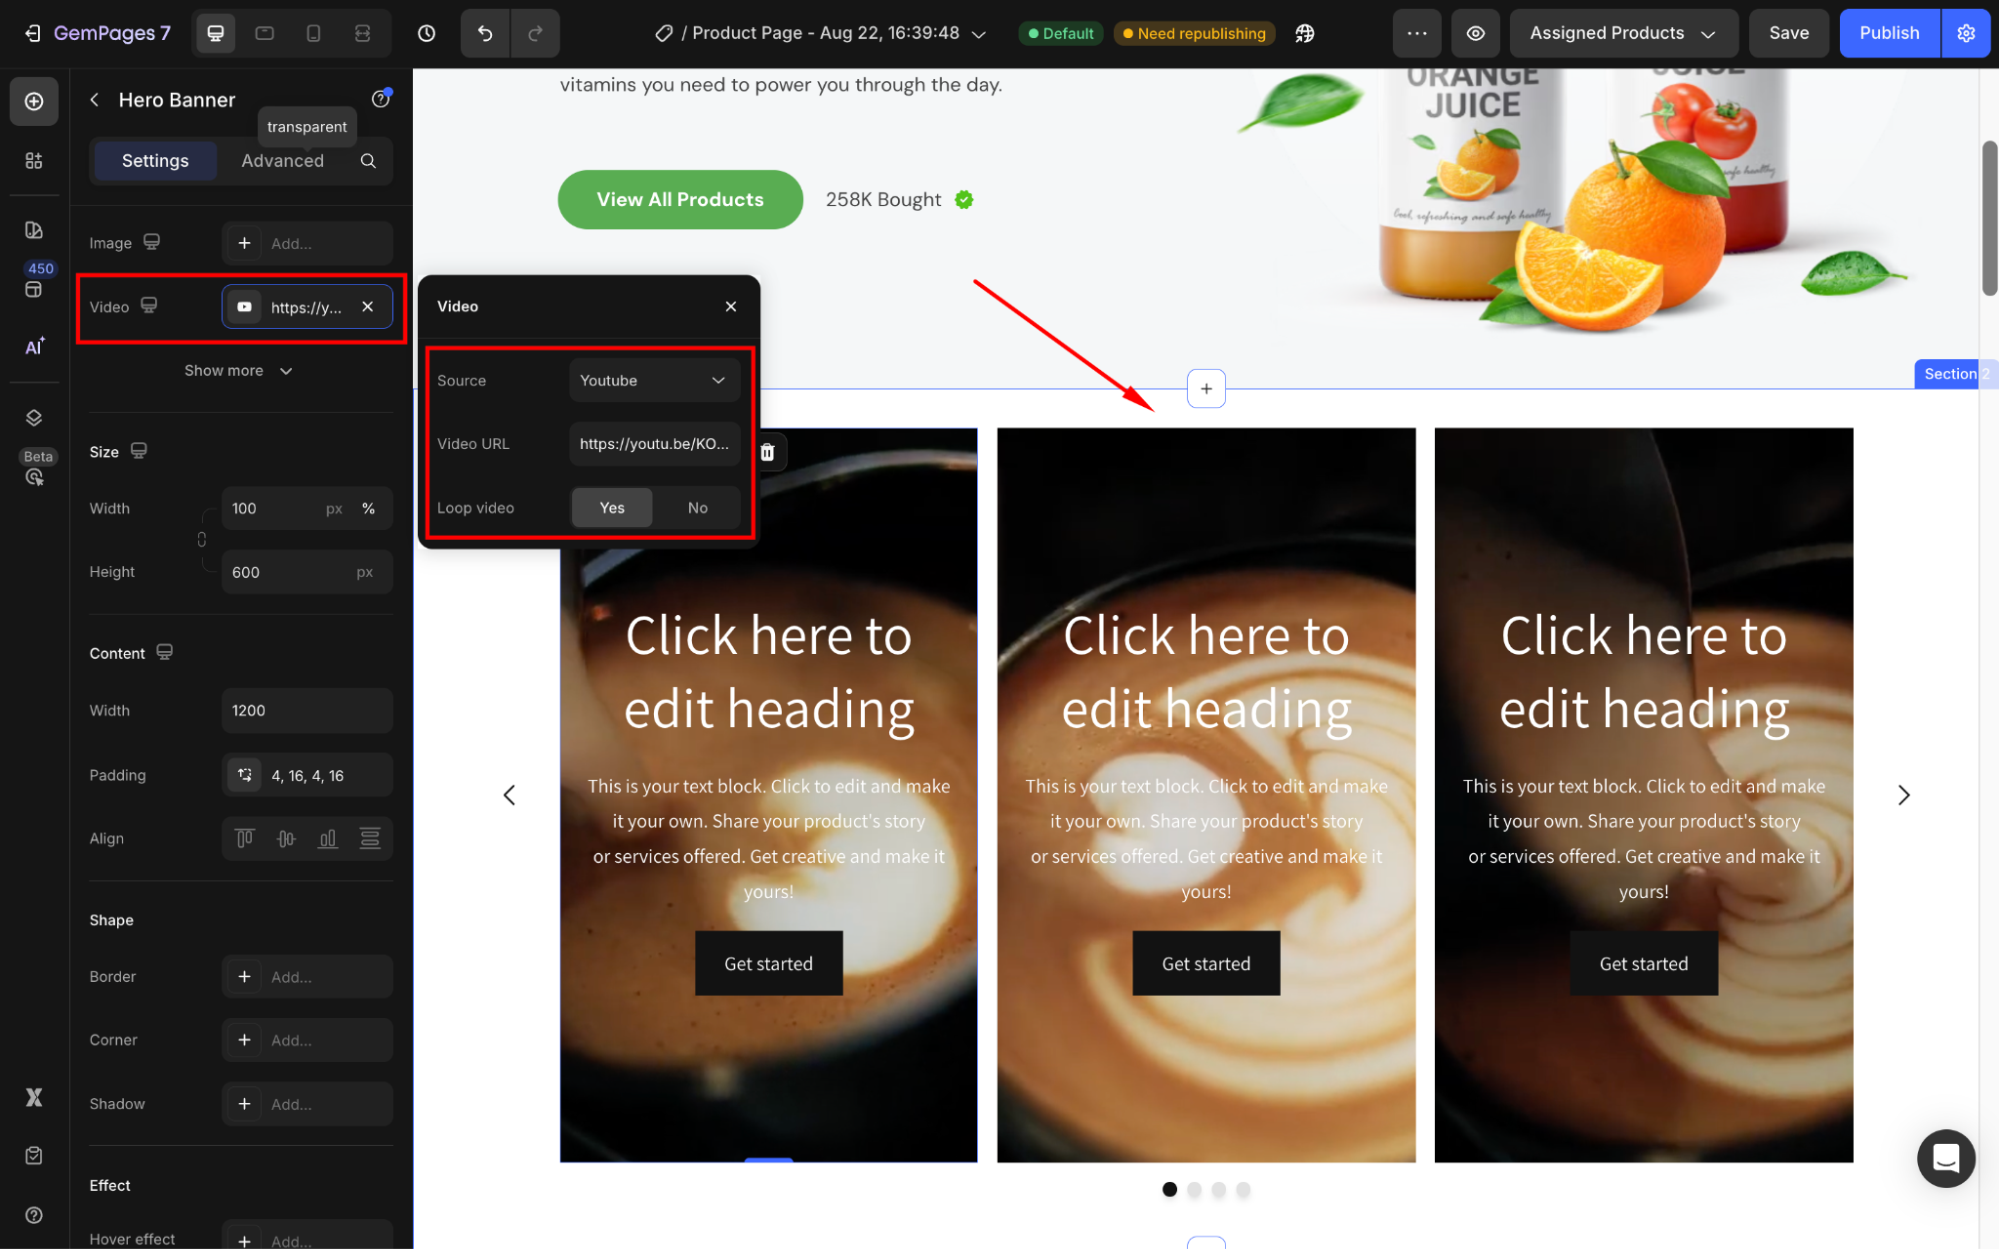
Refer to this article for details on how to customize your backgrounds.
Step 4: Customize the Text
Then, edit the text and style it to fit your branding:
- Click on each text block to open its settings.
- Under the Text style section, you can customize the font style, size, color, and alignment for each column.
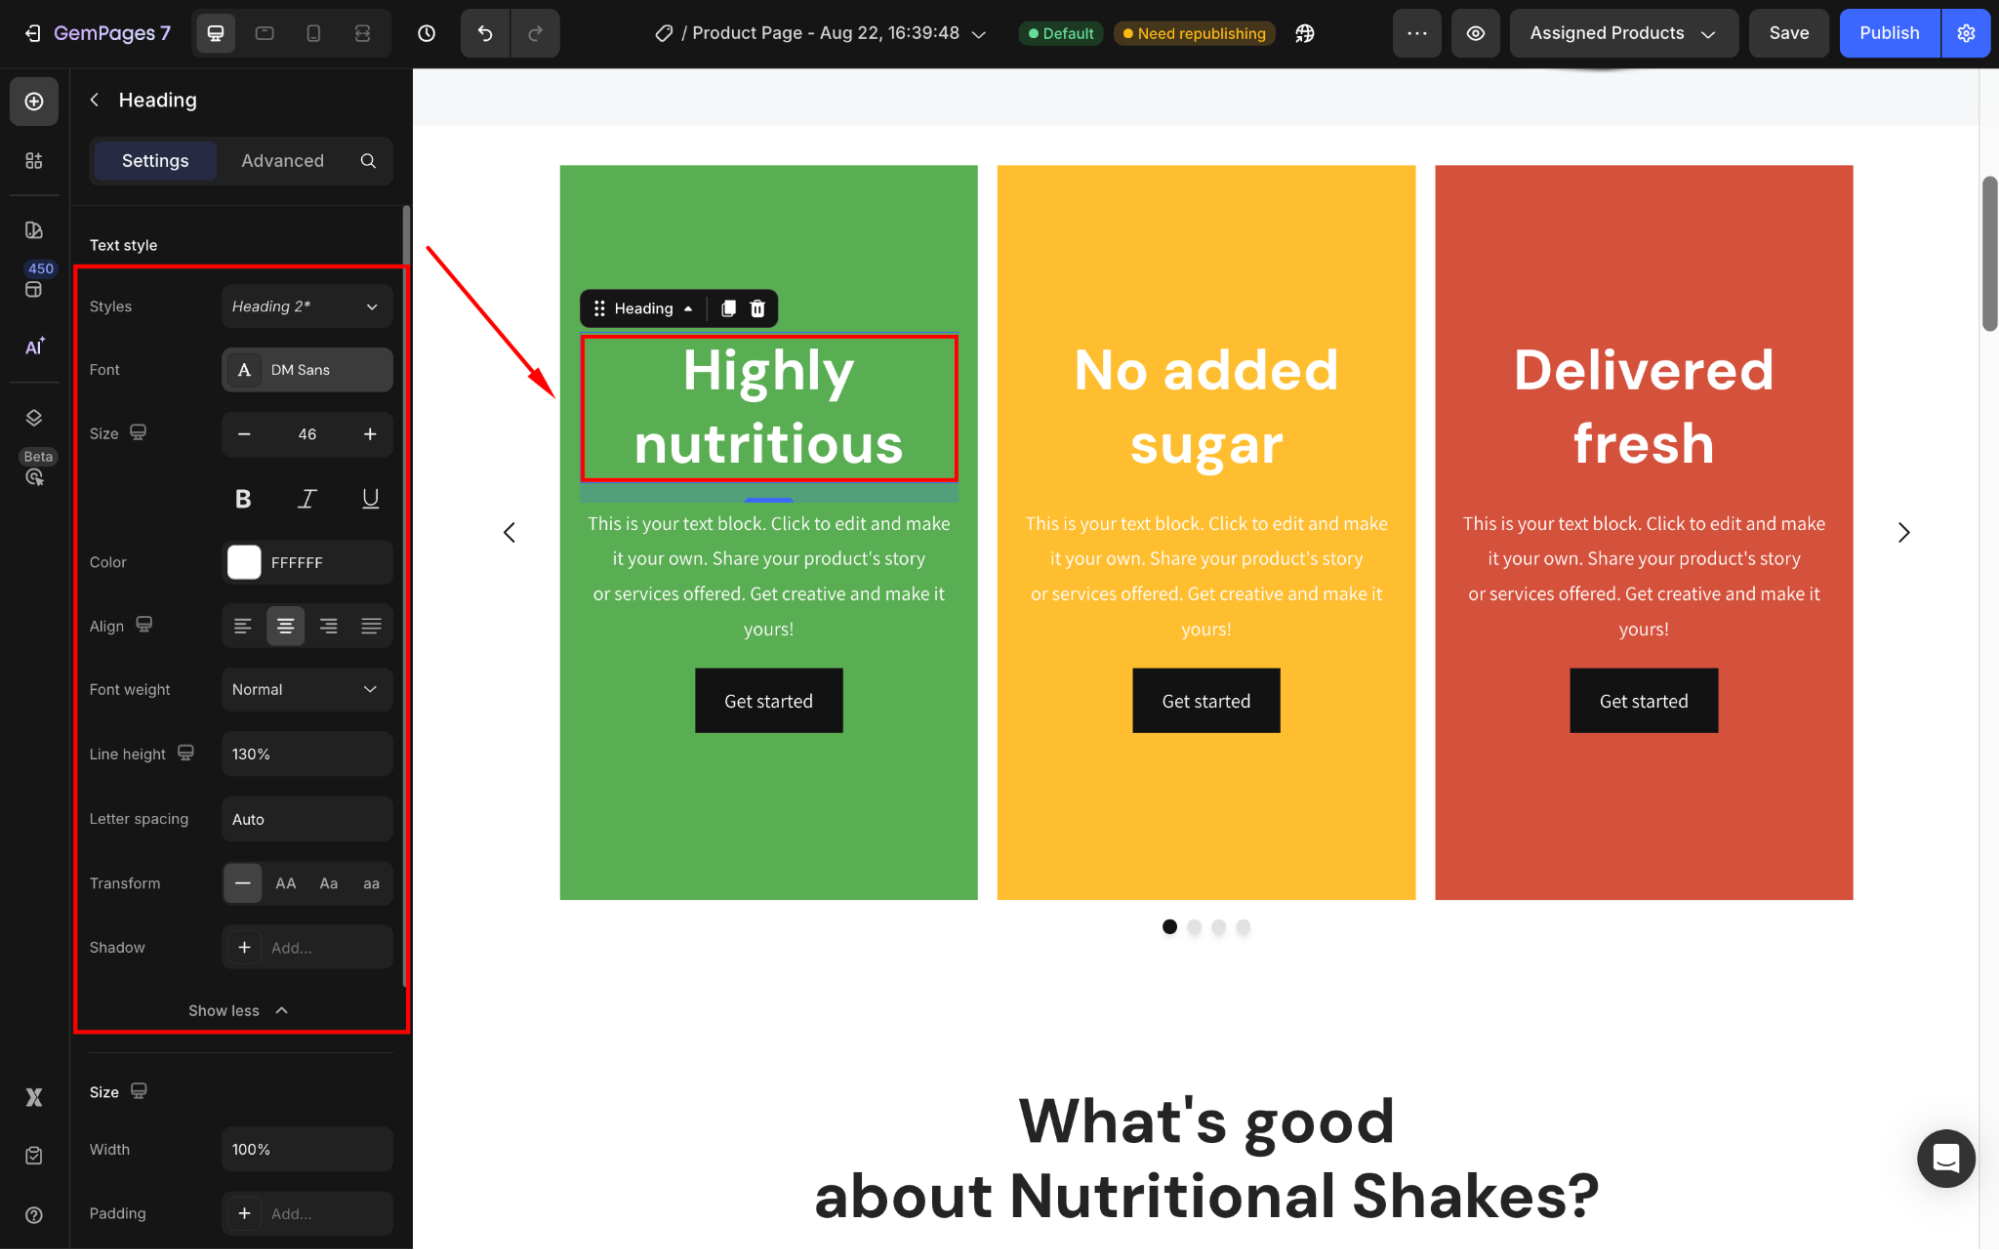
For further information about Text Style, check out our article.
FAQs about Carousel with Text
1. Can I add buttons or links to each slide?
Yes. You can insert a Button element inside the Hero Banner to drive traffic to product pages, collections, or external links.
2. How can I make my carousel auto-play?
In the Carousel Settings panel, you’ll find the Auto Play option under the Slide effect section. Select Yes to enable the auto play feature for your carousel.
3. Is the carousel mobile-friendly?
Yes. Carousels created in GemPages are responsive by default. You can fine-tune the display for mobile and tablet using the editor’s device preview mode.
4. What image size should I use for the best result?
We recommend using images with the same aspect ratio and at least 1200px width for high resolution and consistency. Check out our Recommended Size for Images.


Thank you for your comments