


This article shows you how to upload a transparent logo to your Shopify store with GemPages v7.
How to Upload a Transparent Logo to Your Shopify Store
To set up a transparent logo in your Shopify store, follow these steps:
Step 1: Prepare your logo
- Ensure your logo is in .png format with a transparent background.
- Use a high-resolution file to keep your logo sharp across all devices.
Tip: The recommended size is 300 x 300 pixels (Square aspect ratio).
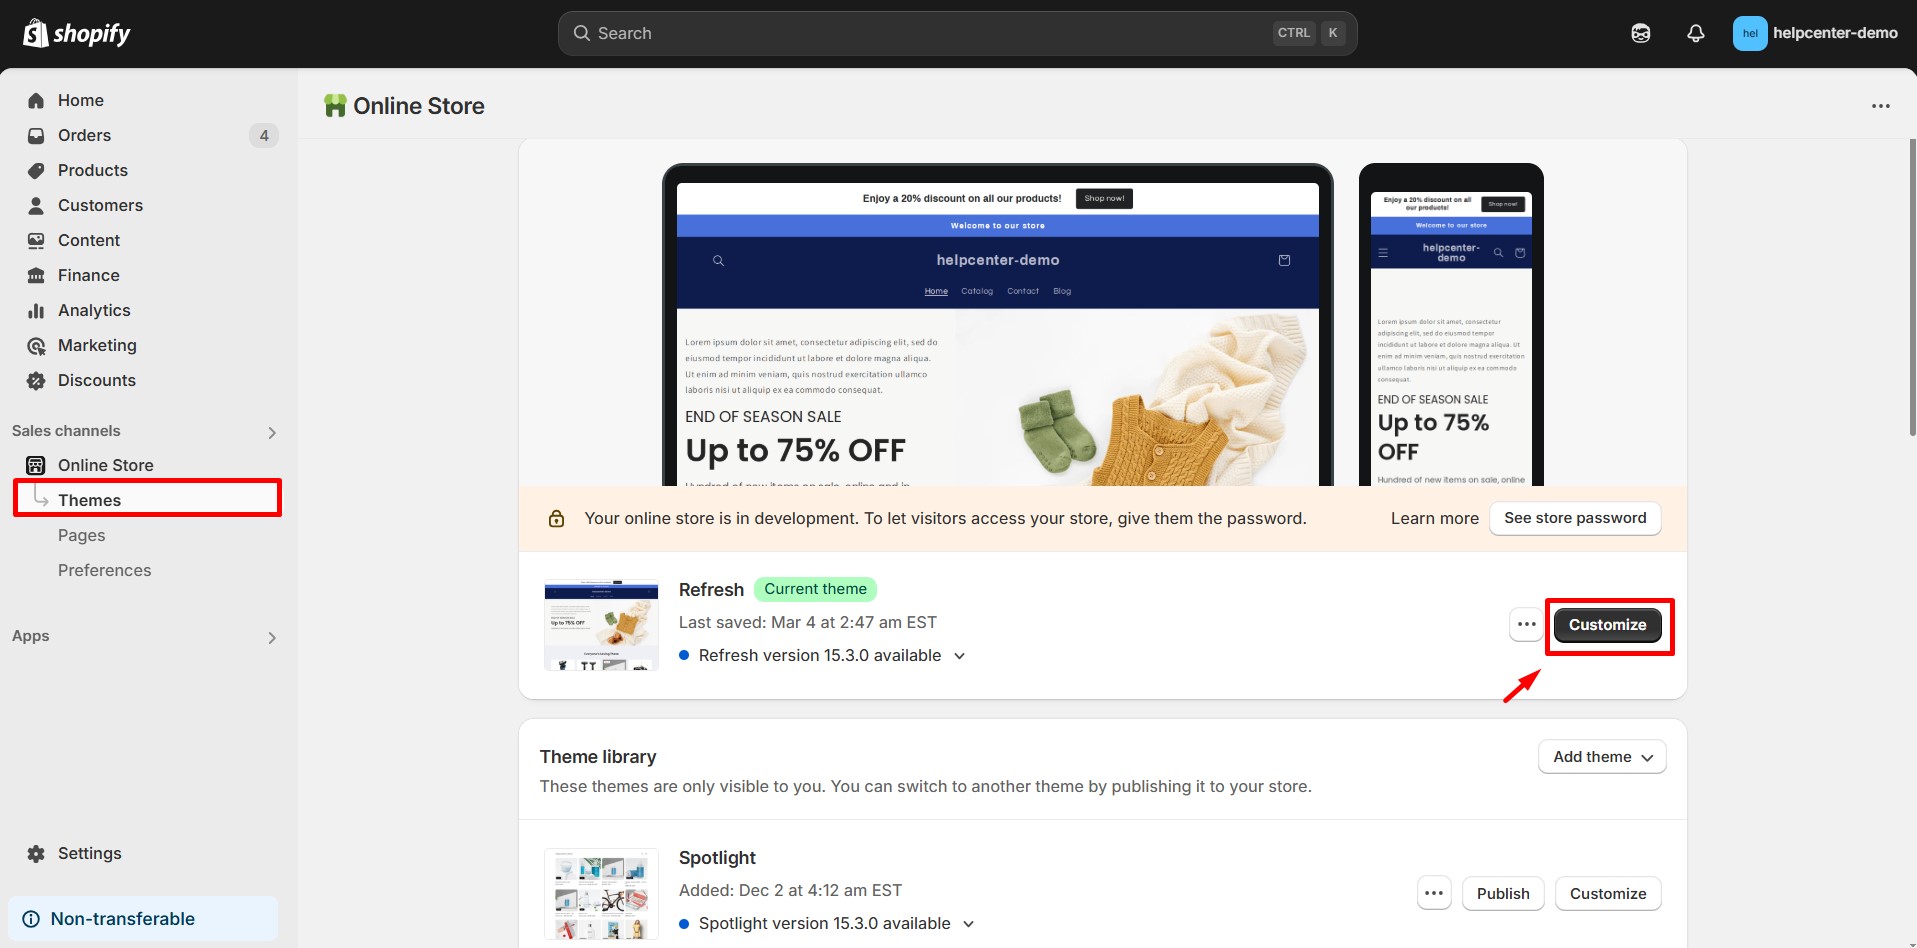
Step 2: Access Theme Settings
- From your Shopify admin, go to Online Store > Themes.
- Find the theme you want to edit and click Customize.
Step 3: Upload the logo
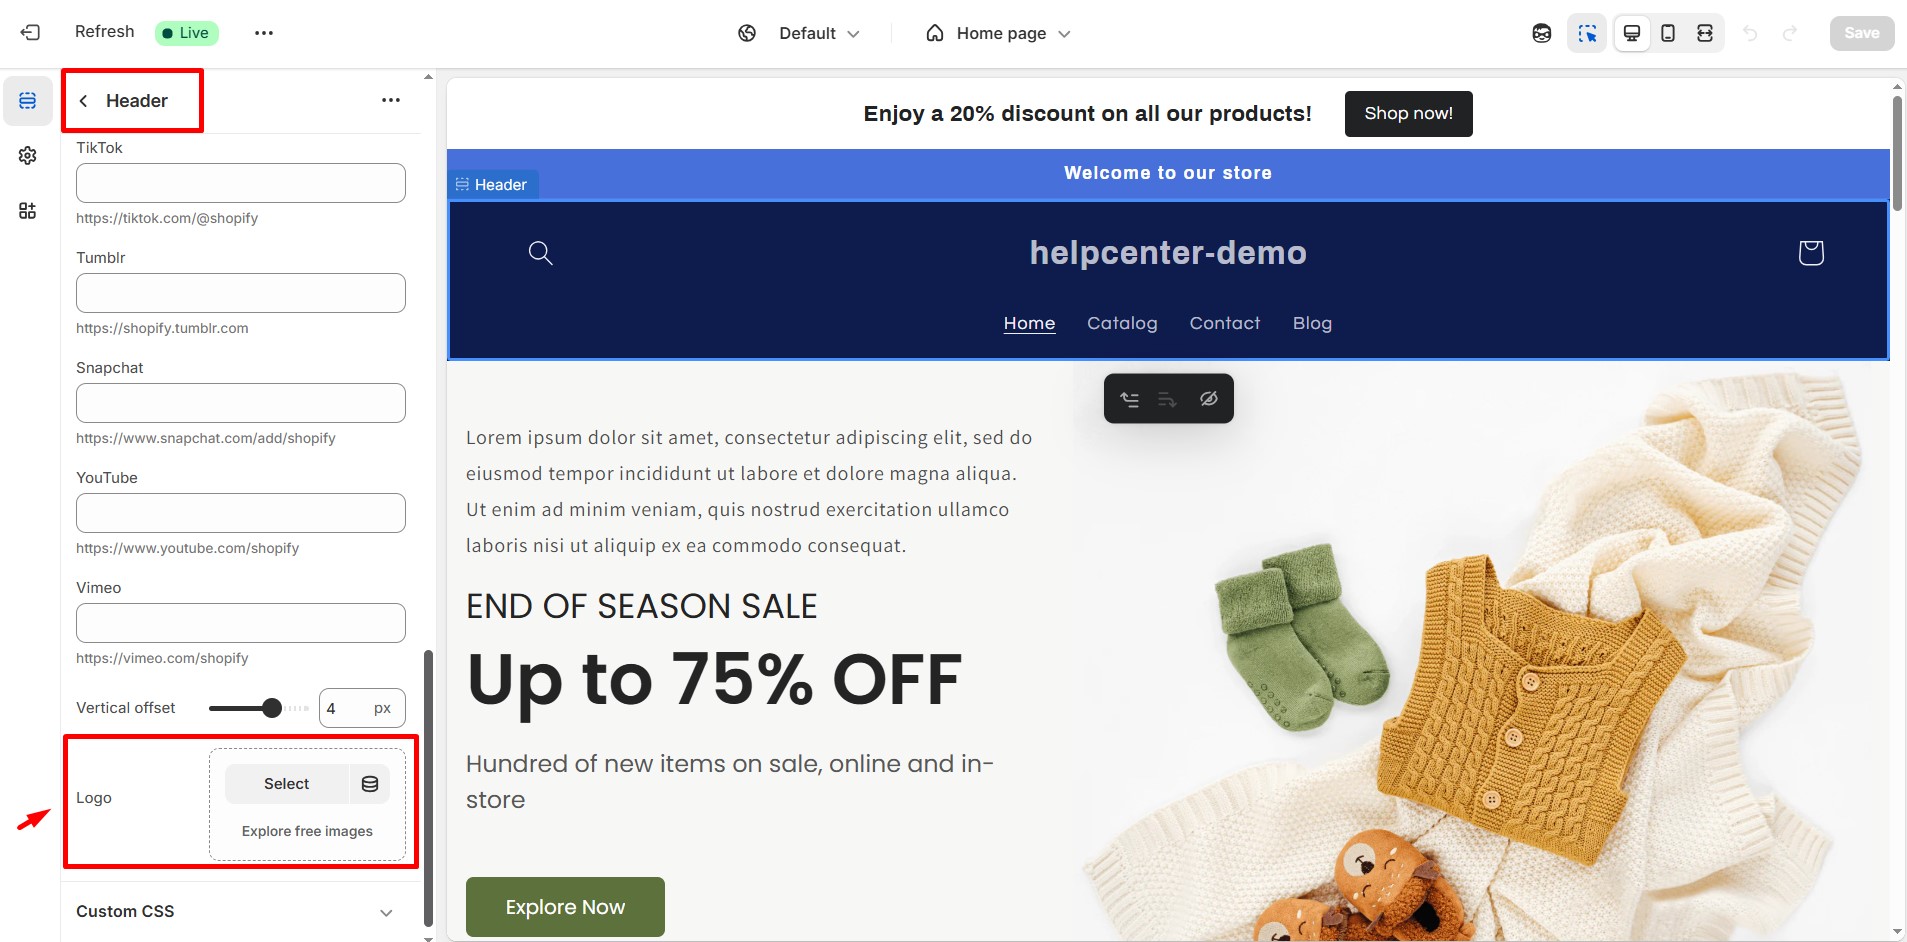
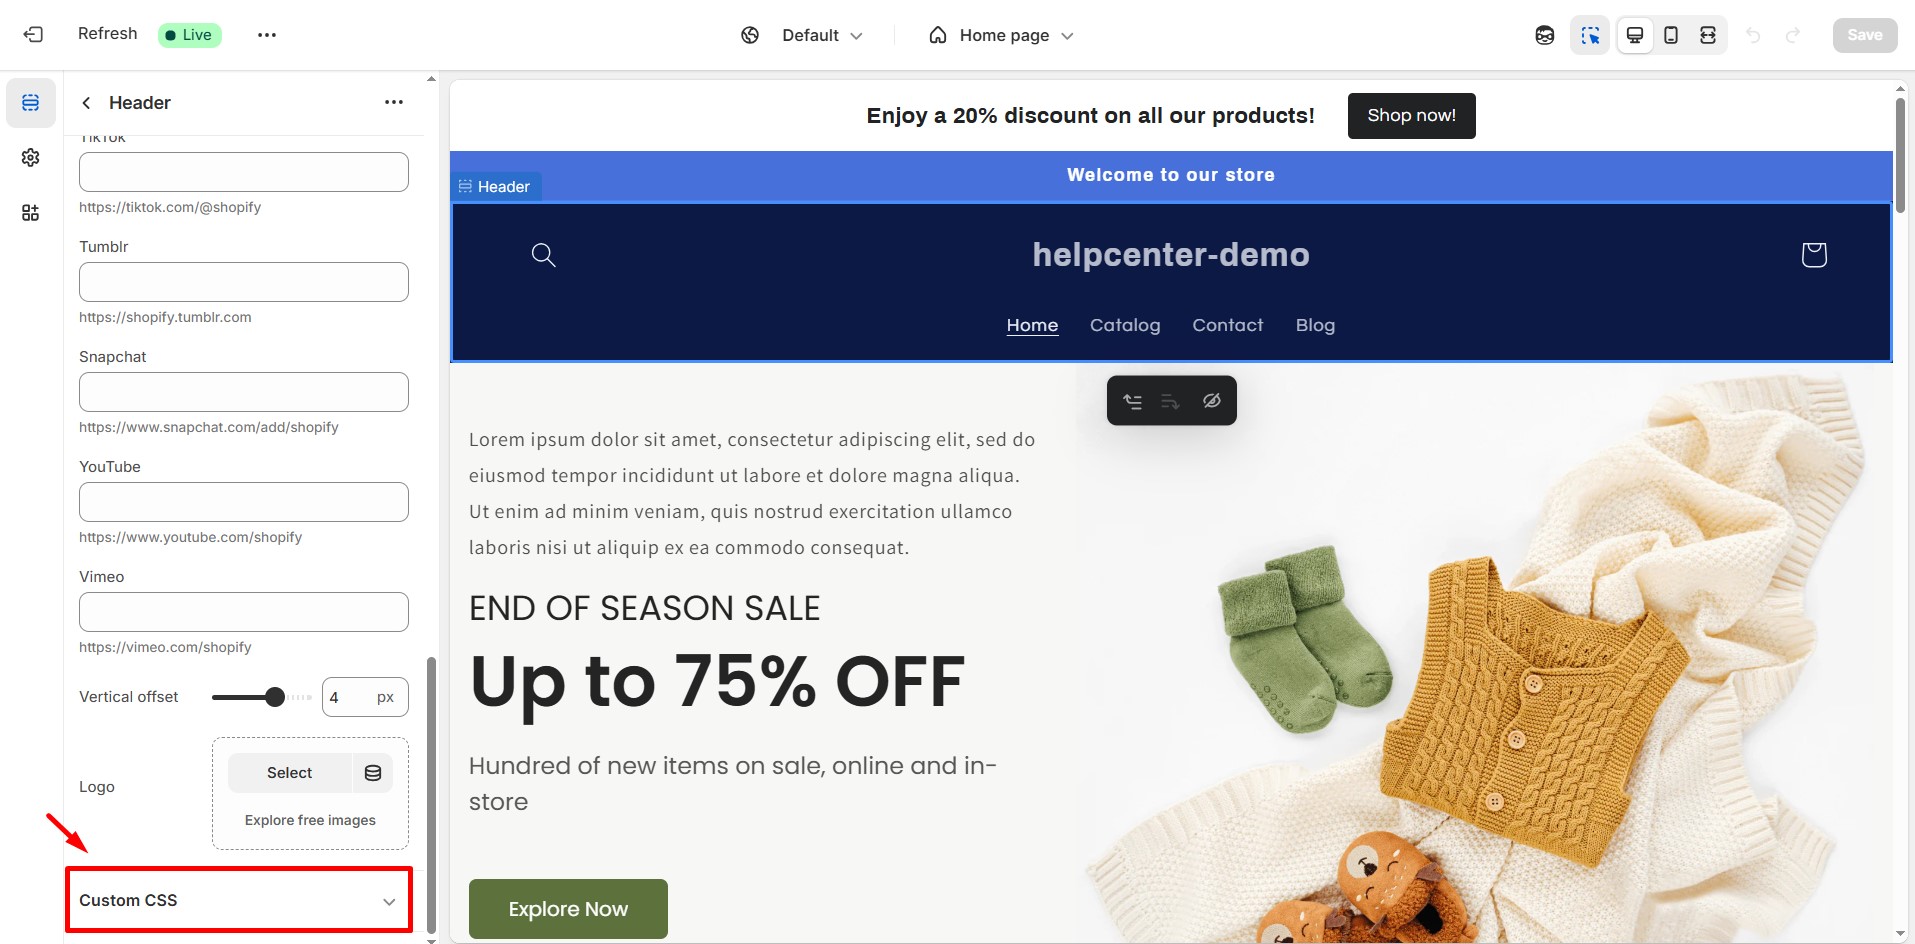
- In the theme editor, navigate to the Header section.
- Look for the logo settings and upload your transparent .png logo.
Step 4: Adjust Header Settings
Some themes allow you to enable a transparent header.
- Change the header background to ensure the transparent logo displays properly.
- If your theme doesn’t support transparent headers, you may need to add custom CSS or edit the theme code.
Note: If your theme doesn’t support transparent headers by default, you may need to modify the theme’s code or use custom CSS to achieve the desired effect.
How to Upload a Transparent Image in GemPages
If you’re using GemPages and want to add a transparent image to your page:
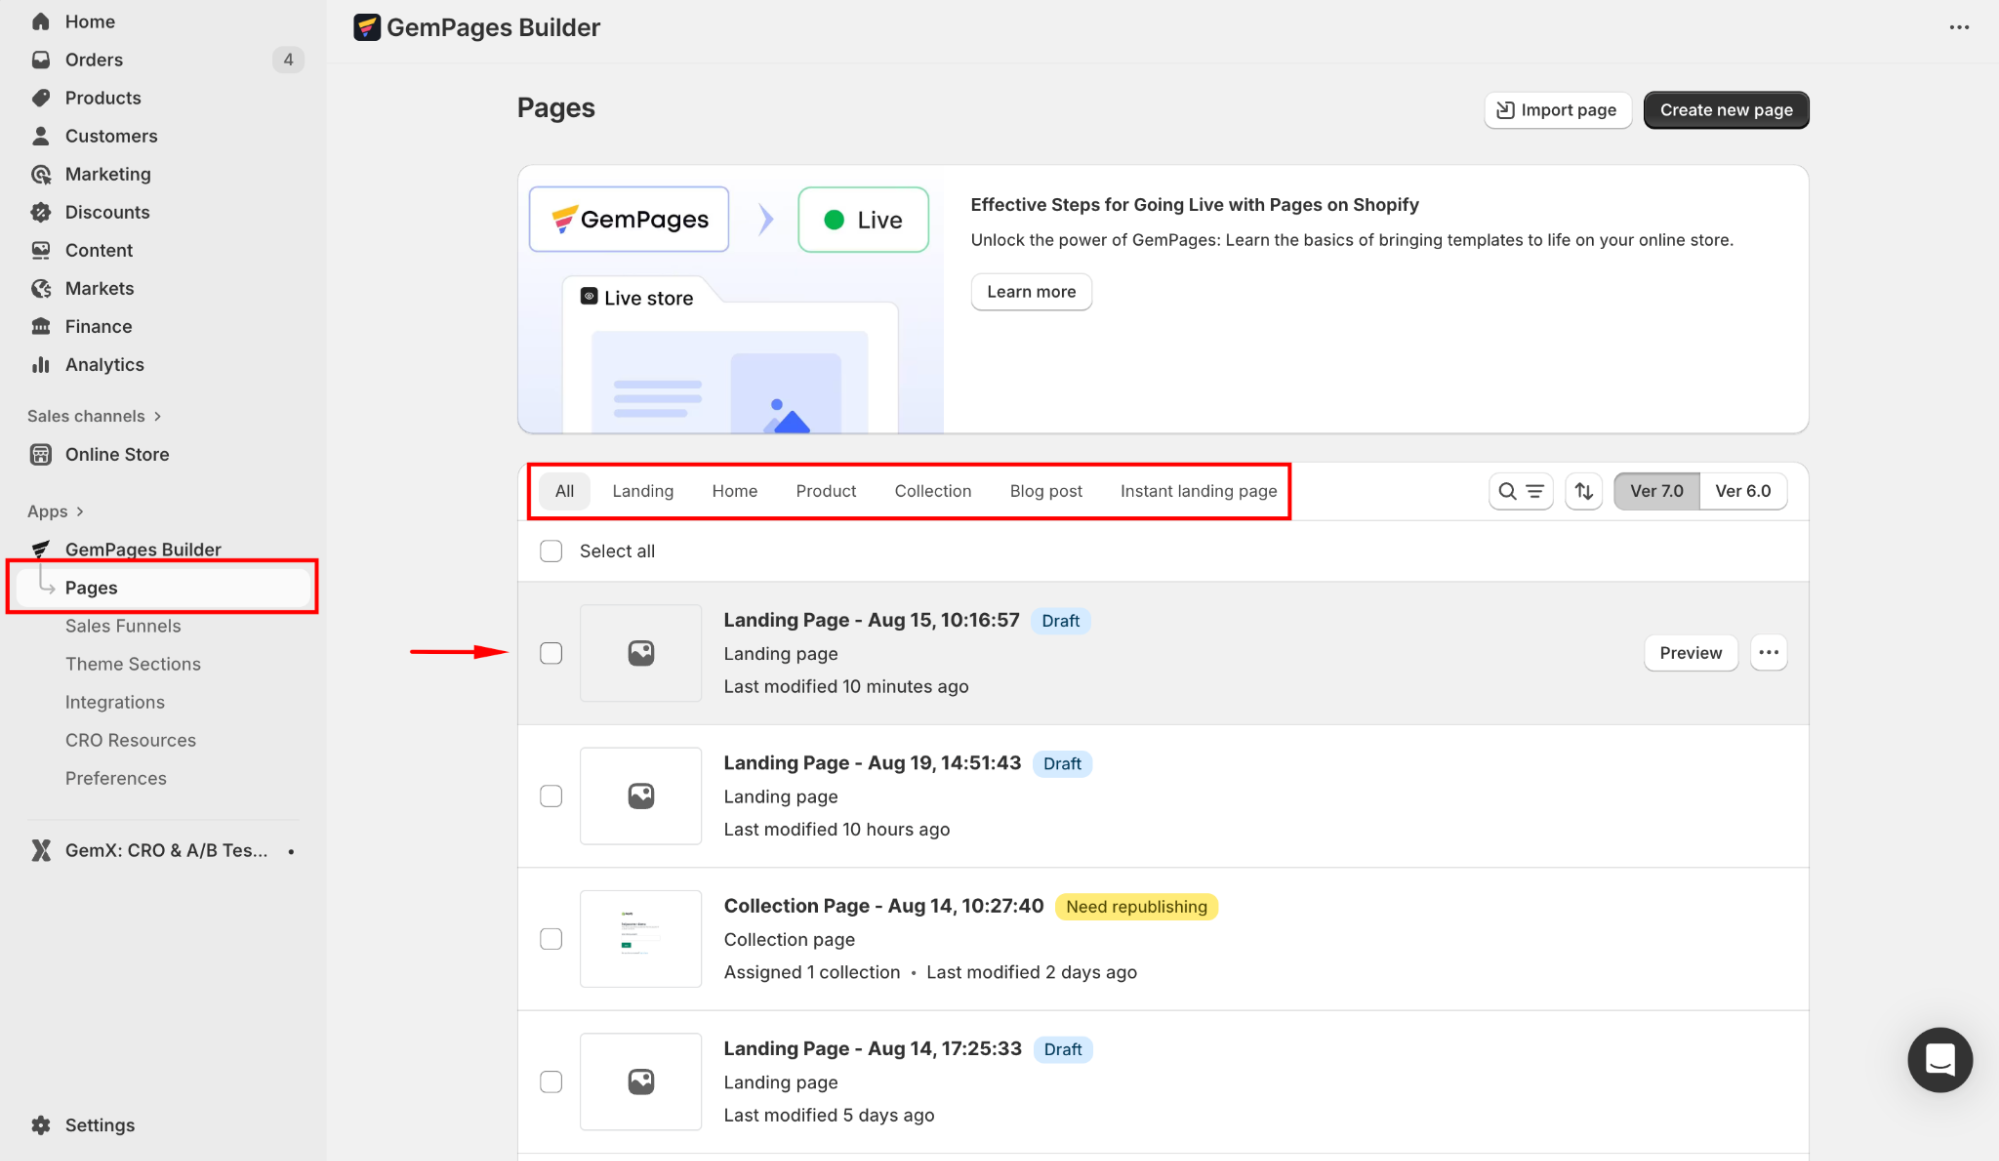
Step 1: Open the GemPages Editor
- From your Shopify admin, navigate to GemPages Builder app > Pages.
- Locate the target template to which you want to add a transparent logo.
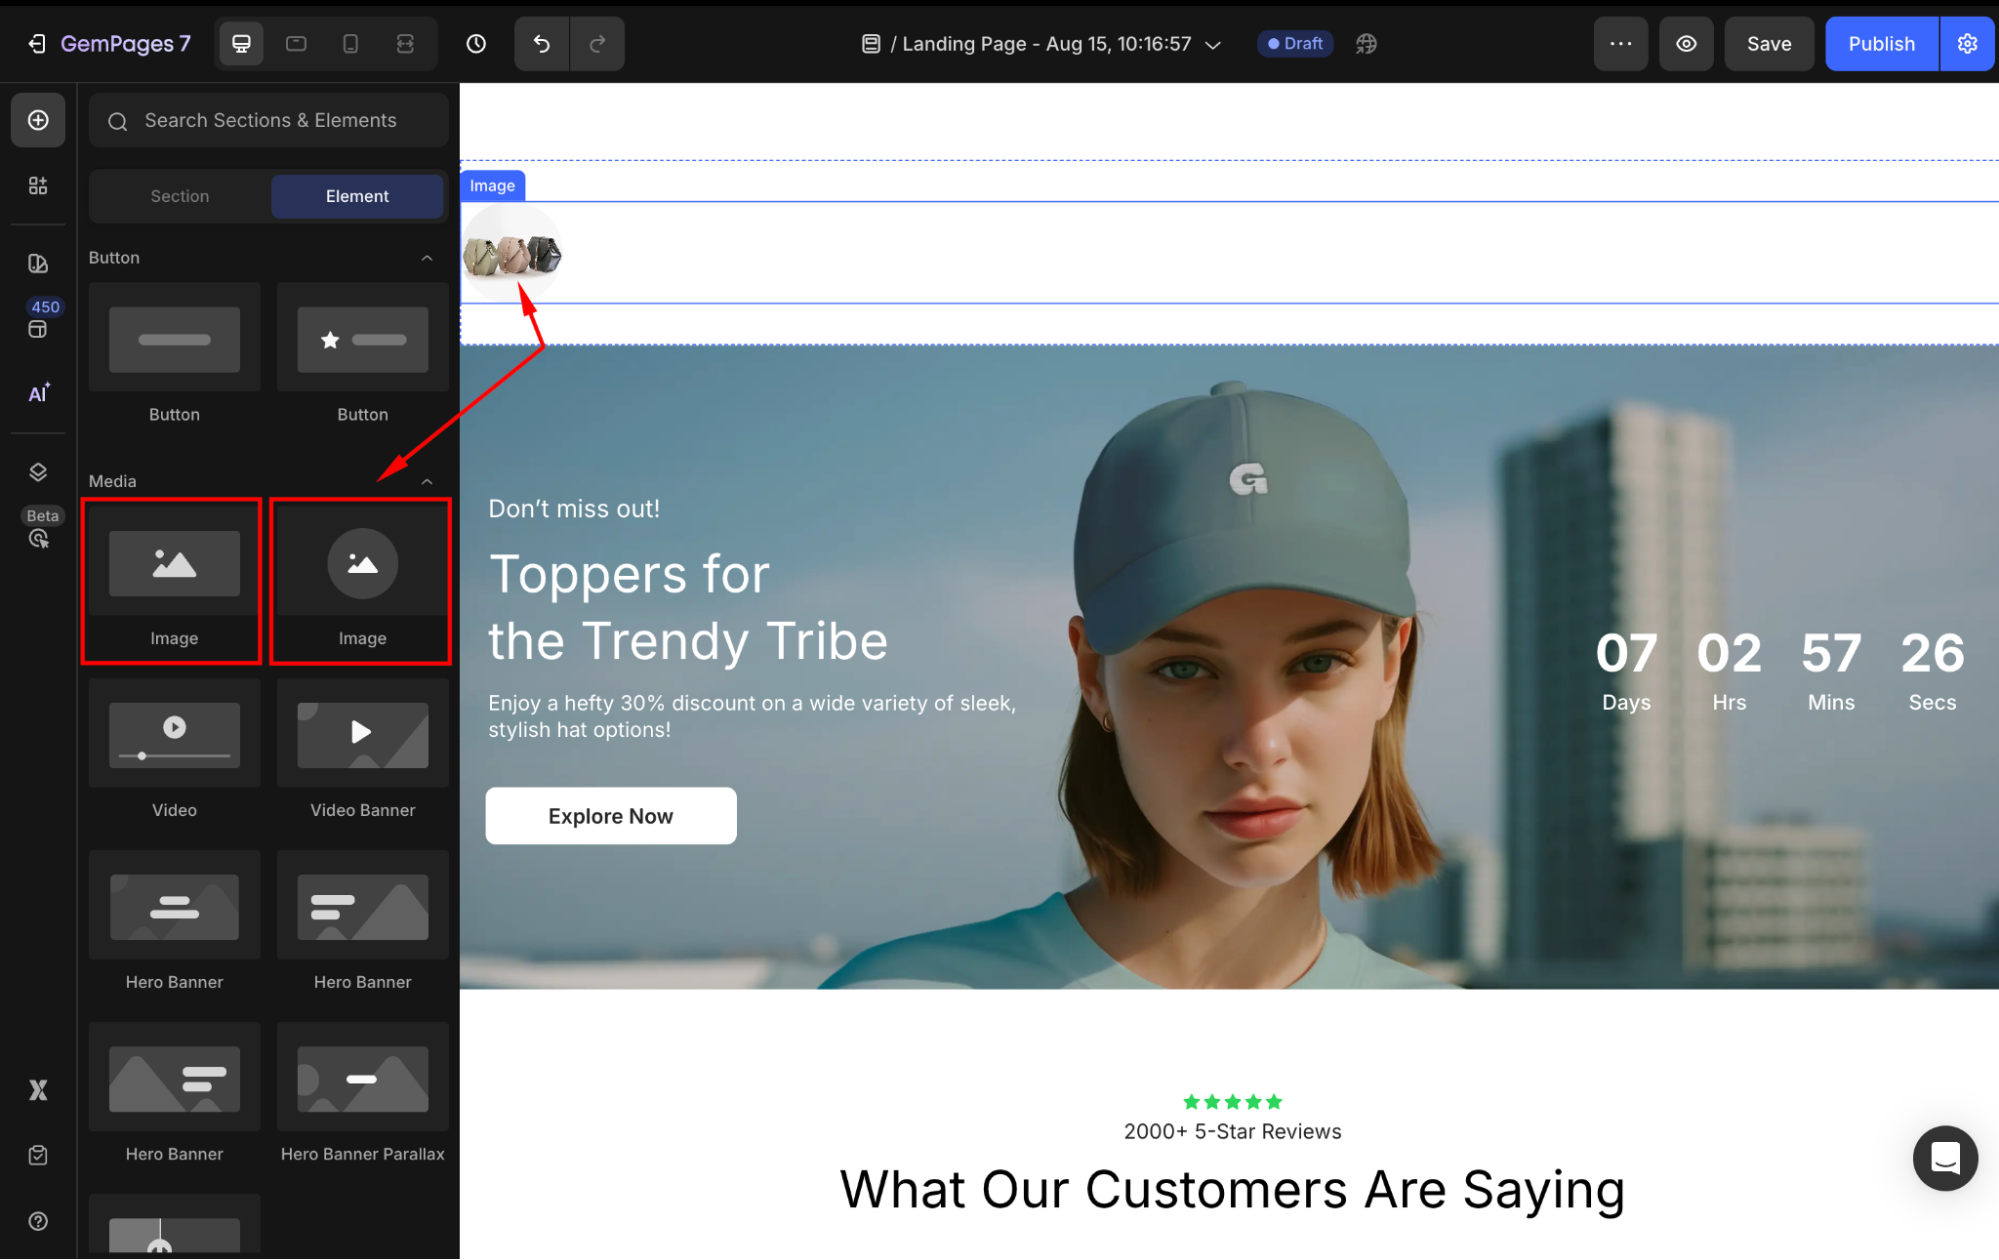
Step 2: Add an Image Element to your page
- On the left sidebar, search for the Image element.
- Drag and drop it to the desired location on the page.
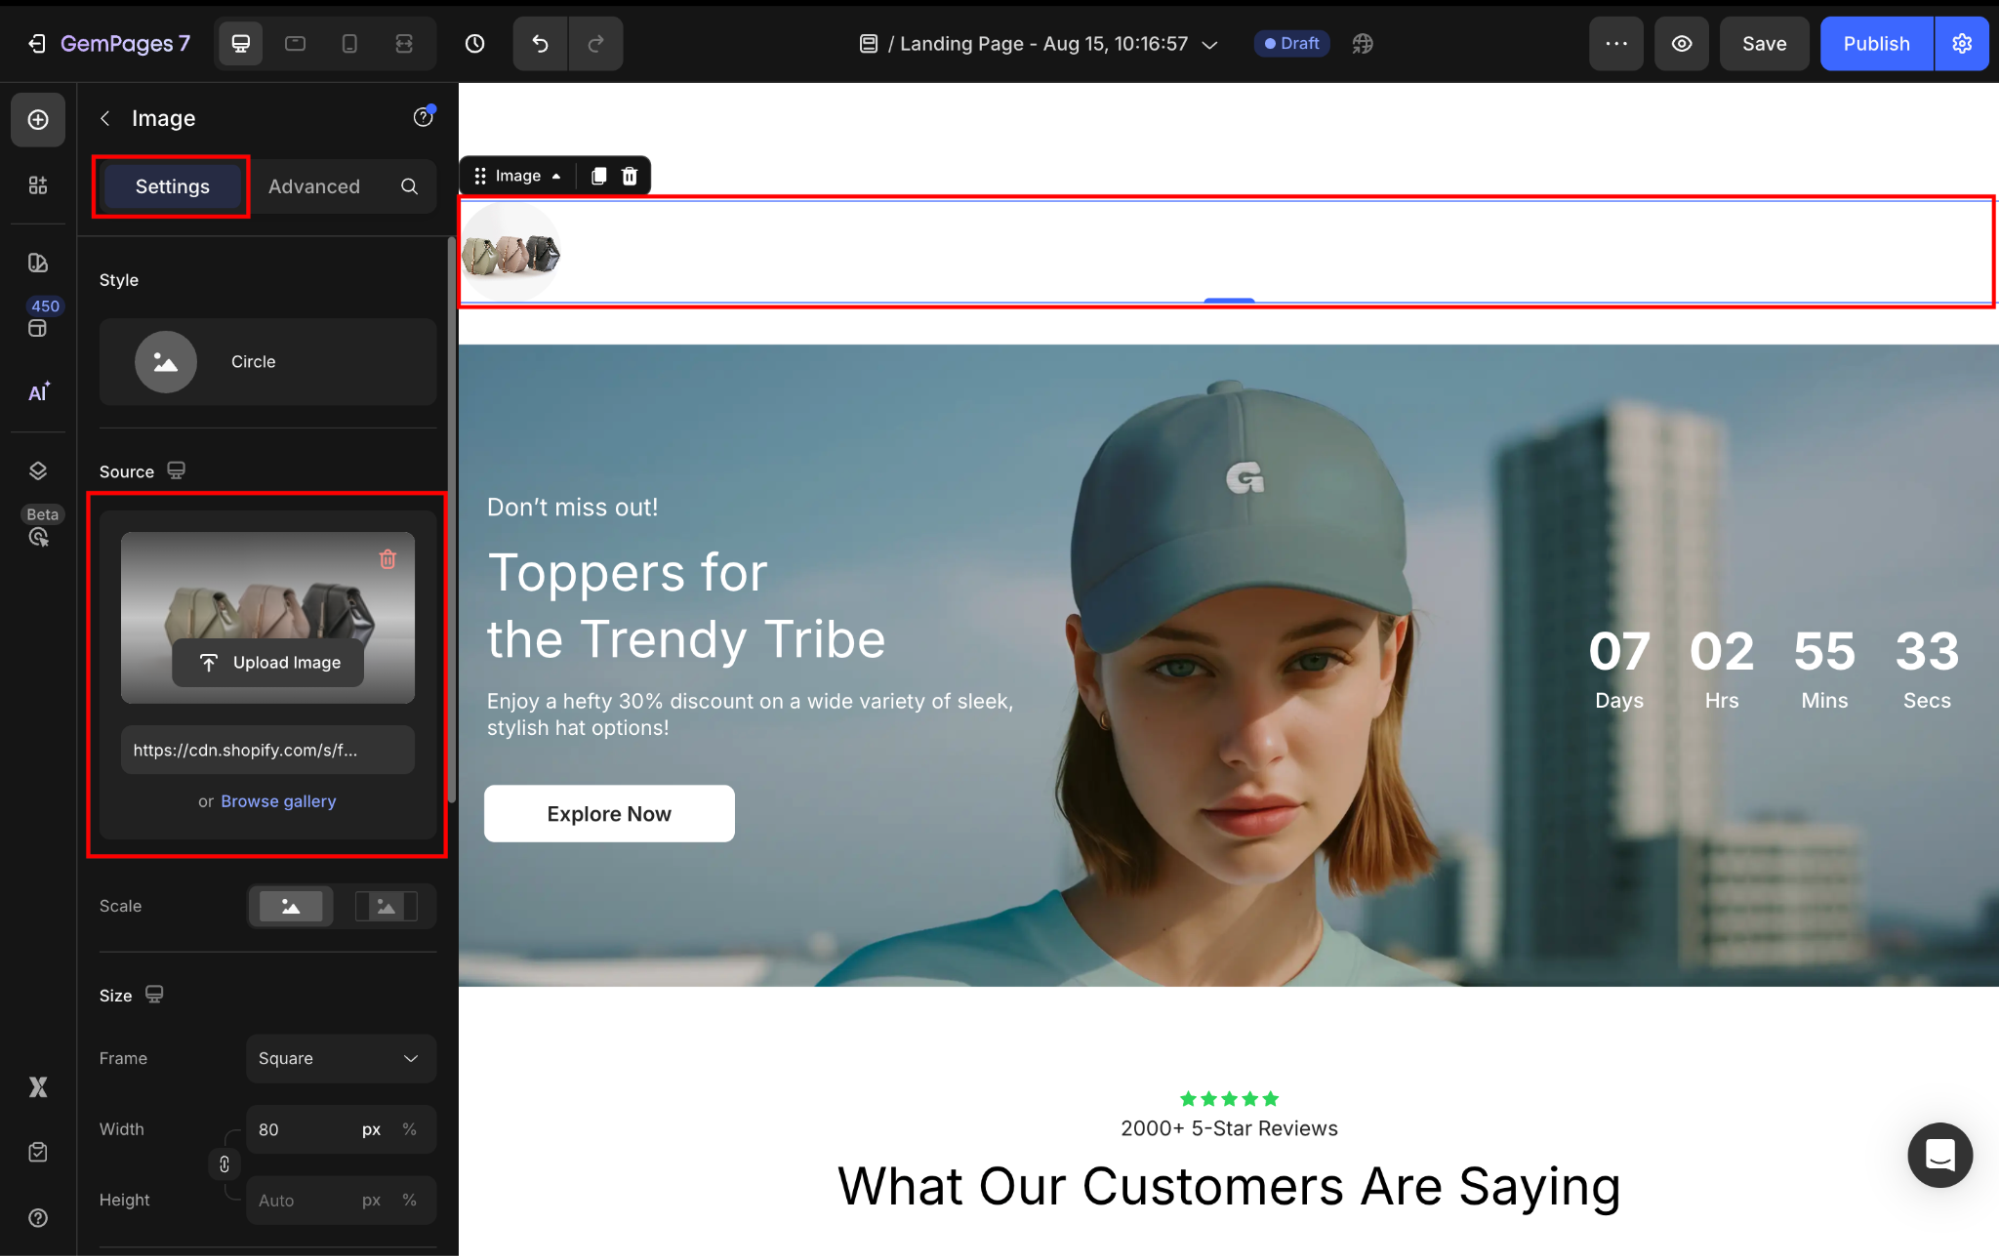
Step 3: Upload your image/logo
- Click on the Image element to open its settings.
- Under the Settings tab, locate the Source section.
- Upload your transparent logo or image
Step 4: Customize your image
Adjust dimensions, alignment, and responsiveness to fit your design.

For more customization options, see the Image Element article.
Additional Tips
- Consistent Branding: Use the same logo across your store to maintain brand consistency.
- Responsive Design: Test your logo on various devices to ensure it displays correctly.
- Optimize for Performance: Keep image file sizes optimized to ensure fast loading times.


Thank you for your comments