


Want to guide your visitors directly to a specific part of your page, like product details, FAQs, or a contact form, with just one click? That’s exactly what anchor links are for.
In this guide, you’ll learn how to create smooth-scrolling links in GemPages Version 7, using buttons, images, or text elements to scroll to any section of your page — no coding needed.

What Is an Anchor Link?
An anchor link (also called a “scroll-to link”) allows you to send visitors to a specific section of the same page — without reloading the page or forcing users to scroll manually.
GemPages makes this functionality easy to set up by allowing you to link any clickable element (like a button or heading) to a section ID on the page.
Before You Start: Get the Section ID
To create an anchor link, you first need the Section ID of the destination you want users to scroll to.
How to find the section ID:
- Hover over the section you want to link to in the Editor.
- Right-click on the section.
- Choose “Copy class” from the dropdown menu.
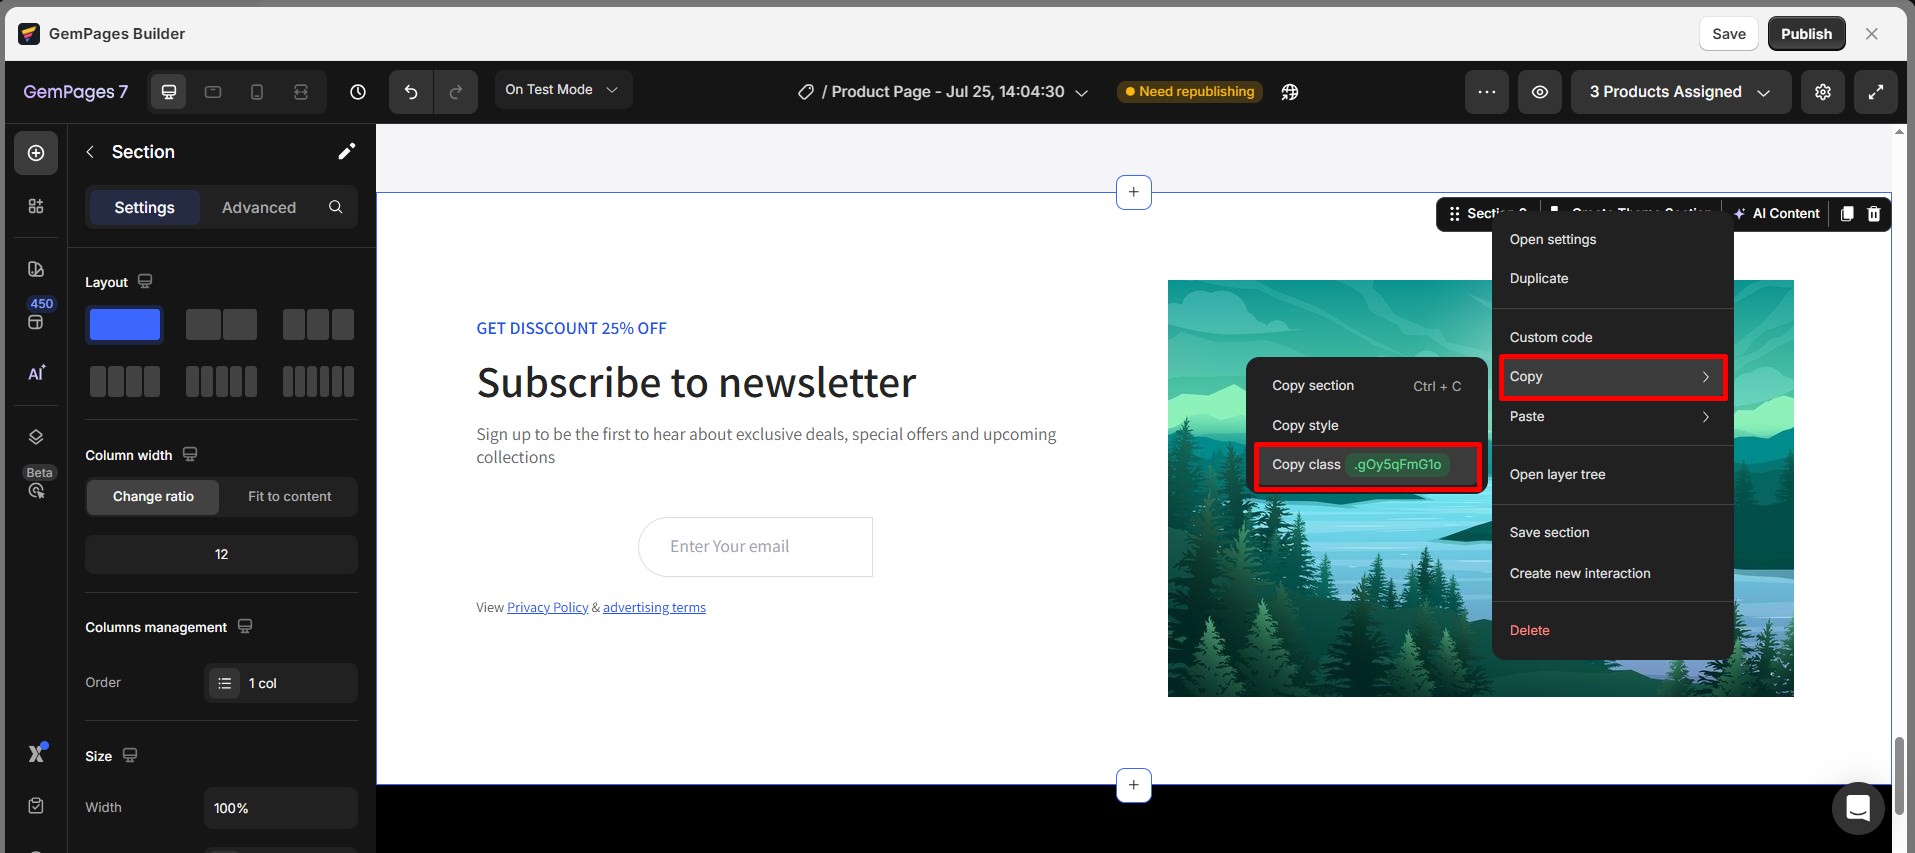
- You’ll get a class like .gp0XsMH_MS. To convert it into an ID, simply replace the dot (.) with a hash (#).
Example: .gp0XsMH_MS → #gp0XsMH_MS
You’ll use this Section ID when setting up the link.
How to Create Anchor Links in GemPages
In GemPages, you can create anchor links in two simple ways:
- Using a button or image: You can turn a button, image, or hero banner into a clickable link that scrolls visitors to a specific section on the same page. This is best when you want a clear action, such as “See Product Details,” “Go to FAQs,” or “Contact Us.”
- Using text (anchor text): You can also add anchor links directly to text inside headings or text blocks. When visitors click the text, the page scrolls to the target section. This option works well for long pages, table-of-contents layouts, or subtle navigation links.
The steps for each method are explained below:
Option 1: Create an Anchor Link Using a Button or Image
Please follow these steps to make a button or image that users can click to scroll down to a specific part of your page. These instructions apply to the Button element but can also be used for the Hero Banner and Image elements.
Step 1: Go to Shopify Admin > Apps and select GemPages Builder to access GemPages Dashboard. Navigate to the Pages section and choose your preferred template to access the Editor.
Step 2: Drag a Button element onto your page.
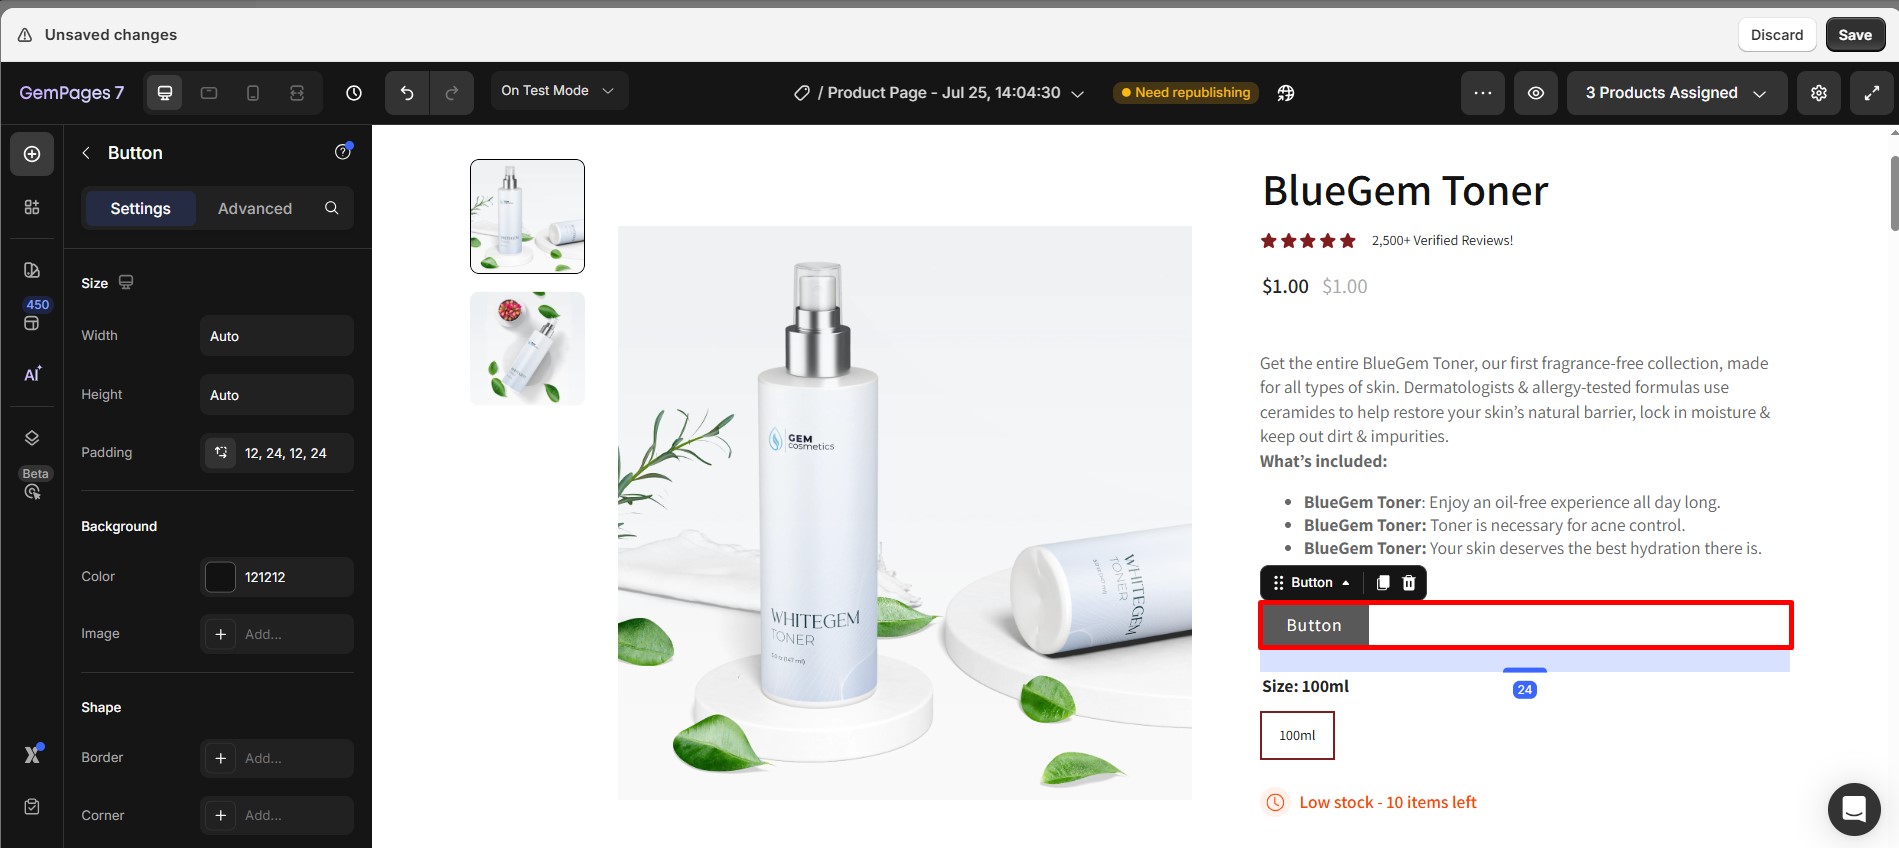
Step 3: Click the button element to reveal the configuration on the left sidebar. Toggle on the Link button.
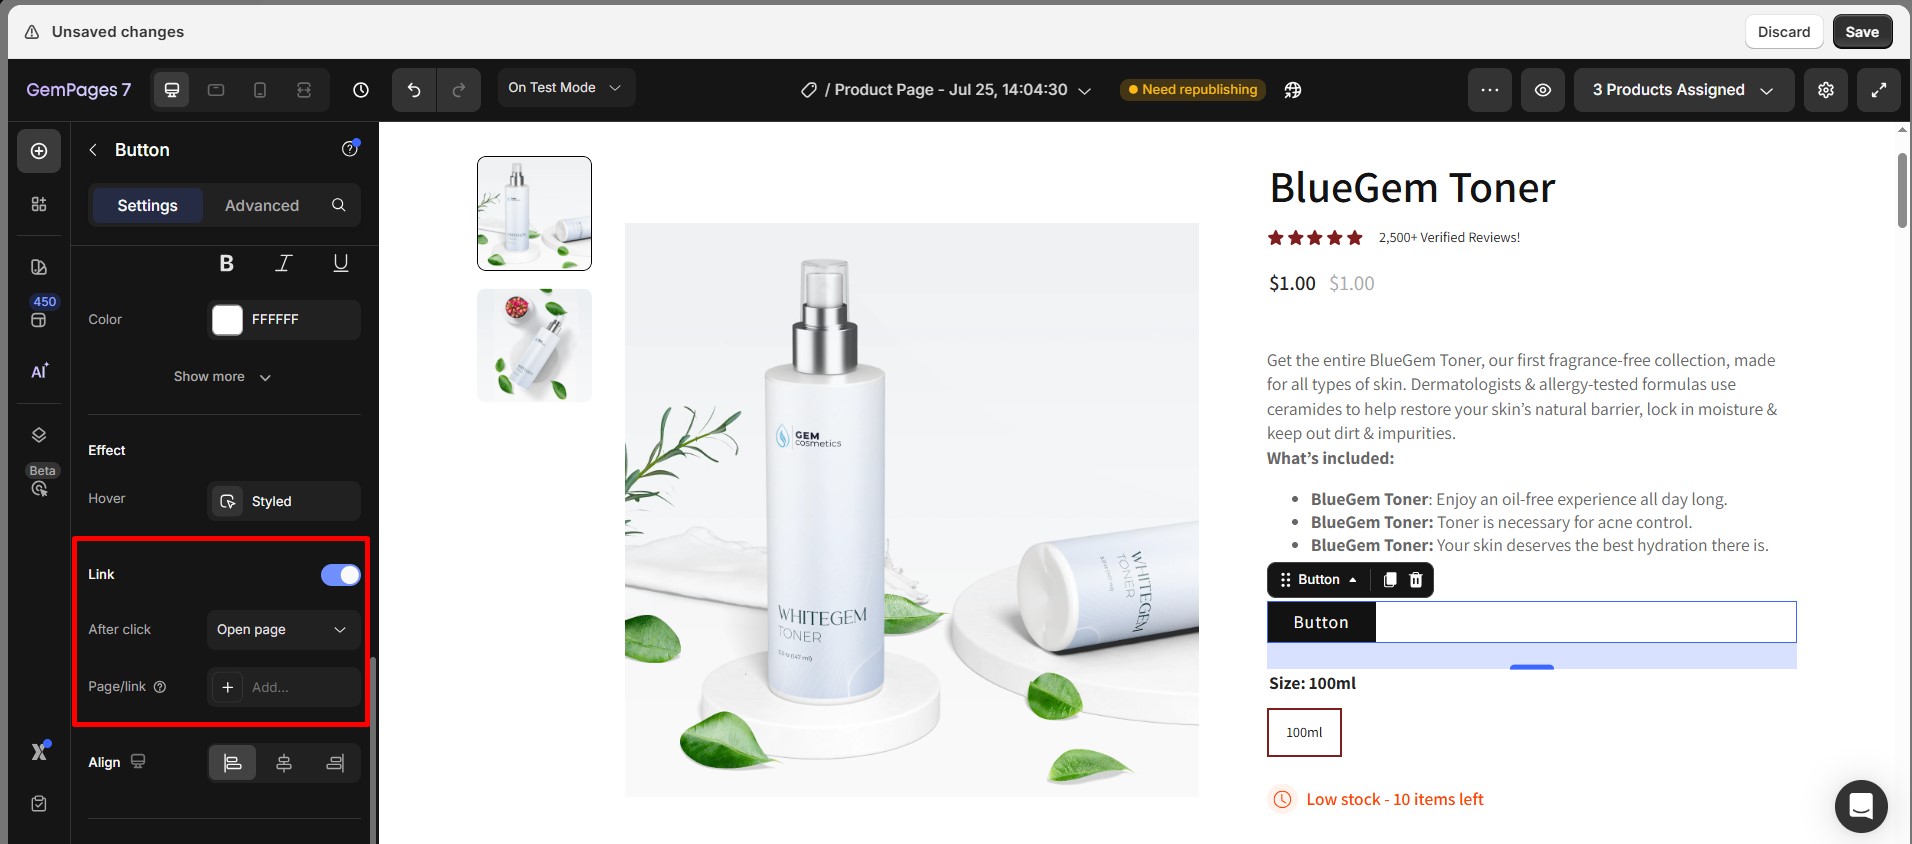
Step 4: Select After click action: Choose an action that triggers when the link is clicked:
- Open page: Open another page/URL.
- Scroll to: Scroll to a specific section on the page.
- Open popup: Open a specific popup.
- Send email: Send an email to a specific email address.
- Make phone call: Perform a phone call when browsing on mobile or tablet.
In this case, we’ll choose Scroll to.
Step 5: Paste the Section ID you copied earlier, or select a destination from the list.
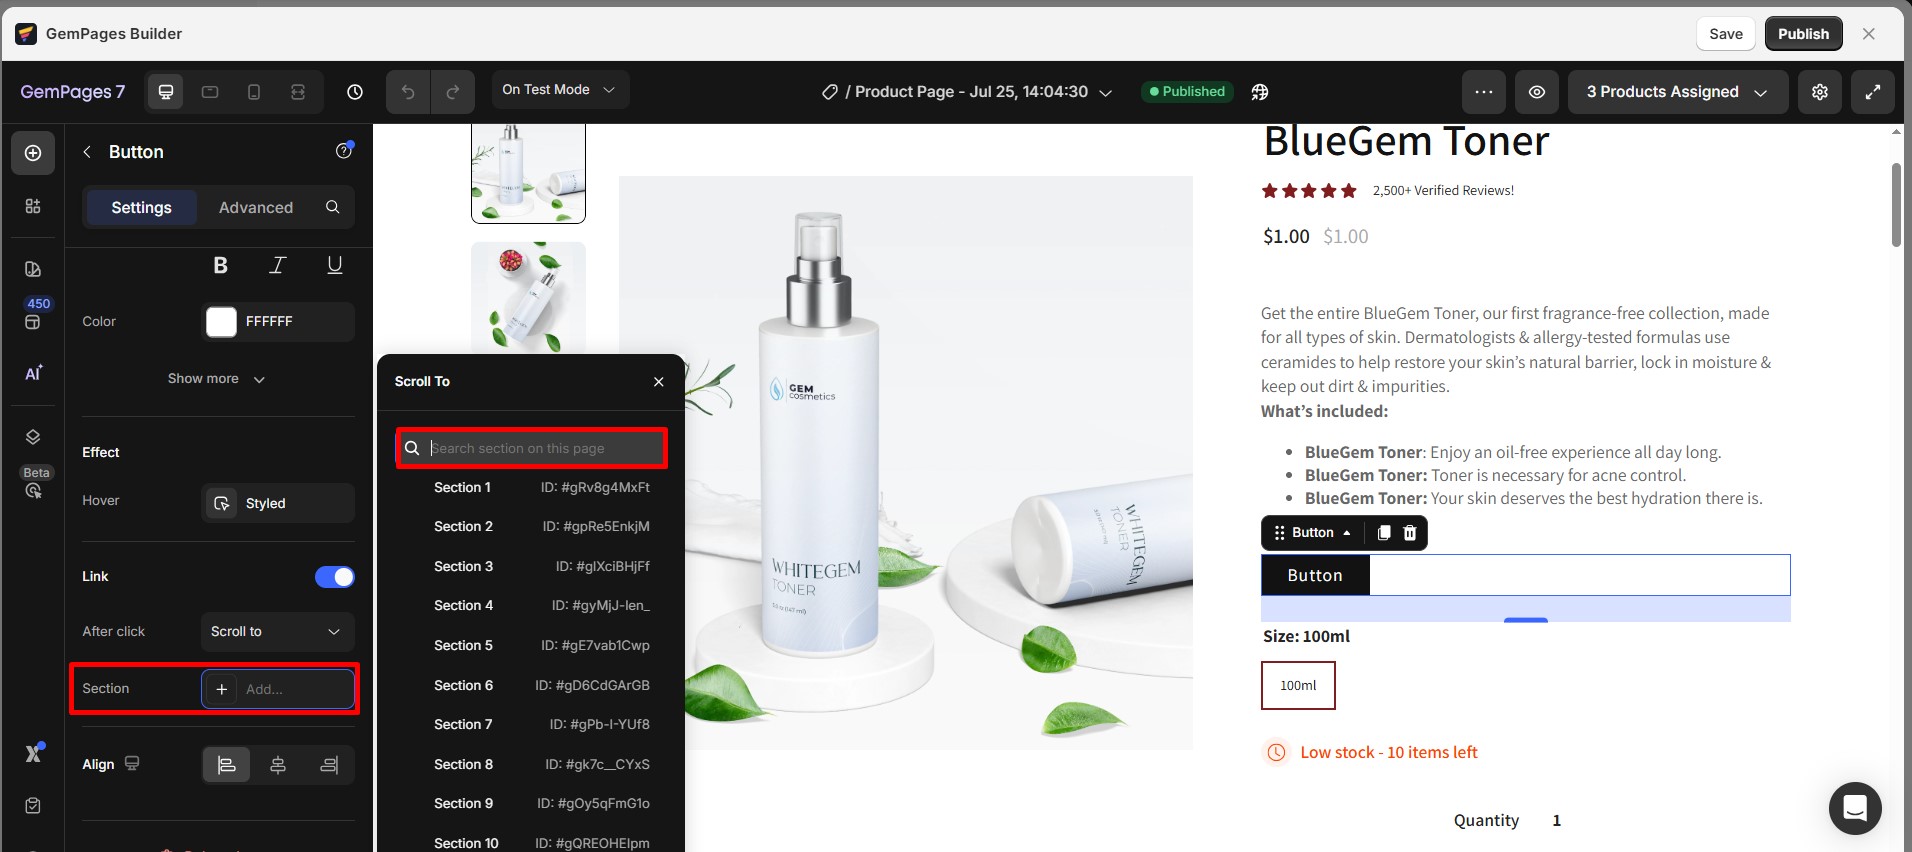
Step 6: Hit the blue Save button. Next, hit Save and Publish to check the result on the live page.
Your button now scrolls smoothly to the section when clicked.
Option 2: Create an Anchor Link Using Text (Anchor Text)
If you prefer using text links instead of buttons or images, you can create anchor links directly within text elements.
Step 1: In the GemPages Dashboard, open your template and enter the Editor.
Step 2: In the Editor, drag a text-based element onto your page, e.g., a Heading element.
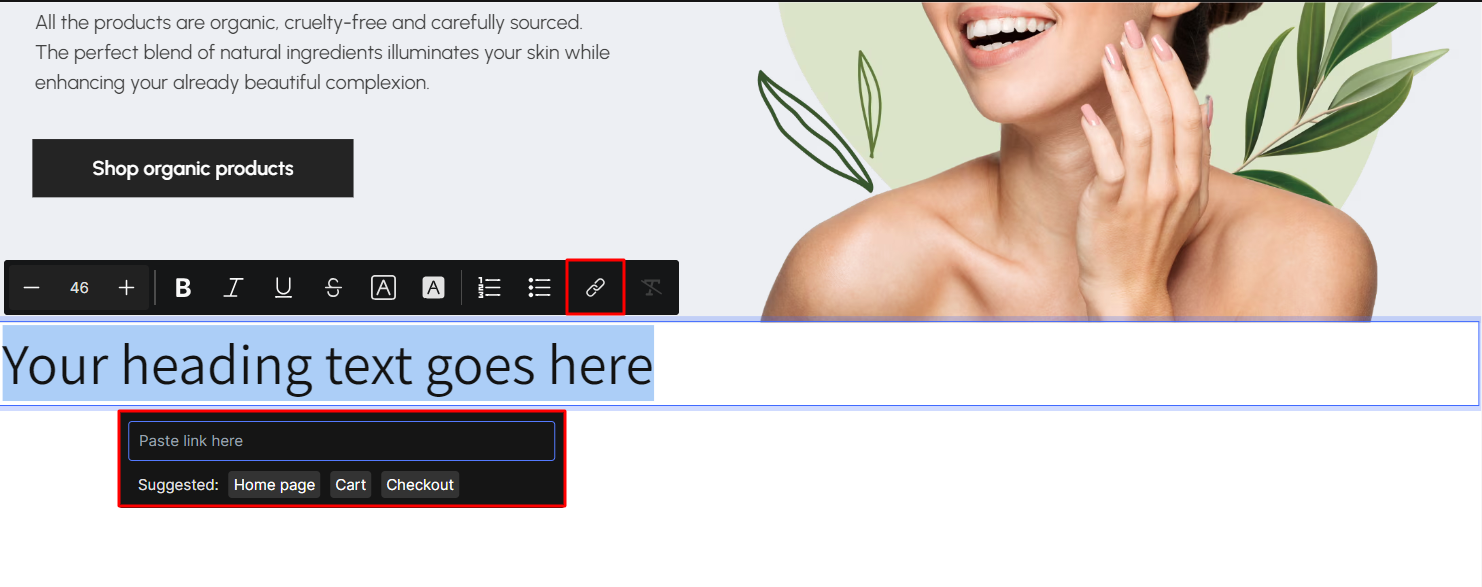
Step 3: Select the text where you want to add an anchor link, triggering the inline text panel for further customization.
Step 4: Click the chain icon to reveal a Custom URL field.
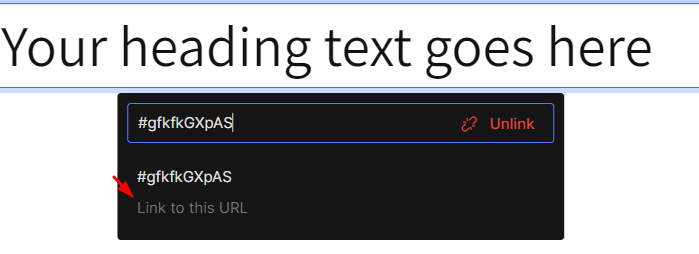
Step 5: Paste the Section ID of the destination into the field and click on Link to this URL.
Step 6: Save and Publish the page to check the result on your live page.
FAQs
1. Can I create an anchor link directly to an element (e.g., a button or image)?
Currently, anchor links in GemPages only work with Sections or Rows, not with individual elements.
If you’d like to link directly to an element, you need to place that element inside a Row. Then, copy the Row’s class (and convert it to an ID) to use as your scroll destination.
2. Why does my anchor link not scroll to the correct element?
Most of the time, it’s because the element is not inside a Section or Row. Please make sure the target element is wrapped inside a Row and use that Row’s Section ID for smooth scrolling.
3. Can I use anchor links for popups or external URLs?
No. Anchor links are designed only for scrolling within the same page. For actions like opening a pop-up or linking to an external page, you should use the respective options in the “After click action” menu.
4. Can I make a button scroll to the bottom of my page?


Thank you for your comments