


This step-by-step guide will show you how to create and customize a Shopify collection page in GemPages, then assign it to your Shopify collections to display your products beautifully and boost sales.
What is a Shopify Collection Page?
A Shopify collection page is a dedicated webpage that displays a group of products under a specific collection. Collections help organize your store by category or theme, such as “Summer Dresses,” “Best Sellers,” or “New Arrivals.”
By creating well-structured collection pages, you help customers navigate your store more easily, discover relevant products faster, and stay on your site longer — which can significantly increase your sales.
Here are a few examples of collections you might create:
- Seasonal collections (e.g., Spring Essentials)
- Product-type collections (e.g., T-Shirts, Accessories)
- Promotional collections (e.g., Sale Items, Limited Edition)
How to Create a New Collection on Shopify?
Before creating a Shopify collection page in GemPages, make sure the collection already exists in your Shopify Admin.
GemPages can only display collections that have been created in Shopify.
You can create two types of collections: manual or automated (smart). Once created, each collection will appear as a dedicated webpage showing a gallery of the included products.
Visitors can click any product image on the collection page to view its product details.
Step 1: Log in to Shopify. Go to your Shopify Admin Dashboard.
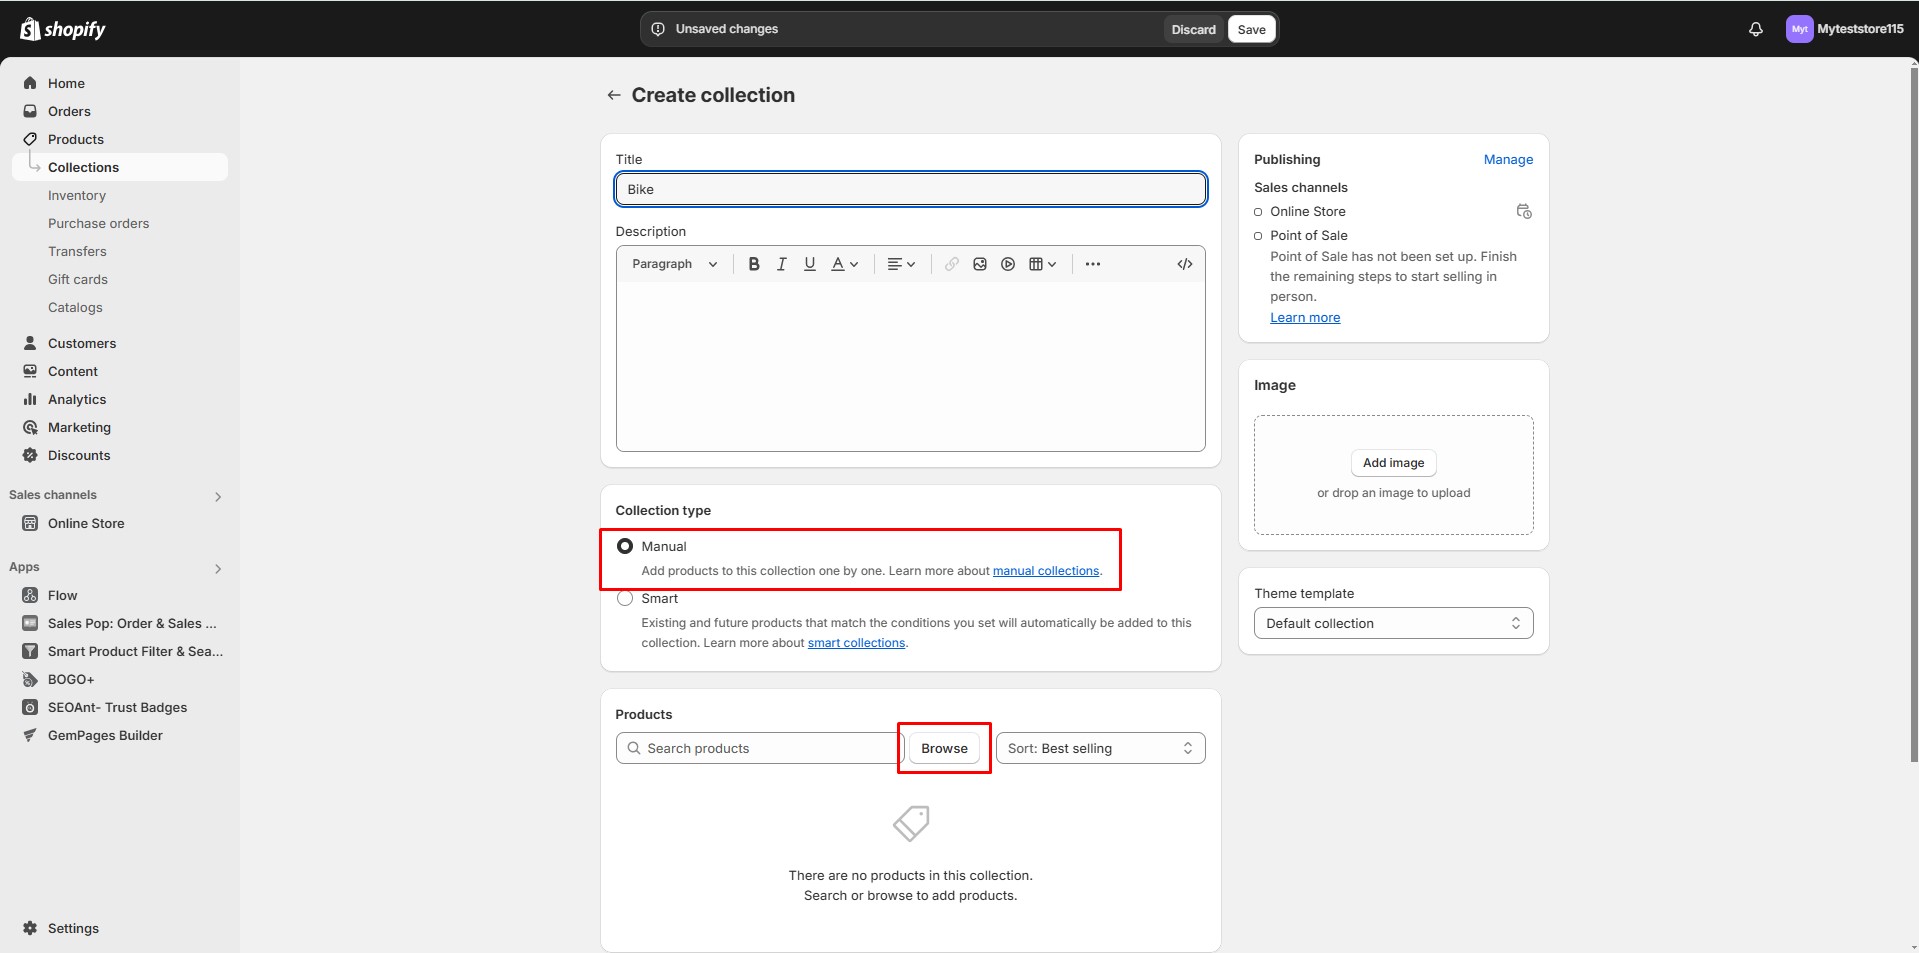
Step 2: Navigate to Products > Collections from the left-hand menu. Click the “Create Collection” button at the top right of the page.

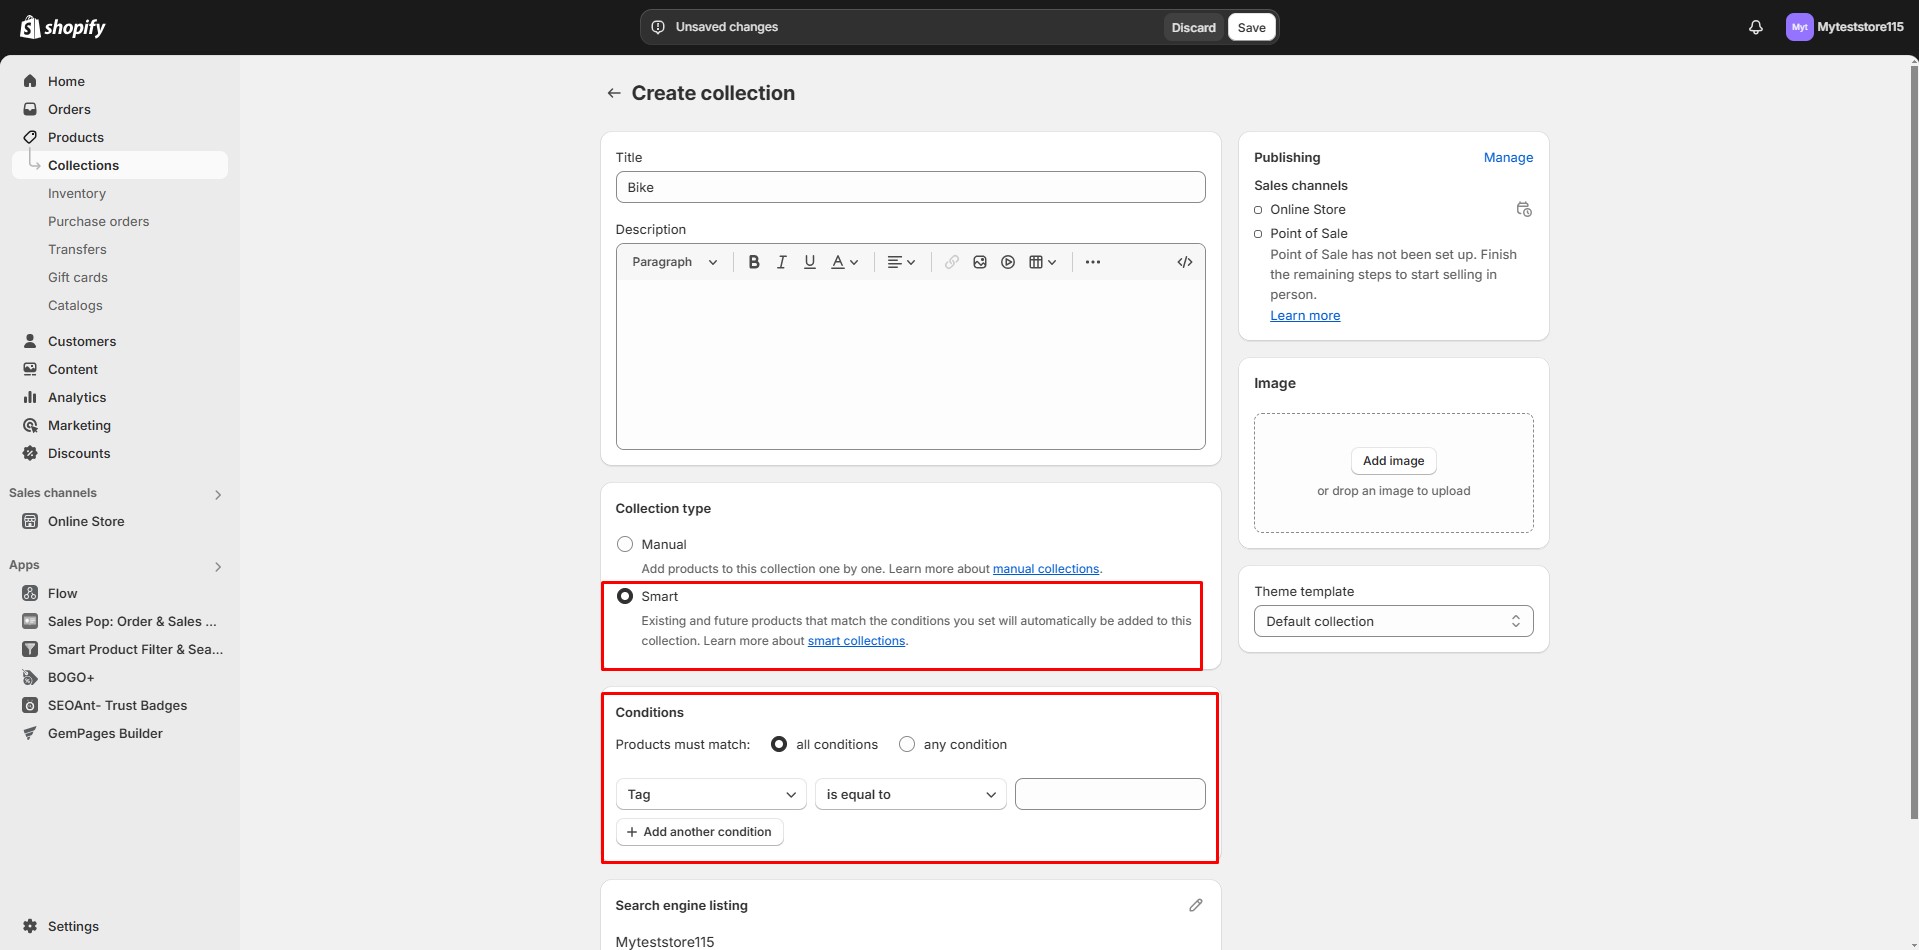
Step 3: Configure Collection type settings:
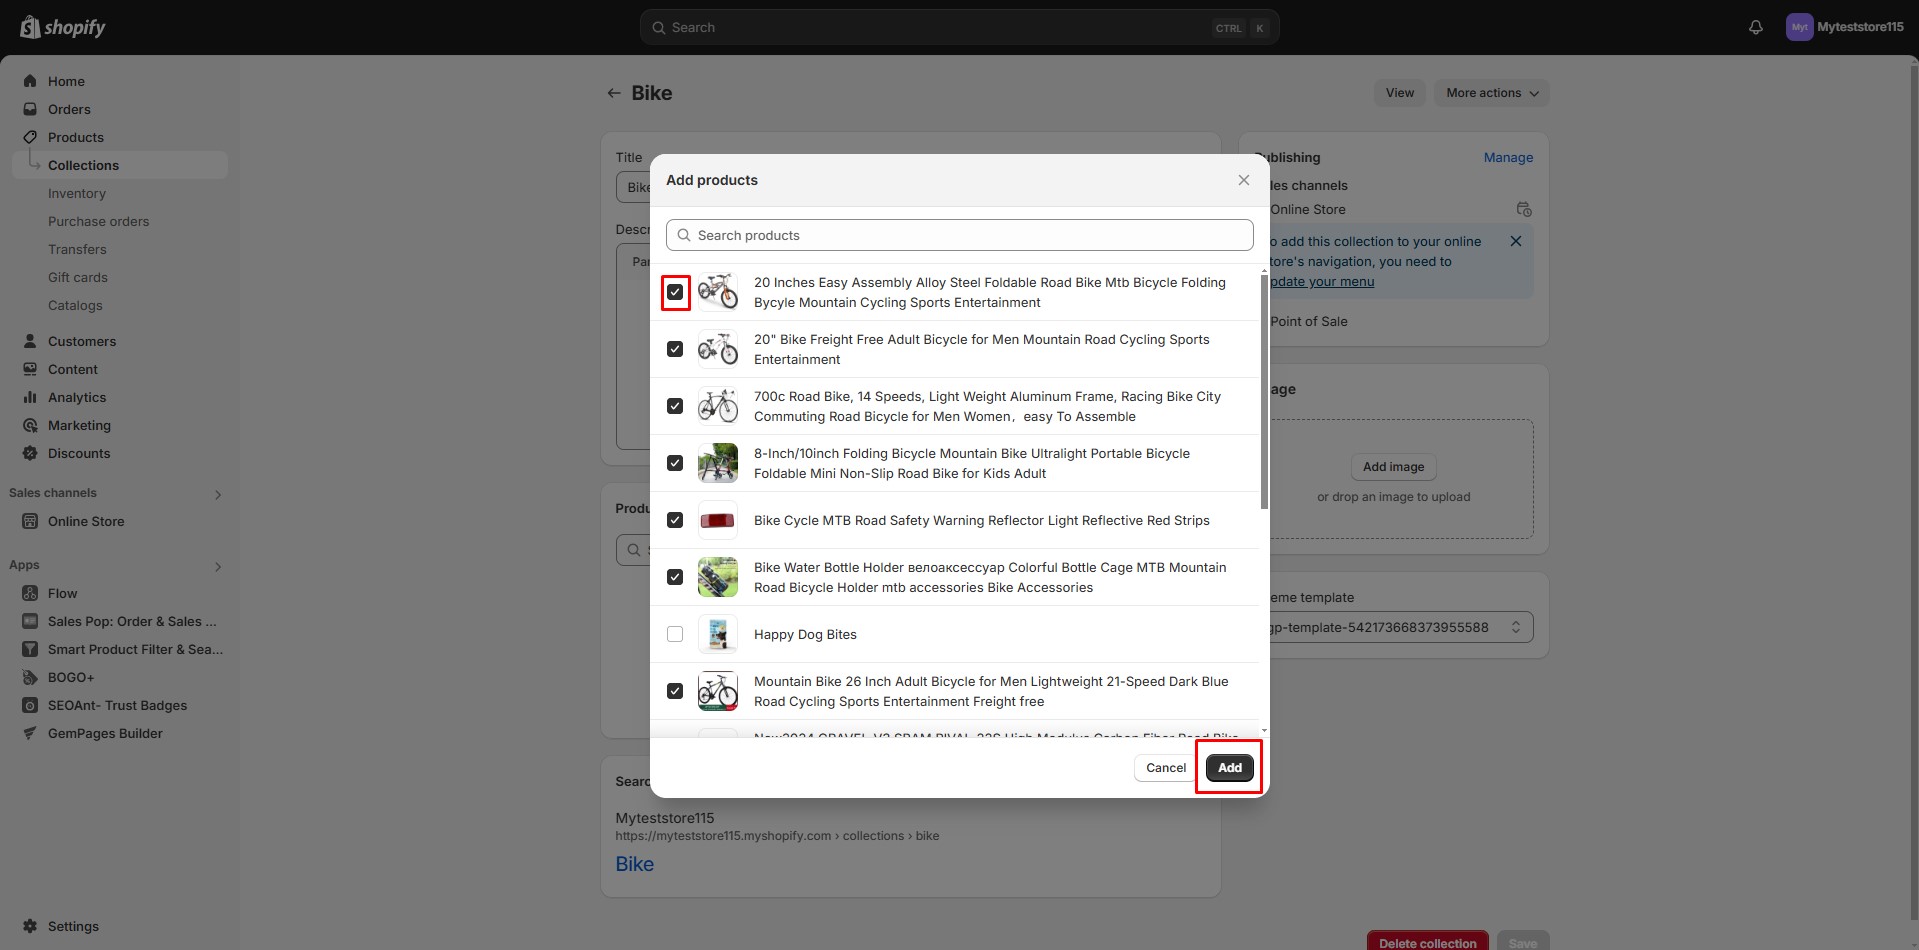
- Manual Collection: A manual collection includes only the products that you choose individually. This type gives you full control, products remain in the collection until you manually add or remove them.
- Automated Collection: An automated collection uses specific conditions to automatically include matching products. You can set up to 60 conditions and define whether products must meet all or any of them. When you add a new product that matches the rules, it’s automatically added to the collection.
Step 4: Fill in other necessary information. Click “Save” to create your collection.
How to Create a New Collection Page with GemPages?
Once your collection is ready in Shopify, you can design a custom collection page in GemPages.
Step 1: Create a New Page
You have two ways to create a new page in GemPages:
Option 1: From the Dashboard
- Open the GemPages Dashboard and click Pages.
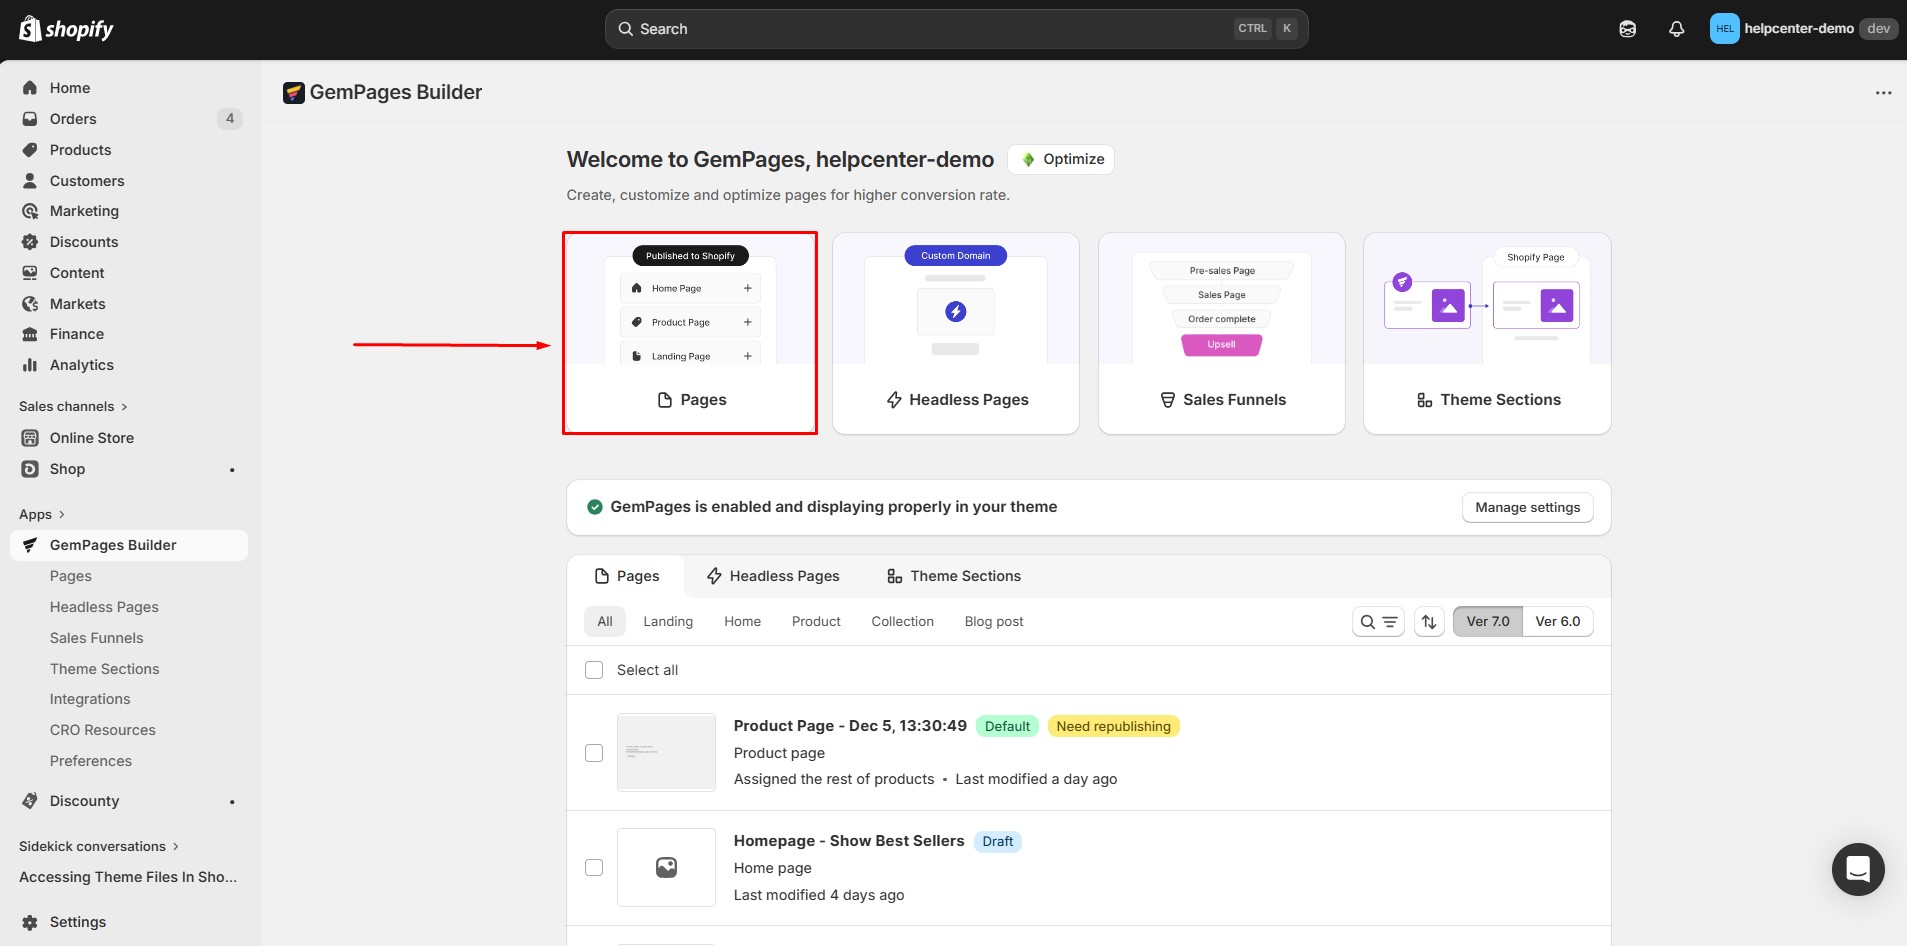
- Or, go to Pages and click Create New Page.
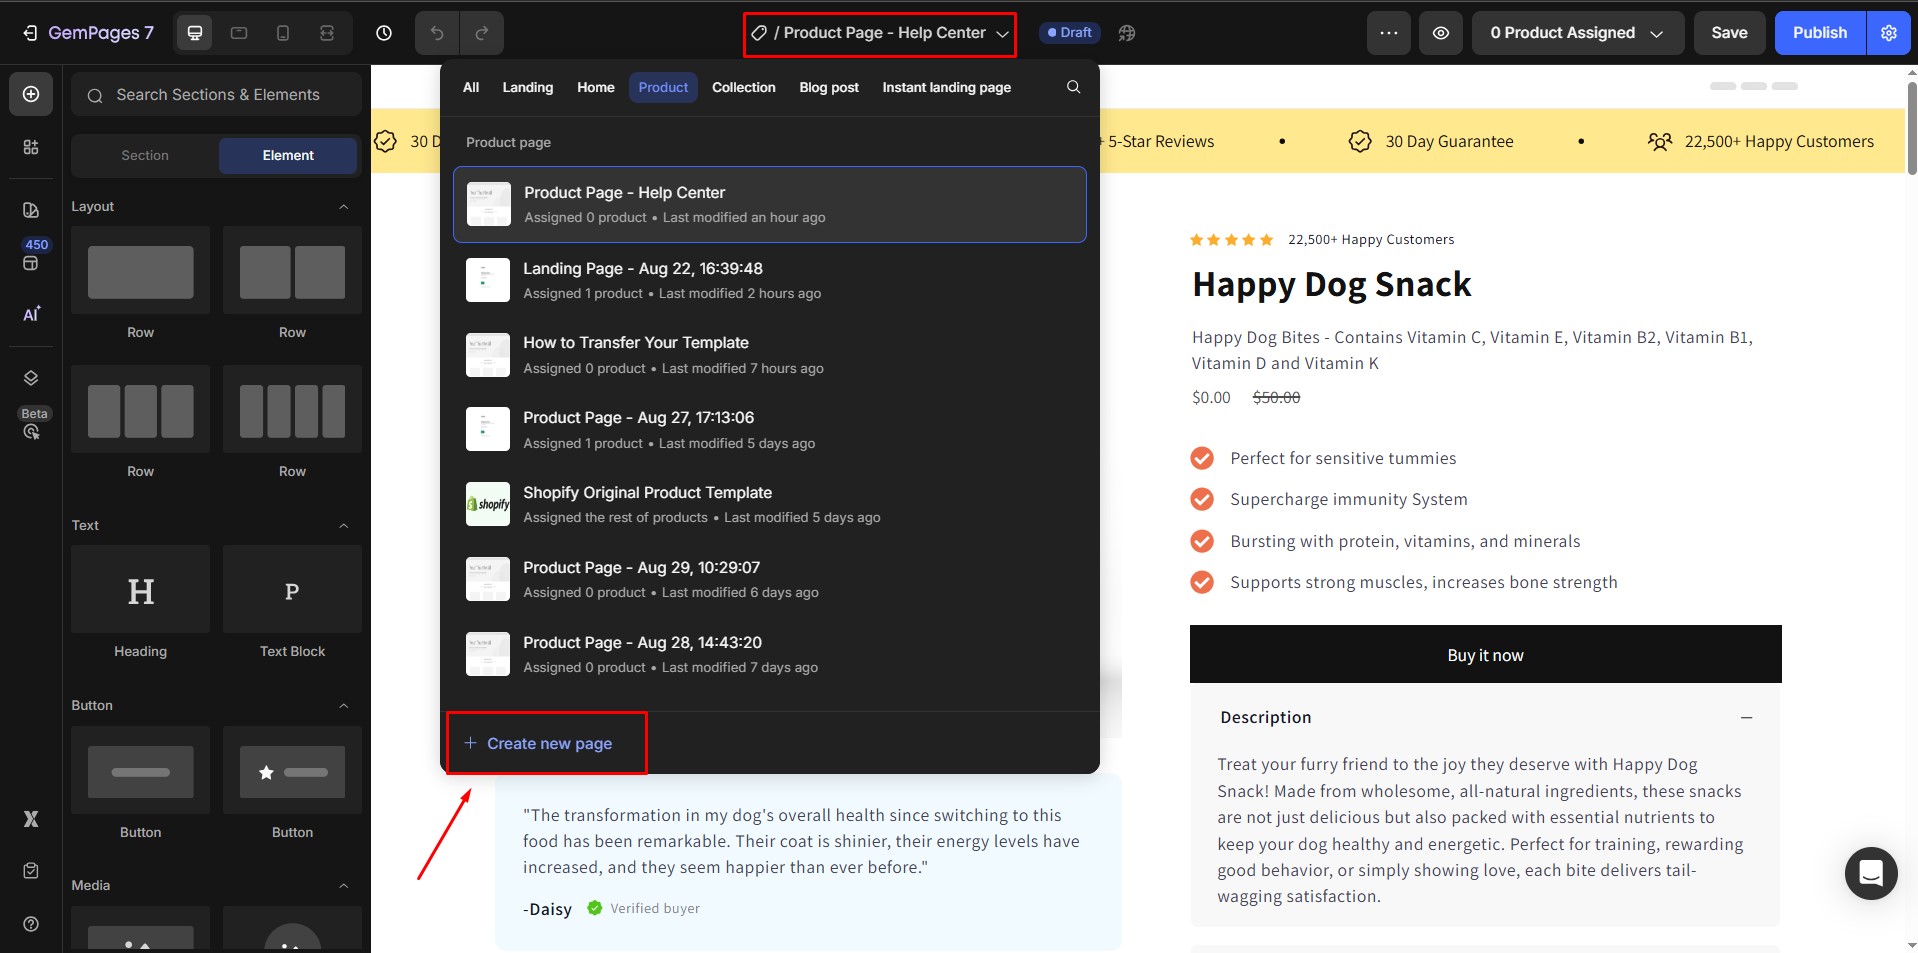
Option 2: From the Editor
- While customizing a page, click the page name at the top of the Editor.
- A list of pages will appear. Select Create New Page.
Step 2: Choose How to Build Your Collection Page
No matter which method you used in Step 1, you will now have three options to create your collection page.
Option 1: Start from Scratch
Choose Start from scratch if you want to design your collection page using a blank canvas.
This option gives you full flexibility to design your layout exactly as you want.
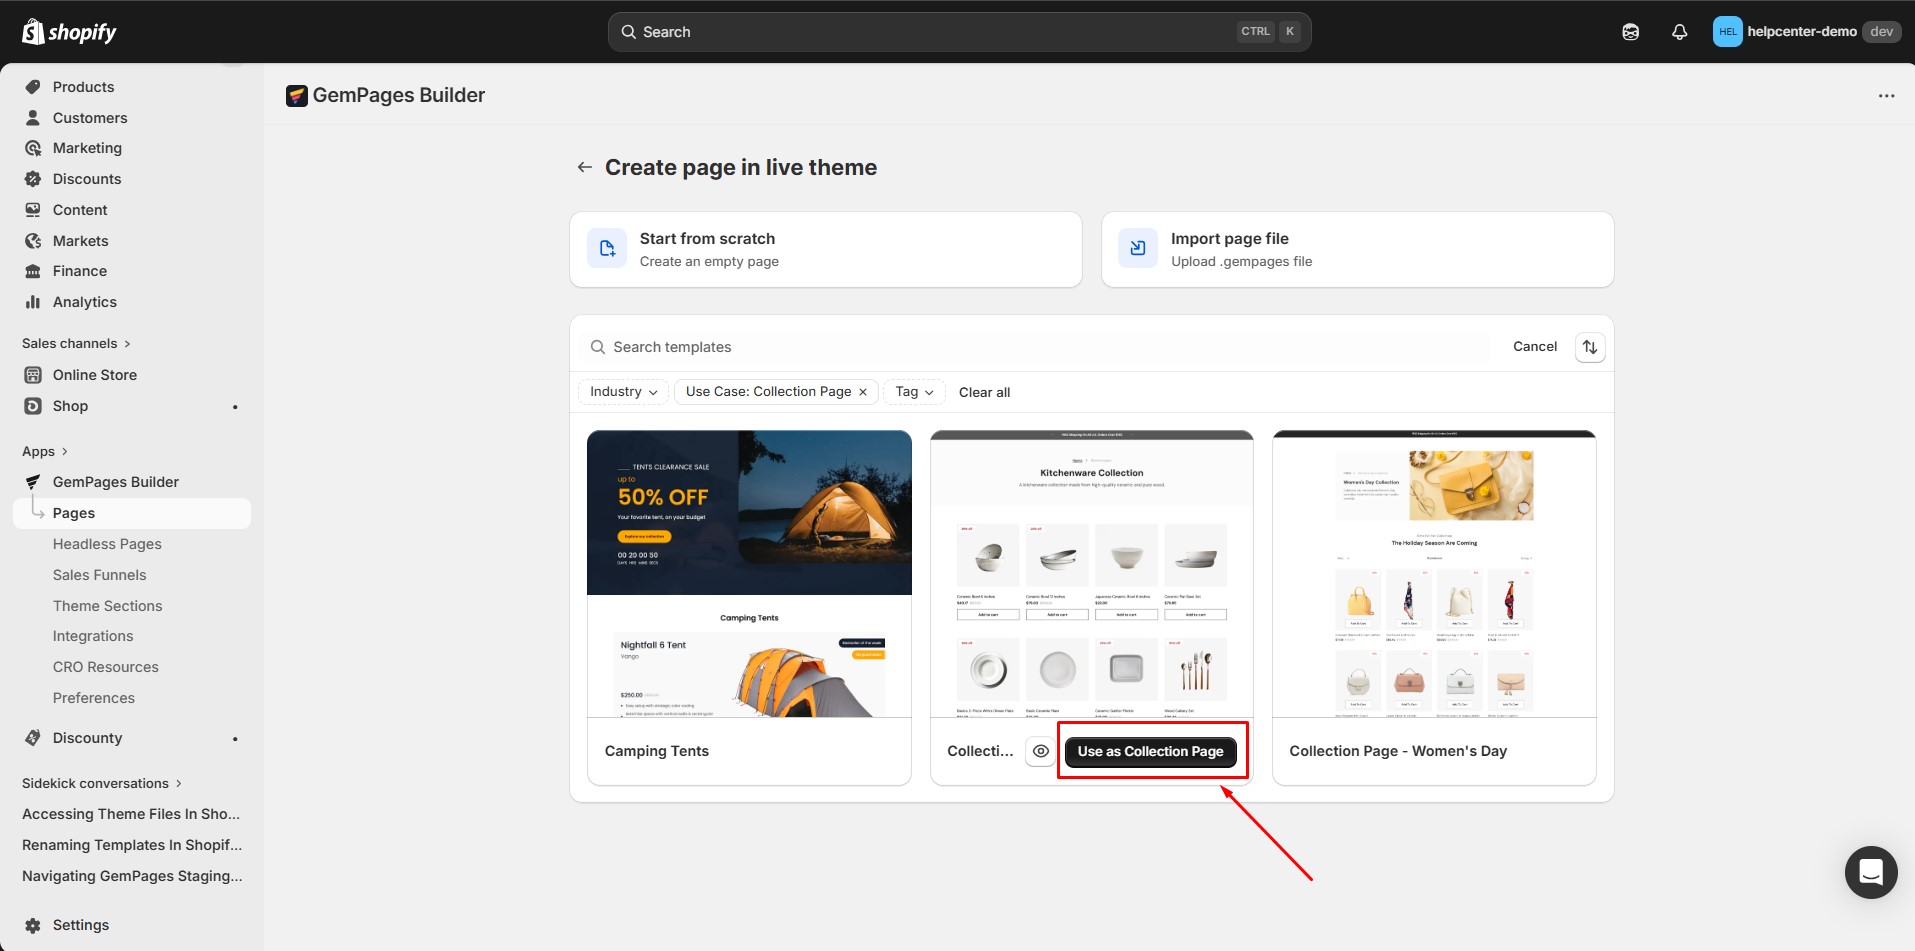
Option 2: Use a Ready-Made Template
You can choose from a library of professionally designed templates to speed up your workflow.
To use a template:
- Browse available templates
- To quickly find the right page type, use the filters in the Use Case section.
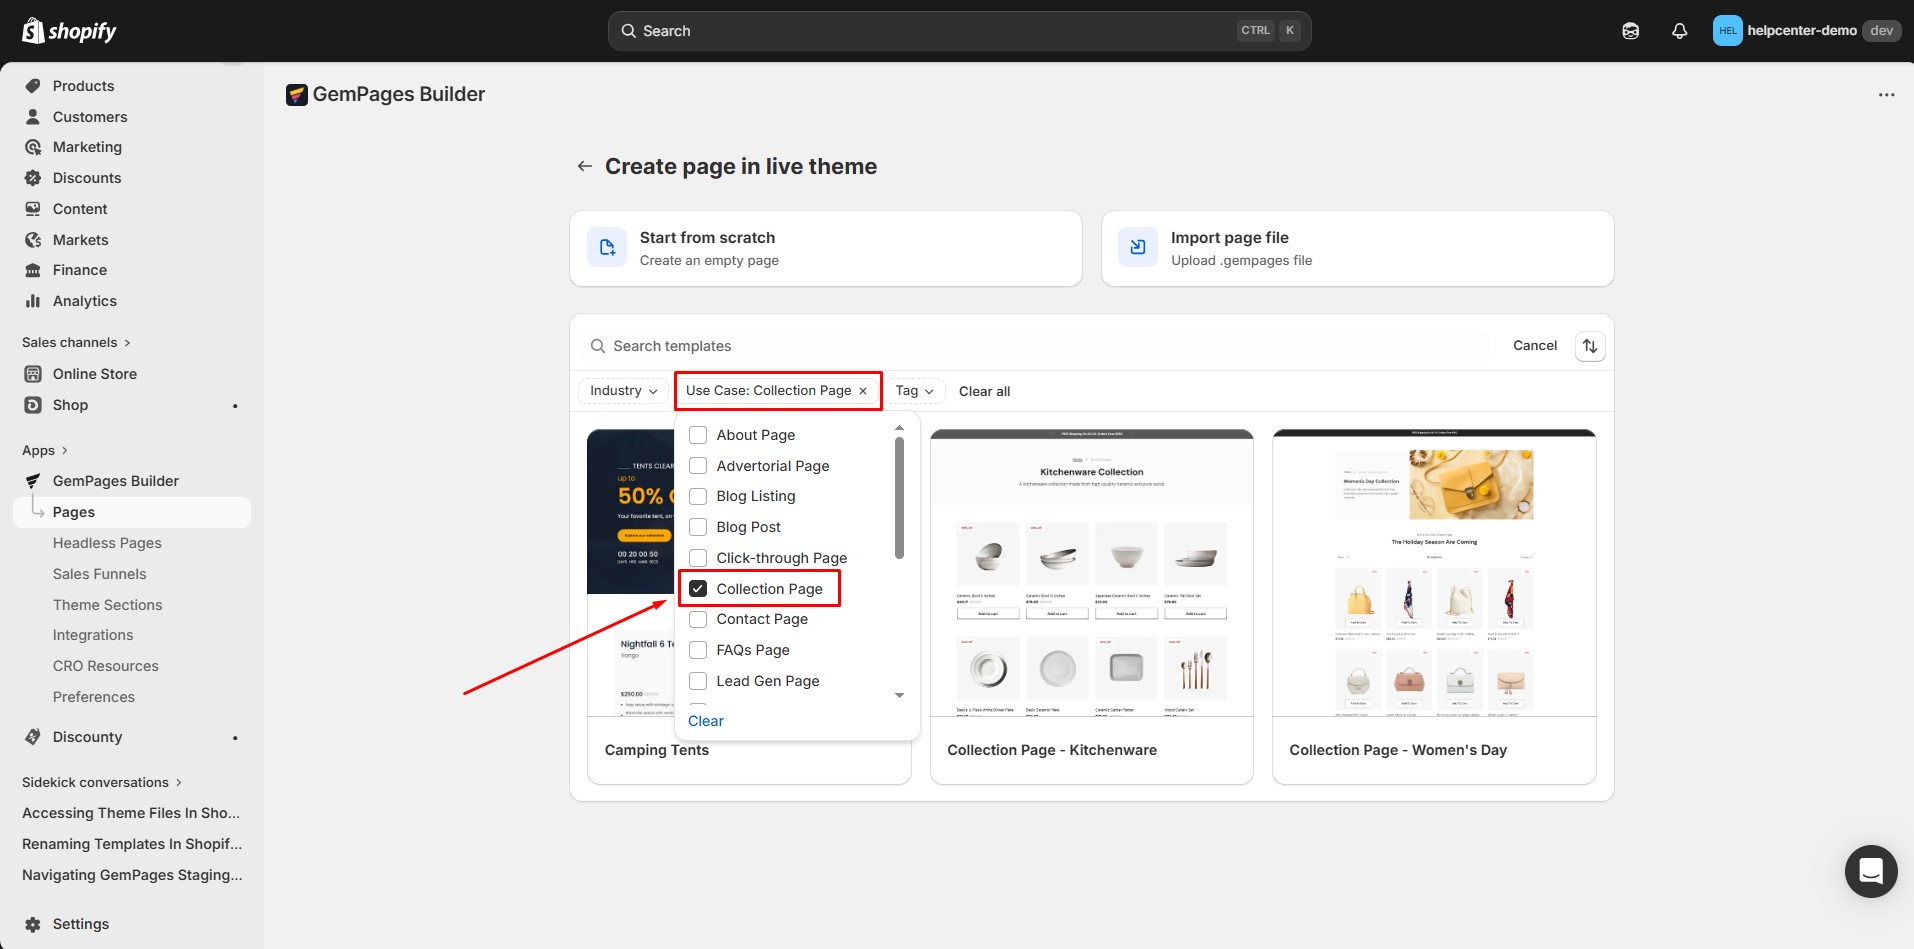
- Hover over the template you want to use. Click Use as collection page.
Option 3: Import a GemPages File
You can also create a collection page by importing a previously exported GemPages file.
This option is useful when:
- Reusing saved layouts
- Sharing designs between stores
- Migrating pages
For more details about this method, refer to this article: https://help.gempages.net/articles/export-import-templates
Step 3: Customize your Collection Page in the Editor
Once inside the Editor, you can freely design your Shopify collection page.
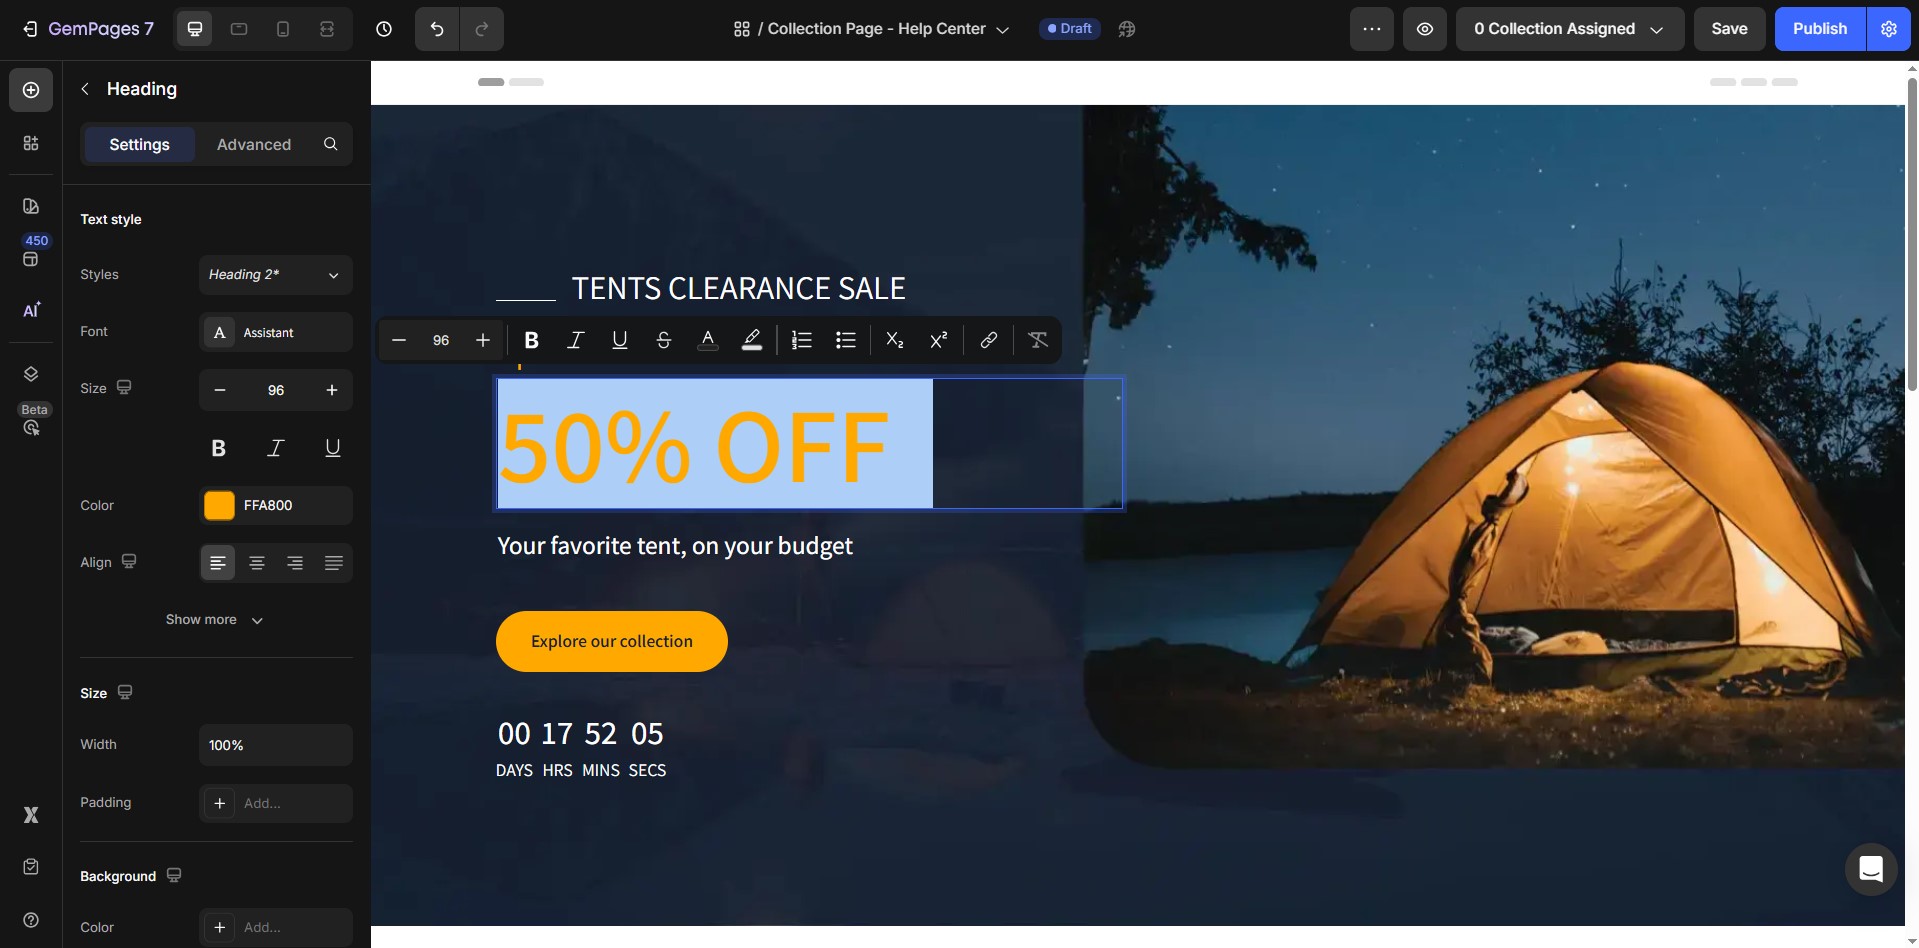
Recommended elements include:
- Collection Banner
- Collection Title
- Collection Toolbar
- Collection Description
- Product List
- Collection Paginator
How to Create a Collection Page Using the Image to Layout Feature
The Image to Layout feature allows you to convert an image or a URL into an editable page layout.
This helps speed up page creation by automatically detecting sections and generating a structured layout based on visual input.
You can use:
- A screenshot
- A webpage URL
The system will analyze the input and generate editable sections inside the Editor.
Step 1: Create a New Page From Scratch
Click Start from scratch to create a blank page. Once you enter the Editor, you will see the option to convert a URL or an image into a page layout.
Step 2: Choose Your Input Method
At this point, you will have two options:
- Paste a URL to Create a Layout
Paste a webpage URL into the input box. The system will analyze the URL and extract layout elements.
- Upload an Image
Click the upload area and select an image from your device. This image will be used to generate a page structure.
Step 3: Generate the Layout
- After entering a URL or uploading an image:
- Click Generate.
Important: Make sure you have the legal right to use the images for your page. GemPages is not responsible for any copyright disputes between you and the image owner.
How to Assign a Collection to a Template?
After creating your new collection page, you’ll need to assign one or multiple Shopify collections to it so that it displays correctly.
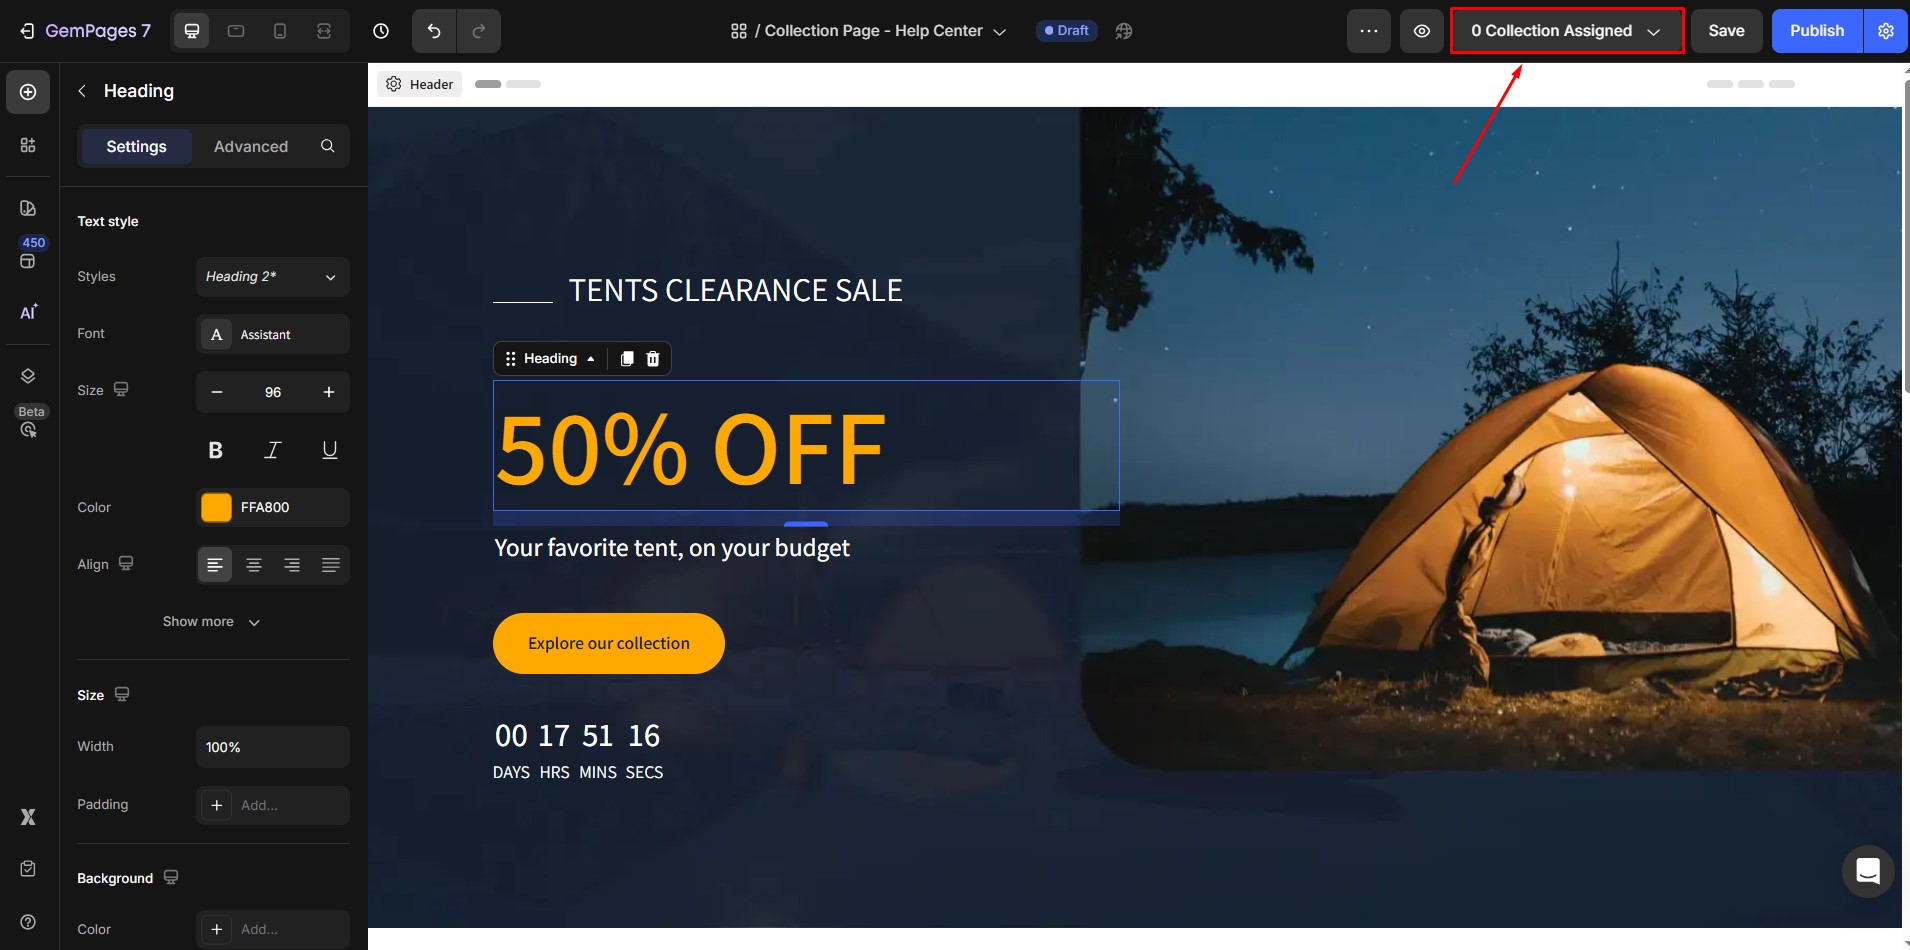
Step 1: In the top-right corner of the Editor, click Collection Assigned.
Step 2: Choose whether to apply the template to all collections or just a specific one.
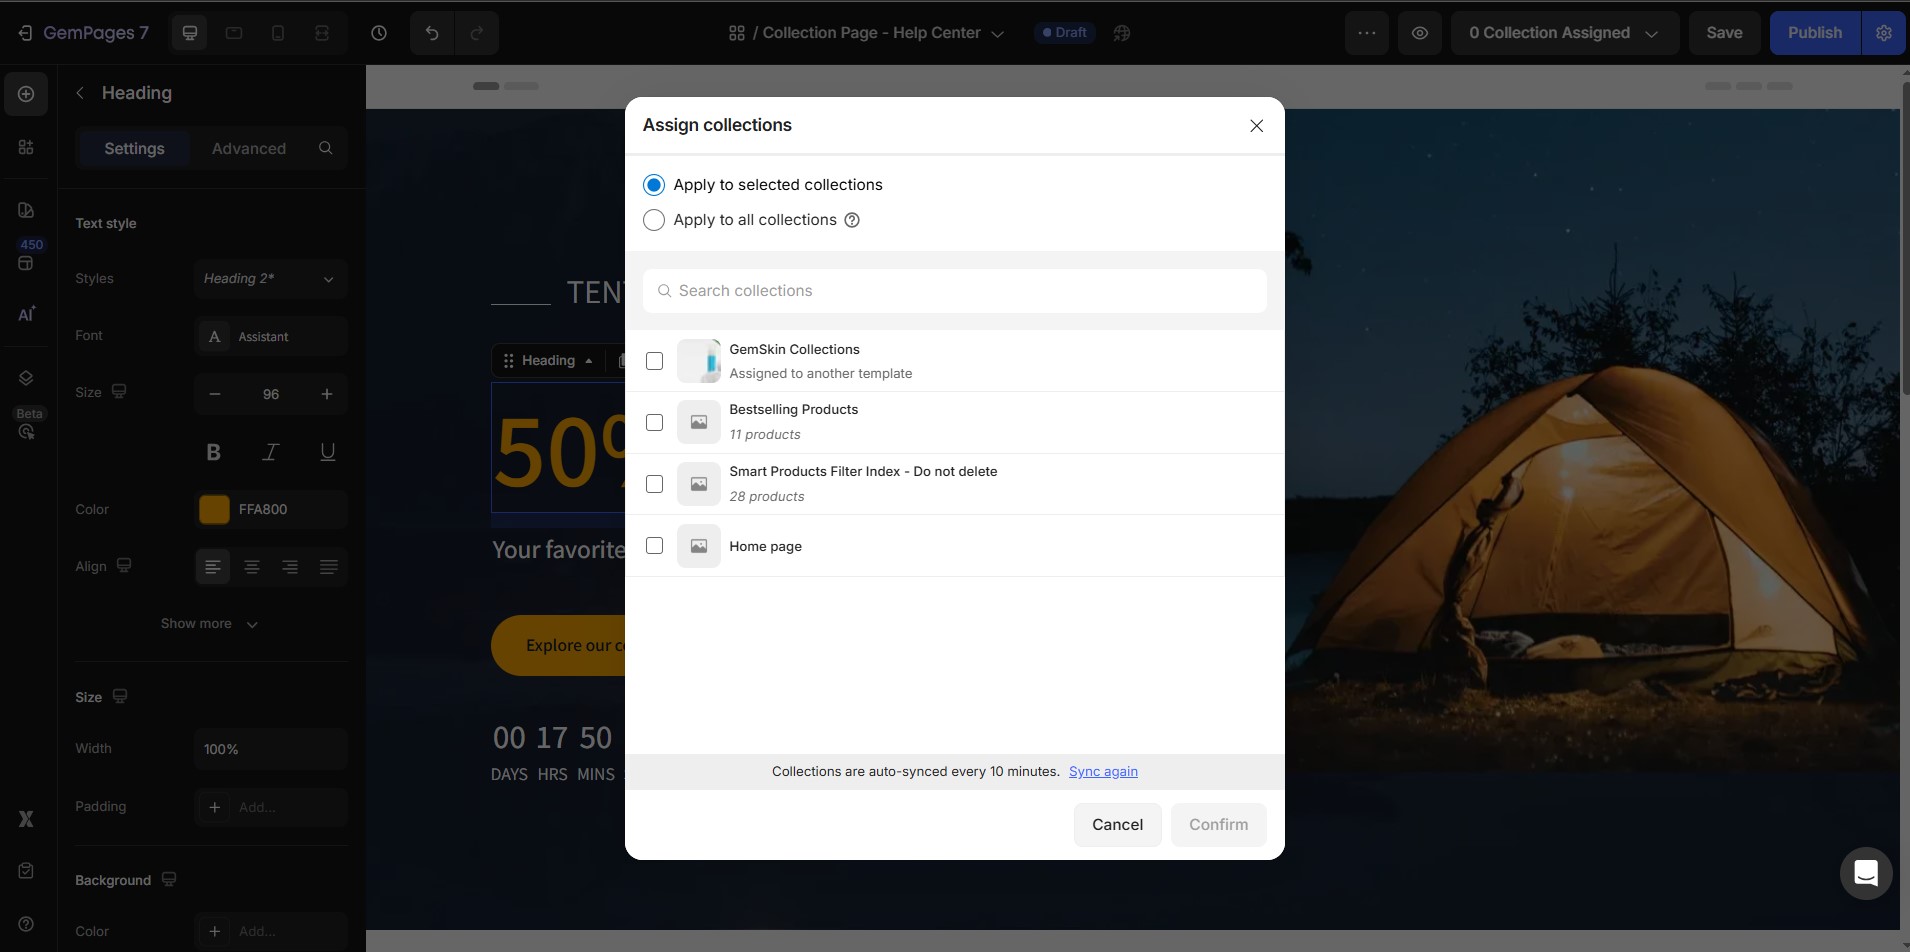
Please note that:
- Apply to selected collections: This collection page template will be applied to your selected collections.
- Apply to all collections: This template will be applied to all your collections, except the ones that have already been assigned to other templates.
Step 3: Click Confirm to save changes.
Your Shopify collection page is now live with your assigned collections.
How to Add a Collection to Your Shopify Menu
After you create a collection, make sure customers can easily find it by adding a link to the collection in your store’s navigation menu.
To link a collection from an existing menu:
Step 1: From your Shopify Admin, go to Online Store > Content > Menus.
Step 2: On the Menus page, click the name of the menu you want to edit.
In the Menu items section, click Add menu item.
Step 3: In the Name field, enter the name of the collection (this will be displayed to customers).
Step 4: In the Link field, select Collections, then choose the collection you want to link.
Step 5: Click Add, then Save menu.
How to Create a Link on a Page to a Collection
You can add a link to a collection page in several ways. The most common method is to let customers click on elements such as Buttons, Text, or Images that direct them to a specific collection page.
Follow the steps below to add a collection link to your page.
Step 1: Open the Page You Want to Link to a Collection
From the GemPages Dashboard, open the page where you want to add a link to your collection page.
Click Edit to enter the Editor.
Step 2: Select the Element You Want to Link
Choose the element that customers will click to go to your collection page.
Common elements include:
- Button
- Text
- Image
For example, you can select a Button element that says Shop Now or View Collection.
Step 3: Enable the Link Option and Add the Collection Link
After selecting the element:
- Open the Element Settings panel.
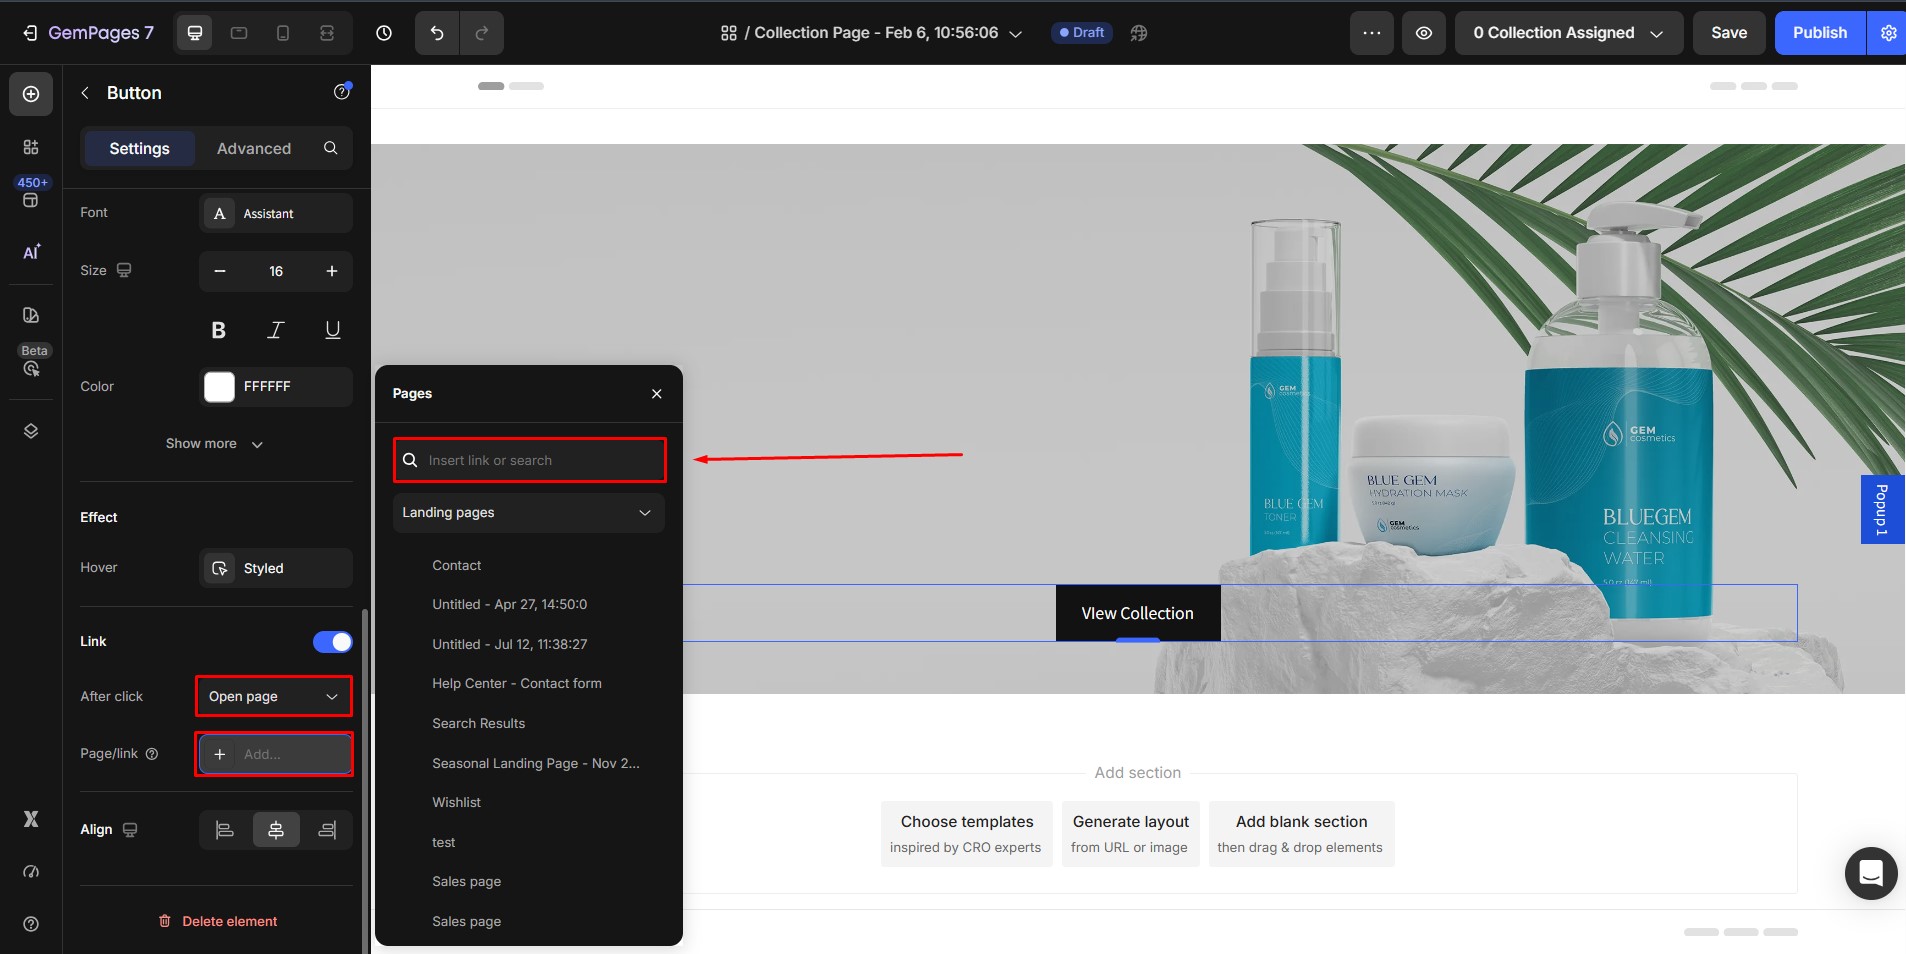
- Toggle on the Link section => Select Open page.
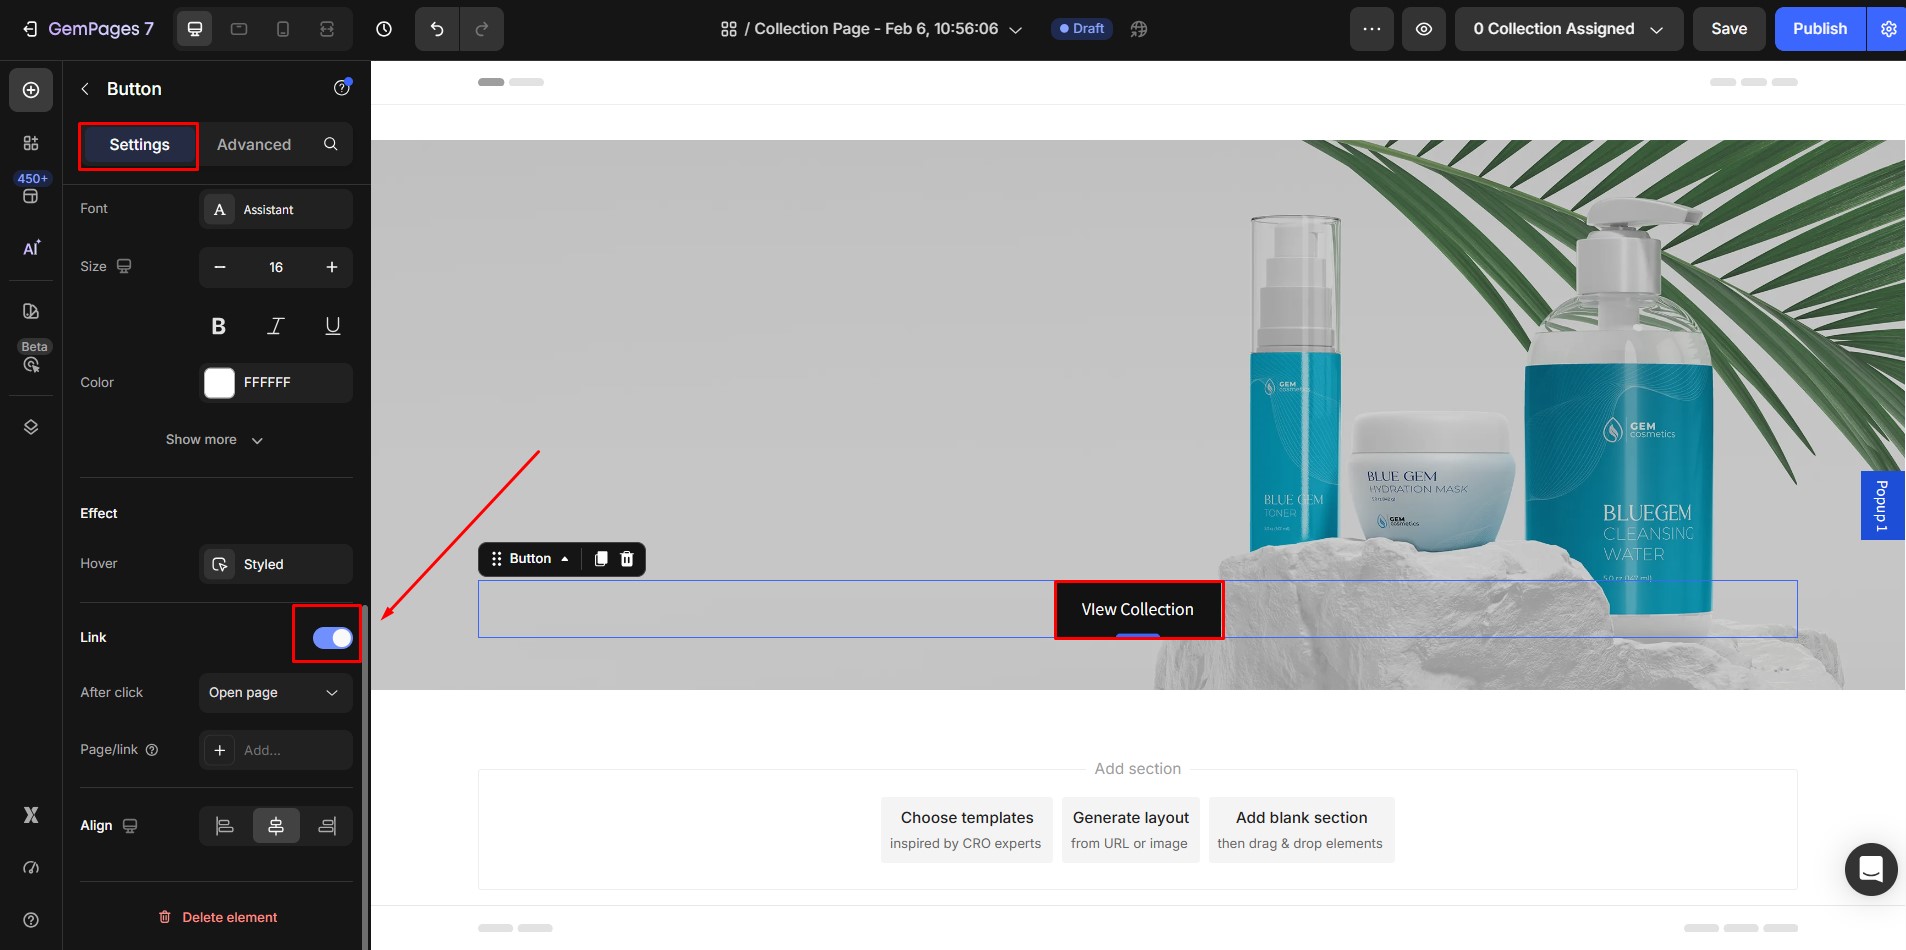
- In the Link field, choose or paste the collection link that you want to direct customers to.
Once added, clicking the selected element will redirect visitors to the chosen collection page.
SEO Tips for Shopify Collection Pages
- Use descriptive collection titles and meta descriptions.
- Include keywords like Shopify collection page, Shopify collection template, and Shopify product collection.
- Add engaging banners and text to improve on-page engagement.
- Test your layout on mobile devices for optimal performance.
Troubleshooting: Products Not Showing on a Collection Page
1. Products are not included in the collection
- For manual collections, make sure the products are added manually.
- For automated collections, ensure the products meet the collection conditions.
2. Products are not active or not available on the Online Store
- Product status is set to Active
- The Online Store sales channel is enabled
3. Collection template assignment is limited
- In the GemPages Editor, click Collection Assigned and review the applied collections.
4. Changes have not been published or synced
- Save your changes
- Republish the collection page in GemPages
- Refresh the storefront or clear browser cache
If you’ve checked all the steps above and the issue still persists, please contact our team at support@gempages.help. Our team will be happy to assist you further.
FAQs about Collection Page
1. How do I reuse a collection page template for another collection?
You don’t need to copy the page. Simply open the collection page in the GemPages Editor, click Collection Assigned, and assign the same template to another Shopify collection.
2. How do I increase the number of products displayed on a collection page?
Edit the Product List element and set the number of products to display. You can show from 1 up to 50 products per page, then save and republish the collection page.


