


This guide will walk you through creating an in-line Shopify countdown timer in your announcement bar using GemPages.
What is a Countdown Timer?
A countdown timer is a tool that counts the time left until a specific event, like a sale ending or an event starting.
By creating a sense of urgency and scarcity, it motivates customers to act quickly, reducing hesitation and cart abandonment. This psychological trigger, often referred to as fear of missing out (FOMO), can significantly boost sales and engagement.
Examples of Use Cases
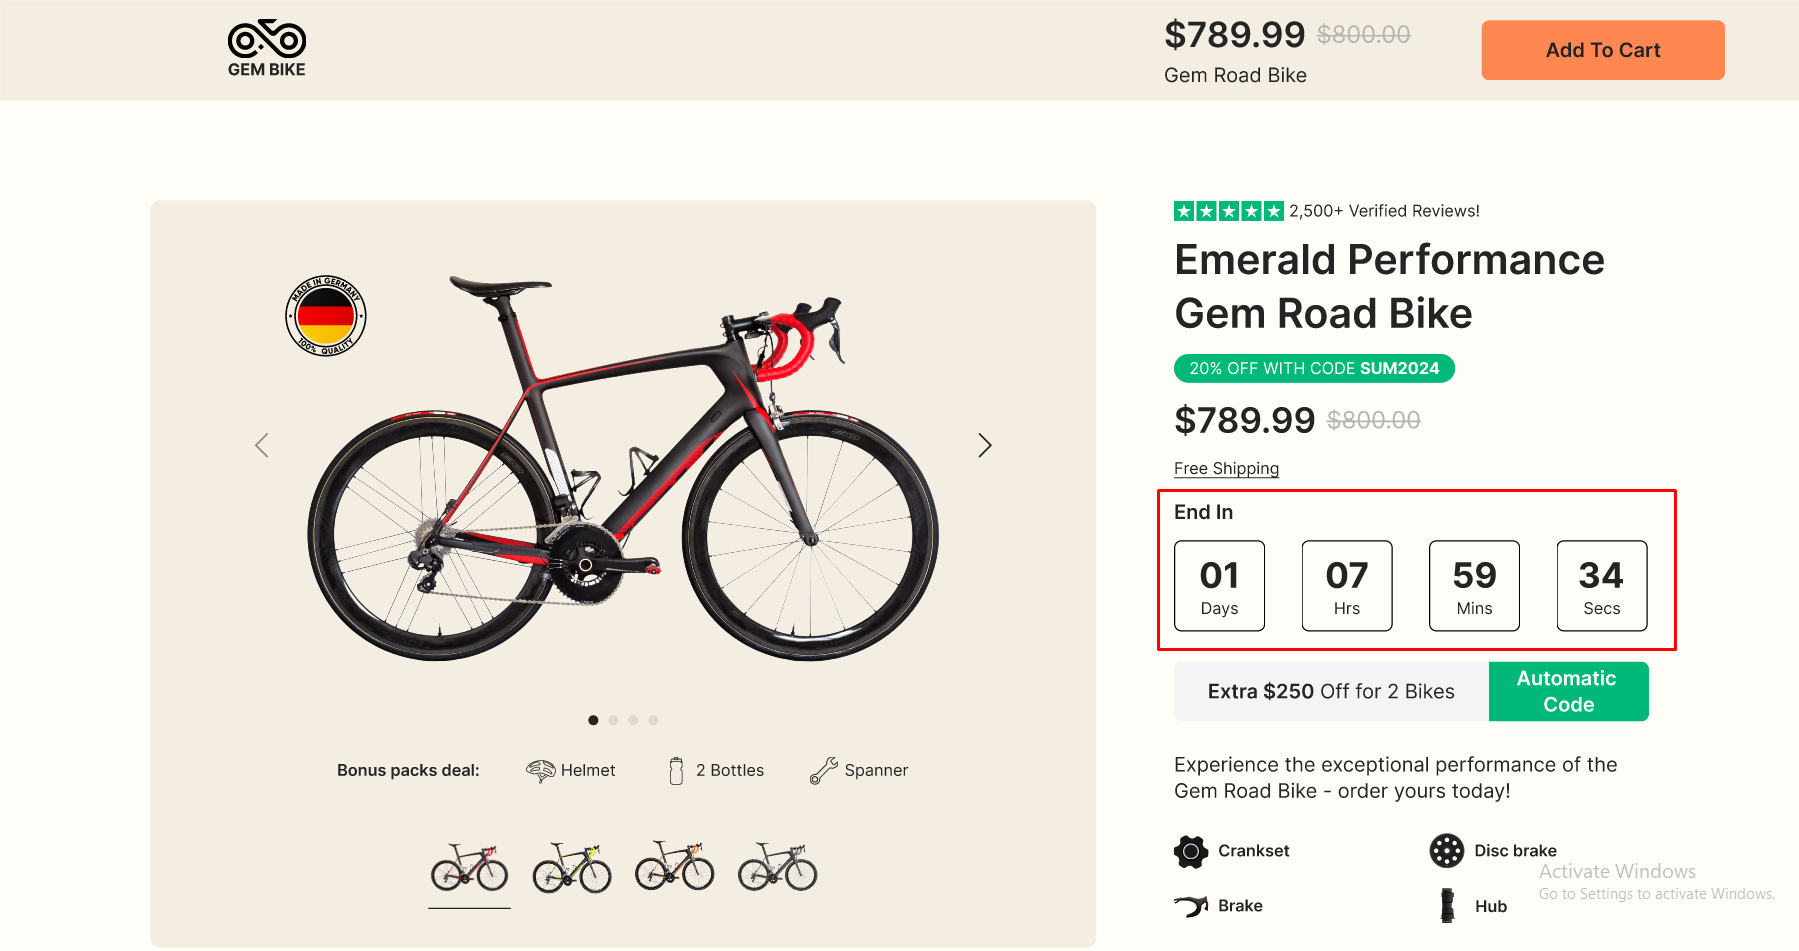
- Announcement Bar

- Product Pages
- Landing Page
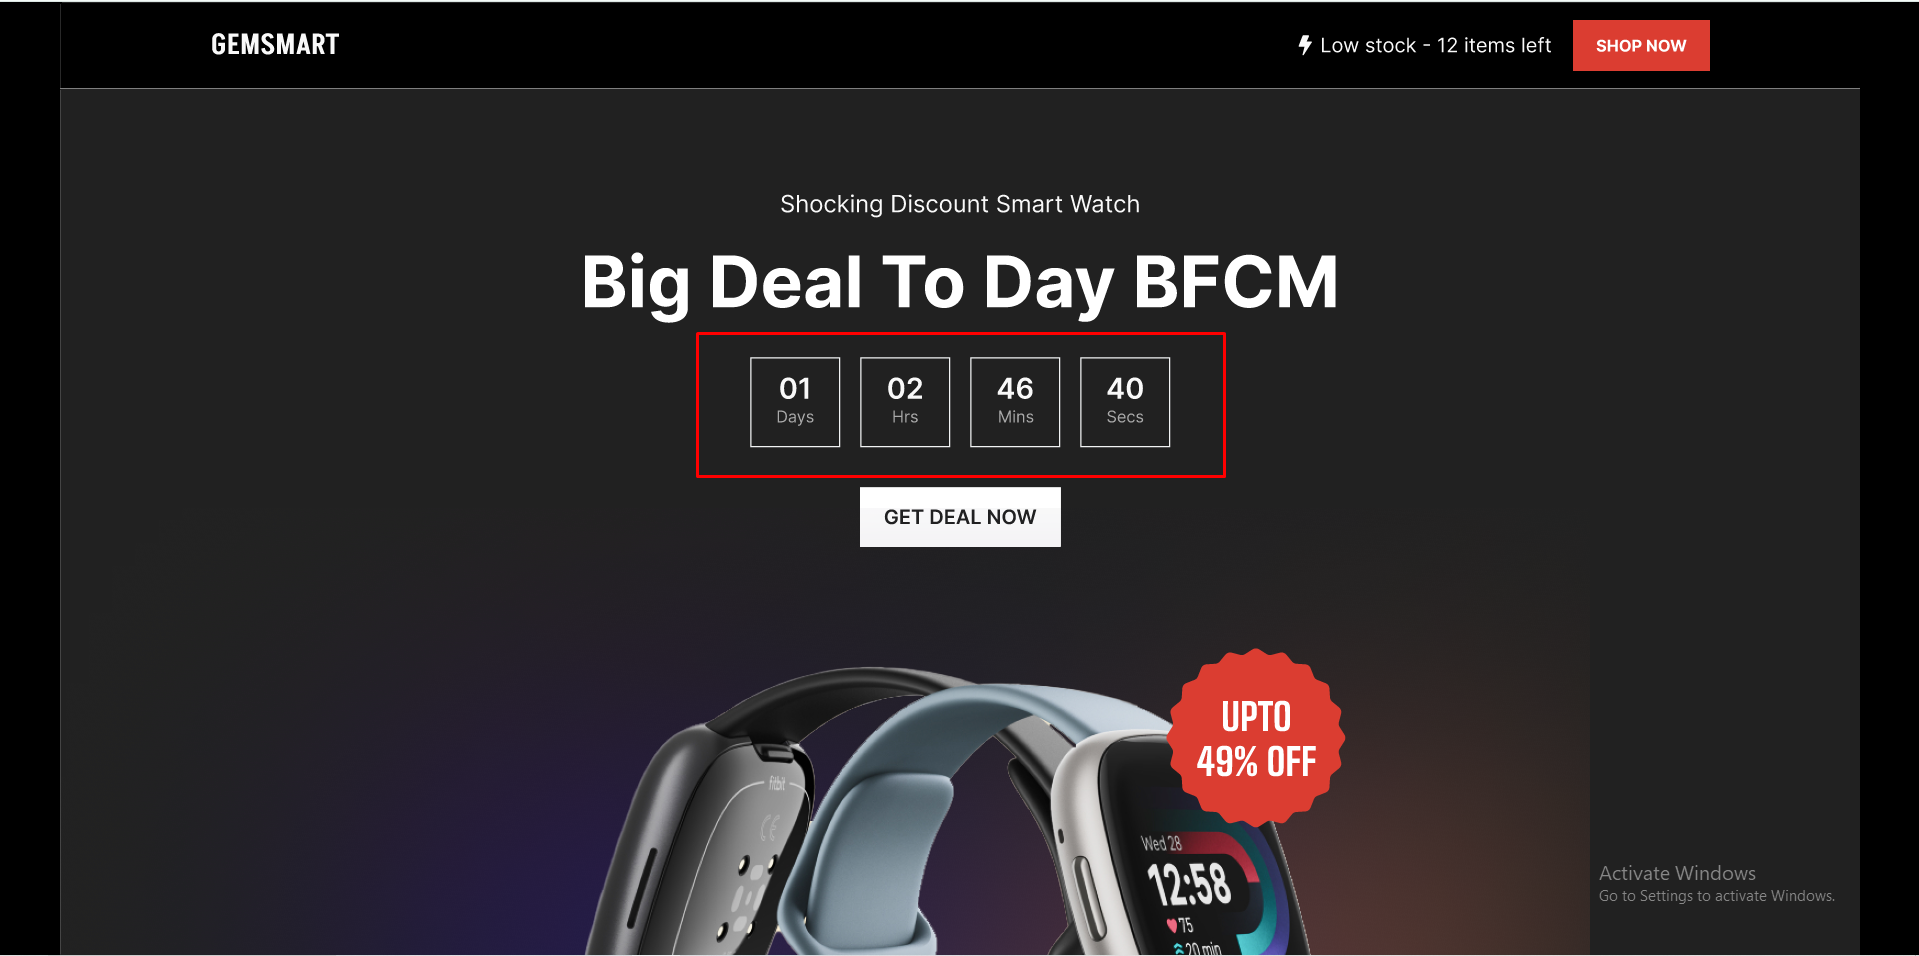
In this tutorial, we’ll focus on designing an in-line countdown timer inside an announcement bar. In-line means the timer sits neatly on the same line as your promotional text, instead of being placed below or separately.
How to Design an In-Line Countdown Timer in the Announcement Bar
Creating an in-line countdown timer (“in-line” means the countdown timer is placed within the same line as text or other elements, instead of being separate), such as one for an announcement bar.
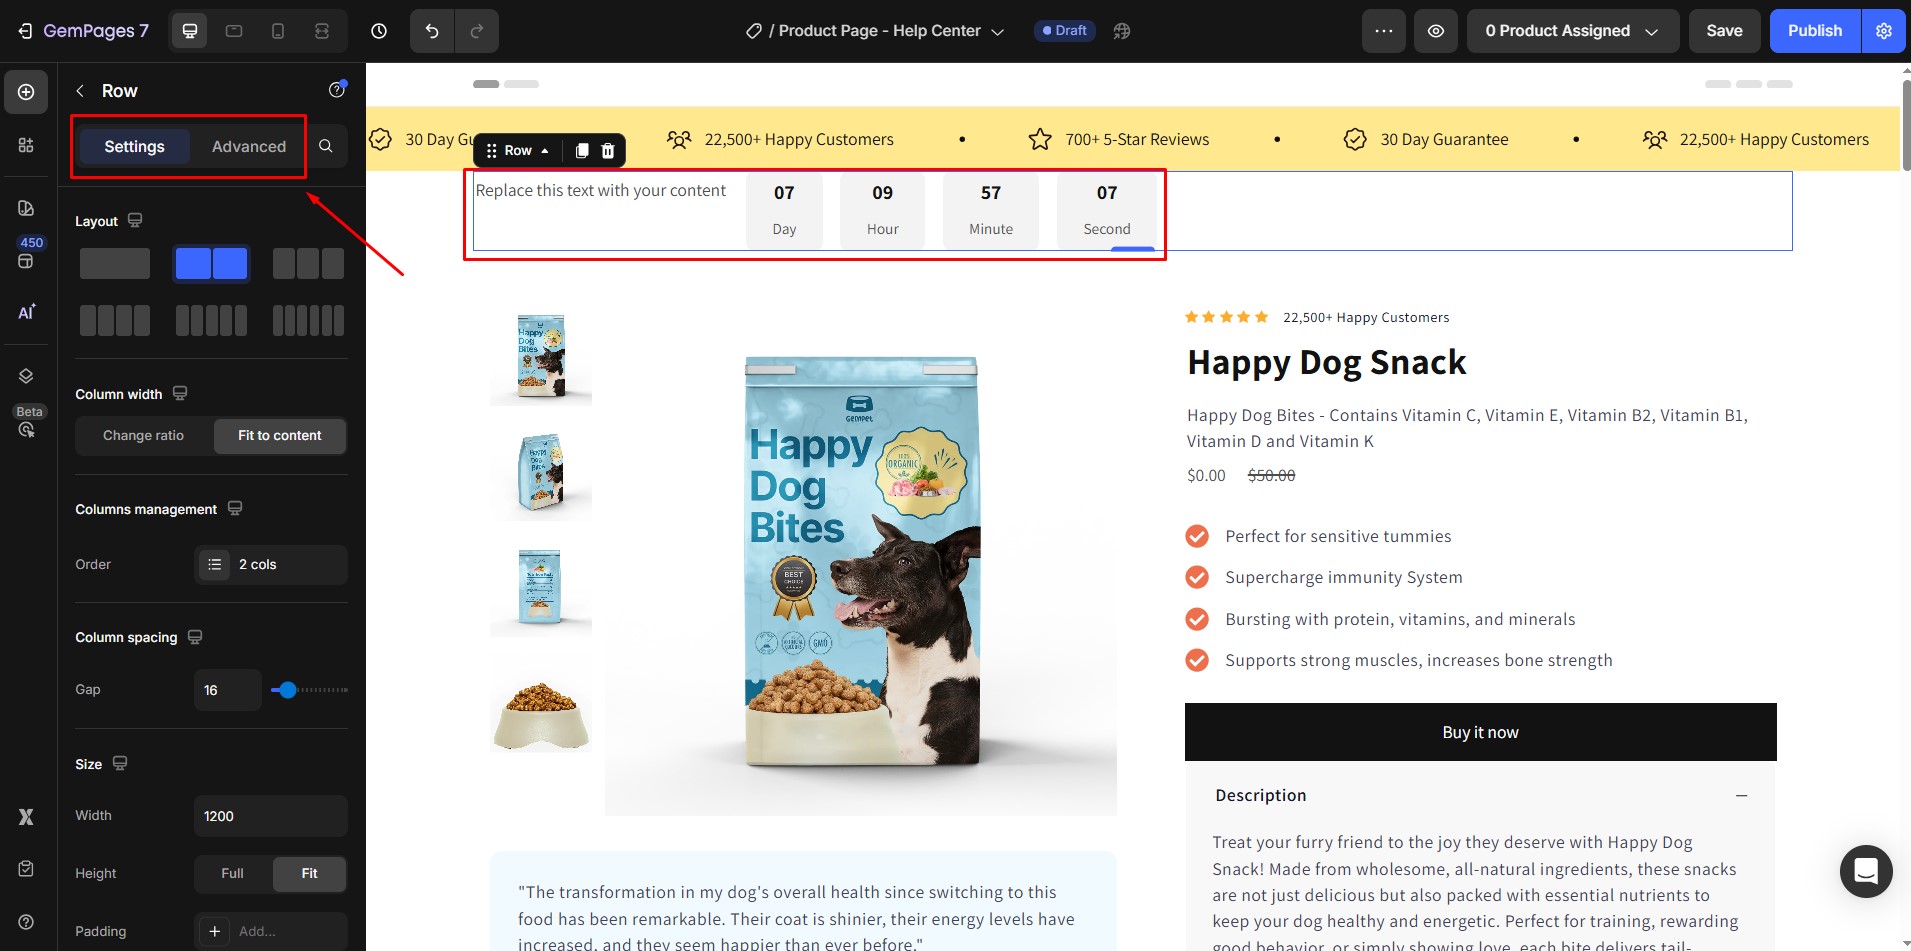
Step 1: Create a Row with Two Columns
- Add a Row element with two columns to your page layout.
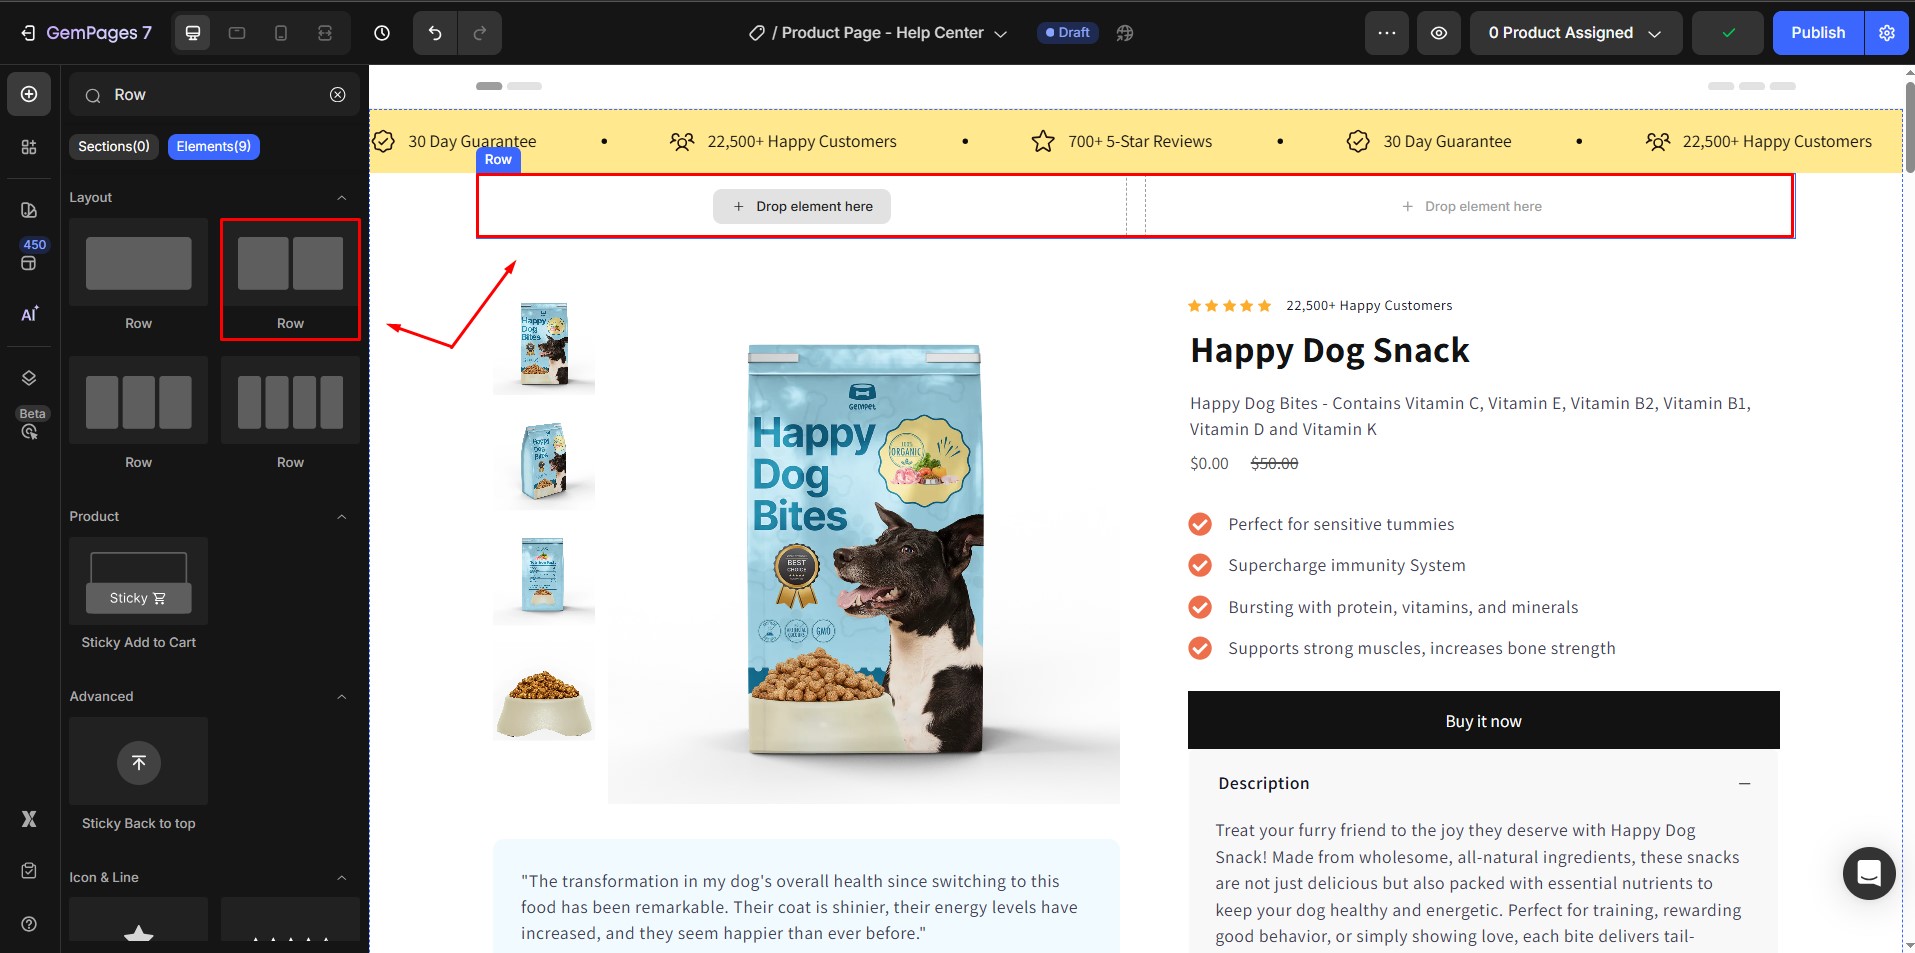
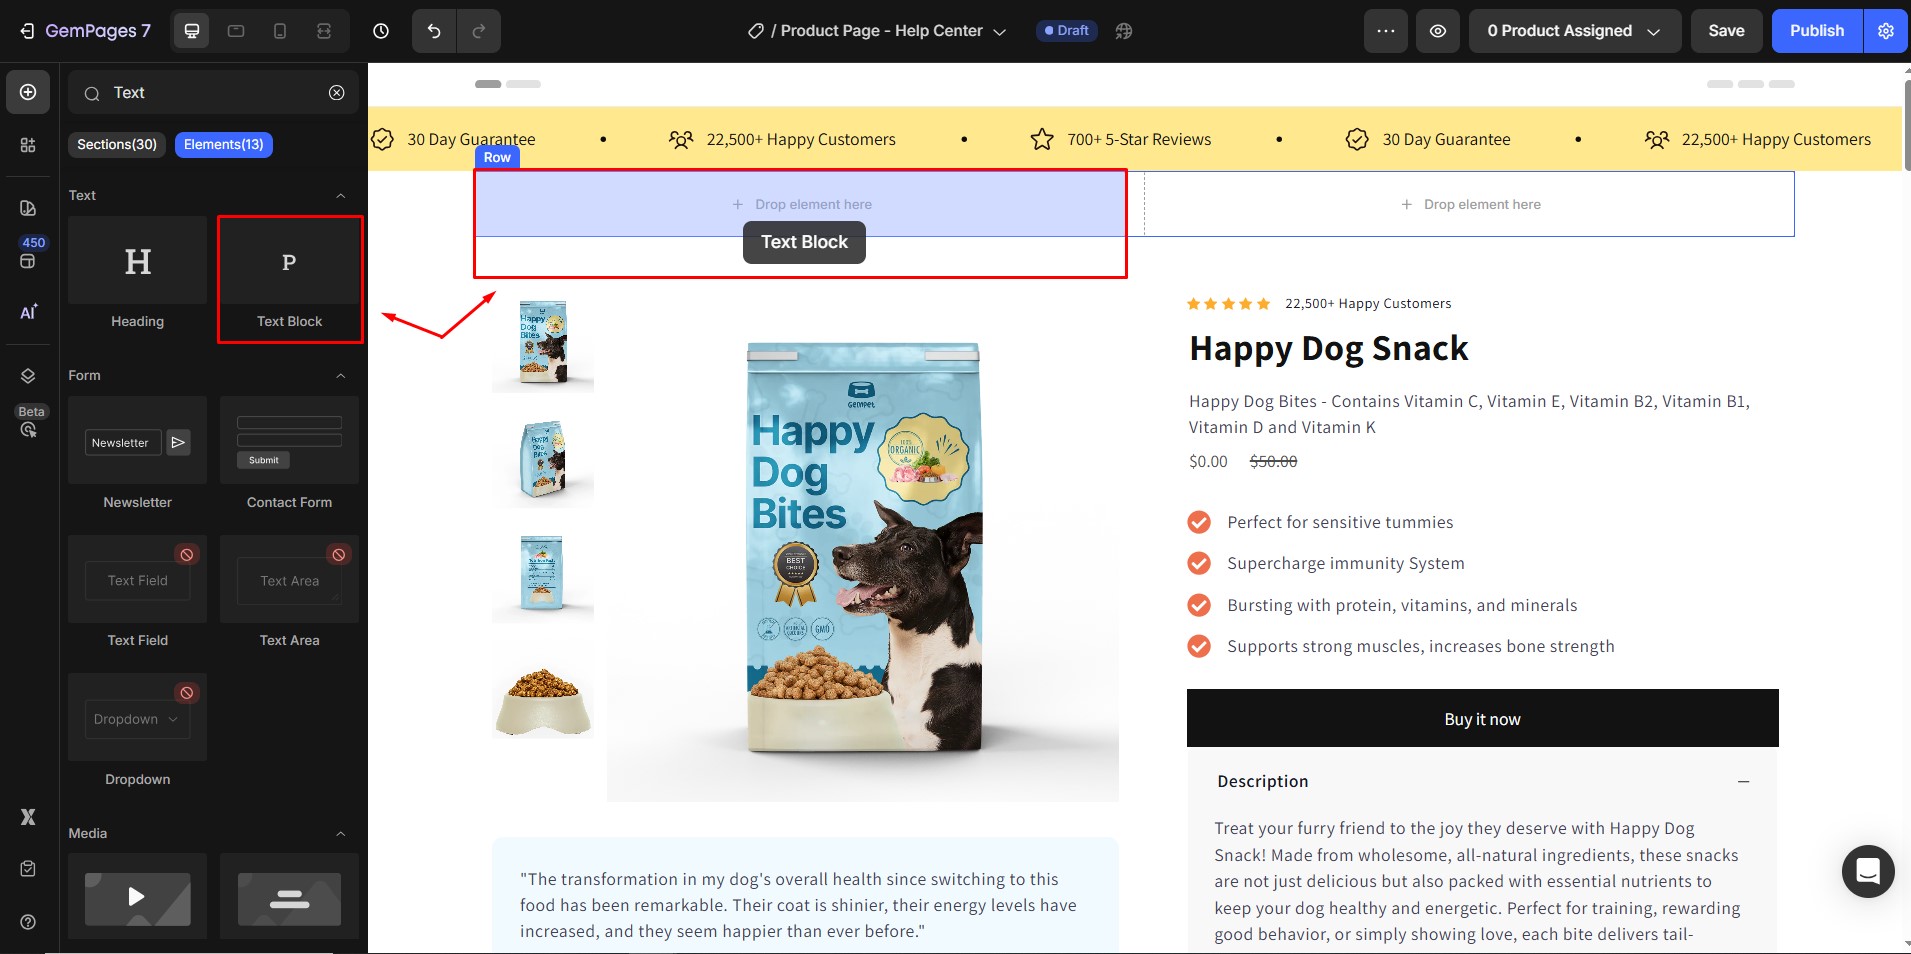
- In the left column, drag and drop a Text element. This is where you can add a short promotional message like “Limited Time Offer!” or “Sale Ends Soon.”
- In the right column, drag and drop the Countdown Timer element to display the timer.
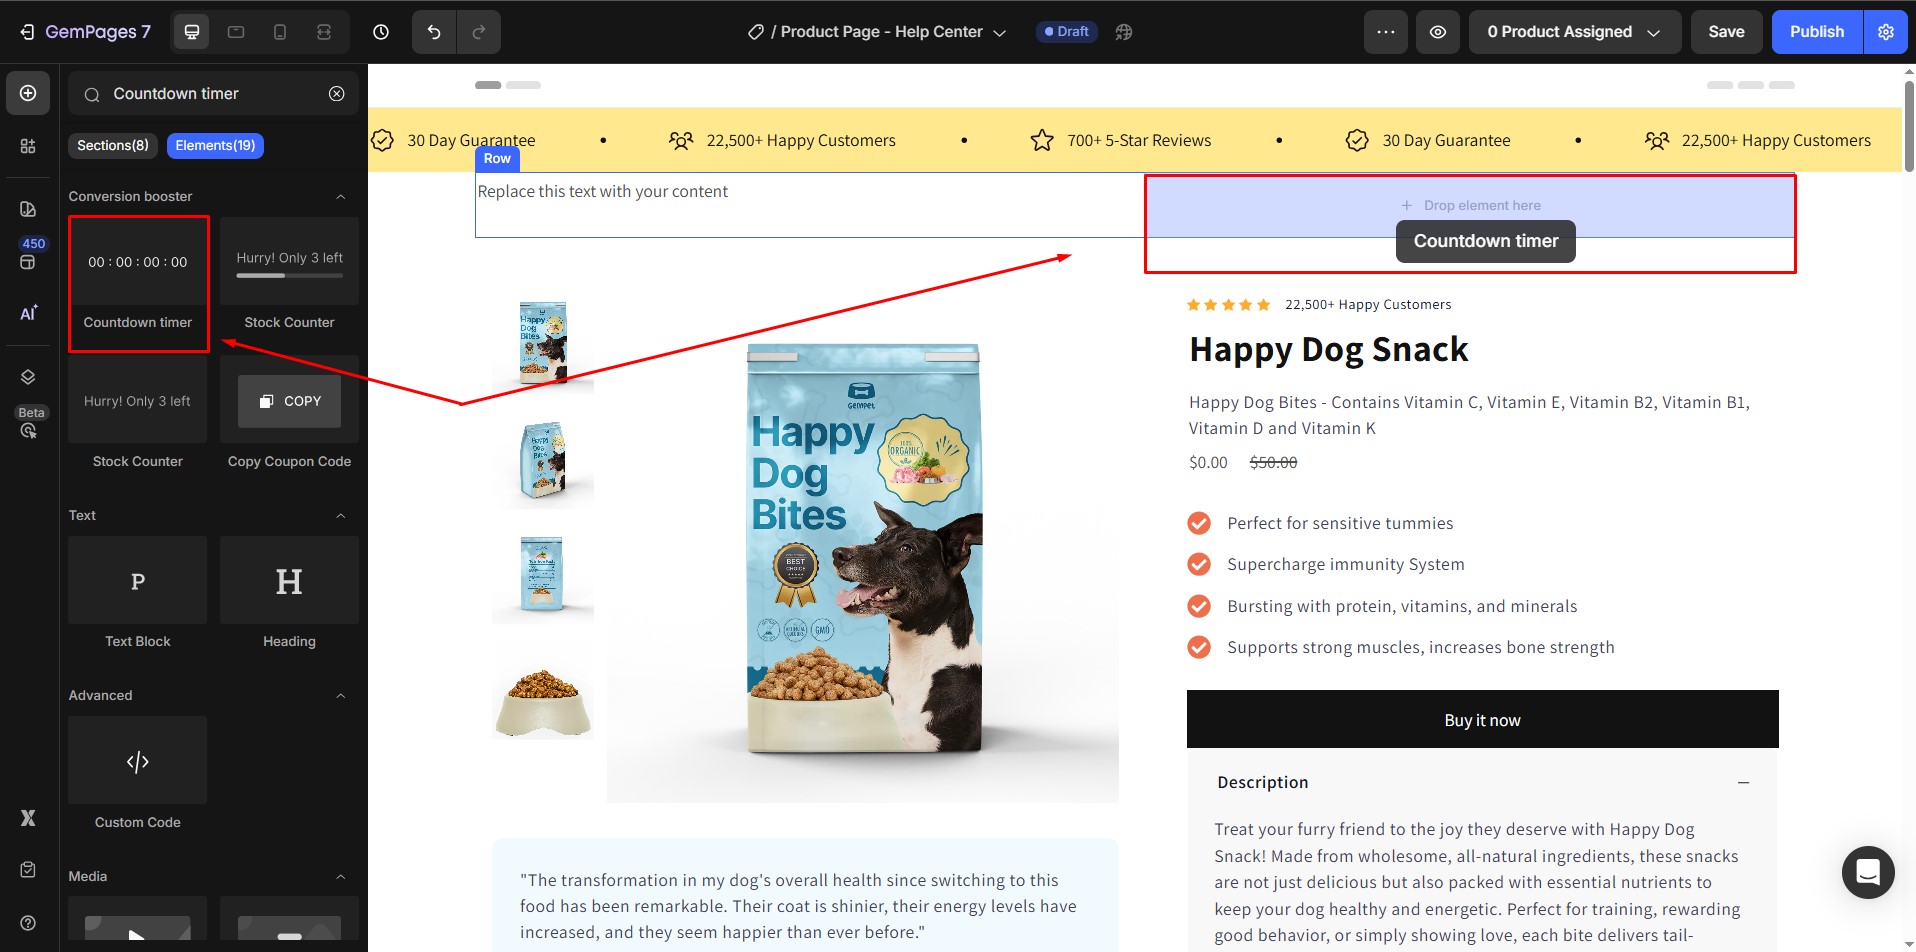

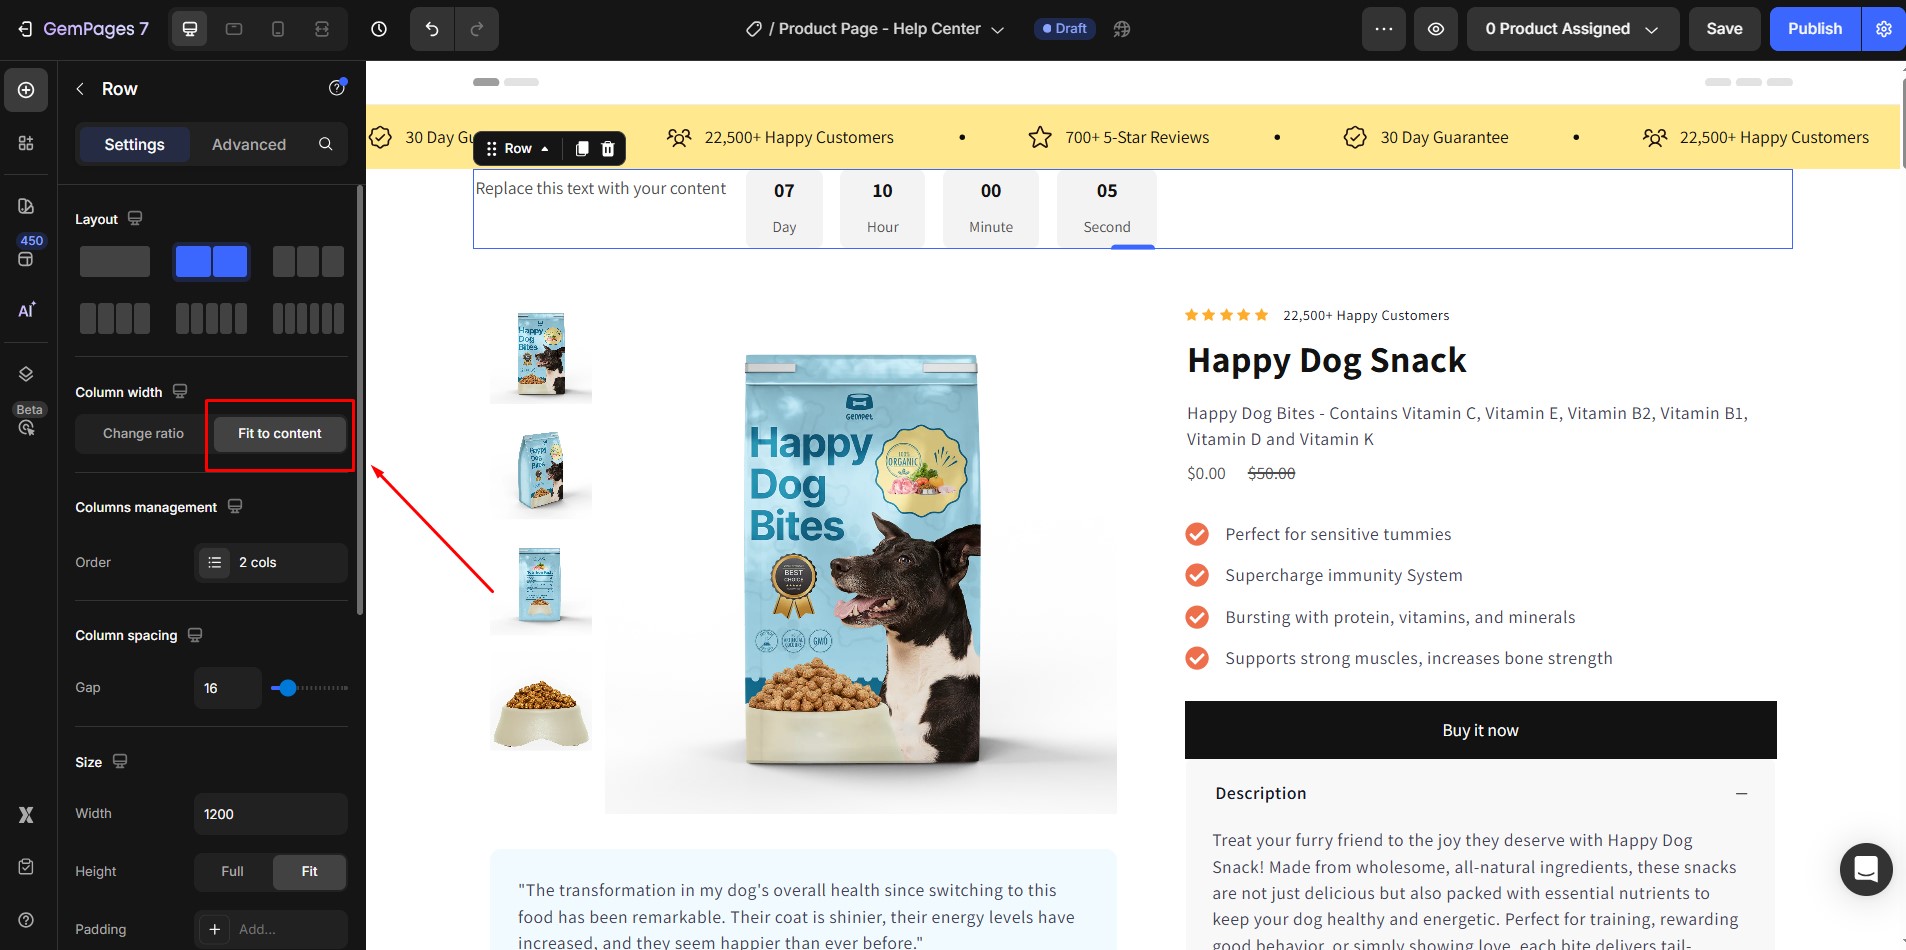
- Open the Row settings and set Column Width → Fit Content. This ensures your announcement bar adapts neatly to the text and timer without extra spacing.
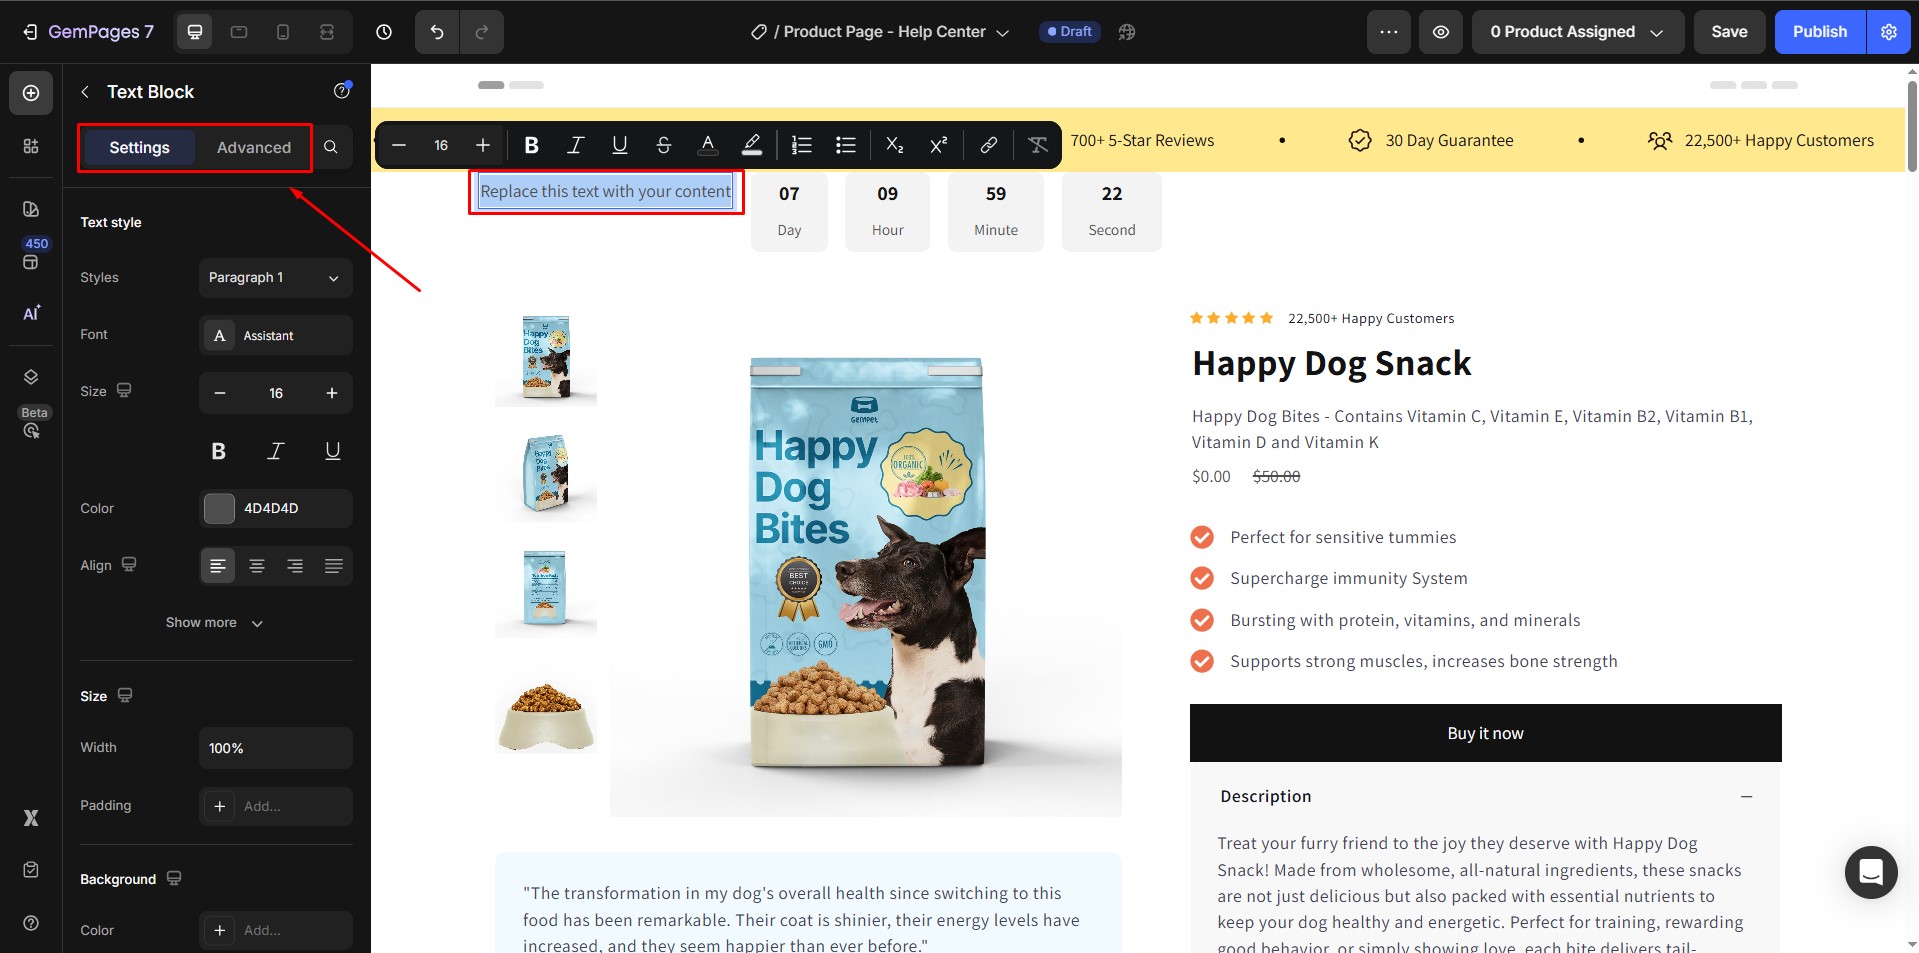
Step 2: Customize the Text Element
Click on the Text element in the left column. The settings panel will open with two tabs: Settings and Advanced. Here, you can:
- Edit the text (e.g., “Free Shipping Ends In:” or “Sale Ends Soon”)
- Adjust the text style: font, size, weight, alignment, and color
- Change the background, padding, or margins for better spacing
For detailed guidance, see our full article on the Text Element.
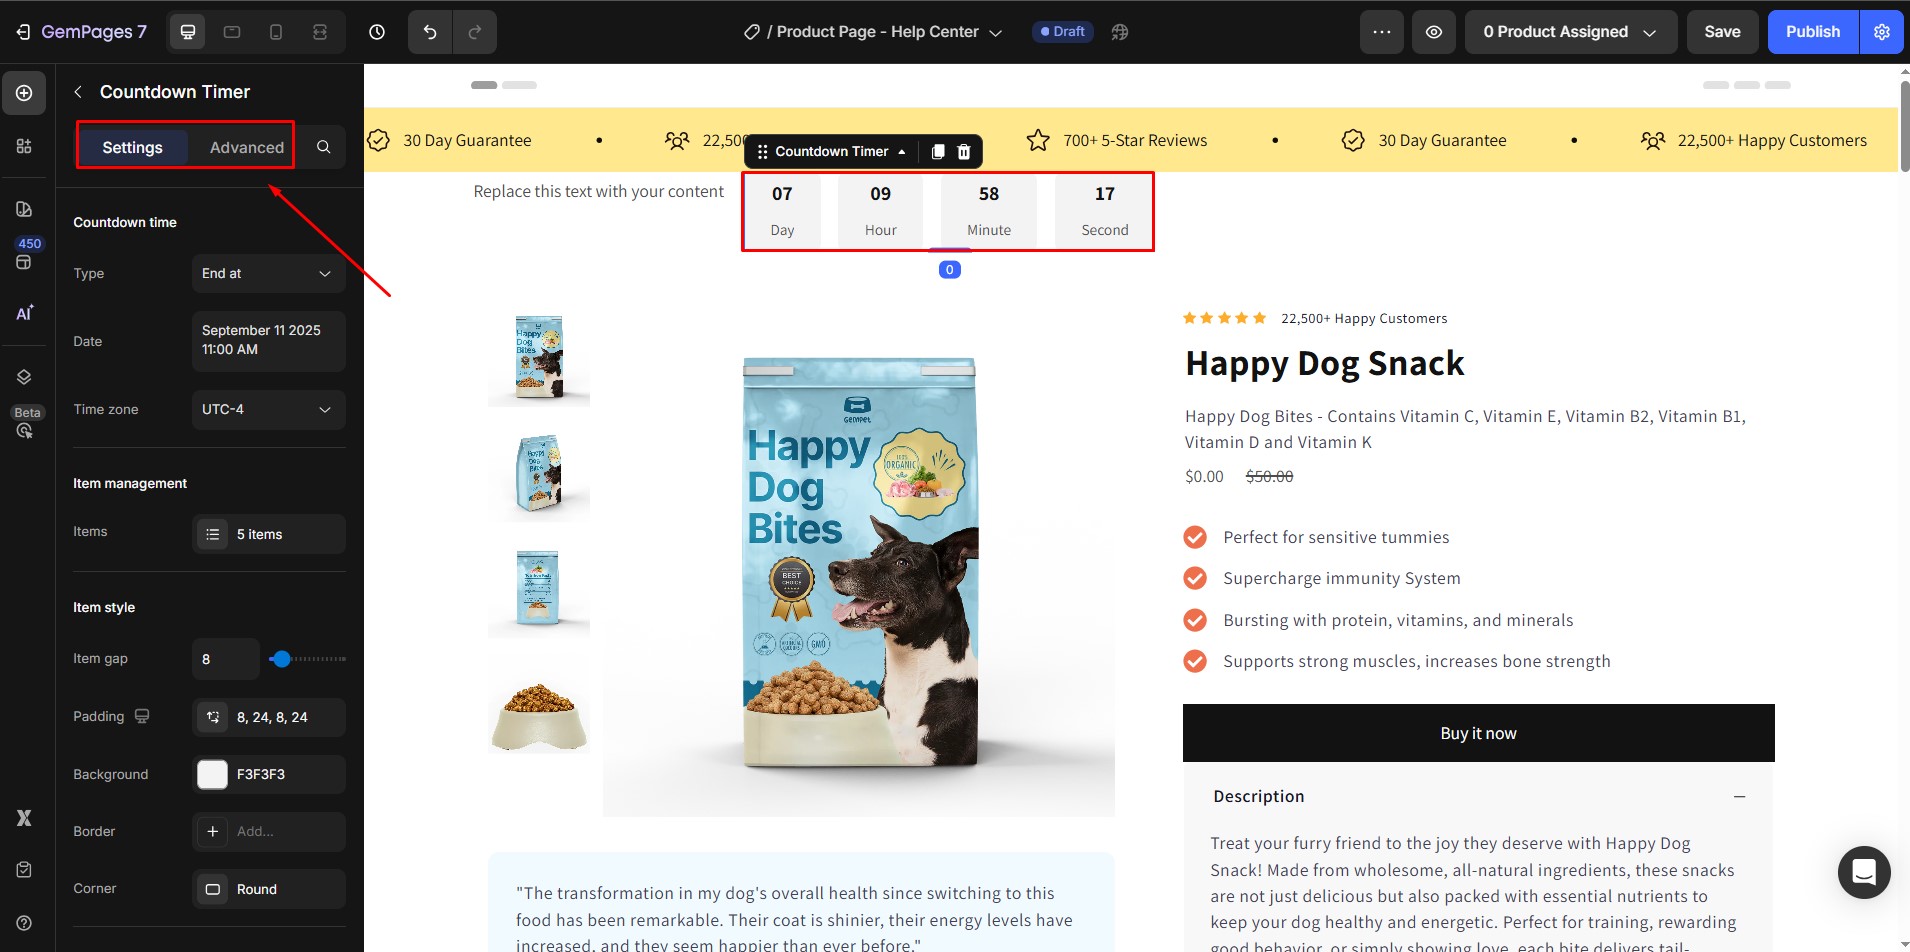
Step 3: Customize the Countdown Timer Element
Click on the Countdown Timer element in the right column. In the settings panel (Settings + Advanced), you can adjust:
- End time: set when the countdown finishes
- Item management: choose which units to display (weeks, days, hours, minutes, seconds) and edit their captions
- Design options: background color, size, shape, font, and alignment
For more advanced styling, see our full guide on the Countdown Timer Element.
Step 4: Customize the Row Layout
Finally, fine-tune the Row element that contains both the text and countdown timer:
- Adjust row size and alignment to fit your announcement bar
- Add or remove background colors for better visibility
- Control spacing and padding to ensure the bar looks balanced
Learn more in our detailed article on the Row Element.
Step 5: Save and Publish
When you’re done with the design, click Save and then Publish. Your Shopify countdown timer will now appear in your announcement bar.


Thank you for your comments