


How to Change Shipping Cost Shopify
Follow these steps to update your shipping rates directly from your Shopify admin panel:
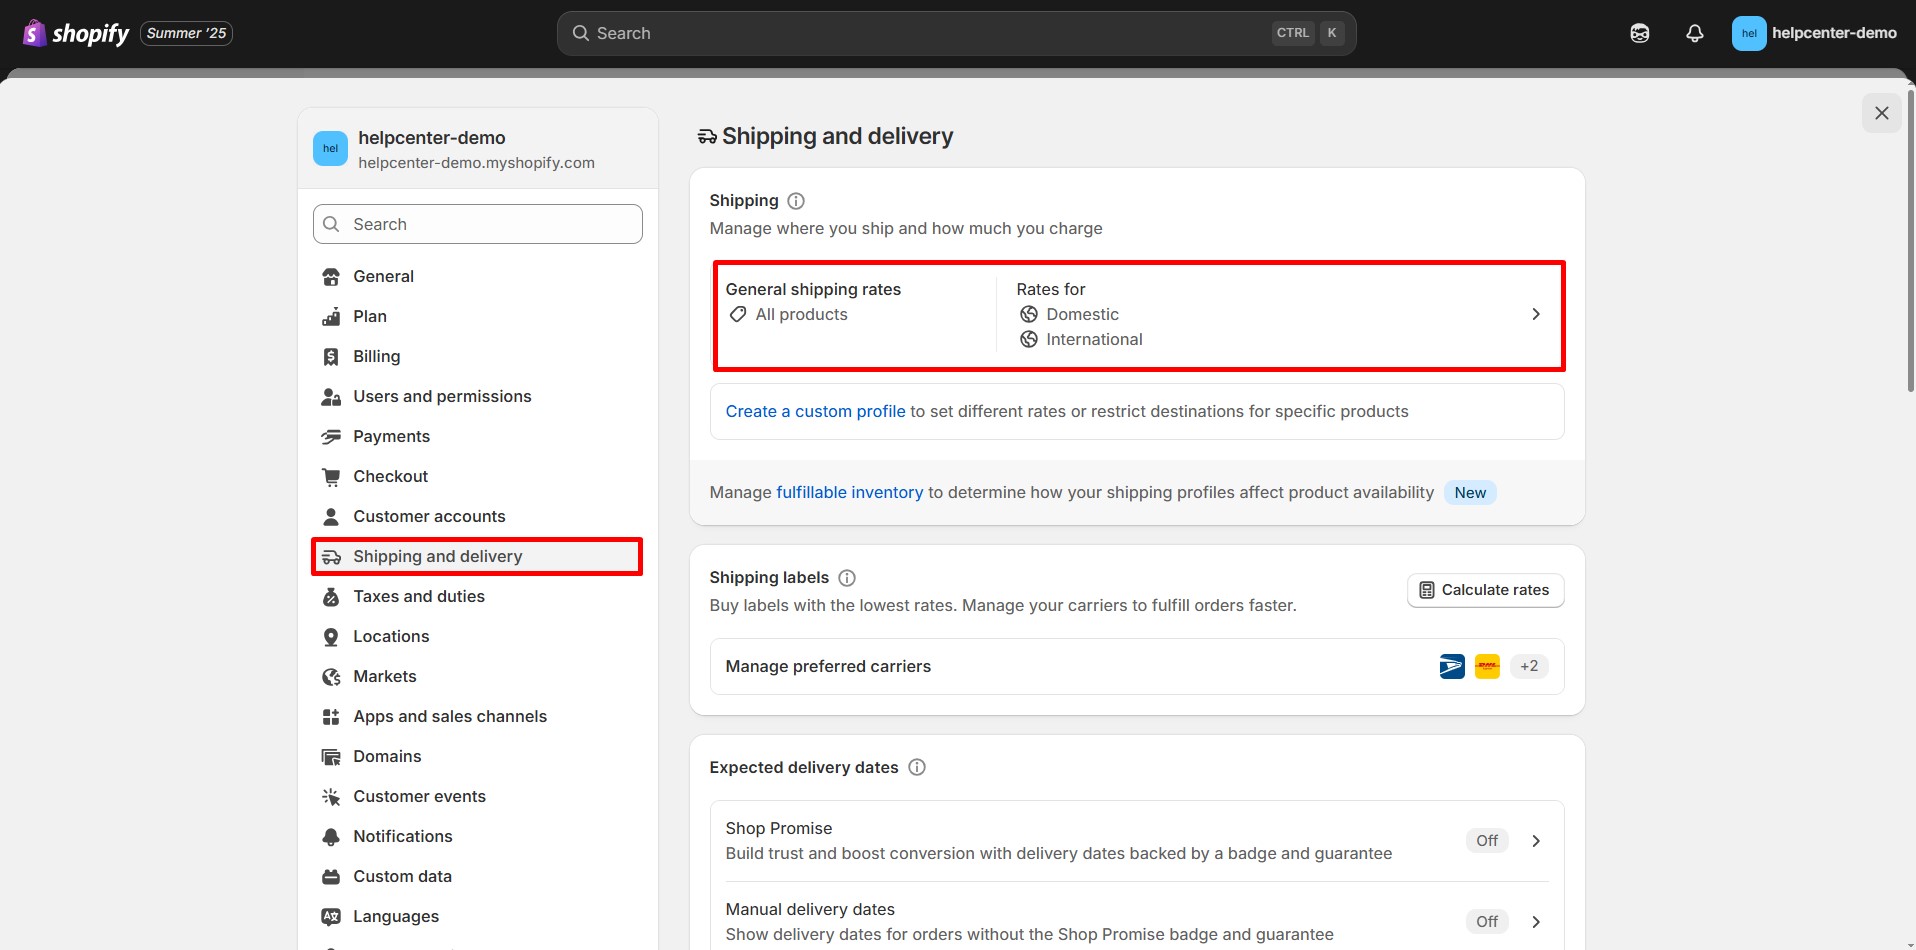
Step 1: From your Shopify admin, go to Settings > Shipping and delivery. In the Shipping section, click on the General shipping rate.
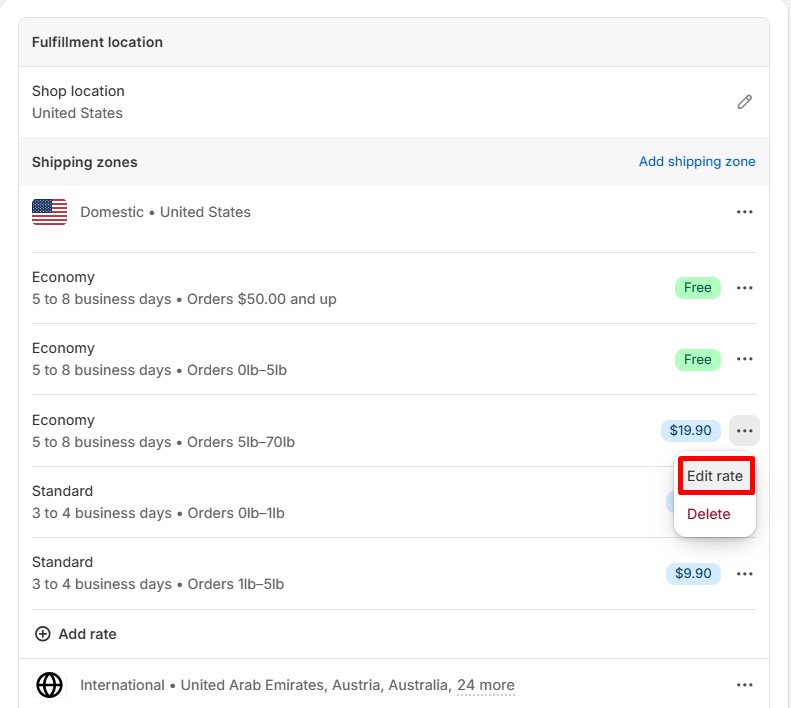
Step 2: For each shipping zone listed (e.g., domestic, international), you’ll see existing shipping rates. To modify an existing rate:
- Click the … button next to the rate and select Edit rate.
- Adjust the rate details as needed, then click Done.
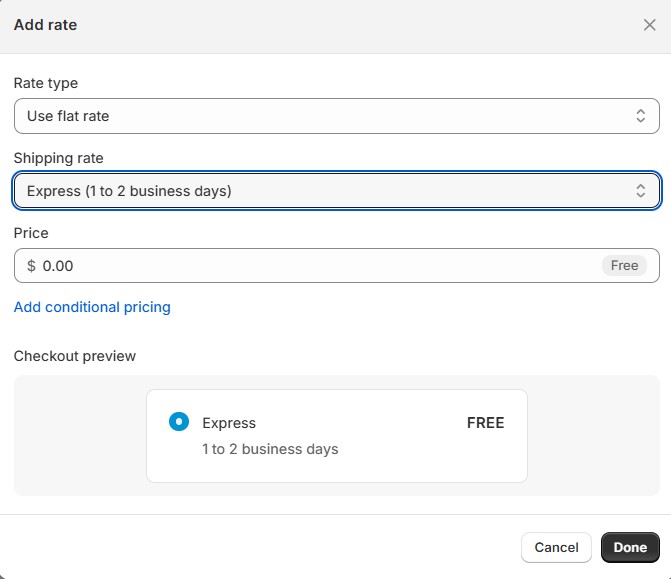
To add a new rate:
- Click Add rate.

- Choose the rate type (e.g., flat rate, calculated).
- Set the shipping rate.
- Set the shipping price.
- Optionally, add conditions based on order price or weight.
- Click Done.
Step 3: After making changes, click Save to apply them.
How to Add a Free Shipping Badge to Your Product Page with GemPages
If you offer free shipping, you can highlight it directly on your product pages to boost conversion. Here’s how to add a Free Shipping badge using GemPages.
Ensure the following before you begin:
- You have GemPages installed.
- Your product pages are created using GemPages.
- You’ve assigned products to the correct product template in GemPages.
Check out these related guides:
- How to Install GemPages
- Create Your Product Page with GemPages
- Assign Product to Product Template in GemPages
Step-by-Step Guide to Add Free Shipping Badge:
Step 1: From your GemPages Dashboard, navigate to the Pages section. Select the product page that you want to add free shipping badge.
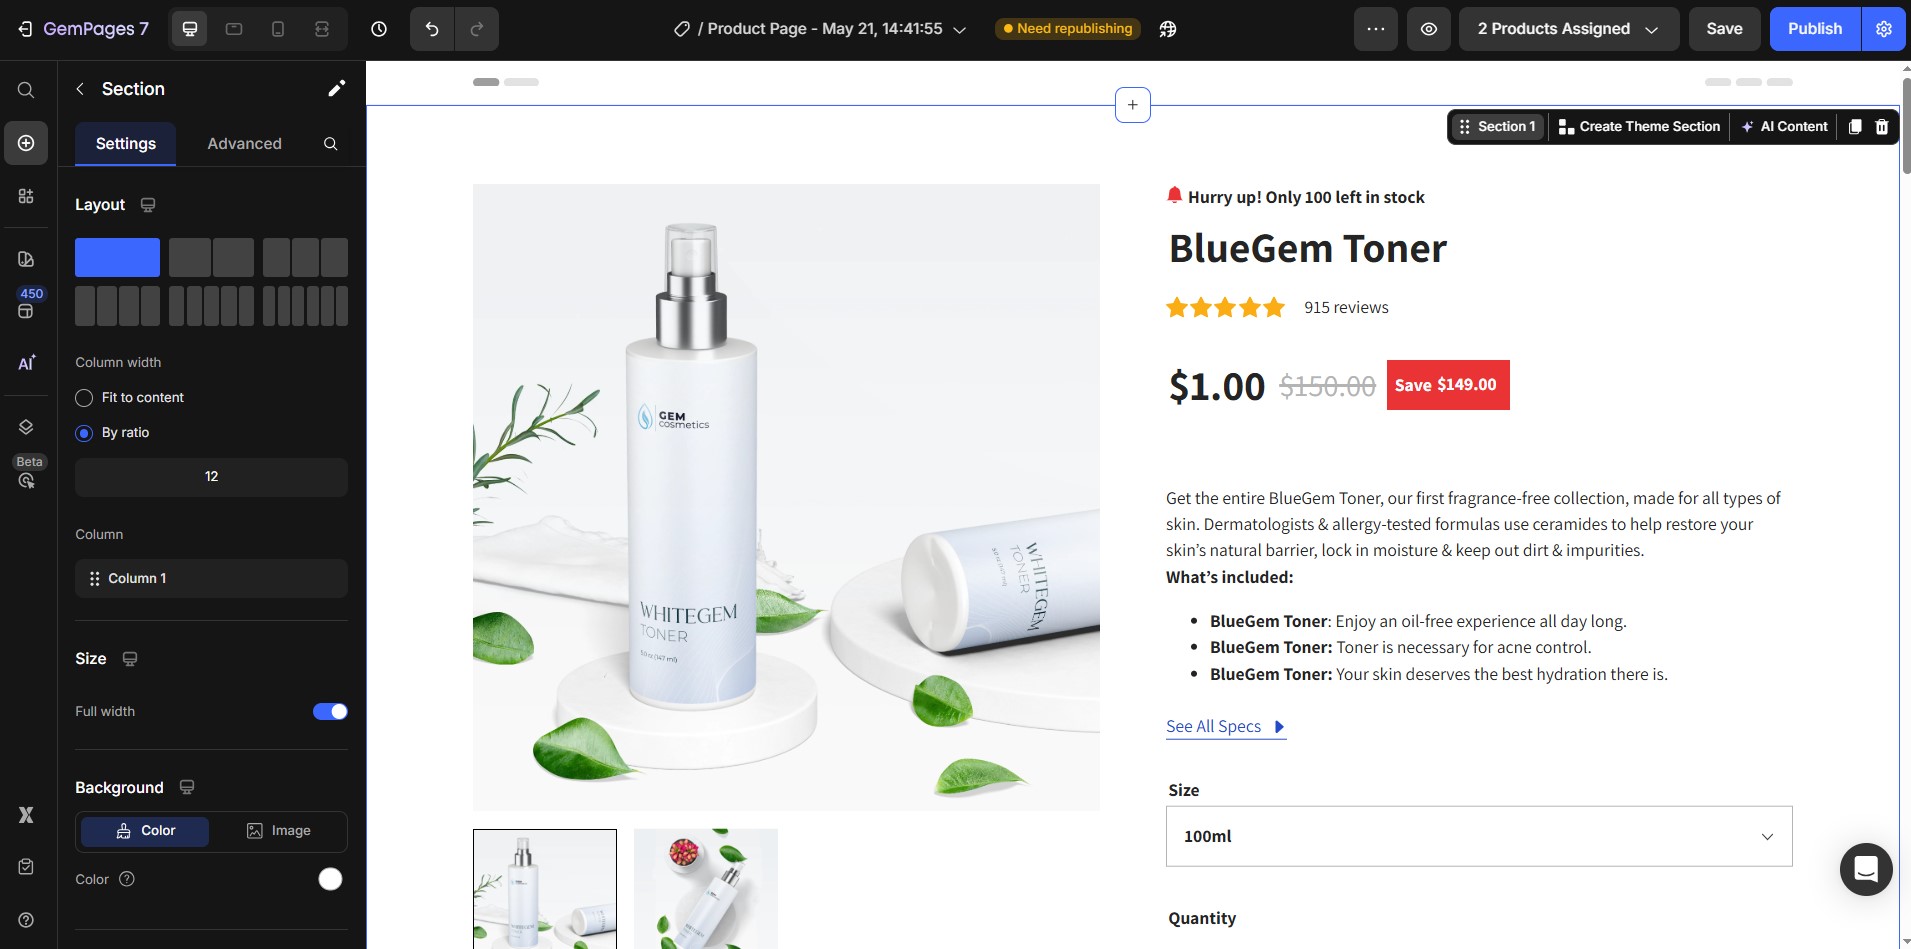
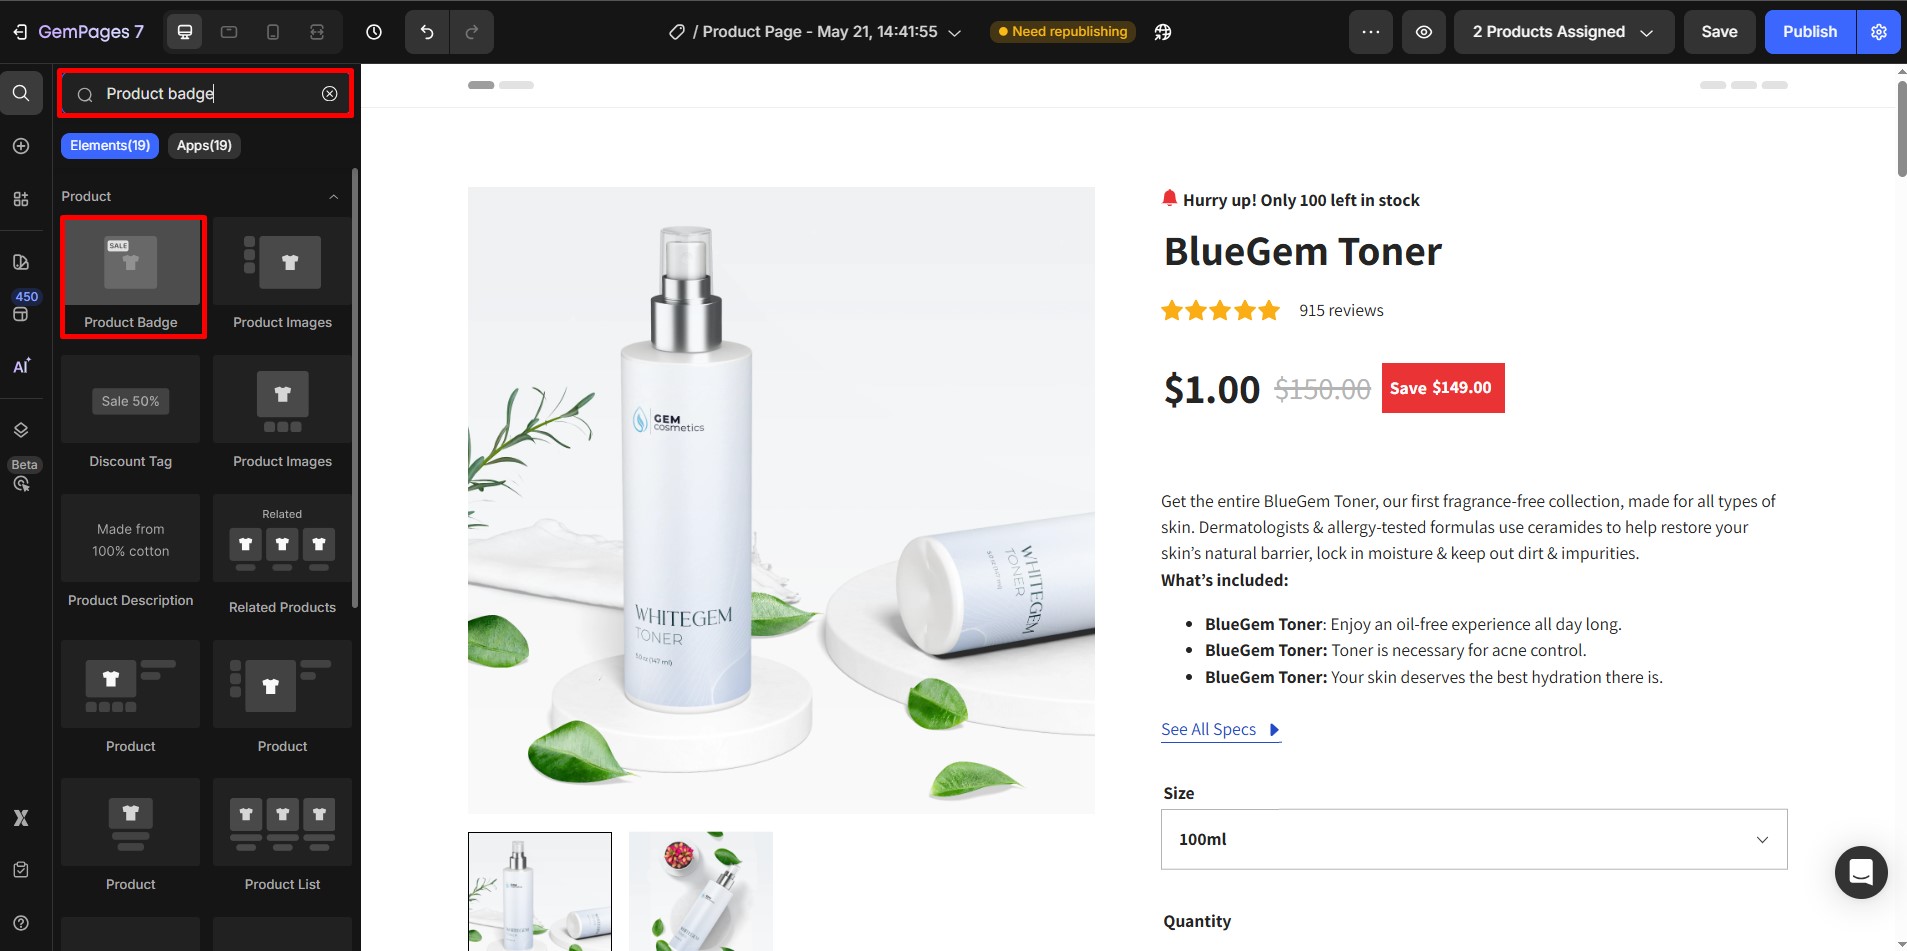
Step 2: Use the search bar to find the Product Badge element. Drag and drop it into the desired position within the Product or Product List element.

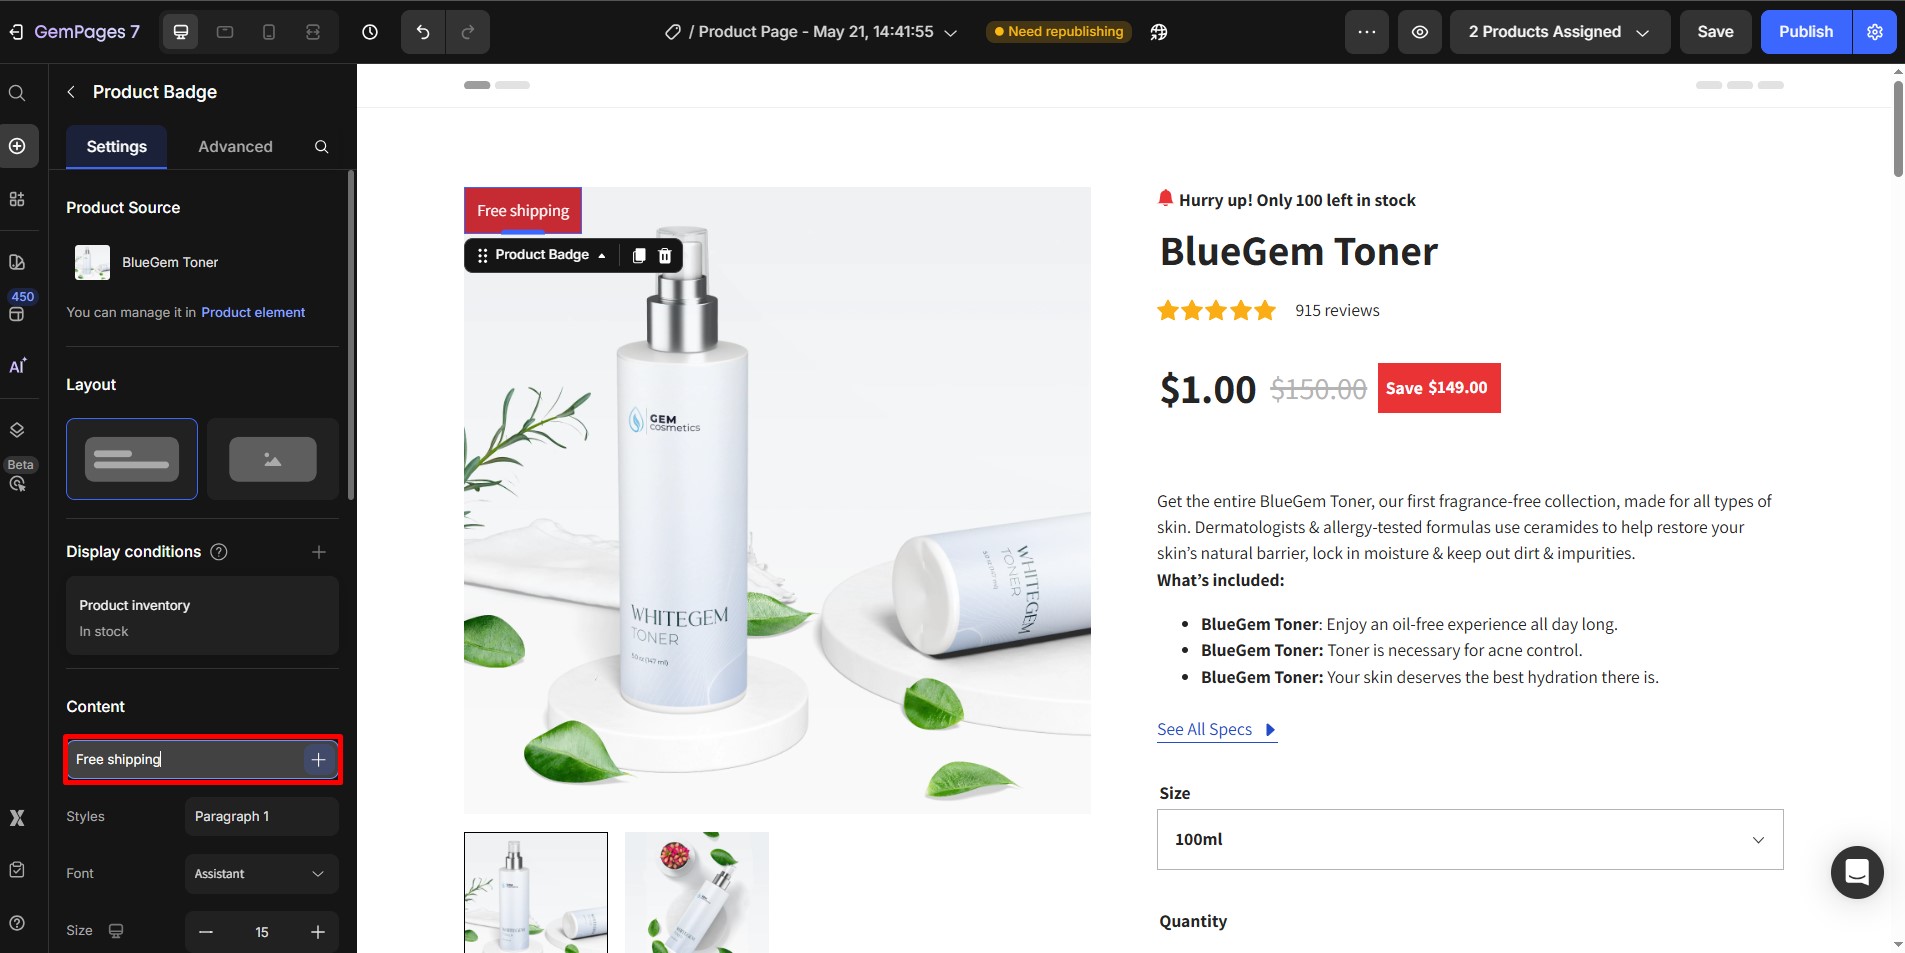
Step 3: Configure the badge:
- Layout: Choose between a text-based or image-based badge.
- Content: For a text badge, enter “Free Shipping” and customize the font, color, and style.
Step 4: Save and publish.


Thank you for your comments