


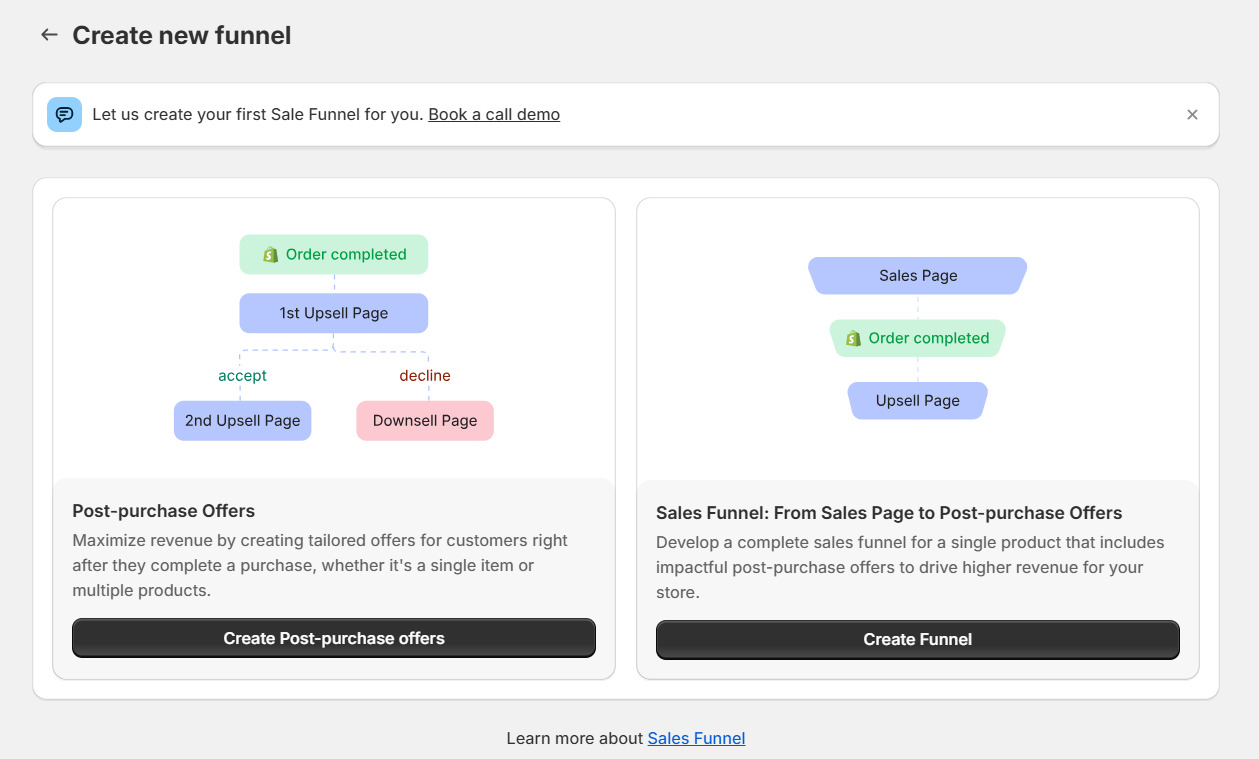
Product Selection Within Sales Page
Previously, users needed to select a trigger product before editing a sales page. With this update, you can now choose your product directly within the Sales Page Editor, following these simple steps:
Step 1: Click Add Page.
Step 2: The system redirects to the Editor, displaying a blank page.
Step 3: Choose Use existing page designs to utilize your pre-built pages or Explore templates to select from GemPages’ ready-made models.
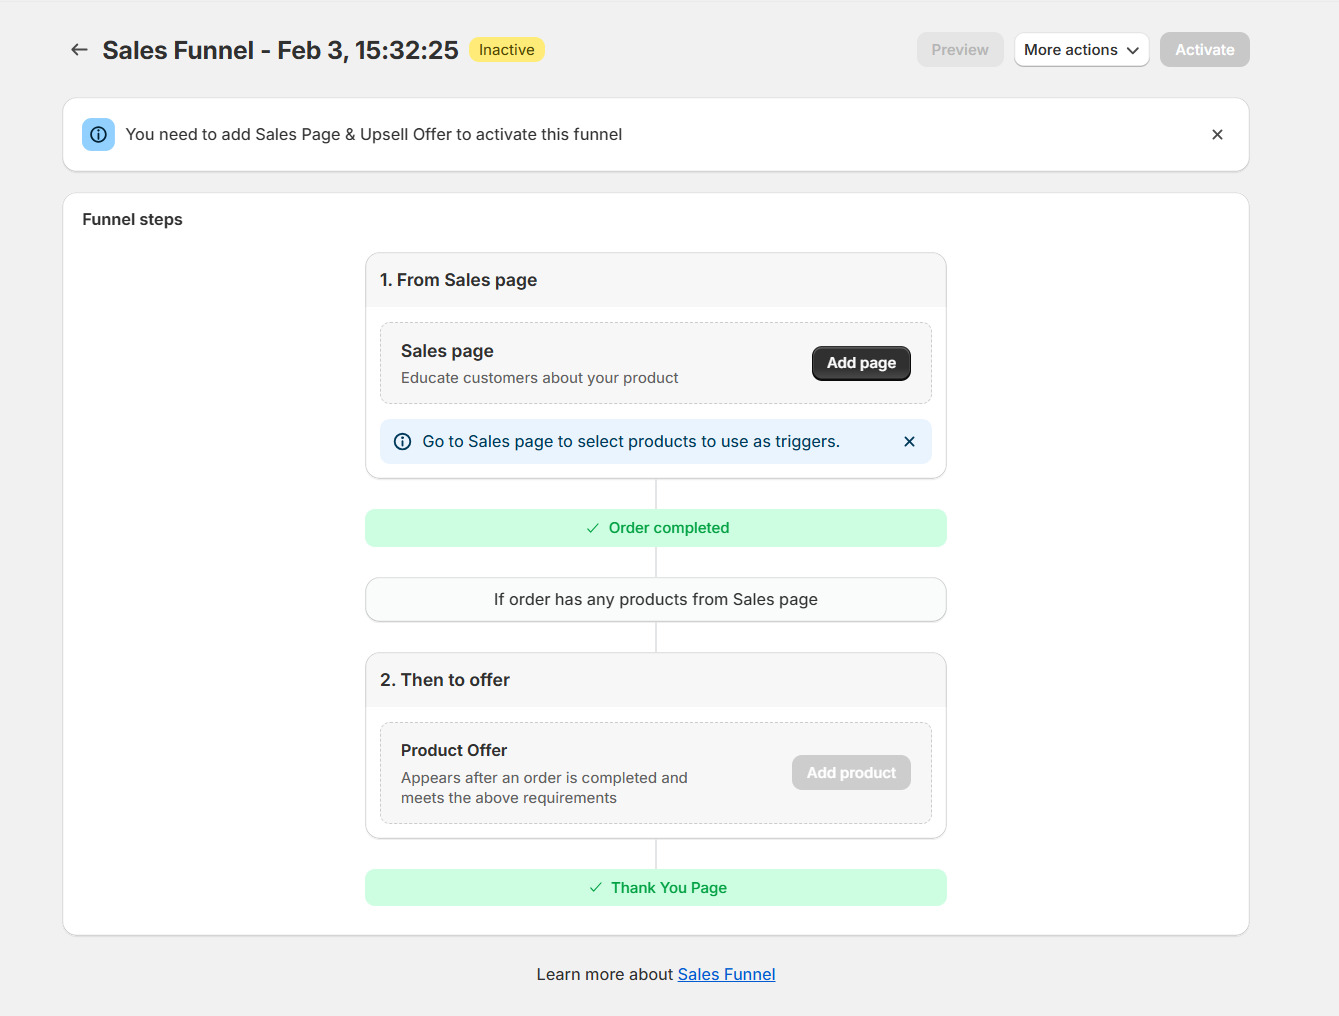
Click “Add page” to pick your trigger product and design your sales page as well
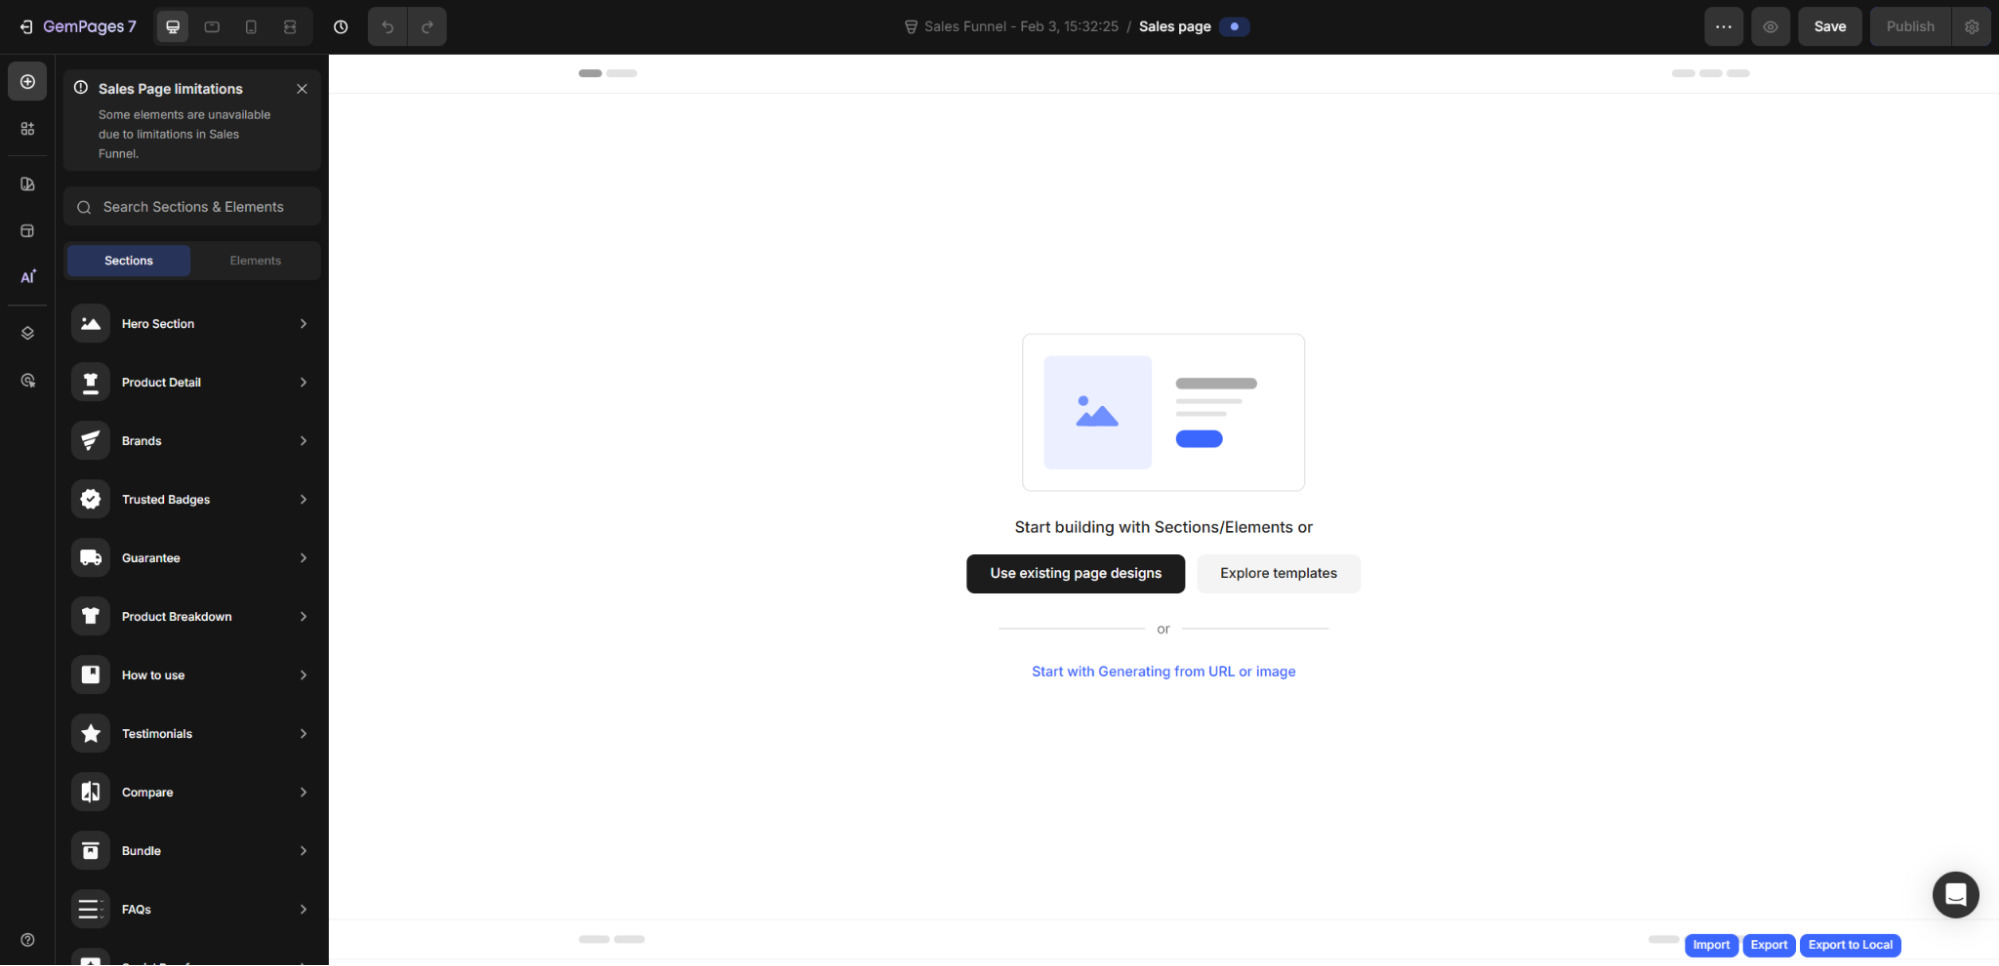 You can choose to use existing page or pick one pre-made template from our library
1. If you add an existing page
When adding an existing page, you have two options:
Option 1: Use any page type as a Template:
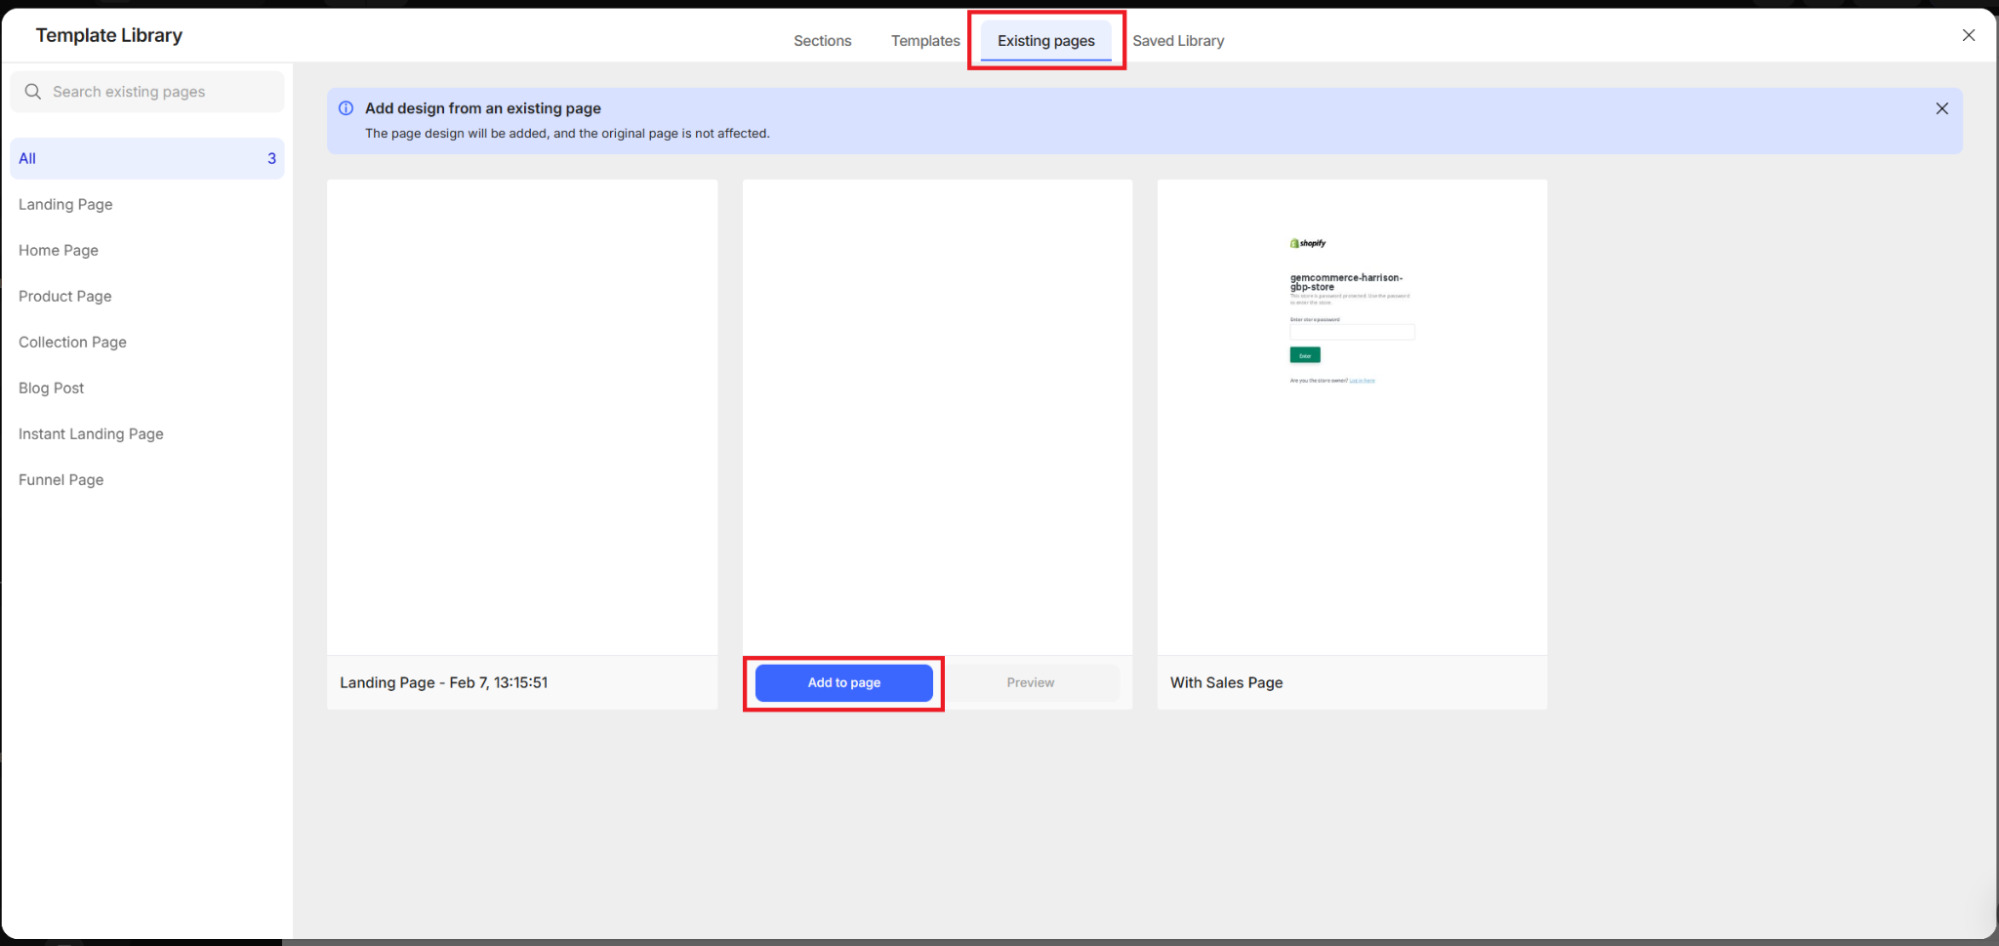
After selecting “Add Page,” the Editor will prompt you to confirm whether you want to keep the products from the existing page as trigger products for the Sales Page:
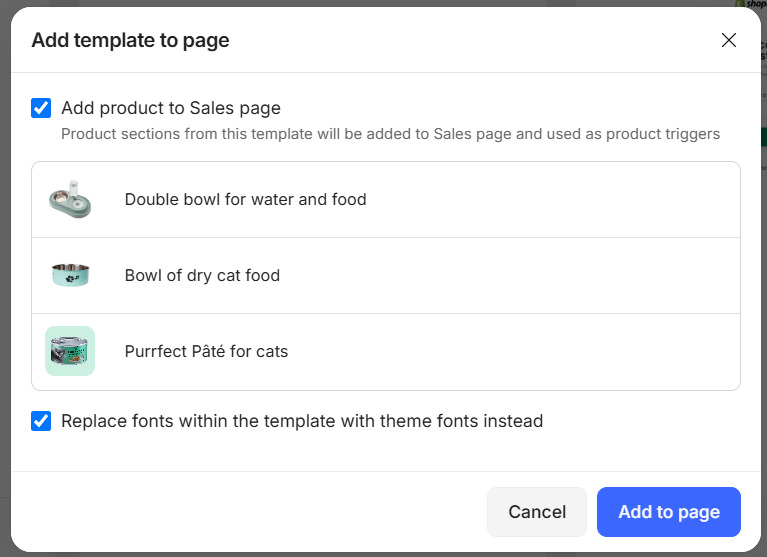
If you check the “Add product to Sales Page” box, all products from the selected existing page will be added to the Sales Page. If NOT, the existing page layout will still be copied to the Sales Page, but you’ll need to manually select new products.
- The product assigned to that page automatically becomes the trigger product for the sales funnel.
- If the selected product page contains multiple products, the previewed product will act as the trigger product, and only that product will be displayed on the live page.
You can add more products to the Sales Page, turning all included products to be trigger products for the sales funnel. Simply drag-and-drop Product element and pick the product you want to sell.
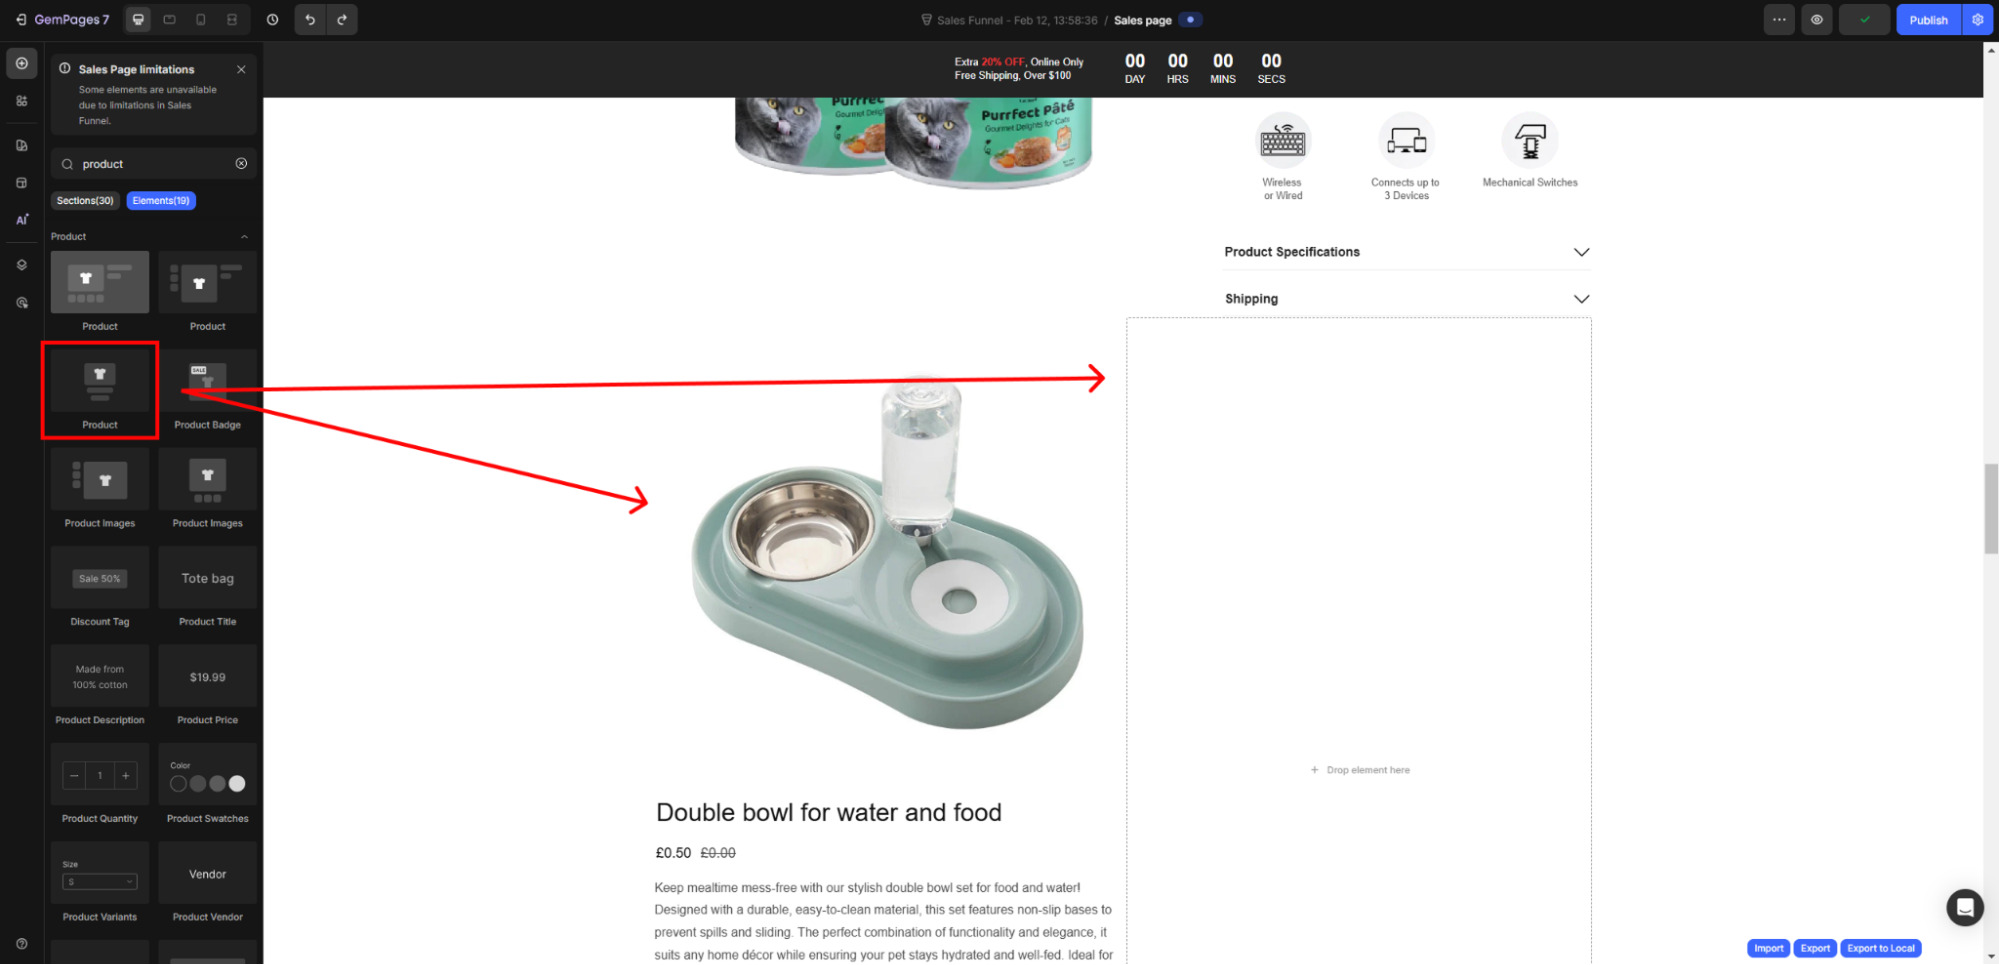 Drag-and-drop the product element on your page
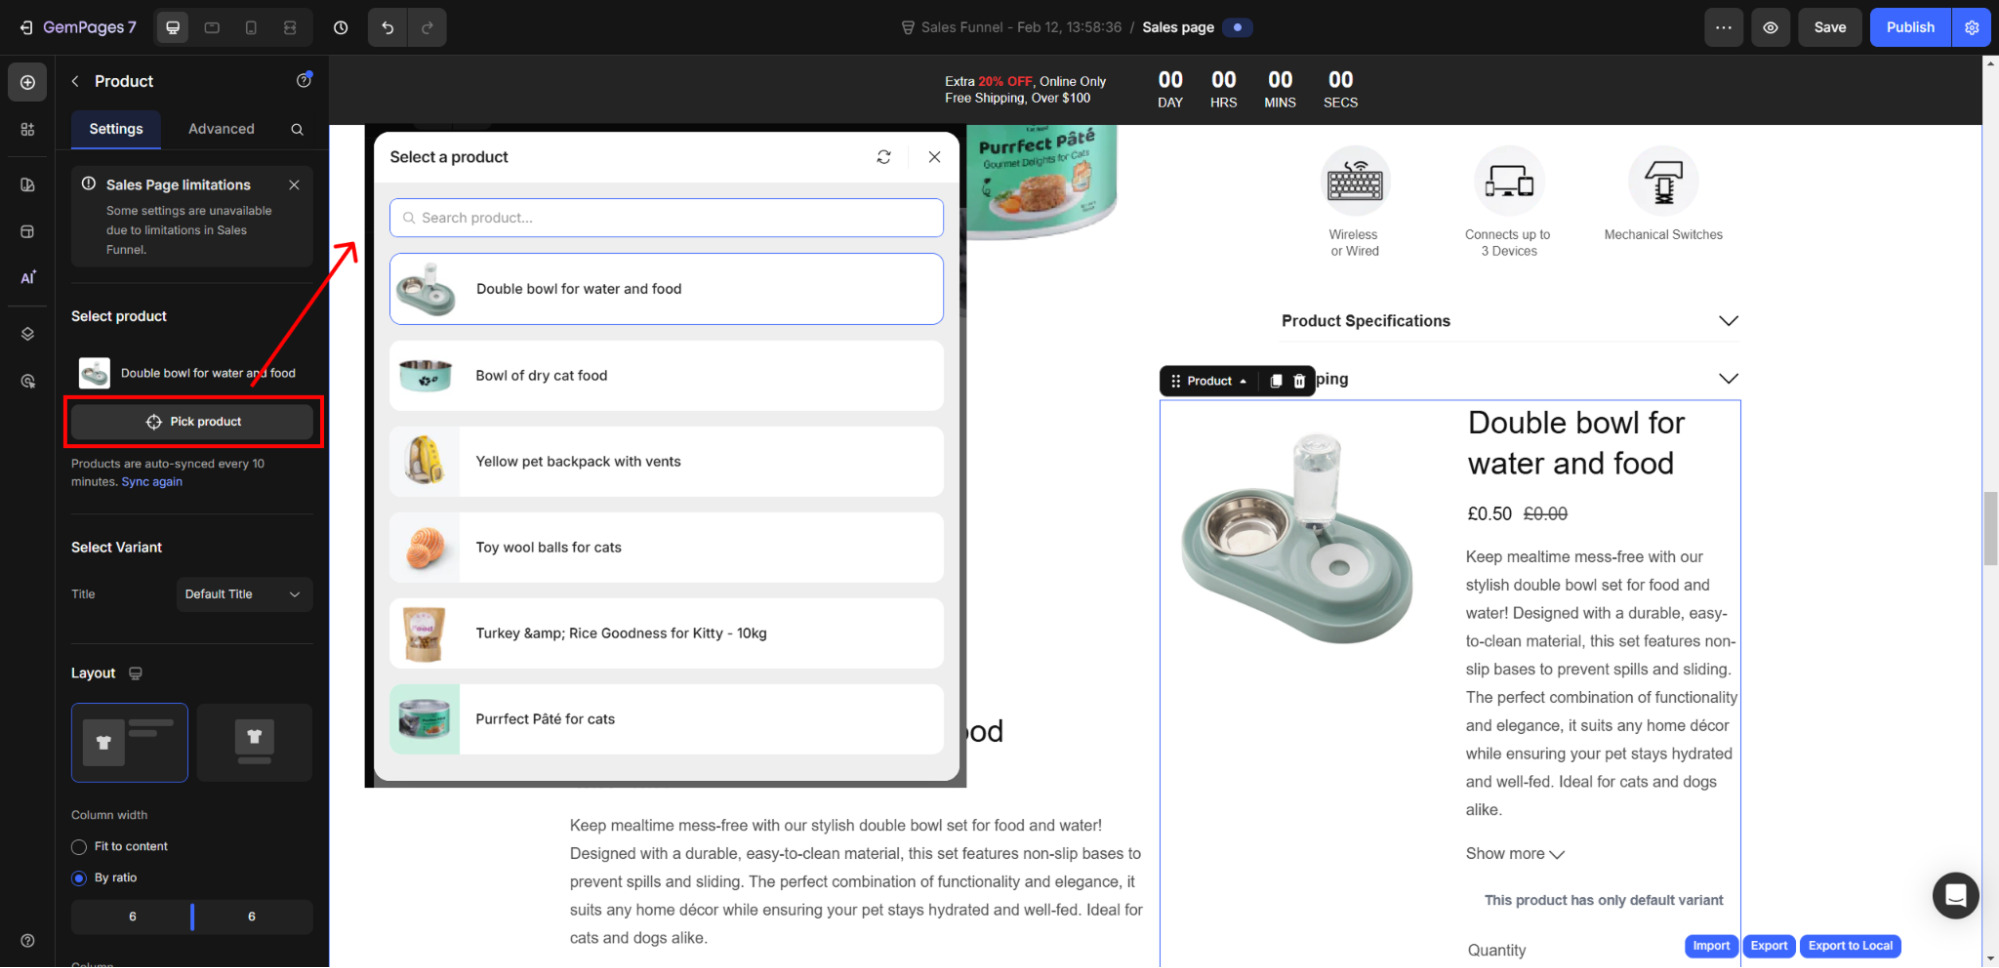 Click on “Pick product” to update with any product from your store
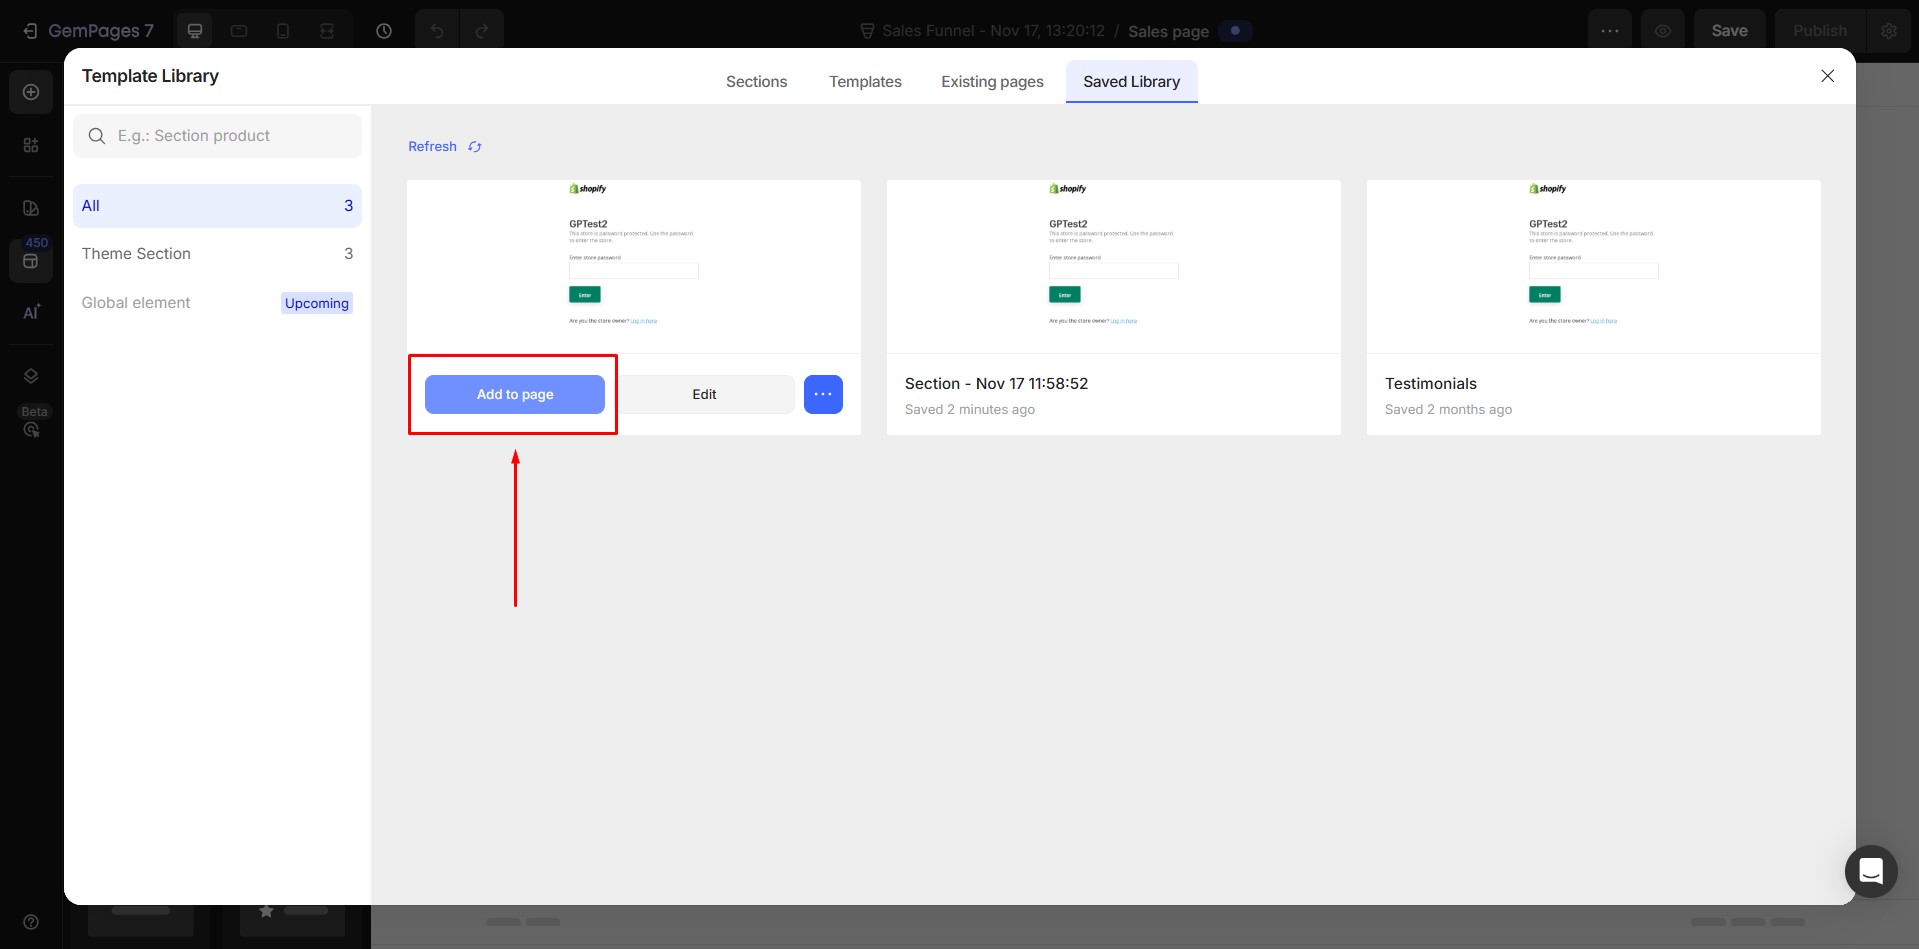
If you want to use another page template, heading to Library > Existing Page > Choose any page type you want.
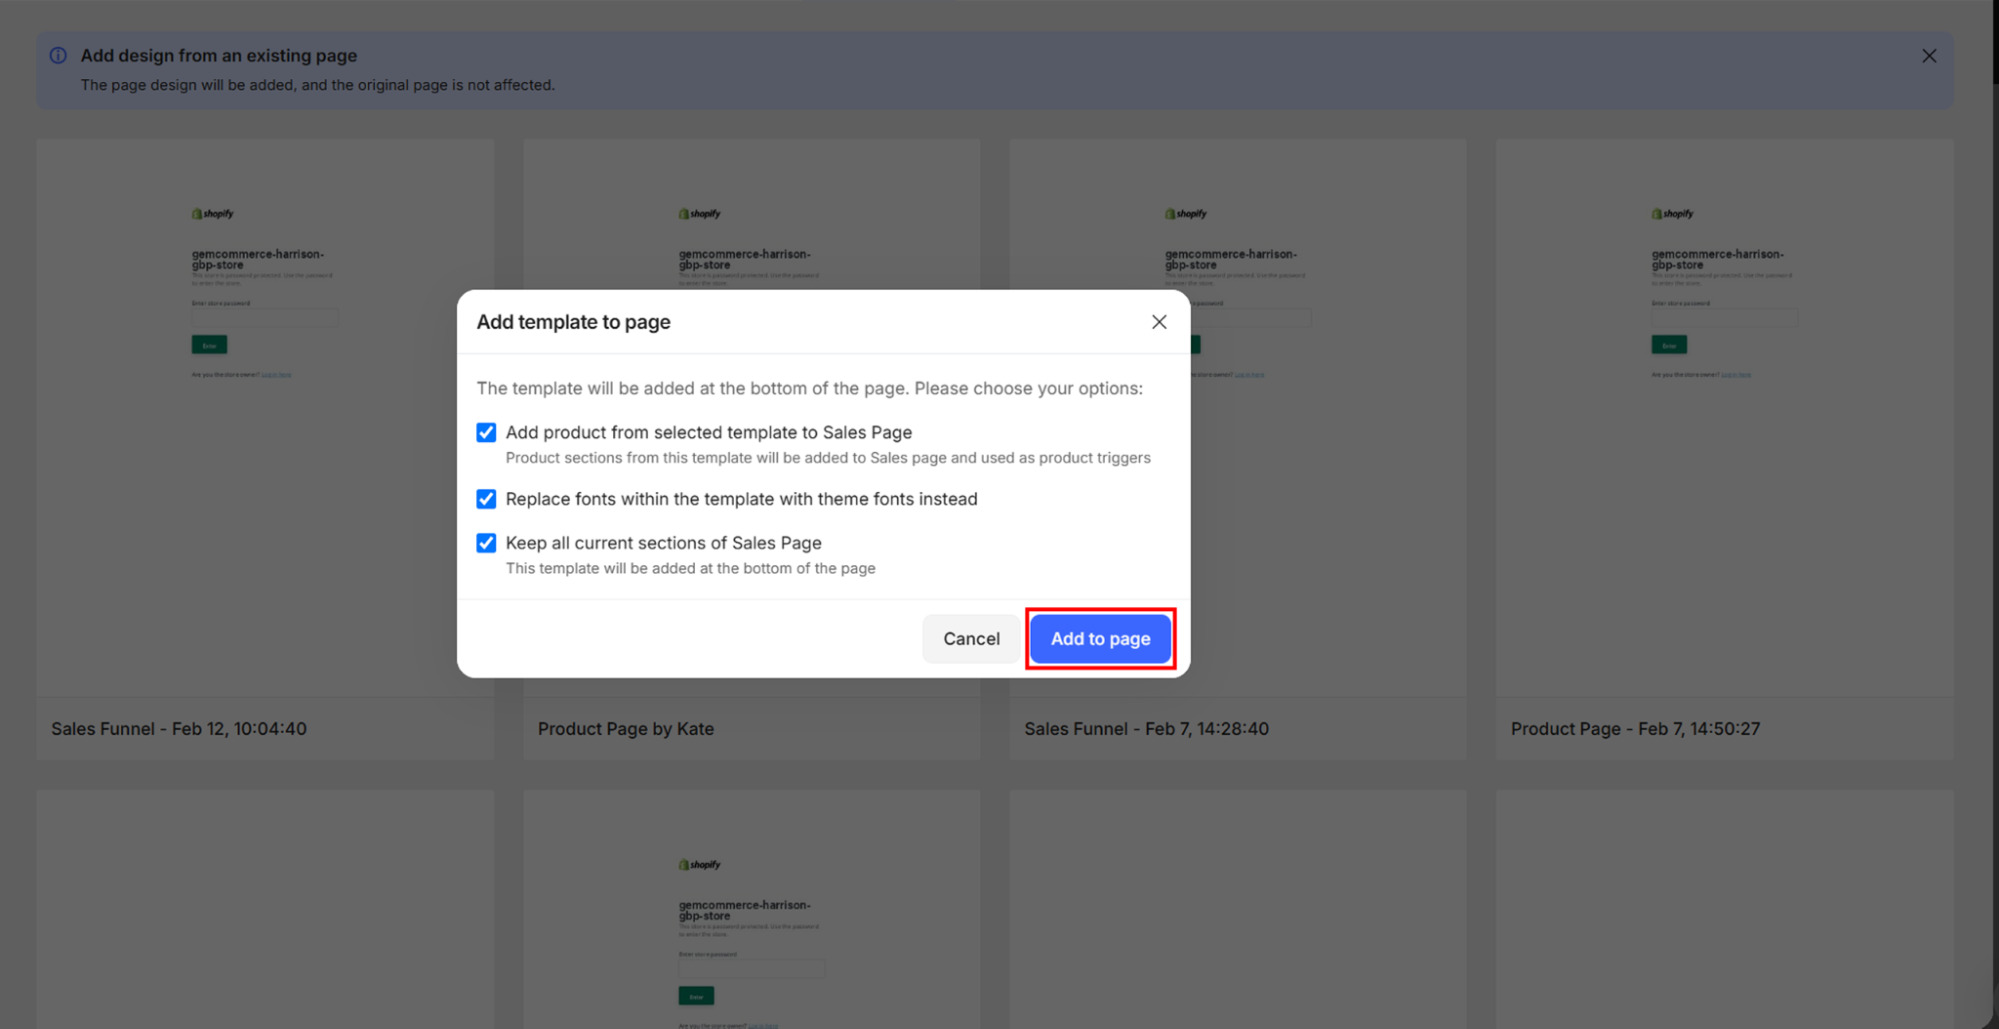
The Editor will prompt you to confirm whether you want to add products from the new page to your existing sales page or replace them all. Pick an option and click on “Add to page” to continue editing.
Option 2: Use a Collection Page as a Template:
- The Product List section will be disabled, as Sales Pages do not support product list elements.
- The rest of the Collection Page layout remains unchanged.
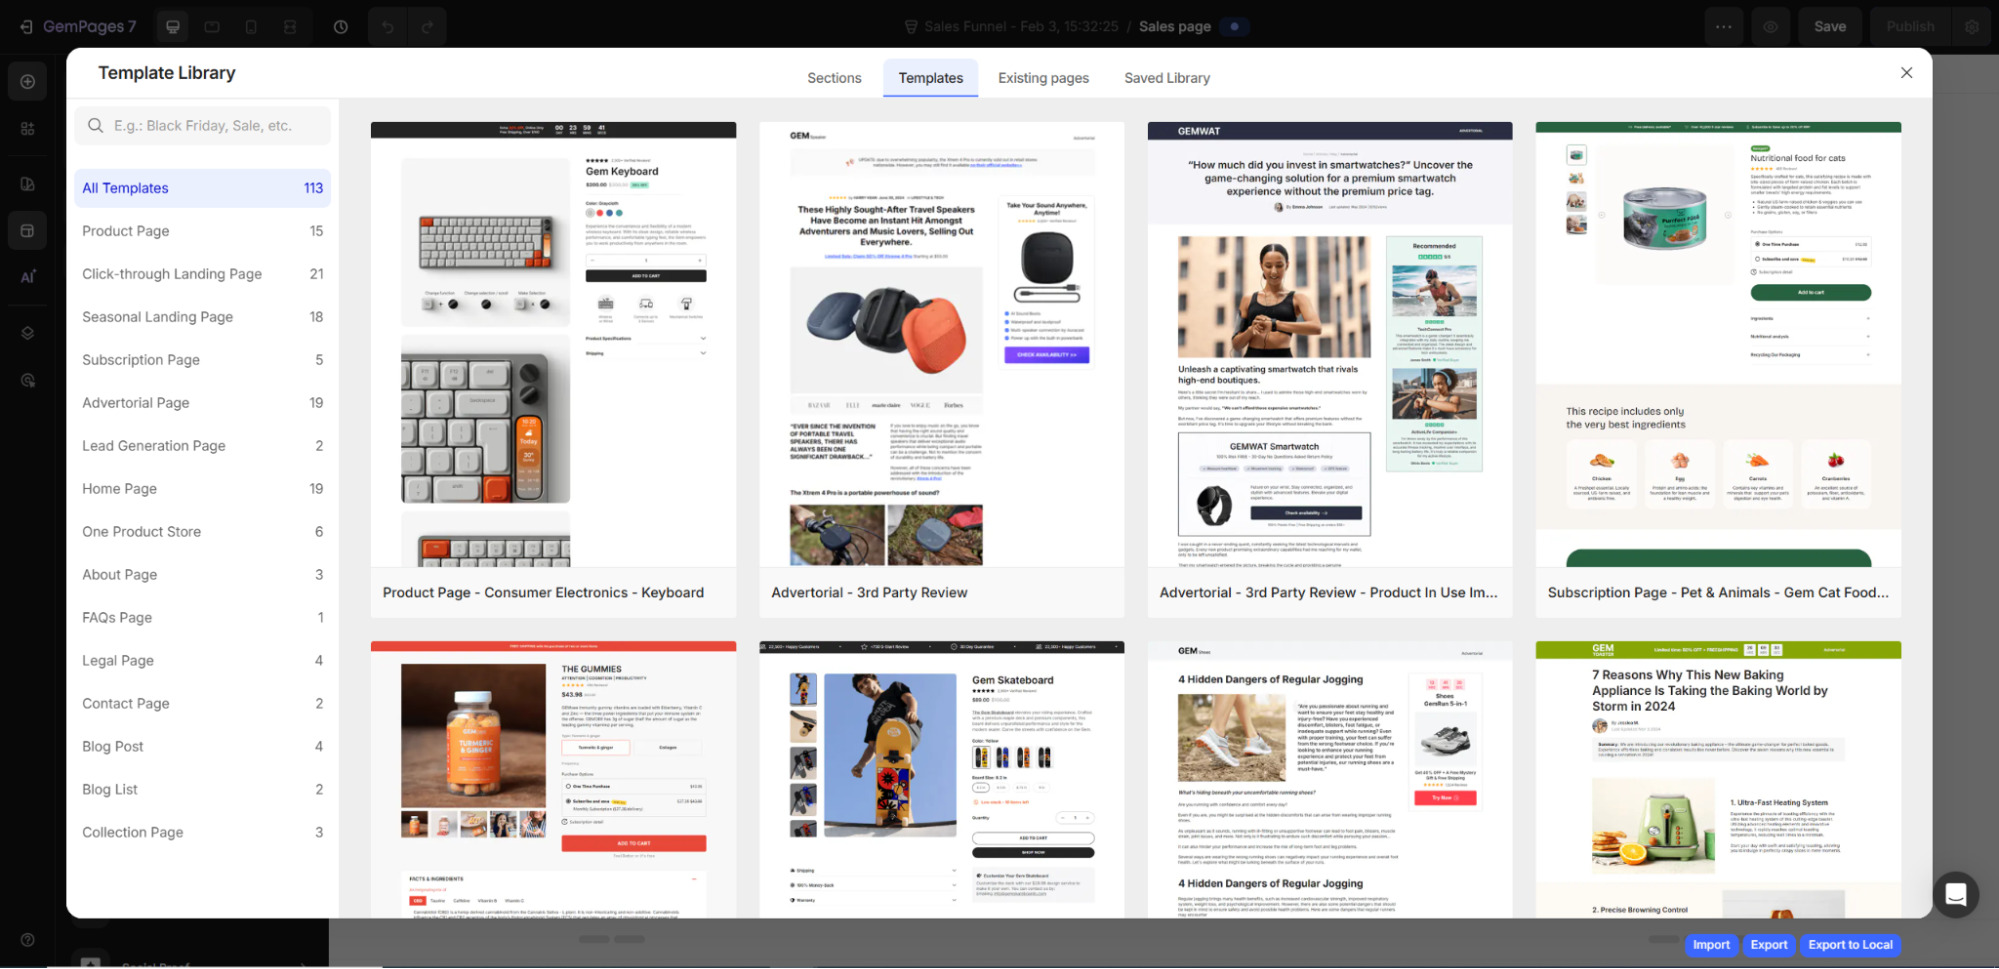
2. If you use pre-made templates
Boost your Shopify store’s success with GemPages’ premium pre-made templates—crafted with deep market research, high-end design, and conversion-focused strategies.
Our diverse collection caters to every niche, ensuring your store stands out with stunning visuals and seamless user experiences.
Whether you’re launching a brand, optimizing for sales, or refining your store’s aesthetics, these templates provide a hassle-free way to build a professional, high-performing storefront in minutes.
Product Updates on Live Pages
Having finished designing your sales page, click on the “Publish” button at the top right corner to live your page. The Editor will guide you to continue editing the whole funnel including 1st and 2nd upsell/downsell offers.
Moving to the Sales Funnel dashboard, the Settings Panel will display all featured images of products on the Sales Page for easy reference.
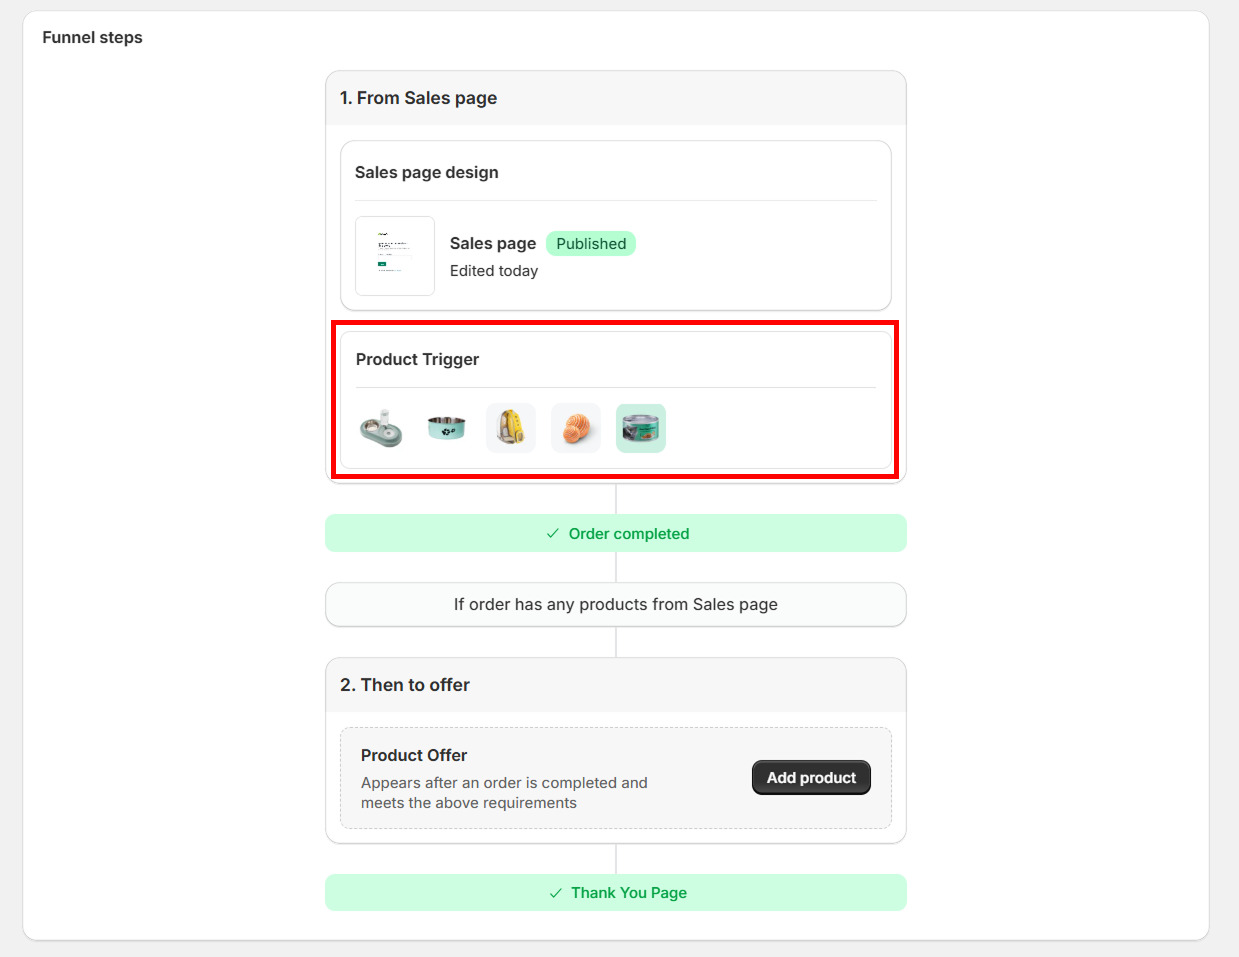
Products’ featured image will be displayed all
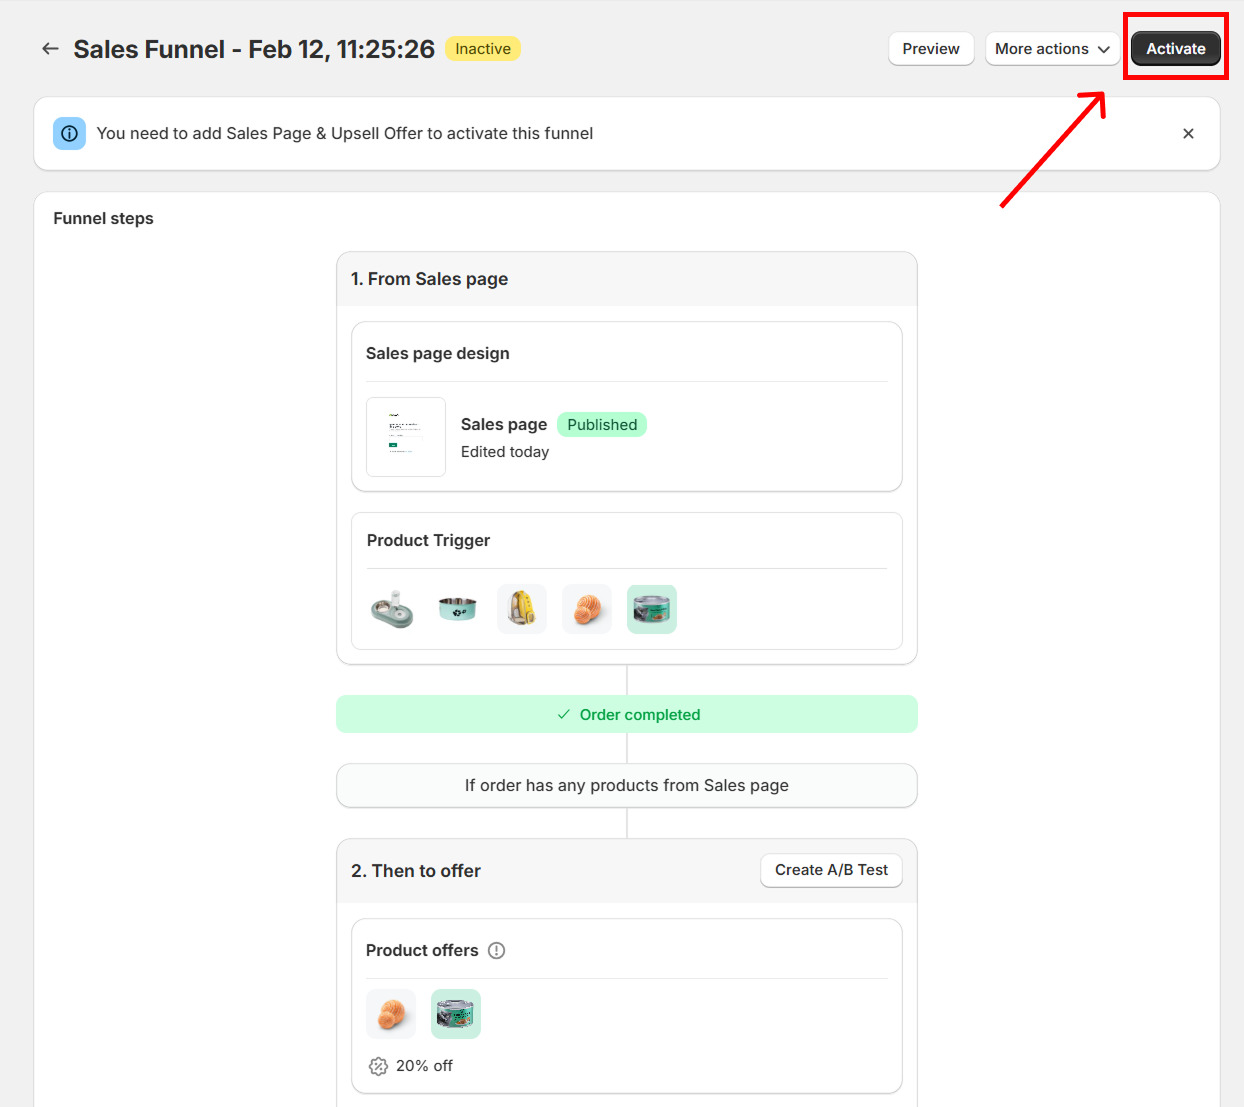
Finally, click Activate Sales Funnel (with a warning prompt that all pages within the funnel will be published) to start selling your products.
Theme Sections in Sales Pages
You can add a Theme Section to a Sales Page, but it will always be detached before being added.
Why detaching is required
Sales Pages automatically use all Product elements on the page as trigger products for the funnel.
If you add a Theme Section containing Product elements, those products would also become trigger products. Because Theme Sections are global, any changes made to them (editing, deleting, or replacing products) would unintentionally modify the Sales Page’s trigger products. To avoid this problem, GemPages detaches the Theme Section when it is added to the Sales Page, making it independent:
- The Sales Page’s trigger products remain unchanged.
- Updates to the global Theme Section will not affect the detached version.
- You can freely edit the section in the Sales Page Editor without impacting global templates.
How detaching works
Case 1: If you add a Theme Section directly to a Sales Page
- The user selects a Theme Section and adds it to the Sales Page.
- A modal appears, explaining that the section will be detached to prevent changes to trigger products.
- The user clicks Detach and add to page.
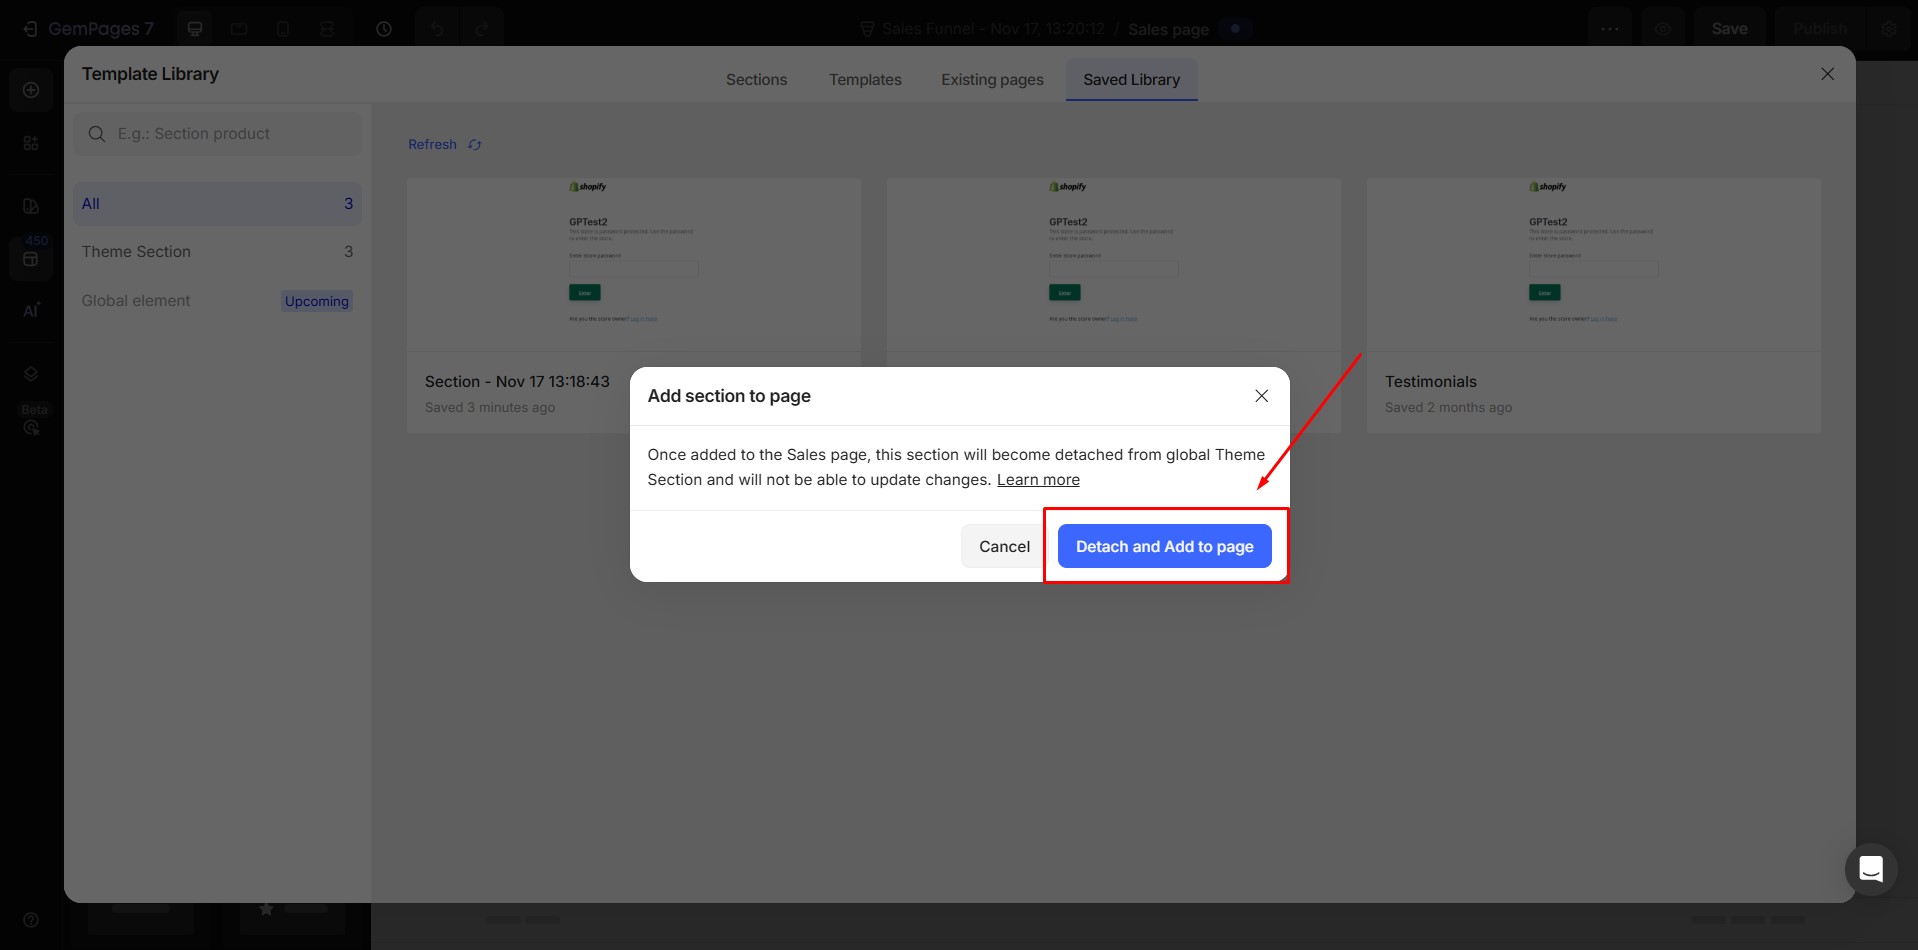
- The Theme Section is detached from the global version and added to the Sales Page.
- The user can now freely edit the section in the Editor.
Case 2: If you add an existing page template that includes Theme Sections
- The user adds an existing page containing Theme Sections with Product elements.
- The modal Add template to page appears.
- If the user chooses Add theme section to sales page, they confirm by clicking Detach and add to page.
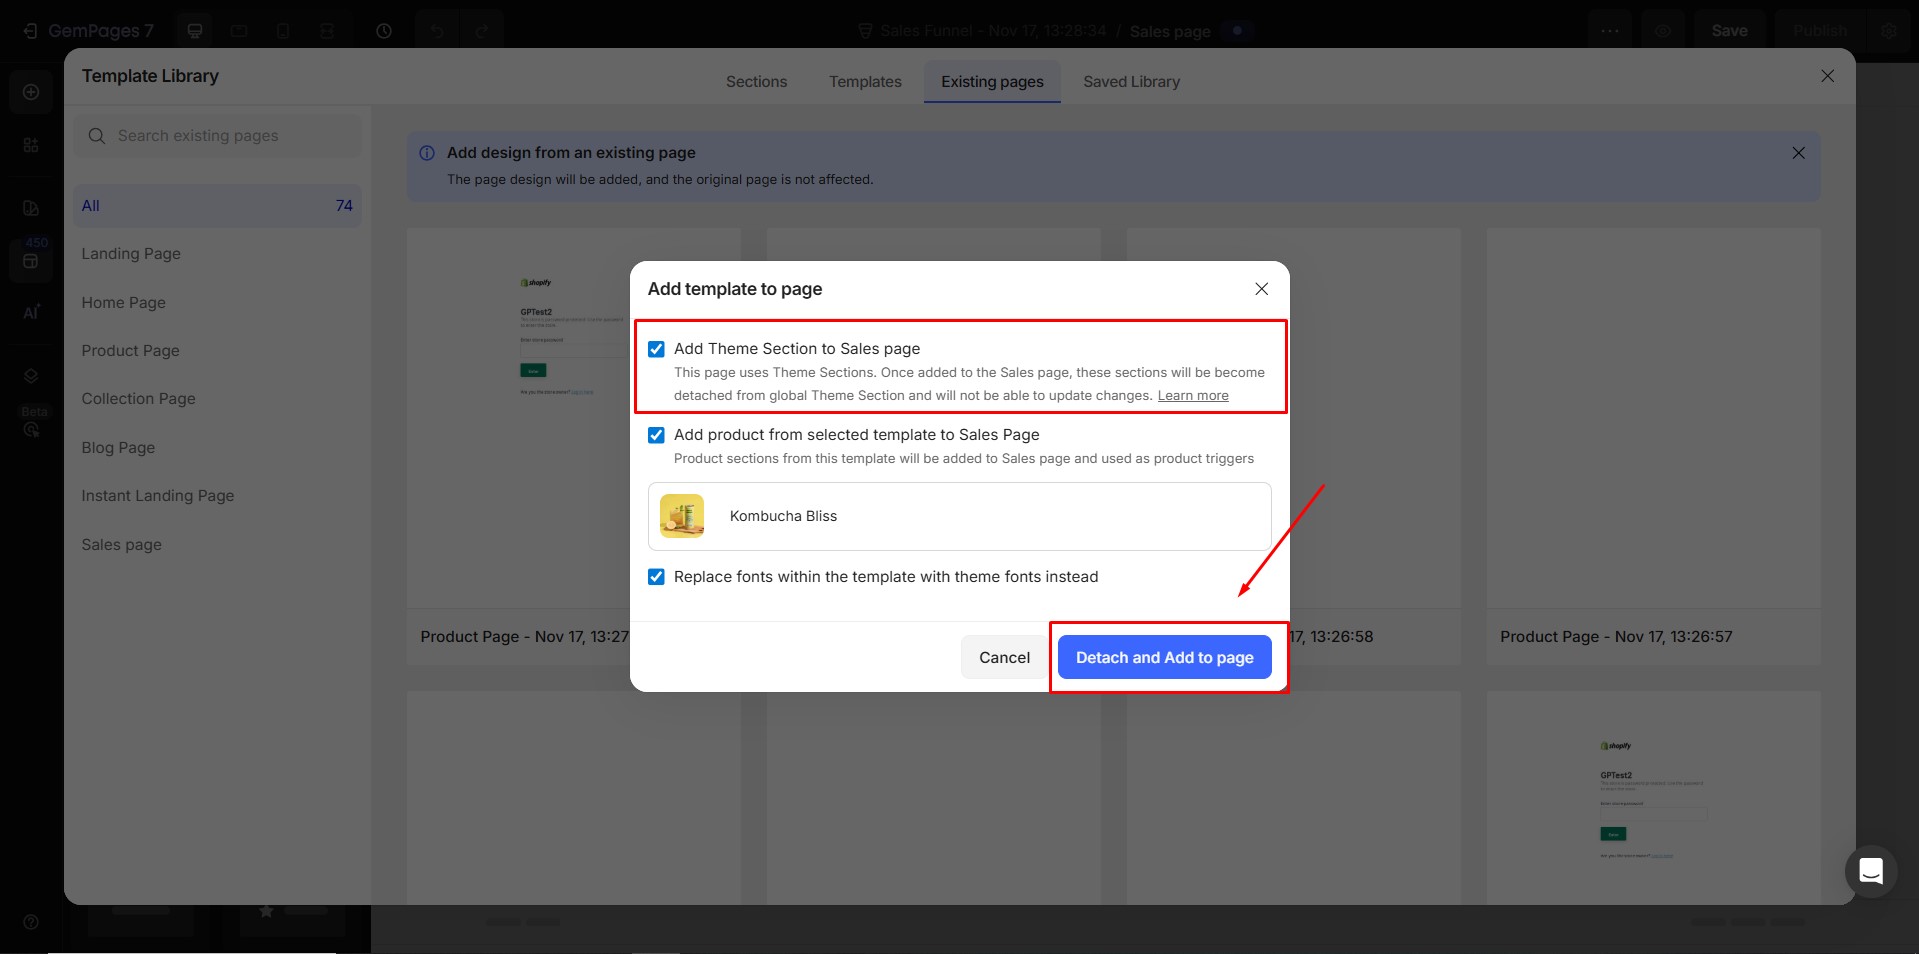
- The Theme Section is detached from the global version and added to the Sales Page.
- The user can edit the section independently without affecting the global template.
FAQs about Sales Page
1. Will customers still see the Upsell page if they don’t purchase from the Sales Page?


Thank you for your comments