


Design the Hero Banner
Step 1: Drag and drop a Hero Banner element to your preferred position and upload your image.

Step 2: Select the Design tab, go to Spacing then reduce the top and bottom padding values to 0.

Step 3: Switch to the Settings tab to enter this extra class: “gem-custom-hero-banner”

Add the overlay effect
Step 1: Drag out a Row element and drop it inside the Hero Banner.

Step 2:
Under the Row element’s Design tab, increase the top and bottom padding to any large value, for example, 200 px.

Then, select a background color under the Background section. This will be the color for your overlay when hovering.

Step 3:
- Enter this extra class under the Settings tab: “gem-custom-hero-banner-overlay”.
- Make the Row full-width by switching the toggle.

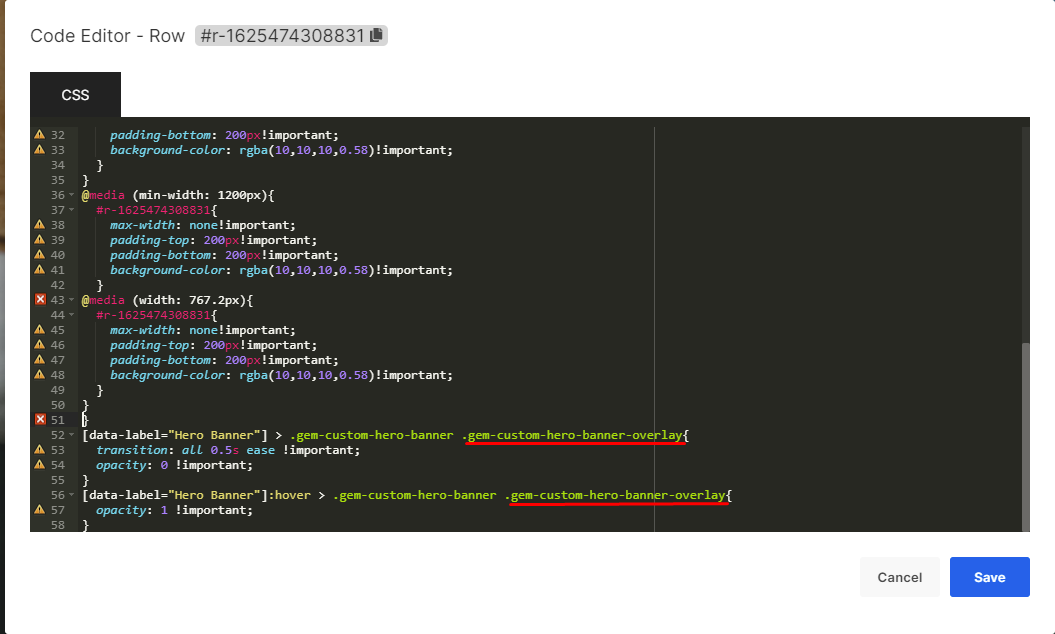
Step 4: Right-click on the Row element’s label and select “Edit Code”.

Add this line of code into your Row’s CSS code structure and “Save”.
[data-label="Hero Banner"] > .gem-custom-hero-banner .gem-custom-hero-banner-overlay{

transition: all 0.5s ease !important;

opacity: 0 !important;

}

[data-label="Hero Banner"]:hover > .gem-custom-hero-banner .gem-custom-hero-banner-overlay{

opacity: 1 !important;

}
Custom the overlay effect
The overlay is fully functional as a normal row element. Therefore, you can drop other elements inside it. For example, let’s give the overlay a text by adding in the Heading element.

Edit the heading’s content

Step 5: Save and Publish to make your change go live.

The final result should look like this:

That’s it! There’s so much more about GemPages for you to discover in our Help Center.


Thank you for your comments