


What Are Shopify Automatic Discounts?
Automatic discounts apply at checkout without customers needing to enter a code. They’re ideal for:
- Buy 1 Get 1 (BOGO) deals
- Quantity-based discounts (e.g., buy 3, get 20% off)
- Sitewide or collection-based promotions
How to Set Up Shopify Automatic Discounts?
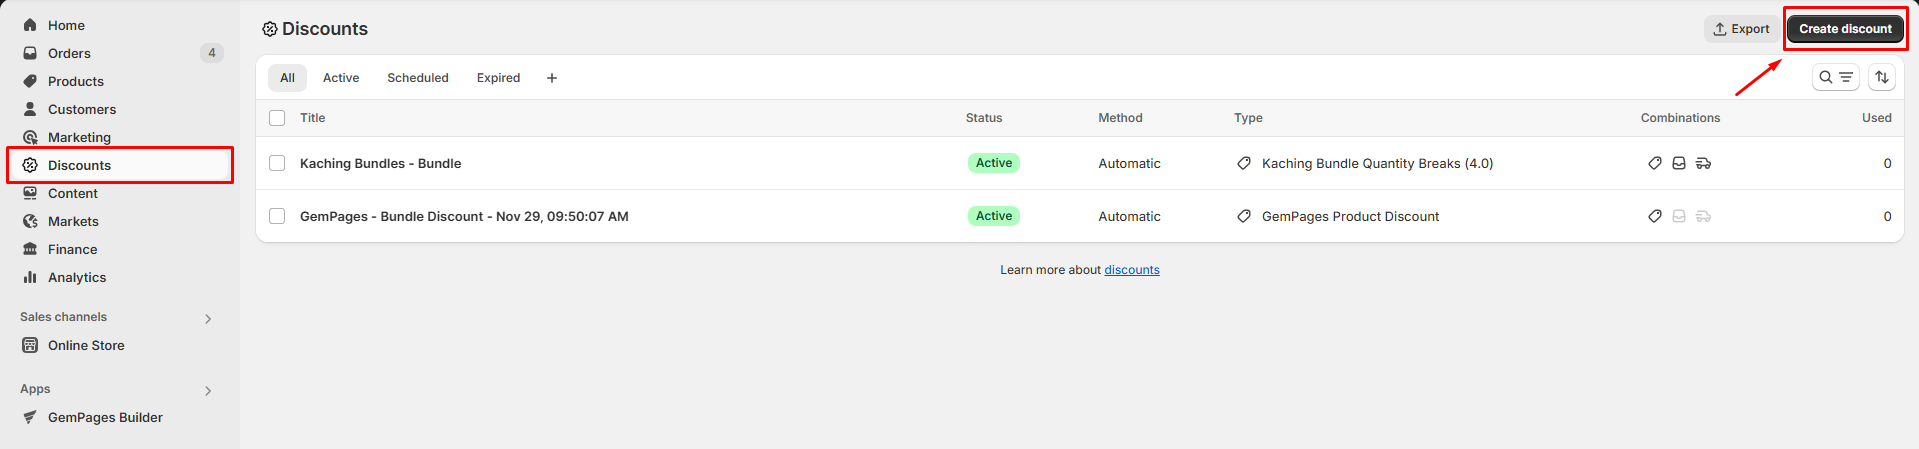
Step 1: Go to the Shopify Admin
- Log in to your Shopify Admin
- From the left menu, go to Discounts
- Click the Create discount button in the top-right corner
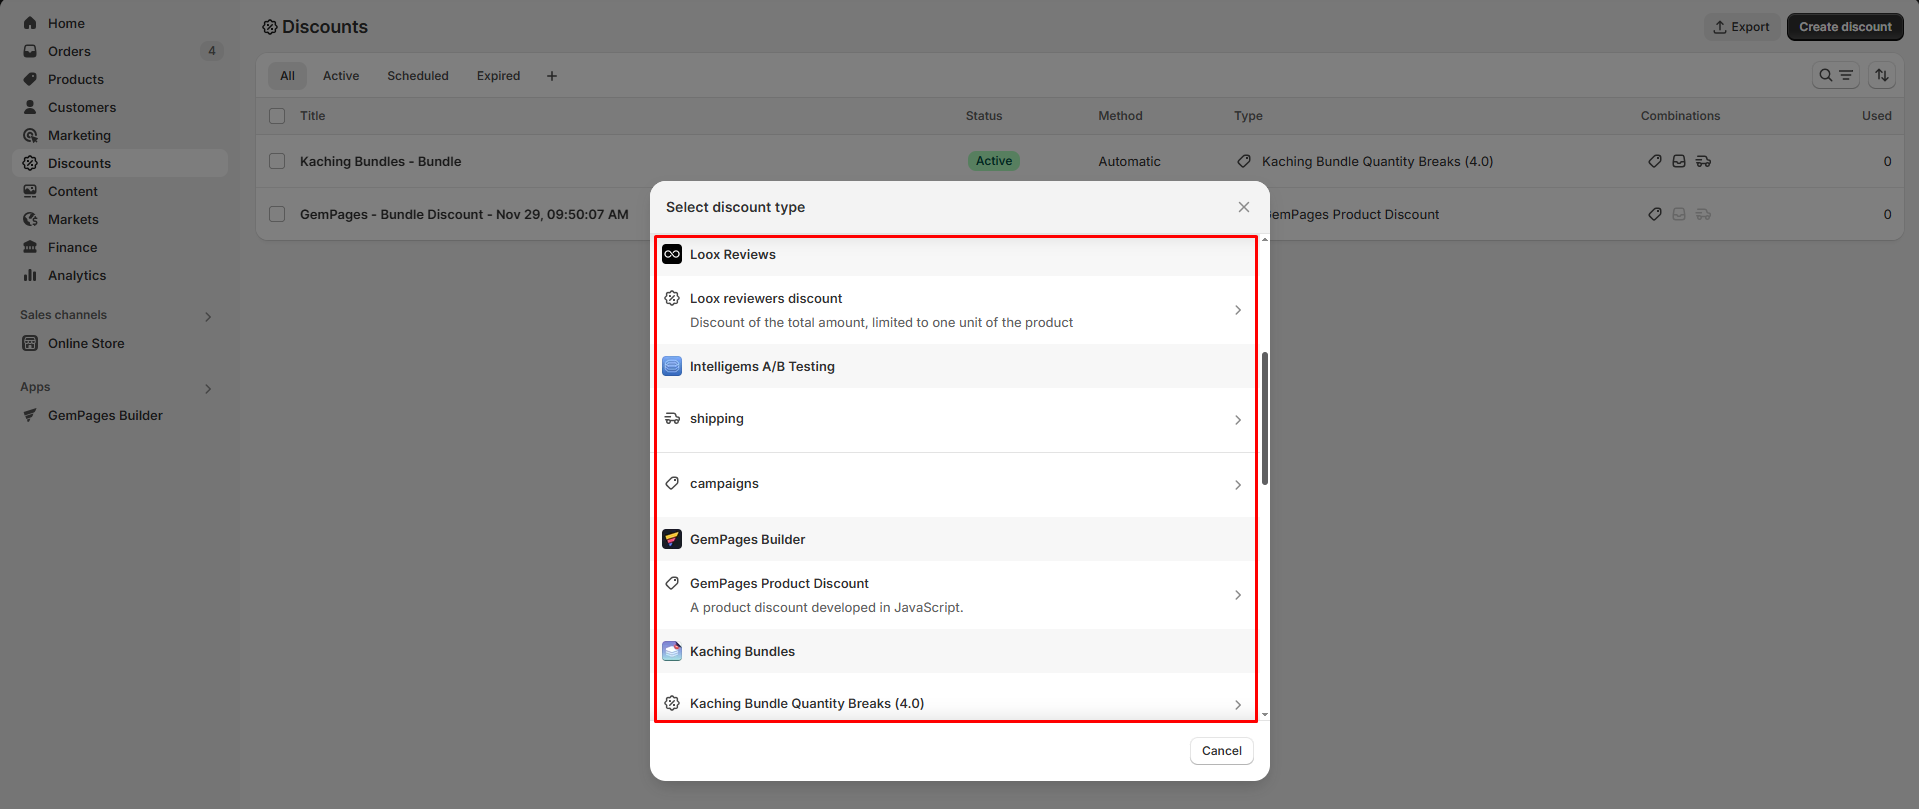
Step 2: Select a Discount Type
You’ll now see a list of available discount types, which may include:
Native Shopify discounts:
- Amount off product
- Buy X, Get Y
- Amount off orders
- Free shipping
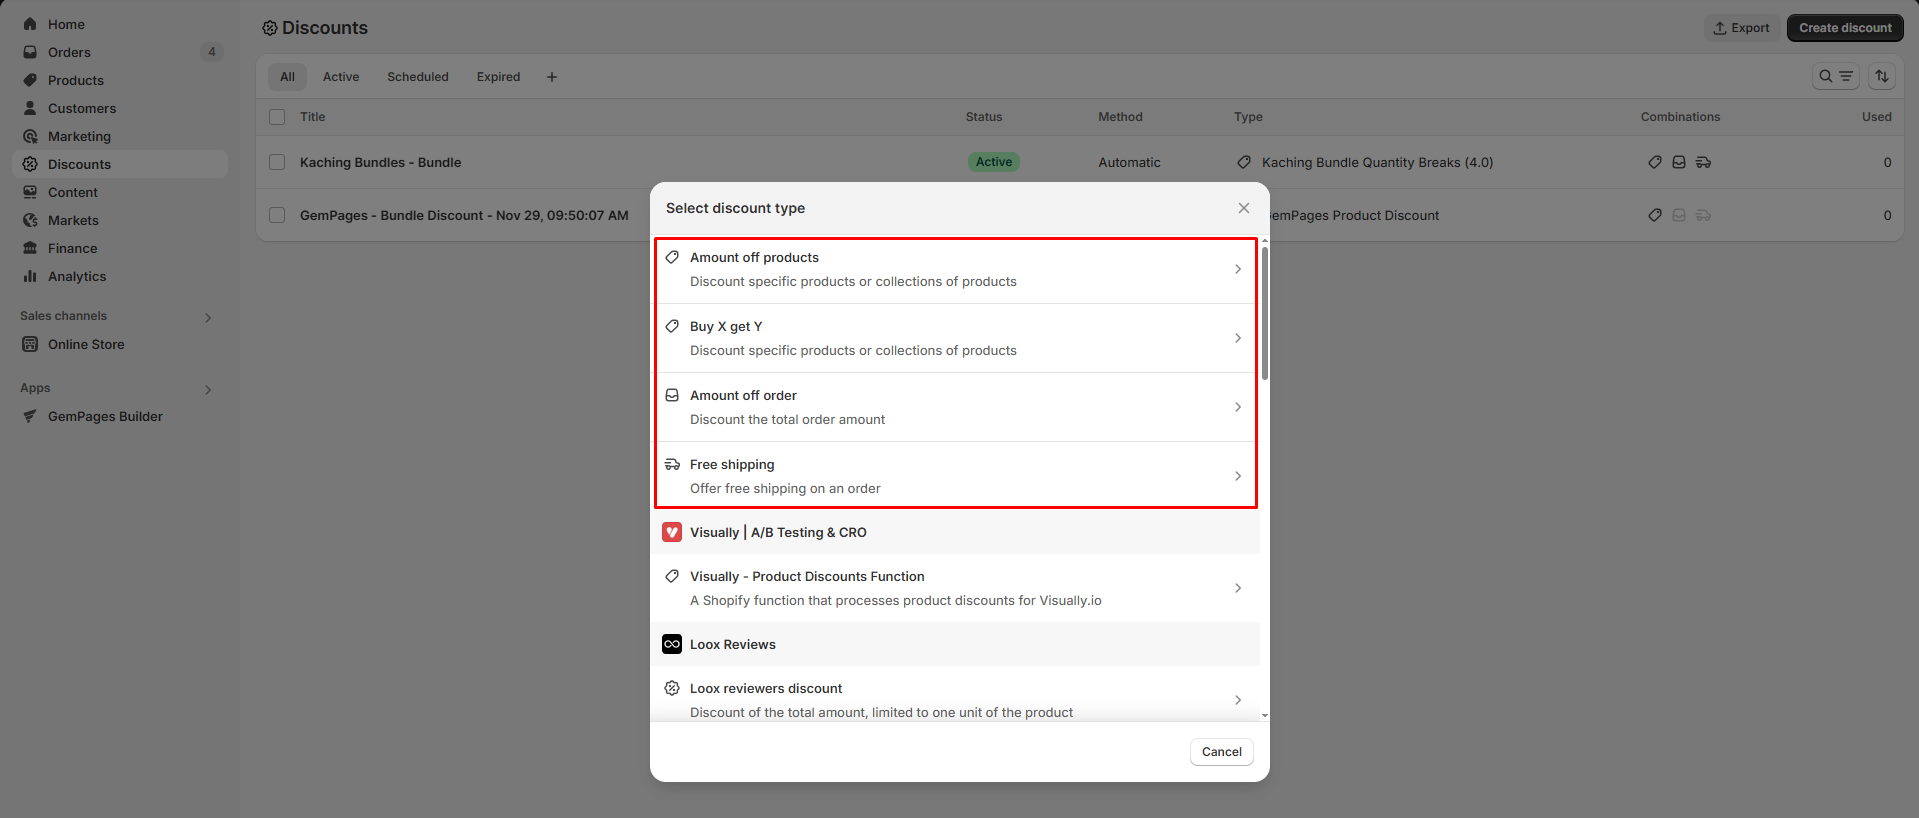
Third-party app discounts (Shopify Functions):
- GemPages Product Discount
- Kaching Bundle Quantity Breaks
- Loox Reviewers Discount
- Intelligems A/B Testing
- And others
Step 3: Configure Discount Details
Once you choose a discount type, you’ll be directed to a setup page. Ensure to select Automatic discount as the method.
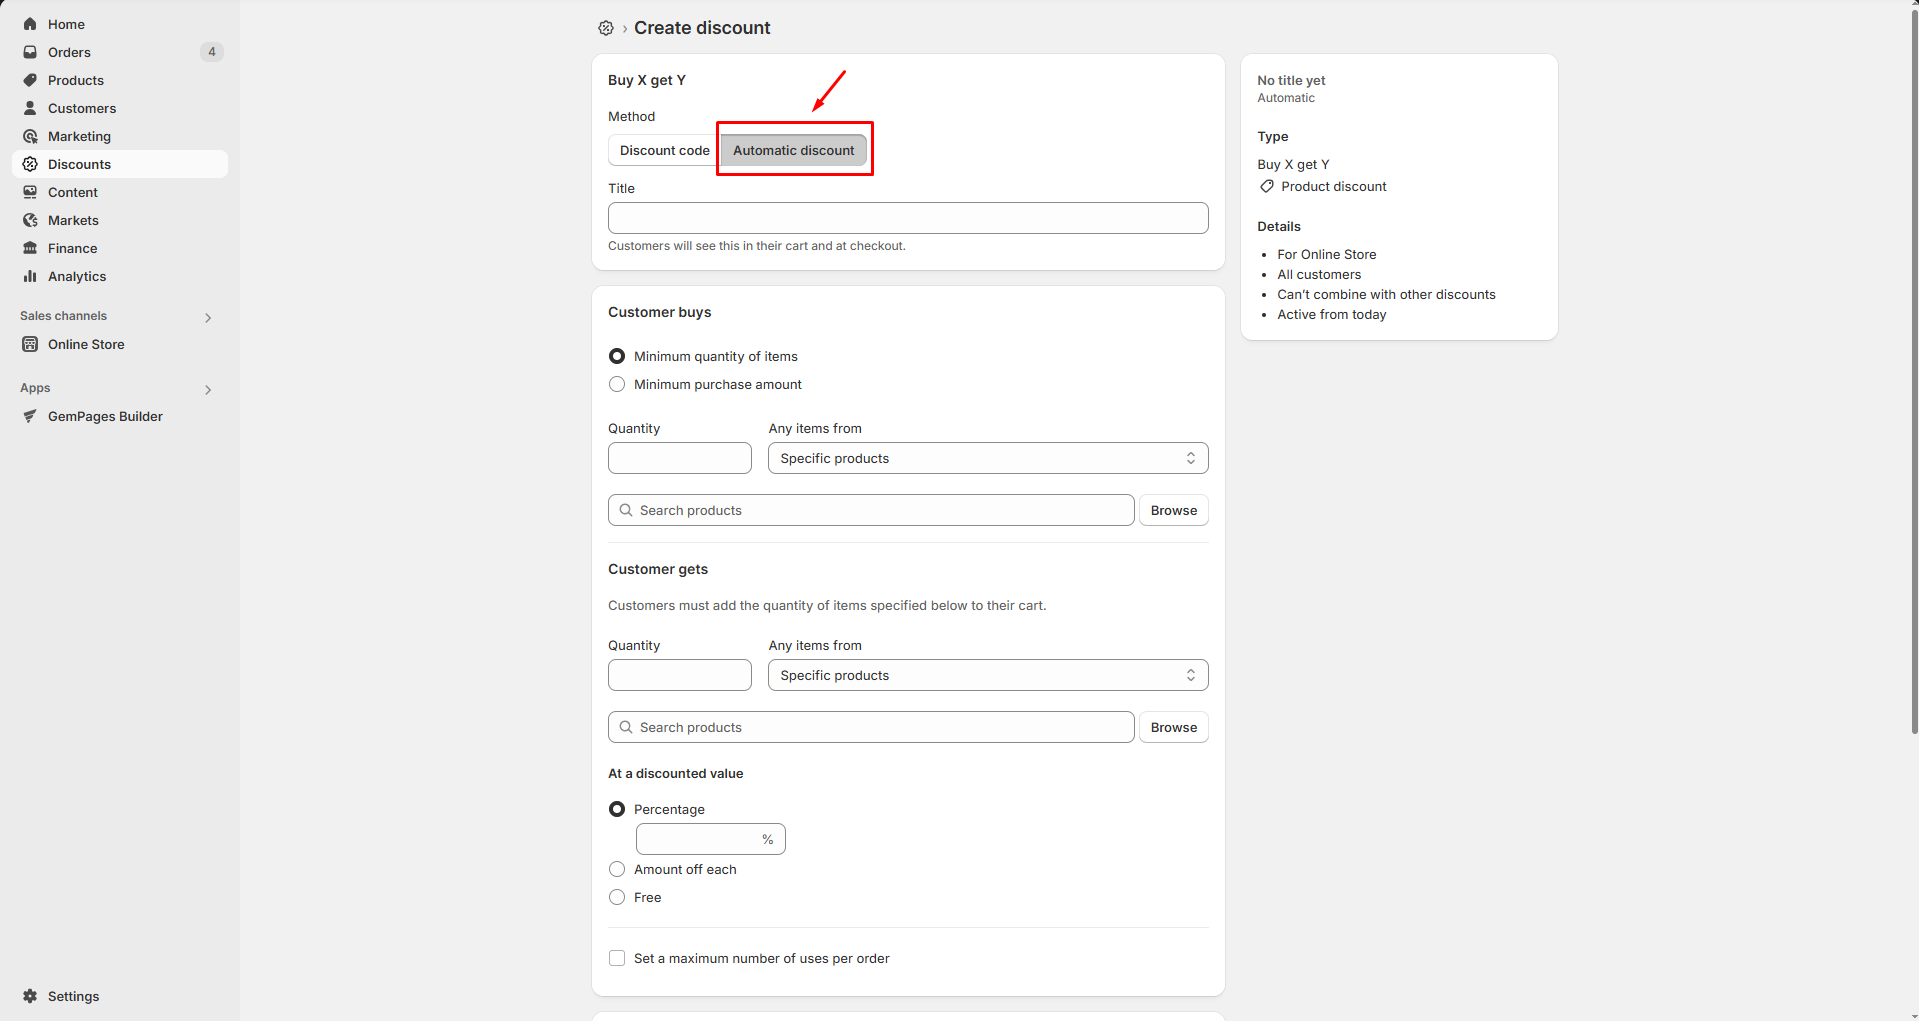
Then, fill in the following fields:
| Field | Definition | Example |
| Name | Internal reference only. Not visible to customers. | BOGO July Campaign |
| Discount Type | The method of discount logic (e.g., % off, fixed amount, BOGO) | 10% off, Buy 2 Get 1 Free |
| Applies to | Define whether it applies to the whole order, collections, or specific items | Applies to all accessories |
| Minimum Requirements | Conditions to trigger the discount | Minimum purchase of $50 |
| Customer Eligibility | Choose whether the discount is for all, specific groups, or returning customers | Only for newsletter subscribers |
| Active Dates | Set the start and end date/time of the promotion | July 20-July 31, 2025 |
Step 4: Review and Save
Click Save to activate your discount. It will be applied automatically based on the criteria you defined.
If you’re working with GemPages
In case you’re using GemPages or similar apps, please note that:
- The discounts are powered by Shopify Functions and apply automatically at checkout.
- You can manage them directly in Shopify Admin under Discounts.
- To visually show the discount logic on your custom-built pages, we recommend adding badges, banners, or custom messages in GemPages (e.g., “Buy 2, Get 1 Free – Applied at Checkout”).
FAQs
1. Can I have more than one automatic discount active at a time?
No. Shopify only allows one automatic discount to be active per checkout session. If you try to activate another, it will override the existing one.
2. How do I show my automatic discount on a GemPages-built landing page?
While Shopify handles discount logic at checkout, GemPages does not automatically display discount pricing. You can:
- Add static text/badges like “Discount Applied at Checkout”
- Use dynamic pricing logic via product elements (if the discount is reflected in the Shopify product API)
- Or manually duplicate the logic in your GemPages design using custom code
3. What does “developed in JavaScript” or “Shopify Function” mean in the discount type list?
These refer to custom discount logic created by Shopify apps (like GemPages or Kaching) using Shopify Functions. They give apps more flexibility to control pricing rules and eligibility.
4. Can I schedule an automatic discount to start/end later?
Yes. When setting up your discount, just scroll to the “Active Dates” section to choose a start and end time. The discount will only apply during that timeframe.
5. Where can I check if the automatic discount was used?
Go to Shopify Admin > Discounts, and look under the Used column for each discount. This shows how many orders applied that specific rule.


Thank you for your comments