


What Are Digital Products?
Digital products are intangible assets or media that can be distributed online without the need for physical inventory. Customers receive them instantly via download or access links after purchase. Examples include:
- Ebooks & PDFs
- Online courses & tutorials
- Software & mobile apps
- Digital art, illustrations & printables
- Website themes & templates
- Audio files, music, or sound effects
- Stock photos & videos
- Licenses and usage rights for digital content
Because there are no shipping costs or manufacturing requirements, digital products are highly scalable and offer excellent profit margins.
Why You Should Sell Digital Products on Shopify
Shopify is an ideal platform for digital products because it combines ease of use with powerful eCommerce functionality. Here’s why digital sellers choose Shopify:
- Built-in payment gateways make transactions seamless.
- No shipping hassles: You sell once, deliver instantly.
- Scalability: Sell to a global audience 24/7.
- App ecosystem: Shopify App Store offers powerful tools for secure file delivery.
Popular Digital Products to Sell
If you’re unsure where to start, consider these high-demand digital products:
| Category | Product Ideas |
| Education & Learning | Ebooks, cheat sheets, lesson plans, courses |
| Creatives & Designers | Fonts, illustrations, templates, mockups |
| Audio & Music | Loops, beats, background tracks, SFX |
| Developers & Tech | Software, plugins, tools, code snippets |
| Business & Marketing | Workbooks, swipe files, pitch decks |
| Lifestyle & Hobby | Journals, planners, fitness guides |
Make sure your offering solves a problem or enhances your customer’s life. It’s key to standing out in a crowded marketplace.
How to Add Digital Products to Your Shopify Store
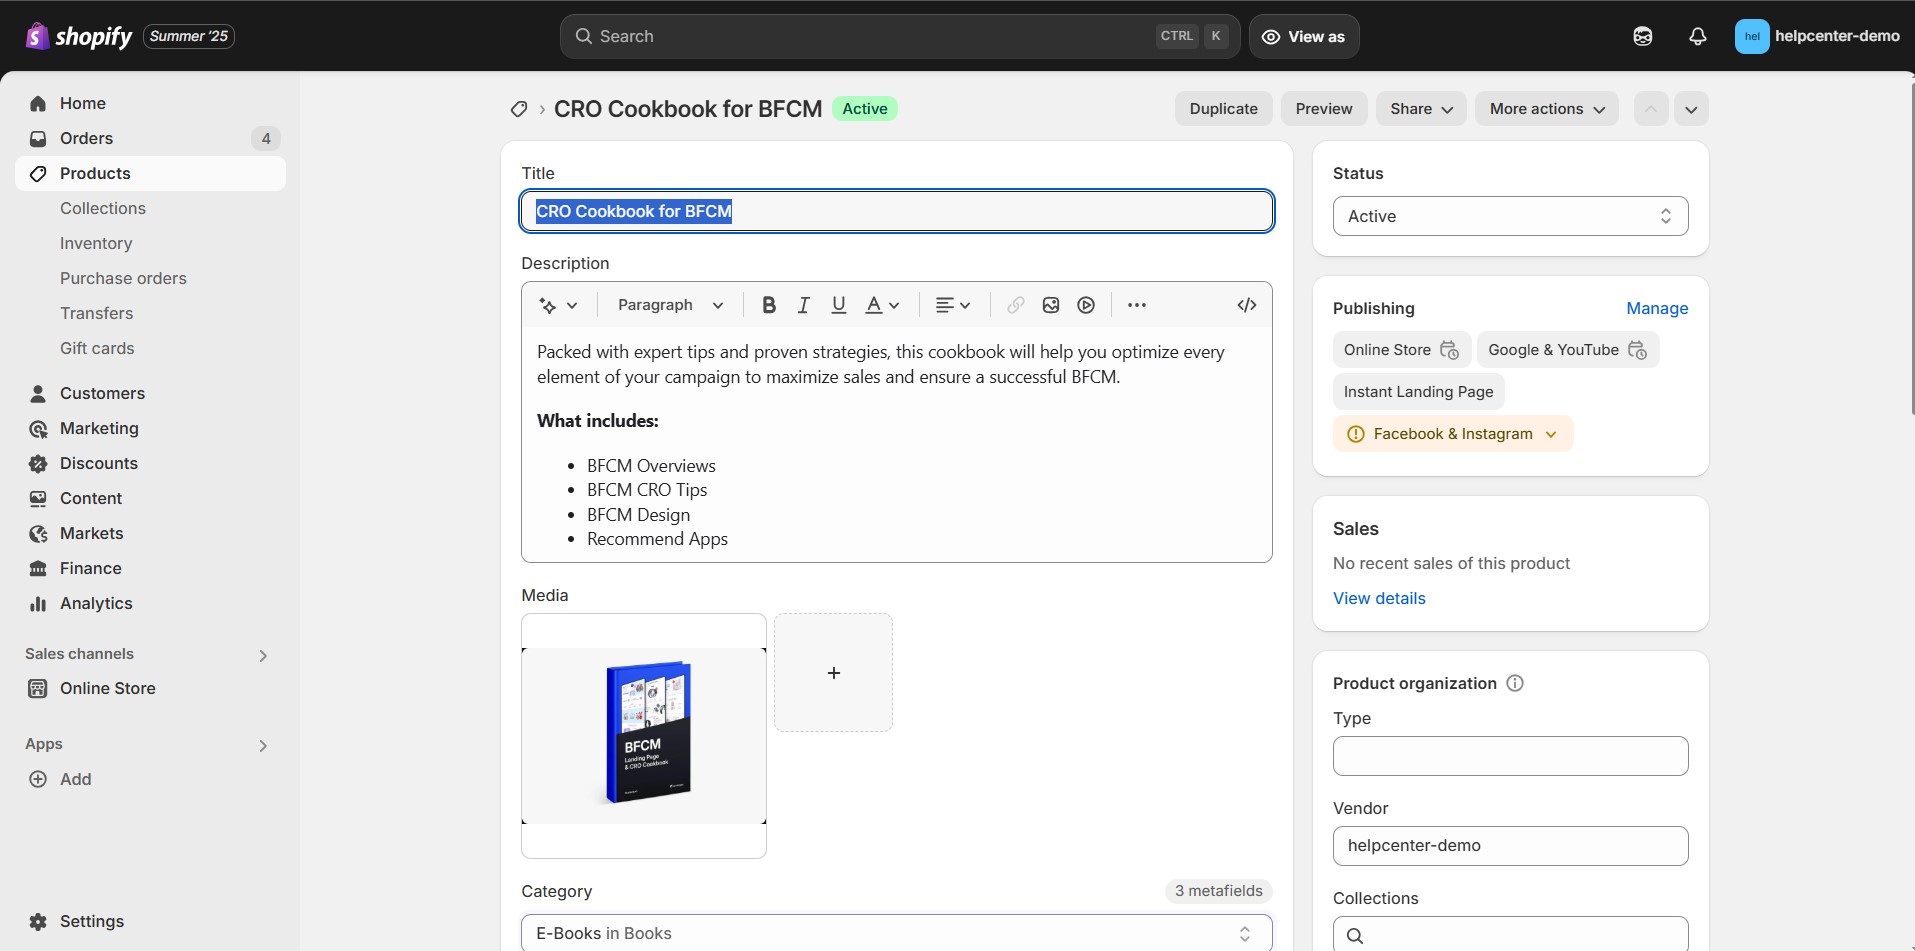
Step 1: Create a New Product
- In Shopify Admin, go to Products > Add Product
- Enter your Product Title
- Add a clear description that explains what’s included, the use case, file formats, and how the customer receives it.
- Upload relevant product images or a preview (e.g., a screenshot of a template, a video walkthrough)
Step 2: Set the Price and Inventory
- In the Pricing section, add the price.
- Leave the Compare-at Price blank unless you’re showing a discount.
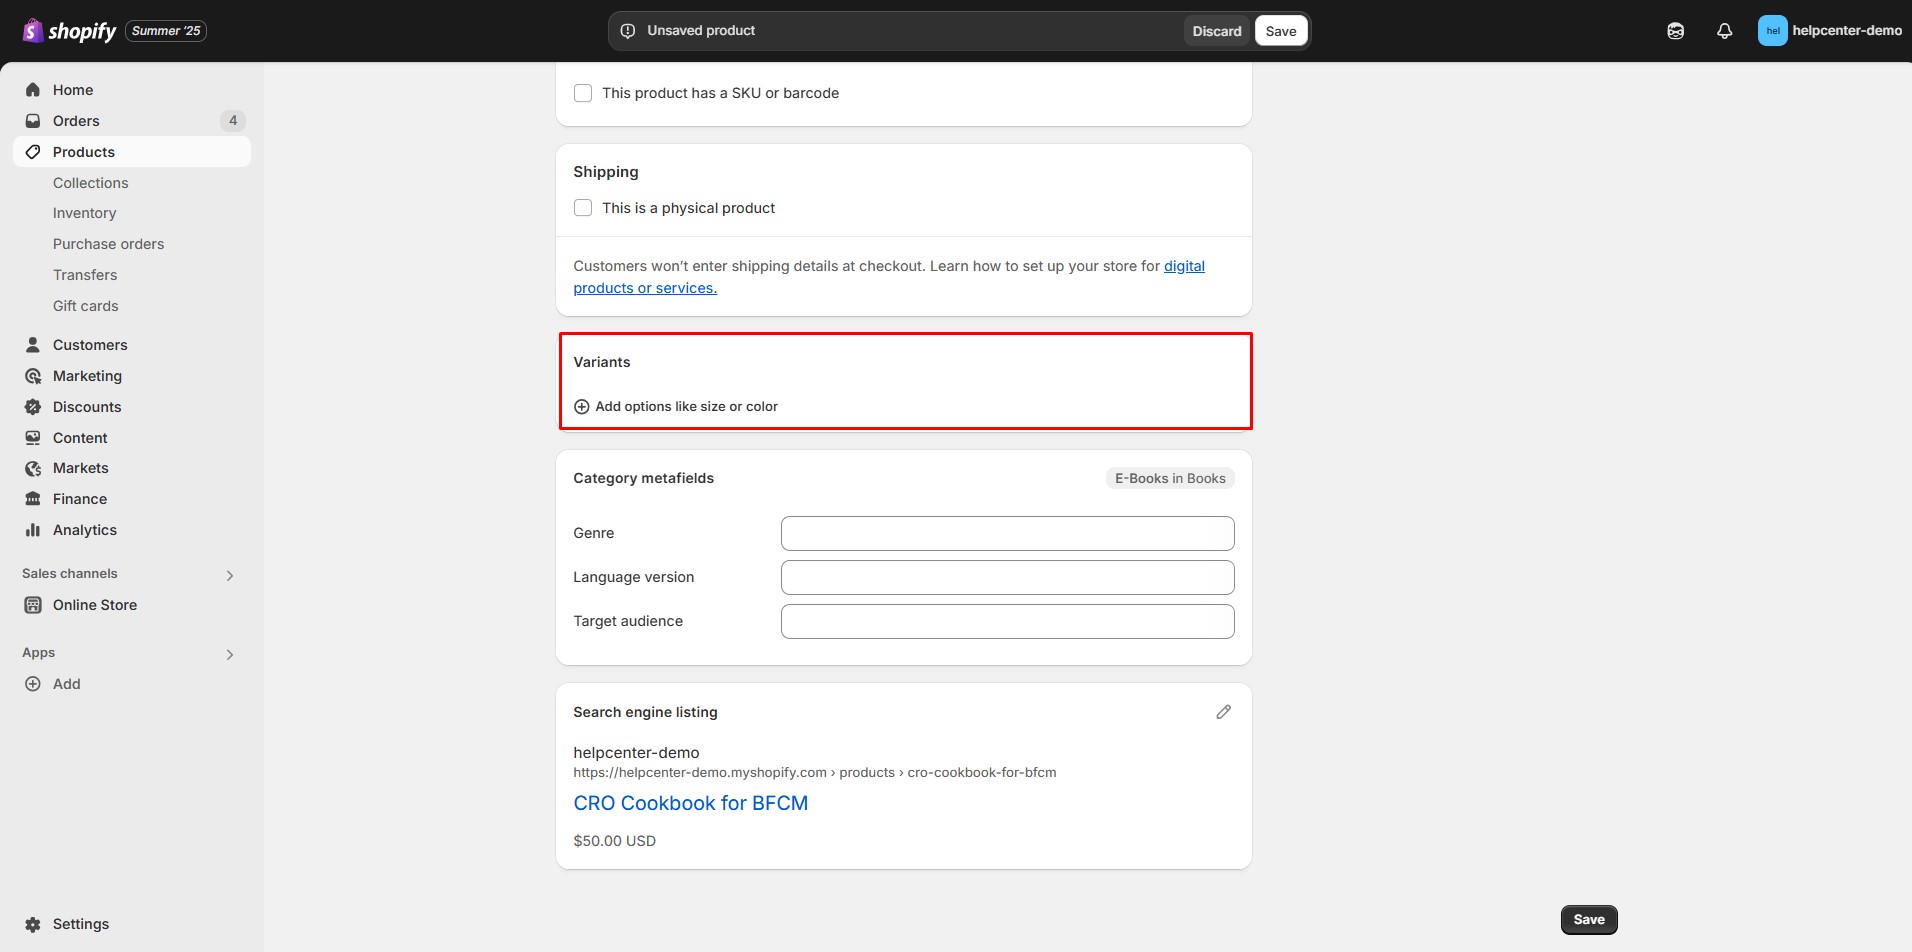
- Uncheck “Track quantity” to prevent the digital products from running out.
- Uncheck “This is a physical product” to ensure that Shopify doesn’t ask for shipping info at checkout.

Step 3: Add Variants (Optional)
If your product includes different formats or licenses, you can add them as variants:
- Example: “PDF” vs “Editable Canva Link”
- Or: “Personal Use” vs “Commercial License”
Step 4: Save Your Product
Click Save to create the product.
Your digital product is now listed in your store, but you still need to attach the file download.
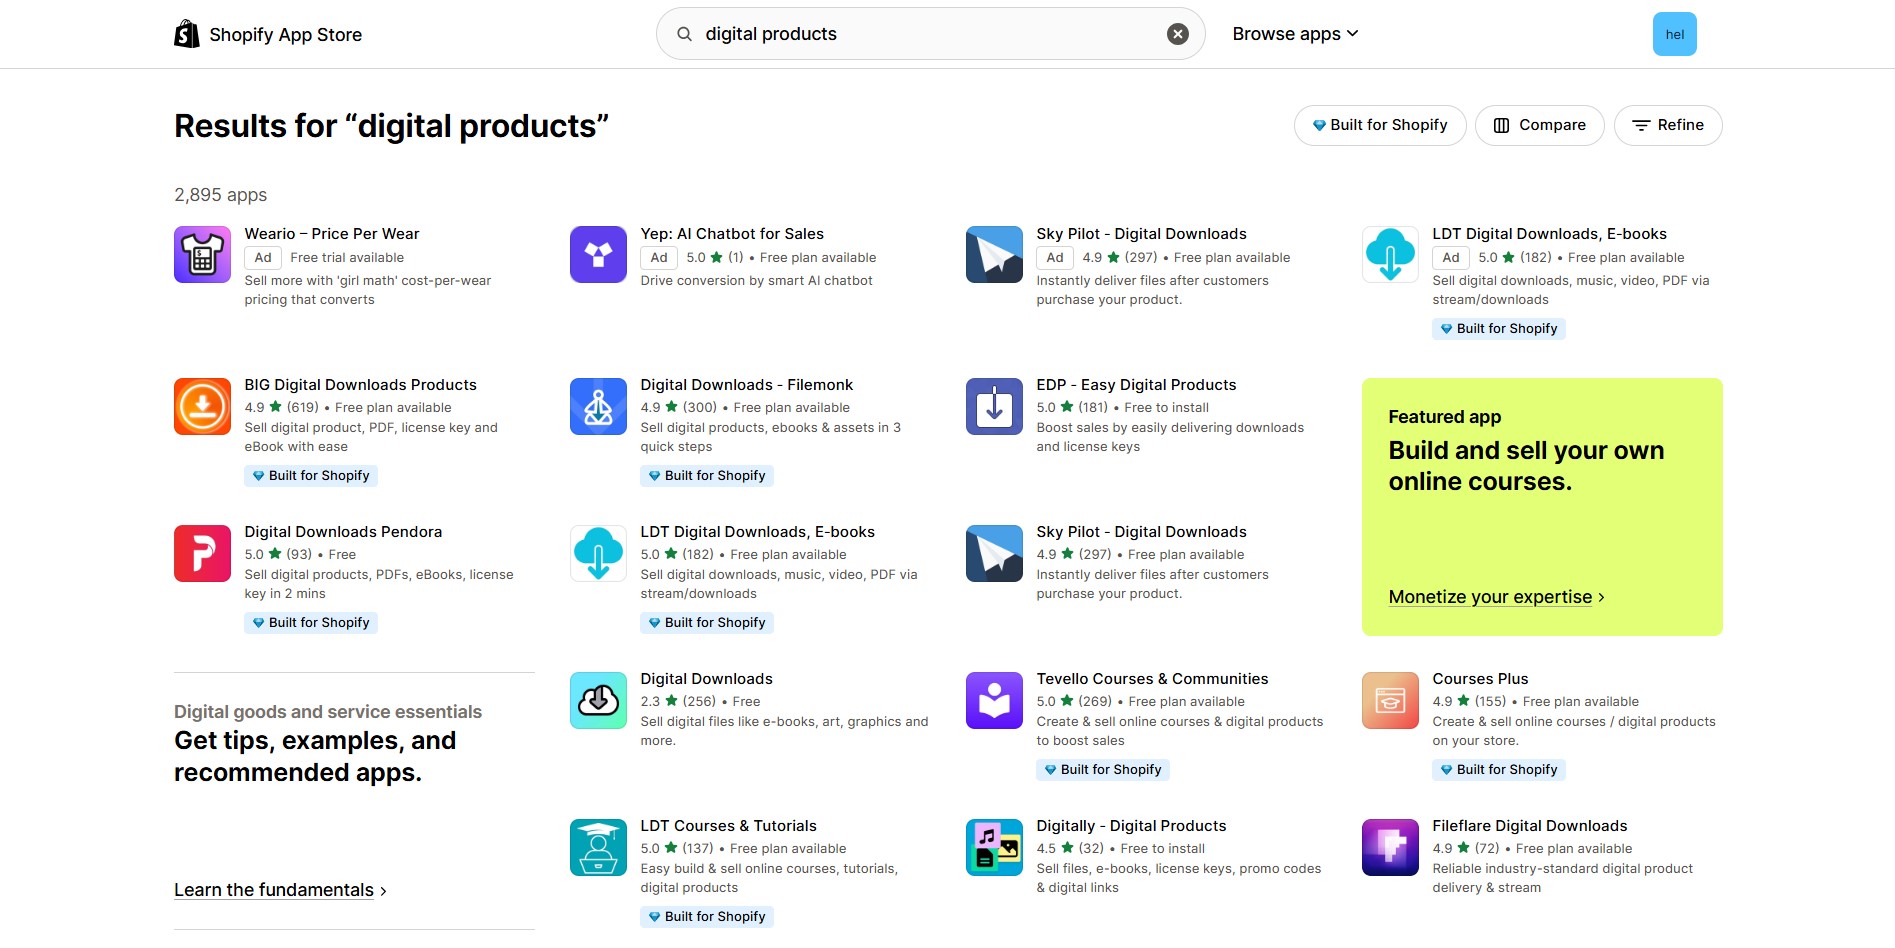
Step 5: Deliver the Digital File via an App
Shopify doesn’t offer built-in file delivery for digital products, so you’ll need to use a third-party app from the Shopify App Store. These apps allow you to automatically send customers a secure download link after purchase.
To get started:
- Go to the Shopify App Store and choose a digital delivery app.
- Install the app and open it from your Shopify admin.
- Once inside, you’ll see a list of your products—select the one you want to link a file to.
- Upload your digital file (like a PDF, ZIP, or audio track) and configure delivery settings.
How to Design a Digital Product Page with GemPages
Creating a conversion-focused product page is essential for digital products, especially since buyers can’t “touch” the item.
Here’s how to do it with GemPages:
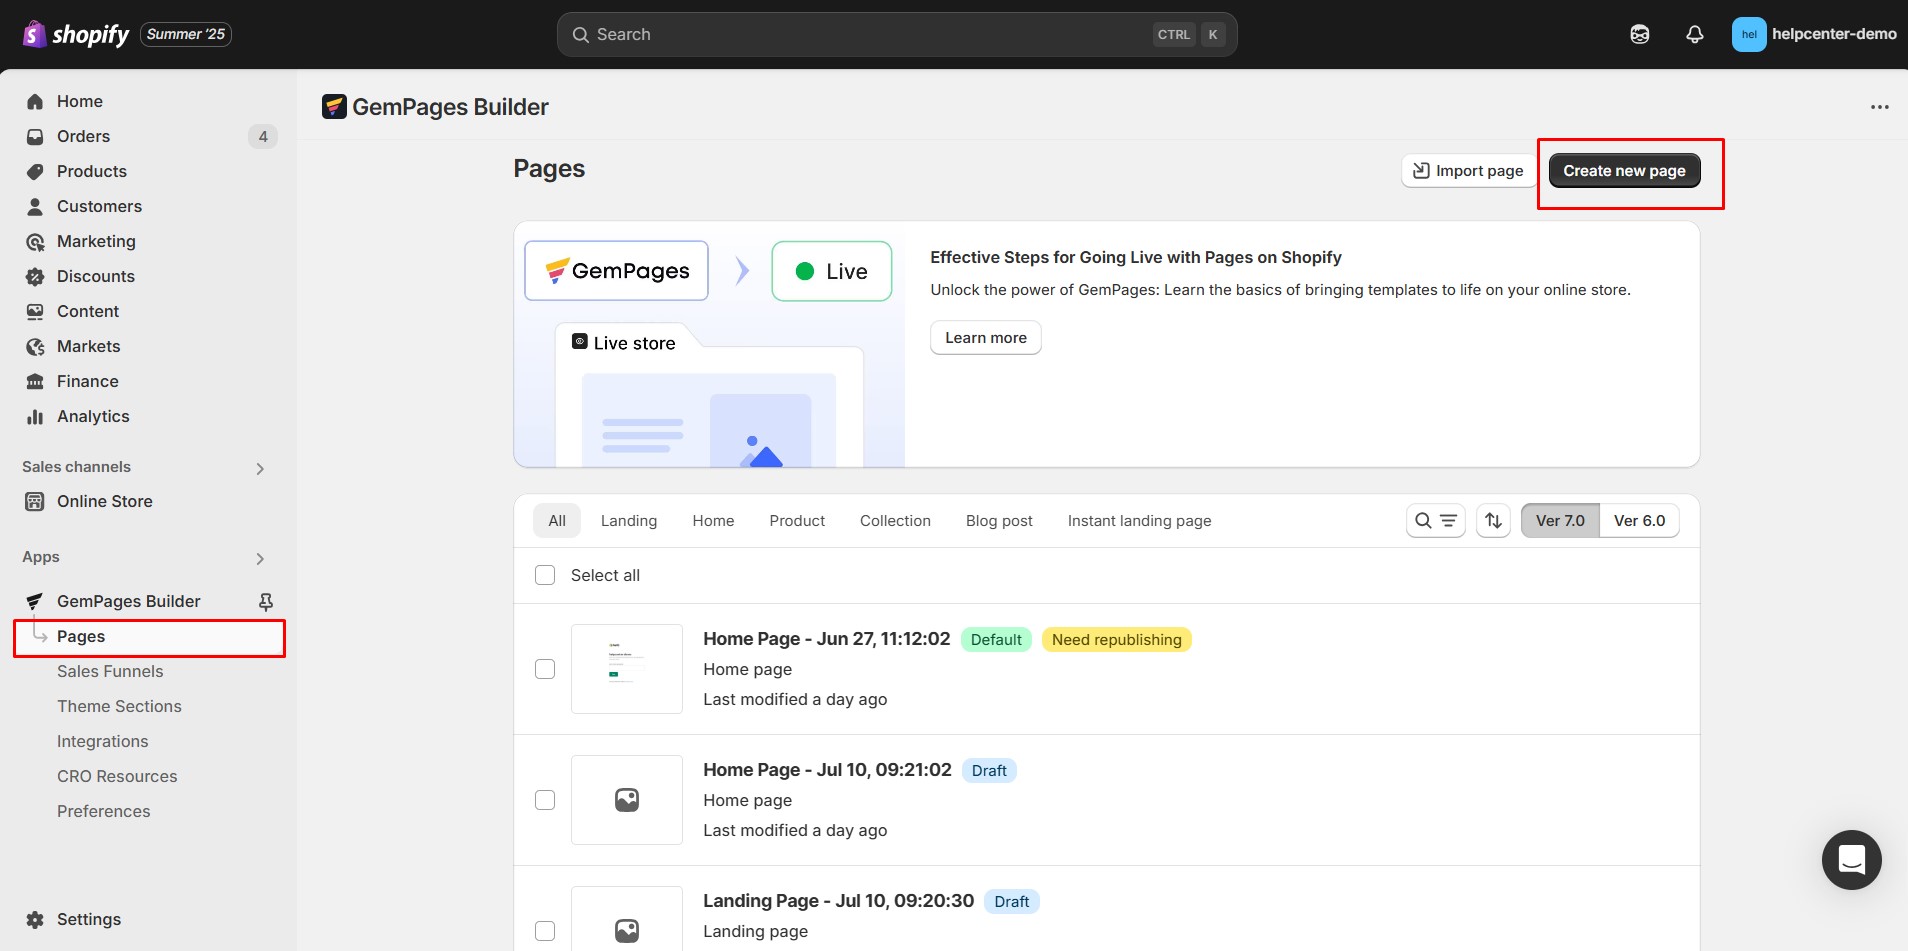
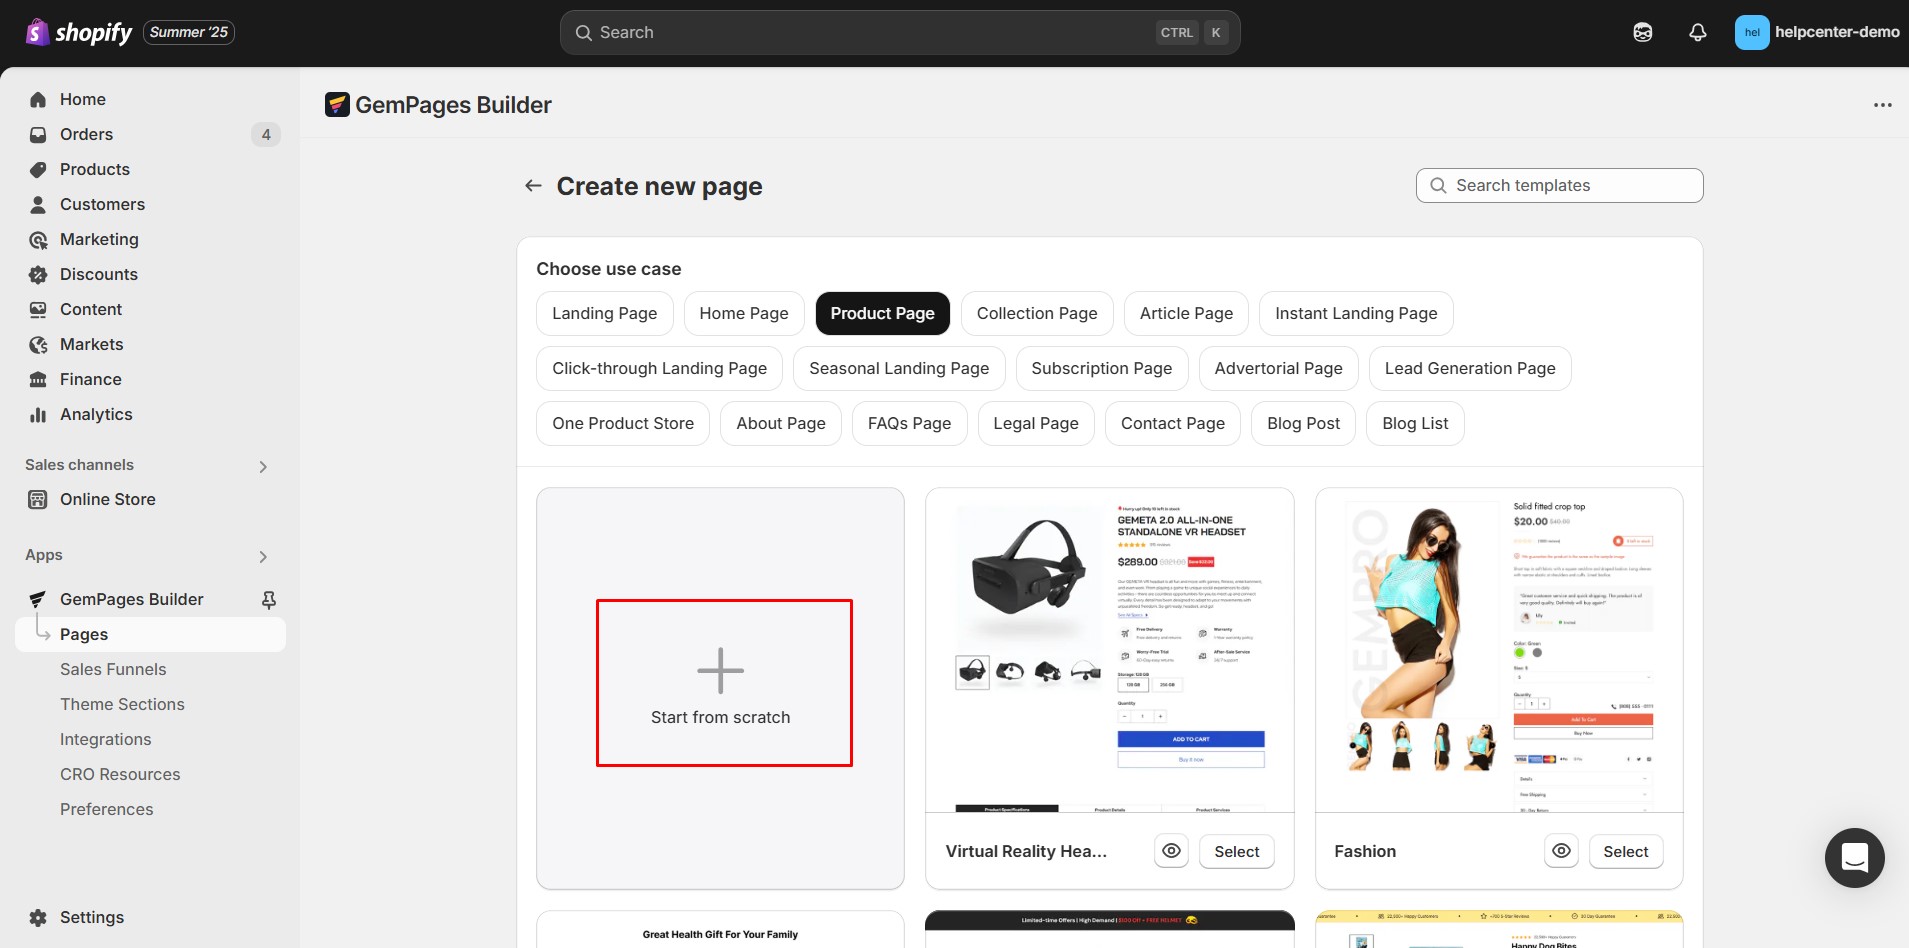
Step 1: Open GemPages Dashboard
- Log in to your Shopify admin, then open the GemPages app.
- In the left sidebar, click Pages, then hit “Create New Page” and select Product Page.
Step 2: Choose a Template or Begin from Scratch
- You’ll see a library of pre-designed product page templates—great for fast launch.

- Alternatively, click “Start from Scratch” to build your layout using drag-and-drop blocks.
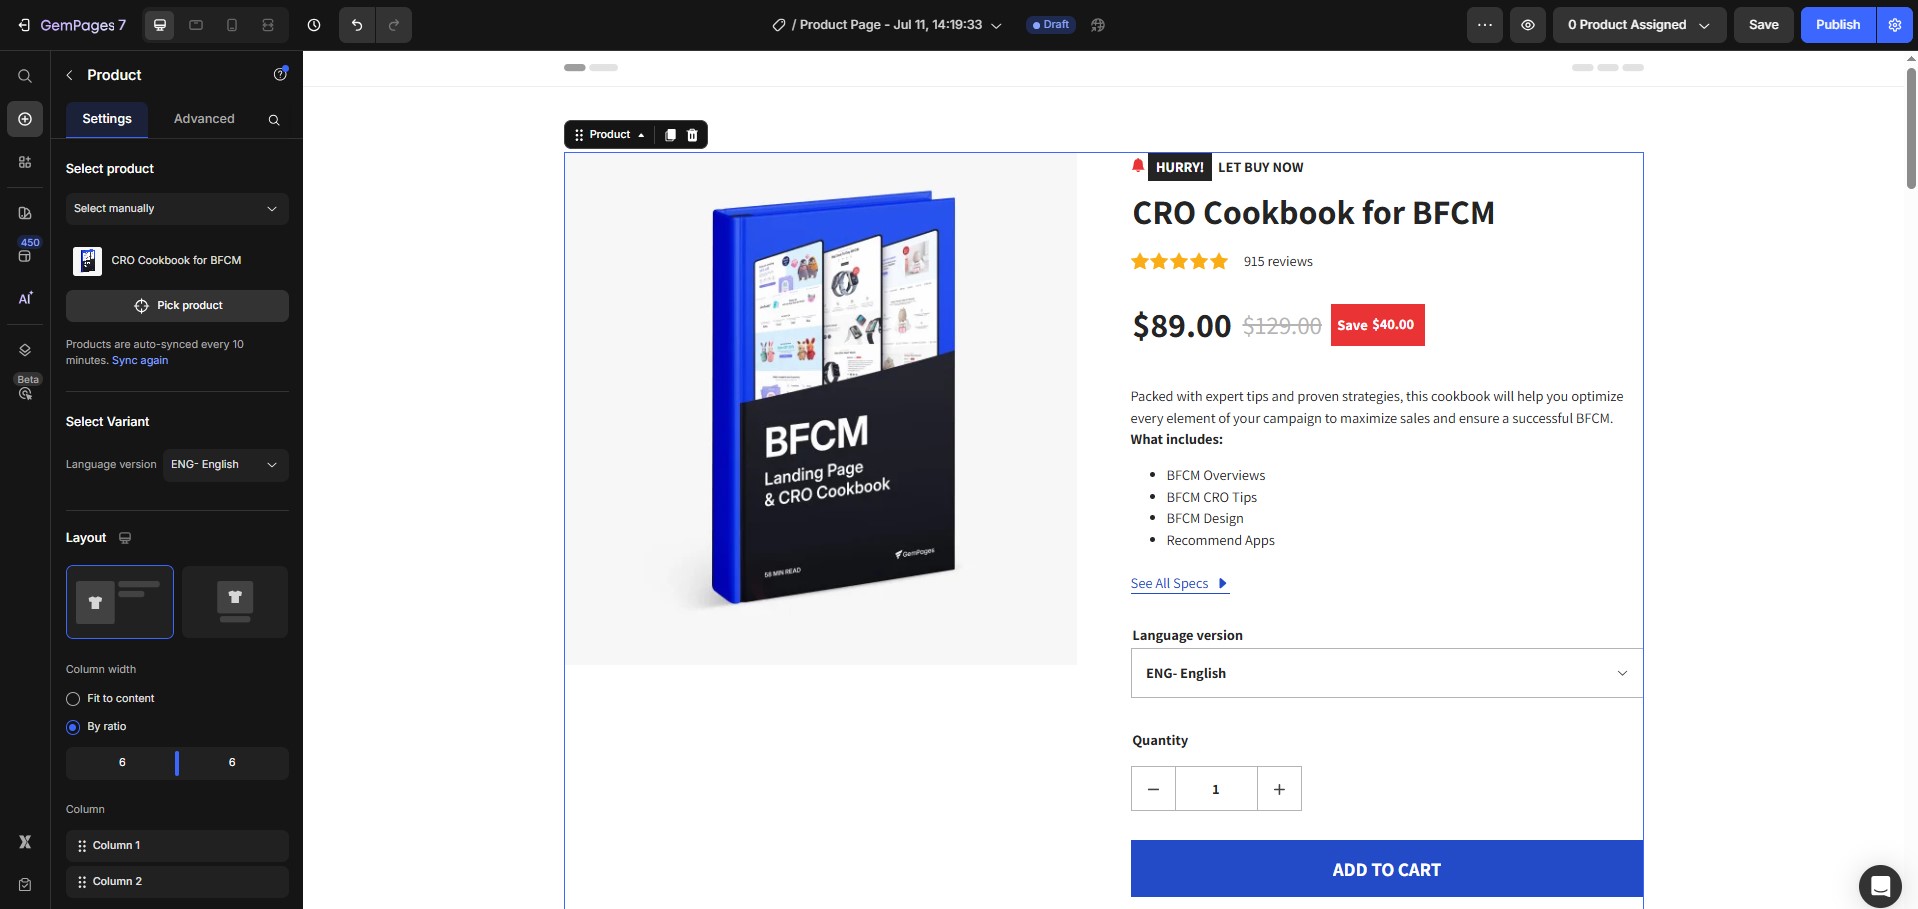
Step 3: Design Your Product Page
If you’re using a pre-built template:
Most templates already include essential content blocks.
You’ll just need to update the text, images, and product details to match your brand and offering.
Templates are a great way to save time while still delivering a professional look.
If you’re starting from scratch:
Make sure to include the following core elements in your product page layout to clearly communicate value and encourage conversions:
- Product Element: Dynamically displays your product’s title, price, and variants, all synced with your Shopify store, and an “Add to Cart” button.
- Image/Video Element: Showcase what your digital product looks like. Use preview images, mockups, or demo videos to build trust and anticipation.
- Text Blocks: Explain what the customer will get: file types (e.g., PDF, ZIP), usage rights, included items, and compatibility (e.g., Canva, iOS, Windows).
- FAQ Section: Answer common questions about access, delivery, refunds, or license terms using collapsible accordions or Q&A lists.
- Trust Badges & Testimonials: Reassure buyers by highlighting secure checkout, instant access, satisfaction guarantees, and social proof from past customers.
- Call-to-Action Buttons (CTAs): Use clear, action-oriented labels like “Buy & Download,” “Get Instant Access,” or “Download Now.”
Style the button to match your brand, and make sure it’s prominently displayed, especially on mobile.
Step 4: Mobile Optimization & Styling
- Use GemPages’ device preview to adjust layouts for mobile and tablet views.
- Ensure core action buttons and product details remain visible and clickable on smaller screens.
Step 5: Save & Publish Your Page
- Click Save to preserve changes.
- When ready, hit Publish to make it live.
- If you want this template to apply to all products automatically, open your template in the dashboard and choose “Apply to all products (Make default)”


Thank you for your comments