Install and configure Infinite Options in Shopify Admin
Before we start, you will need to install the app first by following these steps:
Step 1: Install the app from Shopify App Store by clicking on the “Add app” button and fill in your store domain if needed.

Step 2: Hit “Install app” after reviewing the permissions.

Once the installation process is complete, you will be taken to the app’s Dashboard to configure the app.

Otherwise, you can always locate the app in your store’s app list, under Shopify Admin > Apps.

As GemPages will draw data from the app, you need to have it all configured before designing.
Step 3: Finalize the in-app settings. From the App Dashboard, you will find help docs and customer support to get all configurations done.

Add the Infinite Options element To The GemPages Editor
Once the app has been installed successfully on your store, it’s time to install the element in GemPages Editor.
Step 1: Head over to the GemPages Dashboard, select one of your pages, and enter the Editor via the “Edit” button.
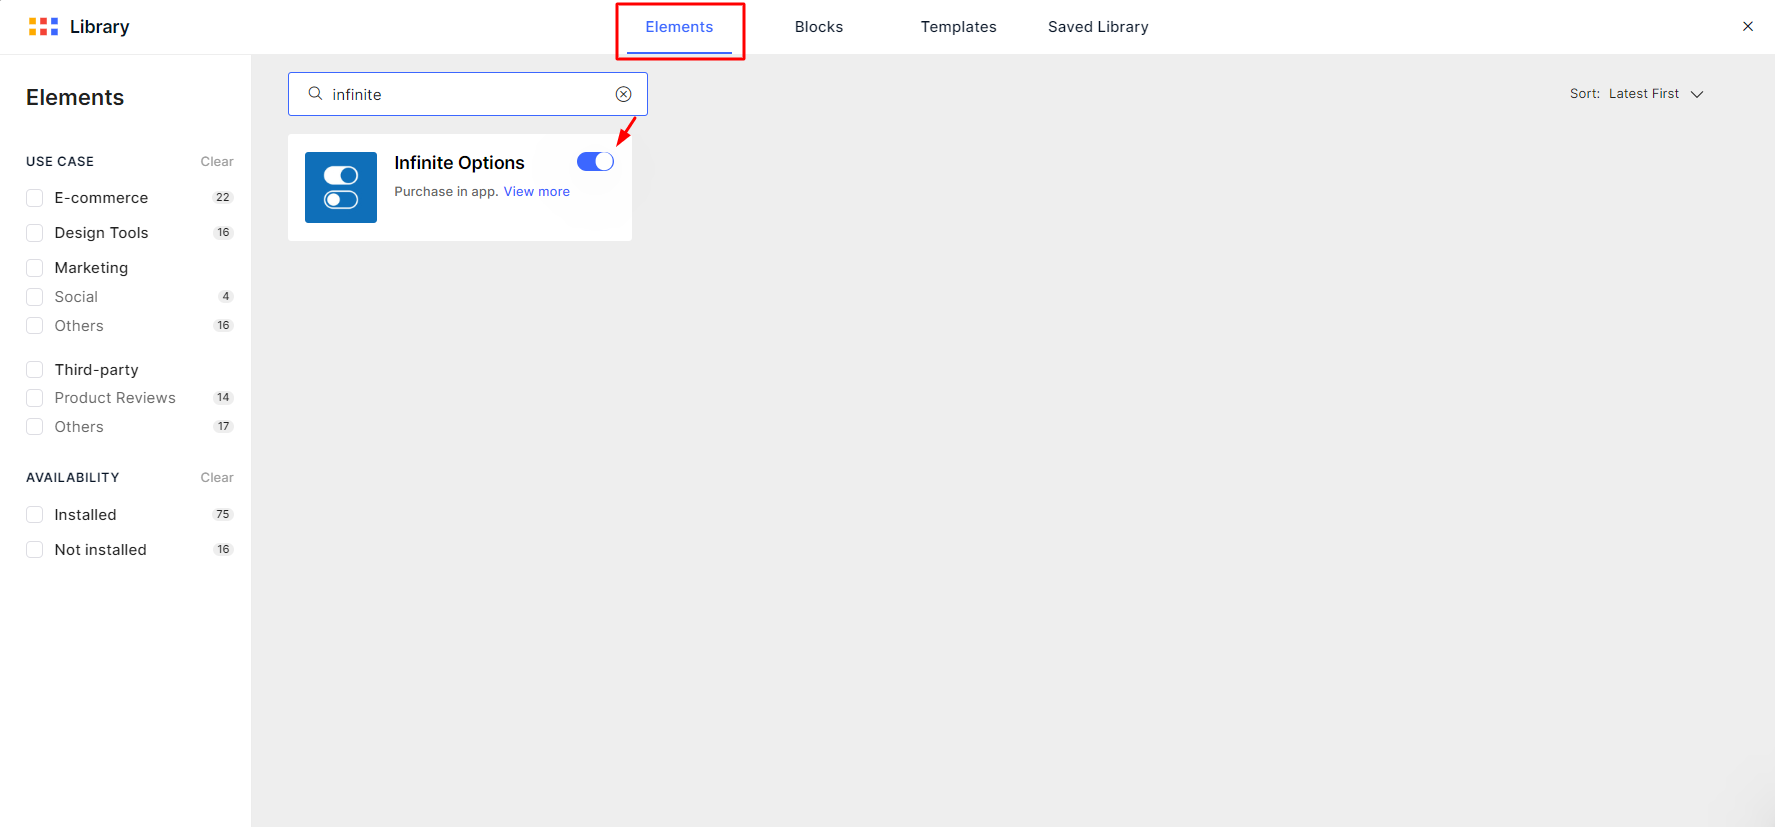
Step 2: In the Editor, click on the “Library” button on the top bar, then switch to the Elements tab. Search for “Infinite Options” using the search bar and toggle on the switch.

Step 4: Exit the Library and you will find the newly added element on your left sidebar, under the Third Party section.

Set up the Infinite Options element in GemPages
Once you have set up your custom fields in Infinite Options, it’s time to put the element onto your page in the Editor.
Step 1: In the GemPages Dashboard, select one of your pages and enter the Editor via the “Edit” button.
Step 2: Search for the Infinite Options element, drag & drop it onto your preferred spot inside the Product module.
If you don’t have a Product module yet, please drag & drop one onto your page first.

Configure the Settings tab
In the Settings tab, you will have the option to align the element and add extra classes.
Alignment
Set the Infinite Options element’s horizontal position to Left, Center, or Right.
Extra Class
If you excel at coding and would like to further customize the element, feel free to add a class name into this field and refer to it later on in the CSS file.
Configure the Design tab
The Design tab holds all the tools you need to fine-tune the look of your Infinite Options element before publishing.
Hit “Save” and “Publish” once you are happy with the result to update your front store.
Here’s an example of what you can achieve with the Infinite Options element.

Check out more of our articles to accelerate your GemPages journey!


