


What is Product Template Assignment in Shopify?
By default, Shopify assigns a single product template to all product pages, limiting how you customize layouts across your catalog. This makes it hard to tailor different designs for different products, especially if you’re running promotions, bundles, or A/B testing layouts.
With GemPages’ Product Assignment feature, you get full flexibility to:
- Create multiple custom product page templates
- Assign templates to specific products or apply one as the default for all
- Improve your Shopify product page design with targeted layouts for each item
Whether you want to assign a product to a landing page, test different versions of your PDPs, or update the Shopify product layout editor experience without code, this feature makes it possible.
This guide will show you how to:
- Set a template as the default for all products
- Or assign product templates to selected items directly from the dashboard or editor
Set A Default Template
To apply a template to all the products, please follow the steps below.
Step 1: From the GemPages Dashboard, navigate to the Page section. Select the Product page type and locate your preferred template.
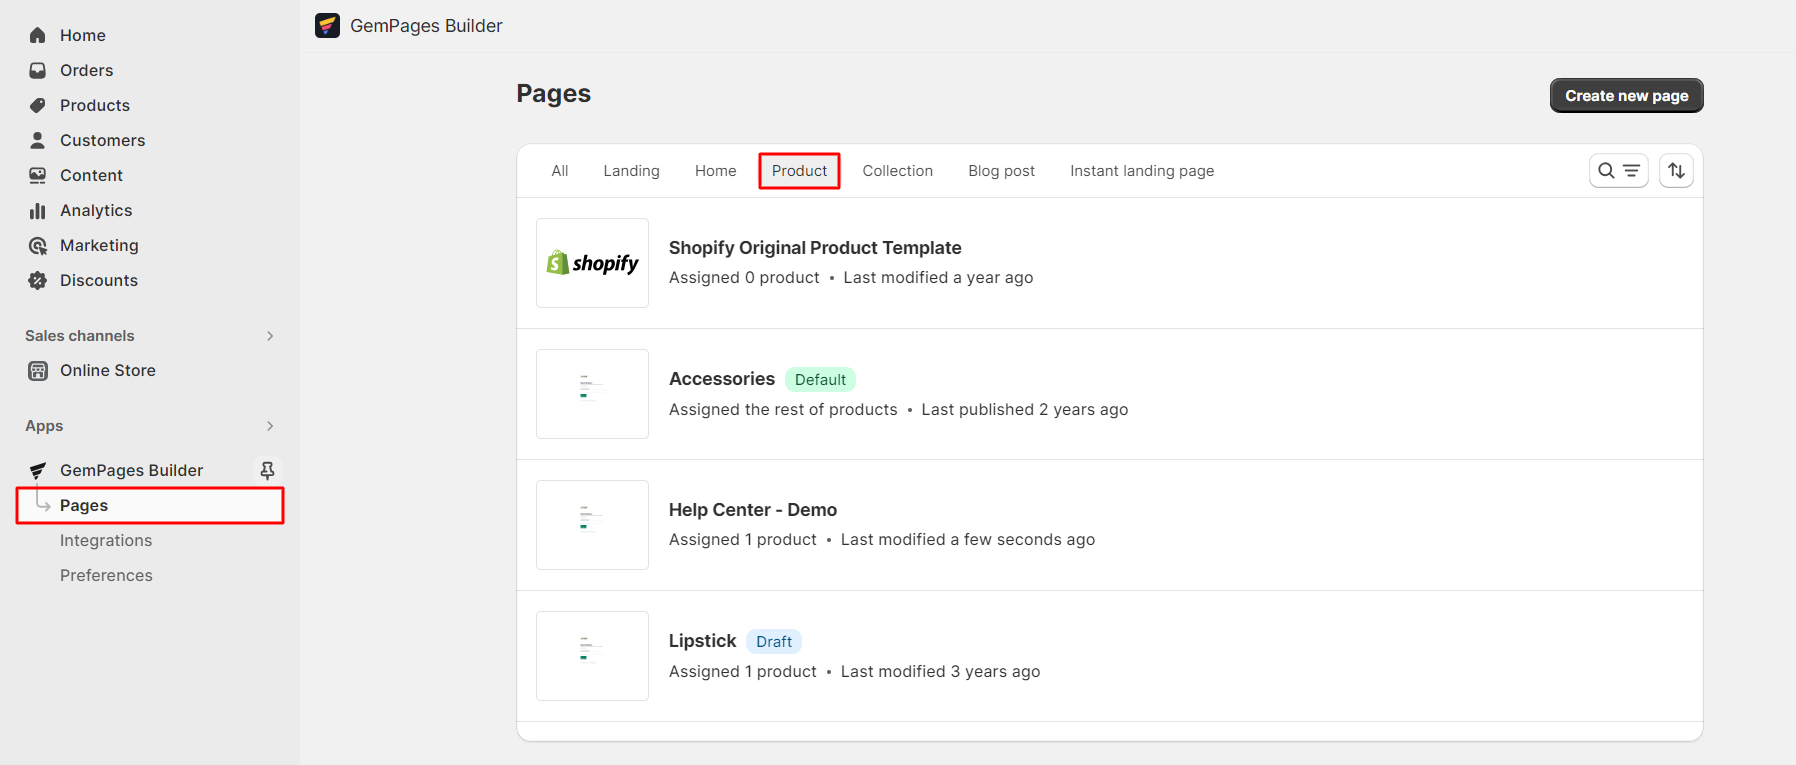
Step 2: Click on the three-dot button next to the template name. Choose “Make default”.
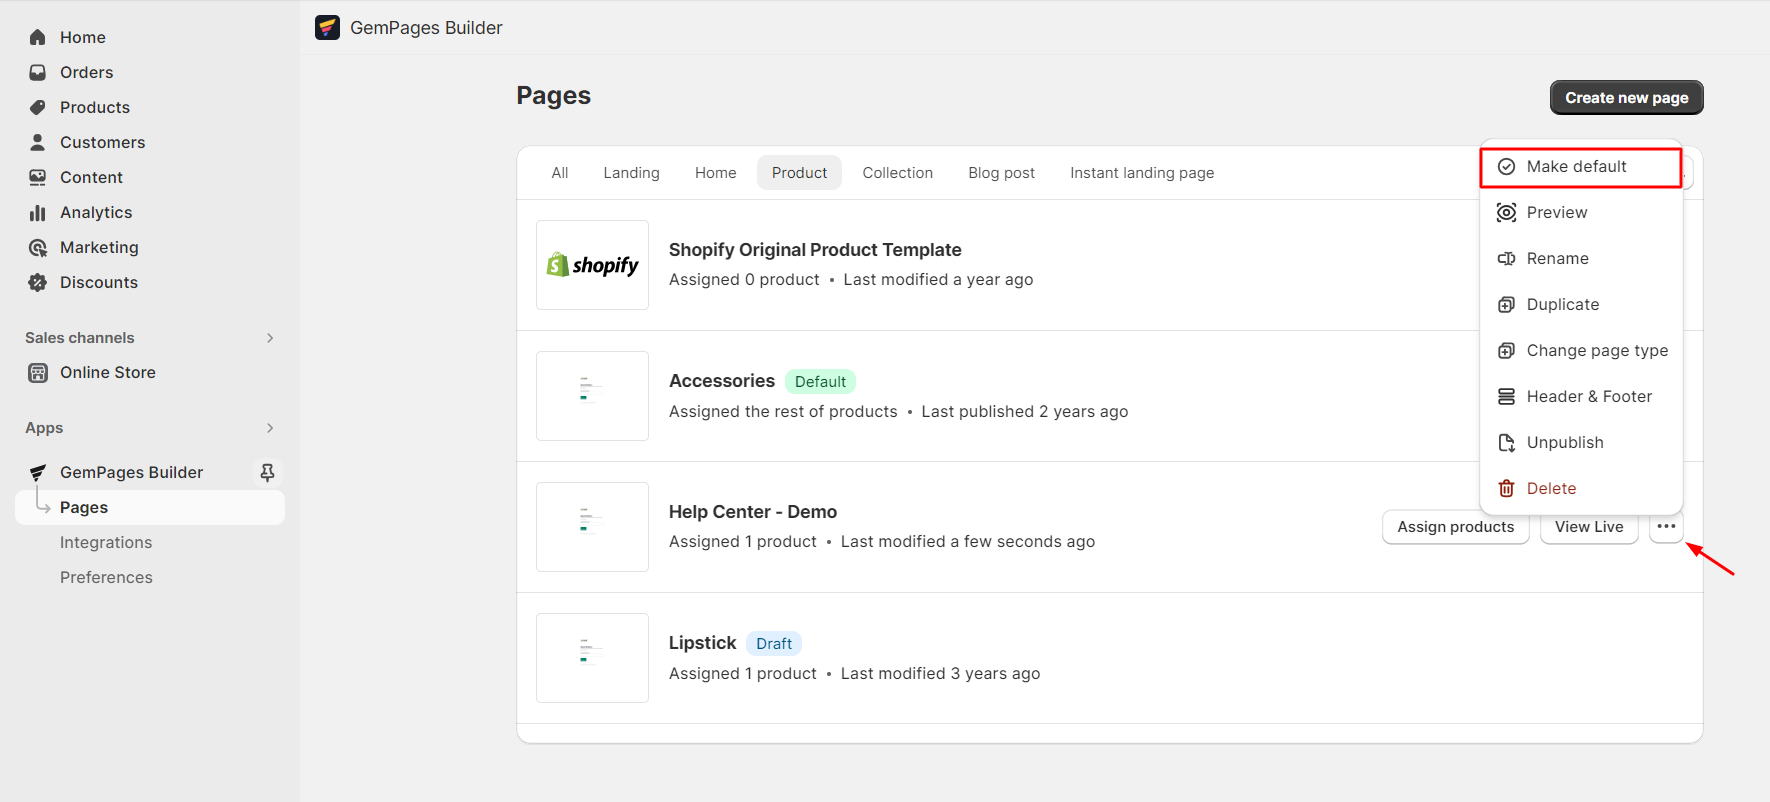 Click on “Confirm.”
Note: If the template is already live, it will be applied to all your pages automatically. Please make sure to think it through before confirming.
How To Assign Products To A Template
There are two ways to assign products to a template: assigning products in the GemPages editor or assigning products from the product page dashboard.
Assign products in the GemPages Editor
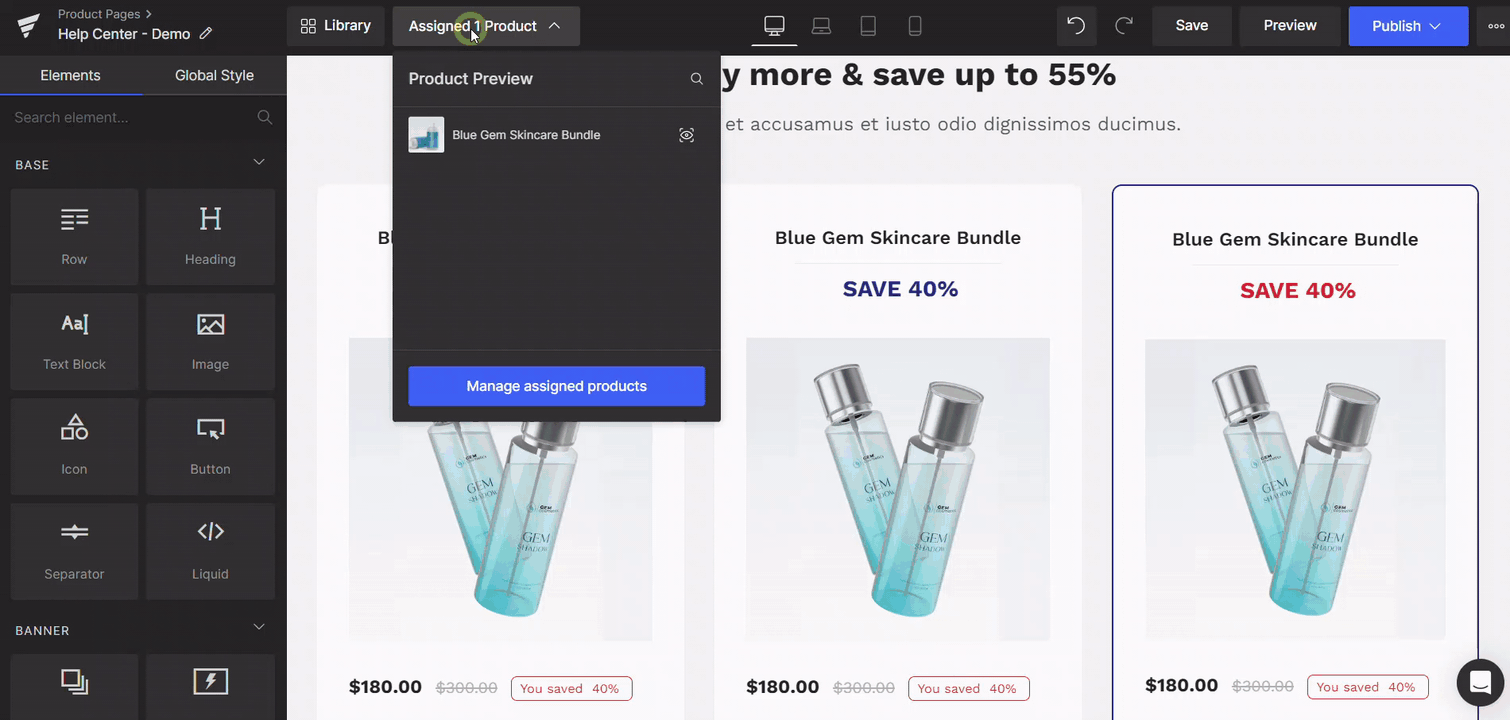
Step 1: From the GemPages Dashboard > Pages, select your preferred page to access the Editor.
Step 2: Select the “Assigned Product” button located at the top of your page. Next, click on “Manage assigned Product”.
A pop-up window will appear, allowing you to choose products to associate with the template. Tick the box next to the desired product, and confirm your selection when done.
To switch and preview different assigned products in the GemPages editor, click on the Change preview button or the Assigned Products button at the top of your page and then, click on the product name or the Eye icon.
Assign products from the Product Page Dashboard
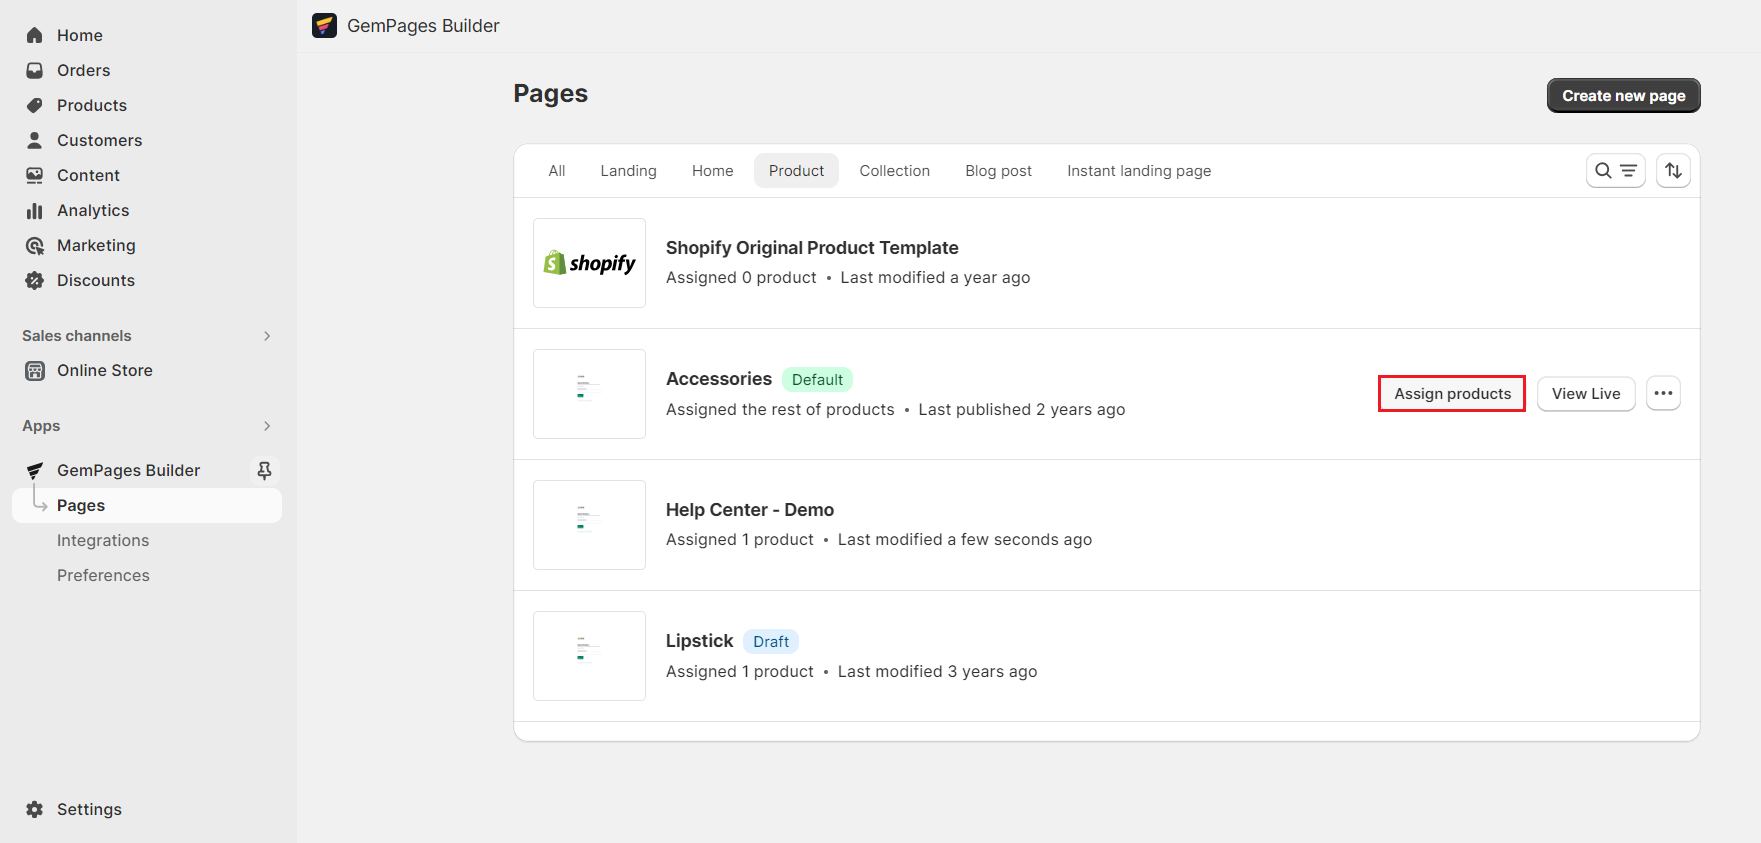
Step 1: From the GemPages Dashboard, navigate to the Page section. Select the Product page type and locate your preferred template.
Step 2: Click on the “Assign Product” button next to the template name.
An open window will appear, allowing you to select the products. Check the box next to the products you want to assign to the template. To find products faster, you can use the search bar.
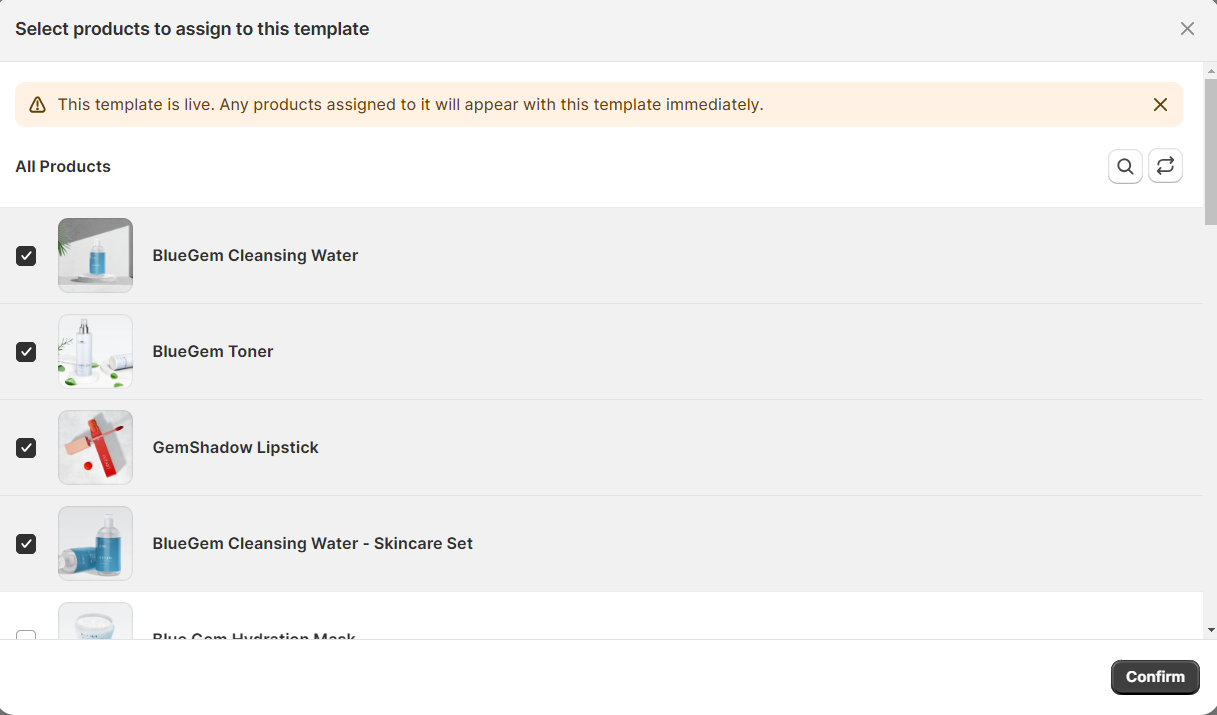
Hit “Confirm” when finished.
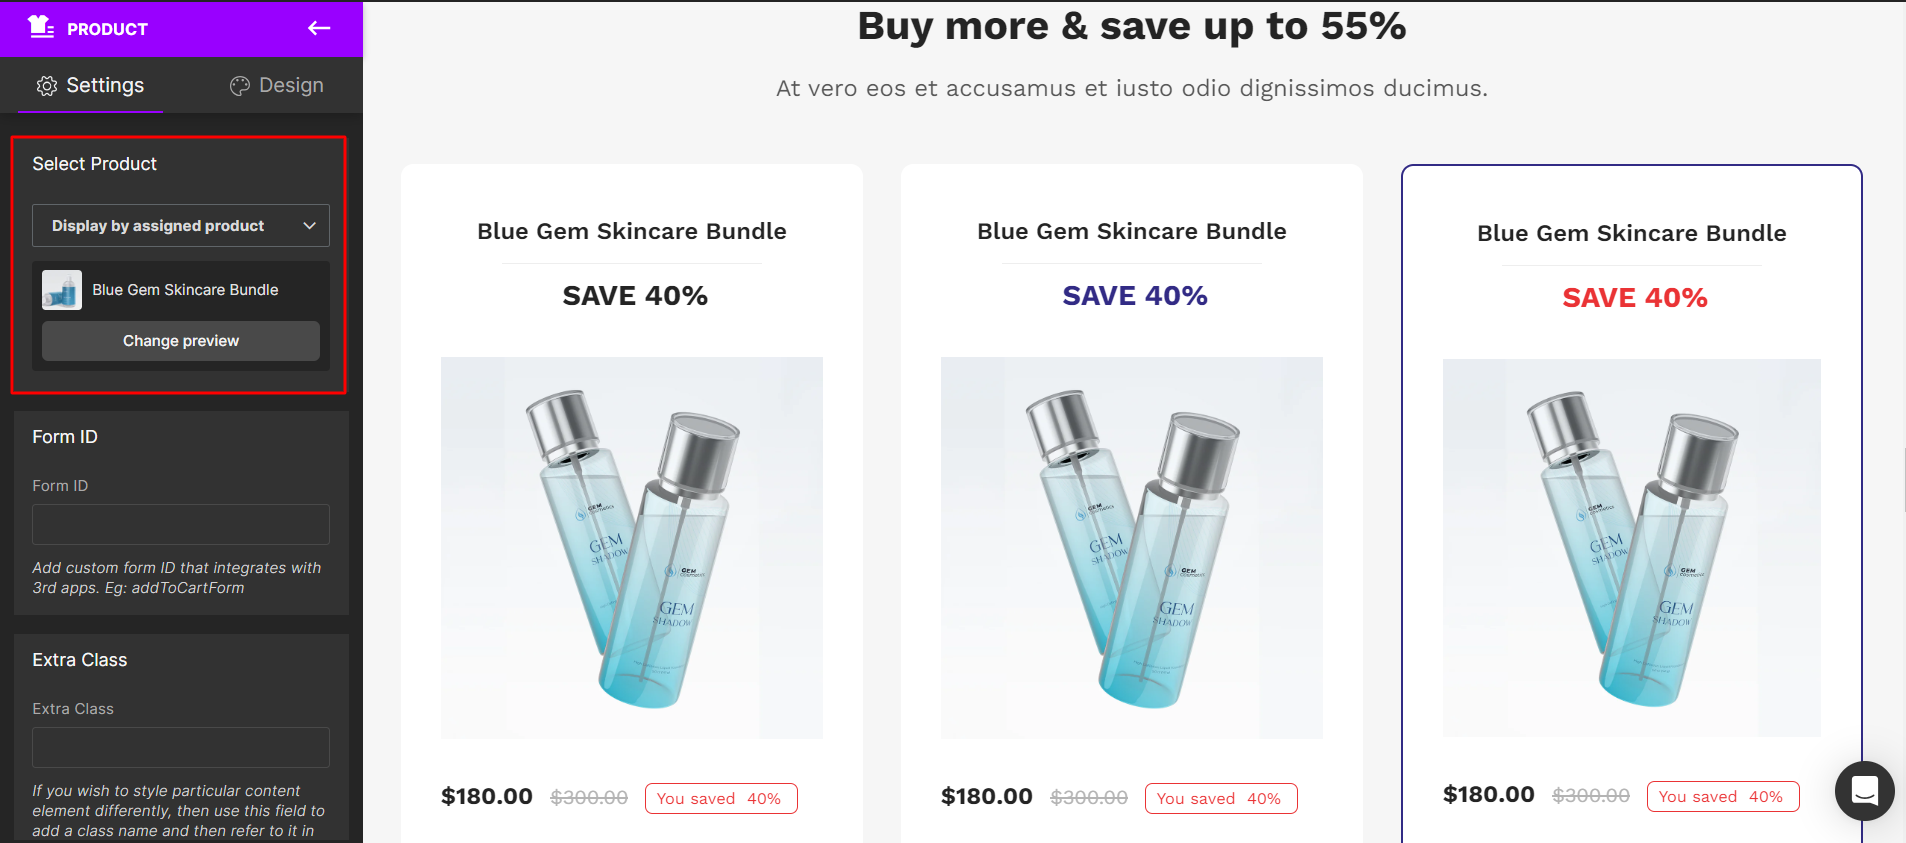
Enable “Display by assigned products”
This function enables automatic synchronization of Shopify data for products assigned within the template. It’s highly recommended for your default template or templates assigning multiple products. To activate this feature, follow the steps below:
Step 1: From the GemPages Dashboard > Pages, select your preferred page to access the Editor.
Step 2: Locate the Product Module. Click on the Product Module to reveal the configuration on the left sidebar of the Editor. Under “Select Product”, choose the option Display by assigned product from the drop-down menu.
If you opt for the “Select Manually” option at this point, the product information will remain fixed. This is useful, for instance, when you have a template with only one assigned product or when creating a product bundle to display multiple products on the same page. For a detailed guide on creating a product bundle with GemPages, refer to this article.
FAQs
1. What is the Product Assignment feature in GemPages?
It allows you to assign a product template to specific Shopify products, giving you a fully customizable product page layout that overrides the default Shopify design.
2. How do I assign a product to a template in Shopify?
Using GemPages, you can either:
- Assign from the Editor
- Or from the Product Page Dashboard
This lets you customize the Shopify product page design without editing code.
3. Can I apply one product template to multiple products?
Yes! You can apply a template to multiple products in just a few clicks using the “Assign Product” button in GemPages.
4. Can I use different templates for different products?
Absolutely. With GemPages product page templates, you can create unique layouts and assign them individually, perfect for custom product page Shopify setups.
5. What’s the difference between “Display by assigned product” and “Select manually”?
- Display by assigned product: Syncs dynamic Shopify data for each assigned item
- Select manually: Locks in static data, great for Shopify, change product page layout, use cases like bundles or fixed product pages


Thank you for your comments