About Anchor Links
Have you ever clicked on a hyperlinked item on a website and seen the page conveniently scroll itself down to a spot? That’s called an anchor link. An anchor link allows you to take visitors to a specific spot on your site with just a click, bypassing the need for cumbersome manual scrolling and constituting a much more user-friendly Online store that will surely convert.
In GemPages, you can anchor down using button, image-based, and text-based elements. This article will show you how to achieve just that.
Before Linking: Find your Element/Section ID
In the Editor, each element/section is defined with its own unique Section ID. This can be used to point to a style in a style sheet, or in this case, point to other elements to scroll to the destination section you want to take viewers to.
Here’s how you can find your element/ section ID. Depending on the version of the GemPages Editor you’re using, the instructions may vary. Please follow the instructions specific to your Version and proceed with the following steps accordingly.
Step 1: Locate the destination you want to scroll to. Find an element in that section > Right-click > Edit Code
In this example, it’ll be the Hero Banner element.

Step 2: Copy the Hero Banner element’s ID that appears at the top of the new pop-up Code Editor window.

You now have the section ID to proceed to create an anchor link for your elements.
For Button and image-based elements
The steps below are for the Button element, but they also work for the Hero Banner and Image elements.
Step 1: In the GemPages Dashboard, open your page template and enter the Editor.
Step 2: Drag out a Button element onto your page.

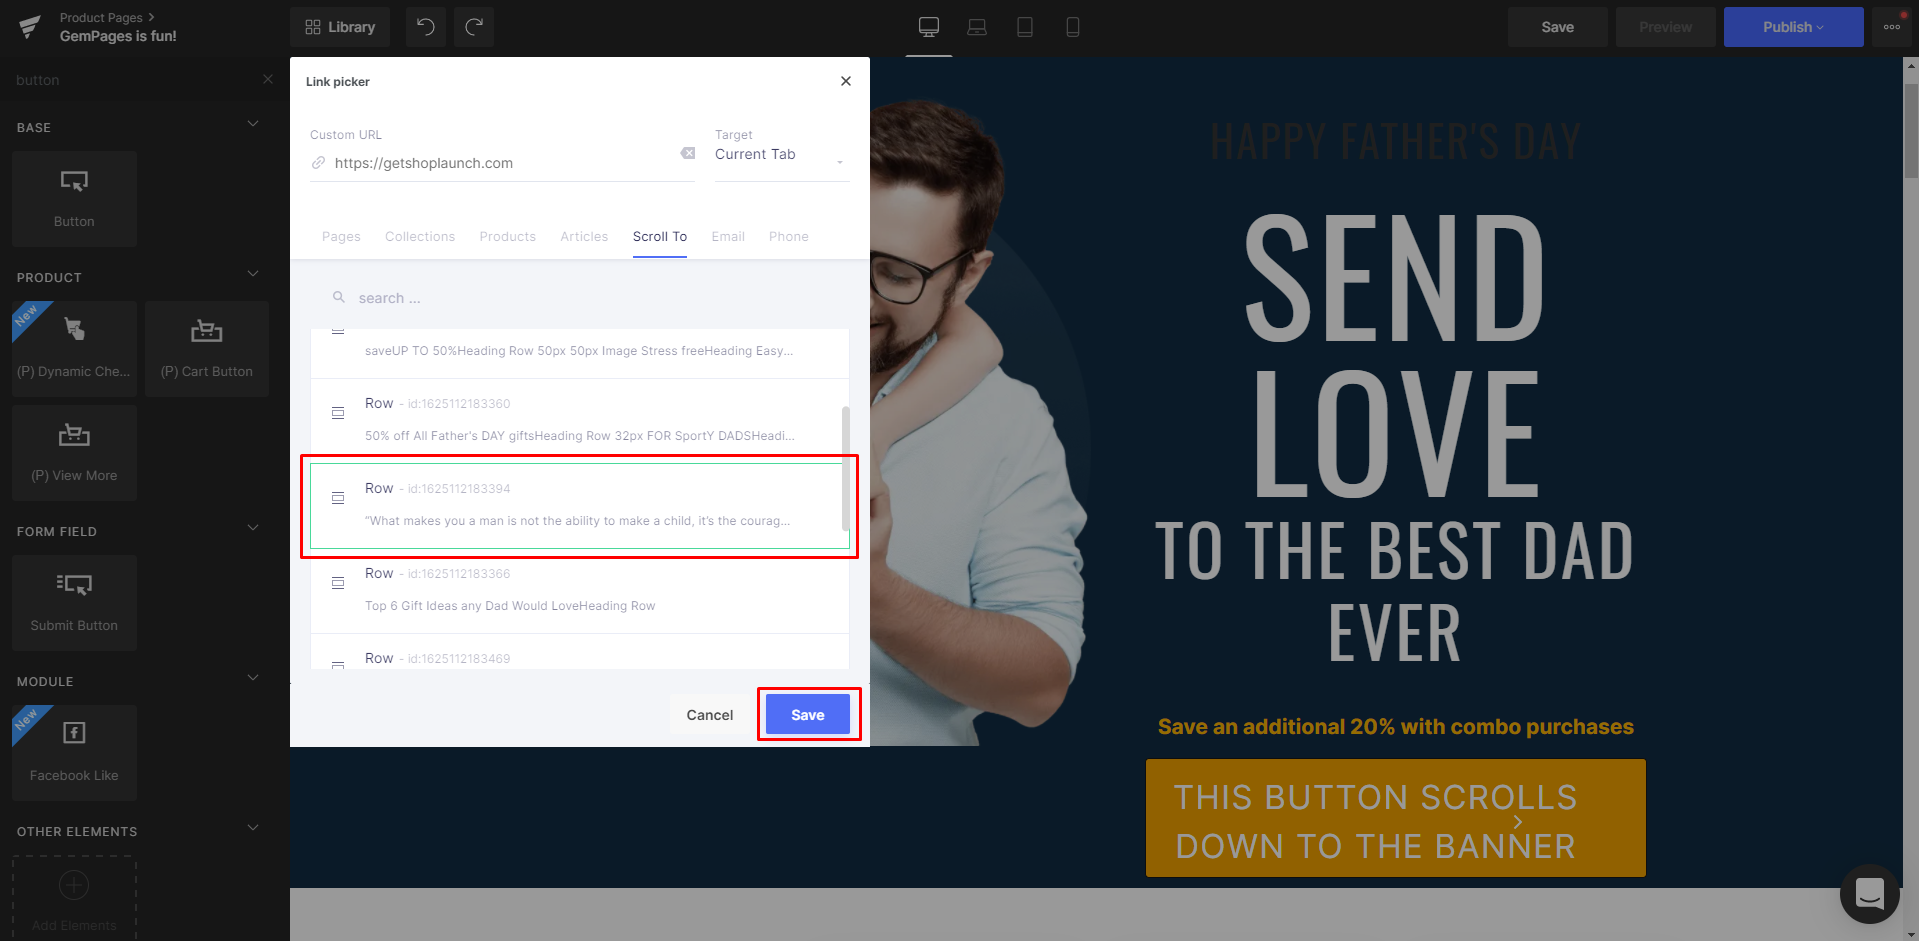
Step 3: Select the “Pick Link” button under the “Edit link” section, a Link picker window will pop up.

Step 4: In the new window, paste the Section ID of the destination into the “Custom URL” box.
Alternatively, you can select the “Scroll To” tab and select the destination from the list underneath.

Step 5: Hit the blue “Save” button. Next, hit Save and Publish to check the result on the live page.


For text-based elements
Step 1: In the Dashboard, open up your template and enter the Editor.
Step 2: In the Editor, drag out a text-based element, e.g. Heading.

Step 3: Highlight the text and wait for the action panel to pop up.
Step 4: Select the chain icon and a “Custom URL” field will appear.

Step 5: Paste the Section ID of the destination into the field and hit “Enter“.
Step 6: Save and Publish the page to check for the result on your live page.
Here is how the final result should look like on your live page:

And there you have it! Creating an anchor link used to require complicated coding, but it’s just a few simple clicks with GemPages.


Thank you for your comments