This article will help you to create a slider of featured product images in just minutes.
Creating a good-looking product gallery slider on your product page is a great way to attract more people. As the product is showed from multiple angles or associated with various variants, it absolutely can help you boost your conversion rate better. With GemPages, you can set it up in a blink of an eye by following these steps.
Select style to display product images
- Step 1: Select the (P) Image list element on your editor page.

- Step 2: Choose Slider from the dropdown list of Style under the Settings tab.

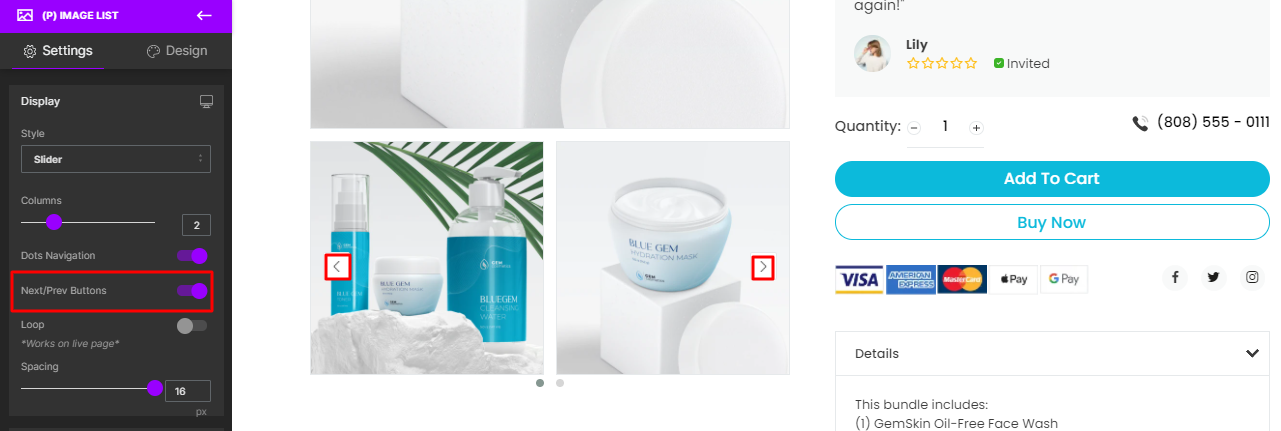
Customize your image slider
- Columns: Slide from left to right to increase the number of product images in the slider and vice versa.

- Dots Navigation: If you toggle it on, your customers will easily browse each variant by clicking on the dot.

- Next/Prev Buttons: If you enable this feature, it will display two arrows on the left and right. It creates smoothly scrolling on images when pressing on the arrow.

- Loop: Enabling this feature helps you to create continuous scrolling on images
You only see the result of this setting on the live page.

- Spacing: Adjust more or less space between images in pixels

When everything is perfect, don’t forget to Save your changes or hit Publish in order to apply the changes on your live page.


Thank you for your comments