This article will introduce a new element named (P) Vendor.
What is a (P) Vendor element?
A vendor is an individual or enterprise that contributes goods or services within an economic production chain. In terms of (P) Vendor element in GemPages, it is designed to display the product’s vendor which can be found in Shopify to the webpage interface.

(P) Vendor is a child-element of the Product module, which means you will need to drag this element into a Product module to make it work.
How to configure (P) Vendor element
- Add and edit Vendor from Shopify
- Step 1: Access Shopify Admin > Products > All products

- Step 2: Choose any product, scroll down, and navigate to the Vendor box, where you can add or edit the product’s vendor.

- Step 1: Access Shopify Admin > Products > All products
- How to add (P) Vendor Element to GemPages
- Step 1: Access the Library from the Gem Editor page
- Step 2: Click on the Element tab, then search for (P) Vendor

- Step 3: Click on the Add button at the bottom to add this Element to GemPages

- Step 4: You are now able to find this element on the left sidebar dashboard

- Step 1: Access the Library from the Gem Editor page
Settings Tab’s Parameters
- Title Tag: This setting allows you to adjust the type of Heading title for Vendor (from Heading 1 to Heading 5).

- Typography: GemPages provides powerful styling options for the (P) Vendor element.
 The symbol on the top right corner means we are able to adjust the setting for one or more specific devices without affecting others
- Font Size (in pixel), Line Height (in em), and Letter Spacing (in pixel): For these parameters, you just simply slide the adjustment bar from left to right and vice versa to configure them.
- Color: This parameter allows you to choose the color for the text

- Font: You can choose between any fonts available in the Font Manager or you can add any custom font from external sources. For better page loading and graphic design, the maximum font displayed on a page is three fonts. However, there are no limits when configuring fonts in your store. Learn more on how to add a custom font to your site here.
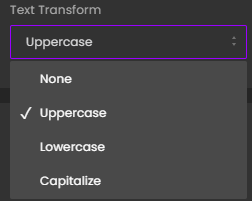
- Text Transform: This allows you to customize your text (None, Uppercase, Lowercase, Capitalize)

- Label Text: You can choose to enable or disable the label text for this element. Also, you are free to customize the Text Value in case you want to enable this feature.

- Alignment: This parameter allows you to determine how the text is positioned within the description box. The four primary types of text alignment include left-aligned, centered, right-aligned, and justified.

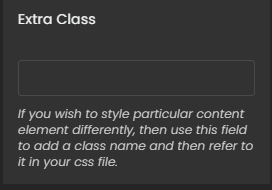
- Extra Class: If you wish to customize the variant’s content element in a particular way, kindly use this field to add a class name and then refer to it in the CSS file.

The (P) Vendor element is all set now.


Thank you for your comments