


SEO Settings on the Shopify Admin
Shopify allows you to edit the Title and Meta description of your pages – two crucial elements for on-page SEO.

A Title is a summary of a webpage that appears at the top of the browser window and the search engine results page. Search engines and searchers need to determine the relevance of a page to the query.
A Meta description is a short description of your page content that will display along with the Title and the URL on the search results page. Although the Meta description isn’t a direct ranking factor in SEO, it significantly impacts visitors’ click-through rate (CTR).
Edit Your Store’s Title and Meta Description
Follow these steps:
Step 1: From your Shopify Admin > Online Store > Preferences, locate the Social sharing image and SEO.
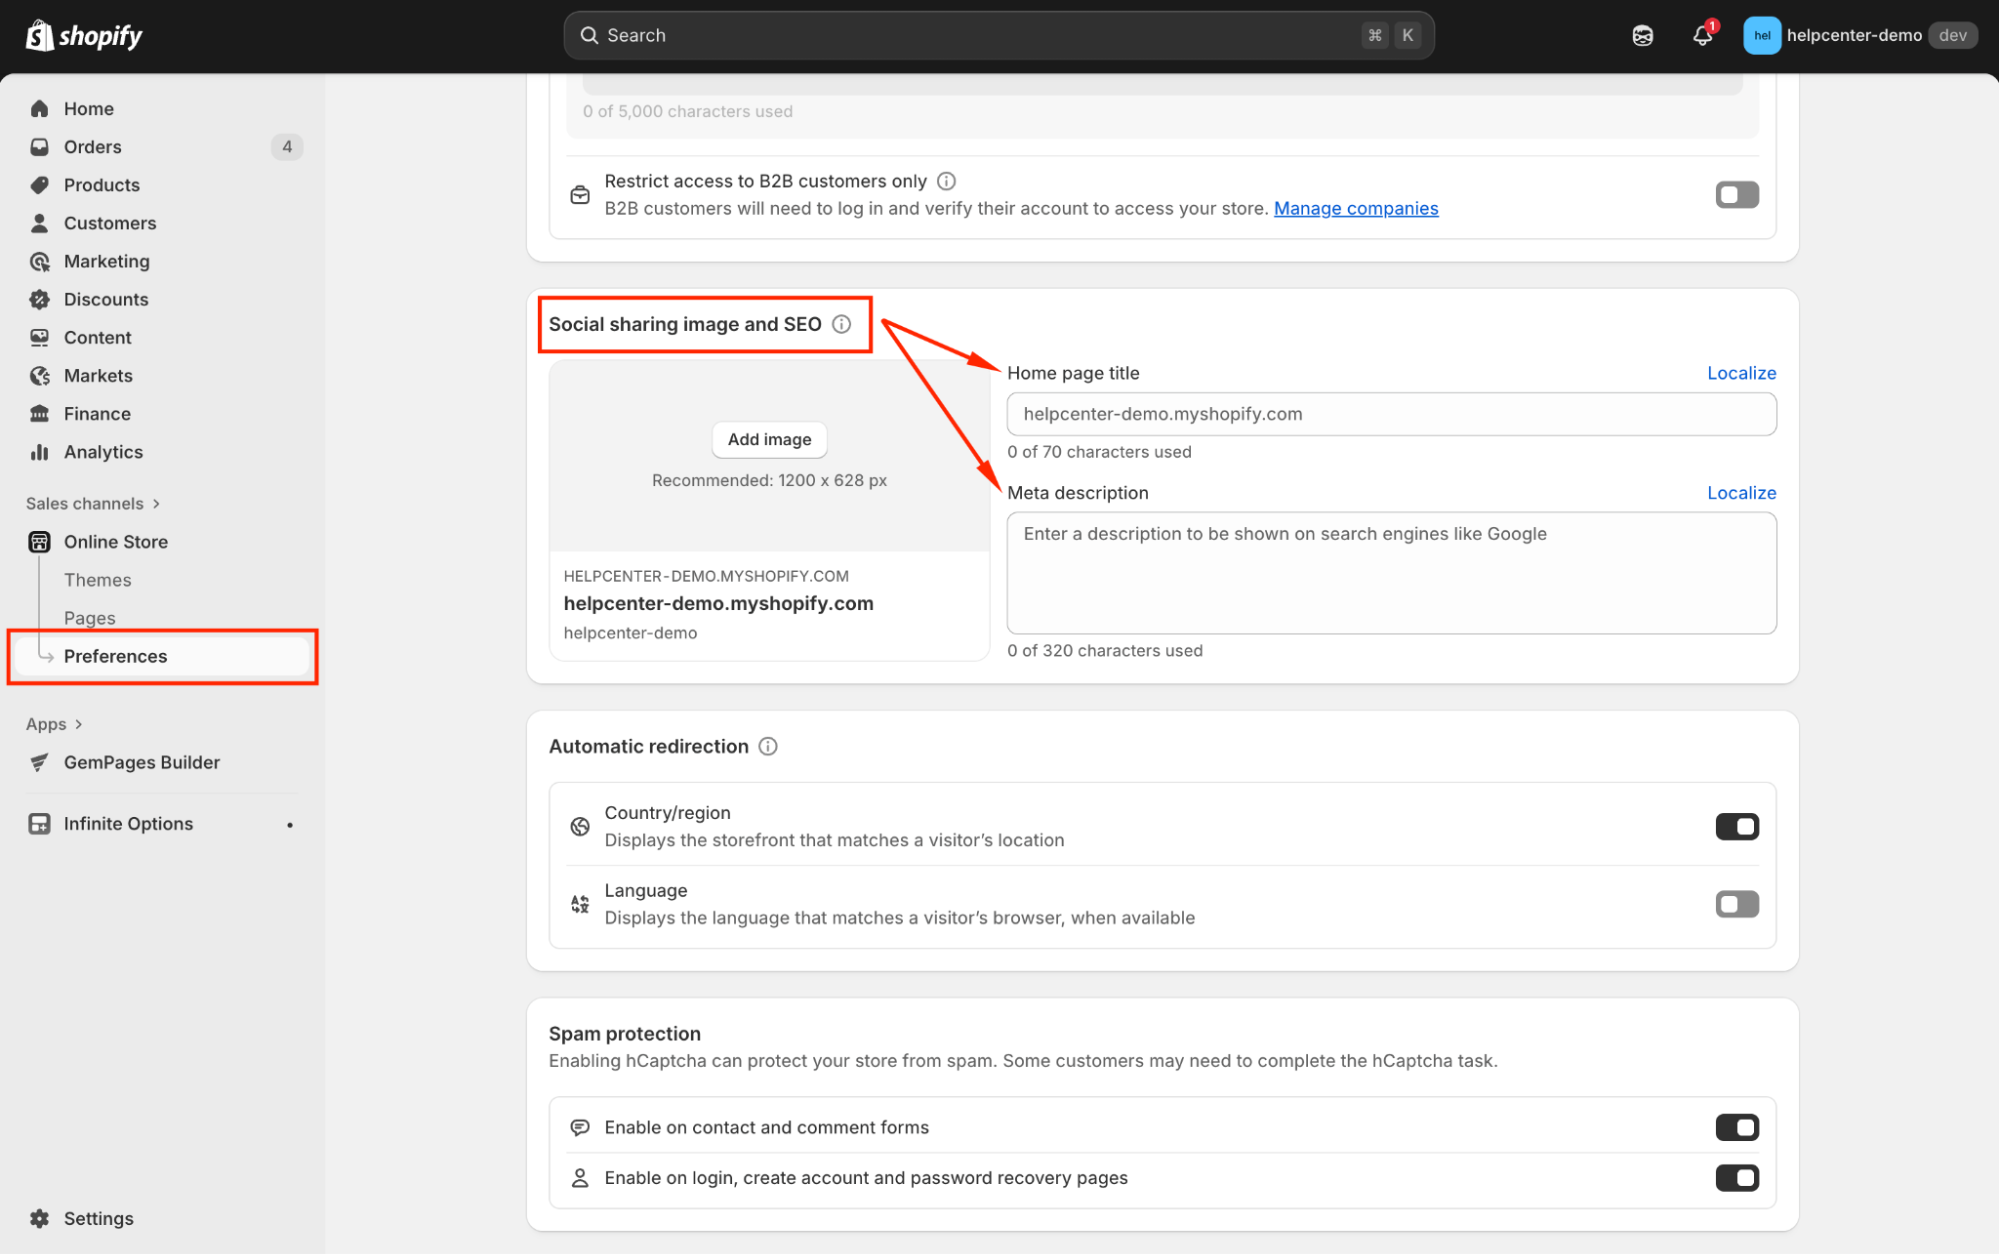
Step 2: Enter your preferred text into the two fields: Homepage title and Homepage meta description.
It’s recommended to keep the Meta description under 160 characters. It is the maximum number not to be cut off when displayed on the search results page.
Step 3: Once done, remember to hit Save before you leave.
Edit Your Pages’ Title and Meta Description
Shopify will auto-generate a preview of your page listing on search engines, so be sure to check it!
- For Product pages and Collection pages:
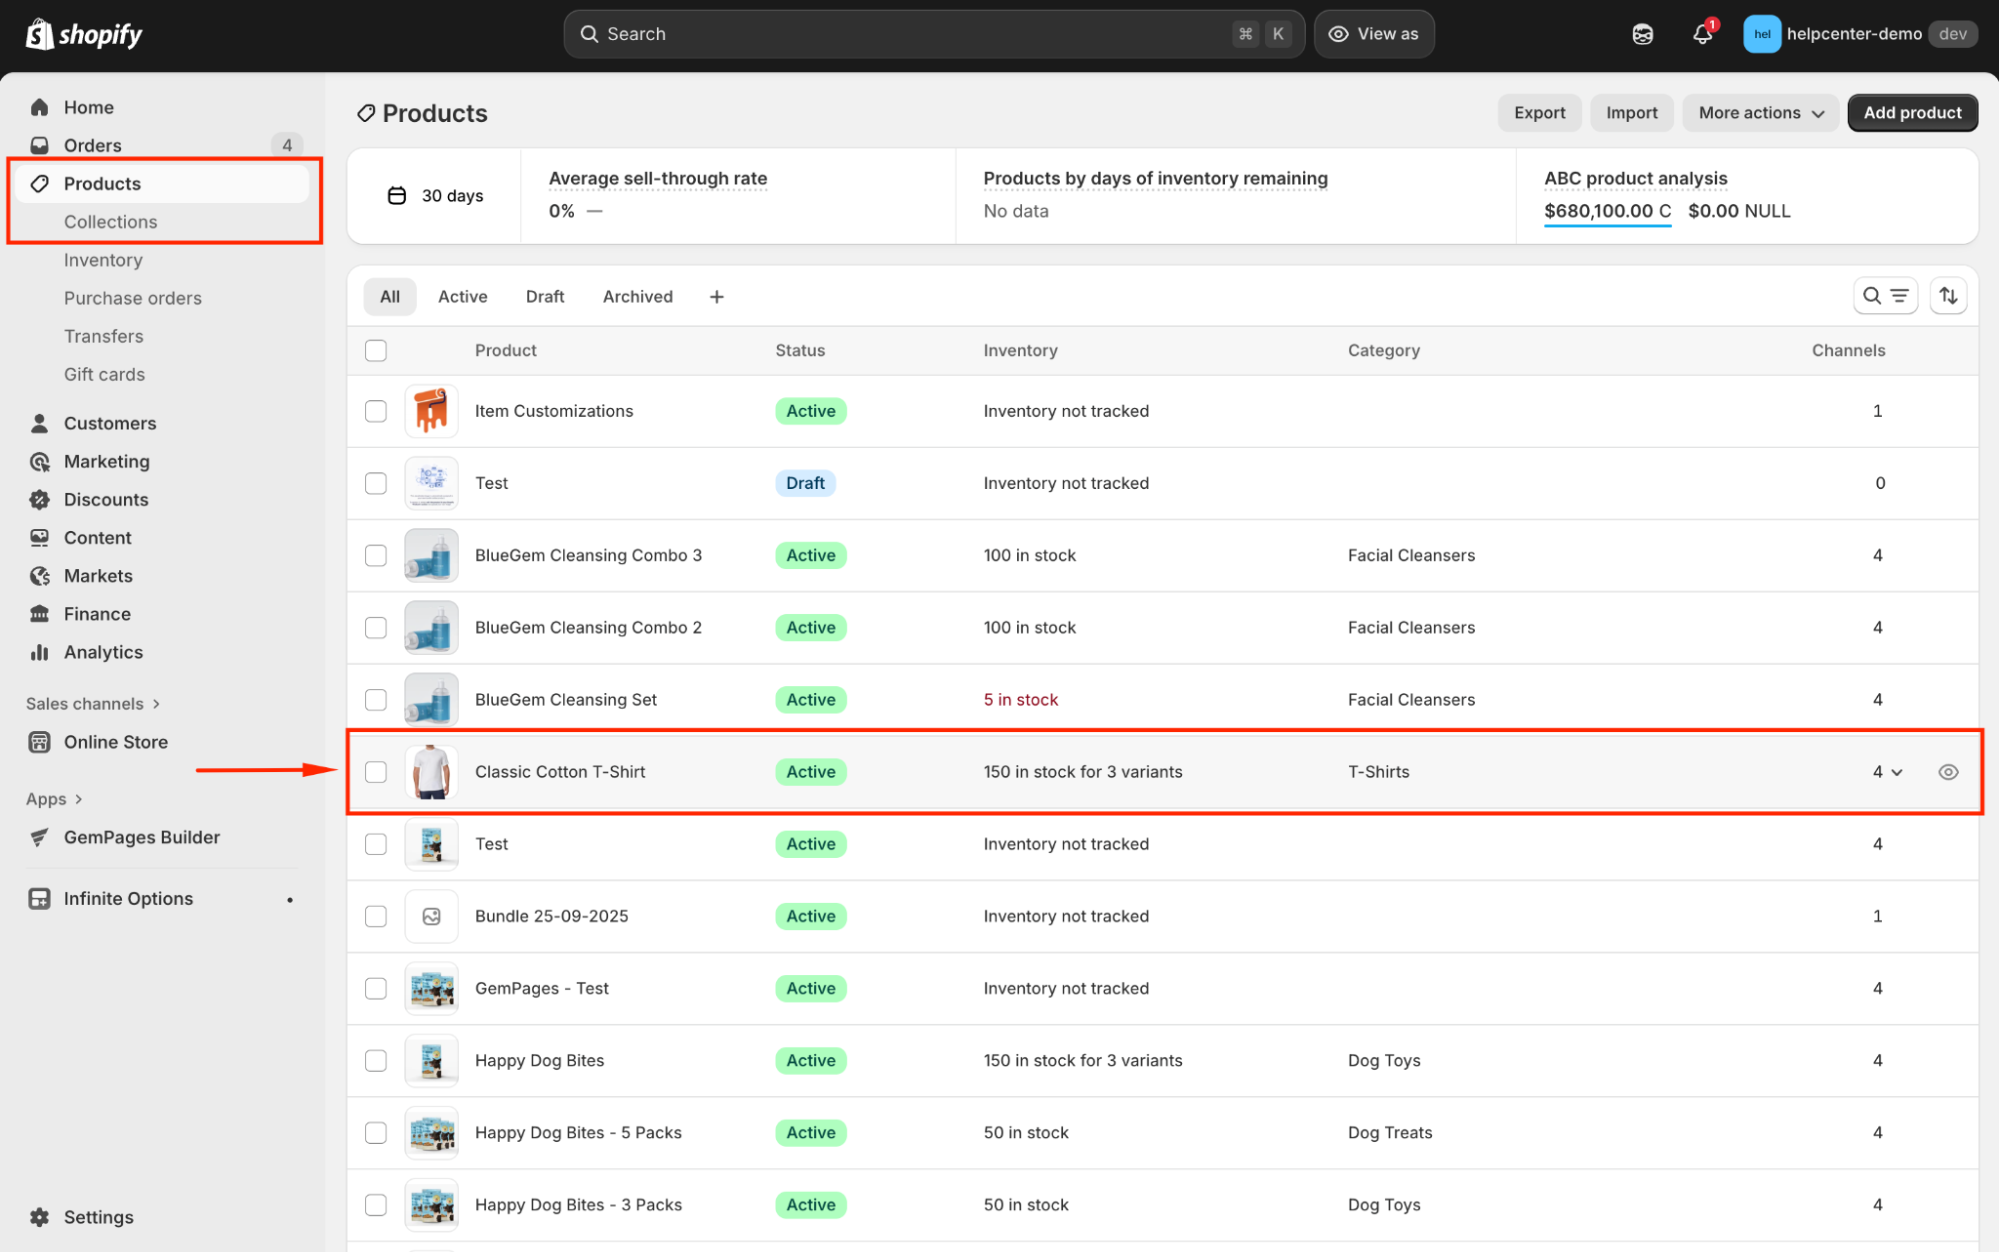
Step 1: From your Shopify Admin > Products, navigate to Products or Collections, and select your preferred one.
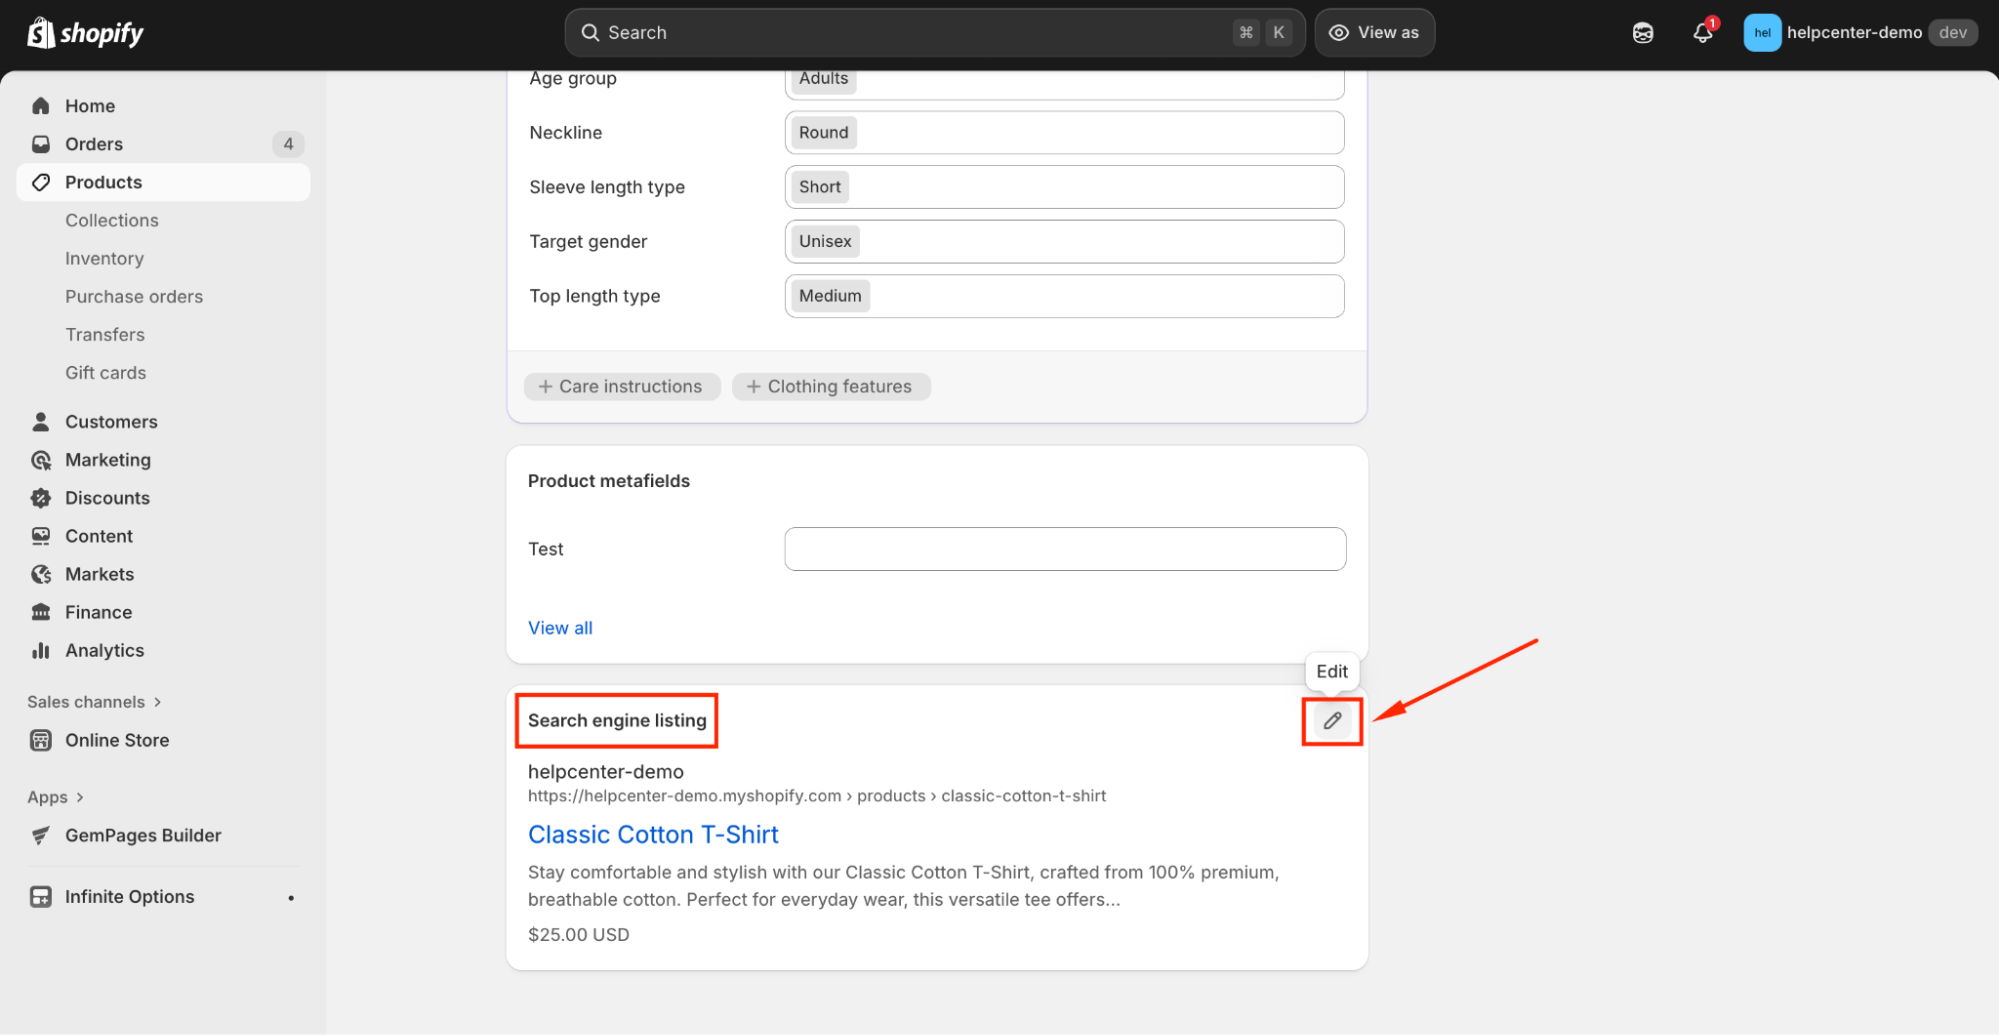
Step 2: Scroll down to the Search engine listing section and click on the pen icon to edit.
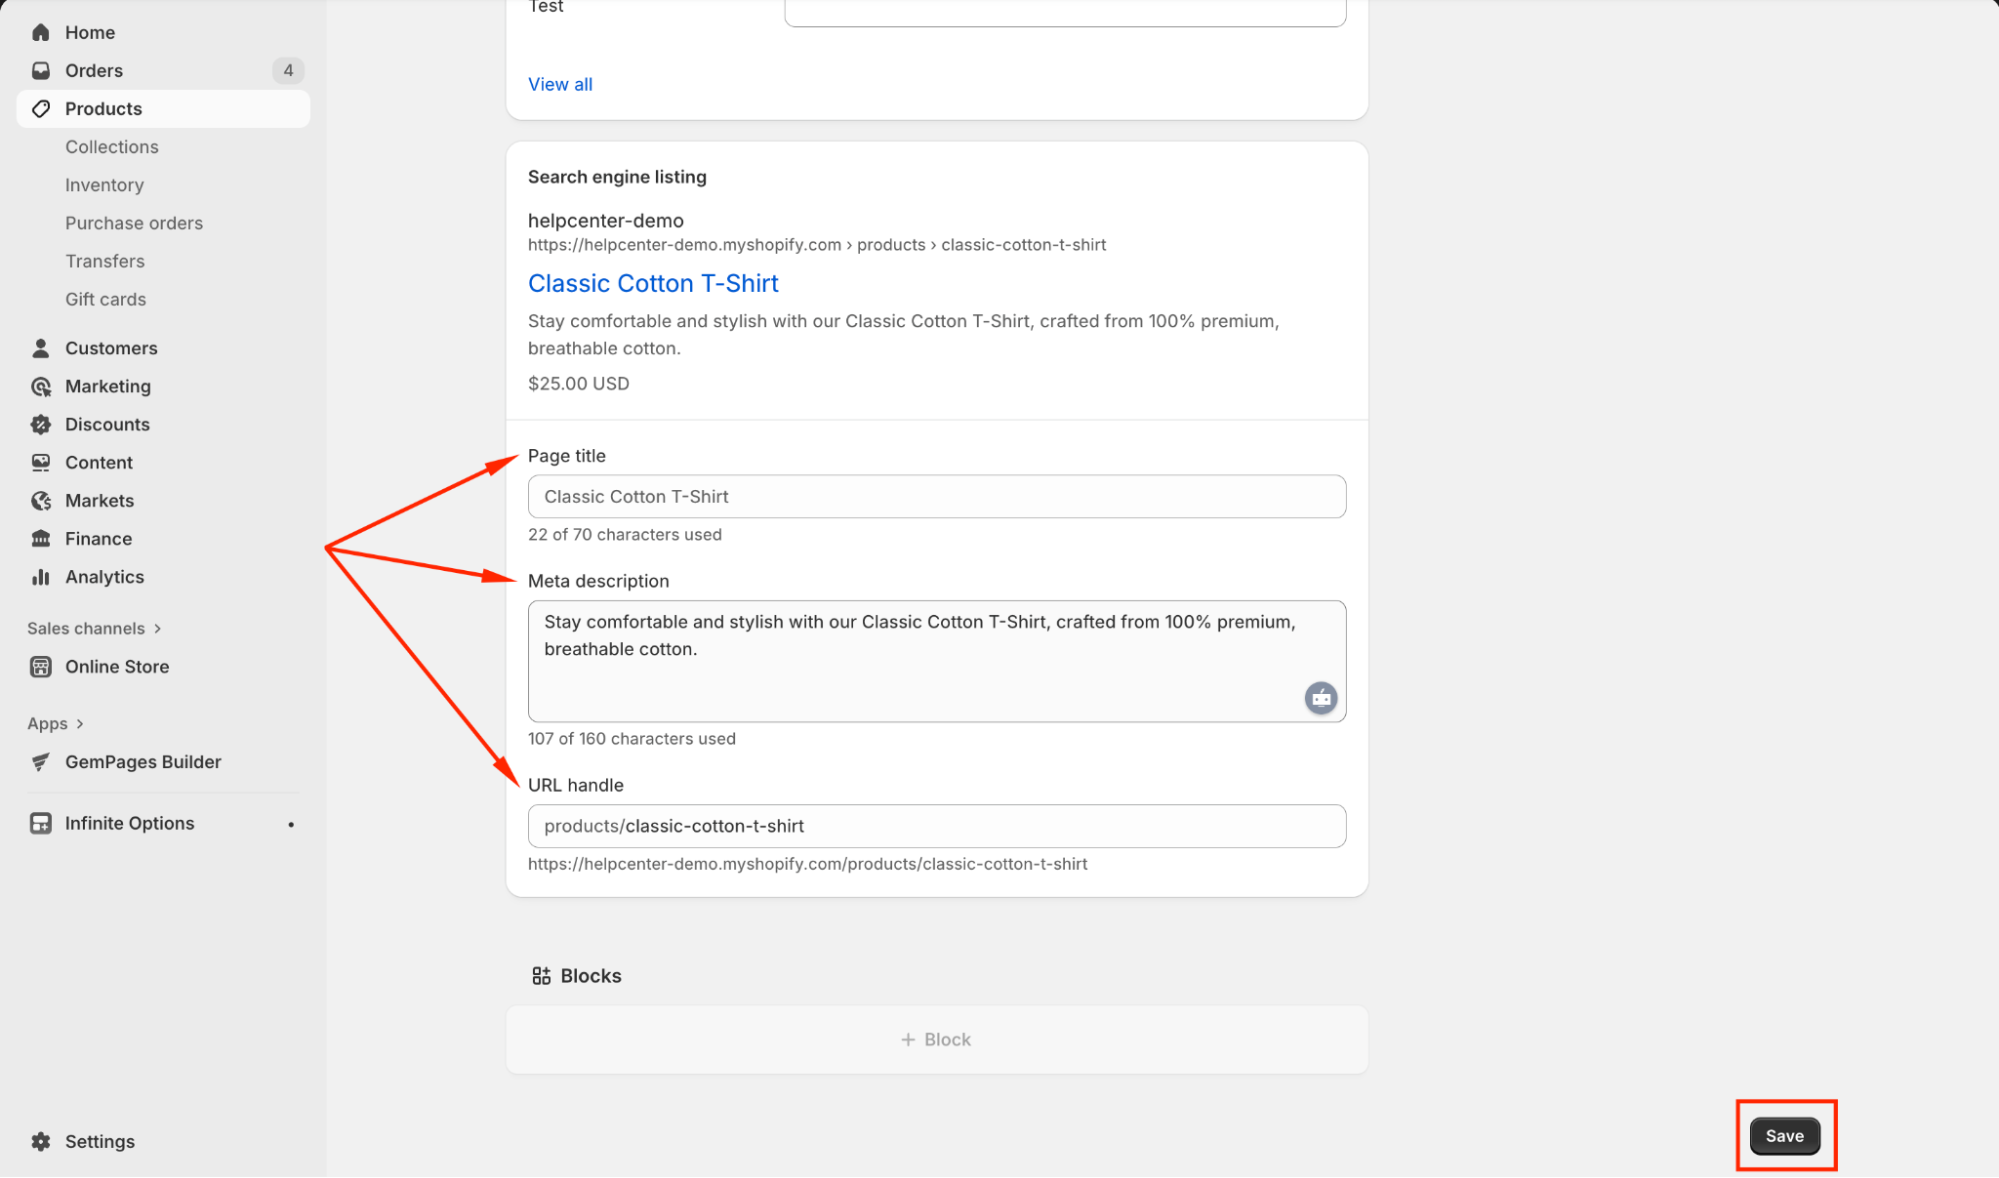
Step 3: Enter your Page title and Meta description for your product page in the respective fields. Hit “Save” when finished.
- For other pages:
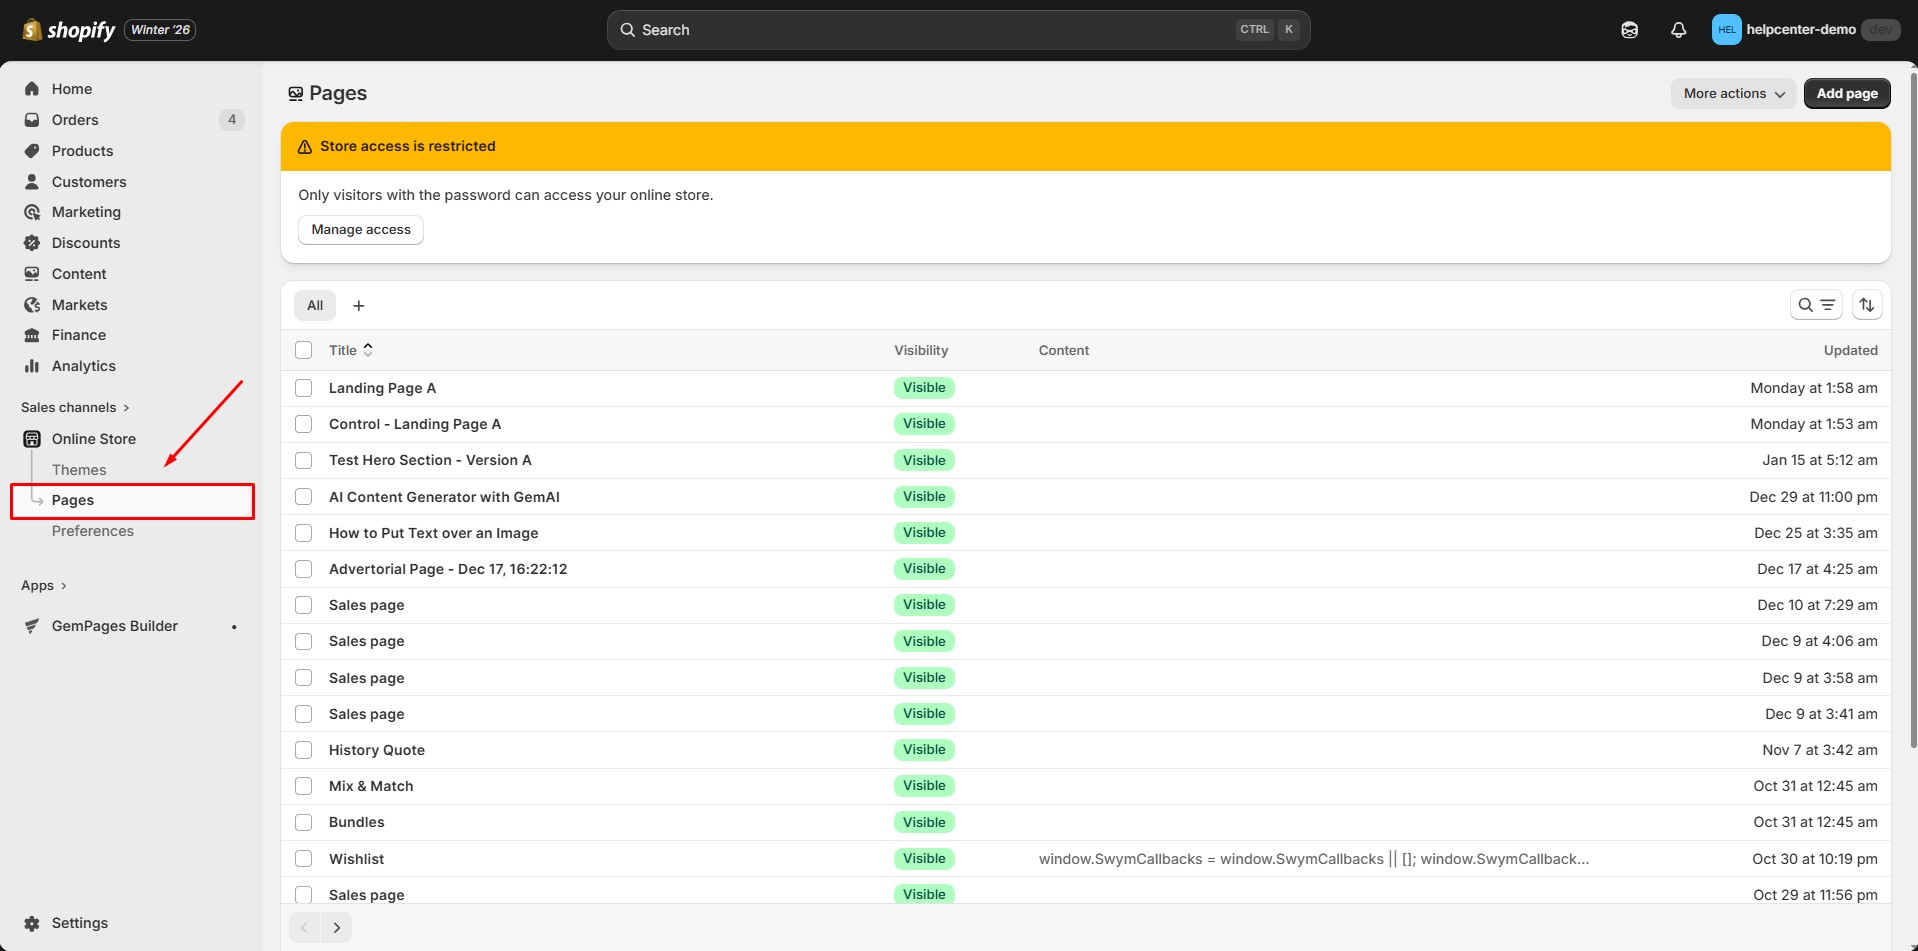
Step 1: From your Shopify Admin > Online stores > Pages and select your preferred page.
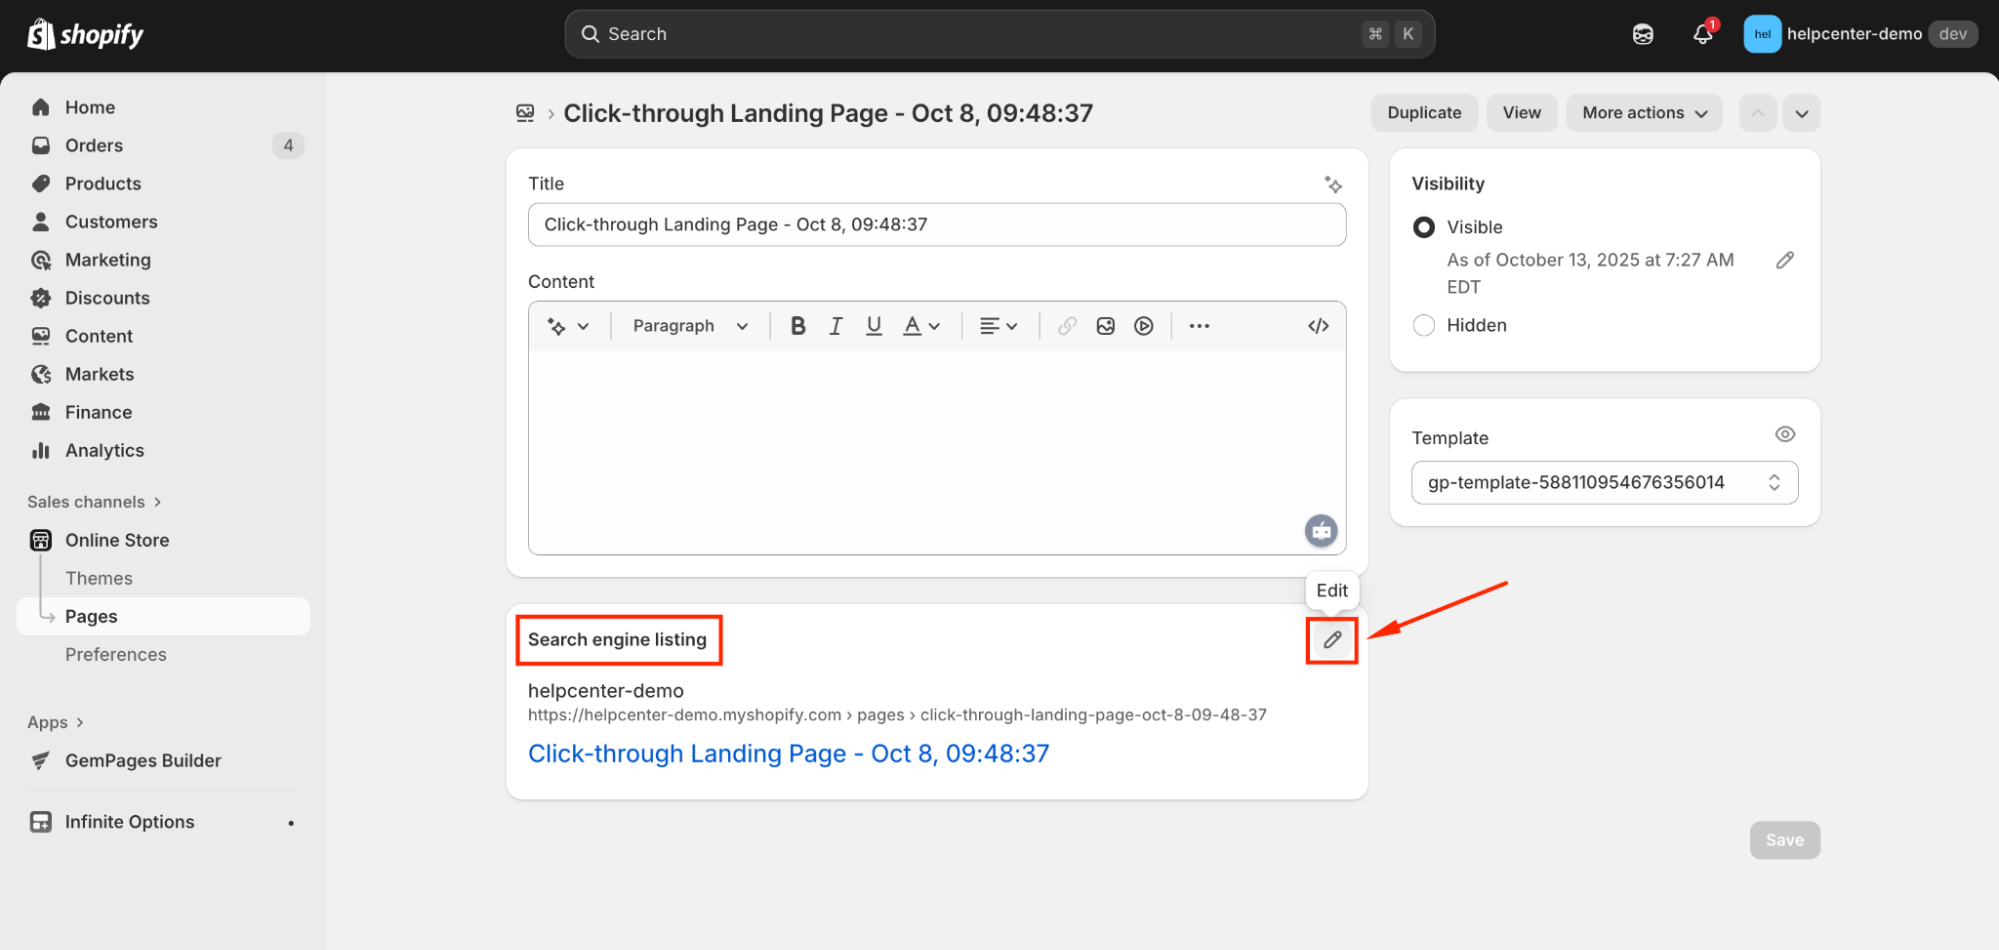
Step 2: Locate the Search engine listing and click the pen icon to edit.
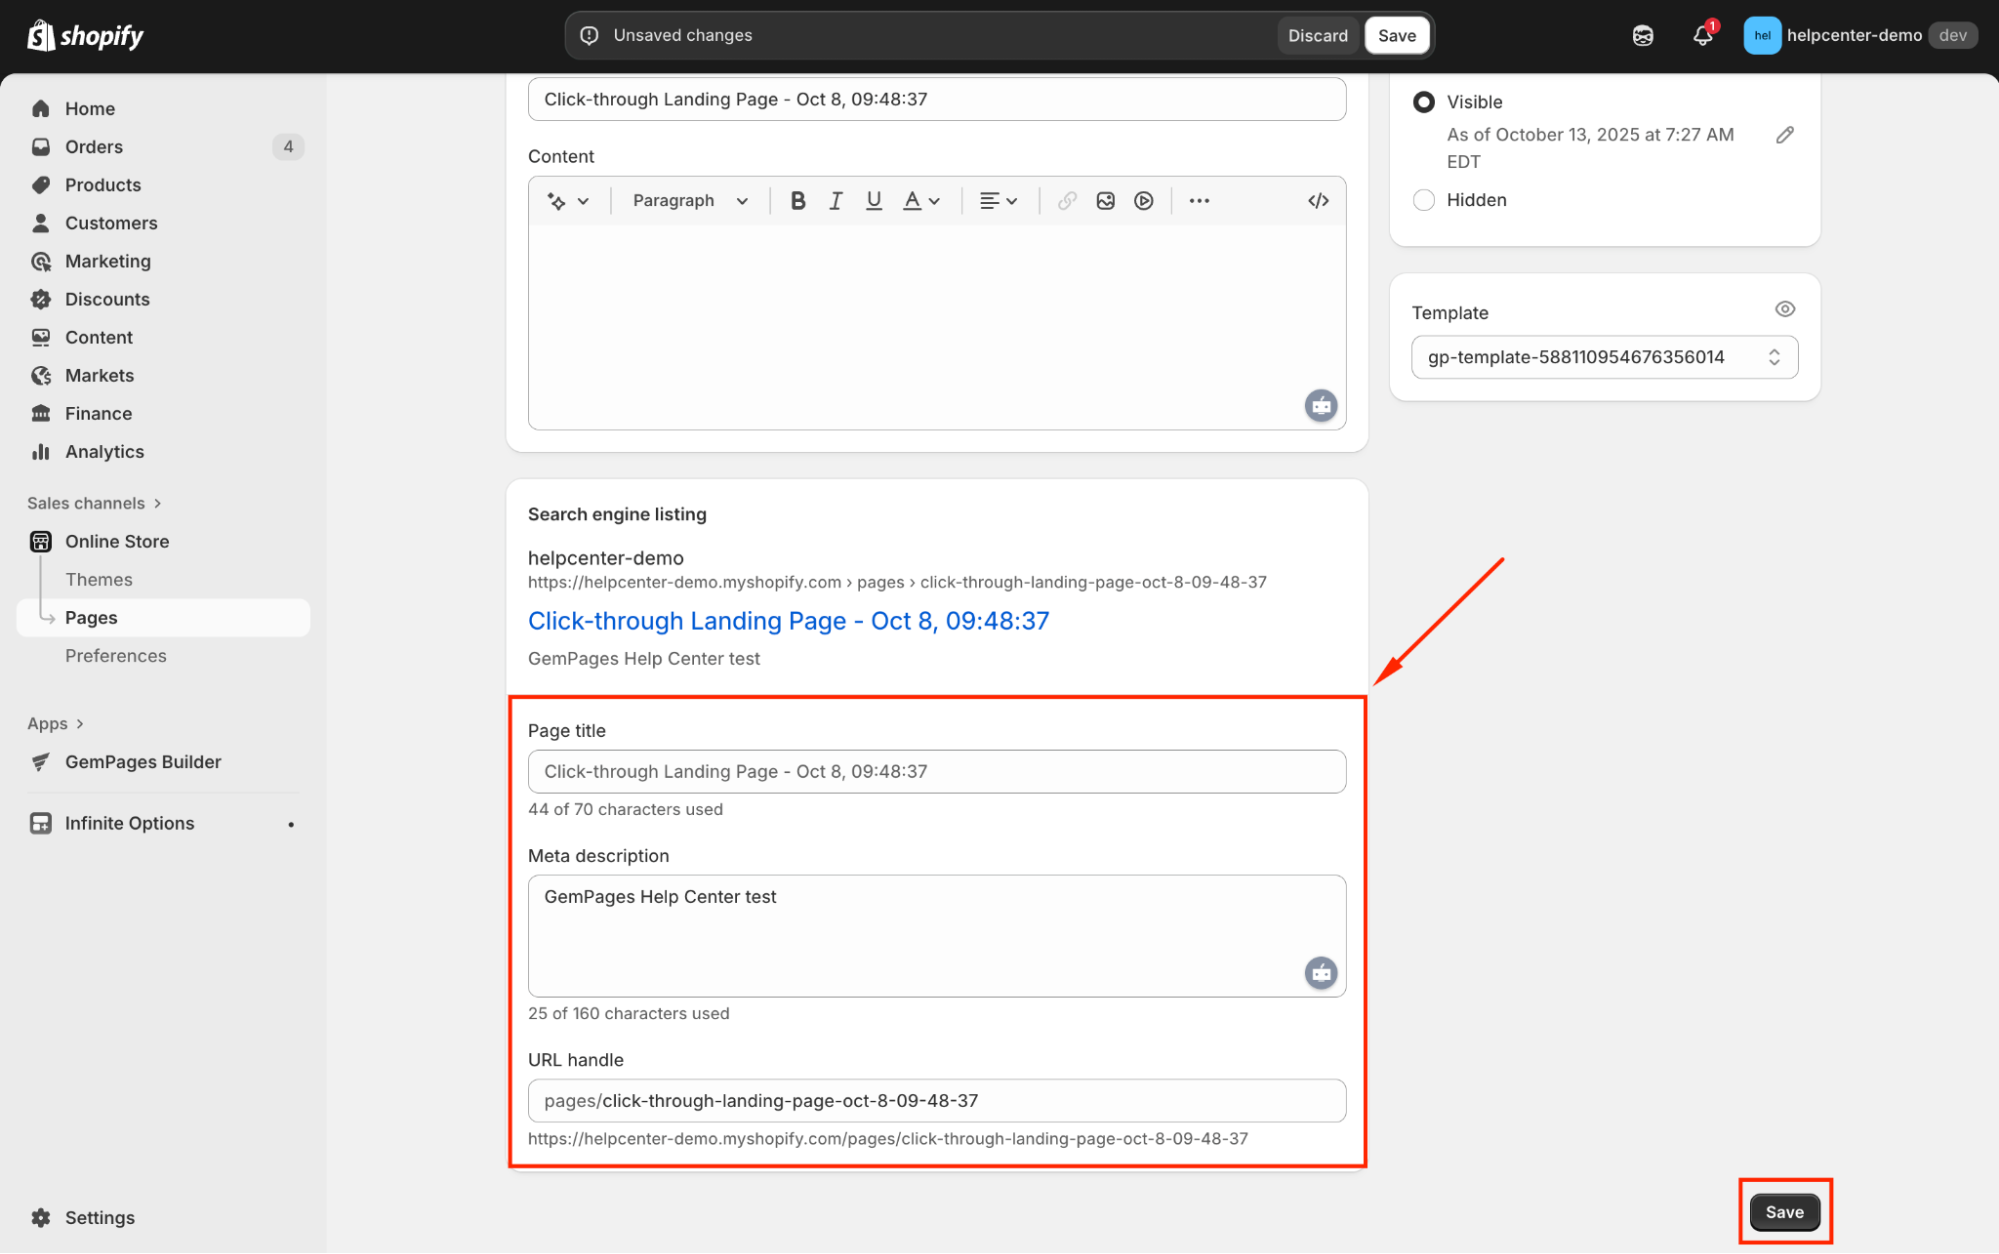
Step 3: Next, fill in the Page Title and Description fields. Hit Save when finished.
SEO Settings on GemPages
Please note that pages created by GemPages will become Shopify’s native pages once you publish them. Therefore, they will inherit the SEO settings from your Shopify admin.
On the other hand, we also provide other SEO tools that will help you rank higher.
For GemPages version 6
Follow these steps to optimize the SEO on-page for your pages built with GemPages.
Edit the Page Title, URL Handle, and Meta Description to enhance SEO
Step 1: From the GemPages Dashboard, select Landing Pages or Blog Posts from the left sidebar. Open your chosen template to edit.
Step 2: Click on the 3-dot button in the right corner and select Publish Settings.

There will be an open window for you to edit the Publish Settings. Under the SEO tab, enter the Page Title, Page URL and handle, and SEO description.

Step 3: Click “Save” when finished.
Set Heading Tags
Also known as header tags, Heading tags are ranked in order of importance from H1 to H6, with H1 usually being the page Title. Heading tags improve your pages’ readability and SEO.
From the GemPages Dashboard, open a template to edit. You can quickly locate the Heading element on the left sidebar of the Editor, under the Base section. Drag & drop the element to any position you prefer.

When clicking on the element, you will find its configuration options in the left sidebar. Under the Title Tag section, you can select the Heading tag from H1 to H6 from the drop-down menu.
Set Alt Texts for Your Images
The alternative text helps to make your website more accessible to the visually impaired. It also allows the search engines to crawl better and rank your website. Here is how you can add the alt text for the image uploaded to GemPages.
From the GemPages Dashboard, open a template to edit and locate the Image element on the left sidebar of the Editor, under the Base section. Drag & drop the element to any position you prefer.

When clicking on the element, you will find its configuration options in the left sidebar. Scroll to the Alt Tag field and input the alt text for your image.
Set Alt Texts for Your Hero Banner
From the GemPages Dashboard, open a template to edit and locate the Hero Banner element on the left sidebar of the Editor, under the Banner section. Drag & drop the element to any position you prefer.
When clicking on the element, you will find its configuration options in the left sidebar. Toggle on the “Fixed mode” switch, you will see the option to input the Alt Tag for your Hero Banner.

For GemPages version 7
If you’re using GemPages v7, follow these steps to enhance your SEO on-page.
Edit the Page Tile, URL Handle, and Meta Description
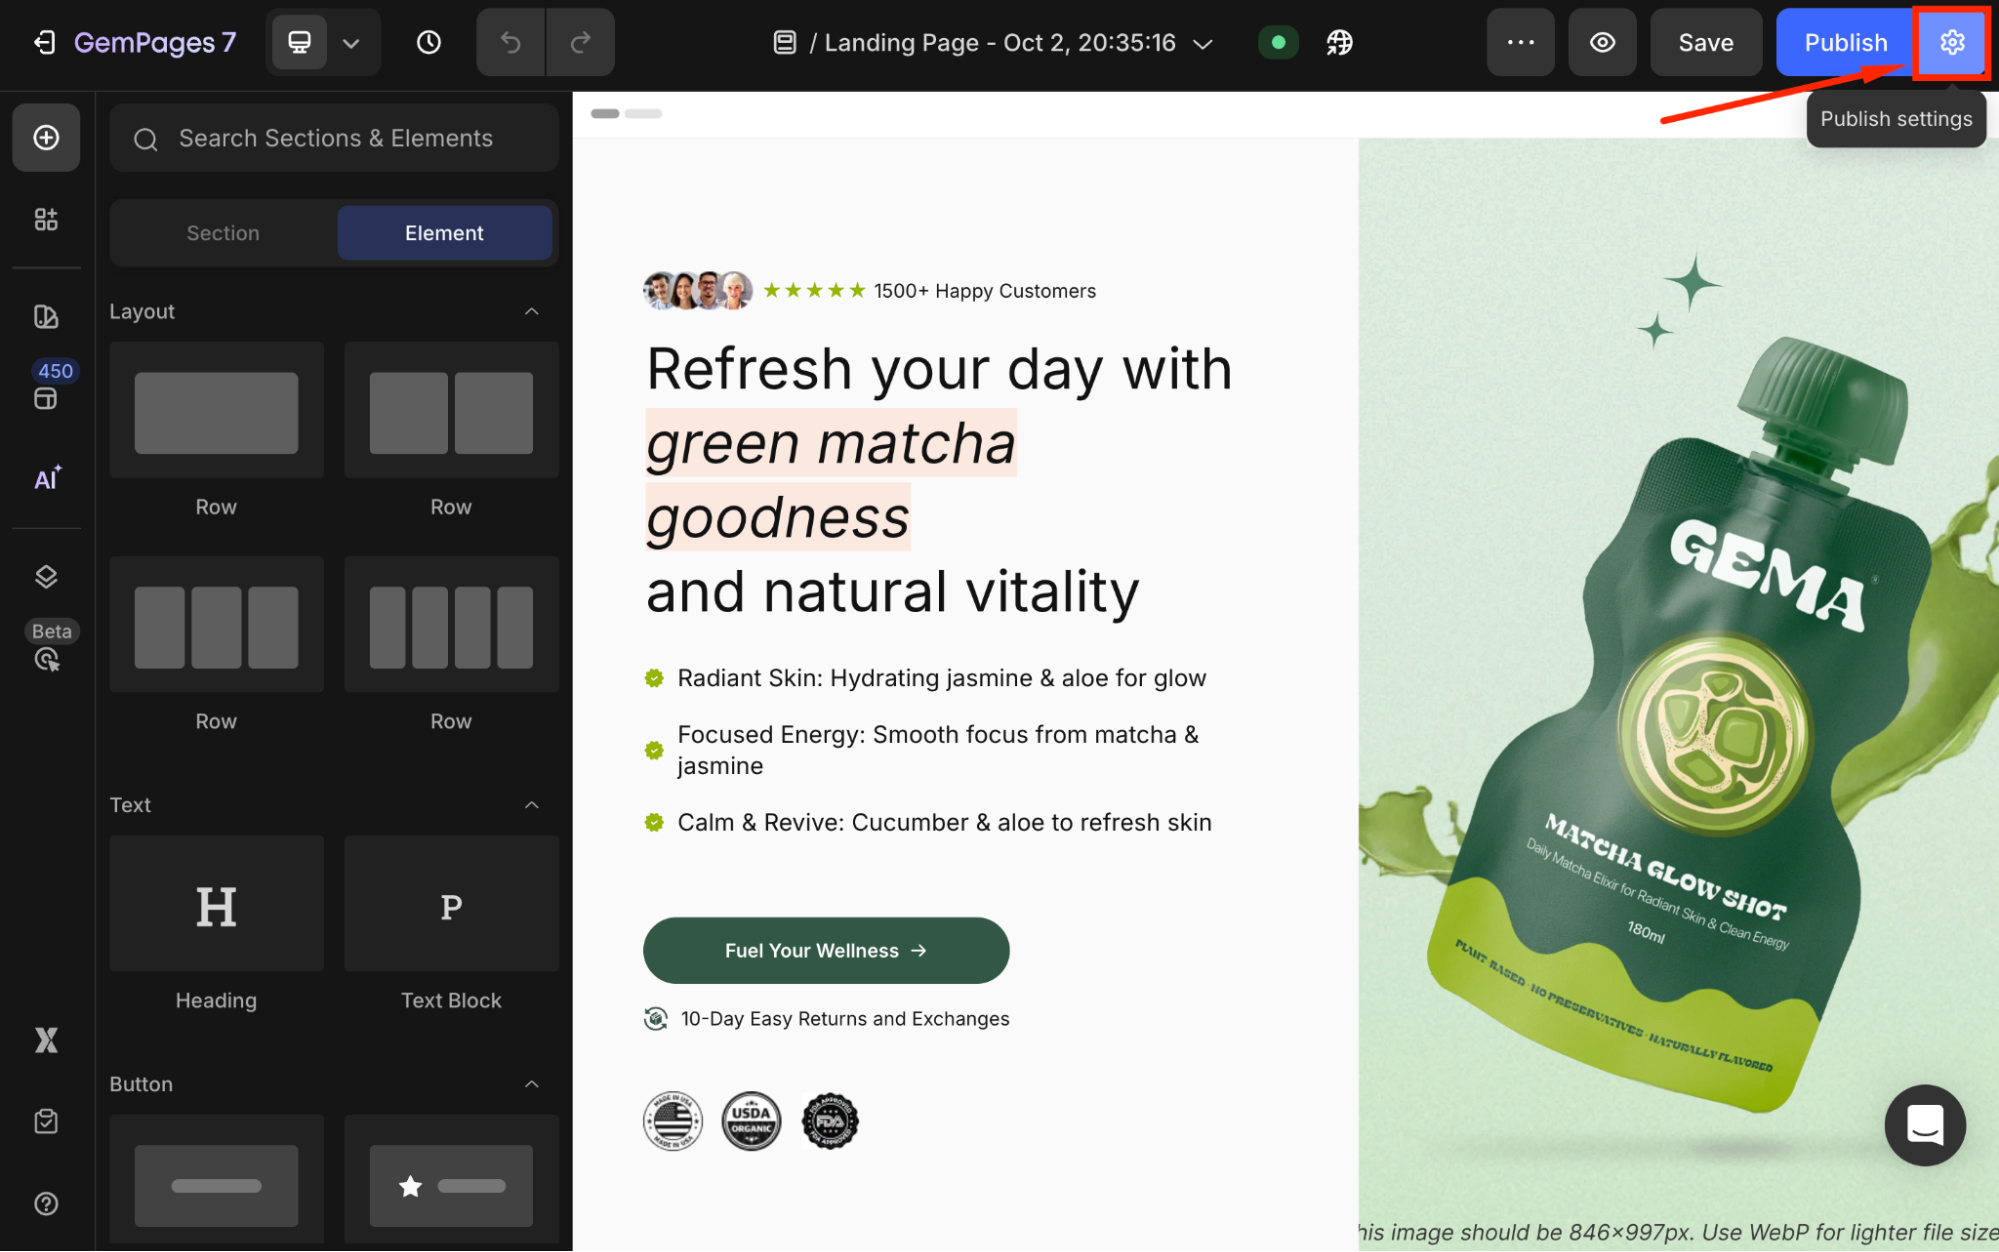
Step 1: From the GemPages Dashboard > Pages, click on your target page to open it in the editor.
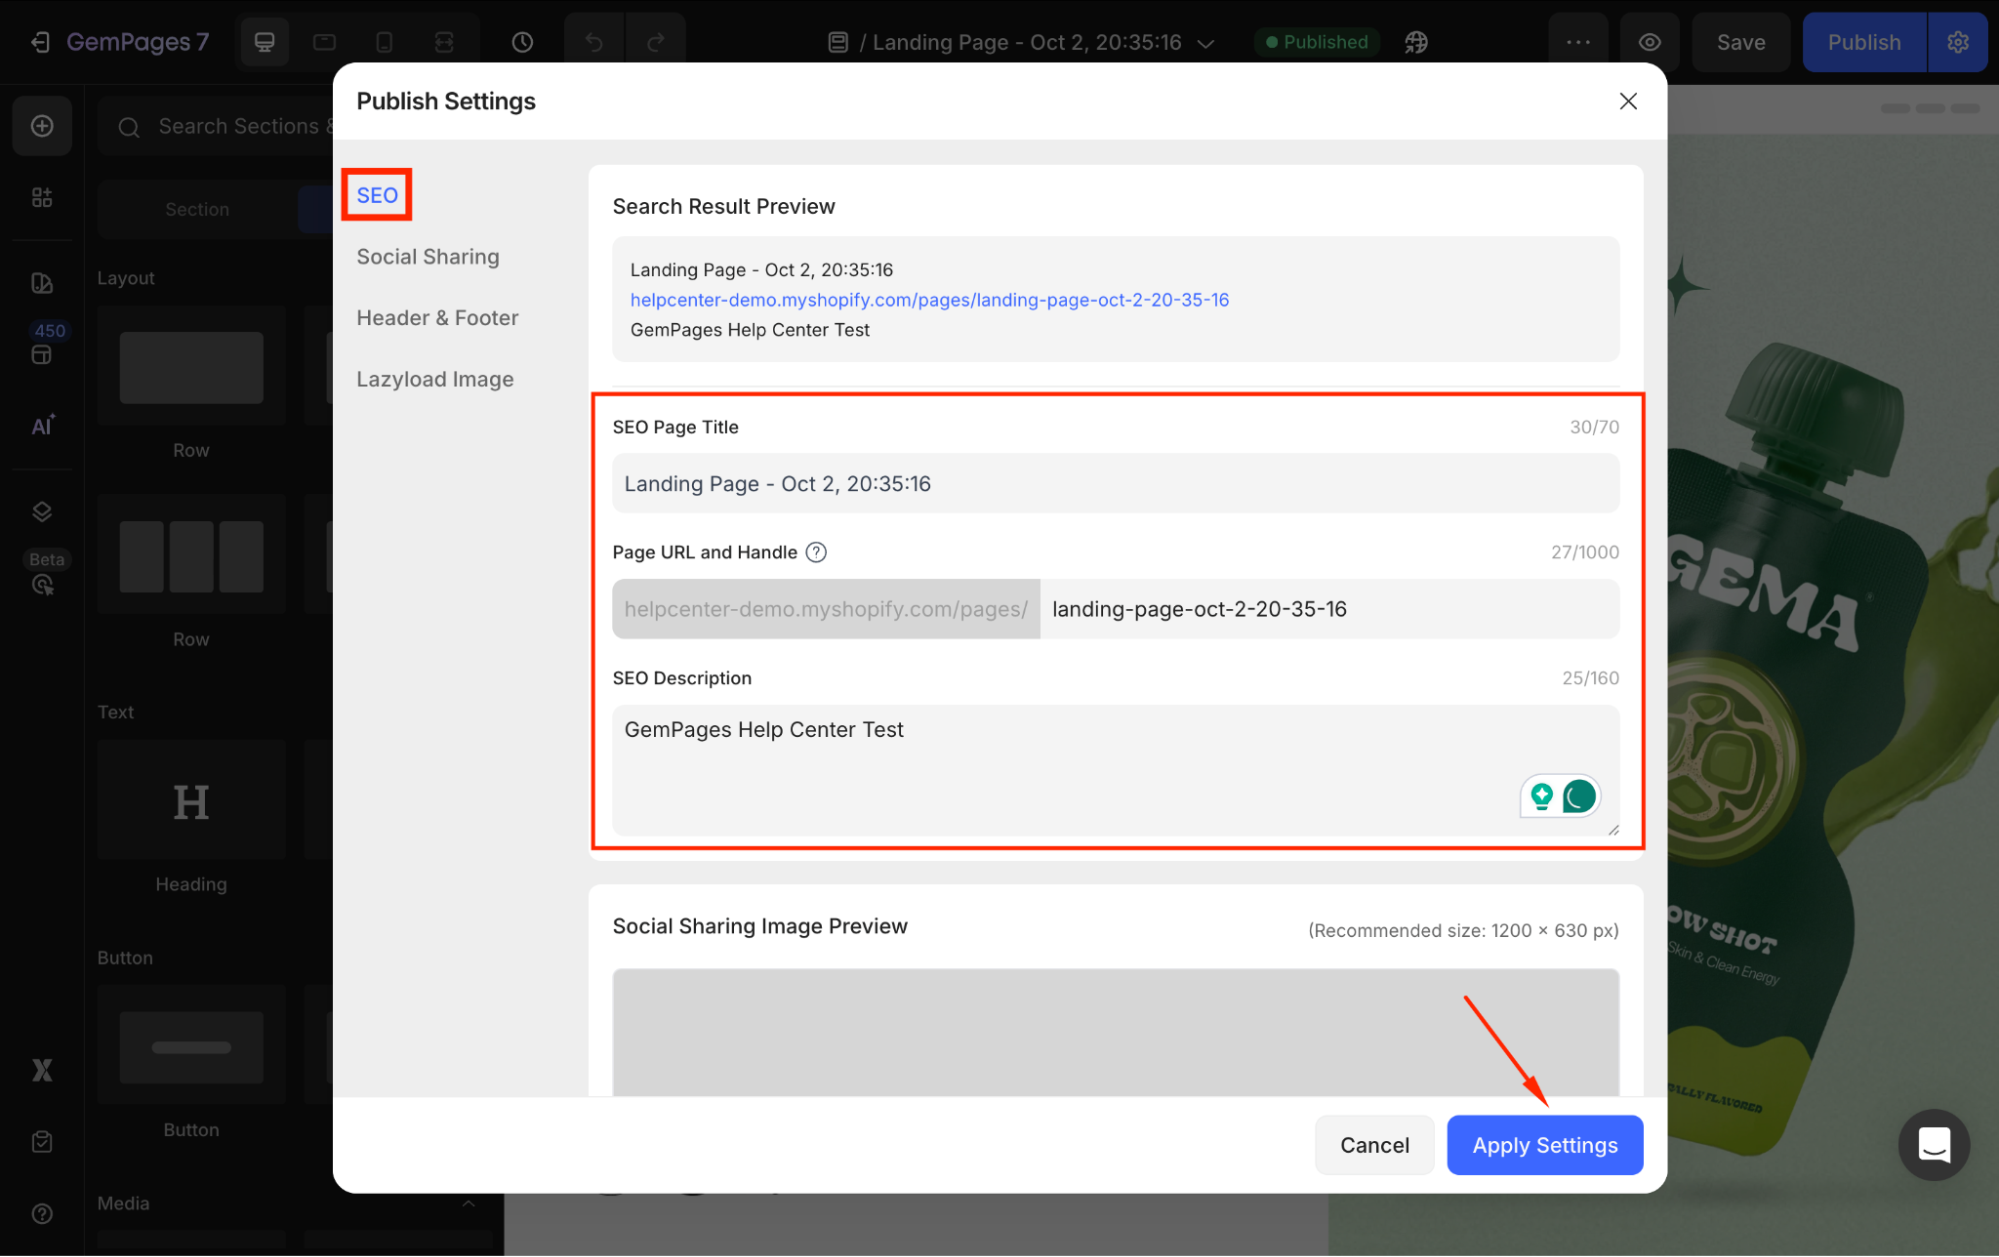
Step 2: Click the Publish Settings icon (⚙️) next to the Publish button to open the settings panel.
Step 3: In the Publish Settings panel, locate SEO, and edit the SEO Page Title, Page URL and Handle, and SEO Description as you prefer. Once done, hit Apply Settings.
Set Heading Tags
In the GemPages Editor, click on any Heading Elements and locate SEO under the Settings tab in your left sidebar.
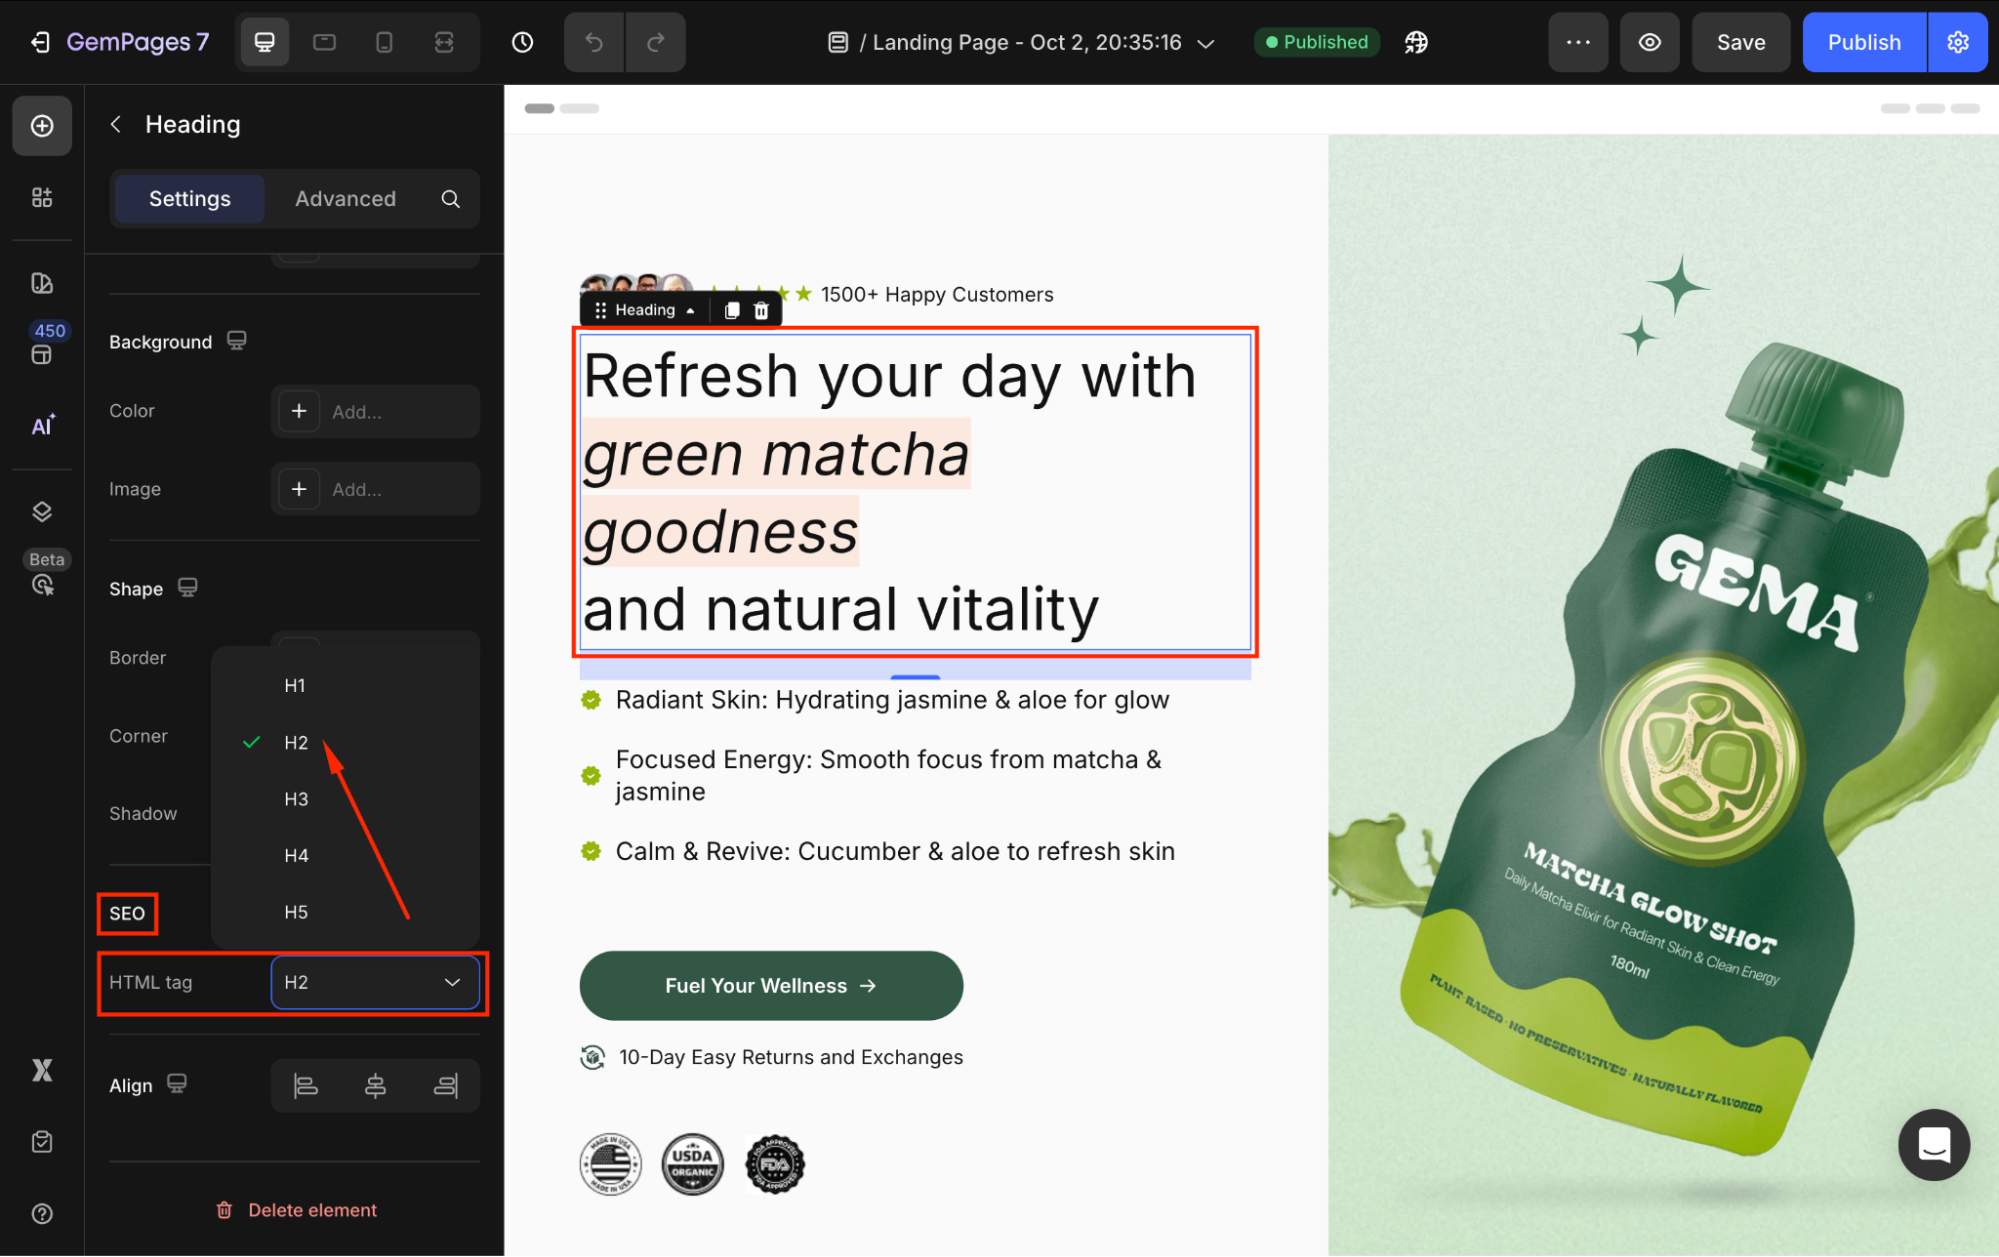
Click on the HTML tag and select your preferred tag for this heading.
Please note that:
- “H1–H6” tag: Use semantic heading structure to improve search engine rankings.
- “Div” tag: For non-semantic purposes, the title doesn’t need to be indexed as a heading.
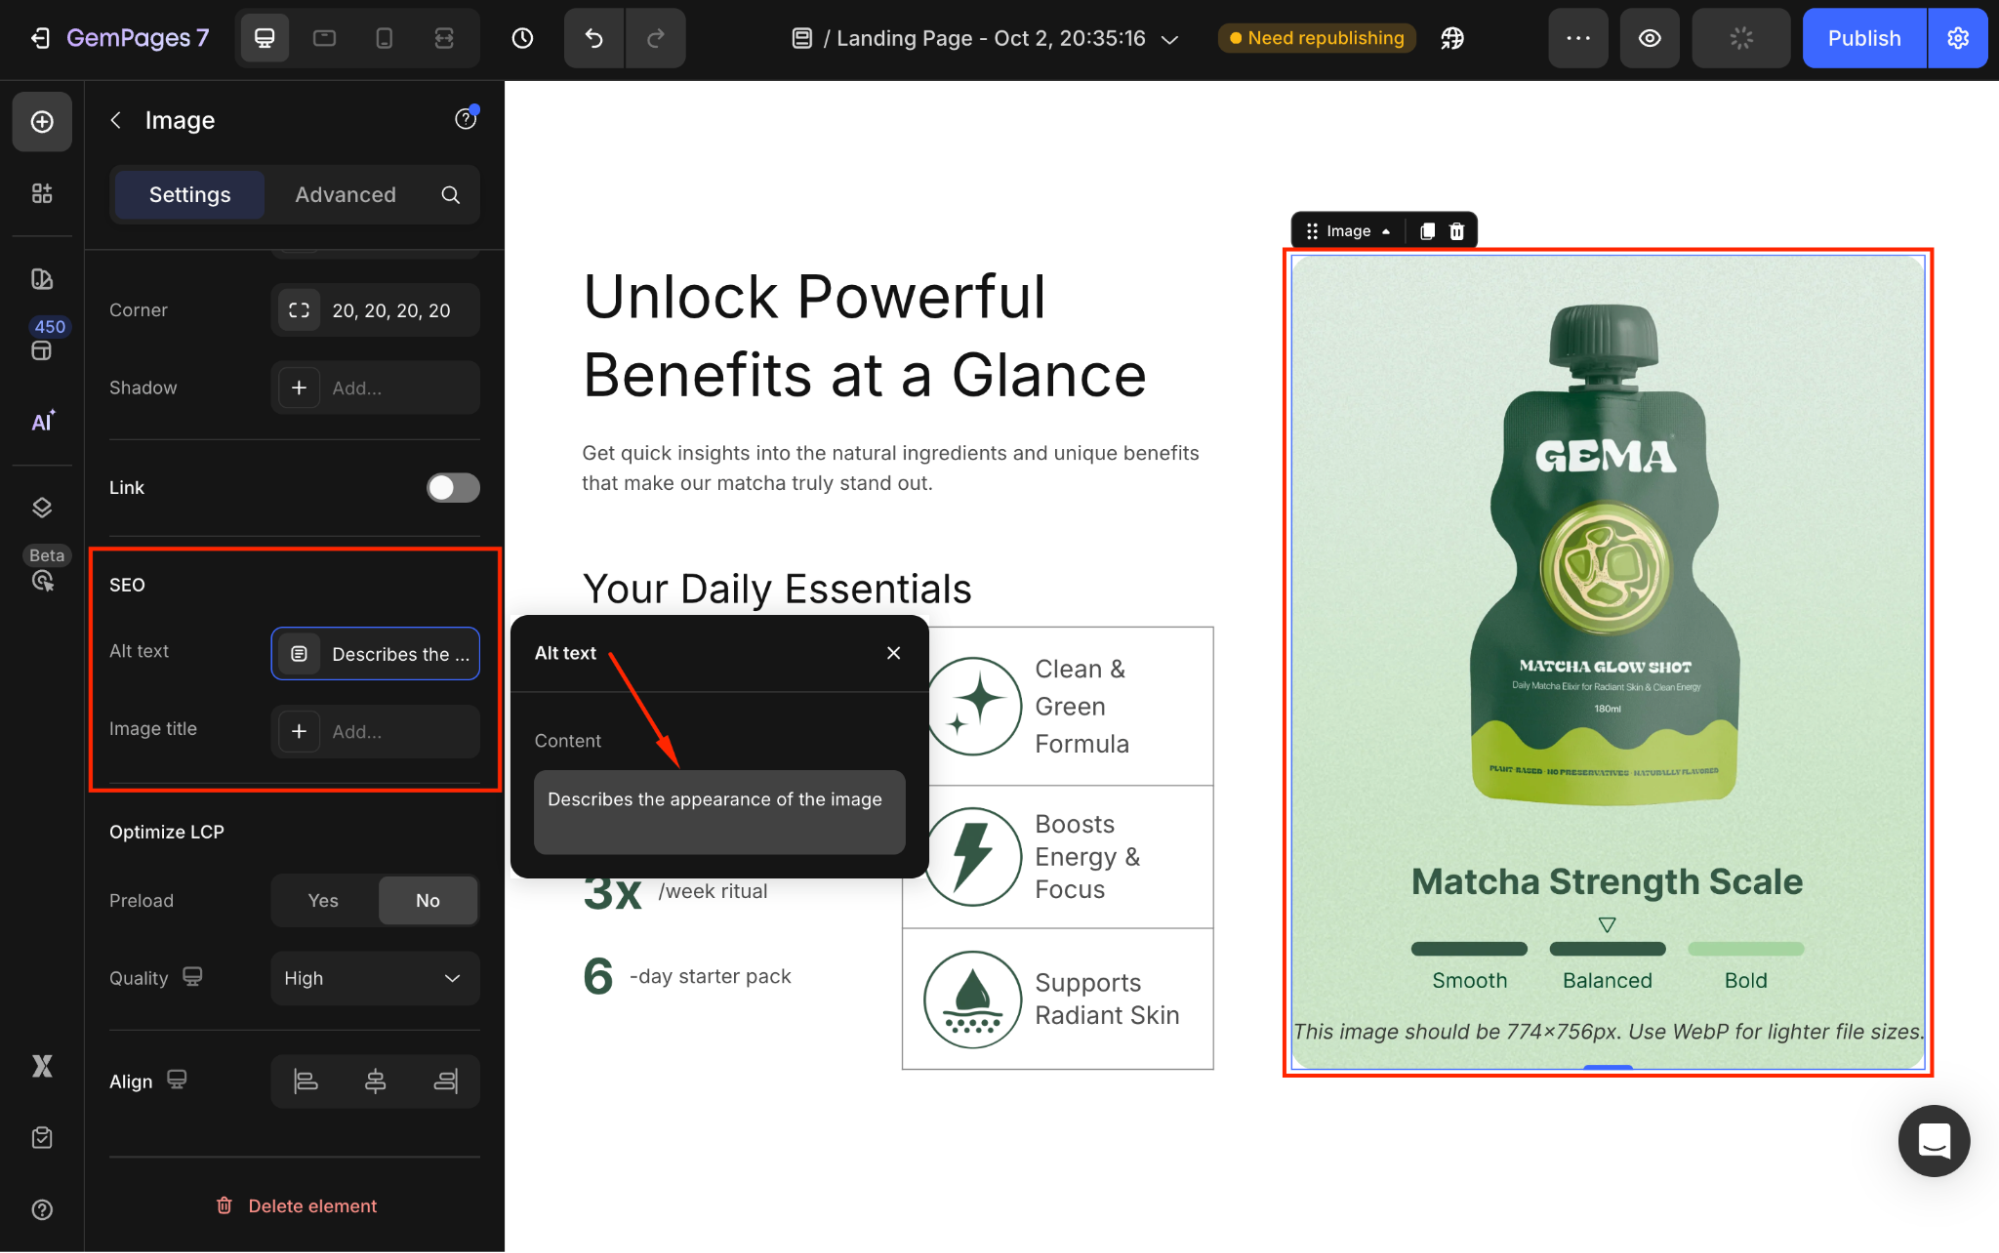
Set Alt Texts for Your Image
Click on your Image Element on your page and locate the SEO section under the Settings tab in your left sidebar.
From there, you can edit the Alt Texts (alternative texts) of your image as well as change the image title to enhance SEO.
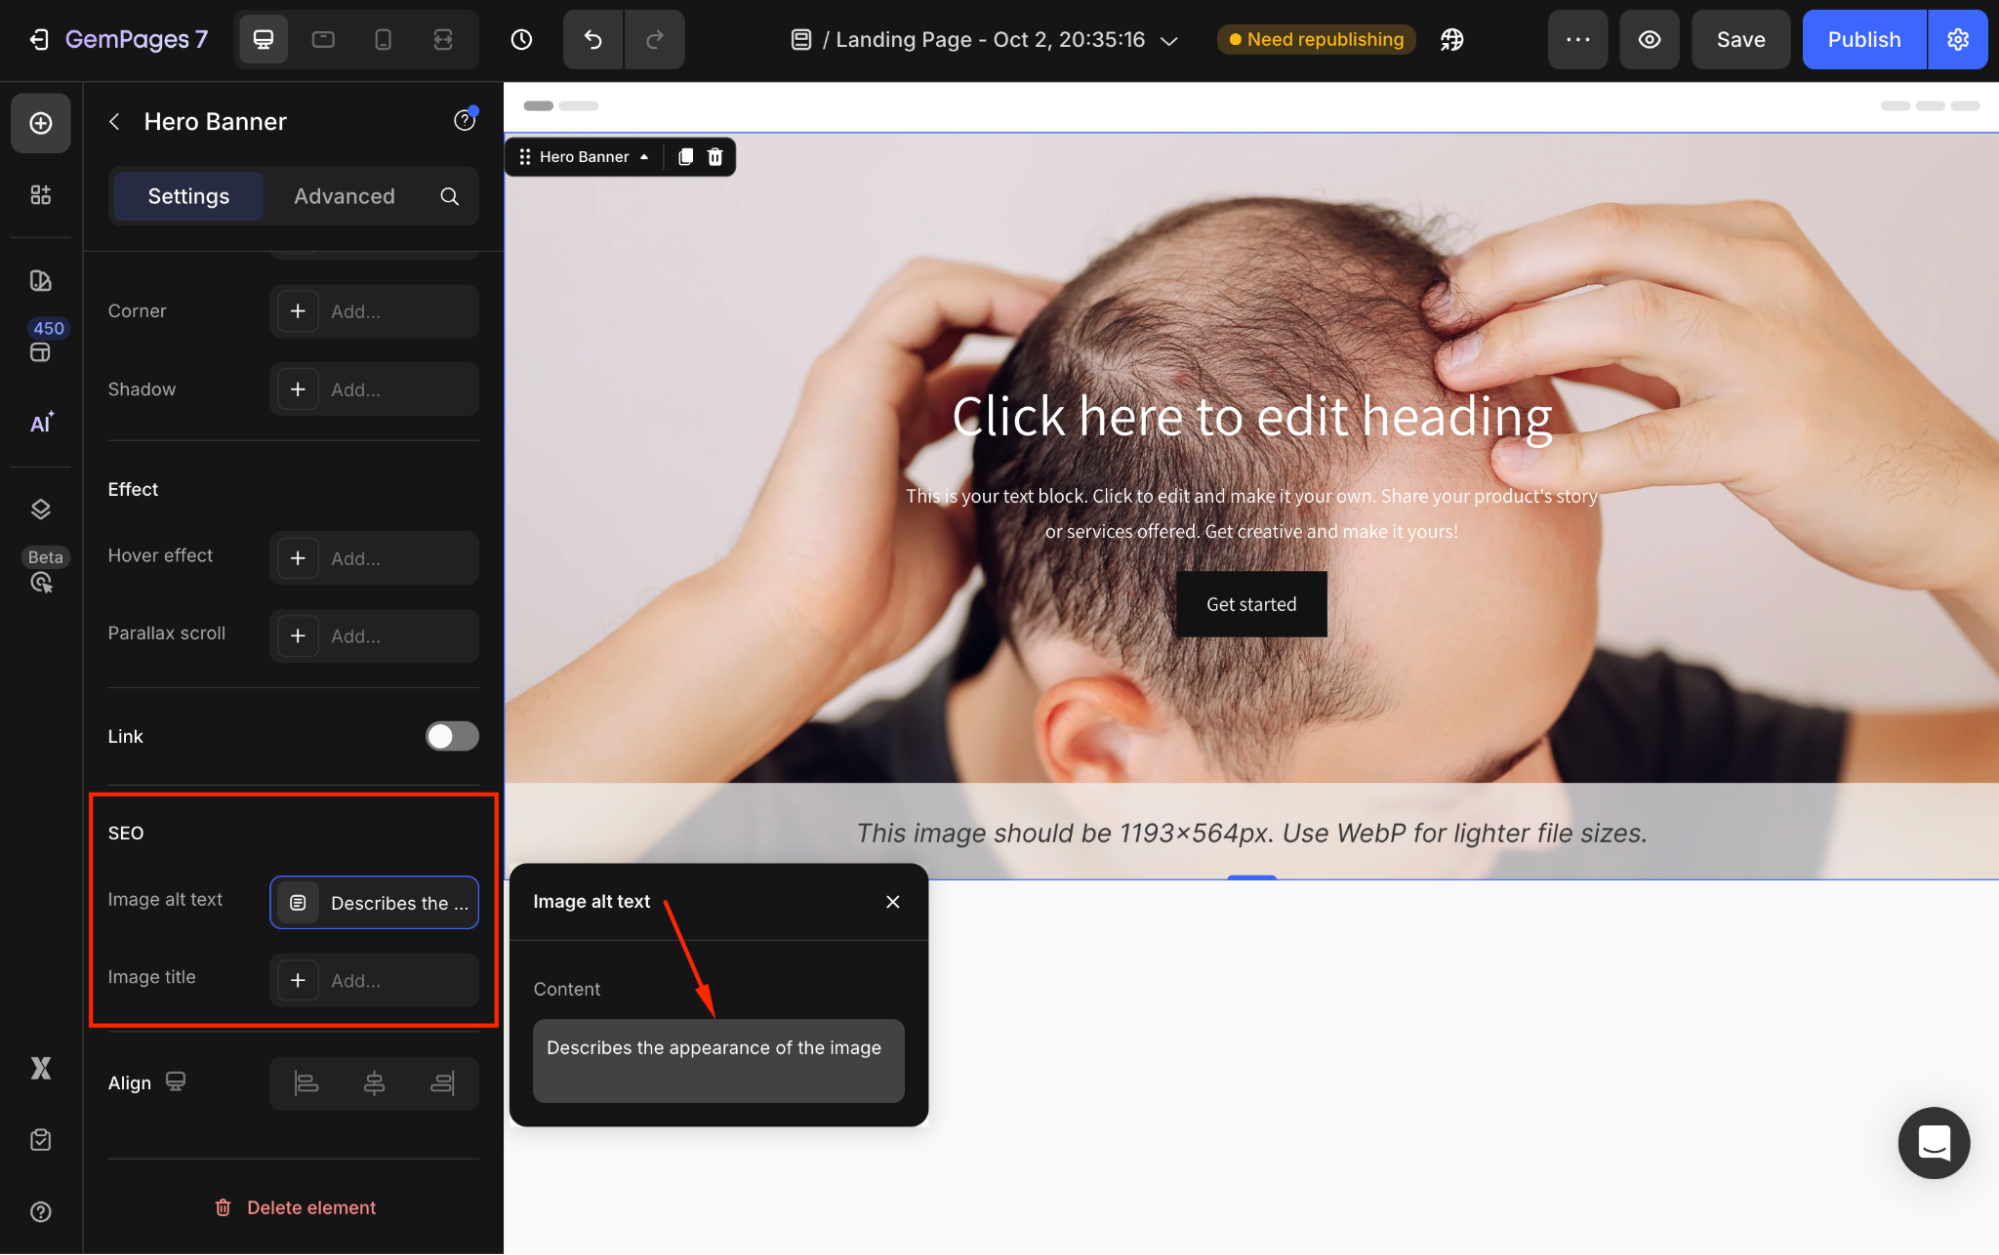
You can follow the same steps to set Alt Texts for your Hero Banner, Video, etc.
Shopify SEO Tips for Better On-Page Optimization
- Optimize page titles and meta descriptions: Always customize your Title and Meta description instead of using auto-generated text. This improves relevance and click-through rate (CTR).
- Use proper heading hierarchy (H1–H2): Make sure each page has only one H1 and uses H2 tags to structure sections clearly. This helps both readability and SEO.
- Add alt text to images and banners: Alt text improves accessibility and allows search engines to better understand your visual content.
- Keep URLs clean and descriptive: Edit the Page URL and handle in Shopify or GemPages to remove unnecessary words or numbers.
- Preview search engine listings: Always review Shopify’s search engine preview to ensure your title and meta description are not cut off.
Common Shopify SEO Mistakes to Avoid
- Using multiple H1 tags on the same page: This can confuse search engines about the main topic of your page.
- Leaving default meta descriptions unchanged: Generic descriptions reduce CTR and may cause Google to rewrite them.
- Missing alt text on images: Images without alt text miss SEO and accessibility opportunities.
- Overstuffing keywords: Repeating keywords unnaturally can harm readability and SEO performance.
- Ignoring page speed considerations: While GemPages code is optimized, excessive images or heavy elements can still affect load time.
FAQs about Optimizing SEO in GemPages
Does GemPages impact my ranking?
Many factors can affect your website’s ability to rank on relevant search engine results pages, including content quality. Please be rest assured that all the content created in GemPages is structured data, which is readable by search engines. Moreover, GemPages’ code won’t make any impact on your site structure.
Does GemPages slow down the page loading speed?
Page builders add more code to your Shopify theme to better display the store, hence it can result in a slower loading time. However, all of GemPage’s code is optimized and minified.
We also offer various options for you to improve the page performance like high-speed CDN, Lazy Loading, Preload resource hint, and so on. Please take a look at this article on how to apply these features to your store.
Why doesn’t Google show my Meta Description?
The most common reason that Google shows a different meta description than the one you provided, is that they believe that meta description isn’t good enough. Unfortunately, nothing that you can do about it, but try a different description. Make sure your meta description accurately reflects what’s on your page. Also, it’s recommended to keep your meta description under 160 characters.
How can I check my SEO ranking?
There are many free tools available for you to check your SEO ranking. You can consider using SEO Site Checkup, Seobility, or SiteChecker for a quick analysis of your store status and any potential issues.


Thank you for your comments