In this article, you will learn about the Product List element and how to use them to best display your store offerings.
What is the Product List Element?
The Product List is an essential element designed to demonstrate a collection of products on your page. You can use it to upsell and cross-sell to maximize the sale value from your customers.

From the GemPages dashboard, open your preferred template to edit. You can quickly find the Product list element on the left sidebar of the Editor, under the Product section. Drag & drop it into your preferred position to start editing.

When clicking on the element, you will find its configuration options in the left sidebar, including the Settings and Design tabs.
Configure the Settings Tab
Collection
Hit “Pick a collection” and choose one collection from the list to see how it will be displayed.

Dynamic
The Dynamic feature, available only on Shopify Collection pages, allows automatic data syncing from Shopify to your Product List element.

Products per Row
You can decide how many product items will be displayed in a row by selecting from the drop-down menu.
To change this number on different devices, click the Desktop icon on the right corner.

Number of Product
Determine how many products will be shown in the element. Be noted that the maximum number is 50 products, which you can adjust with the slider or the number box.

Spacing
Adjust the slider or input the pixel number to change the space between products inside the product list.

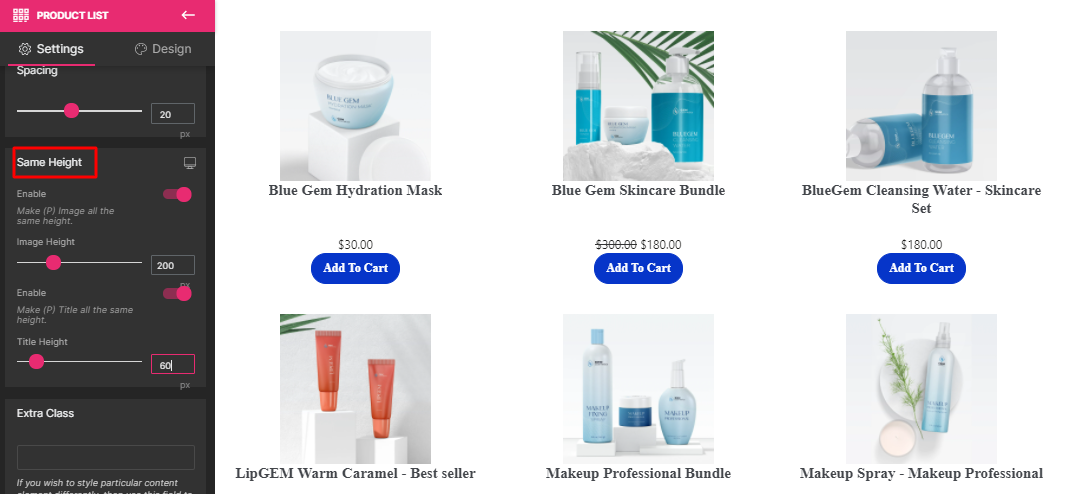
Same Height
This feature enables you to set the same height to the products’ images and titles. Toggle the switch first, then adjust the height you want using the slider or the number box.

Extra class
If you wish to further customize the element with coding, please use this field to add a class name and then refer to it in the CSS file.

Configure the Design Tab
Check out our article to learn how to configure the Design Tab


Thank you for your comments