


Offering Free Shipping is one of the simplest yet most effective ways to boost conversions and improve the shopping experience. This guide will show you how to set up free shipping in Shopify and display a “Free Shipping” badge or message on your storefront using GemPages.
Free shipping is a powerful incentive for customers to complete their purchase. Shopify allows you to configure free shipping in multiple ways, either as a built-in shipping rate, a conditional rule, or via a discount code.
Once you’ve configured it in Shopify, you can use GemPages to visually display “Free Shipping” on your product or landing pages, ensuring that customers see it right away, not only during checkout.
How to Set Up Free Shipping in Shopify?
1. Always Free Shipping (Unconditional)
To offer free shipping for all orders:
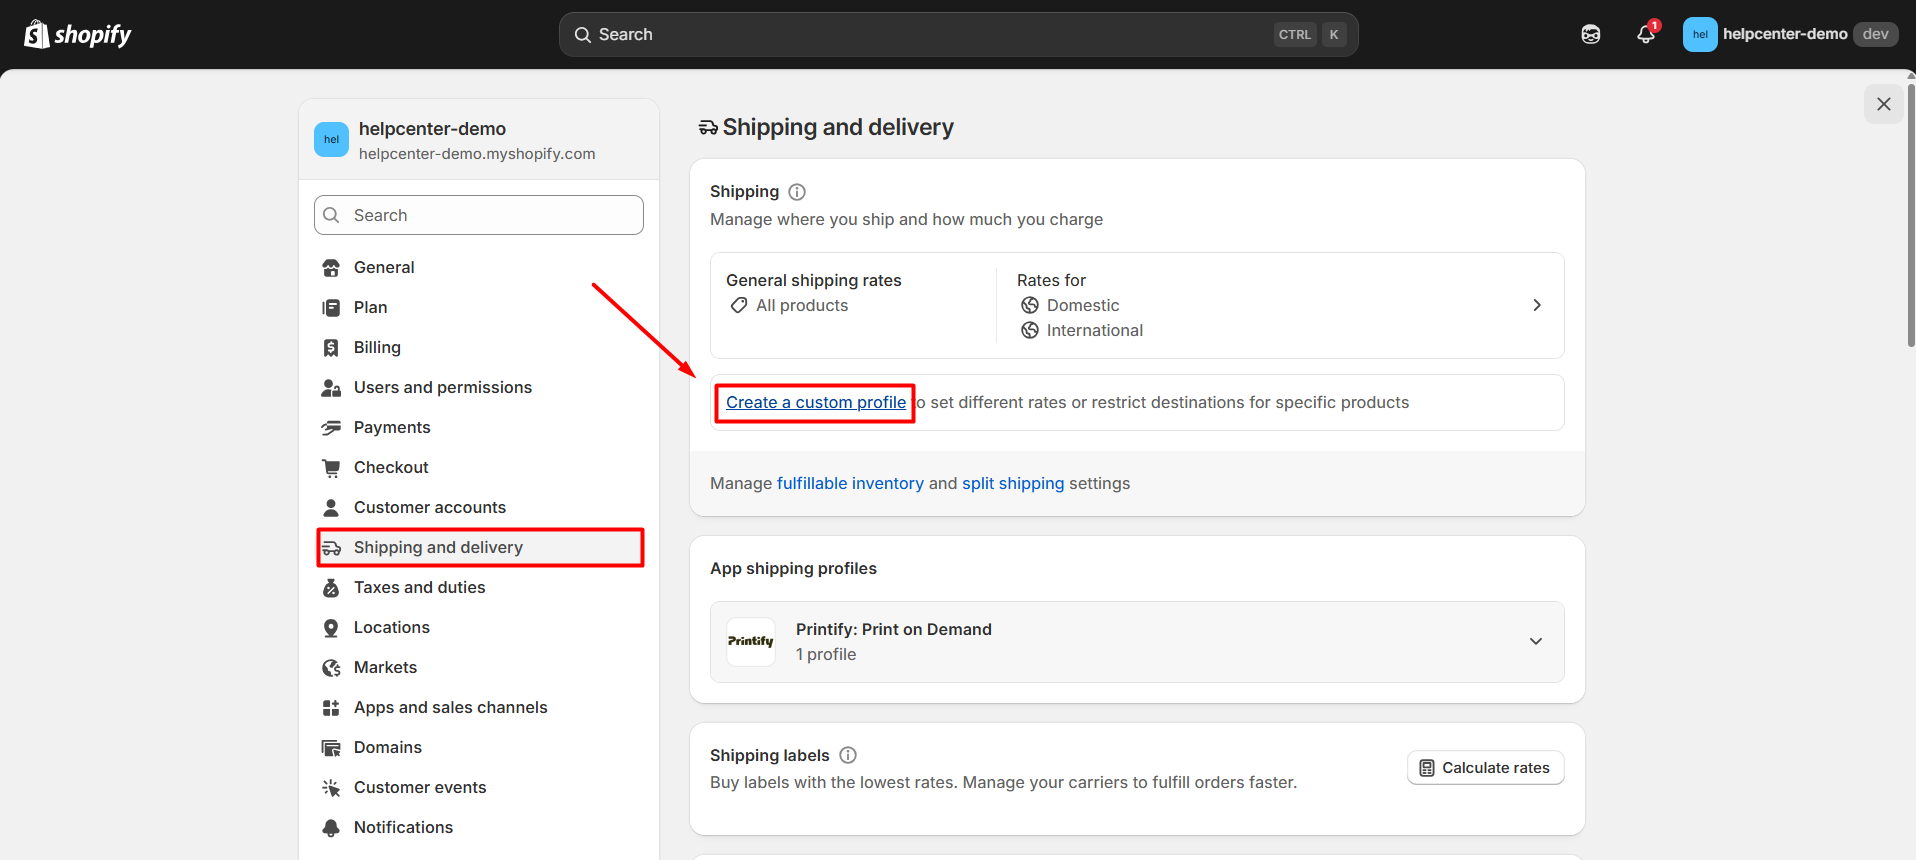
Step 1: From your Shopify admin, go to Settings → Shipping and delivery.
Step 2: Under Shipping profiles, click Manage beside the profile you want to edit.

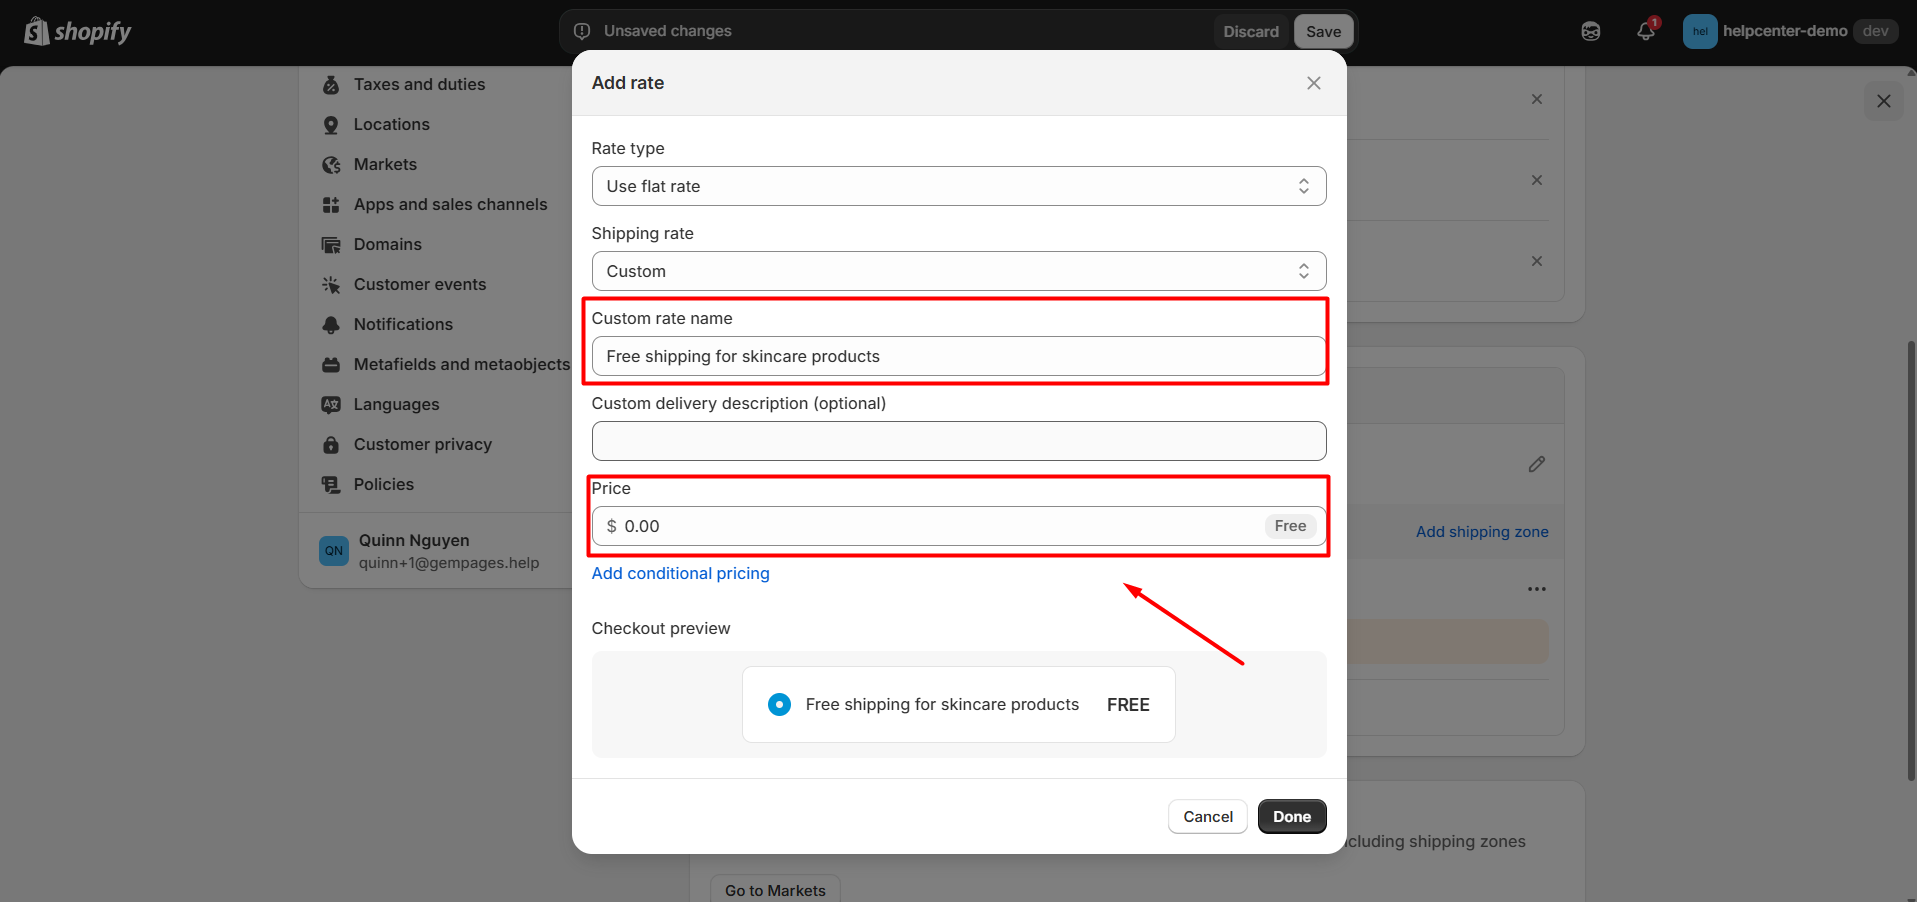
Step 3: In the Shipping zones section, click Add rate.

Step 4: Name the rate (for example, “Free Shipping”). Set the Price to 0.

Step 5: Leave the condition field empty if you want free shipping for all orders.
Step 6: Click Done, then Save.
When customers reach checkout, they’ll see a “Free Shipping” option automatically applied if they’re in a zone you’ve configured.
2. Conditional Free Shipping (Based on Order Value or Weight)
To offer free shipping only when customers meet certain requirements (for example, spend over $50):
Step 1: Go to Settings → Shipping and delivery → [Your Shipping Profile] → Manage.
Step 2: In the zone you want to edit, click Add rate.
Step 3: Name the rate “Free Shipping Over $50”. Set the Price to 0.
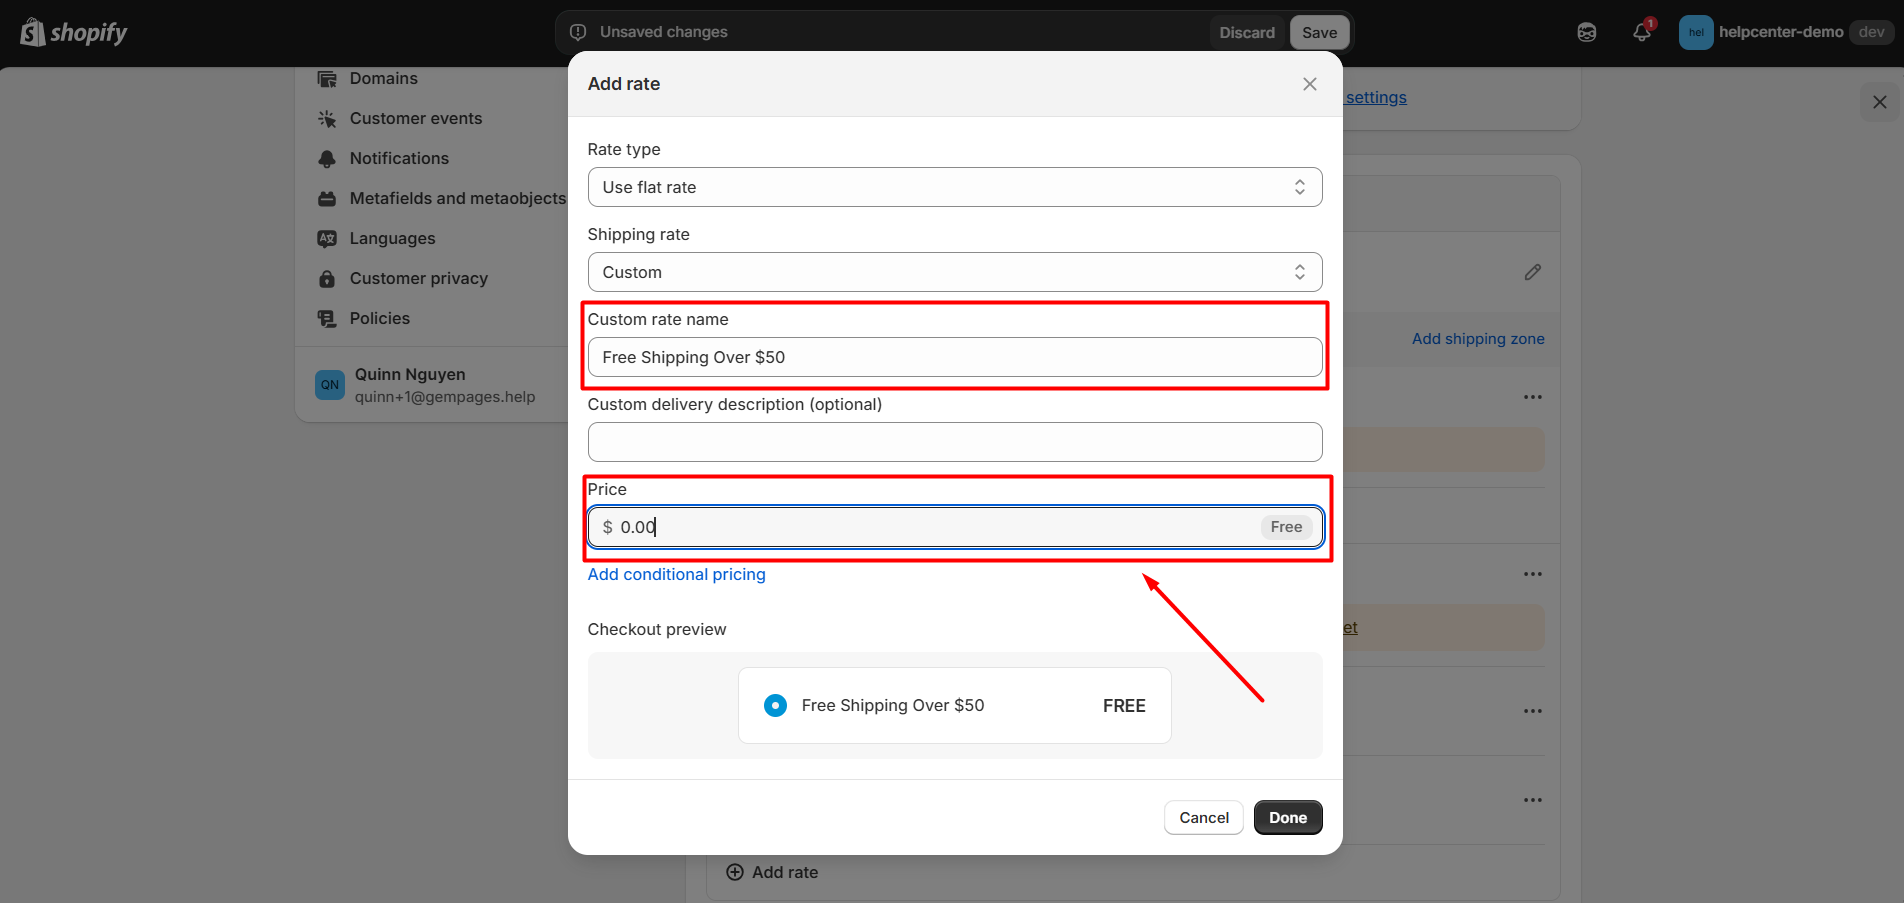
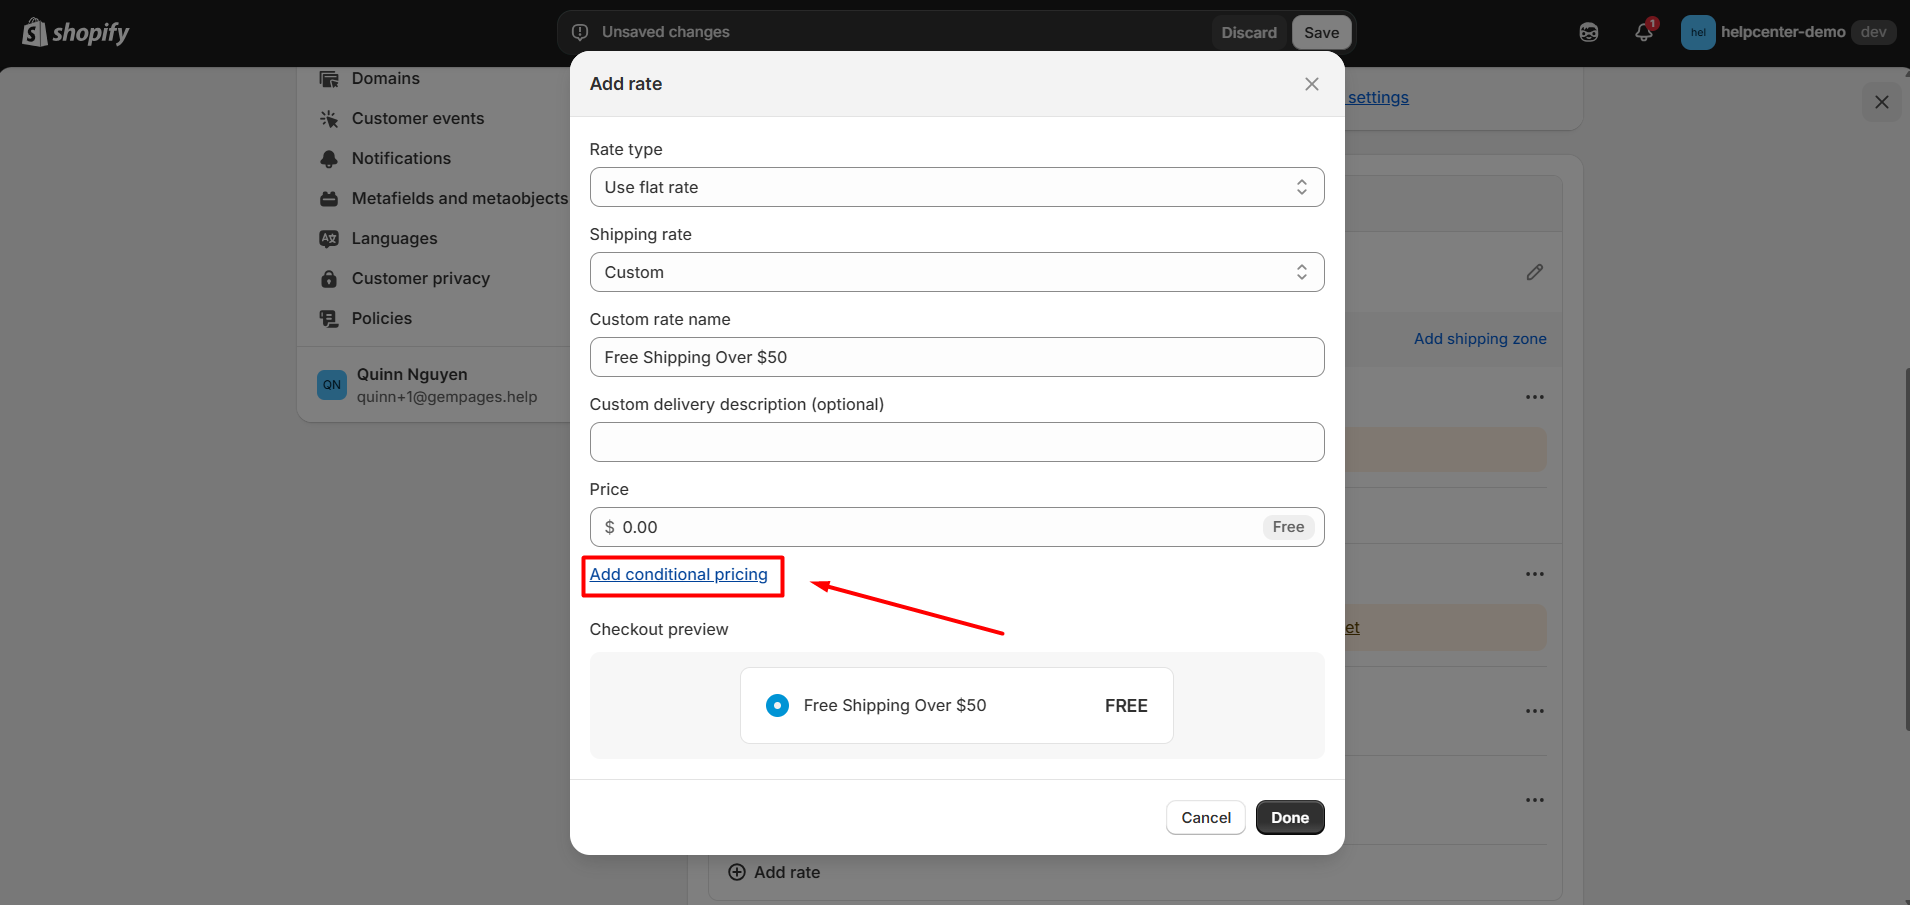
Step 4: Click Add conditional pricing.
Step 5: Choose Based on order price and enter a minimum value (e.g. $50).
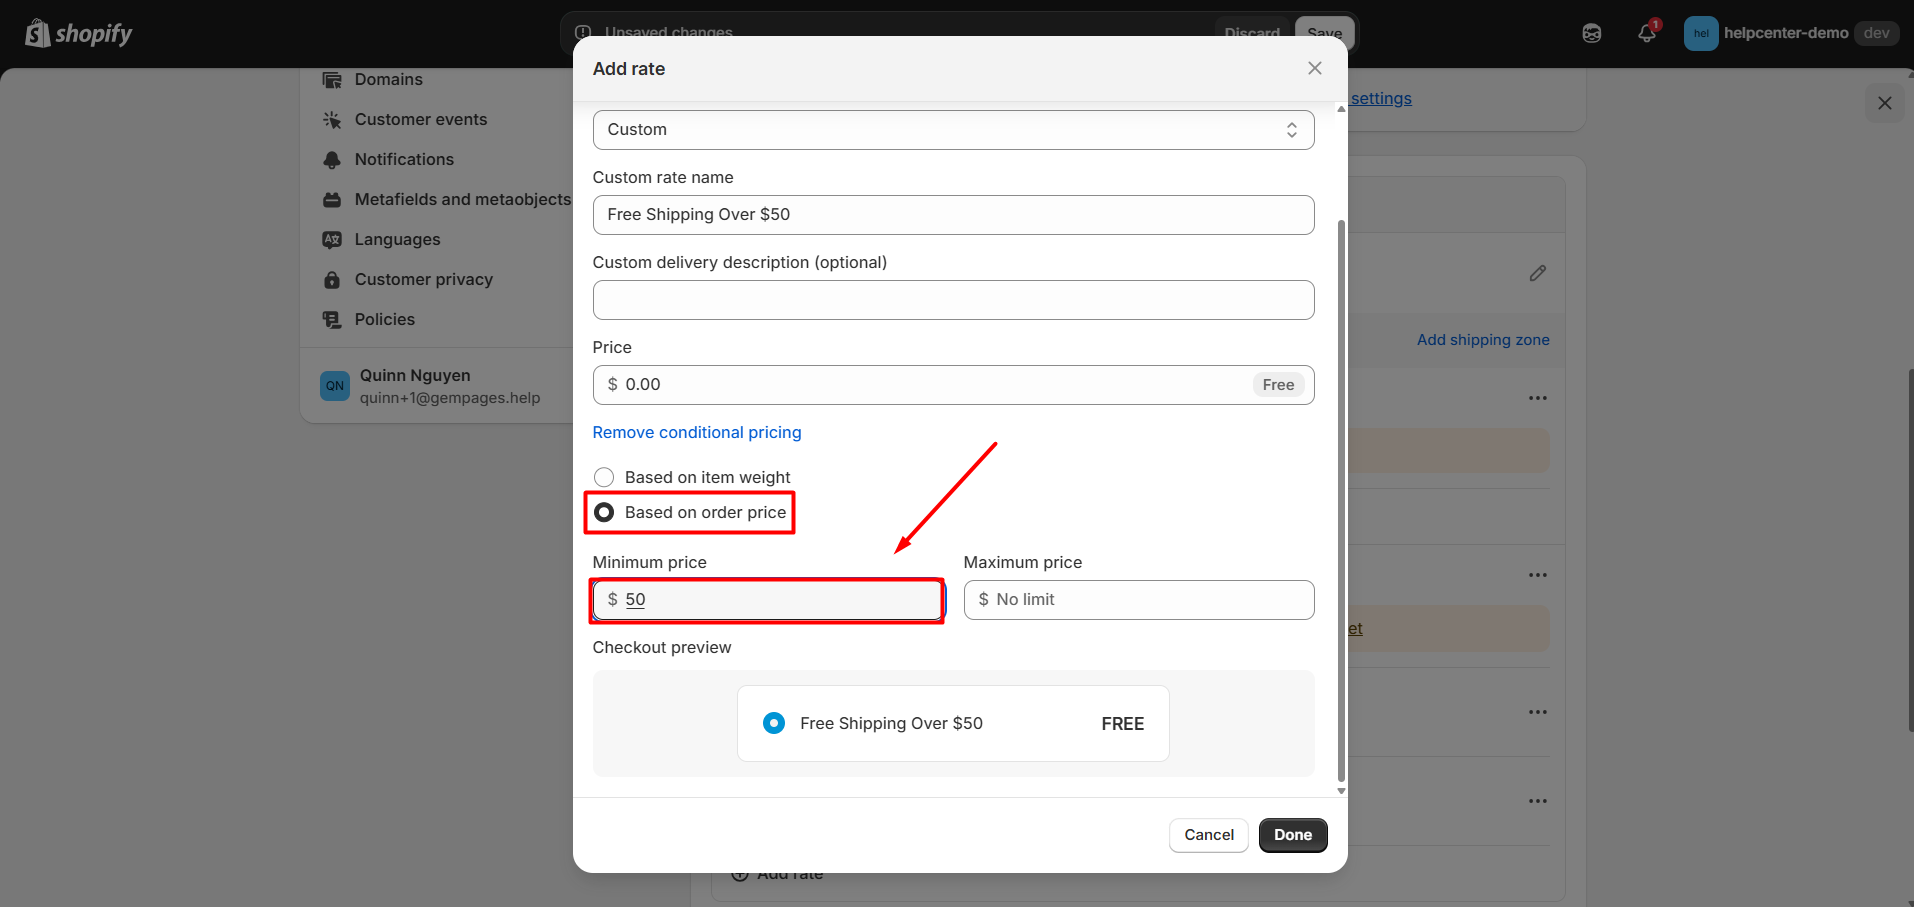
Step 6: Click Done, then Save.
This setup ensures that free shipping is available only when the cart total meets your condition.
Example:
| Order value | Shipping fee |
| $0–$49 | Normal rate applies |
| $50+ | Free (0 USD) |
If you also offer standard shipping for smaller orders, make sure that method remains active so customers can still check out.
3. Free Shipping for Specific Products
If you only want to offer free shipping for specific items:
Step 1: Create a separate shipping profile for those products.
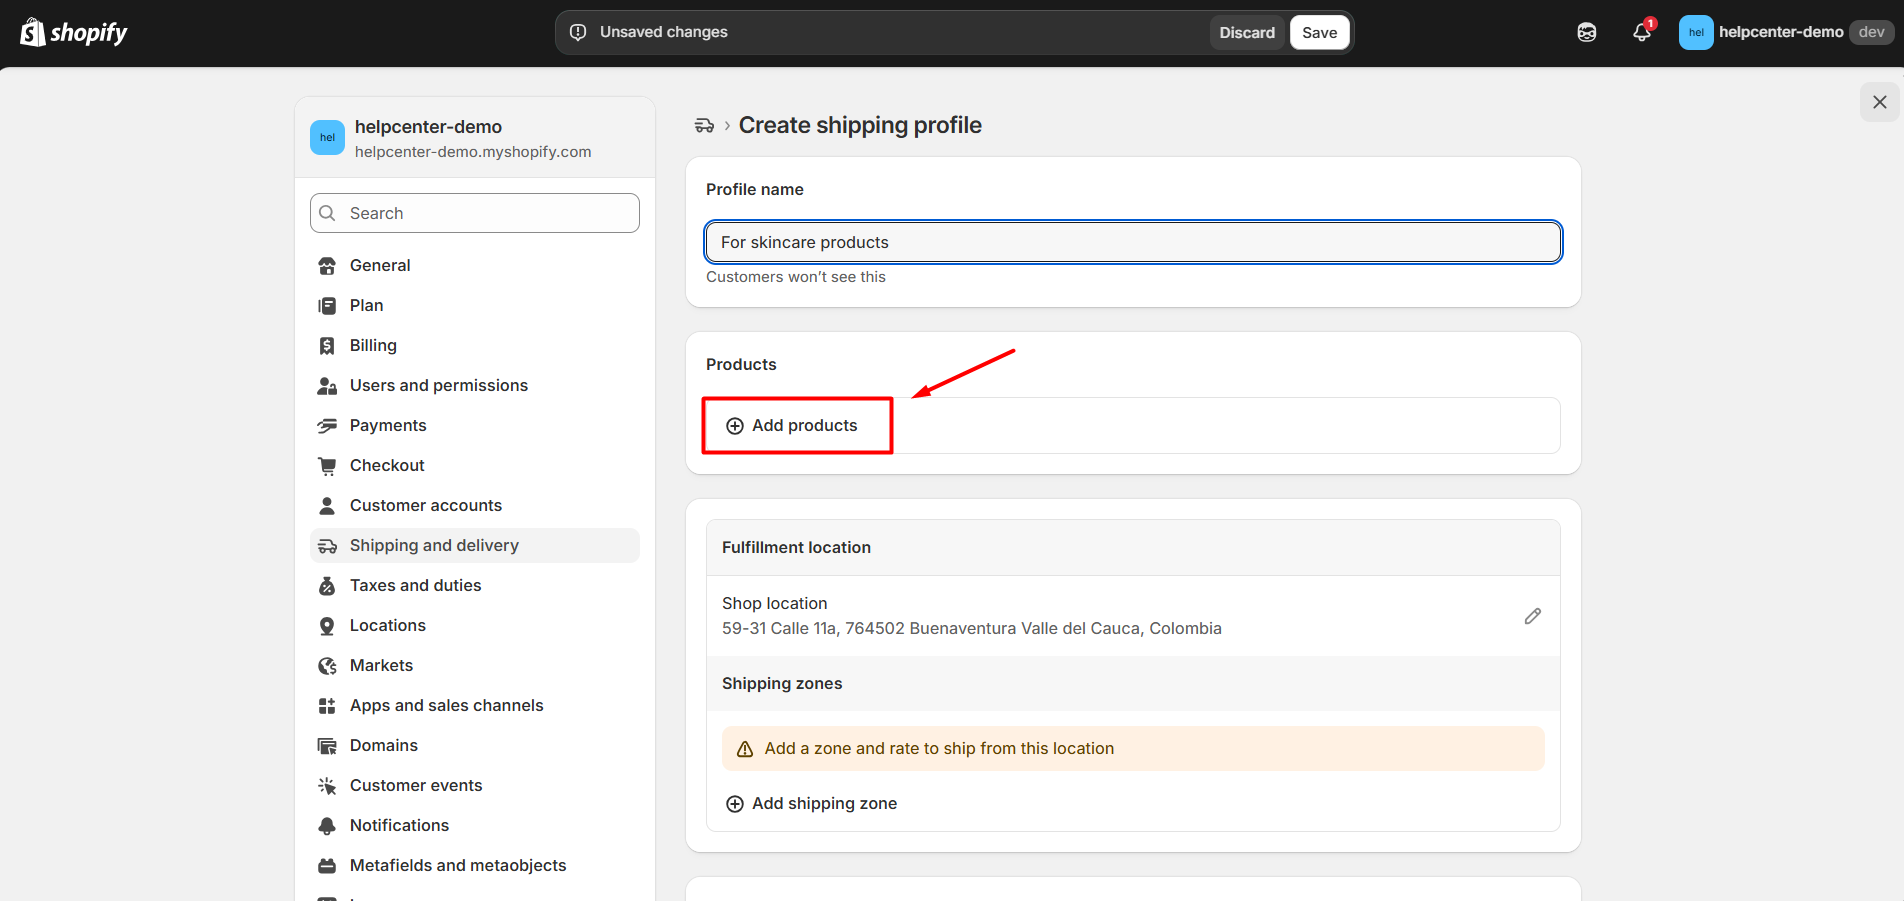
Step 2: In that profile, add a shipping zone and a rate with Price = 0.
Step 3: Save the profile.
This keeps your free shipping items separate from those that require paid shipping.
How to Display Free Shipping in GemPages
Once free shipping is set up in Shopify, you can display this information on your storefront to encourage conversions using the Product Badge Element.
To do this:
Step 1: Open your GemPages Editor.
Step 2: Select your Product Page or the product template you want to edit.
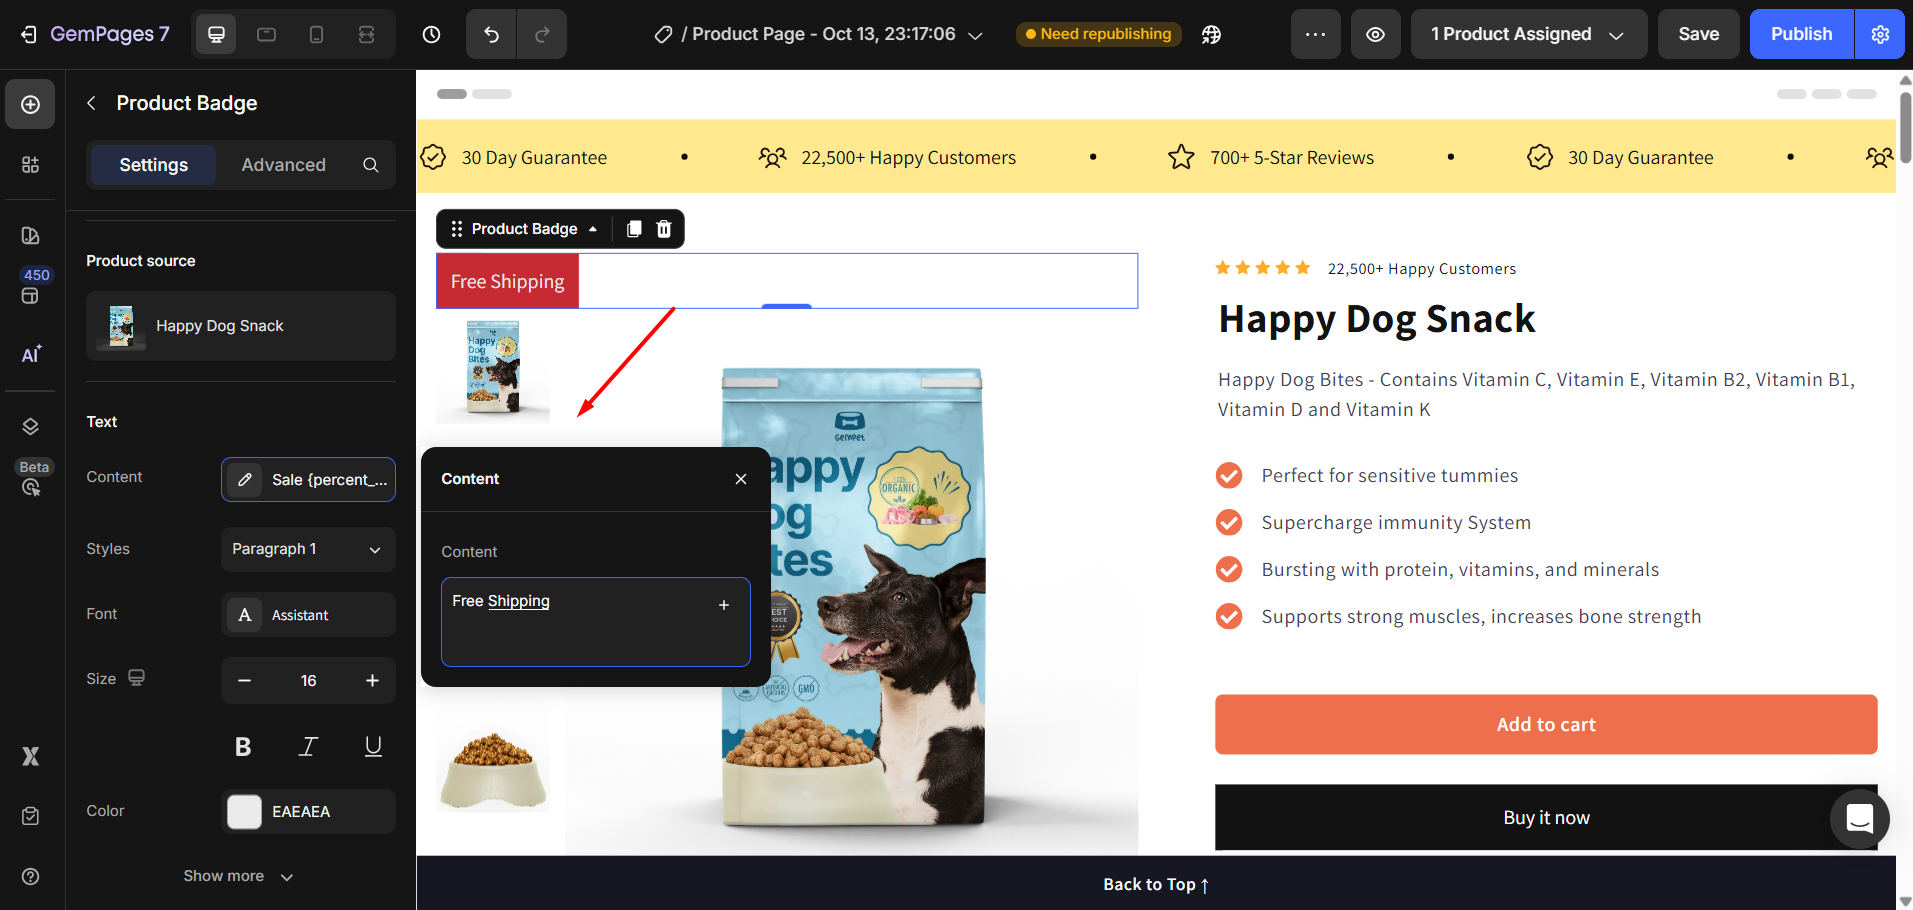
Step 3: Drag and drop the Product Badge element into your layout
![]()
![]()
Step 4: In the settings panel:
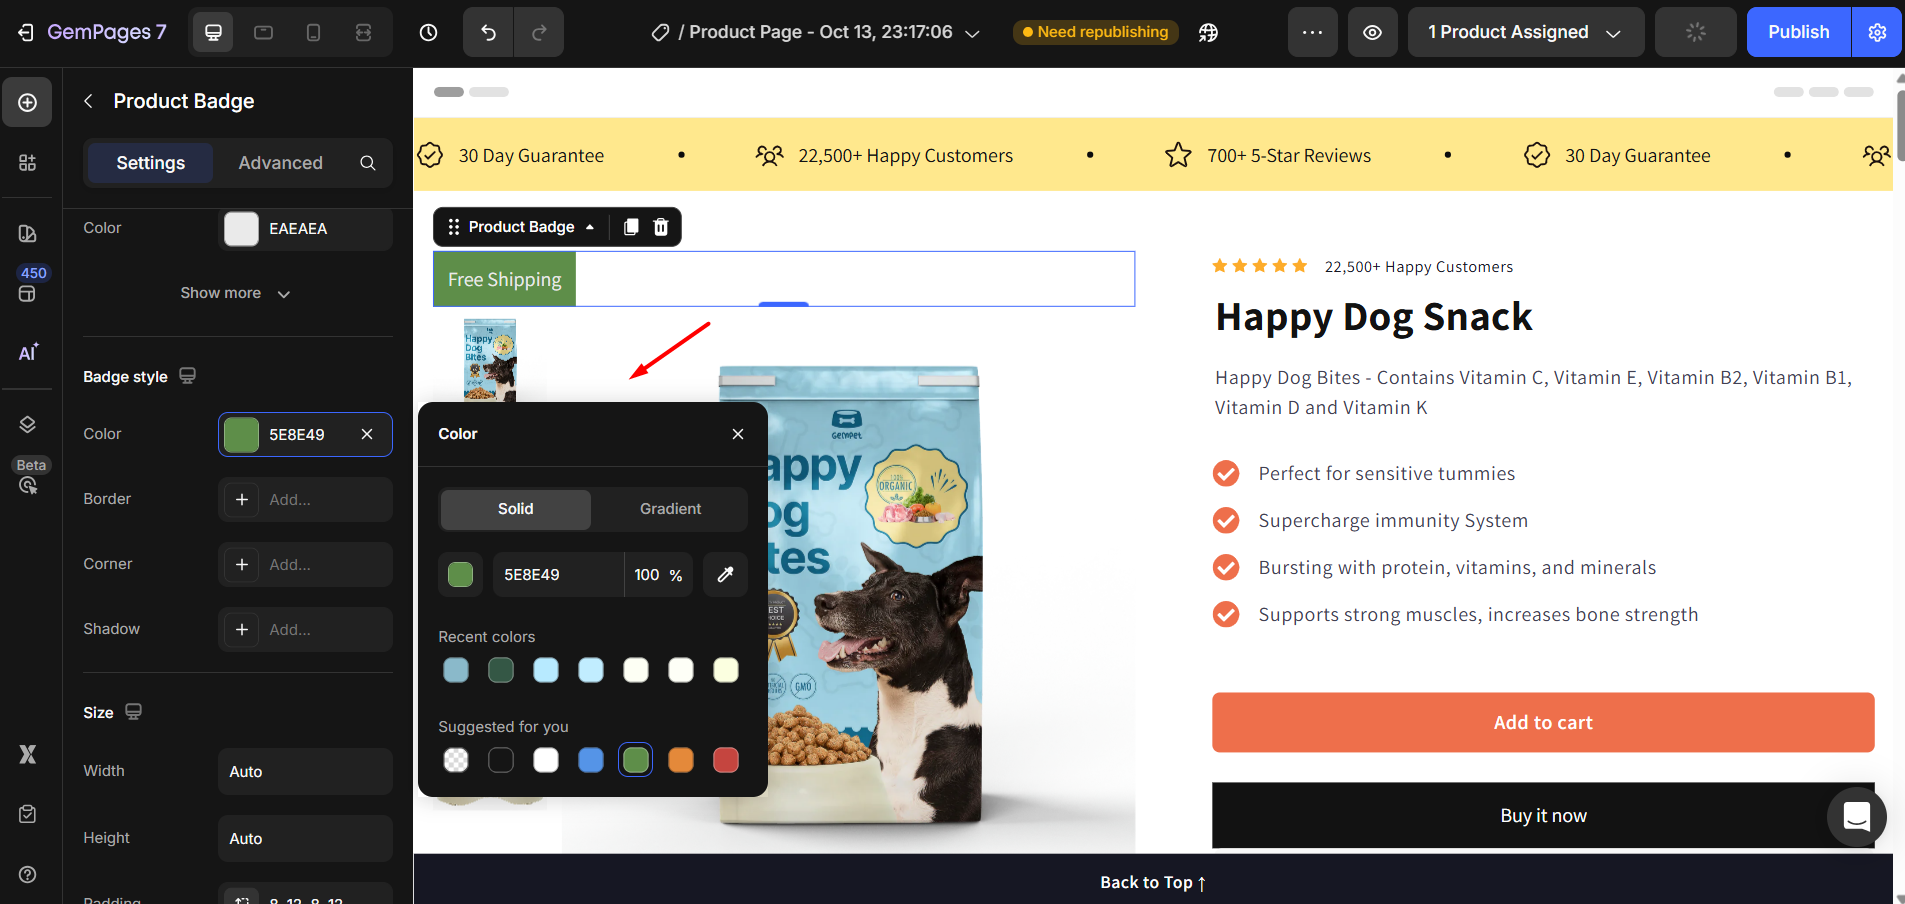
- Choose the badge style.
![]()
- Enter your custom text, such as “Free Shipping” or “Free Shipping on Orders Over $50.”
- Customize the color, font, and style to match your brand.
For more detailed guide on how to customize your product badge, please refer to: Product Badge Element.
Step 5: Click Save & Publish to update your live page.
Your customers will now see the “Free Shipping” badge when browsing your product page — before they even reach checkout.
- The badge only reflects information visually — it does not change your Shopify shipping settings.
- Make sure your badge message matches your actual shipping rules.
- If only some products have free shipping, use conditional display (if available) to show the badge only for those products.
- Always preview your changes in both desktop and mobile views before publishing.
- If you change your shipping rules later, remember to update your GemPages badge text accordingly.


Thank you for your comments