About the Loop Subscriptions App
Loop Subscriptions is an all-in-one app that helps eCommerce brands manage and optimize their subscription services. It enables businesses to personalize subscriber rewards, reduce cancellations, and boost subscription revenue.
Here’s what Loop Subscriptions offers:
- Simplify Subscription Management: Manage subscriptions effortlessly with a mobile-optimized, self-service customer portal.
- Enhance Subscriber Experience: Build tailored customer journeys and elevate the subscriber experience through gamified engagement flows.
- Increase Average Order Value (AOV): Offer flexible, customizable bundles or box subscriptions to increase sales.
- Protect Revenue: Automatically recover lost revenue with smart dunning management for failed payments.
- Improve Subscriber Retention: Retain customers with personalized, interactive cancellation options.
- Integrate Easily with Shopify: Easily integrate with Shopify for smooth operations and straightforward management.
How to Install and Set Up Loop Subscriptions?
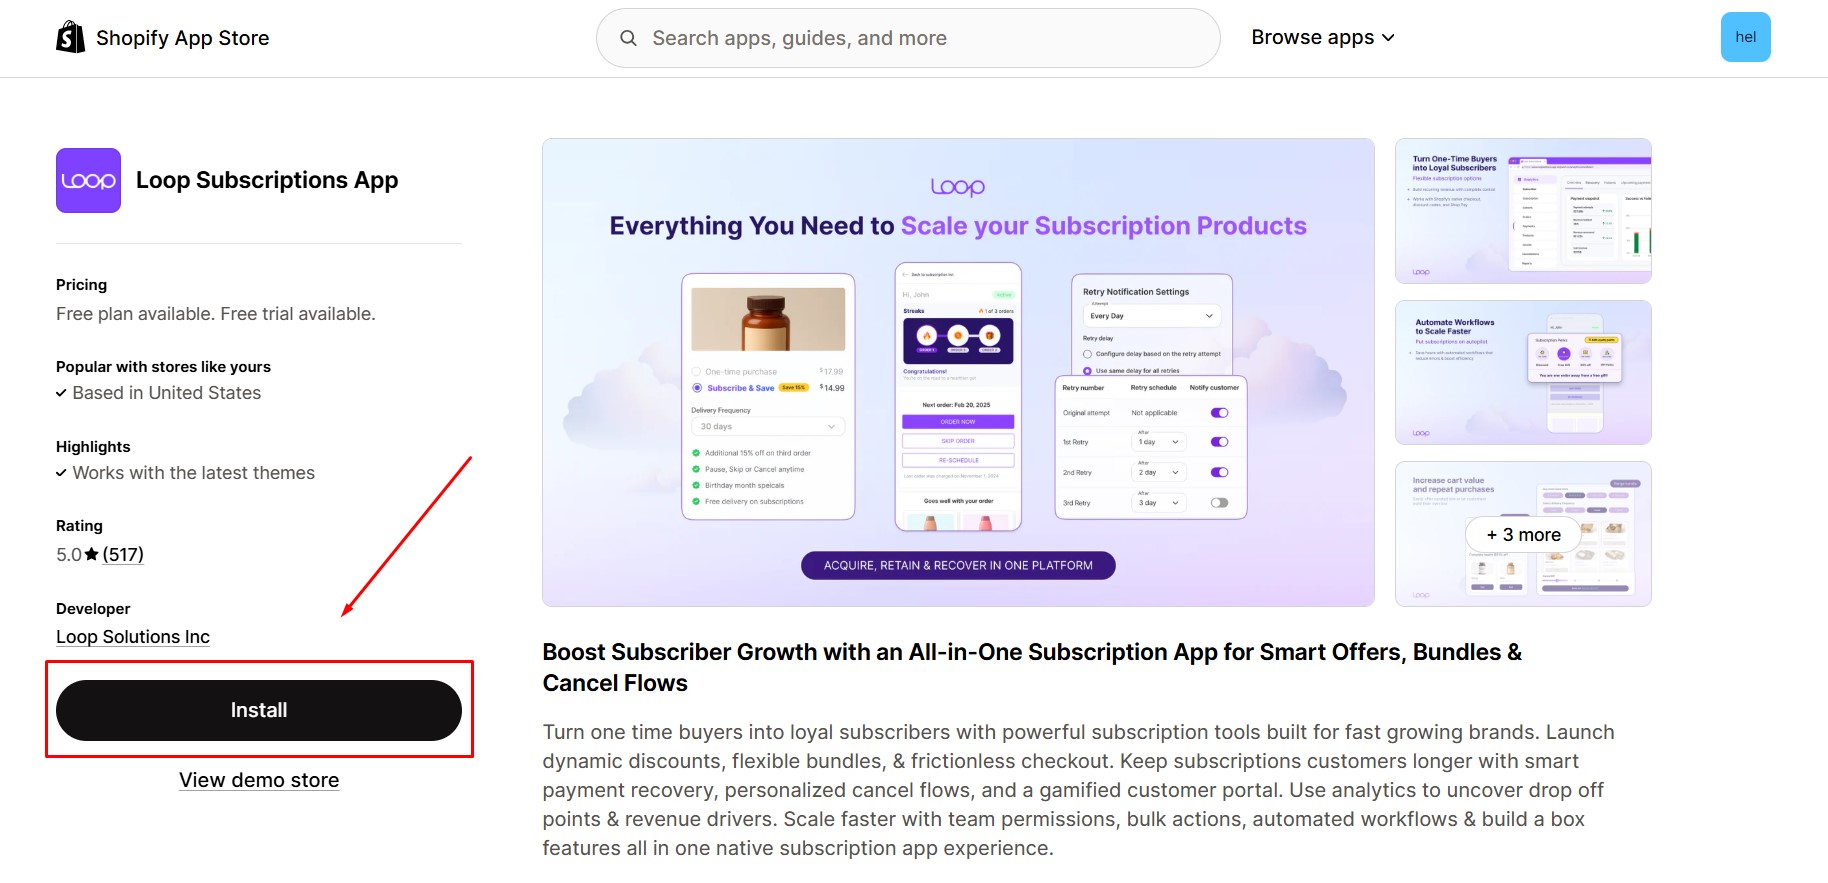
Step 1: Install Loop Subscriptions in the Shopify App Store.
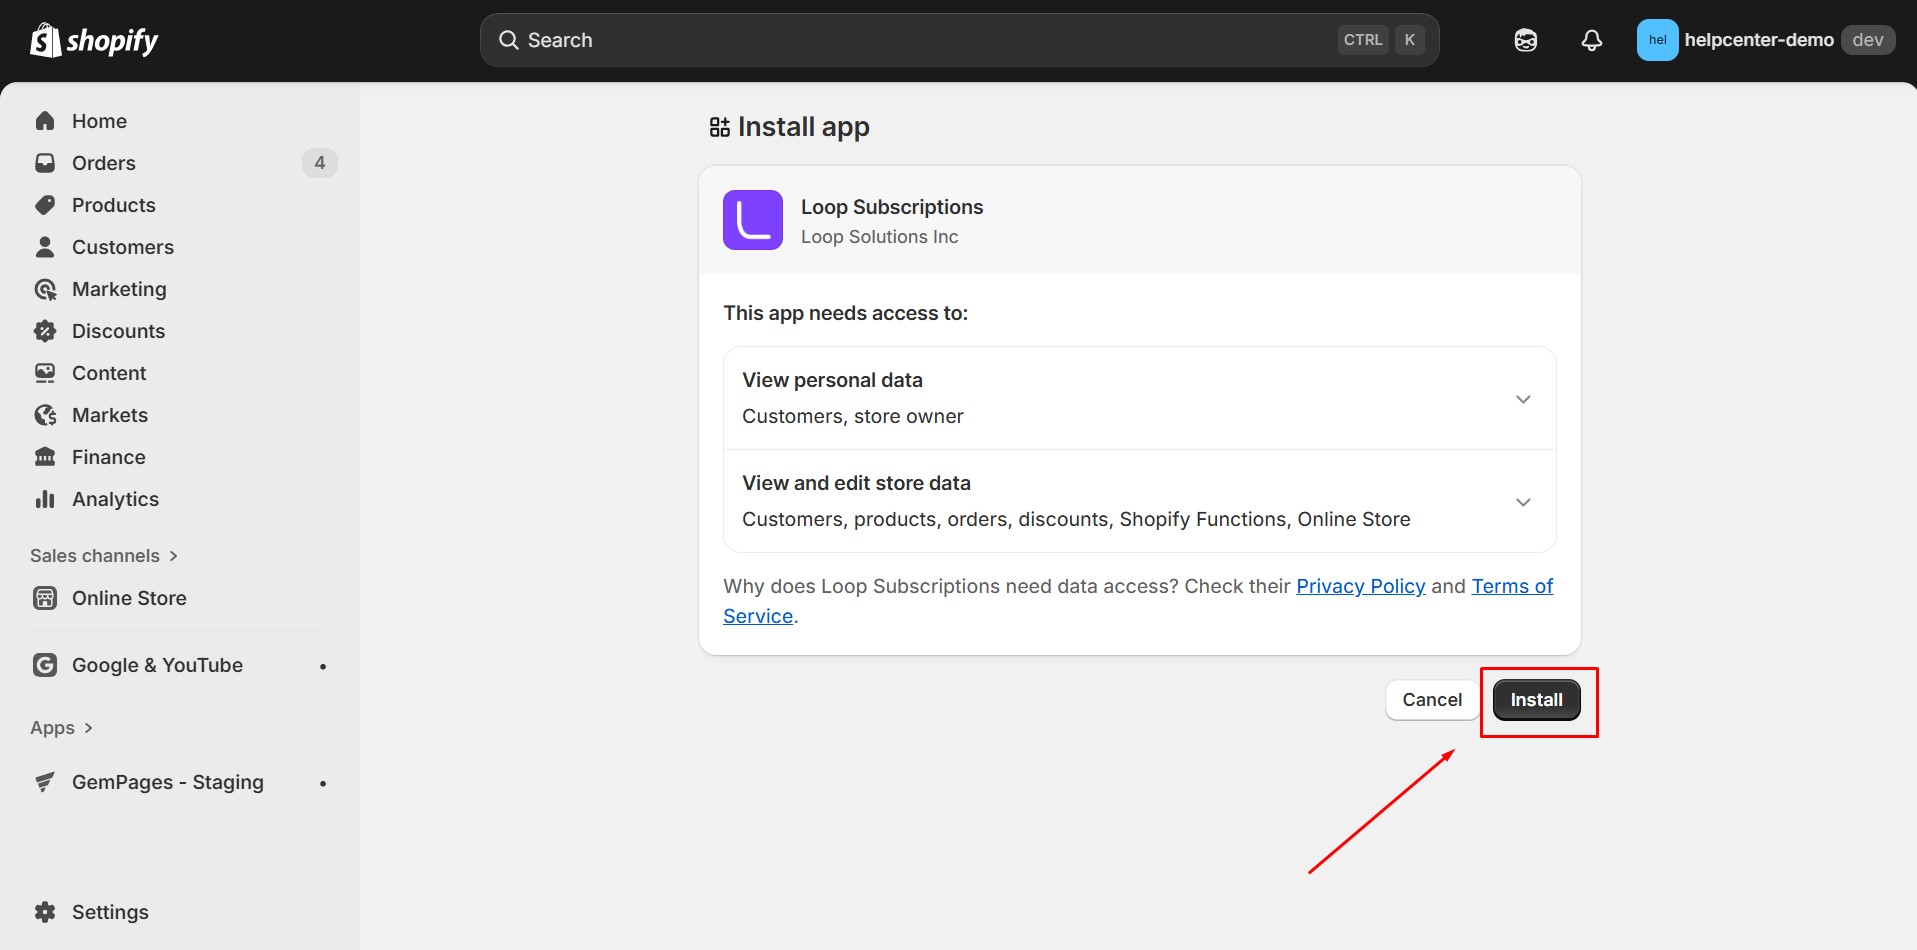
Step 2: Provide the app with access to the required data and click “Install”.
Step 3: Inside the Loop Subscriptions dashboard, click Create Selling Plan.
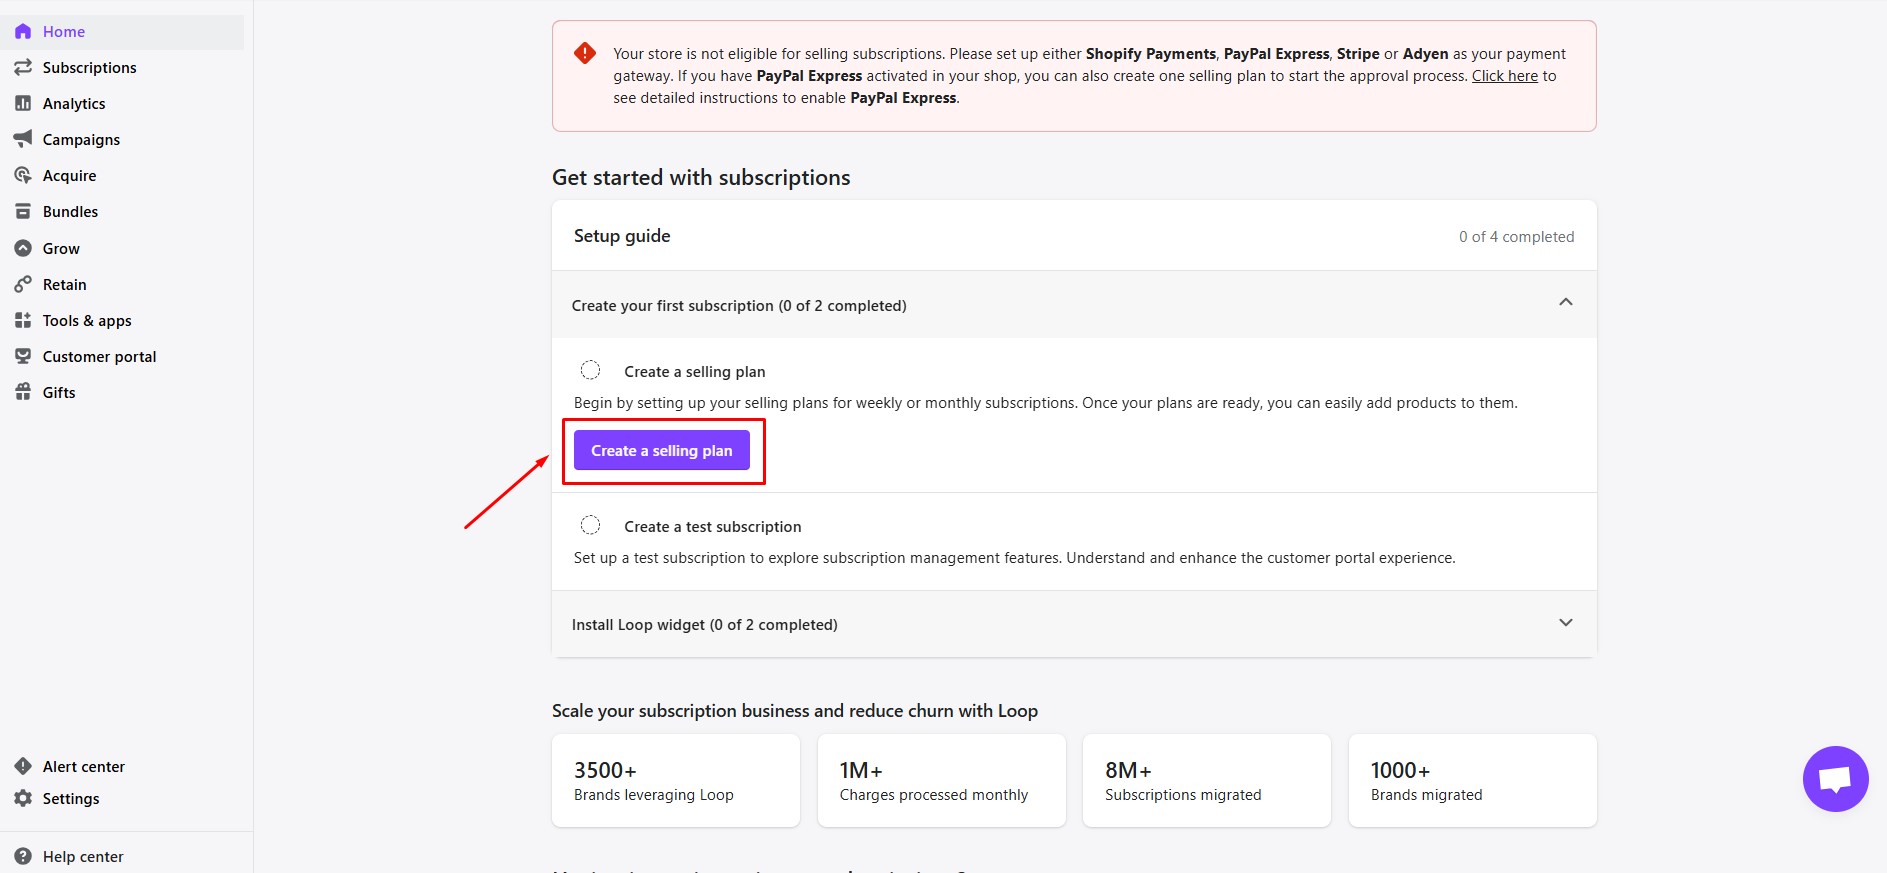
A selling plan defines how your subscriptions are structured.
Fill in the required fields:
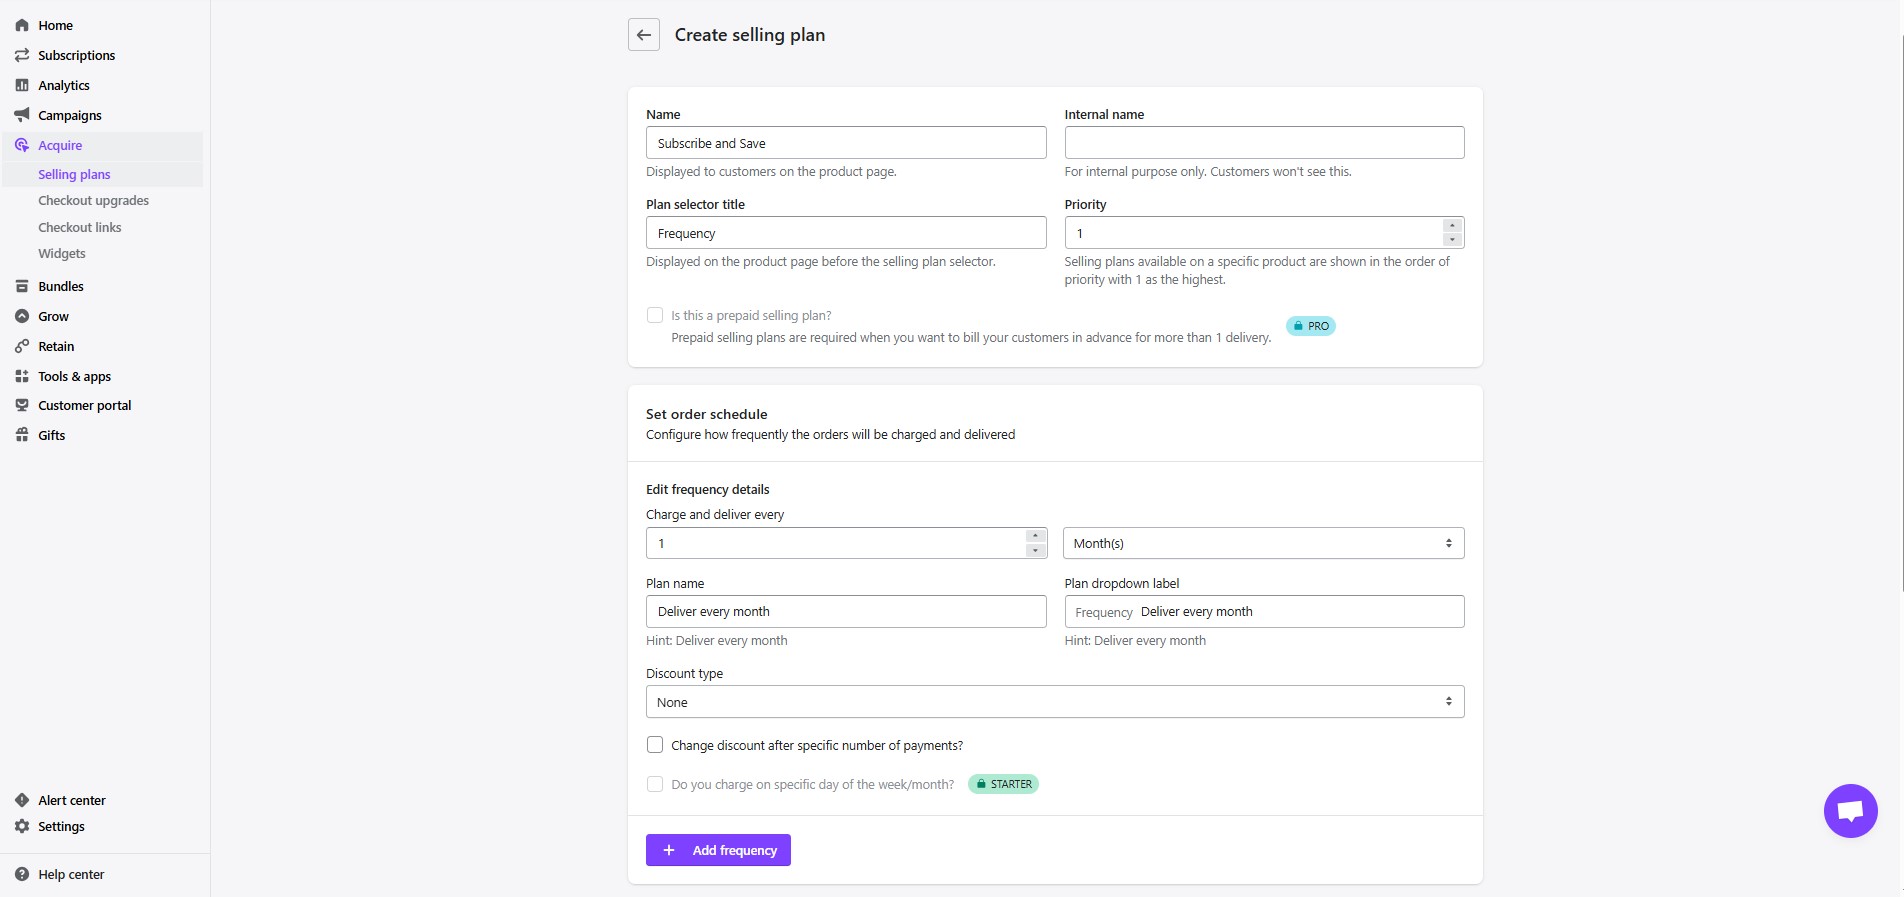
- Name: This is the name of the selling plan that will appear on the product page for customers to see.
- Internal name: Similar to the “Name” field, but used internally and not visible to customers.
- Plan selector title: This is the message displayed on the product page above the selling plan options, such as “Frequency” or “Select your delivery options.”
- Priority: If multiple selling plans are linked to a product, priority determines the order in which these plans are displayed on the product page..
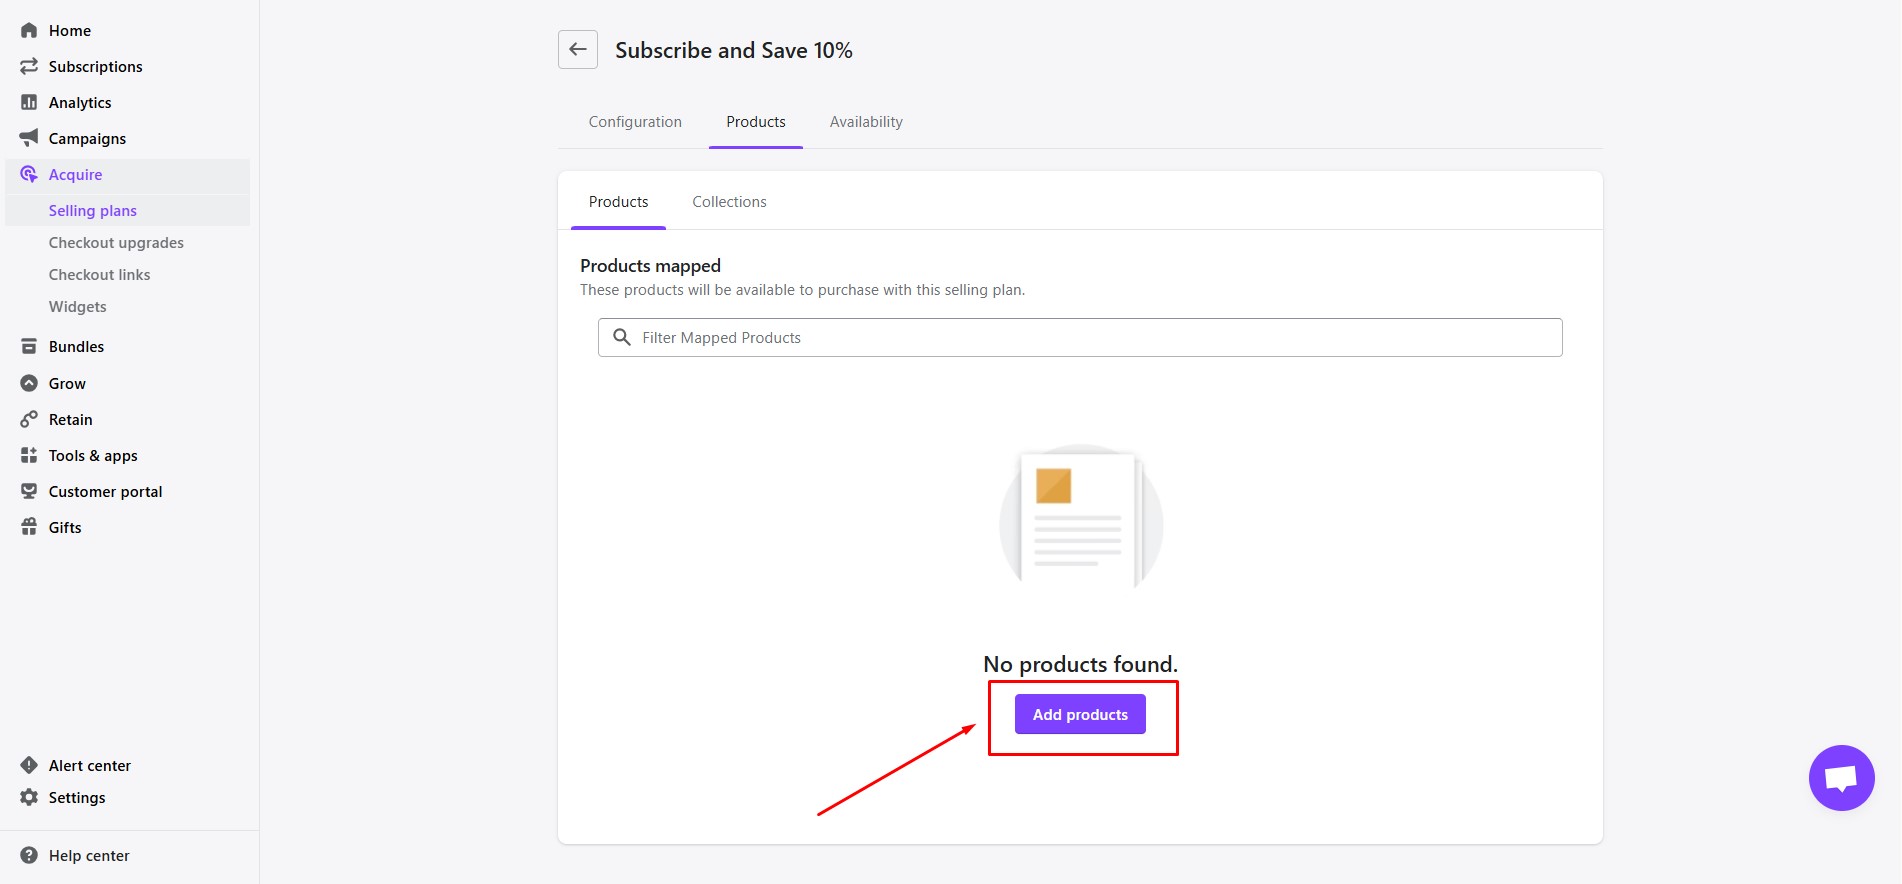
Step 4: After saving the selling plan, click Add products. Choose the products you want to offer as subscriptions.
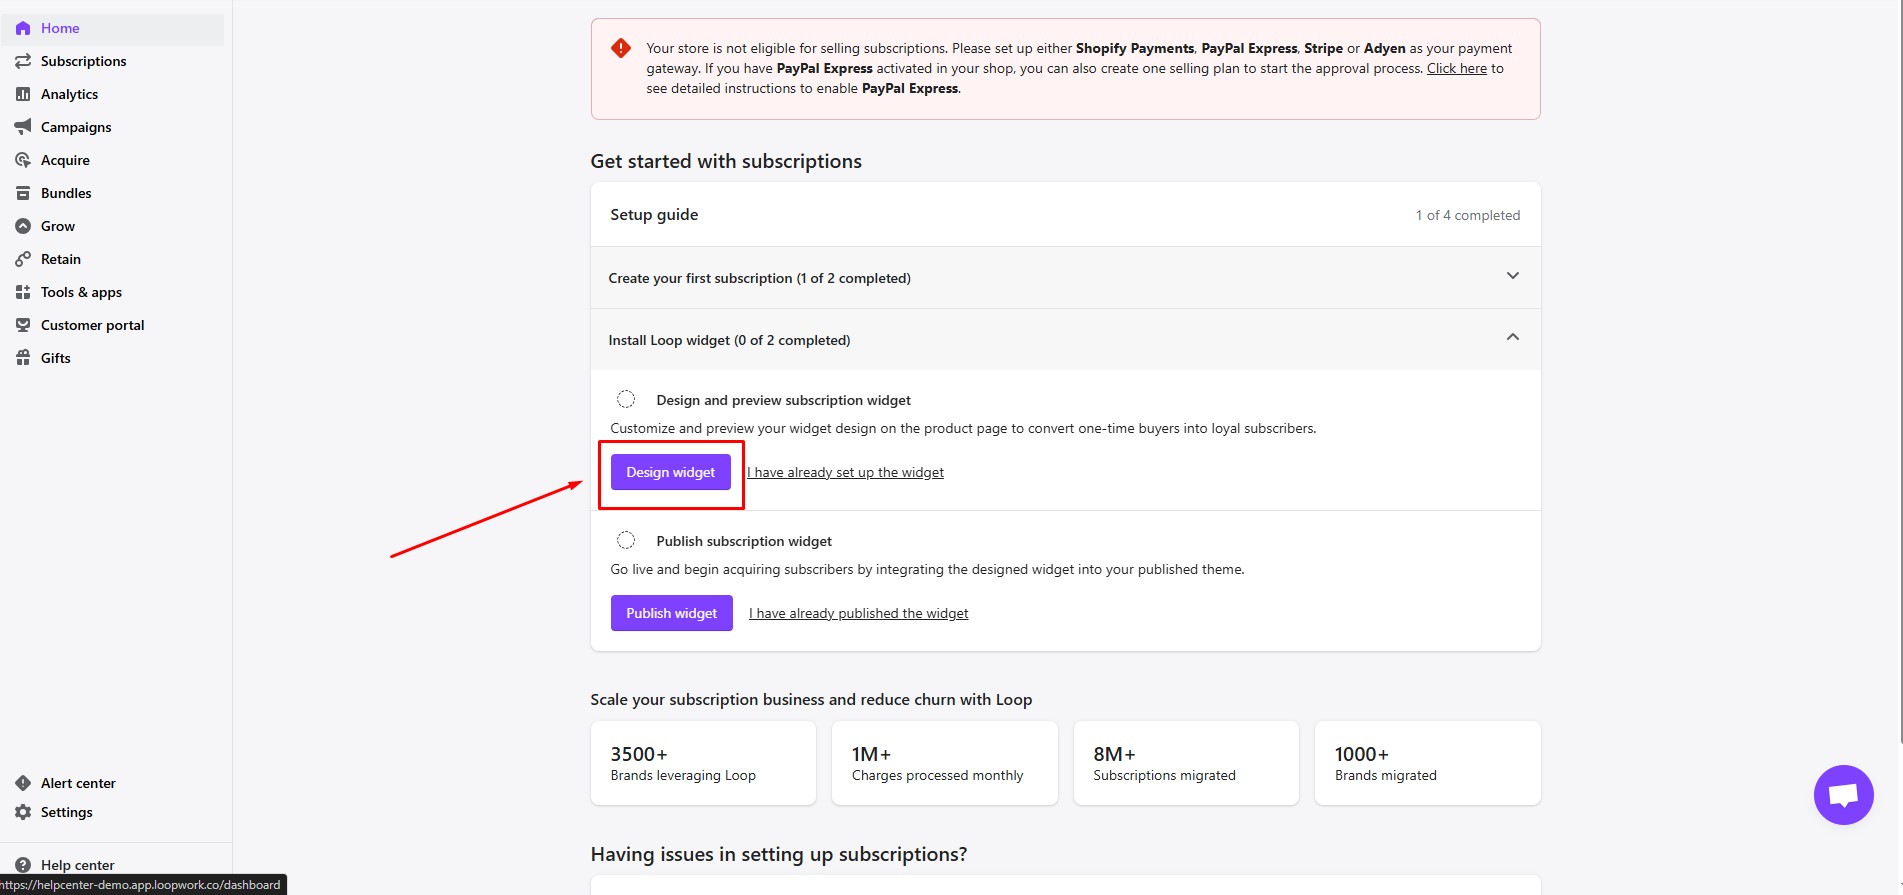
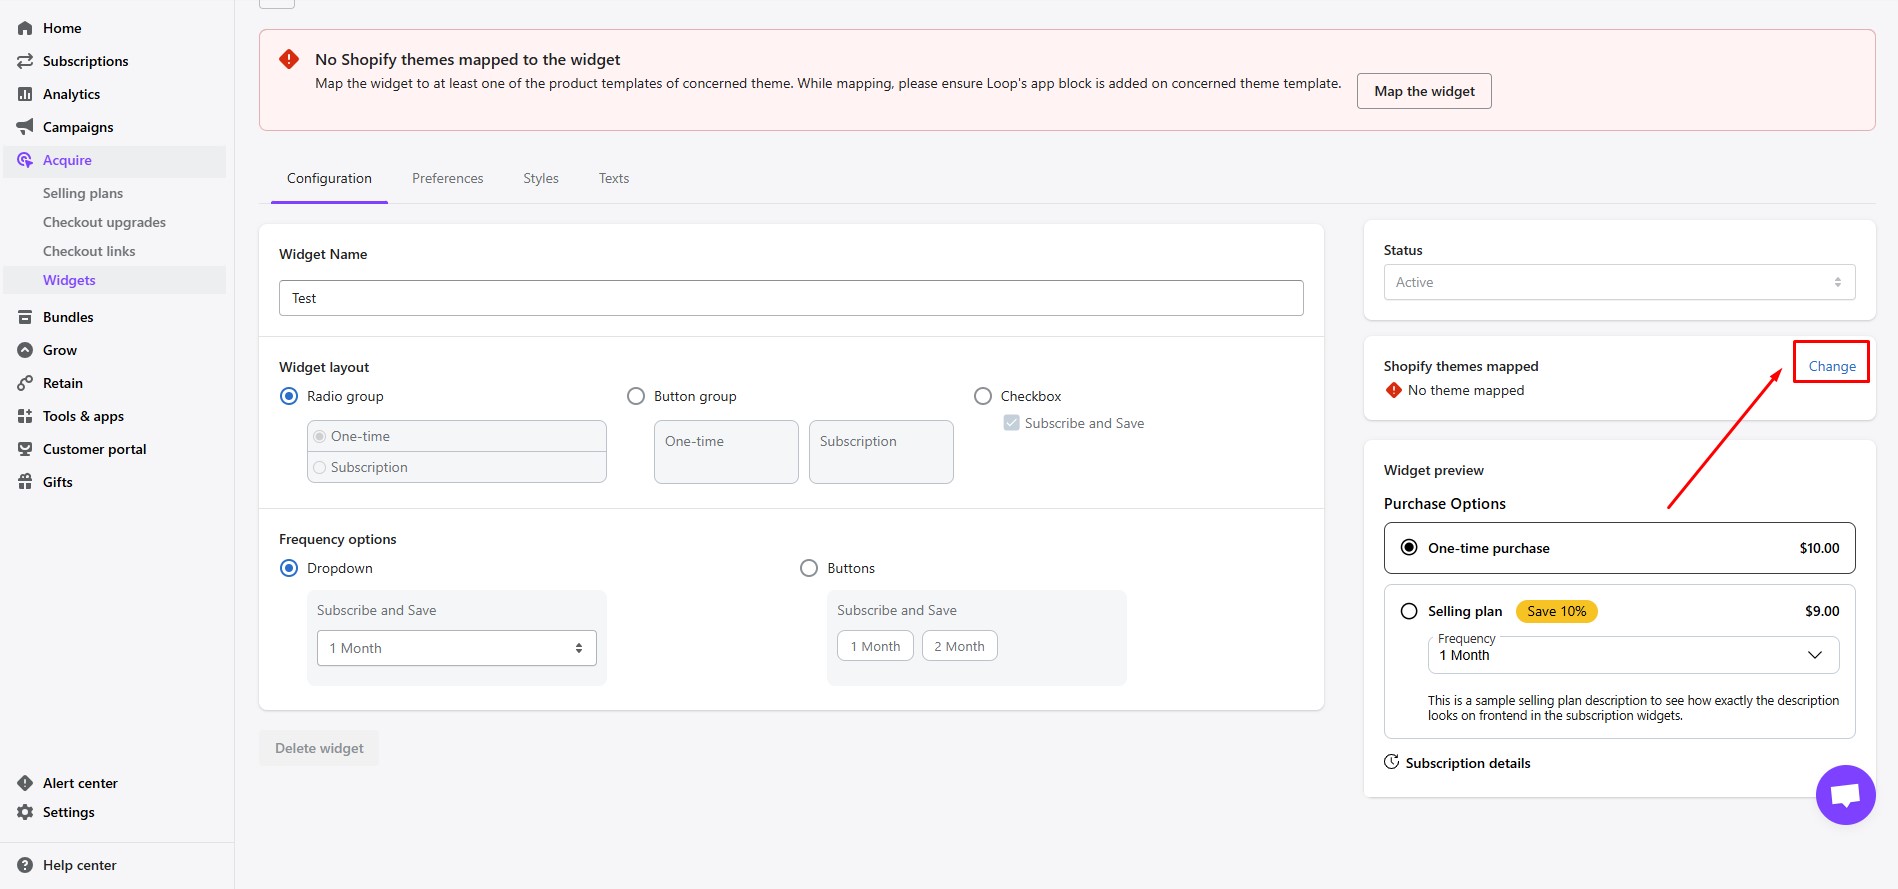
Step 5: Go to Design widget in the Loop dashboard.
Step 6: Configure the widget’s preferences, styles, and texts to match your brand.
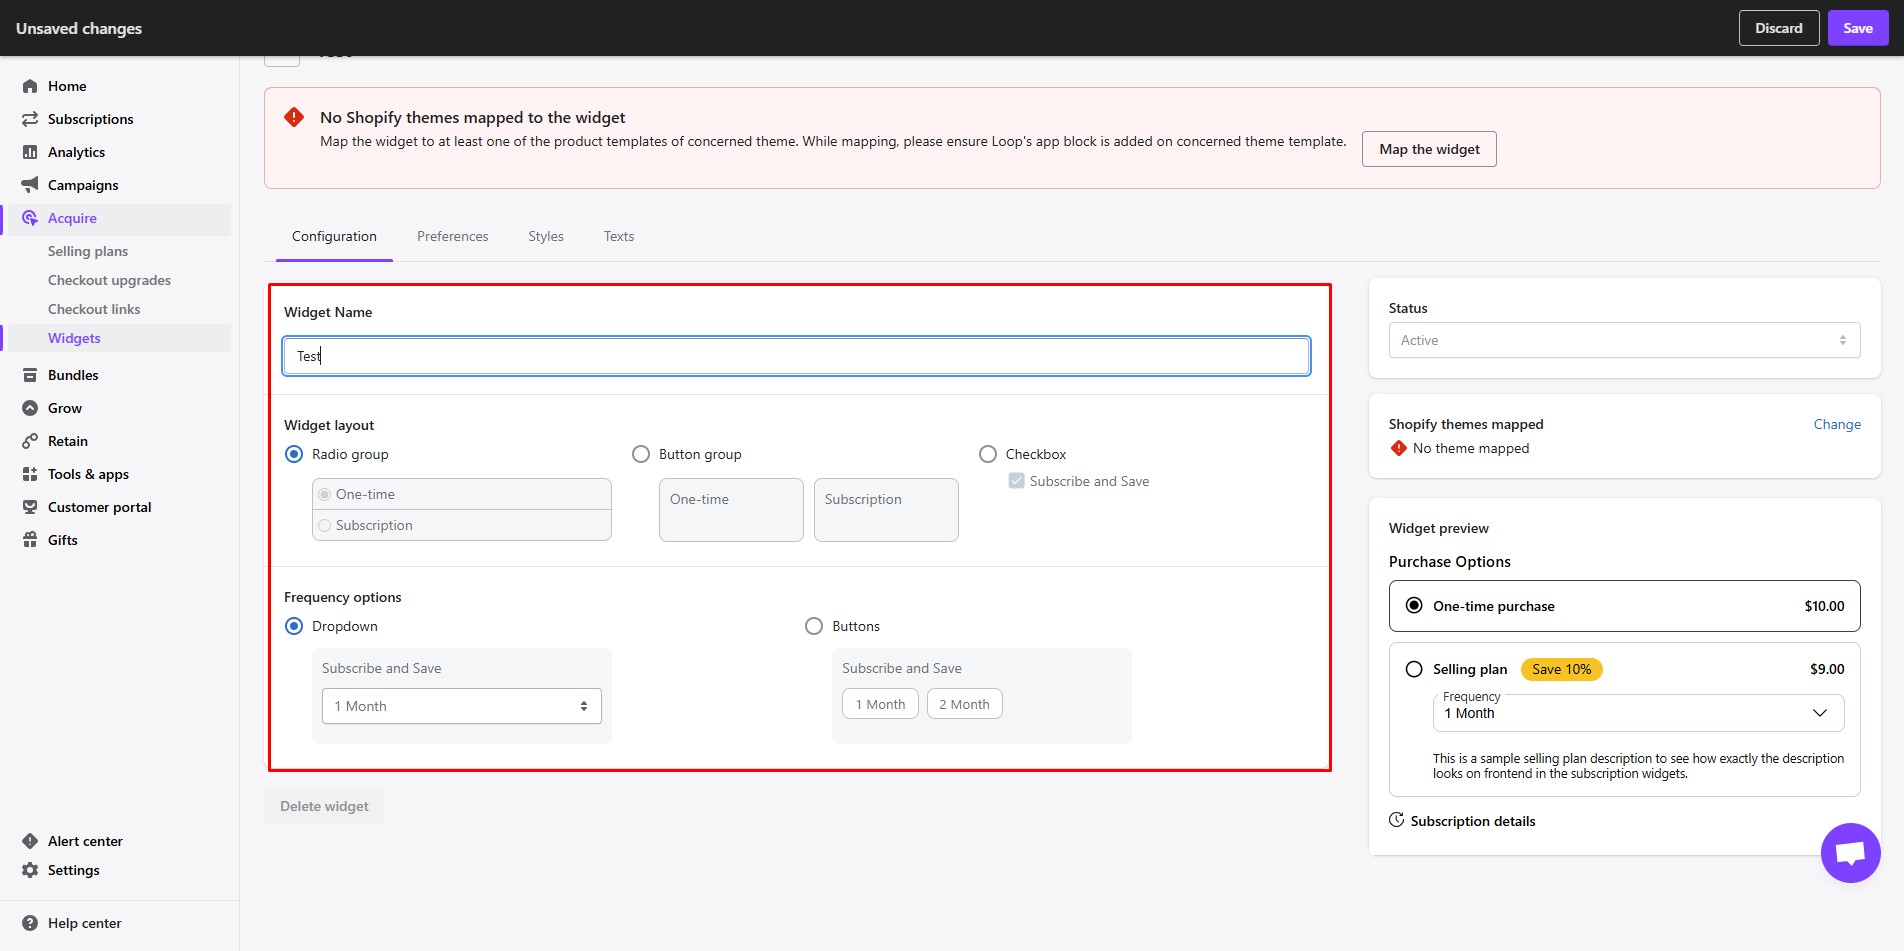
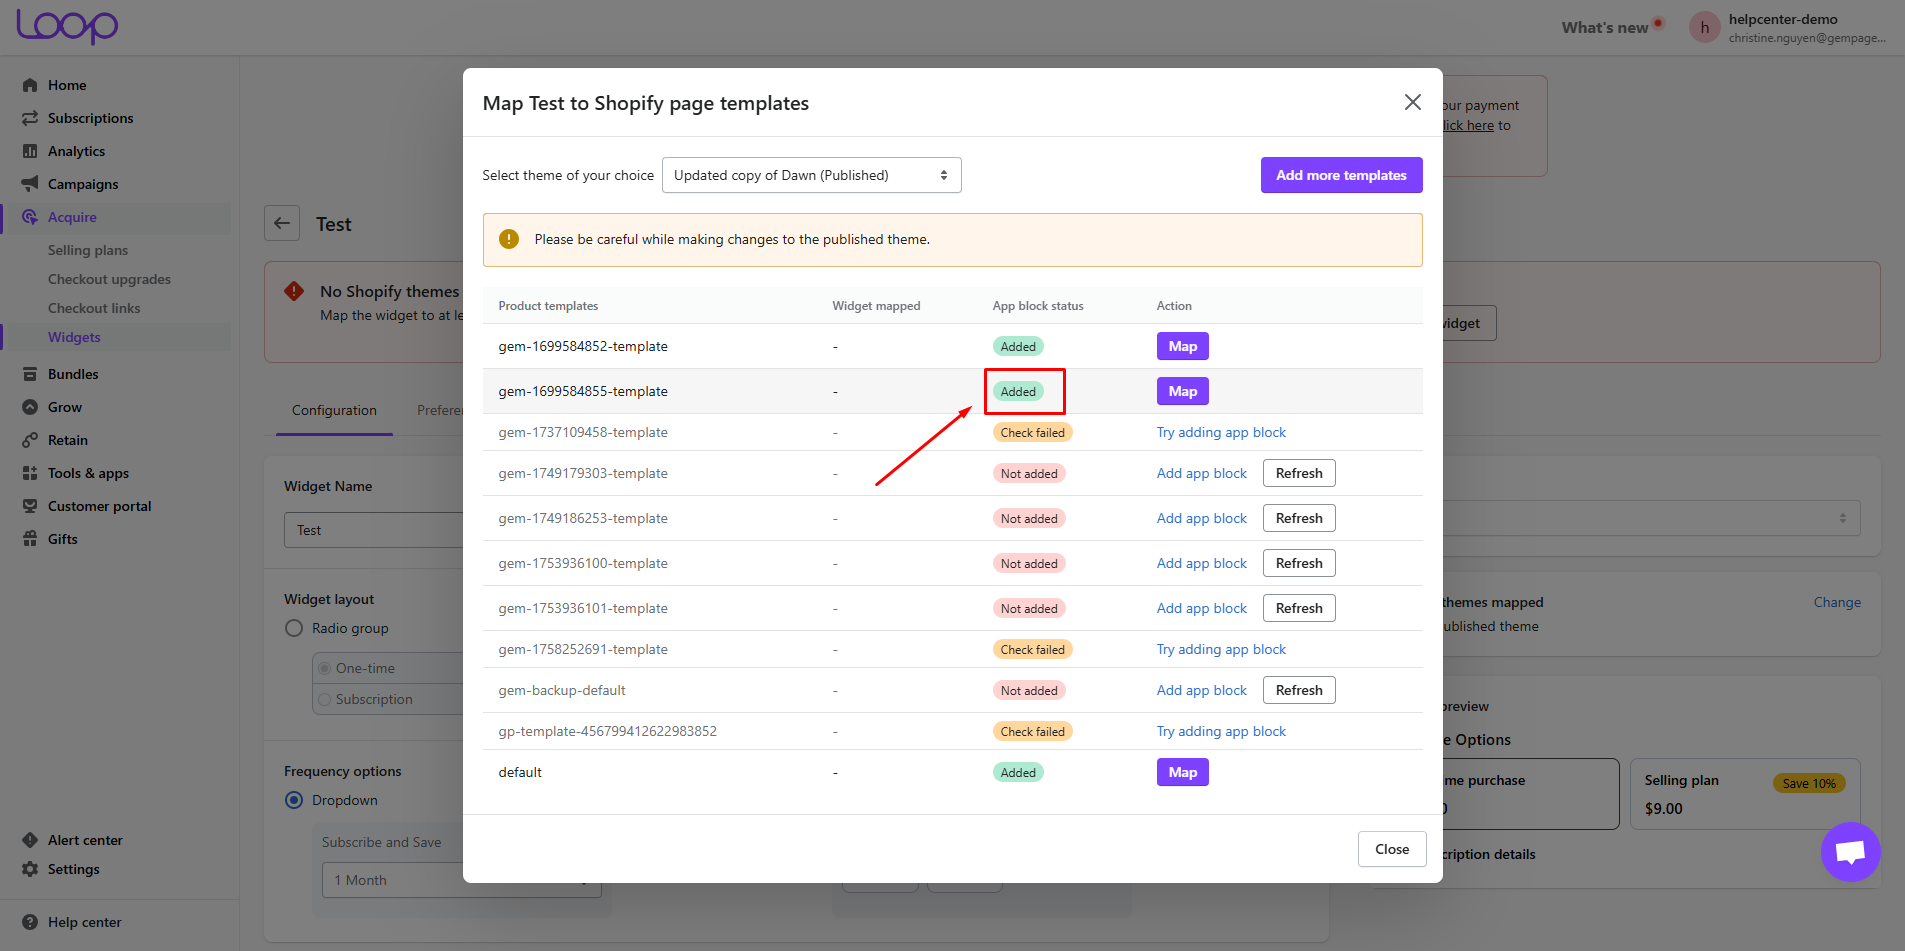
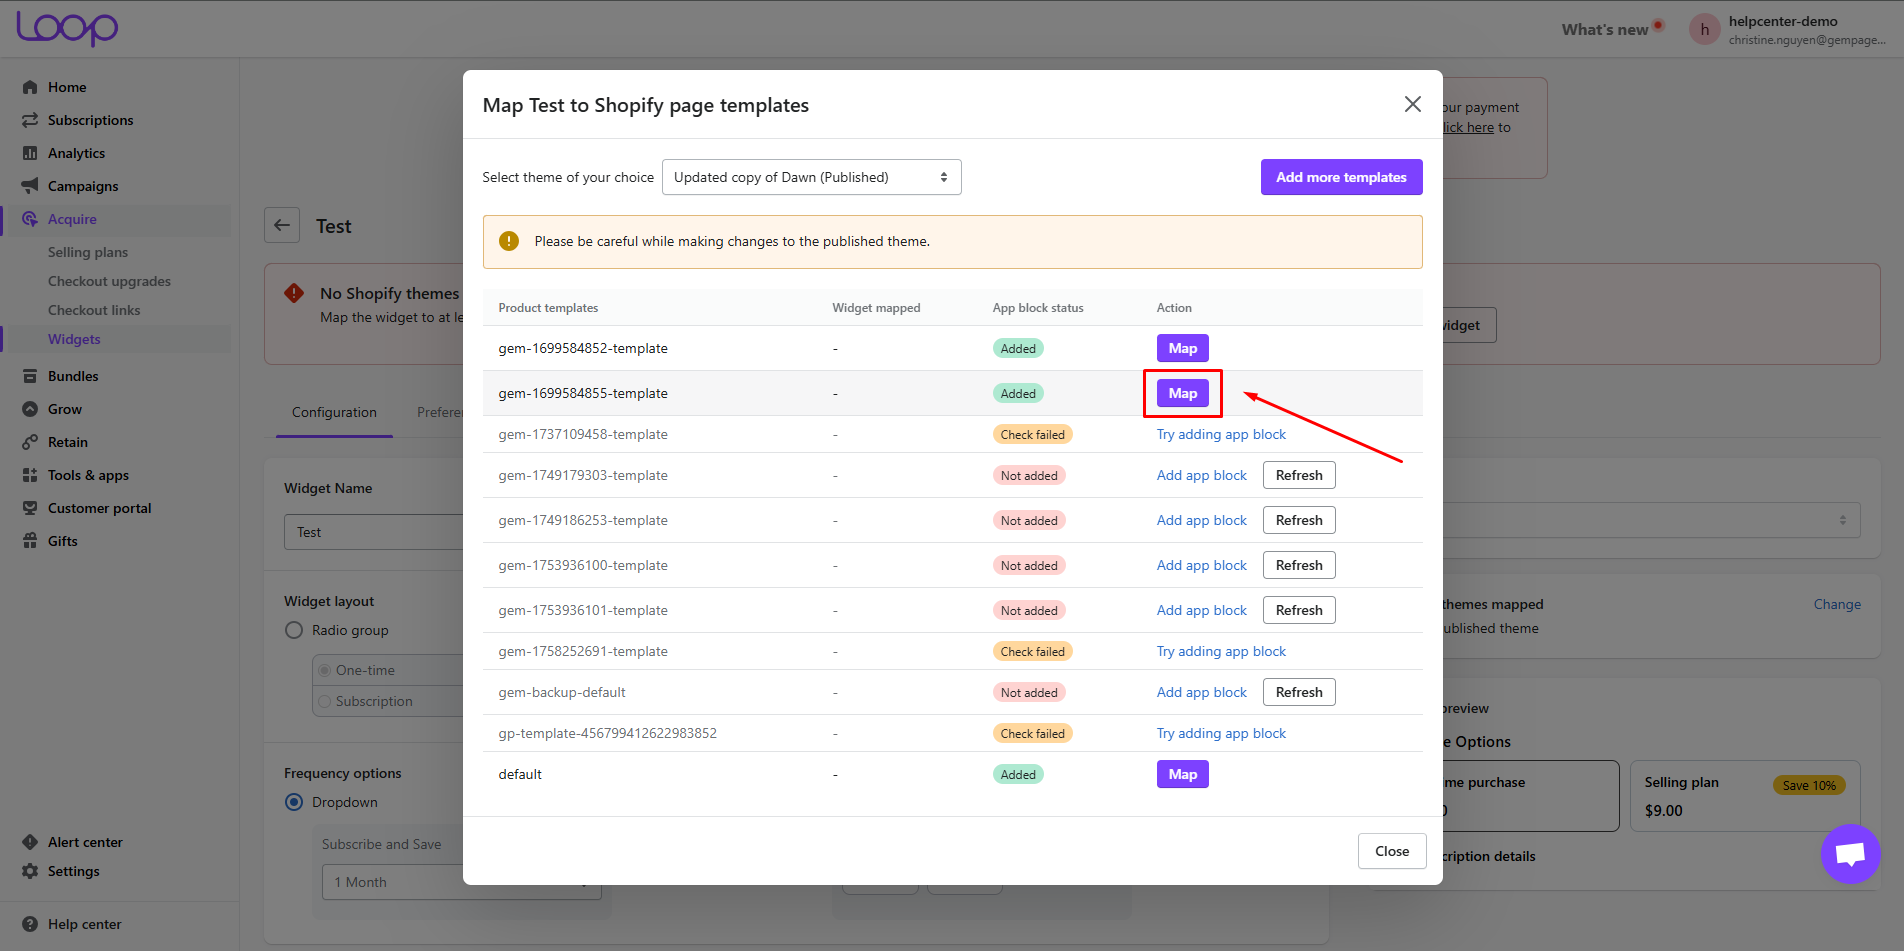
Step 7: Click Change to see your theme’s product page templates.
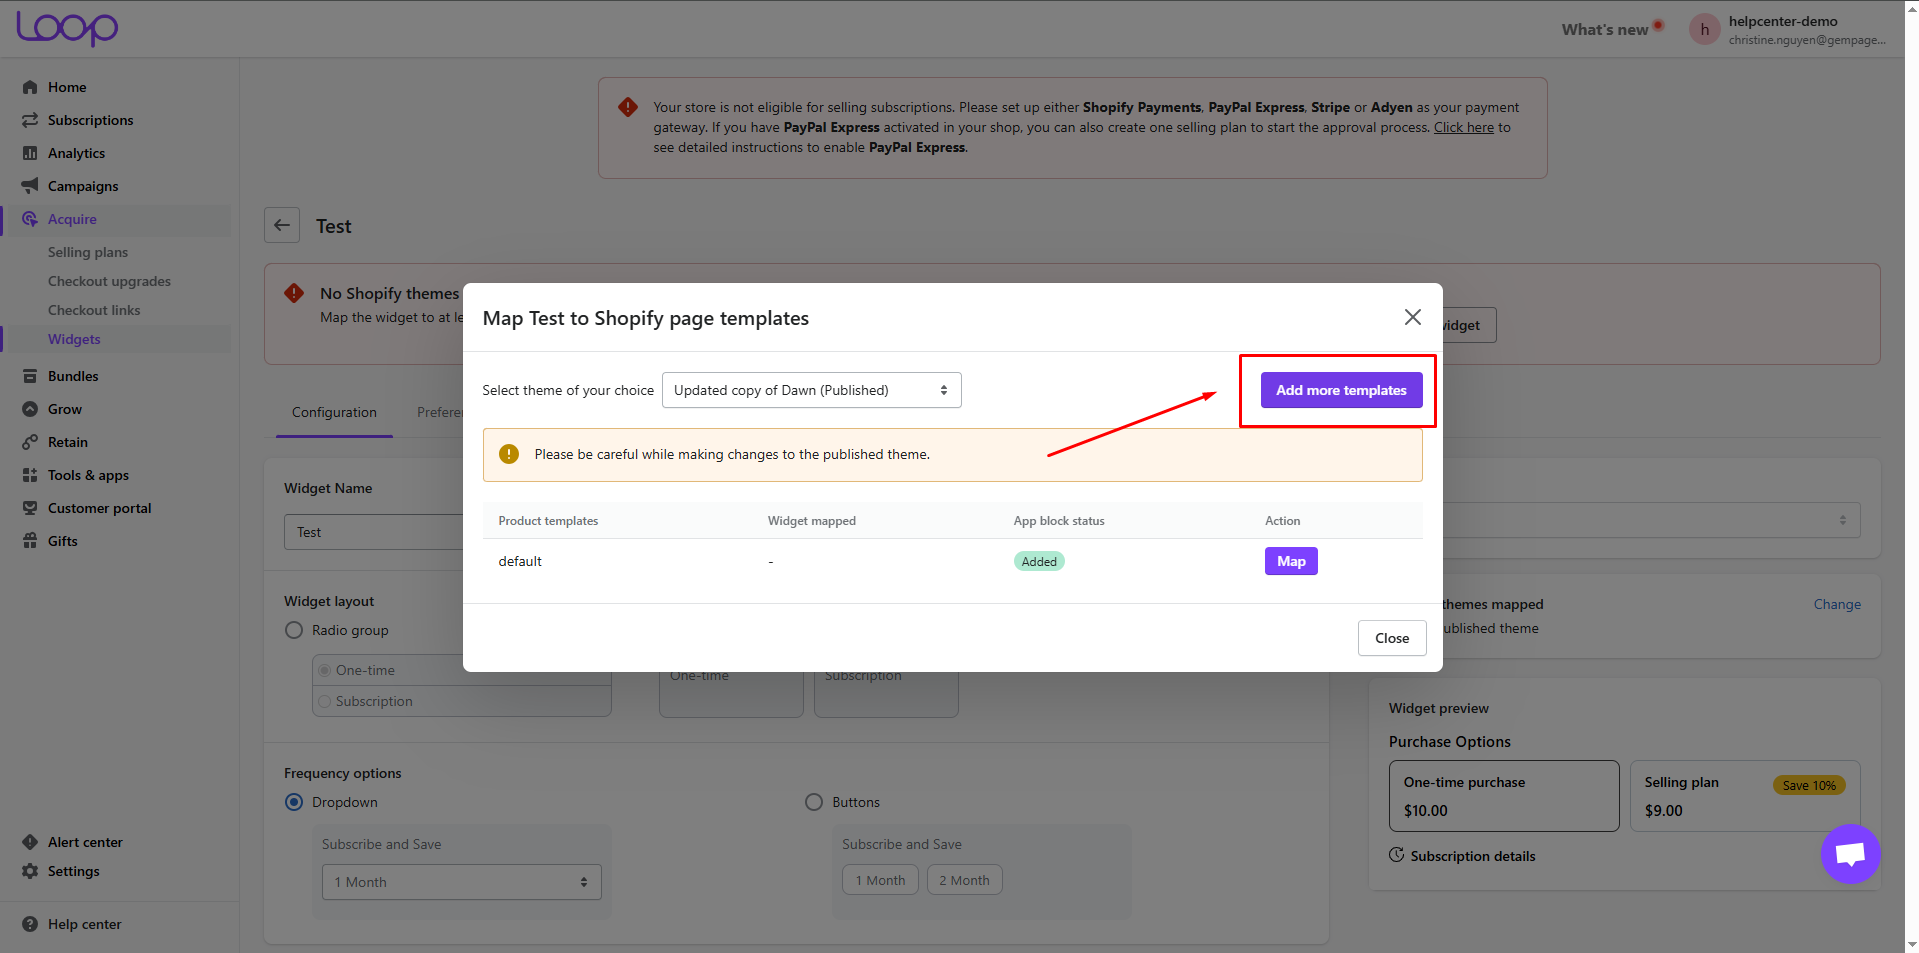
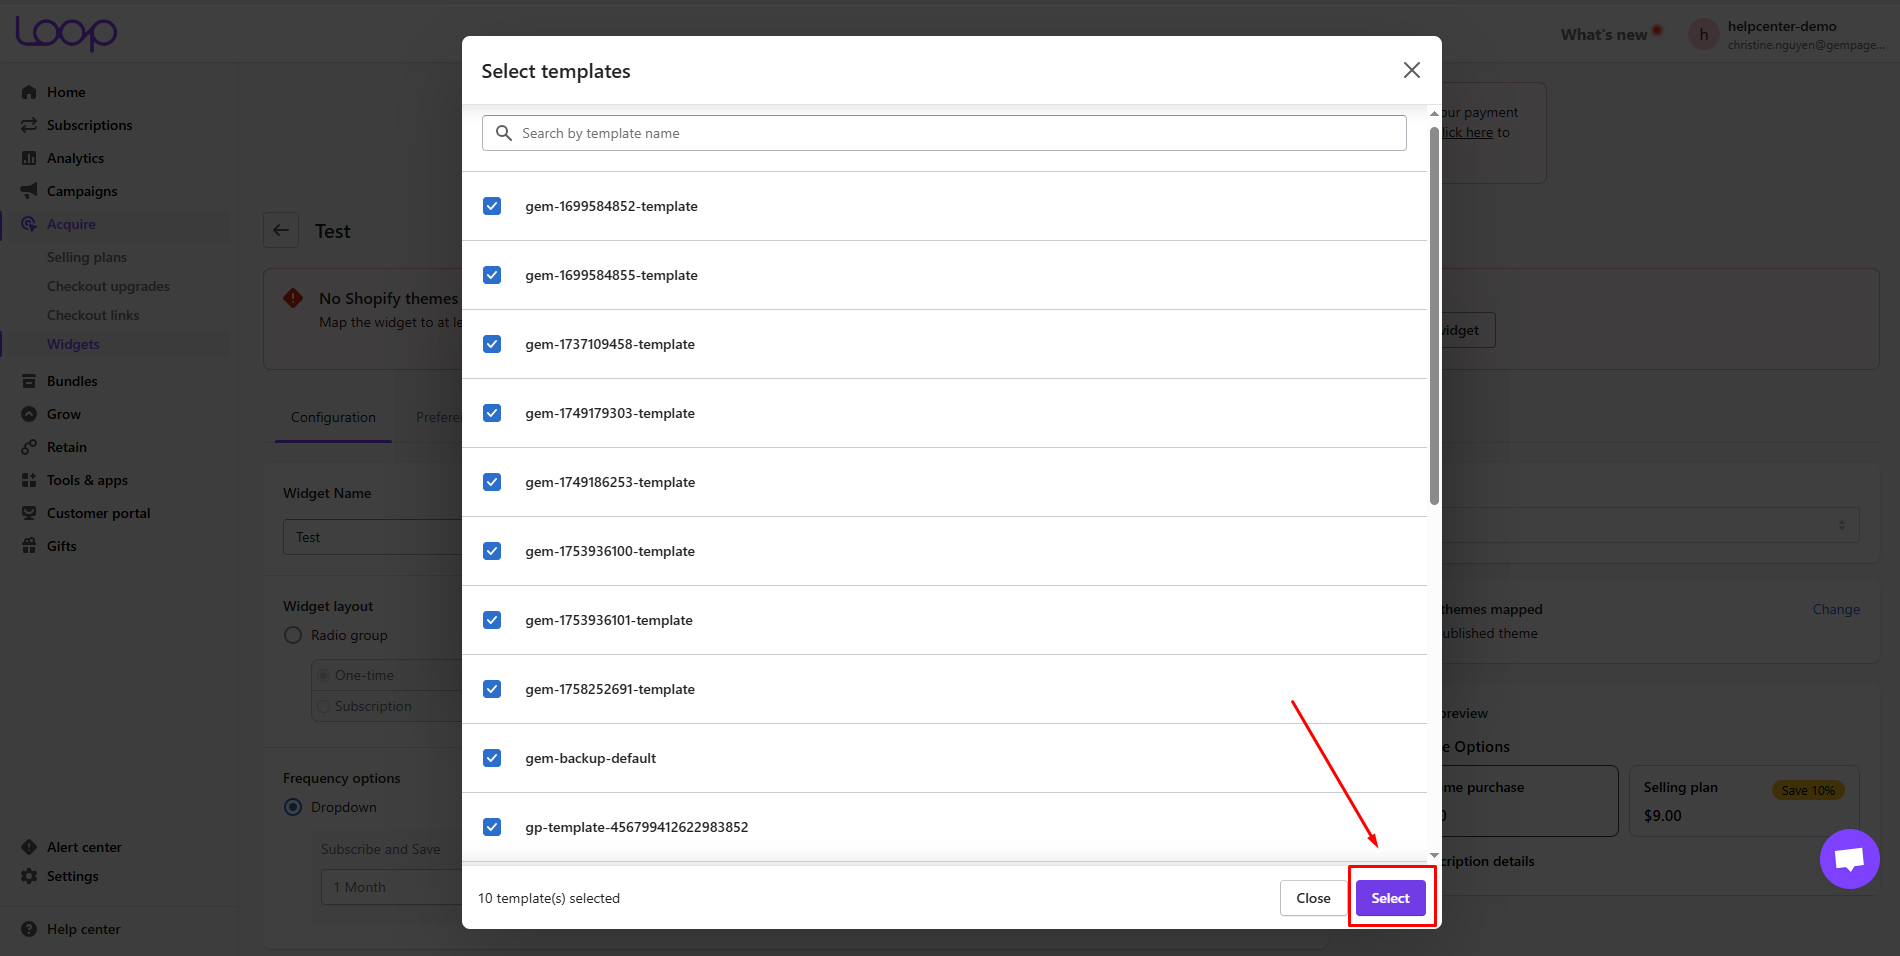
Step 8: Click Add more template to select the template where you want the widget to appear.
Step 9: Click on Add app blocks. For example, we’ll choose a product page built with GemPages.
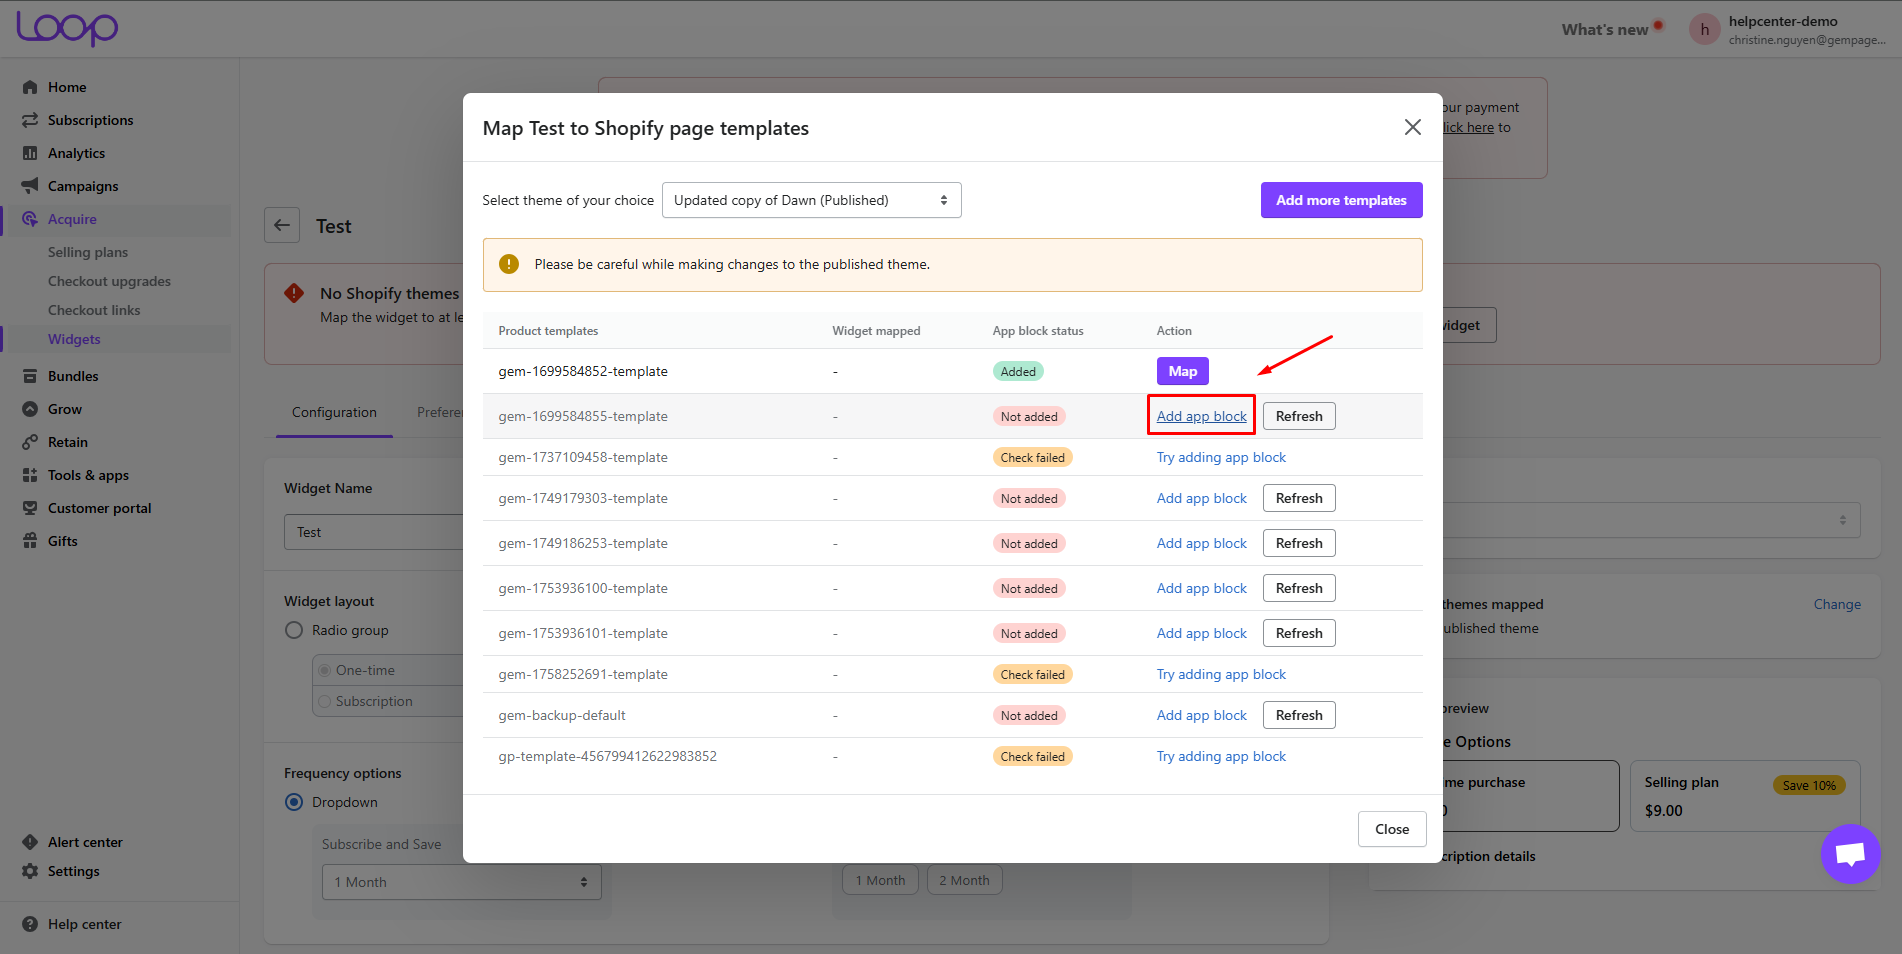
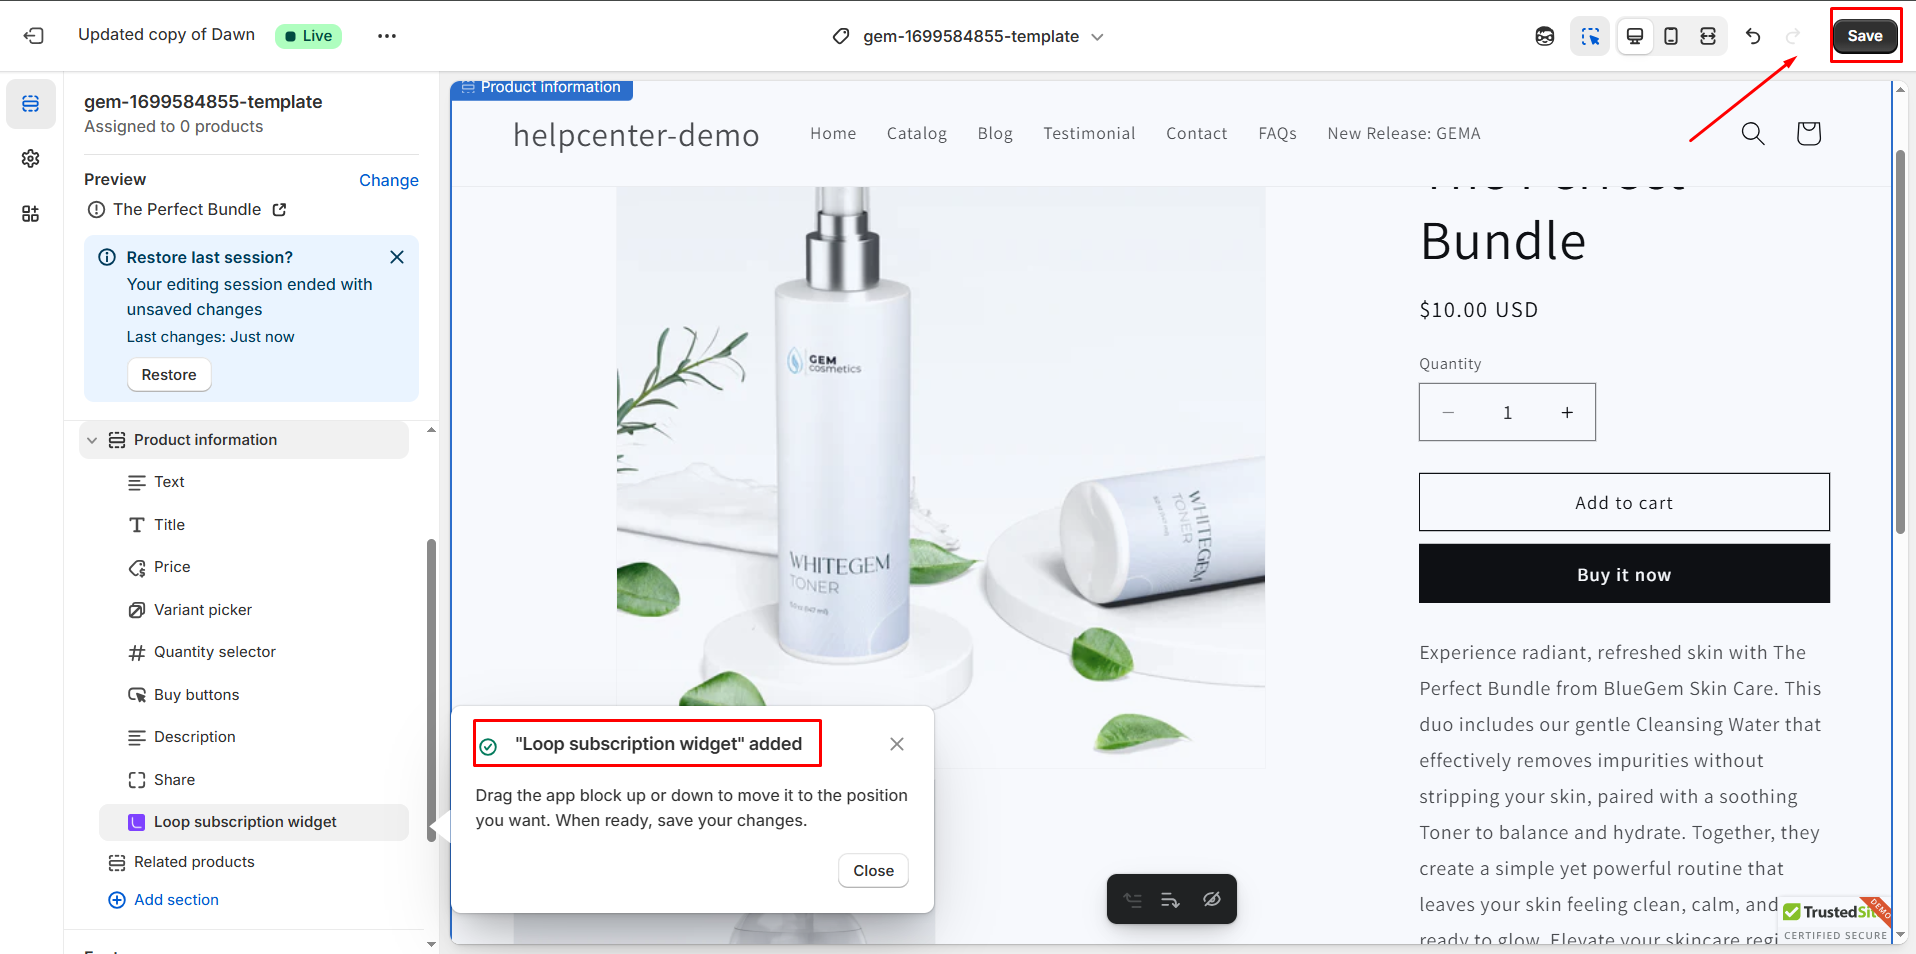
You’ll now see the Loop widget block added successfully.
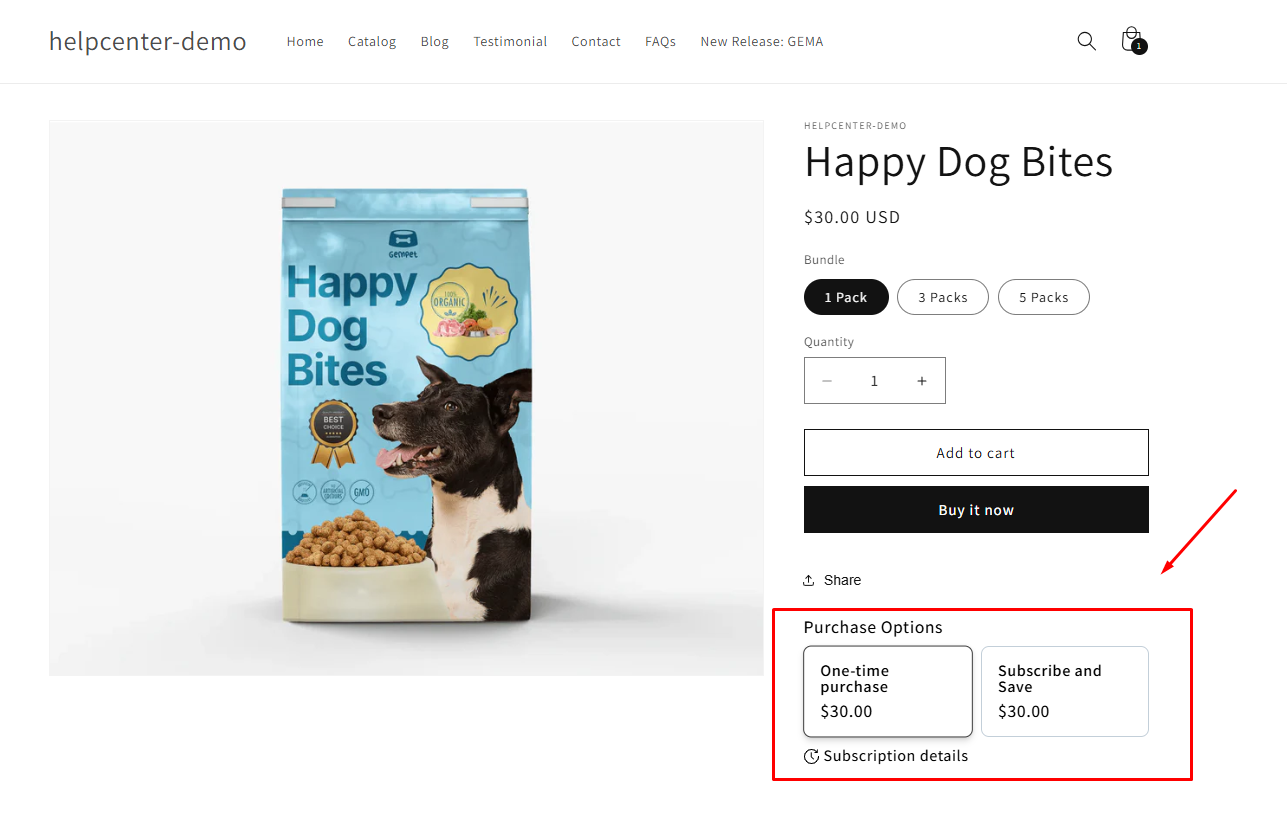
Result: