


When you’re optimizing your Shopify store, understanding how visitors interact with your pages is key.
Heatmap tools like Hotjar or Microsoft Clarity help you visualize where users click, scroll, and move, so you can make data-driven decisions to improve conversions.
Before you start
Before setting up, make sure you have:
- A valid account on a heatmap tool (e.g., Hotjar, Microsoft Clarity).
- Access to your Shopify Admin (Online Store > Themes > Edit Code).
- Access to your GemPages Editor or Instant Landing Page (ILP) settings.
Important notes
- Checkout pages are not tracked due to Shopify’s built-in security restrictions.
- Always comply with privacy laws (GDPR/CCPA) and make sure your visitors consent before tracking.
- Publish your changes after adding the tracking script.
Privacy and compliance
When tracking user sessions, ensure compliance with privacy laws:
- Display a cookie consent banner before activating tracking scripts for users in GDPR regions.
- Avoid recording sensitive data, as most heatmap tools allow you to mask form inputs or exclude fields.
- Shopify checkout and account pages are excluded by default from tracking for privacy protection.
How to Integrate the Common Heatmap Tools?
GemPages supports all major heatmap tools that can be added via tracking scripts. Here are the two most common integrations for Shopify stores:
Hotjar
Hotjar helps visualize how visitors interact with your Shopify and GemPages-built pages through click, move, and scroll heatmaps.
You can install it by:
- Adding the Hotjar tracking code to your Shopify theme.
- Add the script to a Liquid Element (if you’re using v6) or Custom Code Element (for v7 users) on the page you want to track.
See the full guide here: How to Integrate Hotjar with Your Shopify Store.
Microsoft Clarity
Microsoft Clarity is a free heatmap and session recording tool that helps you understand user behavior across your store.
You can integrate it by:
- Adding the Microsoft Clarity tracking code to your Shopify theme.
- Paste the tracking script directly in your theme or GemPages page.
Follow the detailed setup here: How to Integrate Microsoft Clarity with Shopify.
How to Verify Your Integration?
After adding your tracking code, follow these steps to verify your integration:
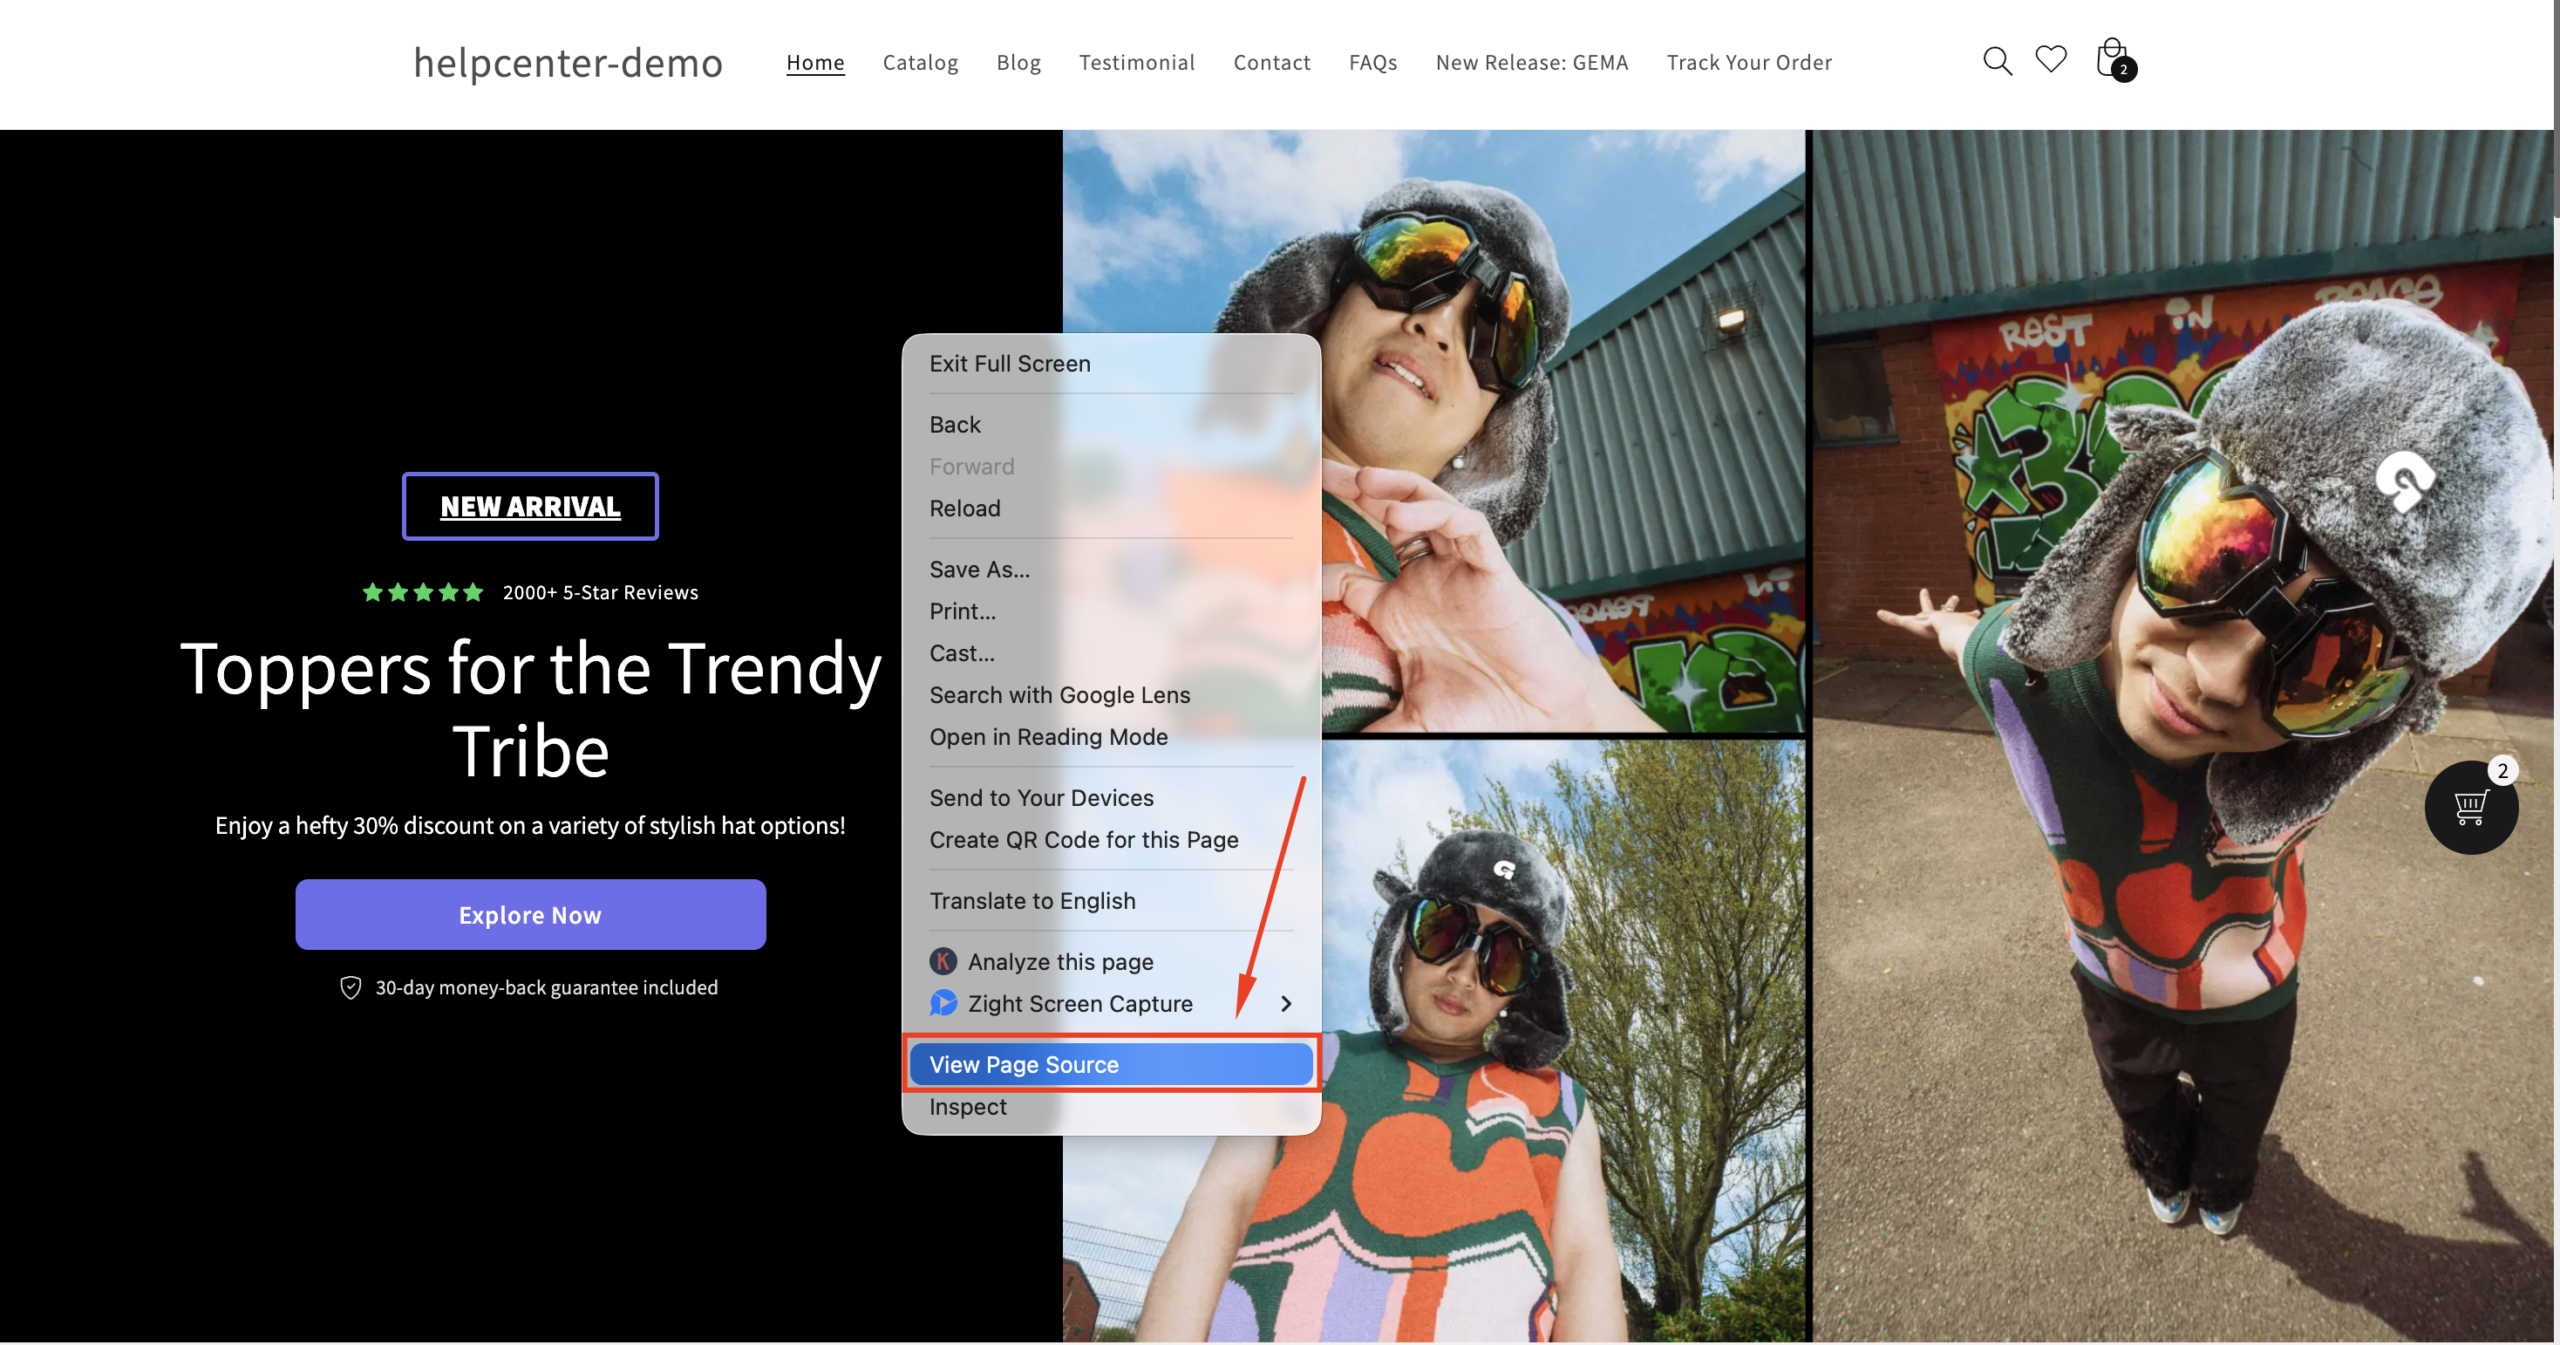
Step 1: Open your live Shopify store.
Step 2: Right-click and select View Page Source to confirm your tracking code is visible near the <head> tag.
Step 3: Visit your heatmap tool dashboard. Please note that it may take a few minutes for the first data to appear.
Most platforms show a status such as “Tracking active” or “Verified.”
Heatmap Integration Troubleshooting
| Issue | Possible cause | How to fix |
| Script not working | Code placed in the wrong location | Ensure it’s before </head> in the theme.liquid |
| No data showing | Ad-blockers or unverified domains | Disable ad-blocker and verify your site domain |
| Checkout not tracked | Shopify restriction | Tracking checkout is unavailable due to security rules |
| GemPages page not recorded | Script added to the wrong page | Add the script via the Liquid Element (for GemPages v6) or Custom Code Element (for GemPages v7) |
| Delay in verification | Script takes time to register | Wait up to 10 minutes or reload the dashboard |


Thank you for your comments